The way those beans hold their crunch even after a proper soak in the vinegar brine—that’s the whole point. You know the feeling when you bite into a pickle or a preserved vegetable, and instead of a limp, soggy mess, your teeth meet a crisp snap that makes your mouth light up? That’s what these green beans deliver. It’s not just about flavor; it’s about texture that lingers, that tactile satisfaction you can’t fake. When I first experimented with water bath canning these, I was obsessed with that precise bite—the balance between tender and firm, with just enough give to remind you it’s fresh, not mushy.
It took a few batches (and some trial-and-error with timing and salt levels) to get the perfect formula. I remember one summer afternoon, jars lined up on the counter, steam fogging the kitchen window, and the smell of dill hanging thick in the air. The beans were bubbling in the pot, and I was waiting for that exact moment when I’d know: yes, these will keep their crispness after the canning process. Honestly, it was the texture that kept me coming back to the recipe—not the tang, not the aroma, but that glorious snap when you bite down.
And here’s a little secret: these aren’t just any green beans. The dill, fresh garlic, and a touch of peppercorns create a brine that preserves not only the crunch but layers of flavor, so every jar feels like a tiny treasure trove of summer days. They’re perfect for grabbing out of the pantry when you want a snack with a punch or a crunchy side that jazzes up even the simplest meal. It’s funny how something as humble as green beans can make you pause and appreciate texture in a way you never thought about before.
So, while these Crispy Dilly Green Beans are great for water bath canning, what really makes them stick in my mind is that honest-to-goodness crunch. It’s a quiet kind of joy, one that reminds me that sometimes the smallest details—the snap of a bean—are worth savoring. And that’s why this recipe isn’t just about preserving food; it’s about preserving that perfect crisp bite, time after time.
Why You’ll Love This Crispy Dilly Green Beans Recipe
Let me tell you, after testing countless variations in my kitchen, this Crispy Dilly Green Beans recipe truly stands out. It’s crafted not only for flavor but for that satisfying crunch that makes preserved green beans something to get excited about. Whether you’re new to water bath canning or a seasoned pro, this recipe has a few things going for it that I think you’ll appreciate:
- Quick & Easy: The preparation comes together in under 30 minutes, making it perfect for those moments when you realize you have an abundance of fresh beans and want to preserve them fast.
- Simple Ingredients: You likely already have all the staples on hand: fresh dill, garlic, vinegar, and good-quality green beans. No fancy or hard-to-find items necessary.
- Perfect for Water Bath Canning: This recipe is designed specifically to maintain that crisp texture through the water bath process, so you get the best of both worlds—shelf stability and crunch.
- Crowd-Pleaser: Whether it’s a picnic, potluck, or just a snack, these beans are always a hit. Kids, adults, and even picky eaters tend to reach for them first.
- Unbelievably Delicious: The dill and garlic infuse each bean with a bright, savory flavor that pairs beautifully with the tangy brine.
This isn’t just a standard dilly bean recipe. I’ve fine-tuned the vinegar to salt ratio and added a touch of sugar to balance the acidity without losing that classic pickle snap. Plus, the secret to perfect water bath canning lies in the timing and packing method, which I’ll walk you through in detail. Honestly, this recipe redefined my expectations for canned green beans—every jar feels like a crunchy little victory.
For me, making these beans feels like capturing summer’s best textures and flavors in a jar. It’s a recipe that’s stuck with me because it delivers on more than just preservation—it delivers on that unmistakable snap, every time.
What Ingredients You Will Need
This recipe uses simple, wholesome ingredients to deliver bold flavor and satisfying texture without the fuss. Most are pantry staples, making it easy to whip up a batch whenever fresh green beans are in season. Here’s what you’ll need:
- Fresh green beans (about 2 pounds or 900 grams) – Choose firm, bright green beans with no blemishes. Snapping off the ends cleanly helps maintain texture.
- Fresh dill (4-5 sprigs per jar) – The star herb. If you can find dill with feathery fronds, it adds the best aroma. I recommend using fresh over dried for that vibrant flavor.
- Garlic cloves (2 per pint/500 ml jar) – Peeled and lightly crushed to release flavor.
- Pickling salt (1 tablespoon) – This is key. Regular table salt can cloud your brine. I use Morton Pickling Salt for consistent results.
- White distilled vinegar (5% acidity, 2 cups or 480 ml) – The acid that preserves and adds tang. Avoid flavored or colored vinegars to keep the beans bright.
- Water (2 cups or 480 ml) – For diluting the vinegar and controlling acidity.
- Black peppercorns (1 teaspoon per jar) – Adds a subtle spice that rounds out the flavor.
- Red pepper flakes (optional, 1/4 teaspoon per jar) – For a little heat if you like your dilly beans with a kick.
- Granulated sugar (1 teaspoon) – Just enough to balance the sharpness of the vinegar without sweetness.
Freshness is everything here. When I canned a batch using beans that had been sitting a day too long, the snap just wasn’t the same. Also, if you’re interested in gluten-free or low-carb pickling, this recipe fits perfectly. For a dairy-free kitchen, no worries—everything here is naturally free of dairy.
In summer, I sometimes swap in a few sprigs of fresh tarragon or a bay leaf for a different herby note, but dill is my tried-and-true. For a little extra crunch, I recommend layering the beans tightly but without crushing them. And if you want to experiment, use crispy garlic dill refrigerator pickles as inspiration for a no-canning quick version.
Equipment Needed
Water bath canning is straightforward but does require some basic equipment. Here’s what you’ll want to gather before starting:
- Water bath canner (or a large, deep pot with a lid and a rack) – This is essential for processing the jars safely.
- Canning jars (pint-size or half-pint) – I use standard Ball or Kerr jars, which you can find at most grocery or hardware stores.
- New metal lids and screw bands – Always use new lids to ensure a proper seal.
- Jar lifter – For safely lowering and lifting hot jars without burns.
- Wide-mouth funnel – Makes filling jars easy and mess-free.
- Kitchen tongs or chopsticks – Handy for removing air bubbles after filling jars.
- Large mixing bowl – For rinsing beans or mixing brine.
- Measuring cups and spoons – Accuracy matters in canning.
If you don’t have a water bath canner, a large stockpot with a rack on the bottom works just fine. Just make sure the jars are covered by 1-2 inches of water during processing. I’ve found that a wide-mouth funnel is a game changer for clean jar filling, especially with delicate green beans.
Keep your equipment clean and sterilized before use, but avoid boiling jars for too long as it may weaken them. I like to keep a stack of extra bands on hand since they can bend or rust over time. For a budget-friendly option, local thrift stores sometimes carry canning supplies, but always ensure lids are new.
Preparation Method
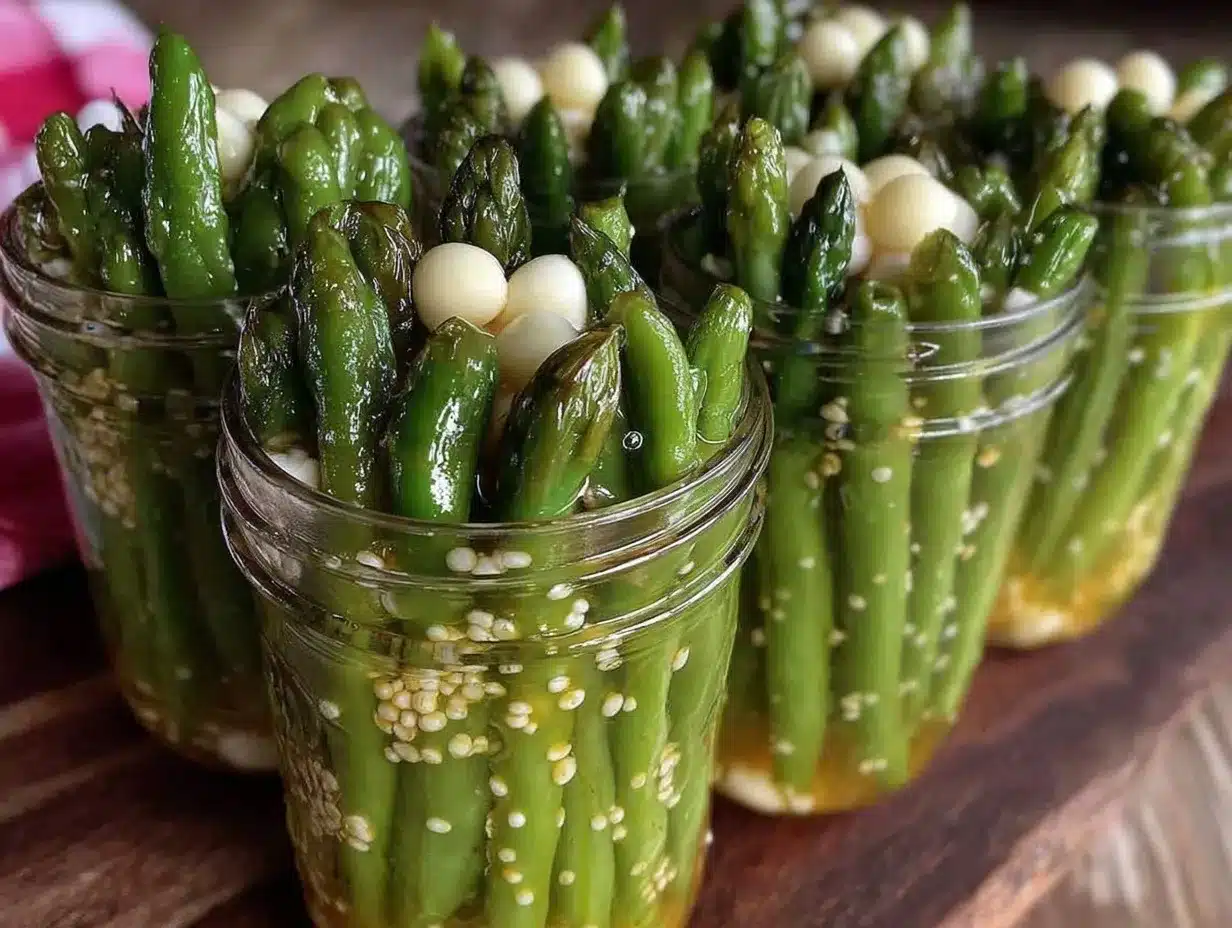
- Prepare your jars and lids: Wash jars and lids in hot, soapy water. Rinse well. Place jars in your water bath canner or large pot filled with hot water to keep warm while you prepare the beans. Warm jars reduce the chance of breakage.
- Wash and trim green beans: Rinse beans thoroughly under cold water. Snap or trim the stem ends off. You want uniform lengths so they fit nicely in jars—about 4 inches (10 cm) long.
- Make the brine: In a medium saucepan, combine 2 cups (480 ml) white distilled vinegar, 2 cups (480 ml) water, 1 tablespoon pickling salt, and 1 teaspoon sugar. Bring to a boil, stirring occasionally until salt and sugar dissolve.
- Pack the jars: Using a wide-mouth funnel, pack the green beans vertically into warm jars, leaving about 1/2 inch (1.3 cm) headspace at the top. Insert 2 garlic cloves, a few sprigs of fresh dill, 1 teaspoon black peppercorns, and optional red pepper flakes into each jar.
- Fill with hot brine: Pour the boiling brine over the packed beans, maintaining the 1/2 inch headspace. Use a non-metallic spatula or chopstick to remove any trapped air bubbles by gently running it around the inside edges.
- Seal the jars: Wipe the rims of the jars with a clean, damp cloth to remove any residue. Place lids and screw bands on jars finger-tight (not too tight).
- Process in water bath: Place jars into the water bath canner with water covering jars by at least 1 inch (2.5 cm). Bring to a rolling boil and process for 10 minutes (adjust for altitude if necessary).
- Cool and store: Carefully remove jars using jar lifter and place on a towel or cooling rack. Let cool undisturbed for 12-24 hours. Check seals—the lids should not flex up and down. Store in a cool, dark place.
Note: Processing time is crucial for safety and texture. Under-processing can cause spoilage, while over-processing may soften the beans. I’ve found 10 minutes strikes the perfect balance for pint jars at sea level. If you live at higher altitudes, adjust times accordingly.
Also, don’t rush the cooling—letting jars rest undisturbed helps the sealing process. If you hear a popping sound, that’s a good sign your jars sealed correctly.
Cooking Tips & Techniques
Getting that perfect crispness in canned green beans can be tricky, but a few insider tips can save you from soggy results:
- Use fresh, firm beans: Older or wilted beans won’t retain crunch. I always pick beans early in the morning or buy from a local farm stand to ensure freshness.
- Don’t overfill jars: Leave proper headspace to allow for expansion during processing. Too little space can cause jars to crack or not seal properly.
- Boil the brine fully: Dissolving salt and sugar completely ensures even flavor and preservation.
- Remove air bubbles: This step is often skipped but crucial. Air pockets can cause jars not to seal and affect texture.
- Adjust processing times for altitude: High-altitude canning requires longer processing; consult a reliable guide for your elevation.
- Use pickling salt, not table salt: Table salt may cloud the brine and leave unwanted additives.
One time I accidentally used regular table salt because I ran out of pickling salt, and the brine turned cloudy with a slightly off flavor. Lesson learned. Also, I’ve found that packing the beans tightly but without squishing them helps keep texture intact while still getting a good flavor infusion.
Multitask by preparing your brine while the jars warm; it saves time and keeps everything moving smoothly. I also recommend labeling jars immediately after cooling with the date and recipe name—it’s easy to forget otherwise.
Variations & Adaptations
This Crispy Dilly Green Beans recipe is versatile and lends itself well to tweaks based on personal taste or dietary needs:
- Spicy Dilly Beans: Add 1/2 teaspoon of red chili flakes or a sliced fresh jalapeño per jar for a fiery twist.
- Garlic Lover’s Version: Increase garlic cloves to 3 or 4 per jar for a bolder punch. I once made a batch with roasted garlic for a mellow, sweet undertone that was surprisingly addictive.
- Low Sodium: Reduce pickling salt by half and add extra vinegar to keep acidity balanced. Just note this may slightly affect texture.
- Herbal Variations: Swap dill for fresh tarragon or add a bay leaf for a unique flavor profile.
- Quick Refrigerator Pickles: If you’re short on time, you can try the crispy garlic dill refrigerator pickles method—ready in just a day but not shelf-stable long-term.
If you’re experimenting with different vinegars, always stick to 5% acidity white distilled vinegar for safety. I once tried apple cider vinegar, and while the flavor was interesting, the beans lost some of their crunch after canning.
Serving & Storage Suggestions
These Crispy Dilly Green Beans are best enjoyed chilled straight from the jar or at room temperature. They make an excellent crunchy snack or a tangy side dish to grilled meats and sandwiches. I like serving them alongside lemon herb chicken thighs for a bright, fresh contrast.
Store your sealed jars in a cool, dark pantry or cupboard. They’ll keep well for up to a year. Once opened, refrigerate and consume within 2-3 weeks for peak freshness. The flavor actually deepens after a few weeks as the beans soak up more brine, but the crispness is best in the first month.
To reheat, I recommend serving cold or at room temp to maintain that crunch. Heating tends to soften the beans, which defeats the purpose of this recipe.
If you want to gift these jars, consider pairing them with a homemade spread like the easy small batch fig jam. The sweet and savory combo is a guaranteed crowd-pleaser.
Nutritional Information & Benefits
These Crispy Dilly Green Beans are a low-calorie, nutrient-rich snack. Per serving (about 1/2 cup or 120 ml):
| Calories | 25 |
|---|---|
| Carbohydrates | 5g |
| Fiber | 2g |
| Protein | 1g |
| Sodium | 400mg (varies by salt used) |
Green beans are a great source of vitamins A, C, and K, plus antioxidants. The vinegar acts as a natural preservative and may support digestion. Using fresh garlic adds immune-boosting compounds. This recipe is naturally gluten-free, low-carb, and vegan-friendly.
From a wellness perspective, I appreciate how this recipe encourages eating more vegetables with minimal processing—plus it’s a fun way to practice food preservation skills that keep fresh produce in your diet year-round.
Conclusion
In the end, these Crispy Dilly Green Beans are more than just a canned vegetable—they’re a celebration of texture and flavor preserved in a jar. Perfectly crunchy, tangy, and aromatic, this recipe makes home canning approachable and genuinely rewarding. I love how it turns a simple green bean into a snack or side that surprises with every bite.
Feel free to tweak the seasonings or spice level to suit your taste. Whether you’re preserving a garden harvest or just craving a crunchy pickle alternative, this recipe delivers. If you try it, I’d love to hear how your batch turns out or any fun twists you add. Sharing these little kitchen victories always brightens my day.
Happy canning and crunching!
FAQs About Crispy Dilly Green Beans for Water Bath Canning
- Can I use frozen green beans for this recipe?
Frozen beans tend to lose their firmness and won’t hold the crisp texture needed for these dilly beans. Fresh is best. - How long do canned dilly green beans last?
Properly processed and sealed jars can last up to 1 year stored in a cool, dark place. - Can I use a pressure canner instead of a water bath?
Since this is an acidic recipe, water bath canning is sufficient and recommended for best texture. - Why are my canned green beans soft?
Softness is usually caused by over-processing, using older beans, or incorrect vinegar acidity. Stick to fresh beans and proper timing. - Can I add other spices or herbs?
Absolutely! Mustard seeds, coriander, or bay leaves can be fun additions. Just keep the core dill and garlic for that classic flavor.
Pin This Recipe!
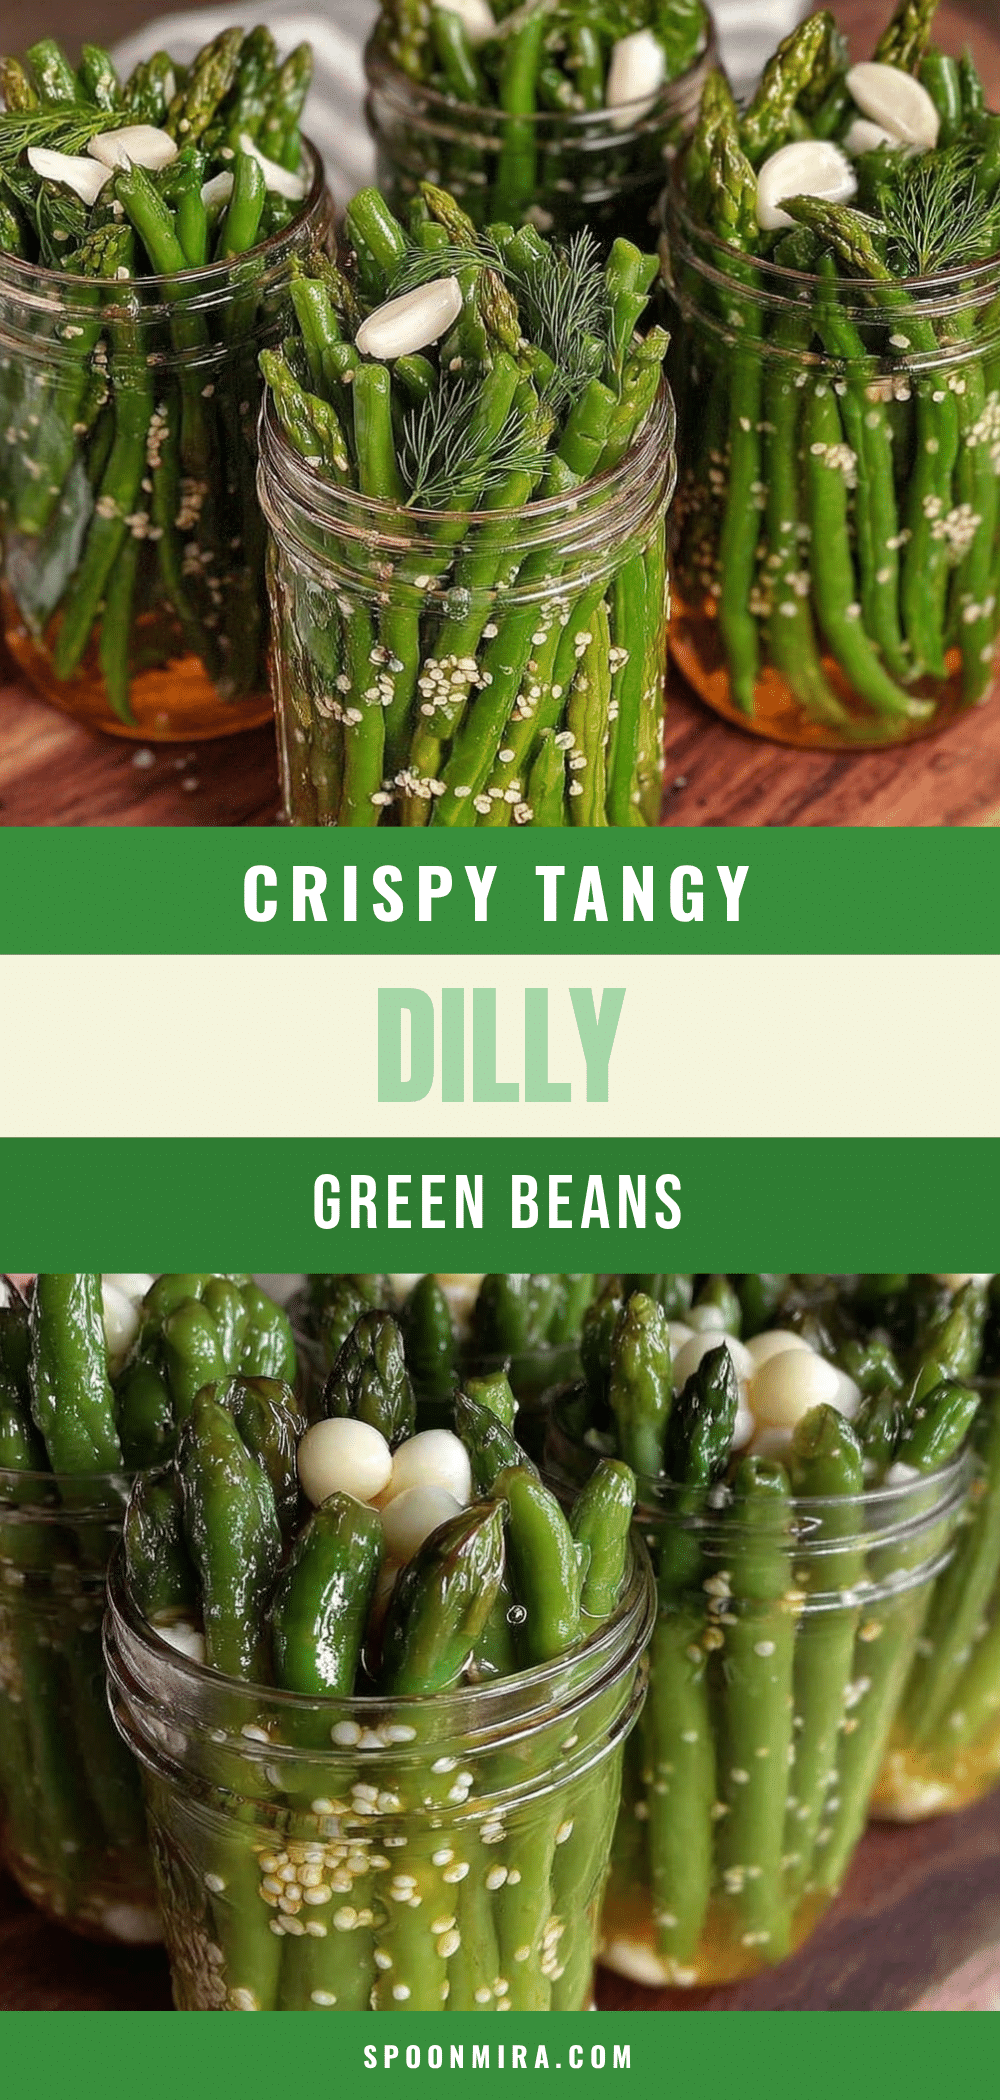
Crispy Dilly Green Beans Recipe Easy for Perfect Water Bath Canning
This recipe delivers perfectly crunchy, tangy, and aromatic canned green beans with a satisfying snap, ideal for water bath canning and preserving summer’s best textures and flavors.
- Prep Time: 20 minutes
- Cook Time: 10 minutes
- Total Time: 30 minutes
- Yield: 4-6 pint jars 1x
- Category: Preserved Vegetables
- Cuisine: American
Ingredients
- 2 pounds (900 grams) fresh green beans
- 4–5 sprigs fresh dill per jar
- 2 garlic cloves per pint (500 ml) jar, peeled and lightly crushed
- 1 tablespoon pickling salt
- 2 cups (480 ml) white distilled vinegar (5% acidity)
- 2 cups (480 ml) water
- 1 teaspoon black peppercorns per jar
- 1/4 teaspoon red pepper flakes per jar (optional)
- 1 teaspoon granulated sugar
Instructions
- Wash jars and lids in hot, soapy water. Rinse well. Place jars in your water bath canner or large pot filled with hot water to keep warm while you prepare the beans.
- Rinse green beans thoroughly under cold water. Snap or trim the stem ends off to about 4 inches (10 cm) long.
- In a medium saucepan, combine 2 cups white distilled vinegar, 2 cups water, 1 tablespoon pickling salt, and 1 teaspoon sugar. Bring to a boil, stirring occasionally until salt and sugar dissolve.
- Using a wide-mouth funnel, pack the green beans vertically into warm jars, leaving about 1/2 inch (1.3 cm) headspace at the top. Insert 2 garlic cloves, a few sprigs of fresh dill, 1 teaspoon black peppercorns, and optional red pepper flakes into each jar.
- Pour the boiling brine over the packed beans, maintaining the 1/2 inch headspace. Use a non-metallic spatula or chopstick to remove any trapped air bubbles by gently running it around the inside edges.
- Wipe the rims of the jars with a clean, damp cloth to remove any residue. Place lids and screw bands on jars finger-tight (not too tight).
- Place jars into the water bath canner with water covering jars by at least 1 inch (2.5 cm). Bring to a rolling boil and process for 10 minutes (adjust for altitude if necessary).
- Carefully remove jars using jar lifter and place on a towel or cooling rack. Let cool undisturbed for 12-24 hours. Check seals—the lids should not flex up and down. Store in a cool, dark place.
Notes
Use fresh, firm green beans for best crunch. Do not overfill jars; leave 1/2 inch headspace. Use pickling salt, not table salt, to avoid cloudy brine. Remove air bubbles before sealing jars. Adjust processing time for altitude. Let jars cool undisturbed for proper sealing. Store sealed jars in a cool, dark place for up to 1 year. Refrigerate after opening and consume within 2-3 weeks. Serve chilled or at room temperature to maintain crunch.
Nutrition
- Serving Size: About 1/2 cup (120 m
- Calories: 25
- Sugar: 1
- Sodium: 400
- Carbohydrates: 5
- Fiber: 2
- Protein: 1
Keywords: green beans, dilly beans, water bath canning, pickled green beans, crunchy green beans, preserved vegetables, homemade pickles, dill, garlic


