Early September, and the light through the kitchen window is soft, the kind that makes the dust motes hang in the air like tiny dancers. The air carries a faint hint of something smoky and green—Hatch chiles, just arriving fresh at the market, their scent promising a subtle kick and warmth. The only thing I want is a dish that feels like the season itself: hearty, comforting, and just a little bit spicy. That’s how this Creamy Hatch Green Chile Chicken Enchilada Casserole came to be a quiet favorite in my kitchen—something to simmer slowly in the oven while the evening slips by, no rush, just the pleasant ritual of waiting and smelling.
This recipe isn’t flashy or complicated, but it’s the kind of meal that settles deep, the kind that makes you pause and think, “Yeah, this is exactly what I needed.” I remember the first time I made it, using Hatch chiles from a tiny roadside stand during a trip to New Mexico. The creamy sauce, dotted with roasted chiles and shredded chicken, layered between tender tortillas—it felt like a warm embrace on a cool night, the kind of food that invites you to sit still and just be. Over time, it’s stuck with me for that quiet comfort it offers, a reminder that sometimes the best meals are the ones made slowly and simply, with ingredients that speak for themselves.
There’s no rush here, no need to fuss. Just a casserole worth savoring, bite by bite.
Why You’ll Love This Recipe
Having tested this Creamy Hatch Green Chile Chicken Enchilada Casserole more times than I can count, I’ve learned a thing or two about what makes it stand out from your usual enchilada dishes. Honestly, it feels like the perfect mix of cozy and exciting—a total crowd-pleaser that you can pull together without losing your mind on a weeknight.
- Quick & Easy: Ready in about 45 minutes, which is a lifesaver when you want homemade dinner but don’t want to live in the kitchen all evening.
- Simple Ingredients: You don’t need to hunt down anything fancy. Hatch chiles bring the flavor, but canned green chiles work too, and the rest are pantry staples.
- Perfect for Cozy Dinners: Whether you’re winding down after a long day or craving comfort food on a cool night, this casserole hits the spot.
- Crowd-Pleaser: I’ve brought this to casual gatherings and family dinners. It always disappears fast, even with picky eaters.
- Unbelievably Delicious: The creamy sauce with tangy green chiles and tender chicken creates a texture and flavor combo that’s just… well, next-level.
What really makes this recipe different is the creamy sauce, made with a touch of cream cheese and sour cream, which gives it that luscious richness without weighing it down. Also, layering the casserole instead of rolling individual enchiladas saves so much time and effort—no fuss, all flavor. If you’re looking for a dish that’s both comforting and a little bit special, this is it. I promise, it’s the kind of recipe that makes you savor each bite, eyes closed, just soaking it in.
What Ingredients You Will Need
This recipe uses simple, wholesome ingredients to deliver bold flavor and satisfying texture without the fuss. Most of these are pantry staples, with the Hatch green chiles being the star that brings fresh, smoky heat.
- For the Chicken Filling:
- 2 cups cooked chicken, shredded (rotisserie chicken works great for convenience)
- 1 cup Hatch green chiles, roasted and chopped (canned is fine if fresh aren’t available)
- 1 medium onion, finely diced (adds sweetness and depth)
- 2 cloves garlic, minced (for that essential aromatic kick)
- For the Creamy Sauce:
- 8 oz cream cheese, softened (I like Philadelphia brand for smoothness)
- 1 cup sour cream (full-fat for richness, but Greek yogurt can substitute)
- 1 cup shredded Monterey Jack cheese (melts beautifully, mild and creamy)
- 1 cup shredded cheddar cheese (sharpness balances the creaminess)
- 1 cup chicken broth (low sodium, to keep the sauce light yet flavorful)
- 1 tbsp olive oil (for sautéing)
- 1 tsp ground cumin (adds warmth and earthiness)
- 1 tsp chili powder (for subtle smoky heat)
- Salt and pepper to taste
- Other:
- 8-10 corn tortillas (soft, fresh if possible; you can lightly toast them before layering to avoid sogginess)
- Fresh cilantro, chopped (optional garnish for brightness)
- Lime wedges (optional, for serving)
For a gluten-free option, make sure your tortillas are corn-based and check that your chicken broth doesn’t contain gluten additives. If you want to swap out dairy, try a dairy-free cream cheese and sour cream alternative, though it will change the texture a bit. I usually roast the Hatch chiles myself to get that slightly charred flavor, but canned green chiles do the trick when time is tight.
Equipment Needed
- Medium skillet or sauté pan – for cooking the onion, garlic, and chicken mixture. A non-stick pan helps but isn’t mandatory.
- Mixing bowls – at least two; one for sauce preparation and one for mixing chicken with chiles.
- 9×13-inch baking dish – perfect size for this casserole. Glass or ceramic works well to evenly bake the layers.
- Measuring cups and spoons – for accuracy with spices and liquids.
- Wooden spoon or spatula – for stirring the sauce and filling.
- Optional: roasting pan or baking sheet – if you decide to roast fresh Hatch chiles yourself (which I recommend if you have the time!).
If you don’t have a 9×13-inch dish, a similarly sized oven-safe casserole dish or even a cast-iron skillet works fine. Just adjust the layering and baking time accordingly. I’ve also used an immersion blender to smooth the sauce in a pinch, but whisking by hand works perfectly well.
Preparation Method

- Preheat your oven to 375°F (190°C). Lightly grease your 9×13-inch baking dish with butter or cooking spray to prevent sticking.
- Prepare the chicken filling: Heat 1 tablespoon olive oil in a skillet over medium heat. Add diced onions and sauté until translucent, about 5 minutes. Toss in minced garlic and cook for another minute until fragrant.
- Add shredded chicken and chopped Hatch green chiles to the skillet. Stir to combine and warm through, about 3-4 minutes. Season with ground cumin, chili powder, salt, and pepper. Remove from heat and set aside.
- Make the creamy sauce: In a mixing bowl, combine softened cream cheese and sour cream. Whisk together until smooth and creamy. Gradually stir in chicken broth until the sauce reaches a pourable consistency. Season with a pinch of salt and pepper.
- Layer the casserole: Place 3-4 corn tortillas on the bottom of the baking dish, overlapping slightly. Spread about one-third of the chicken and chile mixture evenly over the tortillas.
- Drizzle or spoon one-third of the creamy sauce over the chicken layer. Sprinkle a generous handful of shredded Monterey Jack and cheddar cheeses atop the sauce.
- Repeat the layering process two more times—tortillas, chicken mixture, sauce, and cheese—ending with a final cheese layer on top.
- Bake: Cover the casserole loosely with aluminum foil and bake for 20 minutes. Then remove the foil and bake an additional 10-15 minutes, or until the cheese is bubbly and golden at the edges.
- Rest and serve: Let the casserole rest for 5-10 minutes before slicing. Garnish with freshly chopped cilantro and serve with lime wedges, if desired.
Tip: If your tortillas feel dry, lightly brush them with olive oil before layering to keep things moist and tender after baking. Also, watch the cheese during the last 10 minutes; if it browns too quickly, tent the dish again with foil.
Cooking Tips & Techniques
One thing I’ve learned from making this casserole repeatedly is the importance of balancing moisture. Too much sauce can turn the casserole soggy; too little and it dries out. When combining the sauce, add the chicken broth slowly—aim for a creamy but pourable texture that will soak into the tortillas without drowning them.
Another tip is to lightly toast the corn tortillas before layering. A quick pass on a dry skillet makes them pliable and helps them hold up better in the casserole. I sometimes brush them with oil and toast until just golden—this extra step really improves texture.
When roasting fresh Hatch chiles, be patient and use tongs to turn them over an open flame or under the broiler until the skin is blistered and blackened. Then wrap them in foil or a sealed bowl to steam for 10 minutes—this loosens the skin for easy peeling. Roasting gives the chiles a smoky depth that canned versions can’t quite match.
For multitasking, chop your onions and roast the chiles ahead of time. You can even shred the chicken and mix the sauce earlier in the day, then assemble just before baking. This makes weeknight dinners feel much less hectic.
Variations & Adaptations
This recipe is wonderfully flexible, and I’ve enjoyed tweaking it depending on mood, season, and dietary needs.
- Vegetarian version: Swap the chicken for a mix of roasted vegetables like zucchini, corn, and black beans. The creamy sauce and Hatch chiles still shine in this hearty, meat-free option.
- Spice it up: Add diced jalapeños or chipotle peppers in adobo to the filling for a smoky heat boost. Just be careful with the quantities if you prefer milder dishes.
- Dairy-free: Use dairy-free cream cheese and sour cream alternatives, and a vegan cheese blend. The flavor will be a bit different, but still enjoyable.
- Swap tortillas: Flour tortillas create a softer, more bread-like texture, while corn tortillas keep things traditional and slightly chewy. I usually prefer corn for the authentic vibe.
- Chicken alternatives: Pulled rotisserie chicken is a time-saver, but shredded leftover turkey or even cooked shredded pork works beautifully here.
One personal favorite variation is adding a layer of black beans and a handful of fresh corn kernels between the chicken and sauce layers. It adds texture and a touch of sweetness that pairs well with the Hatch chile’s smoky notes.
Serving & Storage Suggestions
This casserole is best served warm, fresh from the oven, with a sprinkling of cilantro and a squeeze of lime to brighten the flavors. It pairs nicely with a simple side salad—something crisp and acidic like a grilled peach burrata salad balances the richness beautifully.
Leftovers store well in the refrigerator for up to 3 days, covered tightly with foil or plastic wrap. Reheat gently in the oven at 350°F (175°C) for about 15 minutes to keep the layers from drying out. You can also microwave individual portions, though the texture is better when reheated in the oven.
If you want to freeze the casserole, bake it partially (about 20 minutes), cool completely, then wrap tightly with foil and freeze for up to 3 months. When ready to eat, thaw overnight in the fridge and bake uncovered until heated through and bubbly.
Flavors meld beautifully after a day, so if you have the patience, making it ahead can actually improve the depth and balance. It’s one of those dishes that tastes like the love was slow-cooked right in.
Nutritional Information & Benefits
Each serving of this creamy Hatch Green Chile Chicken Enchilada Casserole provides a good balance of protein, fat, and carbohydrates. The chicken offers lean protein, while the cheeses and cream cheese add richness and calcium. Hatch chiles contribute vitamins A and C and a bit of capsaicin, which may help with metabolism and inflammation.
Using corn tortillas keeps it gluten-free naturally (just check labels!), and controlling the amount of added salt keeps it heart-friendly. For those watching calories, swapping part of the sour cream with Greek yogurt lightens the dish without losing creaminess.
This recipe fits well into a balanced diet when enjoyed in moderation, and it’s a satisfying way to sneak in some fresh green chiles packed with nutrients.
Conclusion
There’s something quietly satisfying about this Creamy Hatch Green Chile Chicken Enchilada Casserole that keeps me coming back. It’s not just a recipe; it’s a little ritual of comfort and warmth on a busy evening or a slow weekend night. The way the smoky Hatch chiles melt into the creamy sauce, wrapping the tender chicken, all layered between soft tortillas—it’s a dish that feels like home.
Feel free to make it your own, whether by adding different veggies, upping the spice, or swapping cheeses. I hope it brings a bit of that same calm and contentment I find when I make it. And if you try it, I’d love to hear how you twist it to fit your kitchen’s story.
Don’t hesitate to share your experience or favorite variations below—there’s always room for more ideas around this table.
Frequently Asked Questions
Can I use canned green chiles instead of fresh Hatch chiles?
Absolutely. While fresh Hatch chiles offer a smoky, roasted flavor, canned green chiles are a convenient substitute that still work well in this casserole.
Is this recipe gluten-free?
Yes, as long as you use corn tortillas and check that your chicken broth is gluten-free, this casserole fits a gluten-free diet.
Can I make this casserole ahead of time?
Yes! You can assemble it a day ahead and refrigerate before baking. Just add extra baking time if baking straight from the fridge.
What can I substitute for cream cheese?
For a lighter version, try mixing Greek yogurt with a little softened butter. Dairy-free cream cheese alternatives also work for those avoiding dairy.
How spicy is this casserole?
It has a gentle heat from the Hatch chiles and chili powder, but it’s not overwhelmingly spicy. You can adjust by adding more or less chili powder or including jalapeños if you like it hotter.
Pin This Recipe!
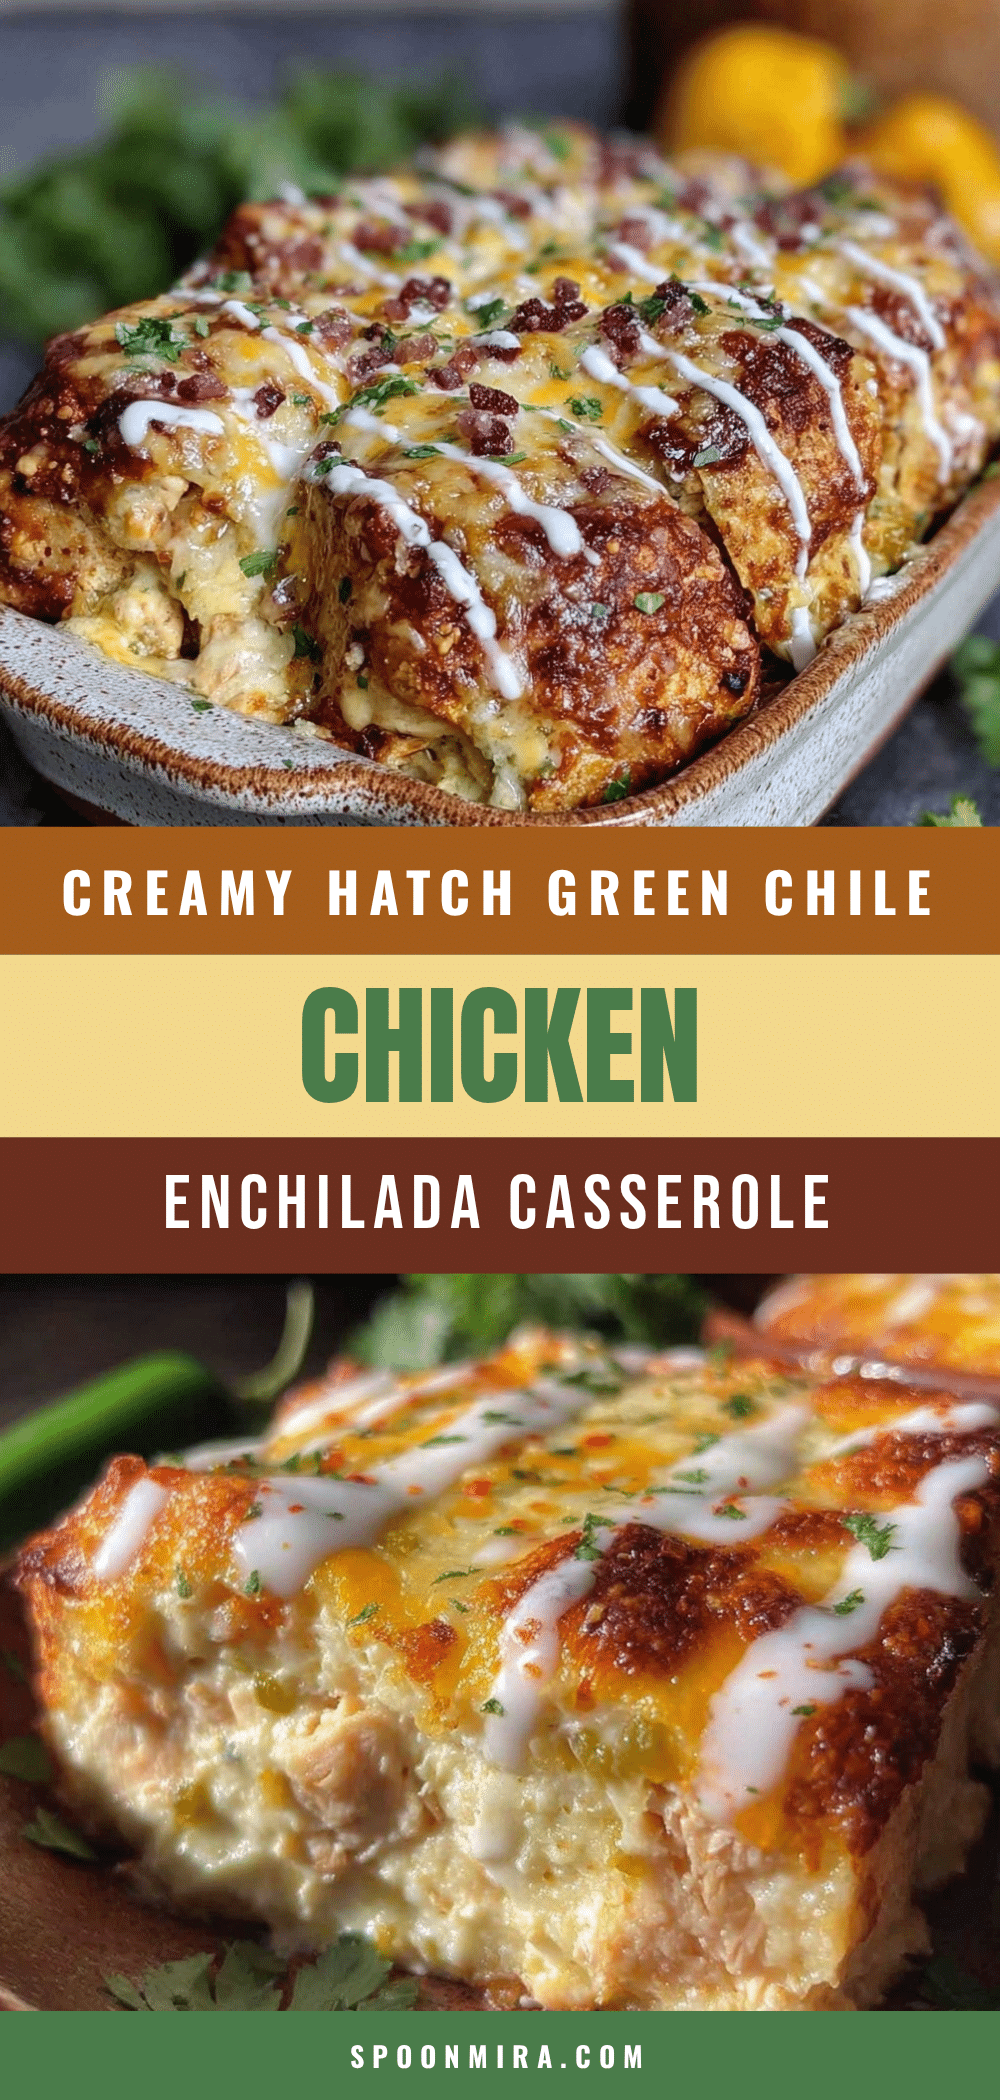
Creamy Hatch Green Chile Chicken Enchilada Casserole

A hearty and comforting casserole featuring shredded chicken, roasted Hatch green chiles, and a creamy cheese sauce layered between tender corn tortillas. Perfect for cozy dinners with a subtle spicy kick.
- Prep Time: 15 minutes
- Cook Time: 30 minutes
- Total Time: 45 minutes
- Yield: 6 servings 1x
- Category: Main Course
- Cuisine: Mexican
Ingredients
- 2 cups cooked chicken, shredded (rotisserie chicken works great for convenience)
- 1 cup Hatch green chiles, roasted and chopped (canned is fine if fresh aren’t available)
- 1 medium onion, finely diced
- 2 cloves garlic, minced
- 8 oz cream cheese, softened
- 1 cup sour cream (full-fat, Greek yogurt can substitute)
- 1 cup shredded Monterey Jack cheese
- 1 cup shredded cheddar cheese
- 1 cup chicken broth (low sodium)
- 1 tbsp olive oil
- 1 tsp ground cumin
- 1 tsp chili powder
- Salt and pepper to taste
- 8–10 corn tortillas
- Fresh cilantro, chopped (optional garnish)
- Lime wedges (optional, for serving)
Instructions
- Preheat your oven to 375°F (190°C). Lightly grease your 9×13-inch baking dish with butter or cooking spray.
- Heat 1 tablespoon olive oil in a skillet over medium heat. Add diced onions and sauté until translucent, about 5 minutes.
- Add minced garlic and cook for another minute until fragrant.
- Add shredded chicken and chopped Hatch green chiles to the skillet. Stir to combine and warm through, about 3-4 minutes. Season with ground cumin, chili powder, salt, and pepper. Remove from heat and set aside.
- In a mixing bowl, combine softened cream cheese and sour cream. Whisk together until smooth and creamy.
- Gradually stir in chicken broth until the sauce reaches a pourable consistency. Season with salt and pepper.
- Place 3-4 corn tortillas on the bottom of the baking dish, overlapping slightly.
- Spread about one-third of the chicken and chile mixture evenly over the tortillas.
- Drizzle or spoon one-third of the creamy sauce over the chicken layer.
- Sprinkle a generous handful of shredded Monterey Jack and cheddar cheeses atop the sauce.
- Repeat the layering process two more times—tortillas, chicken mixture, sauce, and cheese—ending with a final cheese layer on top.
- Cover the casserole loosely with aluminum foil and bake for 20 minutes.
- Remove the foil and bake an additional 10-15 minutes, or until the cheese is bubbly and golden at the edges.
- Let the casserole rest for 5-10 minutes before slicing.
- Garnish with freshly chopped cilantro and serve with lime wedges, if desired.
Notes
Lightly toast corn tortillas before layering to prevent sogginess. Brush tortillas with olive oil if they feel dry. Watch cheese during last baking minutes to avoid over-browning; tent with foil if needed. For gluten-free, ensure chicken broth and tortillas are gluten-free. Dairy-free alternatives can be used but will alter texture.
Nutrition
- Serving Size: 1 casserole slice (a
- Calories: 420
- Sugar: 3
- Sodium: 550
- Fat: 28
- Saturated Fat: 15
- Carbohydrates: 20
- Fiber: 3
- Protein: 28
Keywords: Hatch green chile, chicken enchilada casserole, creamy casserole, easy dinner, comfort food, Mexican casserole, baked enchiladas


