My neighbor Carol did not trust vinegar. That was the first thing she told me when I handed her a jar of these pickled dilly beans last summer. She said it with the kind of certainty most people reserve for politics or parking. Vinegar reminded her of cleaning products and regret—specifically the regret of attempting pickled eggs in 1987. I laughed, but I understood. Pickling can feel like kitchen chemistry you never quite learned. And dilly beans? They sound like something your grandmother made that you pretended to like out of politeness.
Carol took the jar home anyway because I had used fresh dill from her garden (a peace offering for borrowing her ladder). Three days later, she texted me a photo of an empty jar with the caption, “I ate them standing in front of the fridge at midnight.” That was the moment I knew these crunchy sweet and spicy pickled dilly beans had real power. They convert people. Not through persuasion, but through that first bite—the snap, the tang, the slow heat that sneaks up on you.
I developed this recipe after a particularly aggressive farmers market purchase. I had bought three pounds of green beans because they looked so perfect, and then realized I had no plan. Roasting felt boring. Blanching felt sad. I wanted something that would last, something I could pull out of the fridge when I needed a hit of summer in the middle of a gray Tuesday. These beans deliver that. They are crunchy, sweet, spicy, and so dill-forward that every bite tastes like sunshine and patience.
Here is the thing about making your own pickled dilly beans—you control everything. The crunch, the heat, the sweetness. You are not at the mercy of some corporate recipe designed to sit on a shelf for eighteen months. These are alive. They get better every day. And honestly? They are easier than you think.
Why You Will Love This Recipe
These crunchy sweet and spicy pickled dilly beans are not just another canning project. They are the kind of recipe that makes you look like a kitchen wizard with minimal effort. I have tested this method at least seven times to get the texture right—because nobody wants a soggy dilly bean. Nobody.
- Quick & Easy : From start to finished jars in under 45 minutes. No complicated canning equipment required for refrigerator pickles.
- Simple Ingredients : Fresh green beans, dill, garlic, red pepper flakes, sugar, vinegar, and salt. That is it. You probably have most of these already.
- Perfect for Gifting : These jars look gorgeous on any counter. I have given them as hostess gifts, holiday presents, and “I am sorry I ate your last pickle” apologies.
- Crowd-Pleaser : Even people who claim they do not like pickles love these. The sweetness balances the heat, and the crunch wins everyone over.
- Unbelievably Versatile : Use them in bloody marys, chop them into tuna salad, serve them on a charcuterie board, or eat them straight from the jar like I do.
What makes this recipe different is the balance. Most dilly bean recipes lean too hard on the vinegar or skimp on the heat. I spent weeks adjusting the sugar-to-vinegar ratio until the sweetness felt present but not cloying. The red pepper flakes add warmth without violence. The dill is front and center, not hiding in the background. This is the version I would serve to anyone who thinks they do not like pickled vegetables. It changes minds.
This recipe is the one that makes you close your eyes after the first bite. It is summer preserved in glass. It is the reason my neighbor now buys extra green beans at the farmers market and texts me for the recipe every July.
What Ingredients You Will Need
This recipe uses straightforward ingredients that work together to create something greater than the sum of their parts. The magic happens in the balance—sweet against sour, heat against cool, crunch against brine.
- Fresh green beans – 1 pound, trimmed. Look for firm, bright green beans that snap when you bend them. Avoid limp or blemished ones. I prefer medium-thickness beans; skinny French haricots verts work too but will be less crunchy after pickling.
- Distilled white vinegar – 1 cup. This gives the cleanest, brightest flavor. Apple cider vinegar works in a pinch but will change the color slightly.
- Water – 1 cup. Tap water is fine, but if yours is heavily chlorinated, use filtered water for a cleaner taste.
- Granulated sugar – ½ cup. This balances the vinegar and feeds the heat. Do not reduce it unless you want aggressively sour beans.
- Kosher salt – 2 tablespoons. I use Diamond Crystal. If you use Morton, reduce to 1½ tablespoons because it is denser.
- Fresh dill – 4 large sprigs, plus more for garnish. Use the fronds and stems—the stems have intense flavor. Do not substitute dried dill here; it will not give you that fresh, grassy brightness.
- Garlic – 4 cloves, smashed. Smashing releases more flavor than slicing. Use fresh garlic, not pre-minced from a jar.
- Red pepper flakes – 1 to 2 teaspoons, depending on your heat tolerance. I use 1½ teaspoons for a noticeable warmth that does not overwhelm.
- Mustard seeds – 1 teaspoon (optional but recommended). They add a subtle pop and visual appeal.
- Black peppercorns – ½ teaspoon. Whole, not ground. They infuse gently over time.
For the best texture, I recommend using beans from a farmers market or growing your own if you can. Store-bought green beans work perfectly fine, just make sure they are fresh. I have tested this with organic and conventional beans and honestly cannot tell the difference once they are pickled. Use what is available and affordable.
If you want to experiment, try adding a thin slice of fresh jalapeño to each jar for extra heat. Or throw in a star anise for a subtle licorice note that pairs surprisingly well with the dill.
Equipment Needed
You do not need a fancy kitchen to make these pickled dilly beans. Here is what you will need:
- Two pint-sized mason jars with lids. Wide-mouth jars are easier to pack the beans into. Reuse pasta sauce jars if they seal well.
- A medium saucepan for the brine. Stainless steel or enameled works best. Avoid aluminum—it can react with the vinegar.
- A sharp knife for trimming the beans. A chef’s knife or paring knife both work.
- A cutting board. Wood or plastic, whichever you prefer.
- A measuring cup for liquids. Glass is ideal so you can see the measurements clearly.
- Measuring spoons. Get the exact amounts right—pickling is chemistry, not art.
- A funnel (optional but helpful) for pouring brine into jars without spilling.
- A small bowl for smashed garlic and spices.
If you do not have a funnel, do not worry. I have poured brine into jars using a steady hand and a lot of hope for years. It works. Just wipe the rim clean before sealing.
For storage, label your jars with the date using a piece of masking tape and a marker. Trust me—you will forget when you made them, and then you will play a guessing game that nobody wins.
Preparation Method
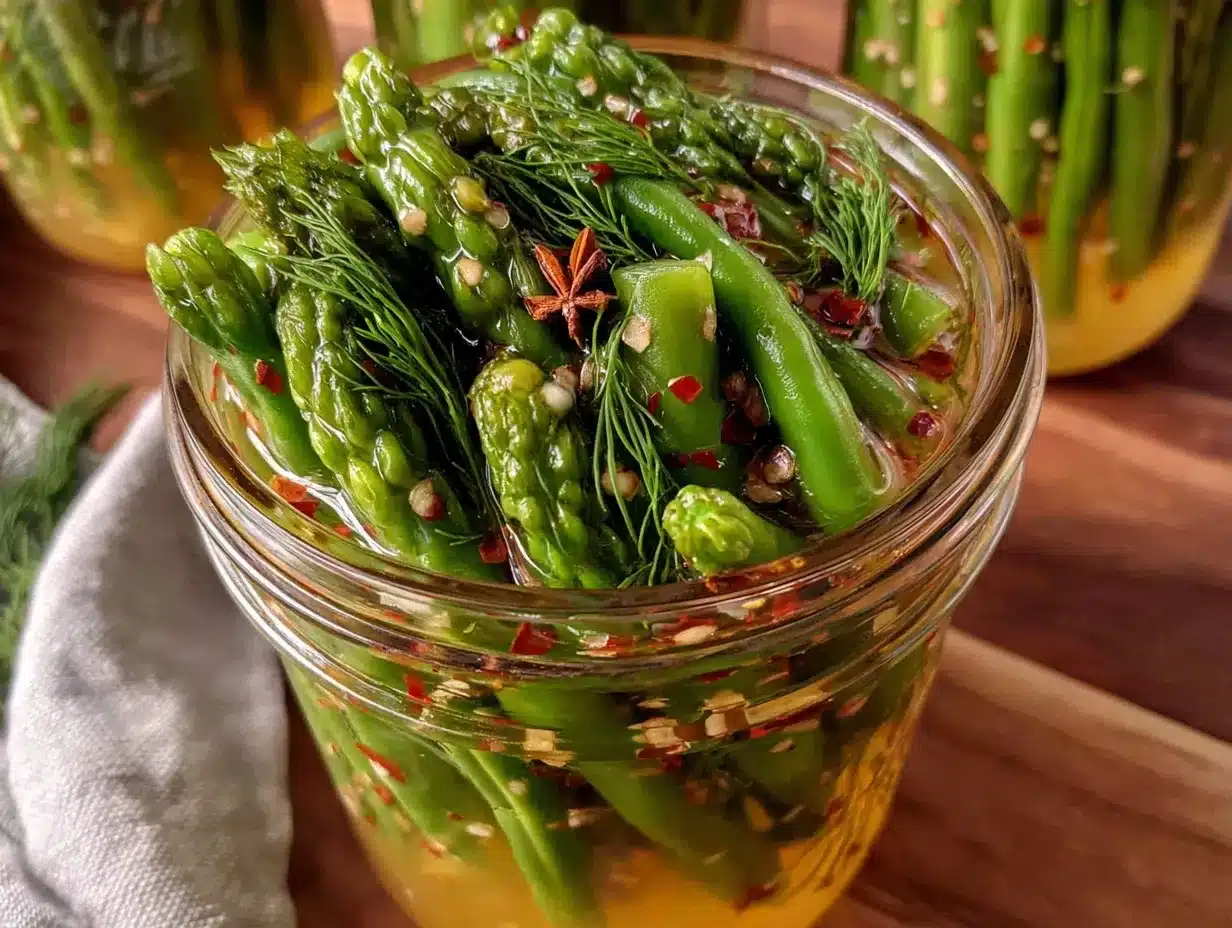
Making these crunchy sweet and spicy pickled dilly beans is straightforward. Follow these steps, and you will have perfect pickles every time.
- Prepare the green beans. Wash them thoroughly under cold water. Trim off the stem ends—just the little nub where they attached to the plant. Leave the tail ends intact; they look prettier that way. If your beans are very long, cut them to fit your jars with about ½ inch of headspace at the top. Pat them dry with a clean kitchen towel.
- Pack the jars. Divide the garlic cloves, dill sprigs, mustard seeds, and black peppercorns evenly between your two pint jars. Pack the green beans vertically into the jars as tightly as you can without crushing them. You want them snug so they stay submerged in the brine. If you leave too much space, the top beans will float and might not pickle evenly.
- Make the brine. In your saucepan, combine the vinegar, water, sugar, salt, and red pepper flakes. Stir everything together. Bring it to a boil over medium-high heat, stirring occasionally to help the sugar and salt dissolve completely. Once it reaches a rolling boil, let it bubble for 1 minute. The brine should look clear and smell sharp but sweet.
- Pour the brine. Carefully pour the hot brine over the green beans in each jar, leaving about ½ inch of headspace at the top. The brine should completely cover the beans. If some beans are sticking up, use a clean knife to gently push them down. Tap the jars on the counter a few times to release any air bubbles.
- Seal and cool. Wipe the rims of the jars with a clean, damp paper towel to remove any brine residue. Screw on the lids until they are fingertip-tight—not too tight, just snug. Let the jars cool completely on the counter, about 1 to 2 hours. You will hear the lids pop as they seal if the jars were hot enough.
- Refrigerate and wait. Once cooled, transfer the jars to the refrigerator. This is the hard part: you need to wait at least 48 hours before tasting. The beans need time to absorb the brine and develop flavor. I know it is tempting, but trust me—day-one beans are not the same as day-three beans. The magic happens after the flavors marry.
- Enjoy. After 48 hours, open a jar and take a bite. The beans should be crunchy, tangy, sweet, and gently spicy. They will keep in the refrigerator for up to 3 months, though I doubt they will last that long.
A quick note on timing: the brine comes together in about 5 minutes, and packing takes another 10. The longest part is waiting for them to cool and then waiting to eat them. Use that time to clean your kitchen or make a batch of homemade sweet tangy zucchini relish to use up extra summer produce.
Cooking Tips & Techniques
I have made these dilly beans enough times to know exactly where things can go wrong. Here is what I have learned through trial, error, and one particularly sad batch of mushy beans.
Do not skip the ice bath. After trimming the beans, plunge them into a bowl of ice water for 5 minutes. This shocks them and helps maintain that signature crunch. I learned this after my first batch came out limp and sad. Never again.
Temperature matters. The brine needs to be boiling when you pour it over the beans. If it is only warm, the beans will not pickle properly and might turn soft. Boiling brine also helps the garlic and dill release their flavors faster.
Pack tightly. You want the beans standing upright and snug against each other. Loose packing means floating beans, which means uneven pickling. If you have extra space, add another bean or two. I have crammed an entire pound of beans into two pint jars with careful packing.
Red pepper flakes are not all the same. Some brands are hotter than others. If you are using a spicy batch, start with 1 teaspoon and taste the brine before pouring. You can always add more heat, but you cannot take it out. I once used a particularly fiery flake and ended up with beans that made my eyes water. Delicious, but intense.
Fresh dill is non-negotiable. Dried dill will give you a muted, hay-like flavor. Fresh dill is bright and grassy and makes these beans taste like summer. If you cannot find fresh dill, consider using dill seed instead—it has a similar flavor profile and holds up well in pickling.
One more thing: if you are new to pickling, start with a small batch. These refrigerator pickles are forgiving, but it is better to learn on two jars than on ten. Once you get the hang of it, you can scale up and make enough to share with neighbors and friends.
Variations & Adaptations
This recipe is a starting point, not a rulebook. Here are some variations I have tried and loved.
Spicy garlic dilly beans. Add 2 extra smashed garlic cloves and 1 teaspoon of red pepper flakes per jar. The garlic softens and becomes almost spreadable after a week. I have eaten these straight from the jar as a snack more times than I care to admit.
Sweet heat version. Increase the sugar to ¾ cup and add ½ teaspoon of cayenne pepper to the brine. This gives you a sweet heat that works beautifully on sandwiches or in bloody marys. My friend swears these are the best dilly beans she has ever had.
Herb garden medley. Replace half the dill with fresh tarragon or thyme. Tarragon adds a subtle anise flavor that pairs surprisingly well with the vinegar. I tried this on a whim and now make it every summer.
Low-sugar option. Reduce the sugar to ¼ cup and add 1 tablespoon of honey. The honey adds complexity without making the beans overly sweet. Just note that honey can cloud the brine slightly—it is still delicious, just not as clear.
Add other vegetables. Throw in some sliced carrots, cauliflower florets, or red onion wedges along with the beans. They all pickle at similar rates and make the jar look gorgeous. I often make a mixed jar for parties, and it disappears first.
For a completely different take, try using these beans in a fresh bento box caprese pasta salad—the tangy crunch adds an unexpected pop that cuts through the creamy pesto.
Serving & Storage Suggestions
These crunchy sweet and spicy pickled dilly beans are incredibly versatile. Here is how I serve and store them.
Serving temperature: Serve them cold, straight from the fridge. The chill enhances the crunch and keeps the flavors bright. If you are taking them to a picnic, pack them in a cooler with an ice pack.
Presentation: Arrange the beans on a platter with toothpicks for easy grabbing. Or leave them in the jar with the lid off—rustic and charming. For a charcuterie board, fan them out next to sharp cheddar, salami, and crusty bread.
Pairings: These beans are incredible with grilled meats, especially burgers and sausages. They also shine in bloody marys—use one as a garnish instead of a celery stalk. I have even chopped them into egg salad for a tangy crunch.
Storage: Keep the jars sealed in the refrigerator. They will stay crunchy and flavorful for up to 3 months. Once opened, consume within 4 weeks for best texture. The brine might become slightly cloudy over time—that is normal and safe, just from the garlic and dill releasing compounds.
Reheating: Do not heat these beans. They are meant to be eaten cold. If you want warm pickled vegetables, make a different recipe.
One thing I love about these beans is how the flavor evolves. On day two, they are good. On day five, they are great. By day ten, they have reached peak deliciousness. The heat mellows into the background, the sweetness deepens, and the dill becomes almost floral. It is worth making them ahead of time just to experience this transformation.
Nutritional Information & Benefits
These pickled dilly beans are a healthy snack option with some surprising benefits.
Estimated per serving (about ½ cup): Calories: 45, Total Fat: 0g, Sodium: 480mg, Total Carbohydrates: 10g, Dietary Fiber: 2g, Sugars: 7g, Protein: 1g.
Key benefits: Green beans are rich in vitamin C, vitamin K, and fiber. The vinegar in the brine may help with blood sugar regulation after meals. Garlic and dill both have antimicrobial properties and add antioxidants to your diet.
Dietary considerations: This recipe is naturally vegan, gluten-free, and dairy-free. It is also low in calories and fat, making it a guilt-free snack. The sugar content comes entirely from the added sugar in the brine—if you are watching your sugar intake, try the low-sugar variation with honey.
Potential allergens: None of the common allergens are present in this recipe. However, if you have a sulfite sensitivity, check your vinegar label—some brands add sulfites as preservatives.
I personally love having these beans on hand for those moments when I need a crunchy, savory snack that is not chips. They satisfy the same craving without the empty calories. Plus, they make me feel like I am eating something that came from the earth, not a factory.
Conclusion
These crunchy sweet and spicy pickled dilly beans have become a staple in my kitchen for good reason. They are simple to make, endlessly customizable, and so satisfying to pull out of the fridge on a random Tuesday. Every time I open a jar, I am transported back to that farmers market moment when I bought too many green beans and had to figure out what to do with them.
I hope you give this recipe a try and make it your own. Add more heat if you like things spicy. Dial back the sugar if you prefer a sharper pickle. Throw in some extra garlic because garlic makes everything better. The beauty of this recipe is that it works with you, not against you.
When you make these beans—and I know you will—come back and let me know how they turned out. Did you add your own twist? Did your neighbor text you at midnight about an empty jar? I want to hear about it. Share your photos, your questions, your victories. This is how recipes become traditions, one jar at a time.
Go ahead. Grab some green beans and start pickling. Your future self—the one who opens a jar in December and tastes July—will thank you.
Frequently Asked Questions
Can I use frozen green beans for this recipe?
Fresh green beans work best for the crunchiest texture. Frozen beans have been blanched and will be softer after pickling. If you must use frozen, thaw them completely and pat them very dry before packing into jars. They will still taste good, just not as crunchy.
How long do these pickled dilly beans last in the refrigerator?
Sealed and stored properly, they will stay crunchy and flavorful for up to 3 months. Once you open a jar, consume the beans within 4 weeks for the best texture and taste. The brine might cloud slightly over time, but that is normal and safe.
Can I water bath can these for shelf-stable storage?
This recipe is designed for refrigerator pickling only. The vinegar-to-water ratio and processing time are not tested for safe water bath canning. If you want shelf-stable dilly beans, look for a tested canning recipe from a trusted source like the USDA or your local extension office.
Why are my dilly beans soft instead of crunchy?
Soft beans usually come from over-processing or using older beans. Make sure your beans are as fresh as possible—they should snap when bent. Also, do not skip the ice bath after trimming. If you used older beans, they might have already lost their natural crunch before pickling.
Can I reuse the brine for another batch?
Technically yes, but the flavor will be much weaker the second time around. The brine absorbs flavors from the first batch of beans, dill, and garlic, so the second batch will taste noticeably different. I recommend making fresh brine for each batch for consistent results.
Pin This Recipe!
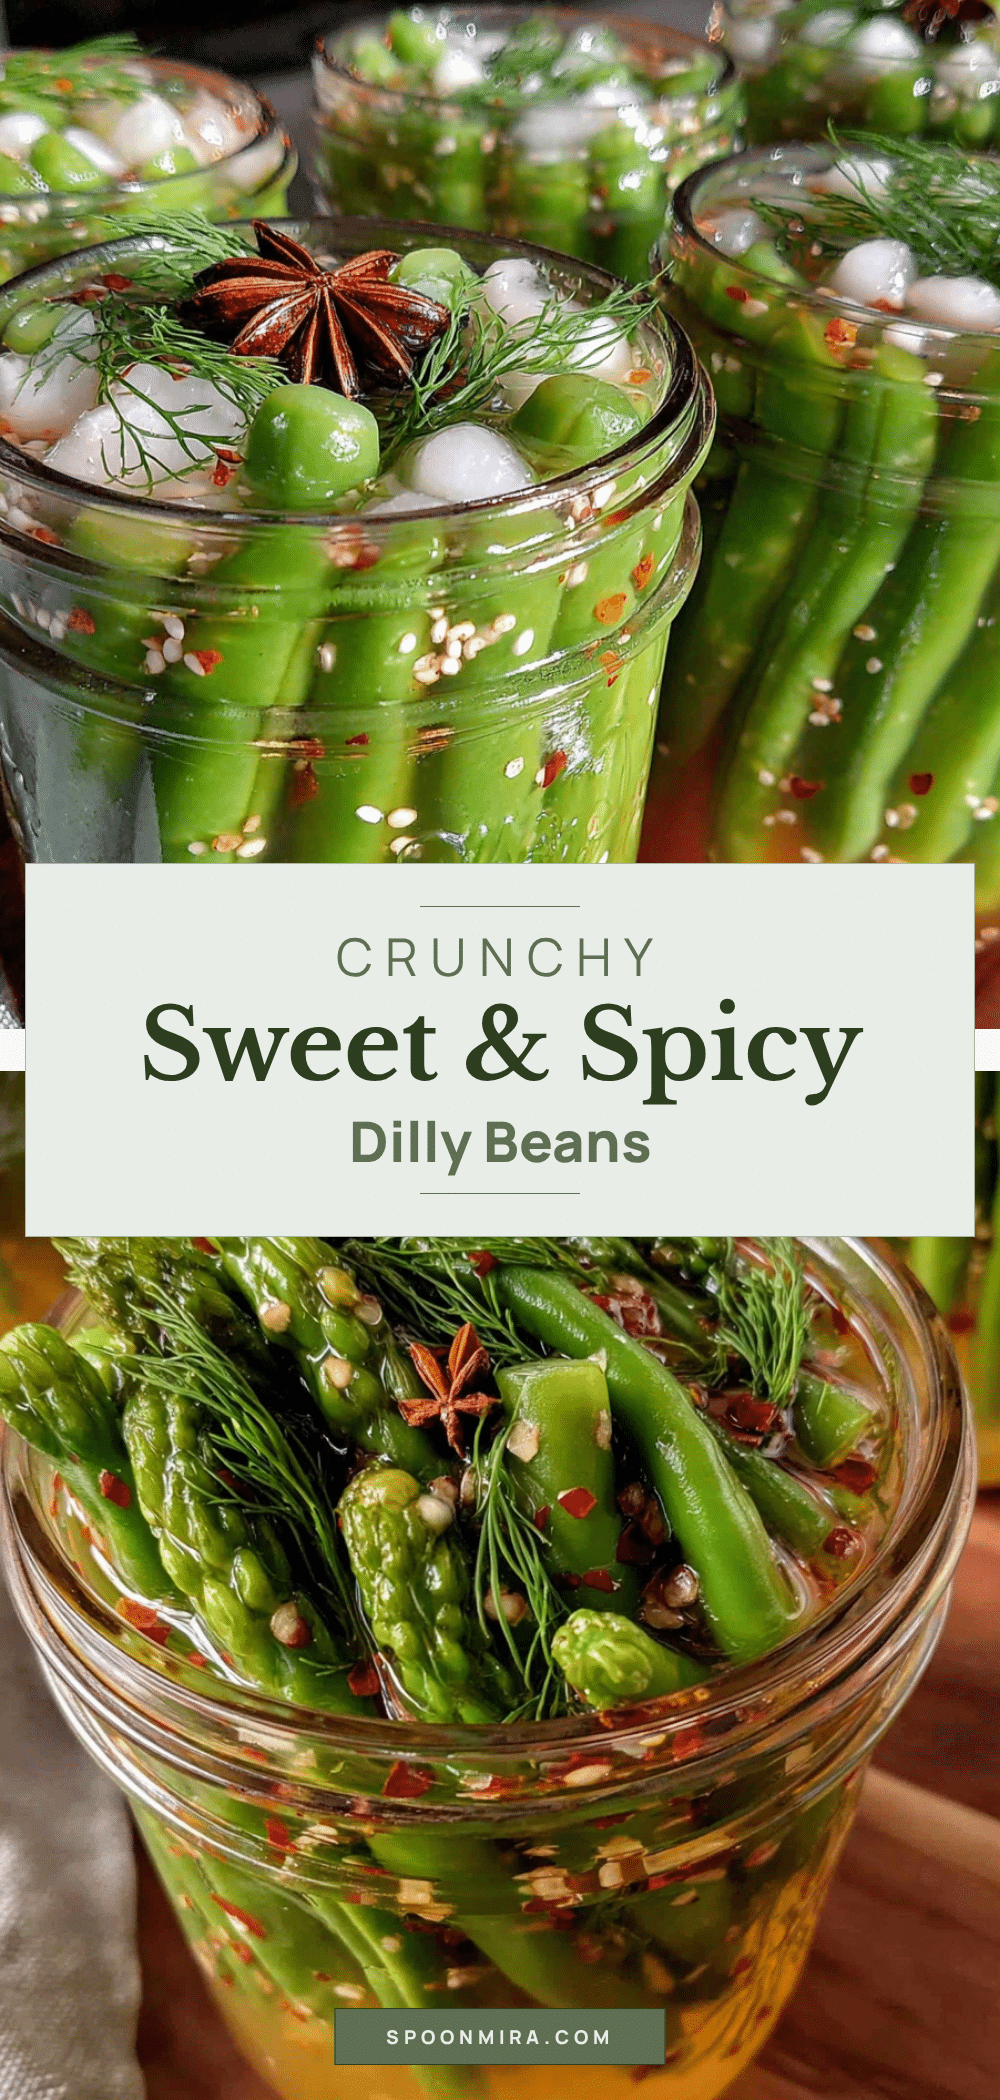
Crunchy Sweet & Spicy Pickled Dilly Beans
These crunchy sweet and spicy pickled dilly beans are quick and easy to make, with a perfect balance of tangy, sweet, and heat. They’re a crowd-pleasing snack or gift that tastes like summer in a jar.
- Prep Time: 15 minutes
- Cook Time: 5 minutes
- Total Time: 20 minutes (plus 48 hours refrigeration)
- Yield: 2 pints (about 8 servings) 1x
- Category: Side Dish, Snack
- Cuisine: American
Ingredients
- 1 pound fresh green beans, trimmed
- 1 cup distilled white vinegar
- 1 cup water
- ½ cup granulated sugar
- 2 tablespoons kosher salt (Diamond Crystal; reduce to 1½ tablespoons if using Morton)
- 4 large sprigs fresh dill
- 4 cloves garlic, smashed
- 1 to 2 teaspoons red pepper flakes (use 1½ teaspoons for medium heat)
- 1 teaspoon mustard seeds (optional)
- ½ teaspoon black peppercorns
Instructions
- Prepare the green beans: Wash them thoroughly under cold water. Trim off the stem ends, leaving the tail ends intact. If beans are very long, cut them to fit your jars with about ½ inch of headspace. Pat dry with a clean kitchen towel.
- Pack the jars: Divide the garlic cloves, dill sprigs, mustard seeds, and black peppercorns evenly between two pint jars. Pack the green beans vertically into the jars as tightly as possible without crushing them.
- Make the brine: In a medium saucepan, combine the vinegar, water, sugar, salt, and red pepper flakes. Bring to a boil over medium-high heat, stirring occasionally until sugar and salt dissolve. Let boil for 1 minute.
- Pour the brine: Carefully pour the hot brine over the green beans in each jar, leaving about ½ inch of headspace. Ensure beans are fully covered. Use a clean knife to gently push down any floating beans. Tap jars on the counter to release air bubbles.
- Seal and cool: Wipe the rims of the jars with a clean, damp paper towel. Screw on lids until fingertip-tight. Let jars cool completely on the counter, about 1 to 2 hours.
- Refrigerate and wait: Transfer cooled jars to the refrigerator. Wait at least 48 hours before tasting to allow flavors to develop.
- Enjoy: After 48 hours, the beans are ready. They will keep in the refrigerator for up to 3 months.
Notes
For best crunch, do not skip the ice bath after trimming beans. Fresh dill is non-negotiable; dried dill will not give the same flavor. The brine must be boiling when poured over beans. Pack beans tightly to ensure even pickling. Red pepper flakes vary in heat; start with 1 teaspoon and adjust. These are refrigerator pickles only—not tested for water bath canning.
Nutrition
- Serving Size: ½ cup
- Calories: 45
- Sugar: 7
- Sodium: 480
- Carbohydrates: 10
- Fiber: 2
- Protein: 1
Keywords: pickled dilly beans, dilly beans, pickled green beans, sweet and spicy pickles, refrigerator pickles, dilly bean recipe, crunchy pickled beans


