Pumpkin puree dripping down the counter, gingersnap crumbs stuck to my elbow, and the cream cheese still sitting on the counter—still cold. That’s where this recipe started. I was supposed to bring dessert to a friend’s fall gathering, and I’d promised something “impressive but not fussy.” Classic overpromise, right? The oven was preheating, the kids were circling like hungry sharks, and I had exactly one shot to get this right without a trip back to the store.
I’d been dreaming of something that combined the tangy richness of cheesecake with that deep, spiced warmth you only get from real pumpkin. But a full cheesecake takes forever, and let’s be honest—slicing a perfect wedge under pressure? Not my strong suit. Bars felt smarter. Faster. Less pressure. And that gingersnap crust? That wasn’t a plan. That was a happy accident born from a half-empty box of cookies I found shoved behind the oatmeal.
The first batch came out okay. The second? That’s when I stopped measuring with actual cups and started going by feel. The filling got creamier, the crust got crunchier, and somewhere between the third and fourth test batch, my husband said, “Don’t bring these anywhere. Keep them here.” That’s when I knew I had something. These creamy pumpkin cheesecake bars with gingersnap crust aren’t just another fall dessert. They’re the one I make when I need to show up with something beautiful but don’t have time for perfectionism. And honestly? They taste better than anything I’ve ever fussed over for hours.
Why You’ll Love This Recipe
Look, I’ve tested a lot of pumpkin desserts over the years. Some are too dense. Some are too sweet. Some taste more like spice than actual pumpkin. These bars hit that sweet spot where everything just works, and here’s why you’ll keep coming back to them.
- Quick & Easy: No water bath, no springform pan, no stress. From start to finish, you’re looking at about an hour of active time. The oven does the rest.
- Simple Ingredients: Cream cheese, pumpkin puree, eggs, sugar, and a box of gingersnaps. That’s basically it. You probably have most of this in your kitchen right now.
- Perfect for Fall Gatherings: Whether it’s Thanksgiving, a potluck, or just a cozy Sunday, these bars travel well and look gorgeous on a plate. No slicing drama.
- Crowd-Pleaser: Kids love the creamy texture. Adults love the grown-up gingersnap crunch. Everyone goes back for seconds.
- Unbelievably Delicious: The tang from the cream cheese cuts through the sweet pumpkin perfectly. And that crust? It’s not just a crust—it’s a whole experience. Spicy, buttery, and just the right amount of crunch.
What makes these different from every other pumpkin cheesecake bar recipe out there? Two things. First, I don’t pre-bake the crust. I know, I know—everyone says you have to. But I found that pressing the gingersnap mixture straight into the pan and pouring the filling over it creates a softer, more integrated crust that doesn’t crumble when you cut into it. Second, I add a tiny splash of vanilla to the pumpkin layer. It sounds simple, but it rounds out the spices in a way that makes the whole thing taste more… complete. More like a real dessert, not just a quick fix.
These bars are the kind of dessert that makes you close your eyes after the first bite. They’re comfort food reimagined—faster than a traditional cheesecake, but with the same soul-soothing satisfaction. Perfect for impressing guests without stress, or turning a simple fall evening into something memorable.
What Ingredients You Will Need
This recipe uses simple, wholesome ingredients to deliver bold flavor and satisfying texture without the fuss. Most of these are pantry staples, especially once fall hits. Here’s what you’ll need and why each one matters.
For the Gingersnap Crust
- Gingersnap cookies, finely crushed (2 cups / about 200g): Don’t skip crushing them yourself. The pre-crushed crumbs just don’t have the same texture. I use Nabisco gingersnaps, but any brand works. The key is getting them fine—like sand—so they hold together.
- Unsalted butter, melted (6 tablespoons / 85g): This binds the crust and adds richness. If you only have salted butter, reduce the added salt in the filling by a pinch.
- Granulated sugar (2 tablespoons / 25g): Just a little sweetness to balance the spicy gingersnaps.
For the Creamy Pumpkin Cheesecake Filling
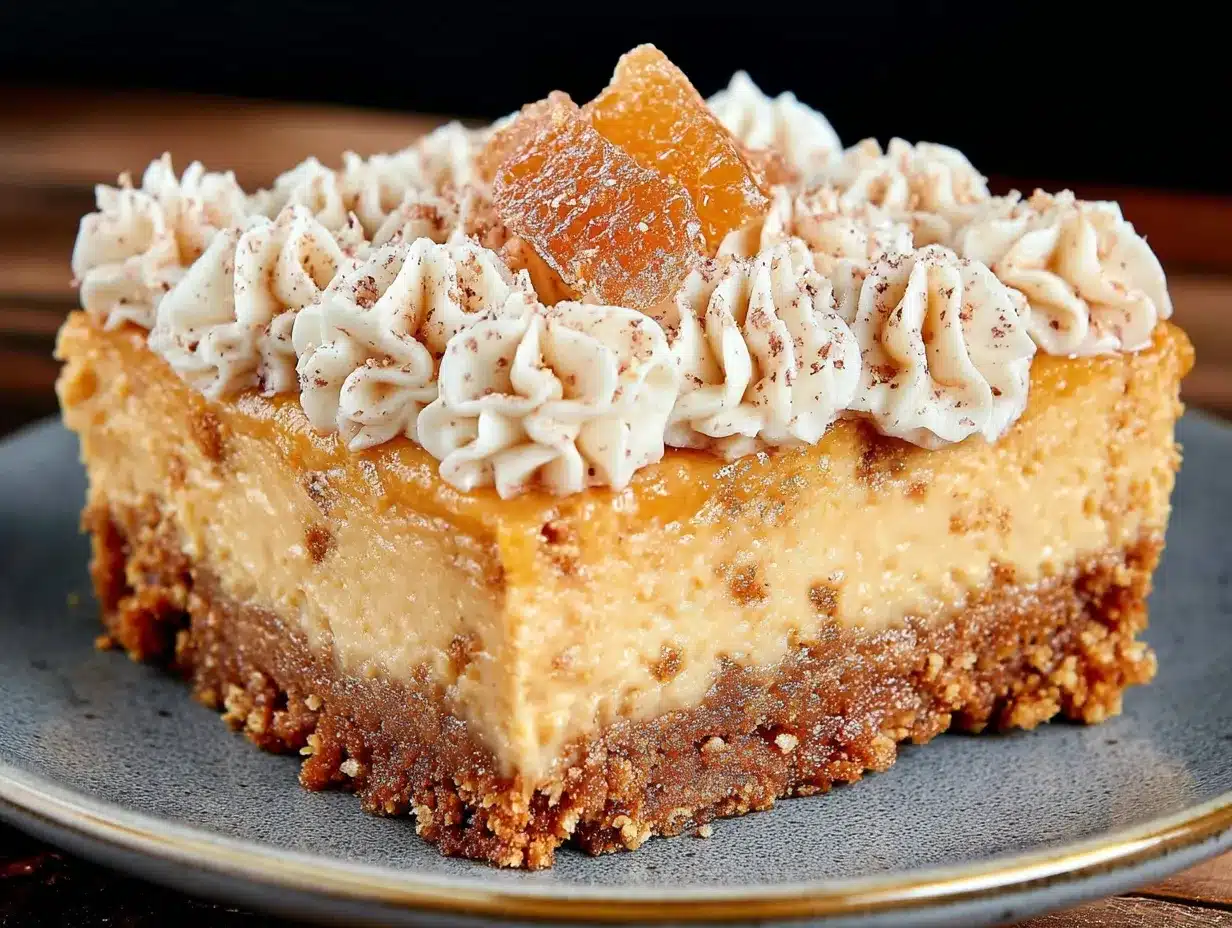
- Cream cheese, softened (16 ounces / 450g, two blocks): Full-fat is non-negotiable here. Low-fat cream cheese gets watery and won’t set properly. Let it sit on the counter for at least an hour before you start.
- Granulated sugar (3/4 cup / 150g): Enough to sweeten without overpowering the pumpkin.
- Pumpkin puree (1 cup / 240g): Not pumpkin pie filling. Pure pumpkin puree. I like Libby’s, but store brands work fine. If your puree looks watery, blot it with a paper towel before mixing.
- Large eggs (2, room temperature): Room temperature eggs blend more smoothly into the cream cheese. Cold eggs can make the filling lumpy.
- Sour cream (1/4 cup / 60g): This is my secret ingredient. It adds tang and makes the filling extra creamy. Greek yogurt works as a substitute.
- Vanilla extract (1 teaspoon): Pure vanilla, not imitation. It makes a difference.
- Pumpkin pie spice (1 1/2 teaspoons): You can use store-bought or make your own with cinnamon, nutmeg, ginger, and cloves. I always add an extra pinch of cinnamon because I’m extra like that.
- Salt (1/4 teaspoon): Balances the sweetness and brings out the pumpkin flavor.
For the Optional Topping
- Whipped cream or caramel drizzle: Not necessary, but highly recommended. A dollop of fresh whipped cream and a drizzle of salted caramel takes these from “really good” to “are you kidding me?”
Equipment Needed
You don’t need a fancy kitchen for these bars. Here’s what you’ll actually use.
- 9×9-inch baking pan: An 8×8 works too, but your bars will be slightly thicker and may need an extra 5 minutes in the oven. Glass or metal both work fine.
- Parchment paper: Don’t skip this. It makes lifting the bars out so much easier. Leave overhang on two sides for handles.
- Food processor or zip-top bag: For crushing the gingersnaps. A food processor gives you the most consistent texture, but a rolling pin and a sturdy bag work just as well. Just make sure there are no big chunks left.
- Electric hand mixer or stand mixer: Cream cheese needs to be really smooth, and doing it by hand is a workout. A hand mixer is fine.
- Mixing bowls: One for the crust, one for the filling. Nothing fancy.
- Rubber spatula: For scraping every last bit of filling into the pan. Waste not, want not.
- Measuring cups and spoons: Standard set. Nothing special.
Preparation Method
Alright, let’s get to it. I’ve made these bars more times than I can count, so I’ll walk you through every step like we’re in the kitchen together. Don’t rush—this is supposed to be fun.
- Preheat your oven to 350°F (175°C). Line your 9×9-inch pan with parchment paper, leaving some overhang on two opposite sides. This is your insurance policy for easy removal later.
- Make the crust. In a food processor, pulse the gingersnap cookies until they turn into fine crumbs. You should have about 2 cups. Pour them into a medium bowl, add the melted butter and 2 tablespoons of sugar, and stir with a fork until every crumb is coated. The mixture should look like wet sand and hold together when you squeeze it.
- Press the crust into the pan. Dump the crumbs into your prepared pan and press them down firmly. I use the bottom of a measuring cup to get it even. Don’t press too hard—you want it compact but not brick-like. Set the pan aside.
- Beat the cream cheese. In a large bowl, beat the softened cream cheese with an electric mixer on medium speed until it’s completely smooth with no lumps. This takes about 2 minutes. Scrape down the sides and the bottom of the bowl at least once. Lumps now mean lumpy cheesecake later.
- Add the sugar. Gradually add the 3/4 cup of sugar and beat until combined. The mixture should look light and fluffy. Don’t overmix—you don’t want to incorporate too much air, which can cause cracks.
- Mix in the pumpkin and wet ingredients. Add the pumpkin puree, sour cream, and vanilla extract. Beat on low speed until just combined. The mixture will turn a beautiful pale orange color. If it looks streaky, keep mixing gently until uniform.
- Add the eggs one at a time. Crack the first egg into the bowl and mix on low speed until the yolk disappears. Repeat with the second egg. Mix only until incorporated—overmixing at this stage can cause the cheesecake to puff up and crack during baking.
- Add the spices. Sprinkle the pumpkin pie spice and salt over the batter. Fold them in gently with a rubber spatula. This is where the magic happens—the kitchen will start smelling like fall.
- Pour the filling over the crust. Pour the pumpkin cheesecake mixture over the crust and spread it evenly with your spatula. Tap the pan gently on the counter a few times to release any air bubbles.
- Bake. Place the pan on the middle rack and bake for 35-40 minutes. The edges should look set and slightly puffed, but the center should still jiggle slightly when you gently shake the pan. That jiggle is your friend—it means the bars will be creamy, not dry.
- Cool completely. Place the pan on a wire rack and let it cool to room temperature. This takes about an hour. Don’t rush this step—putting warm cheesecake in the fridge creates condensation that makes the top soggy.
- Chill for at least 4 hours. Once cool, cover the pan with plastic wrap and refrigerate for at least 4 hours, but overnight is better. The bars need time to set properly. I know it’s hard to wait, but trust me—this is where the texture goes from good to incredible.
- Slice and serve. Use the parchment overhang to lift the entire block out of the pan. Place it on a cutting board and slice into 16 squares. Clean your knife between cuts for the prettiest edges. Serve cold or at room temperature with whipped cream or caramel drizzle.
Cooking Tips & Techniques
I’ve made every mistake in the book so you don’t have to. Here’s what I’ve learned the hard way.
Room temperature ingredients matter. I cannot stress this enough. Cold cream cheese creates lumps that no amount of mixing will fix. Cold eggs can seize the batter. Set everything out on the counter an hour before you start. Set a timer if you’re forgetful like me.
Don’t overbake. The first time I made these, I waited until the center was completely firm. They came out dry and cracked. The center should still wobble when you pull the pan out. It will continue to set as it cools. Trust the jiggle.
Use a water bath? No. Most cheesecake recipes call for a water bath to prevent cracking. But for bars, it’s unnecessary. The shallow pan and shorter baking time mean they cook evenly without one. Just don’t open the oven door during baking—temperature fluctuations cause cracks.
Crush the gingersnaps finely. Big chunks in the crust create weak spots where the bars can fall apart when you cut them. Pulse until the crumbs look like coarse sand. If you see any pieces bigger than a pea, keep pulsing.
Let them chill overnight. I know it’s tempting to dig in after a few hours, but the texture improves dramatically with time. The flavors meld, the texture firms up, and the crust softens just enough to be easy to bite through. Make these a day ahead—your future self will thank you.
Variations & Adaptations
One of the best things about this recipe is how flexible it is. Here are some ways I’ve adapted it for different needs and cravings.
Gluten-Free Version: Use gluten-free gingersnap cookies for the crust. Most major brands offer a gluten-free option now. The rest of the recipe is naturally gluten-free, so this swap is seamless.
Dairy-Free Adaptation: Substitute the cream cheese with a high-quality dairy-free cream cheese alternative, and use coconut cream instead of sour cream. The texture will be slightly less firm, but the flavor is still fantastic. I’ve had good luck with the Kite Hill brand.
Pumpkin Spice Latte Twist: Add 1 tablespoon of instant espresso powder dissolved in 1 teaspoon of hot water to the filling. The coffee flavor deepens the pumpkin spice and makes these taste like your favorite fall drink in dessert form.
Maple Pecan Variation: Swap the granulated sugar in the filling for maple sugar, and add 1/2 cup of toasted, chopped pecans to the crust. The maple flavor pairs beautifully with the pumpkin and gingersnap.
Mini Bar Version: Use a mini muffin tin lined with paper liners. Press a small spoonful of crust into each cup, top with filling, and bake for 18-20 minutes. Perfect for parties or portion control.
Serving & Storage Suggestions
These bars are versatile enough for any occasion. Here’s how to serve and store them for the best experience.
Serving Temperature: I prefer these cold straight from the fridge, but they’re also wonderful at room temperature. If you’re serving them at a gathering, let them sit out for about 15 minutes before serving—they’ll be easier to cut and the flavors will open up.
Presentation Ideas: Arrange the bars on a platter with a dusting of cinnamon or pumpkin pie spice. Add a dollop of fresh whipped cream and a drizzle of caramel sauce for a more elegant look. For a festive touch, garnish with a few candied pecans or a sprinkle of crushed gingersnaps.
Complementary Dishes: These bars pair beautifully with a hot cup of coffee or a spiced chai latte. For a full fall spread, serve them alongside my pumpkin spice sheet cake with cream cheese frosting or a warm bowl of hatch green chile corn chowder for a cozy dinner-dessert combo.
Storage Instructions: Store the bars in an airtight container in the refrigerator for up to 5 days. Place a sheet of parchment paper between layers to prevent sticking. The crust will soften slightly over time, but the flavor actually improves after a day or two.
Freezing Instructions: These freeze beautifully. Wrap individual bars tightly in plastic wrap, then place them in a freezer-safe bag or container. They’ll keep for up to 3 months. Thaw in the refrigerator overnight before serving. Don’t thaw at room temperature—the texture can get watery.
Reheating: I don’t recommend reheating these. They’re meant to be served cold or at room temperature. If you really want a warm dessert, try microwaving a single bar for about 10 seconds—just enough to take the chill off without melting the filling.
Nutritional Information & Benefits
Let’s be real—these are a treat, not a health food. But they do have some redeeming qualities worth noting.
Estimated Nutritional Values (per bar, based on 16 servings):
- Calories: 285
- Fat: 18g
- Carbohydrates: 28g
- Protein: 5g
- Fiber: 1g
- Sugar: 18g
Health Benefits: Pumpkin is packed with vitamin A, which supports eye health and immune function. It’s also a good source of fiber and antioxidants. The cream cheese provides calcium and protein, while the ginger in the crust can help with digestion. I’m not saying these are a superfood, but they’re not empty calories either.
Dietary Considerations: This recipe contains dairy, gluten, and eggs. For a gluten-free version, use gluten-free gingersnaps. For a dairy-free version, use plant-based cream cheese and coconut cream. The recipe is naturally nut-free, making it safe for school events and gatherings where allergies are a concern.
Personal Perspective: I believe in balance. Desserts like these are meant to be enjoyed without guilt. One bar with a cup of coffee is a beautiful way to end a fall day. The key is portion control—and that’s why I love making bars instead of a full cheesecake. You get all the flavor with built-in portion awareness.
Conclusion
These creamy pumpkin cheesecake bars with gingersnap crust are everything I want in a fall dessert—rich, creamy, spiced perfectly, and completely stress-free to make. They’ve become my go-to for every autumn gathering, and I honestly don’t see that changing anytime soon.
The beauty of this recipe is how forgiving it is. You can’t really mess it up. The crust doesn’t need pre-baking. The filling doesn’t need a water bath. And the flavor? It’s forgiving too—a little more spice here, a little less sugar there, and it still works. That’s the kind of recipe I want in my back pocket.
I’d love to hear how these turn out for you. Did you try a variation? Add a topping? Make them for a holiday dinner? Drop a comment below and let me know. And if you’re looking for more fall inspiration, don’t miss my brown sugar peach cobbler or these fudgy zucchini chocolate chip cookies for more seasonal treats.
Happy baking, friends. And remember—the jiggle is your friend.
Frequently Asked Questions
Can I use pumpkin pie filling instead of pumpkin puree?
No, I don’t recommend it. Pumpkin pie filling already has sugar and spices added, which will throw off the balance of this recipe. Stick with 100% pure pumpkin puree for the best results.
Why did my cheesecake bars crack on top?
Cracks usually happen from overbaking or sudden temperature changes. Make sure you pull the bars out while the center is still slightly jiggly. Also, don’t open the oven door during baking—the temperature drop can cause cracking.
Can I make these bars ahead of time?
Absolutely. In fact, I recommend it. The bars need at least 4 hours to set, but they’re even better after a full day in the fridge. You can make them up to 3 days ahead and store them covered in the refrigerator.
How do I get clean, neat slices?
Use a sharp knife and wipe it clean between each cut. For the cleanest edges, chill the bars for the full 4 hours (or overnight) before slicing. If the knife sticks, dip it in hot water and dry it off before cutting.
Can I use a different cookie for the crust?
Yes! Graham crackers, shortbread cookies, or even vanilla wafers work well. Just keep in mind that the flavor profile will change. Gingersnaps add that warm, spicy kick that complements the pumpkin perfectly, but feel free to experiment.
Pin This Recipe!
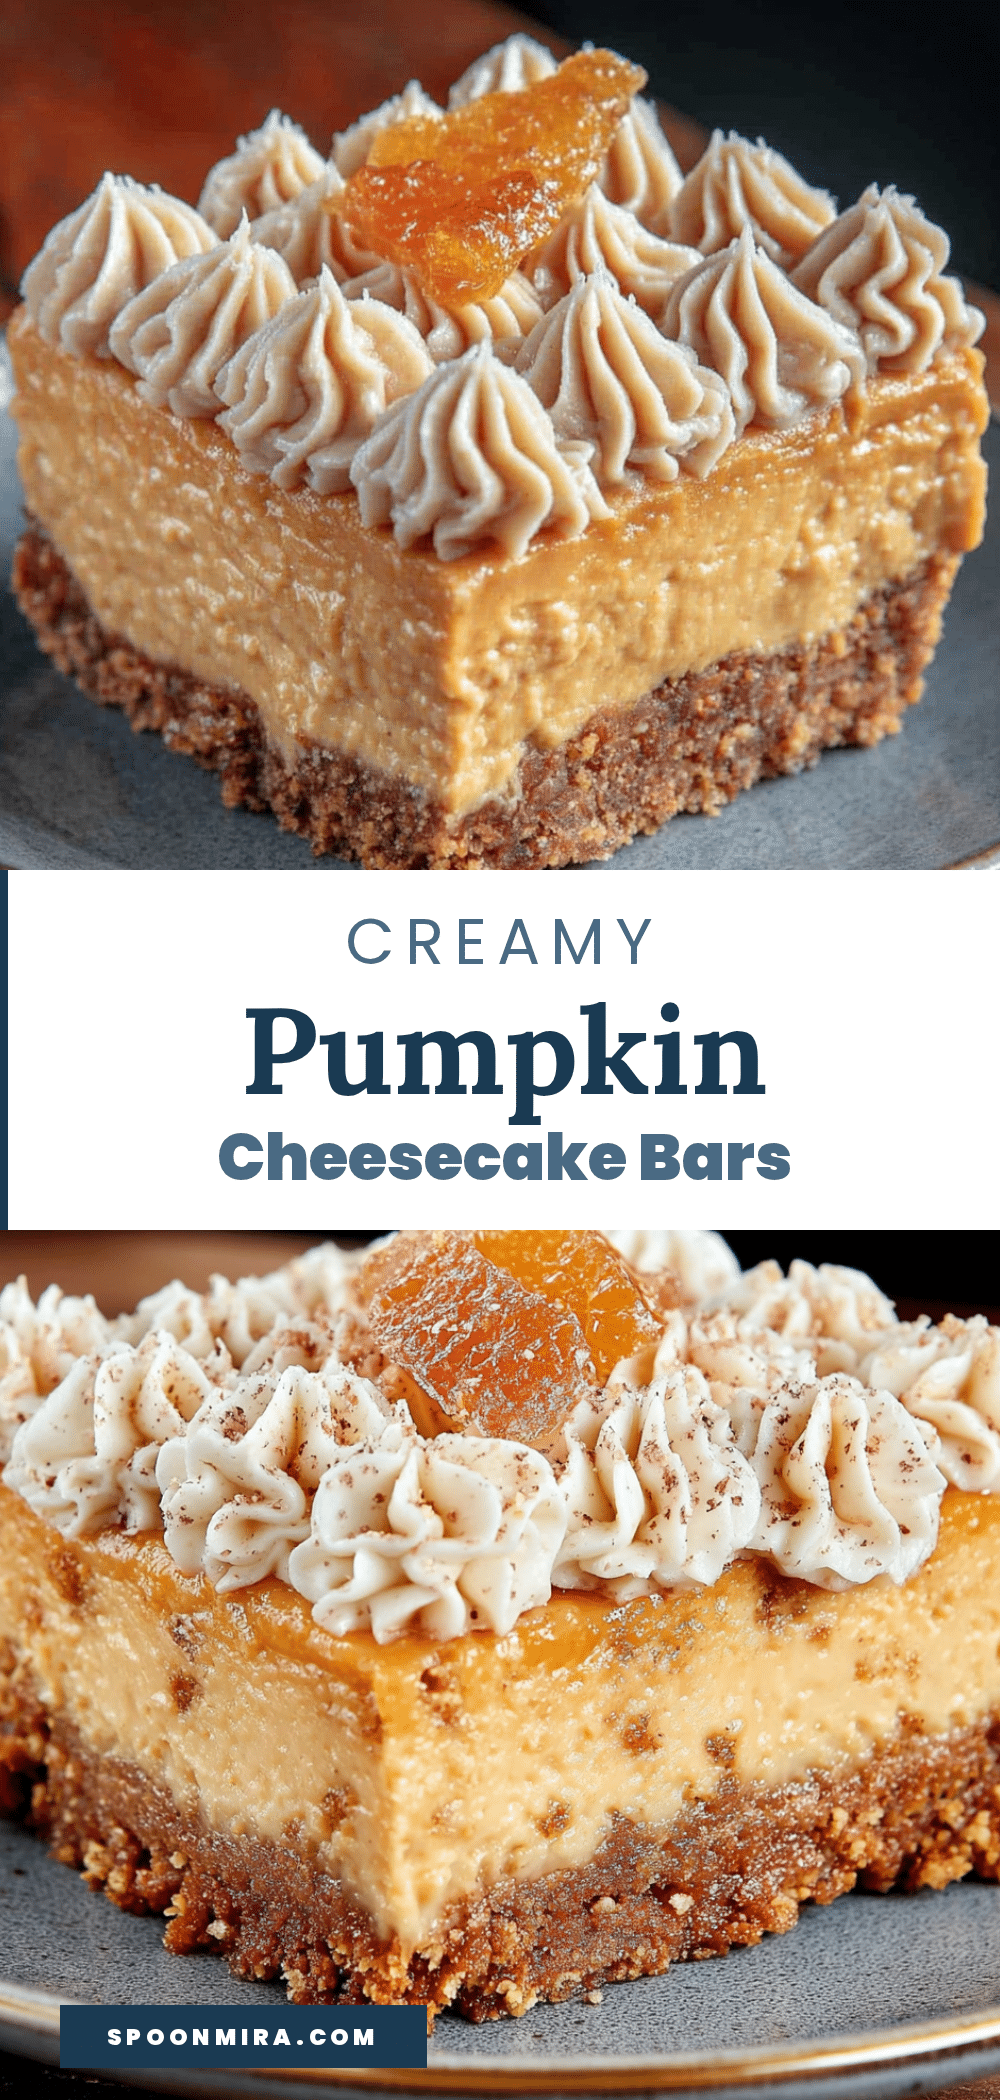
Easy Creamy Pumpkin Cheesecake Bars with Gingersnap Crust
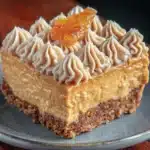
These creamy pumpkin cheesecake bars with a gingersnap crust are the perfect fall dessert—rich, tangy, and spiced just right. No water bath, no springform pan, and no stress, just an impressive treat that comes together in about an hour.
- Prep Time: 20 minutes
- Cook Time: 35-40 minutes
- Total Time: 1 hour (plus 4 hours chilling)
- Yield: 16 bars 1x
- Category: Dessert
- Cuisine: American
Ingredients
- 2 cups (about 200g) finely crushed gingersnap cookies
- 6 tablespoons (85g) unsalted butter, melted
- 2 tablespoons (25g) granulated sugar
- 16 ounces (450g) cream cheese, softened
- 3/4 cup (150g) granulated sugar
- 1 cup (240g) pumpkin puree
- 2 large eggs, room temperature
- 1/4 cup (60g) sour cream
- 1 teaspoon vanilla extract
- 1 1/2 teaspoons pumpkin pie spice
- 1/4 teaspoon salt
- Whipped cream or caramel drizzle (optional, for topping)
Instructions
- Preheat your oven to 350°F (175°C). Line a 9×9-inch baking pan with parchment paper, leaving overhang on two opposite sides.
- Make the crust: In a food processor, pulse gingersnap cookies into fine crumbs (about 2 cups). In a medium bowl, combine crumbs with melted butter and 2 tablespoons sugar. Stir until every crumb is coated and the mixture looks like wet sand.
- Press the crust mixture firmly into the prepared pan using the bottom of a measuring cup. Set aside.
- In a large bowl, beat softened cream cheese with an electric mixer on medium speed until completely smooth, about 2 minutes. Scrape down sides and bottom of bowl.
- Gradually add 3/4 cup sugar and beat until combined and fluffy. Do not overmix.
- Add pumpkin puree, sour cream, and vanilla extract. Beat on low speed until just combined and uniform in color.
- Add eggs one at a time, mixing on low speed after each addition until the yolk disappears. Mix only until incorporated.
- Sprinkle pumpkin pie spice and salt over the batter. Fold in gently with a rubber spatula.
- Pour the filling over the crust and spread evenly. Tap the pan gently on the counter to release air bubbles.
- Bake on the middle rack for 35-40 minutes. The edges should be set and slightly puffed, but the center should still jiggle slightly when shaken.
- Cool the pan on a wire rack to room temperature, about 1 hour.
- Cover with plastic wrap and refrigerate for at least 4 hours, preferably overnight.
- Use the parchment overhang to lift the block out of the pan. Place on a cutting board and slice into 16 squares. Clean the knife between cuts for neat edges. Serve cold or at room temperature with whipped cream or caramel drizzle if desired.
Notes
Do not pre-bake the crust. The center should still jiggle when you remove the bars from the oven—it will set as it cools. For best texture, chill overnight. Room temperature ingredients are crucial for a smooth filling. For gluten-free, use gluten-free gingersnaps. For dairy-free, use plant-based cream cheese and coconut cream.
Nutrition
- Serving Size: 1 bar
- Calories: 285
- Sugar: 18
- Sodium: 220
- Fat: 18
- Saturated Fat: 10
- Carbohydrates: 28
- Fiber: 1
- Protein: 5
Keywords: pumpkin cheesecake bars, gingersnap crust, fall dessert, easy cheesecake bars, pumpkin dessert, Thanksgiving dessert