I burned the first batch of these mummy hand pies so badly the smoke alarm went off twice and my kids thought the house was haunted. Not exactly the spooky vibe I was going for, but honestly, it became a funny memory we still laugh about. I was so focused on making them look perfect—wrapping the pastry strips just right, getting the eyes perfectly spaced—that I completely forgot about the oven timer. That was three Halloweens ago, and every year since, I’ve tweaked and tested until I got these right.
These Spooky Cream Cheese Mummy Hand Pies are now our family’s official Halloween tradition. They’re creepy-cute, surprisingly easy once you get the hang of it, and they taste like a little pocket of creamy, slightly tangy heaven wrapped in flaky, buttery pastry. The first time I served them at our neighborhood Halloween party, they vanished faster than the candy bowl. I watched a grown man in a hot dog costume eat four of them without stopping.
What I love most about this recipe is how it turns a simple cream cheese filling into something that feels special. The filling is rich but not heavy, with a hint of vanilla and a touch of sweetness that balances the flaky crust. And the best part? You don’t need to be a pastry chef to pull these off. If I can learn to make them without setting off the smoke alarm, you absolutely can too.
Why You’ll Love This Recipe
These mummy hand pies aren’t just adorable—they’re genuinely delicious and foolproof. Here’s why they deserve a spot on your Halloween menu:
- Quick & Easy: From start to finish, these come together in about 45 minutes. The active prep time is only 20 minutes, which leaves you plenty of time to carve pumpkins or hide from your own smoke alarm.
- Simple Ingredients: You probably already have most of what you need in your pantry. Cream cheese, butter, flour, sugar, vanilla—nothing fancy required.
- Perfect for Halloween Parties: These are the star of any spooky spread. Kids love the mummy design, and adults love the grown-up flavor. They’re a total crowd-pleaser.
- Unbelievably Delicious: The cream cheese filling is silky and tangy, wrapped in a flaky, golden crust. It’s comfort food with a Halloween twist.
- Make-Ahead Friendly: You can prep these a day ahead and bake them fresh when guests arrive. Or freeze them unbaked for last-minute Halloween emergencies.
What makes this recipe different from other hand pies I’ve tried is the cream cheese filling technique. Instead of just mixing everything together, I let the cream cheese come to room temperature and beat it until it’s light and fluffy before adding the other ingredients. This creates a filling that’s impossibly smooth—no lumps, no graininess, just pure creamy goodness. I learned this trick from a pastry chef friend who told me, “Don’t rush the cream cheese, and it won’t rush you.” She was right.
These pies are the kind of treat that makes people close their eyes after the first bite. They’re perfect for impressing guests without stress, or for turning a simple Halloween snack into something memorable. And honestly, watching my kids’ faces light up when they see the mummy wrappings? That’s worth every burned batch I’ve ever made.
What Ingredients You Will Need
This recipe uses simple, pantry-friendly ingredients to create something that tastes far more complex than it is. The cream cheese is the heart of the filling, while the pastry comes together with just a few basic staples. Let me walk you through each one.
For the Pastry Dough
- 2 ½ cups all-purpose flour (plus extra for dusting) – I prefer Gold Medal or King Arthur for consistent results. The protein content matters here—too high and your pastry will be tough, too low and it won’t hold together.
- 1 cup cold unsalted butter, cut into small cubes – Cold butter is non-negotiable. It creates those flaky layers we’re after. I pop my butter in the freezer for 15 minutes before cutting it up.
- ½ teaspoon salt – Fine sea salt works best. It balances the sweetness without making the pastry taste salty.
- ¼ cup ice water (plus more if needed) – The water needs to be genuinely icy. I keep a glass of water with ice cubes in the fridge while I’m measuring my dry ingredients.
- 1 tablespoon white vinegar – This is my secret ingredient. The vinegar tenderizes the gluten, making the pastry extra flaky. You won’t taste it, I promise.
- 1 large egg, beaten (for egg wash) – This gives the pies that gorgeous golden-brown finish.
For the Cream Cheese Filling
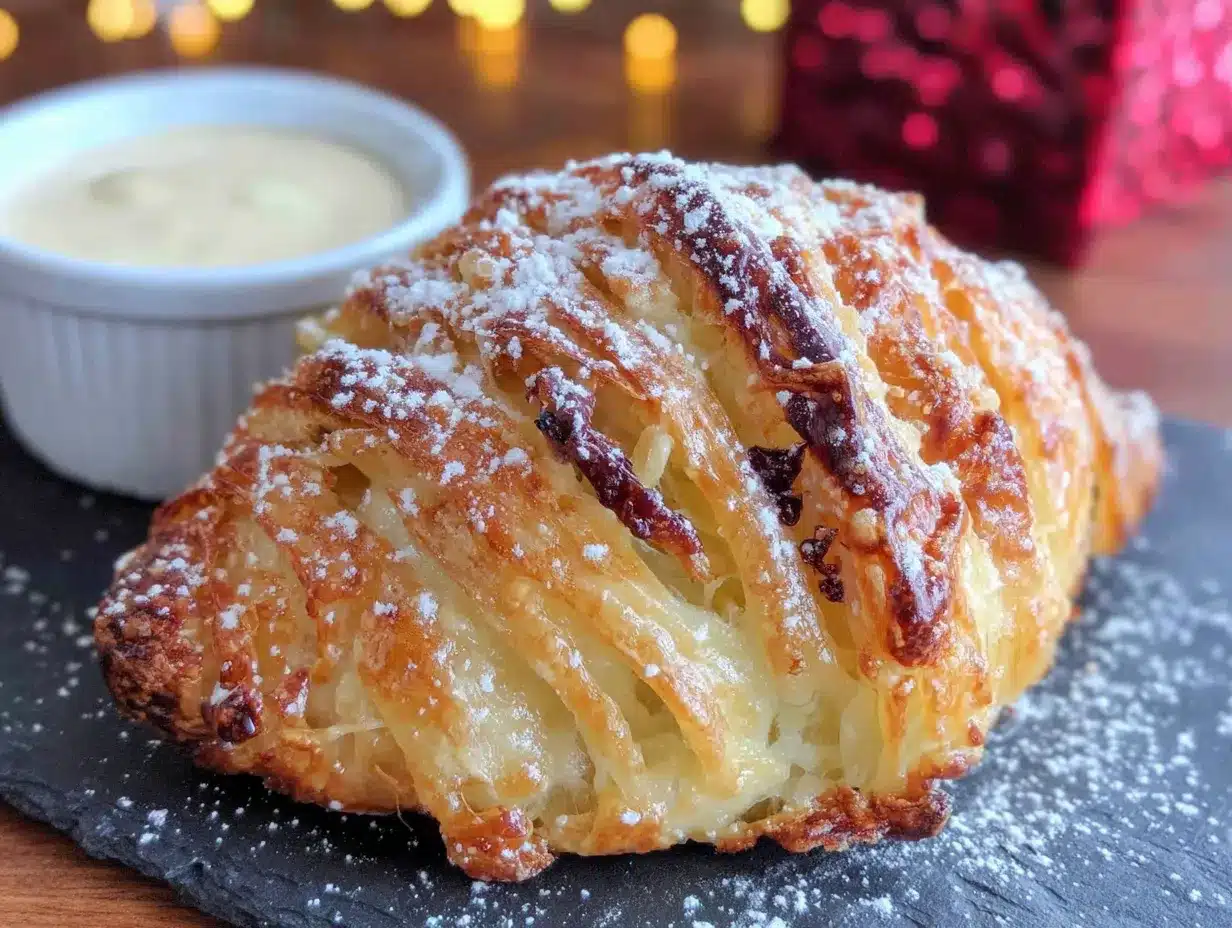
- 8 oz cream cheese, softened to room temperature – Philadelphia is my go-to brand. The full-fat version gives the richest flavor and creamiest texture. Low-fat will work, but the filling won’t be as luscious.
- ¼ cup granulated sugar – Regular white sugar dissolves easily into the cream cheese. You can use powdered sugar if you want an even smoother texture, but granulated works fine.
- 1 teaspoon vanilla extract – Pure vanilla extract makes a noticeable difference. Imitation vanilla works in a pinch, but the flavor won’t be as warm and rich.
- 1 large egg yolk – The yolk adds richness and helps the filling set properly. Save the white for the egg wash.
- 1 tablespoon all-purpose flour – This stabilizes the filling so it doesn’t bubble out of the pies while baking. Trust me on this one—I skipped it once and ended up with cream cheese lava all over my baking sheet.
For Decoration
- Candy eyes – You can find these at any grocery store around Halloween. I like the ones with black pupils because they look creepier. Wilton brand has held up well in the oven for me.
- Powdered sugar (optional, for dusting) – A light dusting makes the mummies look even spookier, like they’ve been rolling around in a haunted bakery.
Equipment Needed
You don’t need fancy equipment for this recipe, which is part of why I love it. Here’s what you’ll need:
- Large mixing bowl – For the pastry dough. A glass or stainless steel bowl works best because it stays cold.
- Pastry cutter or two forks – To cut the butter into the flour. A food processor works too, but I find the manual method gives me more control over the texture.
- Rolling pin – A standard wooden rolling pin is perfect. If you don’t have one, a wine bottle works in a pinch—I’ve done it.
- Baking sheet – Line it with parchment paper for easy cleanup. I use a half-sheet pan.
- Parchment paper – Non-stick and saves your baking sheet from cream cheese disasters.
- Small bowl – For the egg wash.
- Pastry brush – For applying the egg wash. A silicone brush works great and is easy to clean.
- Sharp knife or pizza cutter – To cut the pastry strips for the mummy wrappings. A pizza cutter makes the straightest lines.
- Ruler (optional) – For cutting even strips. I use a ruler because I’m a little obsessive, but you can eyeball it.
- Plastic wrap – For chilling the dough.
I’ve made these pies with a cheap rolling pin and a butter knife, and they still turned out great. The key is keeping everything cold, not having the fanciest tools.
Preparation Method
Step 1: Make the Pastry Dough
In a large mixing bowl, whisk together the 2 ½ cups flour and ½ teaspoon salt. Add the cold butter cubes and toss them in the flour to coat. Using a pastry cutter or two forks, cut the butter into the flour until the mixture resembles coarse meal with pea-sized butter pieces. Don’t overwork it—you want visible chunks of butter. Those chunks create steam pockets in the oven, which gives you flaky layers.
Drizzle the ice water and vinegar over the flour mixture. Stir with a fork until the dough just comes together. It should look shaggy and hold together when squeezed. If it’s too dry, add another tablespoon of ice water. Turn the dough out onto a lightly floured surface, gather it into a ball, then flatten it into a disc. Wrap in plastic wrap and refrigerate for at least 30 minutes. This rest is crucial—it relaxes the gluten and lets the butter firm back up.
Step 2: Make the Cream Cheese Filling
While the dough chills, make the filling. In a medium bowl, beat the softened cream cheese with an electric mixer until smooth and fluffy, about 2 minutes. Add the ¼ cup sugar and beat until combined. Add the vanilla extract and egg yolk, beating until smooth. Finally, mix in the 1 tablespoon flour until fully incorporated. The filling should be thick and creamy, not runny. If it seems too soft, pop it in the fridge for 10 minutes.
I learned the hard way that room temperature cream cheese isn’t optional. Cold cream cheese will give you lumpy filling, and nobody wants a lumpy mummy. Set it out on the counter an hour before you start baking.
Step 3: Assemble the Hand Pies
Preheat your oven to 375°F (190°C) and line a baking sheet with parchment paper. On a lightly floured surface, roll the chilled dough out to about ⅛-inch thickness. Use a sharp knife or pizza cutter to cut out rectangles—approximately 4 inches by 3 inches each. You should get about 8 to 10 rectangles, depending on how thick you roll the dough.
Spoon about 1 heaping tablespoon of cream cheese filling into the center of half of the rectangles, leaving a ½-inch border around the edges. Place the remaining rectangles on top. Use a fork to crimp the edges and seal the pies. Poke a few small holes in the top of each pie with a toothpick to let steam escape. This prevents the pies from exploding in the oven—another lesson learned the messy way.
Step 4: Create the Mummy Wrappings
Now for the fun part. Cut the remaining dough scraps into thin strips, about ¼-inch wide. Wrap these strips around each pie like mummy bandages, leaving a small gap for the eyes. Don’t cover the entire pie—you want some of the golden crust to show through. Lightly press the strips onto the pies so they stick.
Brush the entire surface of each pie (including the strips) with the beaten egg wash. This gives them that beautiful golden color. Gently press two candy eyes into the gap you left. They should stick to the egg wash.
Step 5: Bake
Bake for 18 to 22 minutes, or until the pastry is golden brown and the filling is bubbly. Let them cool on the baking sheet for 5 minutes before transferring to a wire rack. If you dust them with powdered sugar, do it while they’re still slightly warm so it sticks.
The first time I made these, I baked them at 400°F because I was impatient. The bottoms burned while the tops were still pale. Trust the 375°F—it gives the pastry time to cook through without scorching.
Cooking Tips & Techniques
After three years of trial and error, I’ve collected a few tricks that make these pies consistently perfect. Here’s what I’ve learned:
Keep everything cold. This is the number one rule of flaky pastry. If your dough starts feeling sticky or soft, pop it back in the fridge for 10 minutes. I keep a bowl of ice water nearby and dip my fingers in it before handling the dough. It sounds weird, but it works.
Don’t overfill the pies. I know it’s tempting to stuff them with as much cream cheese filling as possible, but too much filling makes the pies leak. One heaping tablespoon per pie is plenty. If you see filling oozing out while they bake, you went overboard.
Use a sharp cutter. A dull knife or cutter will squish the edges of the dough and prevent it from rising properly. I use a pizza cutter for the cleanest cuts. If you’re using a knife, make sure it’s sharp.
Chill the assembled pies. Before baking, pop the assembled pies in the freezer for 10 minutes. This firms up the butter and ensures the pastry stays flaky. I do this while the oven is preheating, and it makes a noticeable difference in the final texture.
Watch the oven like a hawk. Ovens vary wildly. My old oven would burn these at 375°F, while my current one takes the full 22 minutes. Start checking at 18 minutes and look for deep golden brown color on the edges. The center should be set and slightly puffed.
I once forgot to chill the dough and ended up with flat, greasy pies that looked more like sad pancakes than mummies. The chilling step isn’t optional—it’s the difference between flaky and flat.
Variations & Adaptations
One of the best things about this recipe is how adaptable it is. Here are a few variations I’ve tried and loved:
Pumpkin Spice Mummy Pies: Add ¼ cup pumpkin puree and 1 teaspoon pumpkin pie spice to the cream cheese filling. Reduce the sugar to 2 tablespoons since pumpkin adds sweetness. These are perfect for fall and taste like a pumpkin roll in hand pie form.
Chocolate Cream Cheese Filling: Melt 2 ounces of dark chocolate and fold it into the cream cheese mixture. Add 1 tablespoon of cocoa powder for extra chocolate intensity. My kids went absolutely feral for these—they called them “chocolate mummies.”
Savory Mummy Pies: Skip the sugar and vanilla, and add ¼ cup shredded cheddar cheese, 2 tablespoons chopped chives, and a pinch of garlic powder to the cream cheese. These make a great appetizer for Halloween parties. I served them alongside a bowl of creamy hatch chili corn chowder with bacon last year, and it was a hit.
Gluten-Free Option: Use a 1:1 gluten-free flour blend in the pastry. Cup4Cup works beautifully. The texture will be slightly more tender, but still delicious. I’ve tested this with my gluten-sensitive sister-in-law, and she gave it two thumbs up.
Air Fryer Method: Cook at 350°F for 10-12 minutes, flipping halfway through. The air fryer gives an incredibly crispy exterior. Just make sure to spray the basket with non-stick spray first.
For a fun twist, try making these with the leftover dough from my flaky peach cream cheese danish braid. The pastry recipe is almost identical, and you’ll have extra dough to play with.
Serving & Storage Suggestions
These mummy hand pies are best served slightly warm, when the filling is still soft and the pastry is at its flakiest. Let them cool for about 10 minutes after baking—the filling will be molten hot straight out of the oven, and nobody wants a burned tongue on Halloween.
For presentation, arrange them on a platter with a dusting of powdered sugar to look like snow or spider webs. I like to scatter a few candy corn around the plate for extra color. If you’re feeling extra spooky, arrange them on a black platter with fake spider webs underneath. The contrast makes the golden pastry pop.
These pies pair beautifully with a hot cup of apple cider or a pumpkin spice latte. For a full Halloween spread, serve them alongside pumpkin spice sheet cake with cream cheese frosting for a double dose of fall flavor.
Storage: Store leftover pies in an airtight container in the refrigerator for up to 4 days. The pastry will soften slightly, but they’re still delicious. To reheat, pop them in a 350°F oven for 5 minutes or in the air fryer at 325°F for 3 minutes. Microwaving works in a pinch, but the pastry won’t be as crispy.
Freezing: You can freeze unbaked pies for up to 3 months. Assemble them completely, place them on a baking sheet, and freeze until solid. Then transfer to a freezer bag. Bake from frozen at 375°F for 22-25 minutes, adding a few extra minutes as needed. I always keep a batch in the freezer for last-minute Halloween parties or when my kids have a sudden craving for spooky snacks.
The flavors actually develop overnight, so these taste even better the next day. The cream cheese filling gets a little firmer and the vanilla flavor deepens. If you can resist eating them all in one sitting, they’re worth saving for tomorrow.
Nutritional Information & Benefits
Let’s be real—these are a treat, not a health food. But they’re made with real ingredients, and there’s something comforting about knowing exactly what’s in them. Here’s the approximate nutritional breakdown per hand pie (based on 8 servings):
| Nutrient | Amount |
|---|---|
| Calories | 320 |
| Total Fat | 22g |
| Saturated Fat | 14g |
| Cholesterol | 85mg |
| Sodium | 220mg |
| Total Carbohydrates | 27g |
| Dietary Fiber | 1g |
| Sugars | 9g |
| Protein | 5g |
The cream cheese provides a decent amount of calcium and protein, while the butter adds vitamin A. If you’re looking for a slightly lighter option, you can use reduced-fat cream cheese, but I find the full-fat version gives a much better texture. For a dairy-free version, try using vegan cream cheese and plant-based butter—just note the texture will be slightly different.
These pies are vegetarian and can be made gluten-free with the right flour blend. They’re not suitable for vegans in their current form, but you could experiment with a cashew-based filling if you’re feeling adventurous.
From a wellness perspective, I believe in balance. These pies are a special occasion treat, and there’s nothing wrong with enjoying something purely for the joy of it. Halloween comes once a year, and these mummies deserve their moment in the spotlight.
Conclusion
These Spooky Cream Cheese Mummy Hand Pies have become more than just a recipe in my kitchen—they’re a tradition. Every Halloween, my kids and I gather around the counter, rolling dough and placing candy eyes, while the house fills with the smell of butter and vanilla. It’s messy, it’s fun, and it’s ours.
I hope you give these a try, whether for a Halloween party, a spooky movie night, or just because you want to eat something that looks like a mummy. Don’t worry if your first batch isn’t perfect—mine certainly wasn’t. The beauty of these pies is that even the imperfect ones taste amazing. And honestly, a slightly lopsided mummy is creepier anyway.
If you make these, I’d love to hear about it. Leave a comment below and tell me how your mummies turned out. Did your kids help? Did you set off the smoke alarm? (No judgment here.) Share your photos, your stories, and your own creative twists. And if you’re looking for more Halloween inspiration, check out my soft fudgy zucchini chocolate chip cookies for a treat that’s just as delicious and a little less spooky.
Happy Halloween, friends. May your pies be flaky, your filling be creamy, and your smoke alarm stay silent.
Frequently Asked Questions
Can I use store-bought pie crust instead of making my own?
Absolutely. Store-bought refrigerated pie crust works perfectly for this recipe. Just make sure it’s the rolled kind, not the pre-shaped crust. Let it sit at room temperature for 10 minutes before rolling it out so it doesn’t crack. The texture won’t be as flaky as homemade, but it saves time and still tastes great.
How do I keep the candy eyes from falling off during baking?
Press the candy eyes gently into the egg wash before baking. The egg wash acts like glue. If you’re still worried, you can add the eyes after baking—just press them into a tiny dab of frosting or honey. I’ve done both methods, and they work equally well.
Can I make these ahead of time for a party?
Yes! You have two options: assemble them completely and refrigerate for up to 24 hours before baking, or bake them fully and reheat in a 350°F oven for 5 minutes before serving. I prefer the first option because fresh-baked pies taste best. Just add an extra 2-3 minutes to the baking time if they’re going straight from the fridge to the oven.
Why did my filling leak out during baking?
This usually happens for one of three reasons: you overfilled the pies, you didn’t seal the edges properly, or you skipped the flour in the filling. Make sure you leave a ½-inch border around the filling, crimp the edges firmly with a fork, and don’t skip that tablespoon of flour. It’s there for a reason.
Can I use a different filling?
Definitely. Nutella, apple butter, or even leftover canned pear butter with cardamom would work beautifully. Just make sure the filling isn’t too runny, or it will leak. If you’re using fruit preserves, cook them down on the stove for a few minutes to thicken them first.
Pin This Recipe!

Spooky Cream Cheese Mummy Hand Pies: Easy Halloween Recipe

These Spooky Cream Cheese Mummy Hand Pies are creepy-cute, surprisingly easy, and taste like a little pocket of creamy, slightly tangy heaven wrapped in flaky, buttery pastry. Perfect for Halloween parties or a fun family tradition.
- Prep Time: 20 minutes
- Cook Time: 20 minutes
- Total Time: 45 minutes
- Yield: 8 servings 1x
- Category: Dessert
- Cuisine: American
Ingredients
- 2 ½ cups all-purpose flour (plus extra for dusting)
- 1 cup cold unsalted butter, cut into small cubes
- ½ teaspoon fine sea salt
- ¼ cup ice water (plus more if needed)
- 1 tablespoon white vinegar
- 1 large egg, beaten (for egg wash)
- 8 oz cream cheese, softened to room temperature
- ¼ cup granulated sugar
- 1 teaspoon pure vanilla extract
- 1 large egg yolk
- 1 tablespoon all-purpose flour
- Candy eyes (for decoration)
- Powdered sugar (optional, for dusting)
Instructions
- Make the Pastry Dough: In a large mixing bowl, whisk together 2 ½ cups flour and ½ teaspoon salt. Add cold butter cubes and toss to coat. Using a pastry cutter or two forks, cut the butter into the flour until the mixture resembles coarse meal with pea-sized butter pieces. Drizzle ice water and vinegar over the flour mixture; stir with a fork until the dough just comes together. Turn out onto a lightly floured surface, gather into a ball, flatten into a disc, wrap in plastic wrap, and refrigerat…
- Make the Cream Cheese Filling: In a medium bowl, beat softened cream cheese with an electric mixer until smooth and fluffy, about 2 minutes. Add ¼ cup sugar and beat until combined. Add vanilla extract and egg yolk, beating until smooth. Mix in 1 tablespoon flour until fully incorporated. If too soft, refrigerate for 10 minutes.
- Assemble the Hand Pies: Preheat oven to 375°F (190°C) and line a baking sheet with parchment paper. On a lightly floured surface, roll chilled dough to about ⅛-inch thickness. Cut out rectangles approximately 4 inches by 3 inches each (about 8-10 rectangles). Spoon about 1 heaping tablespoon of cream cheese filling into the center of half the rectangles, leaving a ½-inch border. Place remaining rectangles on top; use a fork to crimp edges and seal. Poke a few small holes in the top with a toothp…
- Create the Mummy Wrappings: Cut remaining dough scraps into thin strips, about ¼-inch wide. Wrap strips around each pie like mummy bandages, leaving a small gap for the eyes. Brush entire surface (including strips) with beaten egg wash. Gently press two candy eyes into the gap.
- Bake: Bake for 18 to 22 minutes, until pastry is golden brown and filling is bubbly. Cool on baking sheet for 5 minutes, then transfer to a wire rack. Dust with powdered sugar while still slightly warm if desired.
Notes
Keep everything cold for flaky pastry. Don’t overfill the pies. Chill assembled pies for 10 minutes before baking. Watch the oven closely; start checking at 18 minutes. For best results, use room temperature cream cheese.
Nutrition
- Serving Size: 1 hand pie
- Calories: 320
- Sugar: 9
- Sodium: 220
- Fat: 22
- Saturated Fat: 14
- Carbohydrates: 27
- Fiber: 1
- Protein: 5
Keywords: Halloween, mummy hand pies, cream cheese, hand pies, spooky, easy, fall, party