There used to be a tiny, wood-paneled diner called The Rusty Lantern down on Harbor Road that made a s’mores icebox cake that was pure magic. When they closed their doors three summers ago—”retired,” the sign said—I honestly felt a little lost. That cake was my go-to for every summer potluck and backyard barbecue. After twelve tries—including one disastrous attempt where the graham crackers turned to complete mush—I finally cracked the code. This is it. The exact creamy, crunchy, chocolaty, marshmallow-layered dream I’d been chasing. And honestly, it’s even better than I remembered.
I’m not supposed to play favorites with desserts, but this one has a permanent spot in my summer rotation. You know that feeling when you take a bite and everything just clicks? The crunch of the graham cracker, the silky chocolate pudding, the cloud of marshmallow—it’s like the best campfire memory, minus the smoky clothes and mosquito bites. The first time I served this at a family gathering, my uncle actually asked for the recipe before he’d finished his slice. That’s when I knew I’d nailed it.
What makes this recipe so special isn’t just the taste—it’s how ridiculously easy it is. No oven, no stove, no complicated techniques. Just layers of goodness that come together in minutes and then work their magic in the fridge overnight. The hardest part? Waiting. But trust me, that wait is so worth it. Let me show you how to make this crowd-pleasing no-bake s’mores icebox cake that’ll steal the show at your next get-together.
Why You’ll Love This Recipe
This isn’t just another dessert recipe—it’s your new secret weapon for hosting. Here’s why this no-bake s’mores icebox cake will become your go-to for every gathering:
- No Oven Required: Perfect for hot summer days when you don’t want to heat up the kitchen. Just layer and chill!
- Make-Ahead Magic: Assemble it the day before your party and forget about it. One less thing to stress over when guests arrive.
- Simple Ingredients: You probably have most of these in your pantry right now. No fancy grocery store runs needed.
- Guaranteed Crowd-Pleaser: Kids, adults, even picky eaters—everyone goes back for seconds. I’ve never seen a slice left on a plate.
- Impressive Presentation: Those gorgeous layers make it look like you spent hours in the kitchen. Your secret is safe with me.
What sets this recipe apart from all the other icebox cakes out there? It’s the texture. Most versions end up either too soggy or too firm, but I’ve perfected the ratio of pudding to cream to graham crackers. The chocolate pudding is made from scratch—no box mix here—which gives it that rich, deep flavor you’d expect from a fancy bakery. And the marshmallow layer? It’s not just plain marshmallows thrown in. I use a stabilized marshmallow cream that stays fluffy and light, even after sitting in the fridge overnight.
This is the kind of dessert that makes people close their eyes after the first bite. It’s nostalgic but elevated, familiar but surprising. Perfect for impressing guests without breaking a sweat, or turning a simple summer barbecue into something truly memorable. Plus, it serves a crowd beautifully—I’ve made it for parties of twelve with no issues.
What Ingredients You Will Need
This recipe uses simple, wholesome ingredients to deliver that classic s’mores experience without the campfire. Most of these are pantry staples, so you’re probably already halfway there.
For the Chocolate Pudding Layer:
- 2 cups whole milk (adds richness; 2% works too)
- 1/2 cup granulated sugar
- 1/4 cup unsweetened cocoa powder (I recommend Ghirardelli for the deepest flavor)
- 3 tablespoons cornstarch
- 1/4 teaspoon salt
- 2 large egg yolks
- 2 tablespoons unsalted butter
- 1 teaspoon vanilla extract
For the Whipped Cream Layer:
- 2 cups heavy whipping cream
- 1/4 cup powdered sugar
- 1 teaspoon vanilla extract
For the Marshmallow Layer:
- 1 jar (7 oz) marshmallow creme (like Fluff)
- 1/2 cup marshmallow creme stabilized with 2 tablespoons softened cream cheese (trust me on this one—it keeps it from deflating)
For Assembly:
- 1 box (14.4 oz) graham crackers (you’ll need about 24 full sheets)
- 1 cup semi-sweet chocolate chips (for garnish)
- Optional: 1/2 cup mini marshmallows for topping
A few notes on ingredients: Use full-fat milk for the pudding—it makes a huge difference in creaminess. If you’re dairy-free, you can swap in oat milk and coconut cream, but the texture will be slightly less rich. For the graham crackers, I’ve tried several brands, and Honey Maid gives the best crunch that holds up overnight. Also, don’t skip the cream cheese in the marshmallow layer—it sounds weird, but it’s the secret to keeping everything light and fluffy instead of collapsing into a sticky mess.
Equipment Needed
You don’t need any fancy gadgets for this one. Here’s what you’ll need:
- 9×13-inch baking dish (glass or ceramic works best for even chilling)
- Medium saucepan (for the pudding)
- Whisk
- Large mixing bowls (at least two)
- Hand mixer or stand mixer (for whipping cream)
- Rubber spatula
- Measuring cups and spoons
- Sharp knife (for cutting graham crackers to fit)
If you don’t have a hand mixer, you can whip the cream by hand with a whisk—it’ll take about 8-10 minutes of vigorous arm work, but it’s totally doable. I’ve done it before when my mixer broke, and honestly, it’s a great arm workout! For the baking dish, a 9×13 is ideal, but an 8×8 works if you want a taller cake—just adjust the layering slightly.
Preparation Method
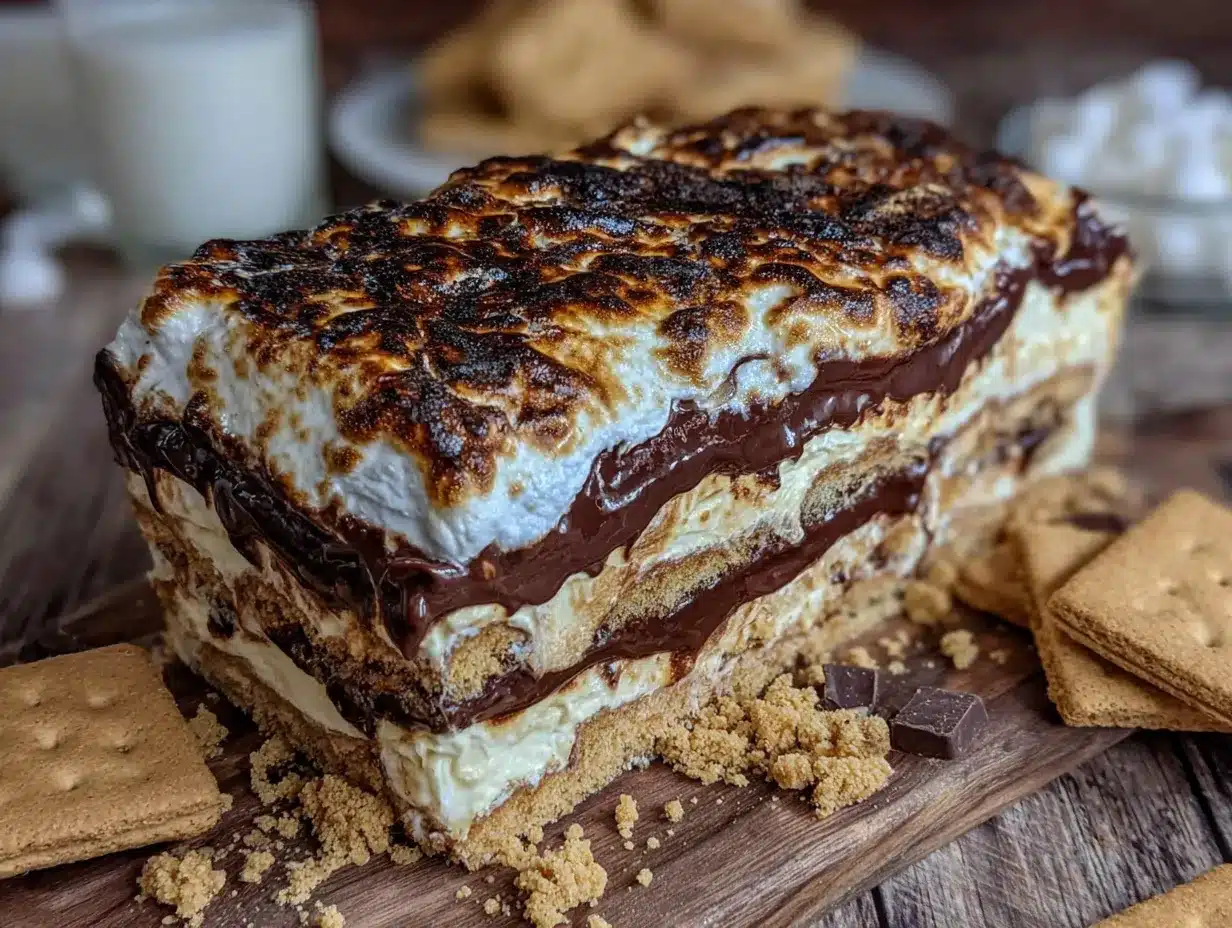
Let’s get to the fun part. This recipe comes together in about 30 minutes of active time, then the fridge does the rest of the work.
- Make the chocolate pudding. In a medium saucepan, whisk together the sugar, cocoa powder, cornstarch, and salt. In a separate bowl, whisk the egg yolks with about 1/4 cup of the milk until smooth. Add the remaining milk to the saucepan and whisk until combined. Cook over medium heat, stirring constantly, until the mixture thickens and starts to bubble—about 6-8 minutes. You’ll feel it getting heavier on the whisk. Once it bubbles, cook for one more minute, then remove from heat. Stir in the butter and vanilla until smooth. Pour through a fine-mesh strainer into a bowl (this catches any lumps) and let it cool slightly while you prep the other layers.
- Whip the cream. In a large mixing bowl, beat the heavy cream, powdered sugar, and vanilla on medium-high speed until soft peaks form. You want it thick but not stiff—think cloud-like. This takes about 3-4 minutes with a hand mixer. Don’t over-whip, or you’ll end up with butter!
- Prepare the marshmallow layer. In another bowl, beat the softened cream cheese until smooth (about 30 seconds). Add the marshmallow creme and beat until fully combined and fluffy. This should take about 2 minutes. Fold in about 1 cup of the whipped cream to lighten it up. Set aside.
- Start layering. Spread a thin layer of chocolate pudding on the bottom of your 9×13 dish—just enough to coat it. This helps the graham crackers stick. Arrange a single layer of graham crackers on top, breaking them to fit as needed. Don’t stress about perfection; overlapping slightly is fine.
- Layer 1: Pudding + Cream. Spread half of the remaining chocolate pudding evenly over the graham crackers. Then spread half of the remaining whipped cream on top of the pudding. Add another layer of graham crackers.
- Layer 2: Marshmallow + Cream. Spread all of the marshmallow mixture over the graham crackers. Then add another layer of graham crackers on top of the marshmallow.
- Layer 3: Pudding + Cream. Spread the remaining chocolate pudding over the graham crackers, followed by the remaining whipped cream. Add a final layer of graham crackers on top.
- Top it off. Spread any remaining whipped cream (you might have a little extra) over the top layer of graham crackers. Sprinkle with chocolate chips and mini marshmallows if using.
- Chill. Cover loosely with plastic wrap and refrigerate for at least 8 hours, or overnight. This is crucial—the graham crackers need time to soften and meld with the creamy layers. Don’t rush it!
- Serve. When ready to serve, let it sit at room temperature for about 10 minutes for easier slicing. Use a sharp knife to cut clean squares, wiping the blade between cuts. Serve cold or at room temperature—both are delicious.
One thing I learned the hard way: don’t skip the chilling time. I once tried to serve this after only 4 hours, and the graham crackers were still crunchy in the middle. It was good, but not the melt-in-your-mouth magic you get after a full night in the fridge. Patience pays off here!
Cooking Tips & Techniques
After making this cake more times than I can count, I’ve picked up a few tricks that make a real difference:
Don’t skimp on the pudding cooking time. The first time I made this, I pulled the pudding off the heat as soon as it thickened, thinking it was done. Big mistake. It needs that extra minute of bubbling to fully activate the cornstarch. Otherwise, the pudding will be too thin and your cake will be soupy. Look for big, lazy bubbles breaking the surface—that’s your cue to start the timer.
Temperature matters. Make sure your heavy cream is cold straight from the fridge. Warm cream won’t whip properly. Same goes for the cream cheese in the marshmallow layer—it needs to be softened to room temperature, or you’ll end up with lumpy bits. I leave mine out for about 30 minutes before starting.
Press gently when layering. When you add each new layer of graham crackers, press down very lightly—just enough to make contact with the cream underneath. Too much pressure and you’ll push the cream out the sides. Too little and the layers won’t stick together properly. A gentle pat with your palm is perfect.
One mistake I made more than once: I used to spread the marshmallow layer straight over the graham crackers without the cream cheese stabilizer. Big mistake. The marshmallow would deflate overnight, leaving a sad, flat layer. The cream cheese trick was a game-changer. It keeps everything light and fluffy for days.
Timing strategy for hosts: Assemble this cake the morning of your party or the night before. It frees up your oven and your time for other dishes. Plus, it looks gorgeous when you pull it out of the fridge—all those perfect layers ready to impress.
Variations & Adaptations
This recipe is incredibly flexible. Here are some of my favorite twists:
Peanut Butter S’mores Cake: Add 1/2 cup creamy peanut butter to the marshmallow layer before mixing. The combination of chocolate, marshmallow, and peanut butter is absolutely irresistible. I made this version for a Super Bowl party and it disappeared in minutes.
Berry S’mores Cake: Layer fresh raspberries or sliced strawberries between the pudding and cream layers. The tartness of the berries cuts through the sweetness beautifully. This is my go-to for summer brunches—it looks so elegant with those red jewels peeking through.
Vegan Version: Use full-fat coconut milk for the pudding, coconut cream for the whipped topping, and a vegan marshmallow creme (Dandies makes a good one). The graham crackers are usually vegan, but check the label. It won’t be exactly the same, but it’s surprisingly close—my vegan friend couldn’t tell the difference!
Gluten-Free Option: Swap the graham crackers for gluten-free graham crackers or even gluten-free vanilla wafers. I’ve tried both, and the wafers give a slightly different texture—more delicate—but still delicious.
Individual Servings: Instead of a big dish, layer everything in small mason jars or dessert cups. This is perfect for parties where people are mingling. Plus, they look adorable tied with a little ribbon.
Serving & Storage Suggestions
This cake is best served cold, straight from the fridge. Let it sit at room temperature for about 10 minutes before slicing—this makes the layers easier to cut without squishing them. Use a sharp knife and wipe it clean between each cut for those picture-perfect squares.
What to serve alongside: A scoop of vanilla ice cream takes this over the top. Or, if you want to balance the sweetness, a cup of black coffee or cold brew is perfect. For a fun presentation, drizzle some warm chocolate sauce over each slice and add a sprinkle of sea salt—the salt really makes the chocolate pop.
Storage: Cover the dish tightly with plastic wrap or transfer slices to an airtight container. The cake will keep in the refrigerator for up to 5 days. The flavors actually get better after day two as everything melds together. Just don’t leave it out at room temperature for more than 2 hours, especially if you’re serving it at a summer picnic.
Freezing: You can freeze individual slices wrapped tightly in plastic wrap and then foil. They’ll keep for up to 3 months. Thaw in the refrigerator overnight before serving. The texture might be slightly softer after freezing, but it’s still delicious.
Reheating note: This is a cold dessert, so no reheating needed. But if you want that campfire vibe, you can pop individual slices under the broiler for 30 seconds to toast the top marshmallows. Watch closely—they burn fast!
Nutritional Information & Benefits
Let’s be real—this is a dessert, not a health food. But here’s what you’re looking at per slice (based on 12 servings):
| Nutrient | Amount per Serving |
|---|---|
| Calories | 385 |
| Total Fat | 22g |
| Saturated Fat | 13g |
| Carbohydrates | 45g |
| Fiber | 2g |
| Sugar | 32g |
| Protein | 5g |
On the bright side, this dessert does have some redeeming qualities. The cocoa powder is rich in antioxidants, and the milk and cream provide calcium and vitamin D. The graham crackers add a little fiber. Plus, because it’s so rich and satisfying, one slice is usually enough—unlike some desserts where you go back for thirds!
If you’re watching your sugar intake, you can reduce the sugar in the pudding by a couple of tablespoons without affecting the texture much. And for a lower-fat version, use 2% milk and reduce the cream by half, replacing it with more pudding. It won’t be as luxurious, but it’ll still hit that s’mores craving.
Conclusion
This crowd-pleasing no-bake s’mores icebox cake is everything you want in a summer dessert—easy, impressive, and absolutely delicious. It’s the kind of recipe that makes you look like a rockstar host without breaking a sweat. Whether you’re serving it at a backyard barbecue, a potluck, or just a quiet night in, it always delivers that nostalgic campfire magic.
I love this recipe because it brings people together. There’s something about s’mores that makes everyone smile, and this cake captures that joy in every single bite. Plus, it’s so forgiving—you can tweak it, adapt it, make it your own, and it always turns out great.
So go ahead—give it a try! I’d love to hear how it turns out. Drop a comment below and let me know if you tried any of the variations, or share your own twist. And if you’re looking for more no-bake desserts, check out my no-bake lasagna dessert or easy chocolate truffles. Happy cooking, friends!
Frequently Asked Questions
Can I use store-bought pudding instead of making it from scratch?
Yes, you can use two boxes of instant chocolate pudding mix prepared with milk according to package directions. It won’t be as rich as homemade, but it’ll save you about 15 minutes. Just make sure to use the cook-and-serve kind, not instant, for better texture.
How far in advance can I make this cake?
You can make it up to 2 days ahead of time. In fact, it tastes even better on day two! Just keep it covered in the fridge. After 3 days, the graham crackers start to get a bit too soft, so I wouldn’t push it past that.
Can I use chocolate graham crackers instead of regular ones?
Absolutely! Chocolate graham crackers add an extra layer of chocolate flavor. I’ve done this for a double-chocolate version, and it was a huge hit. Just be aware that the cake will be quite rich—maybe skip the chocolate chips on top.
My pudding turned out lumpy. What went wrong?
This usually happens if you don’t whisk constantly while cooking, or if you add the egg yolks too quickly. Next time, make sure to whisk the egg yolks with a bit of milk first before adding them to the pot. And keep stirring! If you do end up with lumps, just strain the pudding through a fine-mesh sieve—it’ll be smooth as silk.
Can I make this in a different size dish?
Yes, an 8×8 dish works great for a taller cake—just reduce the layers slightly. You’ll have about 3 layers instead of 4. A 9-inch round springform pan also works beautifully and makes for a stunning presentation. Just adjust the graham crackers to fit the shape.
Pin This Recipe!
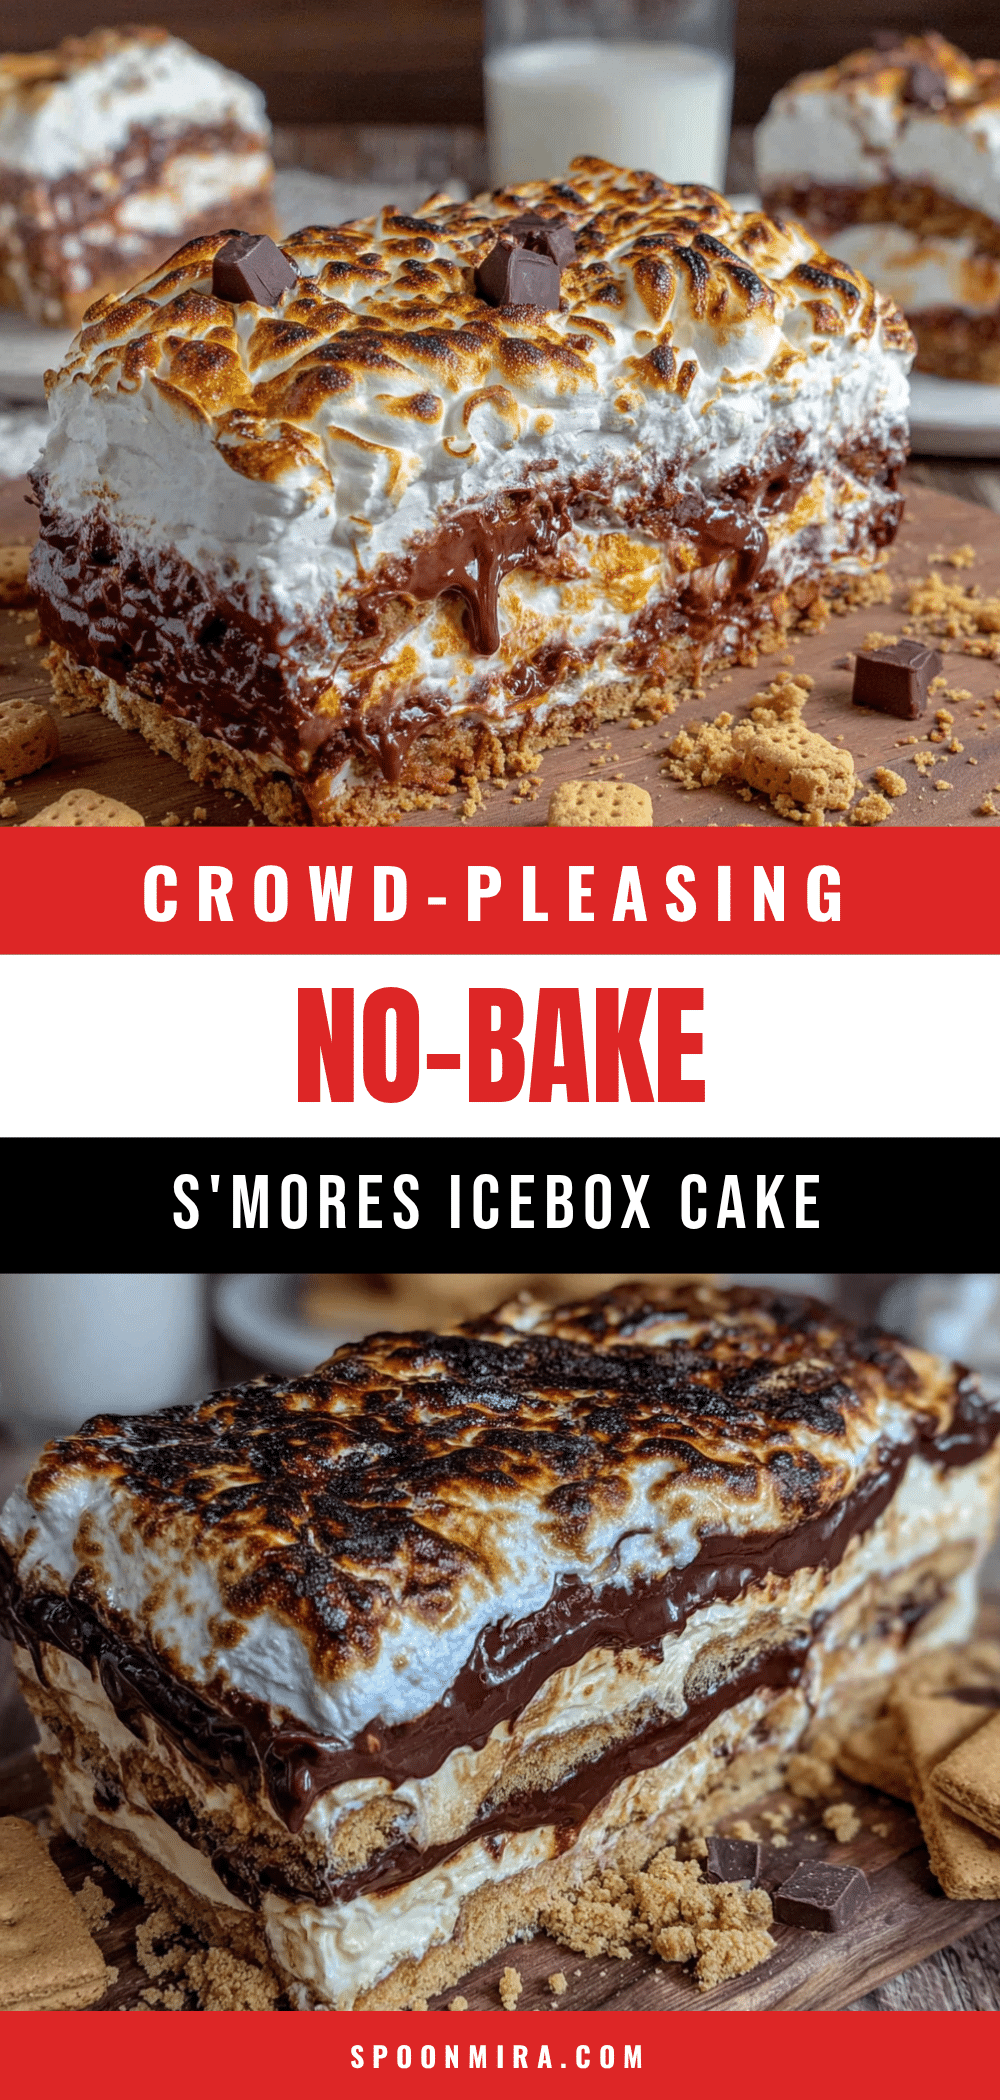
The Best No-Bake Smores Icebox Cake
A creamy, crunchy, chocolaty, marshmallow-layered no-bake dessert that captures the nostalgic campfire magic of s’mores without the heat. Perfect for summer gatherings, this easy icebox cake features homemade chocolate pudding, stabilized marshmallow cream, and layers of graham crackers that soften overnight into a dreamy, crowd-pleasing treat.
- Prep Time: 30 minutes
- Cook Time: 10 minutes
- Total Time: 8 hours 40 minutes (includes chilling)
- Yield: 12 servings 1x
- Category: Dessert
- Cuisine: American
Ingredients
- 2 cups whole milk
- 1/2 cup granulated sugar
- 1/4 cup unsweetened cocoa powder
- 3 tablespoons cornstarch
- 1/4 teaspoon salt
- 2 large egg yolks
- 2 tablespoons unsalted butter
- 1 teaspoon vanilla extract
- 2 cups heavy whipping cream
- 1/4 cup powdered sugar
- 1 teaspoon vanilla extract
- 1 jar (7 oz) marshmallow creme (like Fluff)
- 2 tablespoons softened cream cheese
- 1 box (14.4 oz) graham crackers (about 24 full sheets)
- 1 cup semi-sweet chocolate chips (for garnish)
- 1/2 cup mini marshmallows (optional, for topping)
Instructions
- Make the chocolate pudding: In a medium saucepan, whisk together sugar, cocoa powder, cornstarch, and salt. In a separate bowl, whisk egg yolks with about 1/4 cup of the milk until smooth. Add remaining milk to saucepan and whisk until combined. Cook over medium heat, stirring constantly, until mixture thickens and starts to bubble (about 6-8 minutes). Once bubbling, cook for one more minute, then remove from heat. Stir in butter and vanilla until smooth. Pour through a fine-mesh strainer into a…
- Whip the cream: In a large mixing bowl, beat heavy cream, powdered sugar, and vanilla on medium-high speed until soft peaks form (about 3-4 minutes). Do not over-whip.
- Prepare the marshmallow layer: In another bowl, beat softened cream cheese until smooth (about 30 seconds). Add marshmallow creme and beat until fully combined and fluffy (about 2 minutes). Fold in about 1 cup of the whipped cream to lighten it.
- Start layering: Spread a thin layer of chocolate pudding on the bottom of a 9×13-inch baking dish. Arrange a single layer of graham crackers on top, breaking to fit as needed.
- Layer 1: Spread half of the remaining chocolate pudding over the graham crackers, then half of the remaining whipped cream. Add another layer of graham crackers.
- Layer 2: Spread all of the marshmallow mixture over the graham crackers, then add another layer of graham crackers.
- Layer 3: Spread the remaining chocolate pudding over the graham crackers, followed by the remaining whipped cream. Add a final layer of graham crackers on top.
- Top it off: Spread any remaining whipped cream over the top layer of graham crackers. Sprinkle with chocolate chips and mini marshmallows if using.
- Chill: Cover loosely with plastic wrap and refrigerate for at least 8 hours, or overnight.
- Serve: Let sit at room temperature for about 10 minutes for easier slicing. Use a sharp knife to cut clean squares, wiping the blade between cuts. Serve cold or at room temperature.
Notes
Don’t skip the chilling time—the graham crackers need at least 8 hours to soften properly. For the marshmallow layer, the cream cheese stabilizer is essential to keep it from deflating. Use full-fat milk for the richest pudding. If you don’t have a hand mixer, you can whip the cream by hand with a whisk (about 8-10 minutes). The cake can be made up to 2 days ahead and tastes even better on day two. Store covered in the refrigerator for up to 5 days. Freeze individual slices wrapped tightly for up to 3 months.
Nutrition
- Serving Size: 1 slice (1/12 of cak
- Calories: 385
- Sugar: 32
- Fat: 22
- Saturated Fat: 13
- Carbohydrates: 45
- Fiber: 2
- Protein: 5
Keywords: no-bake dessert, s'mores, icebox cake, summer dessert, chocolate pudding, marshmallow, graham cracker, potluck dessert, make-ahead dessert


