My youngest swore they hated chicken thighs. For years. “Too greasy,” they’d say, pushing the plate away. “The texture is weird.” I’d nod, make a mental note, and reach for another boneless skinless chicken breast—dry, bland, and honestly, a little sad. Then, last Tuesday, I made this one-pan honey garlic chicken thighs recipe ‘just for myself’ for a quick lunch while they were at school. I was feeling lazy, the fridge was bare, and I needed something fast. I pulled out some thighs I’d grabbed on sale, threw together a sticky sauce in the pan, and figured I’d eat the leftovers cold later.
When they walked in the door, I was standing at the counter, fork in hand, having just pulled a piece of caramelized chicken skin off the pan. “What’s that?” they asked, eyeing the glossy, golden-brown thighs. “Something you won’t like,” I said, trying to hide the fork. They grabbed one anyway. Took a bite. Chewed. Swallowed. Then they asked for a plate. I mean, you could have knocked me over with a feather. The same kid who once claimed dark meat was “gross” ate three pieces and asked if I could make it again tomorrow.
That’s the thing about this recipe. It sneaks up on you. The honey and garlic do this magical thing in the pan—they turn into a glossy, savory-sweet glaze that clings to the chicken and caramelizes around the edges. It’s not greasy. It’s not weird. It’s, honestly, the kind of dinner that makes you close your eyes after the first bite. And the best part? It all happens in one pan. No marinating, no complicated steps, no sink full of dirty dishes. Maybe you’ve been there—staring at a package of chicken thighs, not sure what to do with them, worried the family won’t eat them. Let me tell you, this one changed everything in my kitchen. It’s the recipe that proved me wrong in the best way possible.
Why You’ll Love This Recipe
Let’s be real for a second. We’re all busy, we’re all tired, and we’re all trying to get dinner on the table without a meltdown. This recipe is built for exactly that moment. It’s not fancy, but it works. Every single time.
- Quick & Easy: From fridge to table in under 30 minutes. No marinating, no complicated steps. Just sear, glaze, and serve. Perfect for those nights when you walk in the door at 5:30 and need to eat by 6.
- Simple Ingredients: You probably have everything in your pantry right now. Honey, soy sauce, garlic, a little ketchup, and some chicken thighs. That’s it. No trips to a specialty store.
- Perfect for Family Meals: This is the definition of a crowd-pleaser. The sauce is sweet enough for kids, savory enough for adults, and the whole thing comes together without anyone complaining. I’ve served it to picky toddlers, hungry teenagers, and skeptical in-laws. It works every time.
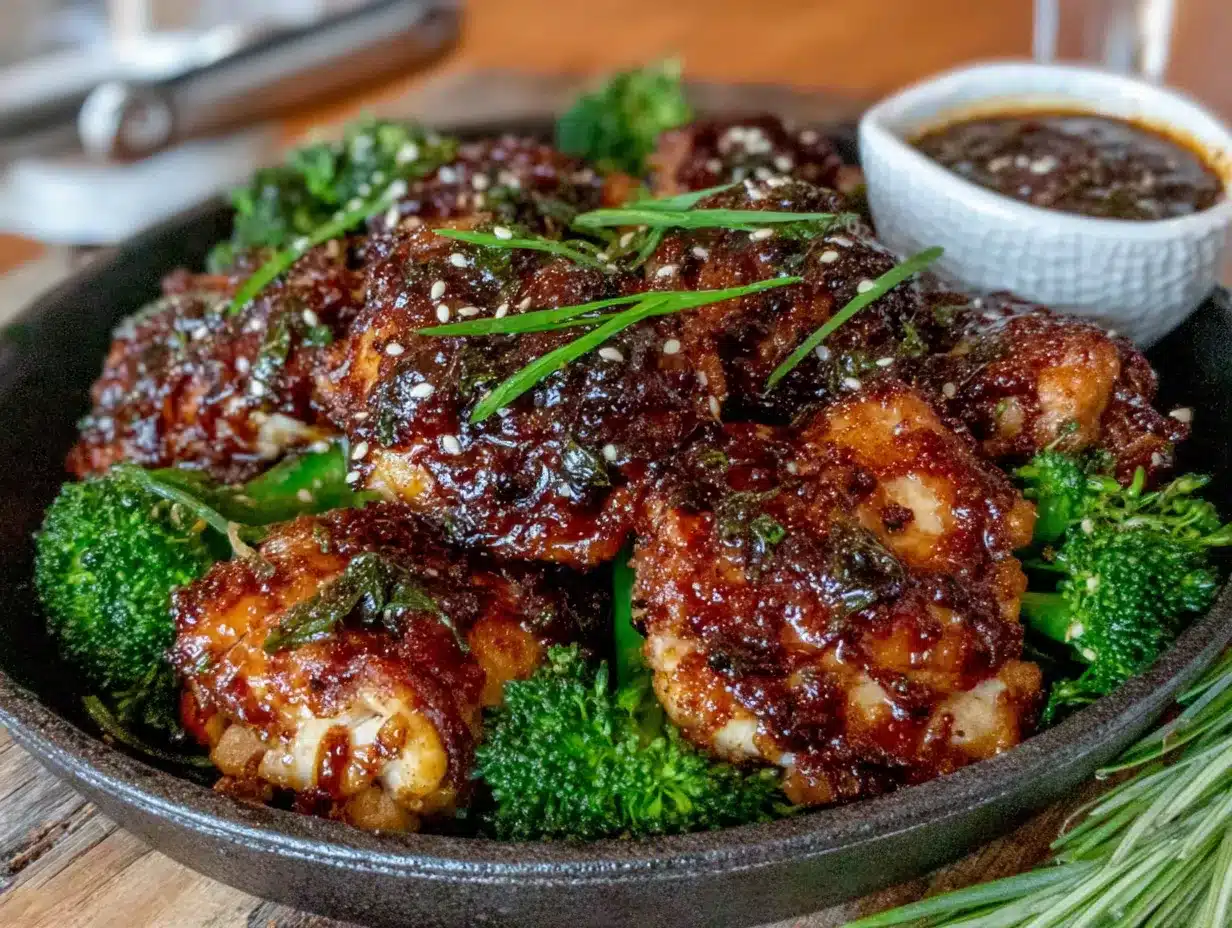
- Unbelievably Delicious: The magic is in the caramelization. The honey and soy sauce reduce into this sticky, almost candied coating on the chicken. The edges get a little crispy, the inside stays juicy, and the whole pan smells like the best thing you’ve ever cooked.
- One-Pan Wonder: This isn’t just about less cleanup—though that’s a huge bonus. Cooking everything in one pan means the flavors concentrate and deepen. The sauce reduces right in the same skillet, so nothing gets lost.
What makes this different from every other honey garlic chicken recipe out there? It’s the balance. So many versions are either too sweet or too salty. This one hits that perfect middle ground where the honey feels indulgent but not cloying, and the garlic is present without being overpowering. Plus, the one-pan method means the sauce thickens into a glaze rather than staying thin and watery. It clings to the chicken like it belongs there.
Honestly, this is the kind of recipe that makes you feel like a hero. It’s affordable—chicken thighs are usually cheaper than breasts—it reheats beautifully, and it pleases everyone at the table. That’s a win in my book.
What Ingredients You Will Need
This recipe uses simple, everyday ingredients to deliver big flavor without any fuss. Most of these are pantry staples, so you can probably make this tonight without a grocery run. Let’s break down what each ingredient does and how to choose the best ones.
- Chicken Thighs (bone-in, skin-on, about 2 lbs or 900g): This is the star. Bone-in, skin-on thighs stay juicier and develop that incredible crispy skin in the pan. If you want to use boneless skinless thighs, you can—just reduce the cooking time by about 5-7 minutes. I personally prefer thighs from [Brand] or the store brand—just look for ones that are plump and have even coloring. The fat in the dark meat is what makes this dish so forgiving; it’s hard to overcook them into dry, sad pieces.
- Honey (⅓ cup or 110g): This provides the sweetness and helps create that sticky, glossy glaze. Use a good-quality honey here—the flavor really comes through. I like a mild wildflower honey or clover honey. Avoid anything too strongly flavored like buckwheat honey, as it can overpower the garlic. If your honey has crystallized, just warm the jar in a bowl of hot water for a few minutes.
- Soy Sauce (¼ cup or 60ml): This is your salty, umami backbone. It balances the sweetness of the honey and adds depth. I use regular soy sauce, but low-sodium works fine if you’re watching your salt intake. For a gluten-free option, use tamari or coconut aminos—both work beautifully without changing the flavor profile much.
- Garlic (4-5 cloves, minced): Fresh garlic is non-negotiable here. Please don’t use the jarred stuff—it has a different flavor and won’t give you the same aromatic punch. Mince it yourself; it takes 30 seconds. The garlic mellows as it cooks, becoming sweet and fragrant rather than sharp and harsh.
- Ketchup (2 tablespoons or 30g): This might seem unusual, but it’s the secret ingredient. The ketchup adds a touch of tomato sweetness, a little tang, and helps the sauce thicken into a glaze. It also gives the finished dish a beautiful, rich color. Don’t skip it—it makes a real difference.
- Rice Vinegar (1 tablespoon or 15ml): A little acidity brightens everything up and cuts through the richness of the chicken and honey. Rice vinegar is mild and slightly sweet. If you don’t have it, you can substitute apple cider vinegar or even a squeeze of fresh lemon juice.
- Sesame Oil (1 teaspoon, optional): This adds a lovely nutty aroma that ties everything together. It’s not essential, but it gives the dish that “restaurant quality” feel. A little goes a long way.
- Cornstarch (1 teaspoon): This helps thicken the sauce slightly. Mix it with an equal amount of cold water before adding it to the pan to prevent lumps. If you’re gluten-free, arrowroot powder works the same way.
- Salt and Pepper (to taste): Season the chicken generously before searing. The skin needs salt to crisp up properly, and a little black pepper adds warmth.
- Green Onions and Sesame Seeds (for garnish): These are optional but highly recommended. The fresh green onions add a pop of color and a mild onion flavor that contrasts nicely with the rich sauce. The sesame seeds add a little crunch.
That’s it. Seven main ingredients (plus salt and pepper) and you’re on your way to a dinner that tastes like you spent hours in the kitchen. The substitutions are easy too—swap the soy sauce for tamari, use boneless thighs, or add a pinch of red pepper flakes for heat. This recipe is flexible on purpose.
Equipment Needed
One of the best things about this recipe is how little equipment it requires. You probably already have everything you need. Here’s the list:
- Large Skillet or Frying Pan (12-inch / 30cm): This is the most important tool. You need a pan big enough to hold all the chicken thighs in a single layer without crowding them. If they’re too close together, they’ll steam instead of sear, and you won’t get that beautiful crispy skin. I use a cast iron skillet—it holds heat beautifully and gives the best sear. But a stainless steel or non-stick pan works great too. Just avoid anything too thin, as it won’t distribute heat evenly.
- Tongs: You’ll need these to flip the chicken and move it around the pan. They give you better control than a spatula. I prefer ones with silicone tips to avoid scratching non-stick pans.
- Small Bowl: For whisking together the sauce ingredients before adding them to the pan. It’s easier to mix everything in a bowl than to try and combine them directly in the hot skillet.
- Whisk or Fork: For mixing the sauce. A fork works perfectly fine if you don’t have a whisk.
- Cutting Board and Knife: For mincing the garlic and slicing the green onions. A sharp knife makes this job much easier and safer.
- Measuring Cups and Spoons: Accuracy matters with the honey and soy sauce—too much of either can throw off the balance. I use my standard set, nothing fancy.
If you don’t have a cast iron skillet, don’t worry. I’ve made this in a non-stick pan plenty of times, and it turns out great. The key is just making sure the pan is hot before you add the chicken. And honestly, if you have to use a smaller pan and cook the chicken in two batches, that’s fine too. It takes a little longer, but the results are still delicious.
Preparation Method
Alright, let’s get cooking. This comes together fast, so I like to have everything prepped and measured before I turn on the heat. Trust me on this—once the chicken hits the pan, you won’t have time to mince garlic. Here’s the step-by-step:
- Prep the Chicken (5 minutes): Pat the chicken thighs dry with paper towels. This is crucial—wet skin won’t crisp up. Season both sides generously with salt and pepper. Don’t be shy with the salt; it helps draw out moisture and creates that golden, crackly skin. Let them sit at room temperature for about 10 minutes while you prep the sauce. This helps them cook more evenly.
- Make the Sauce (3 minutes): In a small bowl, whisk together the honey, soy sauce, minced garlic, ketchup, rice vinegar, and sesame oil (if using). In a separate tiny bowl, mix the cornstarch with 1 teaspoon of cold water and set aside. The cornstarch slurry will go in at the end to thicken the sauce. If you add it now, it will just burn in the pan.
- Heat the Pan (2 minutes): Place your skillet over medium-high heat and add about 1 tablespoon of oil (vegetable, canola, or avocado—something with a high smoke point). Let it heat until the oil shimmers and moves easily around the pan. You want it hot enough that the chicken sizzles the moment it hits the surface.
- Sear the Chicken (8-10 minutes): Place the chicken thighs skin-side down in the hot pan. Don’t move them! Let them cook undisturbed for 5-6 minutes. You’ll know they’re ready to flip when the skin is deep golden brown and releases easily from the pan. If it sticks, it’s not ready yet. Flip and cook the other side for 3-4 minutes. The chicken should be cooked through (internal temperature of 165°F / 74°C) but still juicy. Transfer the chicken to a plate and set aside. Don’t wipe out the pan—those browned bits are pure flavor.
- Make the Glaze (3 minutes): Reduce the heat to medium-low. Pour the sauce mixture into the same pan. It will bubble and steam immediately—that’s good. Stir constantly with a wooden spoon or spatula, scraping up all those browned bits from the bottom of the pan. Let the sauce simmer for about 2 minutes until it thickens slightly and becomes glossy. Give the cornstarch slurry a quick stir and pour it in. Stir for another 30 seconds until the sauce coats the back of a spoon.
- Finish the Chicken (5 minutes): Return the chicken thighs to the pan, skin-side up. Spoon the glaze over the tops. Let them simmer in the sauce for 3-5 minutes, spooning the glaze over them occasionally. This allows the flavors to meld and the sauce to reduce to a sticky, clingy consistency. The kitchen will smell incredible at this point—I’m not kidding.
- Garnish and Serve (2 minutes): Transfer the chicken to a serving platter. Spoon any remaining glaze from the pan over the top. Sprinkle with sliced green onions and sesame seeds. Serve immediately with rice, roasted vegetables, or a simple side salad. The sauce is amazing over rice—don’t waste a drop.
A few things to watch for: If the sauce starts to get too thick or looks like it might burn, add a splash of water or chicken broth to thin it out. Every stove is different, so keep an eye on it. If the chicken is browning too fast but isn’t cooked through, reduce the heat and cover the pan for a few minutes. And if you’re using boneless thighs, they’ll cook faster—start checking at the 4-minute mark on the second side.
Cooking Tips & Techniques
I’ve made this recipe more times than I can count, and I’ve learned a few things along the way. Some of these came from mistakes—like the time I used too much honey and ended up with a sauce that tasted like candy. Here’s what I wish I’d known from the start:
Don’t crowd the pan. This is the number one mistake people make. If you put too many chicken thighs in the pan at once, the temperature drops, and the chicken steams instead of searing. You lose that crispy skin. Cook in batches if you have to. It adds 5 minutes, but it’s worth it.
Patience with the skin. Let the chicken cook undisturbed for a full 5-6 minutes on the first side. I know it’s tempting to peek, but trust the process. The skin needs time to render its fat and turn golden and crispy. If you try to flip too early, the skin will tear and stick to the pan. You’ll know it’s ready when it releases easily.
Balance the sweetness. The honey-to-soy-sauce ratio is delicate. I once doubled the honey thinking it would be “better,” and it was way too sweet. The ketchup and vinegar are there to balance things out, so don’t skip them. If you accidentally add too much honey, a squeeze of lemon juice can help cut the sweetness.
Use a meat thermometer. Chicken thighs are forgiving, but they’re best at 165°F (74°C). If you don’t have a thermometer, cut into the thickest part of a thigh—the juices should run clear, and the meat should be opaque all the way through. No pink.
Let it rest. After you return the chicken to the pan with the glaze, let it sit for a minute or two before serving. This allows the sauce to set slightly and the flavors to meld. It also gives you time to get the rice on the table.
Make extra sauce. Honestly, I often double the sauce ingredients. The extra is amazing drizzled over rice or vegetables. Just be careful not to over-reduce it—you want it syrupy, not sticky like caramel.
Variations & Adaptations
This recipe is incredibly adaptable. I’ve played around with it quite a bit, and here are some of my favorite variations:
Spicy Honey Garlic Chicken: Add ½ teaspoon of red pepper flakes or a teaspoon of sriracha to the sauce. The heat balances beautifully with the sweetness. My teenager loves this version—they say it “wakes up” the dish. Just be mindful if you’re serving it to younger kids who might not handle the heat.
Lemon Garlic Chicken: Replace the rice vinegar with fresh lemon juice and add a teaspoon of lemon zest to the sauce. The citrus brightens everything up and makes it feel lighter. This is my go-to for spring dinners when I want something a little fresher.
Slow Cooker Version: Sear the chicken as directed, then transfer it to a slow cooker. Pour the sauce over the top and cook on low for 4-5 hours. The chicken will be fall-apart tender. Thicken the sauce on the stovetop with a cornstarch slurry before serving. This is perfect for busy days when you want dinner ready when you walk in the door.
Gluten-Free Adaptation: Use tamari or coconut aminos instead of soy sauce. Everything else is naturally gluten-free. I’ve tested this with tamari multiple times, and the flavor is nearly identical.
Vegetable Add-In: Add broccoli florets, snap peas, or bell pepper strips to the pan during the last 5 minutes of cooking. They’ll soak up the glaze and become tender-crisp. This turns the dish into a complete one-pan meal with vegetables built right in.
Air Fryer Method: Cook the chicken thighs in the air fryer at 375°F (190°C) for 15-18 minutes, flipping halfway. While they cook, make the glaze on the stovetop. Toss the cooked chicken in the glaze before serving. The skin gets incredibly crispy this way.
I’ve tried them all, and honestly, the spicy version is my personal favorite. But the original is the one that gets requested most often by the family. You really can’t go wrong.
Serving & Storage Suggestions
This dish is incredibly versatile when it comes to serving. Here’s how I like to do it:
Serving Temperature: Serve the chicken hot, straight from the pan. The glaze is at its best when it’s warm and glossy. If it cools down too much, the sauce can thicken and become a little sticky—still delicious, but not as pretty.
What to Serve With It: The classic pairing is steamed white rice—jasmine or basmati work beautifully. The rice soaks up all that extra glaze. For a lower-carb option, serve it with cauliflower rice or a bed of sautéed greens like spinach or bok choy. Roasted broccoli or green beans are also excellent choices. The slight bitterness of the greens contrasts perfectly with the sweet sauce.
Presentation: Arrange the chicken thighs on a platter, spoon the remaining glaze over the top, and garnish with green onions and sesame seeds. A sprinkle of red pepper flakes adds a pop of color if you’re feeling fancy. It looks impressive with minimal effort.
Storage: Leftovers keep beautifully in an airtight container in the refrigerator for up to 4 days. The flavors actually meld and deepen overnight, so it’s even better the next day. I often make a double batch on purpose just for leftovers.
Reheating: The best way to reheat is in a skillet over medium-low heat with a splash of water or chicken broth. This helps loosen the glaze and keeps the chicken from drying out. Microwave works in a pinch, but the skin won’t be as crispy. If you’re reheating in the microwave, cover the plate with a damp paper towel to add moisture.
Freezing: This freezes well for up to 3 months. Let the chicken cool completely, then place it in a freezer-safe container with the glaze. Thaw overnight in the refrigerator and reheat in a skillet. The sauce might separate slightly, but a good stir brings it back together.
Flavor Development: As I mentioned, the flavors get better after a day in the fridge. The garlic mellows, the honey soaks into the meat, and everything becomes more cohesive. If you can, make this a day ahead—it’s a game-changer for busy weeknights.
Nutritional Information & Benefits
Here’s a rough estimate of the nutritional content per serving (based on 4 servings, using bone-in, skin-on chicken thighs):
- Calories: Approximately 380-420 per serving
- Protein: 28-32g
- Fat: 18-22g (mostly from the chicken skin)
- Carbohydrates: 22-26g (mainly from honey)
- Fiber: 0g
- Sugar: 18-20g (natural from honey, plus a little from ketchup)
- Sodium: 600-700mg (varies based on soy sauce)
These numbers are estimates and will vary based on the specific brands and quantities you use. If you’re watching your sodium, use low-sodium soy sauce and reduce the added salt.
Health Benefits: Chicken thighs are a good source of protein, iron, and B vitamins, which support energy metabolism. The honey provides natural antioxidants, and garlic is known for its immune-supporting properties. While this isn’t a “health food,” it’s a balanced meal that fits well into a sensible diet—especially when served with vegetables and whole grains.
Dietary Considerations: This recipe is naturally dairy-free and nut-free. To make it gluten-free, use tamari or coconut aminos. To reduce sugar, swap half the honey for a sugar-free alternative or use a sugar-free ketchup. The flavor will change slightly, but it still works.
Potential Allergens: Soy (from soy sauce) is the main allergen. If you have a soy allergy, use coconut aminos, which are soy-free and have a similar flavor profile. The recipe is also free of common allergens like dairy, eggs, and nuts.
I personally love that this dish feels indulgent but isn’t loaded with heavy cream or butter. It’s comfort food that doesn’t weigh you down—perfect for those nights when you want something satisfying but not overly rich.
Conclusion
This one-pan honey garlic chicken thighs recipe is more than just a quick dinner—it’s the kind of meal that proves you don’t need fancy ingredients or complicated techniques to make something truly delicious. It’s affordable, it’s fast, and it pleases everyone at the table, from the pickiest eater to the most adventurous palate.
I love this recipe because it’s the one that changed my mind about chicken thighs. It’s the one that made my youngest ask for seconds. It’s the one I turn to on busy weeknights when I need a win. And honestly, it’s the one I make when I want to feel like a good cook without actually trying very hard. That’s a special kind of recipe.
I hope you give it a try—and I hope it becomes a regular in your kitchen too. Play around with the variations, adjust the sweetness to your taste, and make it your own. That’s what cooking is all about. If you make it, I’d love to hear how it turned out. Drop a comment below and let me know if your family loved it as much as mine does. And if you have your own twist on the recipe, share that too—I’m always looking for new ideas!
Happy cooking, friends. Grab that pan and get started. You’ve got this.
Frequently Asked Questions
Can I use chicken breasts instead of thighs?
Yes, you can. Boneless, skinless chicken breasts will work, but they cook faster and can dry out more easily. Reduce the cooking time by about 5 minutes and check for doneness at 165°F (74°C). The sauce will still be delicious, but you’ll miss out on the crispy skin.
How do I prevent the sauce from burning?
The honey can burn if the heat is too high. Keep the heat at medium-low once you add the sauce, and stir frequently. If the sauce starts to look too thick or dark, add a splash of water or chicken broth to thin it out.
Can I make this recipe ahead of time?
Absolutely. Cook the chicken and sauce, then let it cool completely. Store it in the refrigerator for up to 4 days. The flavors actually improve overnight. Reheat gently in a skillet with a splash of water to revive the glaze.
Is this recipe freezer-friendly?
Yes, it freezes well for up to 3 months. Cool the chicken completely, then place it in a freezer-safe container with the sauce. Thaw overnight in the refrigerator before reheating. The sauce might separate slightly, but a good stir fixes it.
What can I serve with this to make it a complete meal?
Steamed rice is the classic choice, but it also pairs beautifully with roasted vegetables, a simple green salad, or cauliflower rice for a lower-carb option. The sauce is great over any of these sides, so don’t skip it.
Pin This Recipe!

Best One-Pan Honey Garlic Chicken Thighs (Easy Kid Dinner)

A quick and easy one-pan honey garlic chicken thighs recipe that turns picky eaters into fans. With a sticky, savory-sweet glaze and crispy skin, this family-friendly dinner comes together in under 30 minutes using simple pantry ingredients.
- Prep Time: 10 minutes
- Cook Time: 20 minutes
- Total Time: 30 minutes
- Yield: 4 servings 1x
- Category: Main Course
- Cuisine: American
Ingredients
- 2 lbs (900g) bone-in, skin-on chicken thighs
- 1/3 cup (110g) honey
- 1/4 cup (60ml) soy sauce
- 4–5 cloves garlic, minced
- 2 tablespoons (30g) ketchup
- 1 tablespoon (15ml) rice vinegar
- 1 teaspoon sesame oil (optional)
- 1 teaspoon cornstarch mixed with 1 teaspoon cold water
- Salt and pepper to taste
- Green onions and sesame seeds for garnish
Instructions
- Pat chicken thighs dry with paper towels. Season both sides generously with salt and pepper. Let sit at room temperature for 10 minutes.
- In a small bowl, whisk together honey, soy sauce, minced garlic, ketchup, rice vinegar, and sesame oil (if using). In a separate tiny bowl, mix cornstarch with 1 teaspoon cold water and set aside.
- Heat a large skillet over medium-high heat with 1 tablespoon oil until shimmering.
- Place chicken skin-side down in the hot pan. Cook undisturbed for 5-6 minutes until skin is deep golden brown and releases easily. Flip and cook other side for 3-4 minutes until internal temperature reaches 165°F (74°C). Transfer chicken to a plate.
- Reduce heat to medium-low. Pour sauce mixture into the same pan, scraping up browned bits. Simmer for 2 minutes until slightly thickened. Stir cornstarch slurry and add to pan; cook 30 seconds until glossy.
- Return chicken to pan skin-side up. Spoon glaze over tops and simmer 3-5 minutes, spooning glaze occasionally, until sauce is sticky and clings to chicken.
- Transfer to a platter, spoon remaining glaze over top, and garnish with green onions and sesame seeds. Serve immediately.
Notes
For extra sauce, double the sauce ingredients. If sauce gets too thick, add a splash of water or chicken broth. For boneless thighs, reduce cooking time by 5-7 minutes. Leftovers keep in the refrigerator for up to 4 days and freeze for up to 3 months.
Nutrition
- Serving Size: 1 serving (about 2 t
- Calories: 400
- Sugar: 19
- Sodium: 650
- Fat: 20
- Saturated Fat: 5
- Carbohydrates: 24
- Protein: 30
Keywords: honey garlic chicken, one-pan chicken, easy chicken dinner, kid-friendly chicken, chicken thighs, quick dinner, family meal