My dad had claimed for years that he hated pumpkin desserts. Years. “Too heavy,” he’d say, waving a hand at the Thanksgiving pie. “Tastes like a candle smells.” Then a few Octobers ago, I made this small-batch pumpkin dump cake on a whim, just a tiny 8×8 pan for myself on a rainy Tuesday. I walked away from the cooling rack for maybe five minutes and came back to find him standing at the counter, fork in hand, with a guilty look on his face and a crumb on his sweater. He didn’t even try to deny it. He just pointed at the pan and said, “That one’s different. That one’s good.”
Honestly, that moment kind of made my whole fall. There’s something about a small-batch dessert that feels less like a production and more like a secret. This isn’t a massive 9×13 pan meant to feed a crowd—it’s a cozy little cake for you, your partner, or a quiet night in. It’s got that warm, spiced pumpkin flavor everyone craves when the leaves start turning, but it’s topped with a buttery, crumbly cake layer that gets almost crispy on the edges. No fussy mixing bowls, no creaming butter and sugar. You just dump, sprinkle, and pour melted butter over the top. It’s the kind of dessert that proves you don’t need a huge occasion to enjoy something special. And if it can convert a pumpkin-hater? Well, it’s basically magic. Let me show you how to make it.
Why You’ll Love This Recipe
Let’s be real—most pumpkin dump cake recipes make a massive pan. This one is scaled down perfectly for an 8×8 dish, which means you get all the cozy flavor without a week’s worth of leftovers sitting in your fridge. I’ve tested this recipe at least six times to get the ratio of pumpkin filling to cake topping just right. You want that gooey, almost pudding-like bottom layer and a golden, buttery top that shatters a little when you cut into it. It’s a delicate balance, and I promise this version nails it.
- Small-Batch & Perfect for Two: No more staring at a half-eaten pan of dessert for days. This one is just the right amount for a cozy night in.
- Simple Pantry Ingredients: You probably have almost everything you need already—canned pumpkin, a box of cake mix, some butter, and eggs. No fancy grocery store trips required.
- Unbelievably Easy: If you can open a can and stir a few things, you can make this cake. There is no electric mixer needed. Your hands do all the work.
- Perfect for Fall: This is the dessert you want after a chilly walk, a rainy afternoon, or a big bowl of chili. It tastes like autumn in a pan.
- Always a Crowd-Pleaser: Even people who claim they “don’t like pumpkin” (like my dad) have been known to go back for seconds. The buttery cake topping is the secret weapon here.
What makes this dump cake different from the rest? The texture. A lot of dump cakes end up soupy or soggy on top. My trick is to use a little less butter than most recipes call for, and to sprinkle the dry cake mix evenly so it forms a proper crust. The result is a top that’s crisp and golden, with a soft, tender pumpkin layer underneath. It’s comfort food at its finest, and it comes together in under 10 minutes of hands-on work. Honestly, that’s my kind of baking.
What Ingredients You Will Need
This recipe uses simple, wholesome ingredients to deliver bold flavor and satisfying texture without the fuss. Most of these are pantry staples, especially if you do any fall baking. Here’s what you’ll need:
- For the Pumpkin Layer:
- 1 can (15 oz) pumpkin puree (not pumpkin pie filling—make sure it’s 100% pure pumpkin)
- 2/3 cup granulated sugar
- 1 large egg
- 1 teaspoon vanilla extract
- 1 teaspoon pumpkin pie spice (adds that warm, cozy flavor)
- 1/2 teaspoon ground cinnamon
- 1/4 teaspoon salt
- 1/2 cup evaporated milk (adds richness; you can use whole milk in a pinch)
- For the Topping:
- 1 box (15.25 oz) yellow cake mix (I prefer Betty Crocker or Duncan Hines for consistent texture)
- 1/2 cup unsalted butter, melted (plus a little extra for greasing the pan)
- 1/2 cup chopped pecans (optional, but highly recommended for crunch)
A quick note on the cake mix: you only need the dry mix itself. Do not prepare the batter according to the box directions. Just pour the powder straight from the box. It seems strange, I know, but that’s the magic of a dump cake. The dry mix absorbs the butter and the moisture from the pumpkin layer as it bakes, creating that signature crumbly topping.
For the pumpkin puree, I always grab Libby’s. It’s thick, not watery, and it has the best flavor. If you can only find pumpkin pie filling, don’t use it here—it’s already sweetened and spiced, and it will throw off the whole recipe. Stick with plain pumpkin puree.
If you want to make this dairy-free, you can substitute the melted butter with a plant-based butter alternative (I like Miyoko’s) and use oat milk instead of evaporated milk. The texture will be slightly different—a bit less rich—but still delicious.
Equipment Needed
The beauty of this recipe is that it doesn’t require a lot of fancy tools. Here’s what you’ll need to pull this together:
- 8×8-inch baking pan: This is the perfect size for a small batch. A 9×9 will also work, but the cake will be slightly thinner and may bake a few minutes faster.
- Large mixing bowl: For whisking together the pumpkin layer ingredients.
- Whisk or fork: To combine the pumpkin mixture until smooth.
- Measuring cups and spoons: For accuracy, especially with the spices and milk.
- Spatula: To spread the pumpkin mixture evenly in the pan.
- Small saucepan or microwave-safe bowl: To melt the butter.
If you don’t have an 8×8 pan, you can use a 9-inch round cake pan or even a small cast-iron skillet. Just keep an eye on the bake time, as it will vary slightly. I’ve made this in a 7×11 dish before, and it worked beautifully—it just needed an extra 5 minutes in the oven.
One tip: use a glass or ceramic baking dish if you have one. Metal pans can sometimes cause the edges to brown too quickly. But honestly, whatever you have will work. This is a forgiving recipe.
Preparation Method
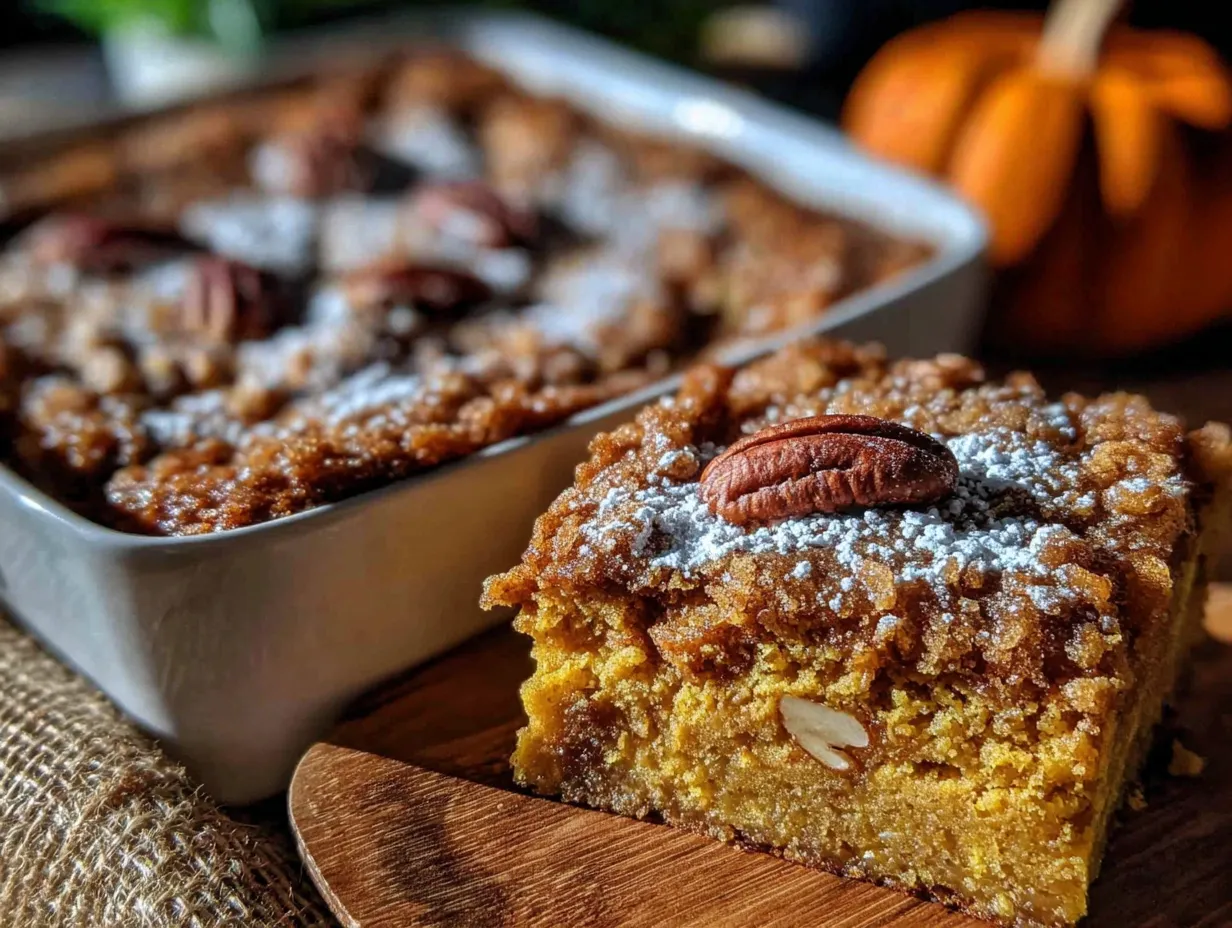
Alright, let’s get to the good part. This is so simple, you’ll barely believe it. Here’s how to make your cozy small-batch pumpkin dump cake:
- Preheat your oven to 350°F (175°C). Grease your 8×8-inch baking pan with a little butter or non-stick spray. Set it aside.
- Make the pumpkin layer. In a large mixing bowl, combine the 15 oz can of pumpkin puree, 2/3 cup granulated sugar, 1 large egg, 1 teaspoon vanilla extract, 1 teaspoon pumpkin pie spice, 1/2 teaspoon ground cinnamon, and 1/4 teaspoon salt. Whisk until everything is smooth and well combined. It should smell like fall at this point.
- Add the evaporated milk. Pour in the 1/2 cup of evaporated milk and whisk again until the mixture is silky and uniform. The batter will be thinner than you expect—that’s totally normal.
- Pour the pumpkin mixture into the prepared pan. Use your spatula to spread it evenly to the edges. Give the pan a little shake to level it out.
- Sprinkle the dry cake mix. Open your box of yellow cake mix and pour the dry powder evenly over the pumpkin layer. Don’t stir it. Don’t mix it. Just let it sit on top like a blanket. Use your fingers or a fork to break up any large clumps of the cake mix as you go.
- Add the pecans (optional). Sprinkle the 1/2 cup of chopped pecans evenly over the dry cake mix. This adds a lovely crunch and a little nutty flavor.
- Drizzle with melted butter. Melt your 1/2 cup of unsalted butter in a small saucepan or microwave-safe bowl. Drizzle it as evenly as possible over the entire surface of the cake mix and pecans. Don’t pour it all in one spot—try to cover as much of the dry mix as you can. Some spots will stay dry, and that’s fine. The butter will sink in and create pockets of buttery goodness.
- Bake. Place the pan in the preheated oven and bake for 35-40 minutes, or until the top is golden brown and the edges are bubbly. The center should be set but still slightly jiggly—it will continue to set as it cools. If you insert a toothpick into the cake layer (not the pumpkin), it should come out with a few moist crumbs.
- Cool slightly before serving. Let the cake cool in the pan on a wire rack for at least 15 minutes. This allows the layers to settle and makes it easier to scoop out clean portions.
A few things to watch for: if the top is browning too quickly but the center isn’t set yet, tent the pan loosely with aluminum foil for the last 10 minutes of baking. And don’t panic if you see a few dry patches of cake mix on top—that’s part of the charm. They’ll soften as the cake cools.
Cooking Tips & Techniques
I’ve made this recipe more times than I can count, and I’ve definitely learned a few things along the way. Here are my best tips for getting it right every time:
Use room temperature ingredients. Your egg and milk should be at room temperature before you start. Cold ingredients can make the pumpkin layer seize up and bake unevenly. Just set them on the counter for 15 minutes before you start.
Don’t over-mix the pumpkin layer. Whisk just until everything is combined. Over-mixing can incorporate too much air, which will make the pumpkin layer puff up and then collapse. You want it dense and creamy.
Sprinkle the cake mix evenly. This is the most important step. If you dump all the cake mix in one spot, you’ll end up with a thick, dry clump of powder in the middle and a thin layer on the edges. Take the extra 30 seconds to sprinkle it evenly across the entire surface.
Melt the butter slowly. If you’re using the microwave, melt the butter in 20-second intervals, stirring between each. You don’t want it to explode or get too hot. Drizzle it slowly, aiming for even coverage. I’ve had a few batches where I got impatient and poured it too fast, and it created a soggy spot in the middle.
Let it rest. I know it’s tempting to dig in right away, but letting the cake cool for at least 15 minutes is crucial. The pumpkin layer needs time to set, and the topping needs to crisp up a little. If you serve it too hot, it will be soupy.
One mistake I made early on: I tried using a spice cake mix instead of yellow cake mix. It sounded good in theory, but the extra spices in the mix clashed with the pumpkin spice and made the whole thing taste a little muddy. Stick with yellow cake mix—it’s the perfect neutral base that lets the pumpkin shine.
Variations & Adaptations
This recipe is wonderfully flexible. Here are a few ways to make it your own:
- Gluten-Free Version: Use a gluten-free yellow cake mix. I’ve tried this with King Arthur’s gluten-free yellow cake mix, and it works perfectly. Just make sure the rest of your ingredients are certified gluten-free as well.
- Vegan Adaptation: Use a flax egg (1 tablespoon ground flaxseed mixed with 3 tablespoons water) instead of the regular egg, and substitute the evaporated milk with oat milk or full-fat coconut milk. Use a plant-based butter for the topping. The texture will be a little less firm, but still delicious.
- Add Chocolate Chips: Sprinkle 1/3 cup of semi-sweet chocolate chips over the cake mix before adding the pecans. The chocolate and pumpkin combo is surprisingly good—it’s like a pumpkin chocolate chip cookie, but in cake form.
- Use a Different Cake Mix: If you want a different flavor profile, try using a butter pecan cake mix or a white cake mix. Both work beautifully. Just avoid anything with fruit flavors or extra spices.
- Make it a Pumpkin Apple Dump Cake: Peel and dice one small apple (about 1/2 cup) and fold it into the pumpkin layer before pouring it into the pan. The apple adds little pockets of sweetness and texture that are lovely.
I personally love the pecan version. The crunch against the soft, creamy pumpkin layer is just perfect. But if you’re not a nut person, feel free to leave them out—the cake is still amazing without them.
Serving & Storage Suggestions
This cake is best served warm, straight from the oven. Scoop it into bowls and top it with a generous dollop of whipped cream or a scoop of vanilla ice cream. The cold creaminess against the warm, buttery cake is absolutely divine. If you’re feeling extra fancy, a drizzle of caramel sauce over the top takes it to another level.
For storage, cover the pan tightly with foil or plastic wrap and keep it in the refrigerator for up to 4 days. The cake will firm up as it chills, but the flavors actually get better over time. To reheat, pop a portion in the microwave for 20-30 seconds, or warm it in a 300°F oven for about 10 minutes. The topping will crisp back up nicely in the oven.
I don’t recommend freezing this cake. The pumpkin layer can become watery when thawed, and the topping loses its crunch. It’s really best enjoyed fresh or within a few days of baking.
One thing I love about this small-batch version is that it’s perfect for sharing with a neighbor or taking to a small gathering. It travels well in the pan, and everyone always asks for the recipe. Just make sure you save a piece for yourself!
Nutritional Information & Benefits
While this is definitely a treat, there are a few redeeming qualities. Pumpkin is packed with vitamin A and fiber, which is good for your eyes and digestion. The pecans add healthy fats and a little protein. And since this is a small-batch recipe, it’s easier to practice portion control—one serving is about 1/8 of the pan.
Here are the approximate nutritional values per serving (based on 8 servings):
- Calories: 380
- Fat: 18g
- Carbohydrates: 52g
- Fiber: 3g
- Sugar: 32g
- Protein: 5g
Please note that these are estimates and will vary based on the specific brands and substitutions you use. If you have dietary concerns, I recommend using a nutrition calculator with your exact ingredients.
This recipe contains dairy, gluten, eggs, and nuts (if using pecans). For allergen-friendly versions, see the variations section above.
Conclusion
This cozy small-batch pumpkin dump cake is the kind of dessert that feels like a warm hug on a cool fall day. It’s simple enough for a Tuesday night, but special enough to serve to company. The buttery, crumbly topping paired with the spiced, creamy pumpkin layer is a combination that never gets old. And honestly, the fact that it comes together in less than 10 minutes of hands-on work? That’s just the cherry on top.
I hope you give this recipe a try, and I hope it becomes a part of your fall traditions the way it has mine. Feel free to customize it with your favorite add-ins—chocolate chips, different nuts, a drizzle of caramel—and make it your own. That’s the beauty of a dump cake. It’s forgiving, it’s flexible, and it’s always delicious.
If you make this, I’d love to hear about it! Leave a comment below and let me know how it turned out. Did you try a variation? Did you serve it with ice cream or whipped cream? Share your photos on social media and tag me—I can’t wait to see your cozy fall creations. Happy baking, friends!
Frequently Asked Questions
Can I use pumpkin pie filling instead of pumpkin puree?
No, I don’t recommend it. Pumpkin pie filling is already sweetened and spiced, so using it will throw off the sugar and spice balance in this recipe. Stick with 100% pure pumpkin puree for the best results.
Can I double this recipe?
Absolutely! To double it, use a 9×13-inch baking pan and double all the ingredients. You’ll need to bake it for about 45-50 minutes, or until the top is golden and the edges are bubbly. Keep an eye on it toward the end.
Why is my dump cake soupy in the middle?
This usually happens if the cake is underbaked or if you used too much milk. Make sure your oven is fully preheated and bake until the center is set but still slightly jiggly. Let it cool for at least 15 minutes before serving—it will continue to set as it cools.
Can I make this in a slow cooker?
Yes, you can! Grease a 6-quart slow cooker, pour in the pumpkin layer, sprinkle the cake mix on top, and drizzle with melted butter. Cook on low for 3-4 hours or on high for 1.5-2 hours, until the top is set and the edges are bubbly. The texture will be a little softer than the oven version, but still delicious.
How do I know when the dump cake is done?
The top should be golden brown, and the edges should be bubbly. The center will still look a little jiggly when you shake the pan—that’s normal. If you insert a toothpick into the cake layer (not the pumpkin), it should come out with a few moist crumbs. Don’t overbake it, or the pumpkin layer can become dry.
Pin This Recipe!
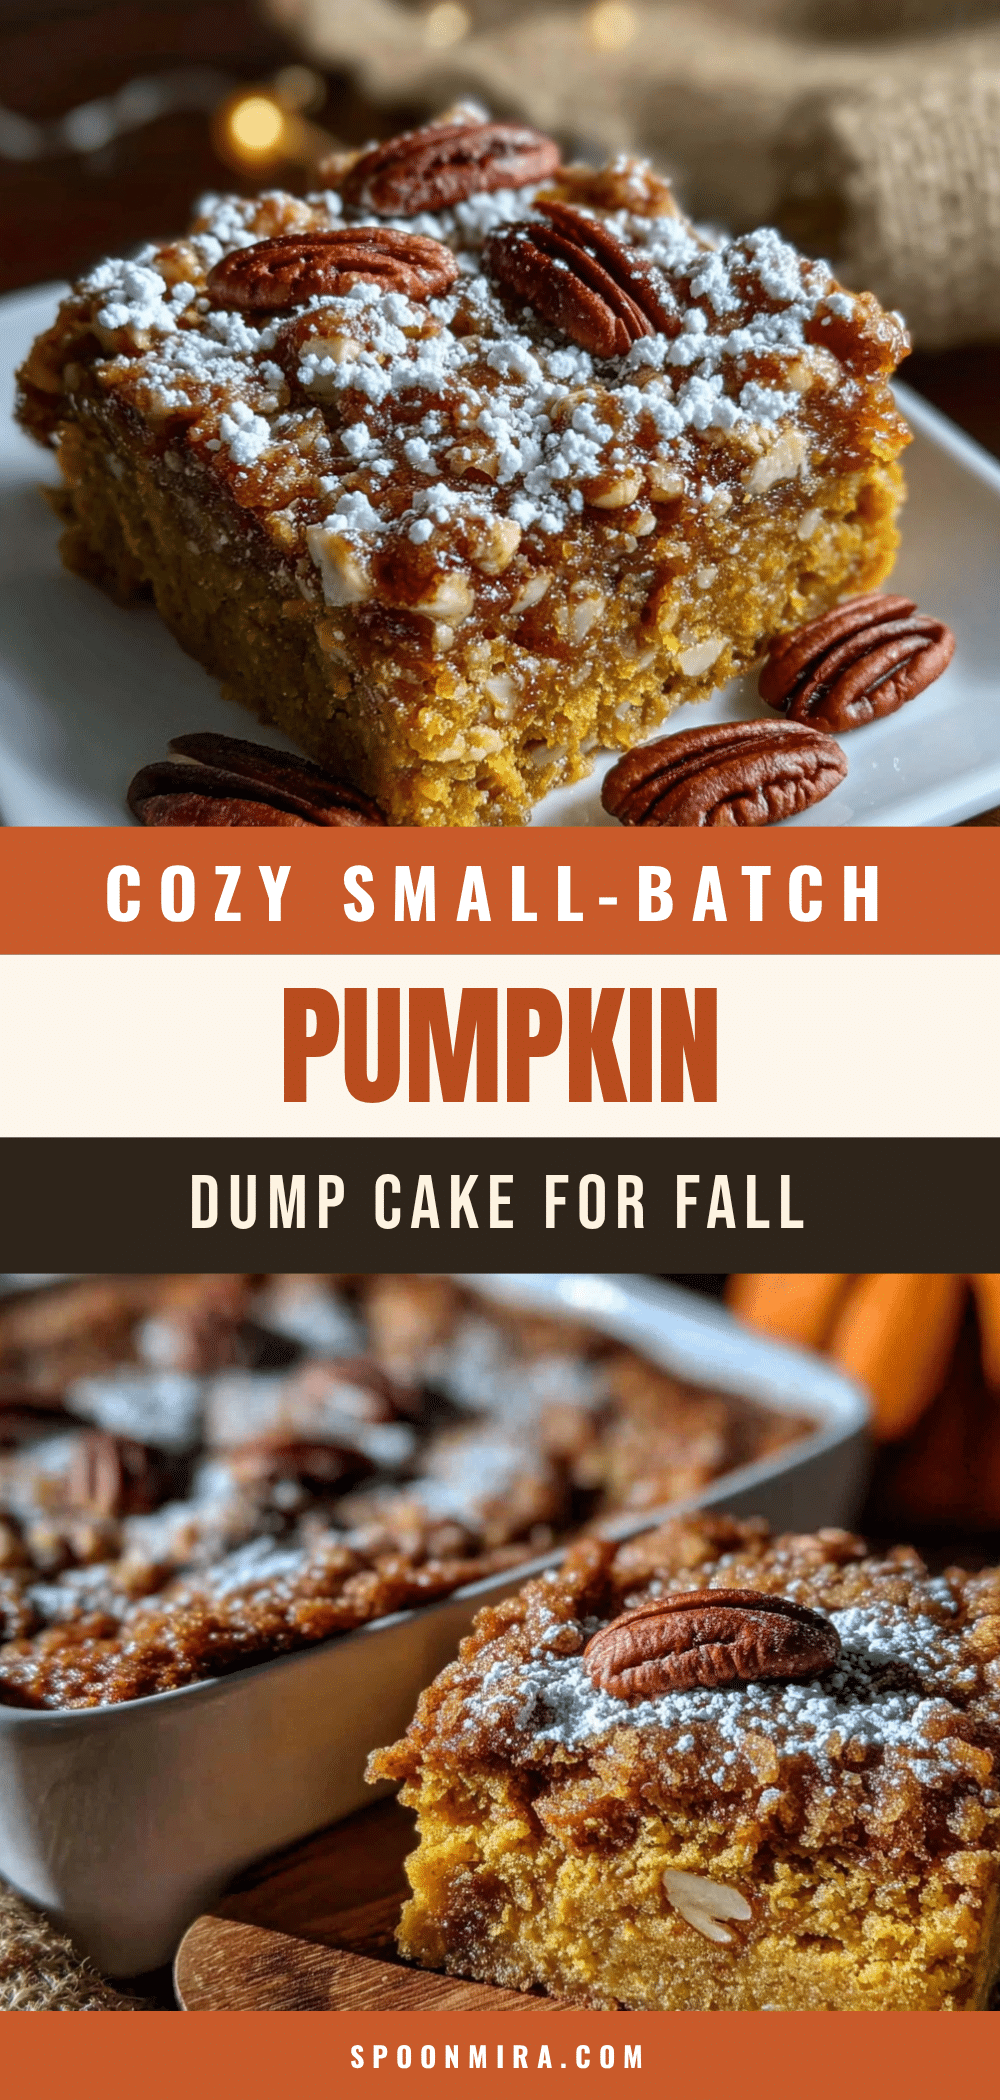
Cozy Small-Batch Pumpkin Dump Cake: Easy Fall Dessert
This small-batch pumpkin dump cake is a cozy, easy fall dessert with a spiced pumpkin layer and a buttery, crumbly cake topping. Perfect for two, it comes together in under 10 minutes of hands-on work and is sure to convert even pumpkin skeptics.
- Prep Time: 10 minutes
- Cook Time: 35-40 minutes
- Total Time: 45-50 minutes
- Yield: 8 servings 1x
- Category: Dessert
- Cuisine: American
Ingredients
- 1 can (15 oz) pumpkin puree (not pumpkin pie filling)
- 2/3 cup granulated sugar
- 1 large egg
- 1 teaspoon vanilla extract
- 1 teaspoon pumpkin pie spice
- 1/2 teaspoon ground cinnamon
- 1/4 teaspoon salt
- 1/2 cup evaporated milk (or whole milk in a pinch)
- 1 box (15.25 oz) yellow cake mix (e.g., Betty Crocker or Duncan Hines)
- 1/2 cup unsalted butter, melted (plus extra for greasing)
- 1/2 cup chopped pecans (optional)
Instructions
- Preheat your oven to 350°F (175°C). Grease an 8×8-inch baking pan with butter or non-stick spray.
- In a large mixing bowl, combine pumpkin puree, sugar, egg, vanilla extract, pumpkin pie spice, cinnamon, and salt. Whisk until smooth.
- Add evaporated milk and whisk until the mixture is silky and uniform.
- Pour the pumpkin mixture into the prepared pan and spread evenly to the edges.
- Sprinkle the dry cake mix evenly over the pumpkin layer. Do not stir. Break up any large clumps with your fingers or a fork.
- If using, sprinkle chopped pecans evenly over the dry cake mix.
- Drizzle melted butter as evenly as possible over the entire surface of the cake mix and pecans.
- Bake for 35-40 minutes, until the top is golden brown and the edges are bubbly. The center should be set but still slightly jiggly.
- Let the cake cool in the pan on a wire rack for at least 15 minutes before serving.
Notes
Use room temperature egg and milk for best results. Do not over-mix the pumpkin layer. Sprinkle cake mix evenly to avoid dry clumps. Let the cake cool for at least 15 minutes before serving to allow the layers to set. For a gluten-free version, use a gluten-free yellow cake mix. For a vegan adaptation, use a flax egg, oat milk or coconut milk, and plant-based butter. Store covered in the refrigerator for up to 4 days. Reheat in the microwave or oven.
Nutrition
- Serving Size: 1/8 of the pan
- Calories: 380
- Sugar: 32
- Fat: 18
- Carbohydrates: 52
- Fiber: 3
- Protein: 5
Keywords: pumpkin dump cake, small batch, fall dessert, easy pumpkin recipe, dump cake, pumpkin dessert, cozy dessert