My best friend looked me dead in the eye and said “black cupcakes are a gimmick.” And honestly? I kind of agreed with her. We were planning our annual Halloween party, and she wanted something that actually tasted good, not just something that looked creepy on a plate. I’d tried black velvet cakes before from box mixes and bakery shops, and they always had that weird, dry crumb and a faint chemical aftertaste from too much food coloring. It was more about the shock value than the flavor, and that just wasn’t going to cut it for us.
So I spent the next three weekends in my kitchen, determined to prove her wrong. The first batch came out looking like charcoal briquettes. The second batch tasted fine but the color was more of a sad, muddy gray. By the third attempt, I was elbow-deep in cocoa powder and buttermilk, and something just clicked. The crumb was tender, the color was a deep, dramatic black, and the flavor had that classic buttermilk tang with a whisper of rich chocolate. I brought a test batch to her house, and she took one bite, then another, then just looked at me and said “okay, I was wrong.”
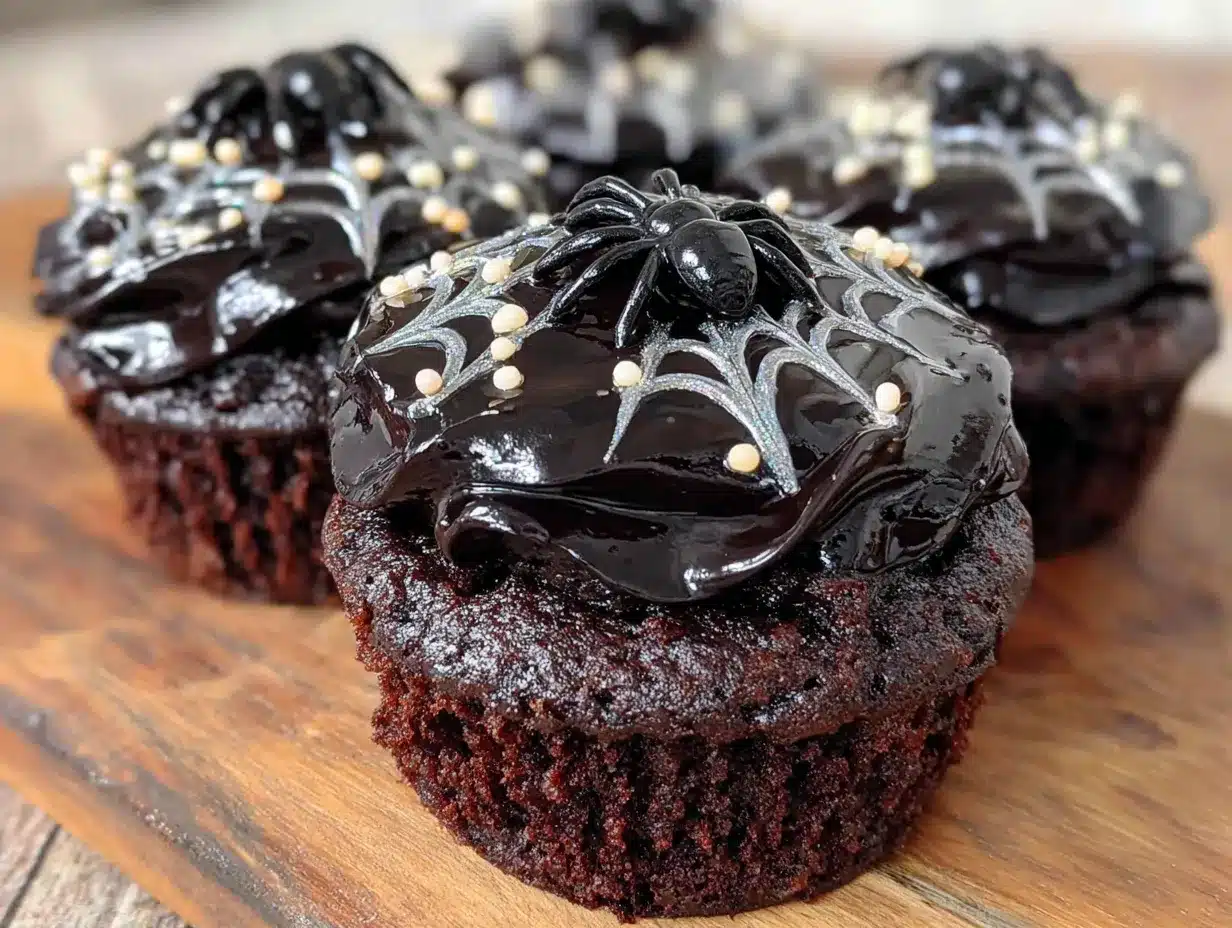
These spooky black velvet Halloween cupcakes with spiderweb icing are the result of all that stubborn trial and error. They are not a gimmick. They are genuinely moist, perfectly tangy, and just chocolatey enough to satisfy without being heavy. The spiderweb icing is surprisingly simple to pull off, and it looks like something out of a professional bakery window. If you need a dessert that steals the show at your Halloween gathering without tasting like a science experiment, this is the one.
Why You’ll Love This Recipe
Let me tell you why these cupcakes have become my non-negotiable Halloween contribution every single year. I have tested this recipe more times than I care to count, tweaking the ratios until everything was just right. The result is something I am genuinely proud to share.
- Rich, Tangy Flavor : The buttermilk and cocoa create a classic red velvet profile, just without the red dye. The flavor is the star here, not the color.
- Perfectly Moist Texture : Thanks to a combination of oil and buttermilk, these cupcakes stay soft and tender for days. No dry, crumbly disasters.
- Naturally Spooky Look : The deep black color comes from a smart combination of black cocoa powder and a touch of gel food coloring. No need to use an entire bottle of dye.
- Simple Spiderweb Icing : You do not need a piping bag or any fancy tips. A simple toothpick drag technique creates a web that looks incredibly detailed with almost zero effort.
- Crowd-Pleasing Appeal : Kids love the spooky look, and adults love that it actually tastes like a quality homemade cupcake. It is the best of both worlds.
What makes this recipe different from the rest is the balance. I have tried versions that were too dry, too sweet, or too reliant on artificial coloring. This one uses black cocoa powder, which gives a natural Oreo-like flavor and a gorgeous dark hue, so you need far less food coloring. It is a smarter, more delicious approach to a Halloween classic. Honestly, after the first bite of the final version, I knew I had cracked the code.
What Ingredients You Will Need
This recipe uses simple, mostly pantry-staple ingredients to create something that feels special. The key players are the black cocoa powder and the buttermilk, which work together to give you that signature dark color and tender crumb. Here is everything you will need, broken down by component.
For the Cupcakes
- All-purpose flour, 1 ½ cups (190g) — spooned and leveled for accuracy
- Black cocoa powder, ¼ cup (25g) — this is the secret to the deep color and Oreo-like taste; I recommend the brand Rodelle for best results
- Unsweetened natural cocoa powder, 2 tablespoons (10g) — adds a deeper chocolate note
- Baking soda, 1 teaspoon
- Salt, ½ teaspoon
- Granulated sugar, 1 cup (200g)
- Vegetable oil, ½ cup (120ml) — keeps the cupcakes incredibly moist
- Large eggs, 2, at room temperature
- Buttermilk, 1 cup (240ml), at room temperature — the acidity is crucial for tenderness and activating the baking soda
- White vinegar, 1 teaspoon — helps deepen the color even more
- Vanilla extract, 1 teaspoon
- Black gel food coloring, 1 to 2 teaspoons (optional, but recommended for an intense black) — I use the AmeriColor Super Black
For the Spiderweb Icing
- Unsalted butter, 1 cup (226g), softened to room temperature
- Powdered sugar, 3 to 4 cups (360g to 480g), sifted
- Heavy cream, 3 to 4 tablespoons (45ml to 60ml), at room temperature
- Vanilla extract, 1 teaspoon
- Salt, a pinch
- Black gel food coloring, for the web lines
If you do not have buttermilk on hand, you can make a quick substitute by adding 1 tablespoon of lemon juice or white vinegar to a measuring cup and filling it with regular milk to the 1-cup line. Let it sit for 5 minutes before using. It works perfectly in a pinch.
Equipment Needed
You do not need a professional bakery setup for these spooky black velvet Halloween cupcakes, but having the right tools makes the process smoother and more enjoyable.
- Standard 12-cup muffin tin — I prefer a non-stick pan for easy release
- Paper cupcake liners — Halloween-themed ones are fun, but plain white or black also look great
- Mixing bowls — one large bowl for the dry ingredients and one for the wet
- Whisk and rubber spatula
- Electric hand mixer or stand mixer — for the frosting; you can do it by hand, but your arm will thank you for the mixer
- Piping bag or a sturdy zip-top bag — for the spiderweb icing
- Toothpick or a skewer — this is your main tool for creating the web design
- Cooling rack — essential for letting the cupcakes cool completely before frosting
I have made these cupcakes with a cheap muffin tin and a plastic fork for mixing, and they still turned out great. Do not let a lack of fancy equipment stop you. A simple zip-top bag with a tiny corner snipped off works just as well as a piping bag for the web design.
Preparation Method
Follow these steps carefully, and you will have a batch of perfectly spooky cupcakes that taste as good as they look. I have included all the little sensory cues I use to know when each stage is just right.
- Preheat and Prep : Preheat your oven to 350°F (175°C). Line your muffin tin with 12 paper liners. This is a crucial step — do not skip the liners, as the black color can stain a bare pan.
- Mix the Dry Ingredients : In a large mixing bowl, whisk together the all-purpose flour, black cocoa powder, natural cocoa powder, baking soda, and salt. Whisk for about 20 seconds to ensure everything is evenly distributed. The mixture will look like dark, sandy powder with a rich chocolate aroma.
- Combine the Wet Ingredients : In a separate bowl, whisk together the granulated sugar, vegetable oil, and eggs until smooth and slightly thickened, about 1 minute. Add the buttermilk, white vinegar, and vanilla extract, and whisk until fully combined. The mixture will be pale and creamy.
- Add the Food Coloring : If you are using the black gel food coloring, add 1 teaspoon to the wet mixture and stir. The color will look like a dark gray at this point. Do not panic. It will deepen as it bakes. If you want an extremely dark, almost true-black color, add another teaspoon.
- Combine Wet and Dry : Pour the wet ingredients into the bowl with the dry ingredients. Use a rubber spatula to fold them together gently. Mix just until you no longer see streaks of flour. A few small lumps are fine. Overmixing will make the cupcakes tough. The batter will be thin and very dark, almost like a black milkshake.
- Fill the Liners : Divide the batter evenly among the 12 liners, filling each about two-thirds full. I use a ¼-cup scoop for this, and it works perfectly. The batter is thin, so it will level itself out in the oven.
- Bake : Bake for 18 to 20 minutes. The cupcakes are done when a toothpick inserted into the center comes out clean or with just a few moist crumbs. The tops will spring back when lightly pressed. Do not overbake, or they will dry out. The color will also darken significantly during baking.
- Cool Completely : Let the cupcakes cool in the pan for 5 minutes, then transfer them to a wire cooling rack to cool completely. This is non-negotiable. If you frost them while they are still warm, the icing will melt into a sad puddle.
- Make the Frosting : While the cupcakes cool, make the spiderweb icing. In a large bowl, beat the softened butter with an electric mixer on medium speed until smooth and creamy, about 2 minutes. Gradually add the sifted powdered sugar, 1 cup at a time, beating on low speed after each addition. Add the heavy cream, vanilla extract, and a pinch of salt. Increase the speed to medium-high and beat for 3 to 4 minutes until the frosting is light, fluffy, and spreadable. If it is too thick, add another tablespoon of cream. If it is too thin, add a little more powdered sugar.
- Frost the Cupcakes : Spread a generous amount of white frosting onto each cooled cupcake. You can use a knife for a rustic look or a piping bag for a smoother, more professional finish. I like to create a slightly domed top using a large round piping tip. This gives you a good surface for the web design.
- Create the Spiderweb : This is the fun part. Place about 2 tablespoons of the remaining white frosting into a small bowl and stir in a few drops of black gel food coloring until it is a deep, dark black. Transfer the black frosting to a small piping bag or a zip-top bag with a tiny corner snipped off. Starting from the center of each cupcake, pipe a small black dot. Then, pipe 3 to 4 concentric circles around the dot, like a target. Finally, use a toothpick or a skewer to drag lines from the center dot outward through the circles. Wipe the toothpick clean after each drag. This creates the classic spiderweb pattern. It is incredibly satisfying to watch.
Cooking Tips & Techniques
I have made every possible mistake with these spooky black velvet Halloween cupcakes so you do not have to. Here are the most important lessons I have learned.
Do not skip the black cocoa powder. I tried a batch using only regular cocoa powder and a ton of black food coloring. The result was a cupcake that tasted fine but had a slightly greenish tint and a chemical aftertaste. Black cocoa powder gives you that deep, natural color and a flavor that reminds everyone of Oreo cookies. It is worth the extra effort to find it.
Room temperature ingredients matter. Cold buttermilk and cold eggs will not emulsify properly with the oil and sugar. Your batter might look curdled or separated. Take the eggs and buttermilk out of the fridge about 30 minutes before you start baking. If you forget, you can place the eggs in a bowl of warm water for 5 minutes and microwave the buttermilk for 15 seconds on low power.
Vinegar is your friend. The white vinegar might seem like an odd addition, but it reacts with the baking soda to create extra lift and helps set the black color. Do not skip it. I once forgot to add it, and the cupcakes came out a lighter, muddier gray.
Practice the web on a plate first. If you are nervous about the spiderweb design, pipe a small test web onto a plate or a piece of wax paper. Once you get the hang of the toothpick drag, it becomes second nature. The motion is simple: pipe your dot and circles, then drag from the center outward. Clean the toothpick, and repeat.
Let the cupcakes cool completely. I cannot stress this enough. I have ruined a beautiful batch of frosting by rushing this step. The warm cupcakes will melt the butter in the frosting, turning it into a greasy, runny mess. Patience is the secret ingredient here.
Variations & Adaptations
One of the best things about this recipe is how adaptable it is. I have tried several variations over the years, and they all turned out fantastic.
Gluten-Free Version : Substitute the all-purpose flour with a high-quality 1:1 gluten-free baking flour blend that contains xanthan gum. I have used Bob’s Red Mill 1:1 Baking Flour with great success. The texture will be slightly more delicate, so handle the batter gently.
Dairy-Free Version : Use a dairy-free buttermilk substitute by mixing 1 cup of unsweetened almond milk or oat milk with 1 tablespoon of lemon juice. For the frosting, use a high-quality vegan butter stick, like the one from Miyoko’s Creamery, and use a dairy-free heavy cream alternative. The flavor will be slightly different, but the texture remains excellent.
Spiderweb Color Swap : Instead of a black web on white frosting, try using orange gel food coloring for a more playful, less spooky look. You can also do a white web on black frosting by coloring the entire batch of frosting black and using a small amount of white frosting for the web. Both options are stunning.
Add a Surprise Filling : After the cupcakes have cooled, use a small apple corer or a knife to cut a small cone out of the center of each cupcake. Fill the hole with a spoonful of raspberry jam, chocolate ganache, or even a dollop of Nutella. Replace the top of the cone and frost as usual. The hidden filling is a delightful surprise for anyone taking a bite.
Spice It Up : Add ½ teaspoon of cinnamon and a pinch of cayenne pepper to the dry ingredients for a subtle, warm heat that pairs beautifully with the chocolate. It is a grown-up twist that works well for an adult Halloween party.
Serving & Storage Suggestions
These spooky black velvet Halloween cupcakes are best served at room temperature. The frosting will be perfectly creamy, and the cake will be tender and moist. If you have made them ahead of time, take them out of the refrigerator about 30 minutes before serving to let them come to room temperature.
For presentation, arrange them on a black or dark purple cake stand. You can add some plastic spiders, edible glitter, or even a few candy eyeballs on top of the spiderweb for extra creepiness. They make a fantastic centerpiece for a Halloween dessert table alongside a batch of cozy brown butter snickerdoodle crinkle cookies for a balanced spread of spooky and classic treats.
Storage : Store any leftover cupcakes in an airtight container at room temperature for up to 2 days. If your kitchen is warm, store them in the refrigerator for up to 5 days. The cold will firm up the frosting, which is actually helpful for keeping the spiderweb design intact.
Freezing : You can freeze the unfrosted cupcakes for up to 3 months. Wrap each one tightly in plastic wrap, then place them in a freezer-safe bag. When you are ready to serve, thaw them at room temperature, then make the frosting and decorate. The spiderweb design is best done fresh. I have also frozen the frosted cupcakes in a single layer in a freezer-safe container. They thaw well, but the frosting might lose a bit of its fluffy texture.
Nutritional Information & Benefits
Let’s be honest: these are a treat, not a health food. But knowing what is in them helps you enjoy them without guilt. The following values are estimates for one cupcake with frosting.
| Nutrient | Amount Per Serving |
|---|---|
| Calories | 385 |
| Total Fat | 20g |
| Saturated Fat | 10g |
| Cholesterol | 55mg |
| Sodium | 220mg |
| Total Carbohydrates | 50g |
| Dietary Fiber | 2g |
| Sugars | 38g |
| Protein | 4g |
Black cocoa powder is rich in antioxidants, thanks to its high concentration of cocoa flavanols. Buttermilk provides calcium and probiotics, which are good for gut health. Of course, the sugar and butter are there for indulgence, and that is perfectly fine for a special occasion. If you are looking for a healthier option for a different occasion, you might enjoy these wholesome gluten-free zucchini bread for a more nutrient-dense treat.
Conclusion
These spooky black velvet Halloween cupcakes with spiderweb icing are the perfect blend of show-stopping looks and genuinely delicious flavor. They have converted even the biggest skeptics in my life, and I am confident they will do the same for you. The process is straightforward, the ingredients are simple, and the result is something you will be proud to bring to any Halloween gathering.
I really do love how versatile this recipe is. You can make it as spooky or as playful as you want. Add a plastic spider, use orange webs, or keep it classic with the black-on-white design. The choice is yours. I would love to see how yours turn out. Leave a comment below and let me know if you tried any fun variations. And if you are looking for more easy, impressive desserts, check out this perfect fall pumpkin spice sheet cake for another crowd-pleasing option. Happy baking, and have a wonderfully spooky Halloween!
Frequently Asked Questions
Can I make these cupcakes ahead of time?
Absolutely. You can bake the cupcakes up to 2 days in advance and store them in an airtight container at room temperature. Make the frosting and decorate them on the day you plan to serve them for the best presentation.
Why are my cupcakes not turning black?
This usually happens when the black cocoa powder is not used or when the food coloring is not strong enough. Make sure you are using black cocoa powder, not just regular cocoa. Also, use a gel-based food coloring rather than a liquid one, as gels are much more concentrated and will give you a deeper color.
Can I use a different type of frosting?
Yes. Cream cheese frosting is a classic pairing with black velvet cake. You can also use a simple chocolate buttercream or even a whipped cream frosting for a lighter option. Just keep in mind that the spiderweb design is easiest to achieve with a stiffer buttercream.
How do I prevent the spiderweb from smearing?
Make sure your base frosting has had time to set slightly. You can pop the frosted cupcakes in the refrigerator for 10 to 15 minutes before piping the web. This firms up the buttercream and makes it easier to drag the toothpick through without smearing.
Can I make this recipe into a cake instead of cupcakes?
Yes. Pour the batter into two 8-inch round cake pans that have been greased and lined with parchment paper. Bake at 350°F (175°C) for 25 to 30 minutes, or until a toothpick inserted into the center comes out clean. You will need to double the frosting recipe to have enough for a layered cake. The spiderweb design looks incredible on a full-sized cake as well.
Pin This Recipe!
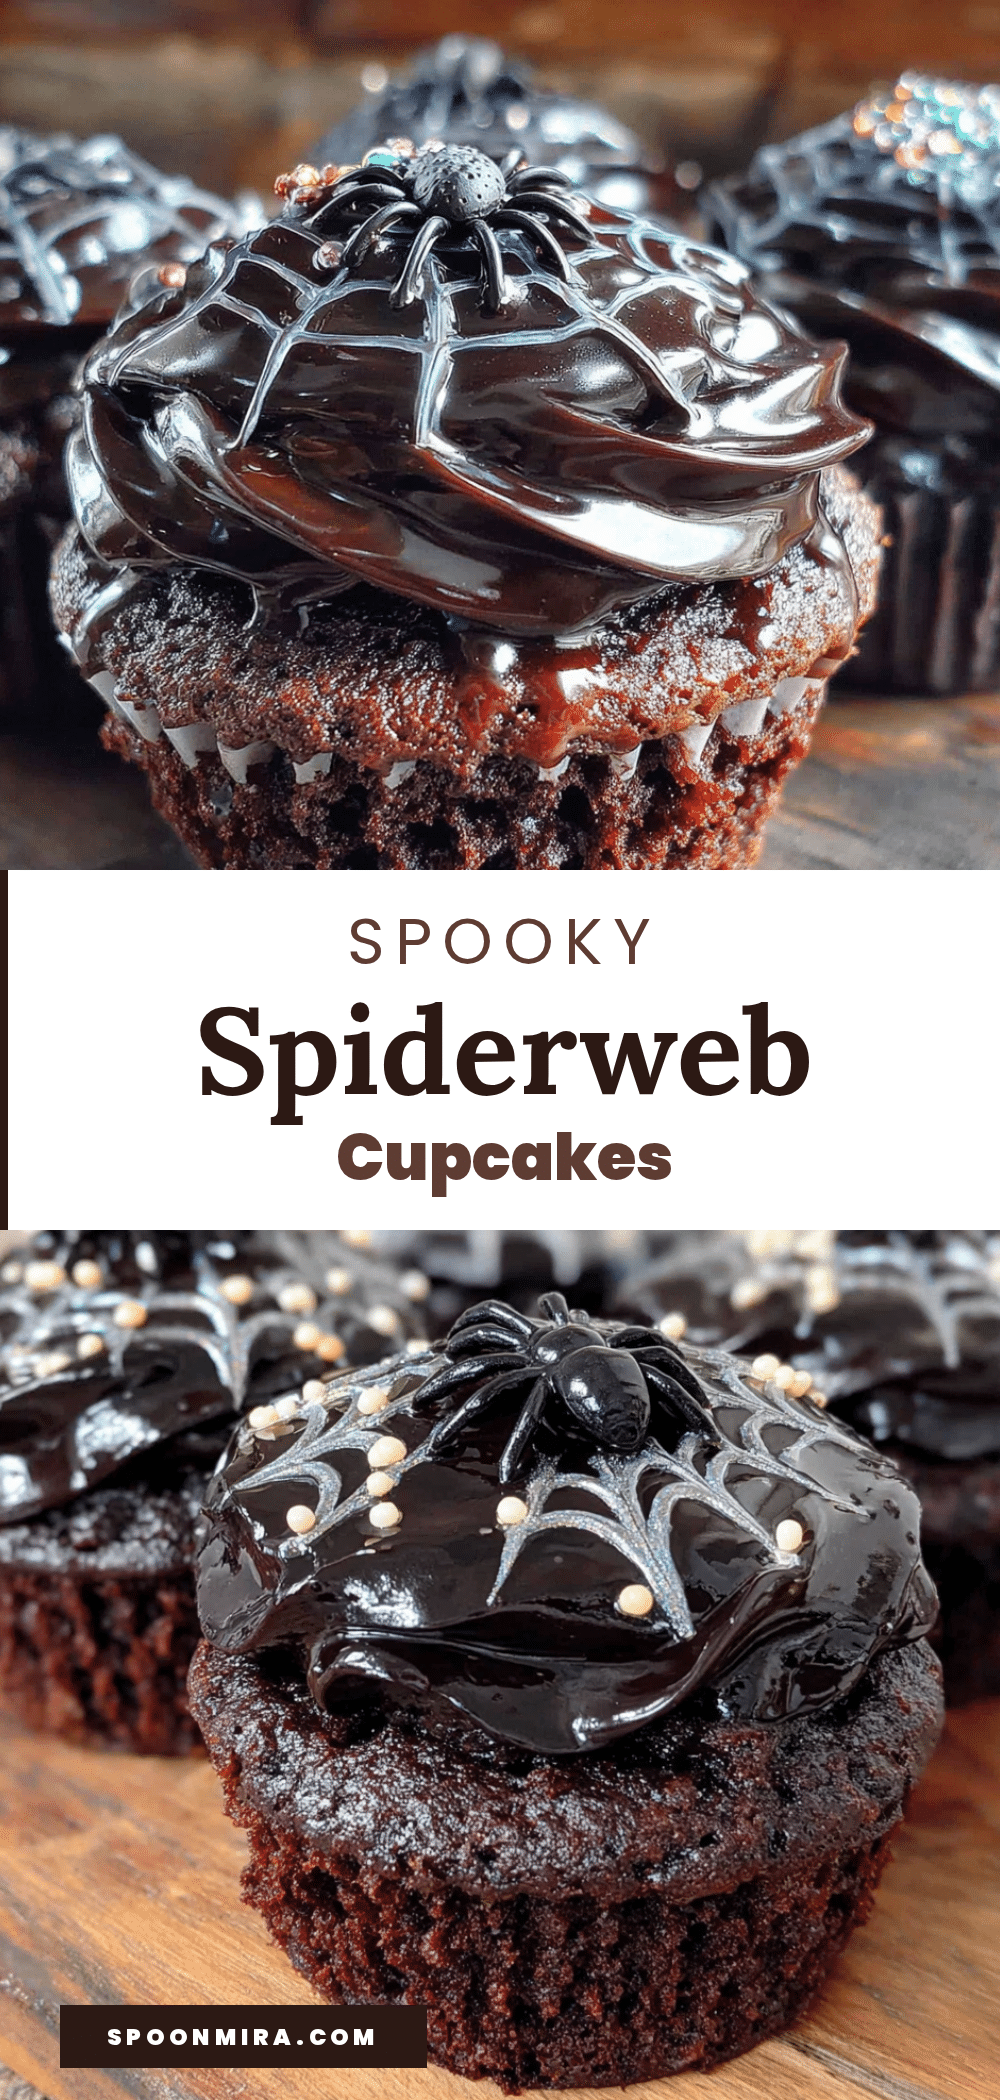
Spooky Black Velvet Halloween Cupcakes: Perfect Spiderweb Icing
These spooky black velvet Halloween cupcakes with spiderweb icing are genuinely moist, perfectly tangy, and just chocolatey enough to satisfy without being heavy. The spiderweb icing is surprisingly simple to pull off, and it looks like something out of a professional bakery window.
- Prep Time: 20 minutes
- Cook Time: 18-20 minutes
- Total Time: 1 hour 10 minutes
- Yield: 12 cupcakes
- Category: Dessert
- Cuisine: American
Ingredients
- All-purpose flour, 1 ½ cups (190g)
- Black cocoa powder, ¼ cup (25g)
- Unsweetened natural cocoa powder, 2 tablespoons (10g)
- Baking soda, 1 teaspoon
- Salt, ½ teaspoon
- Granulated sugar, 1 cup (200g)
- Vegetable oil, ½ cup (120ml)
- Large eggs, 2, at room temperature
- Buttermilk, 1 cup (240ml), at room temperature
- White vinegar, 1 teaspoon
- Vanilla extract, 1 teaspoon
- Black gel food coloring, 1 to 2 teaspoons (optional)
- Unsalted butter, 1 cup (226g), softened to room temperature
- Powdered sugar, 3 to 4 cups (360g to 480g), sifted
- Heavy cream, 3 to 4 tablespoons (45ml to 60ml), at room temperature
- Vanilla extract, 1 teaspoon
- Salt, a pinch
- Black gel food coloring, for the web lines
Instructions
- Preheat your oven to 350°F (175°C). Line your muffin tin with 12 paper liners.
- In a large mixing bowl, whisk together the all-purpose flour, black cocoa powder, natural cocoa powder, baking soda, and salt for about 20 seconds.
- In a separate bowl, whisk together the granulated sugar, vegetable oil, and eggs until smooth and slightly thickened, about 1 minute. Add the buttermilk, white vinegar, and vanilla extract, and whisk until fully combined.
- If using black gel food coloring, add 1 teaspoon to the wet mixture and stir. Add another teaspoon for a darker color.
- Pour the wet ingredients into the bowl with the dry ingredients. Use a rubber spatula to fold them together gently until no streaks of flour remain. A few small lumps are fine.
- Divide the batter evenly among the 12 liners, filling each about two-thirds full.
- Bake for 18 to 20 minutes, until a toothpick inserted into the center comes out clean or with a few moist crumbs. The tops will spring back when lightly pressed.
- Let the cupcakes cool in the pan for 5 minutes, then transfer them to a wire cooling rack to cool completely.
- While the cupcakes cool, make the frosting: In a large bowl, beat the softened butter with an electric mixer on medium speed until smooth and creamy, about 2 minutes. Gradually add the sifted powdered sugar, 1 cup at a time, beating on low speed after each addition. Add the heavy cream, vanilla extract, and a pinch of salt. Increase the speed to medium-high and beat for 3 to 4 minutes until light, fluffy, and spreadable.
- Spread a generous amount of white frosting onto each cooled cupcake.
- Place about 2 tablespoons of the remaining white frosting into a small bowl and stir in a few drops of black gel food coloring until deep black. Transfer the black frosting to a small piping bag or a zip-top bag with a tiny corner snipped off.
- Starting from the center of each cupcake, pipe a small black dot. Then, pipe 3 to 4 concentric circles around the dot. Use a toothpick or skewer to drag lines from the center dot outward through the circles. Wipe the toothpick clean after each drag.
Notes
Do not skip the black cocoa powder; it gives the deep color and Oreo-like flavor. Room temperature ingredients matter for proper emulsification. The white vinegar helps with lift and color. Practice the web on a plate first if nervous. Let cupcakes cool completely before frosting.
Nutrition
- Serving Size: 1 cupcake
- Calories: 385
- Sugar: 38
- Sodium: 220
- Fat: 20
- Saturated Fat: 10
- Carbohydrates: 50
- Fiber: 2
- Protein: 4
Keywords: Halloween cupcakes, black velvet cupcakes, spiderweb icing, black cocoa cupcakes, spooky desserts, Halloween baking


