The woman at the community garden plot next to mine watched me struggle with a pumpkin that was way too big for what I needed. I was standing there, knife in hand, trying to figure out how to cut it without losing a finger. She didn’t say anything at first. Then she reached into her bag and pulled out a little tin foil packet—still warm—and handed it over. “For your tea later,” she said, with this tiny shrug. “And stop fighting that pumpkin. Use the canned stuff. Nobody’s judging.”
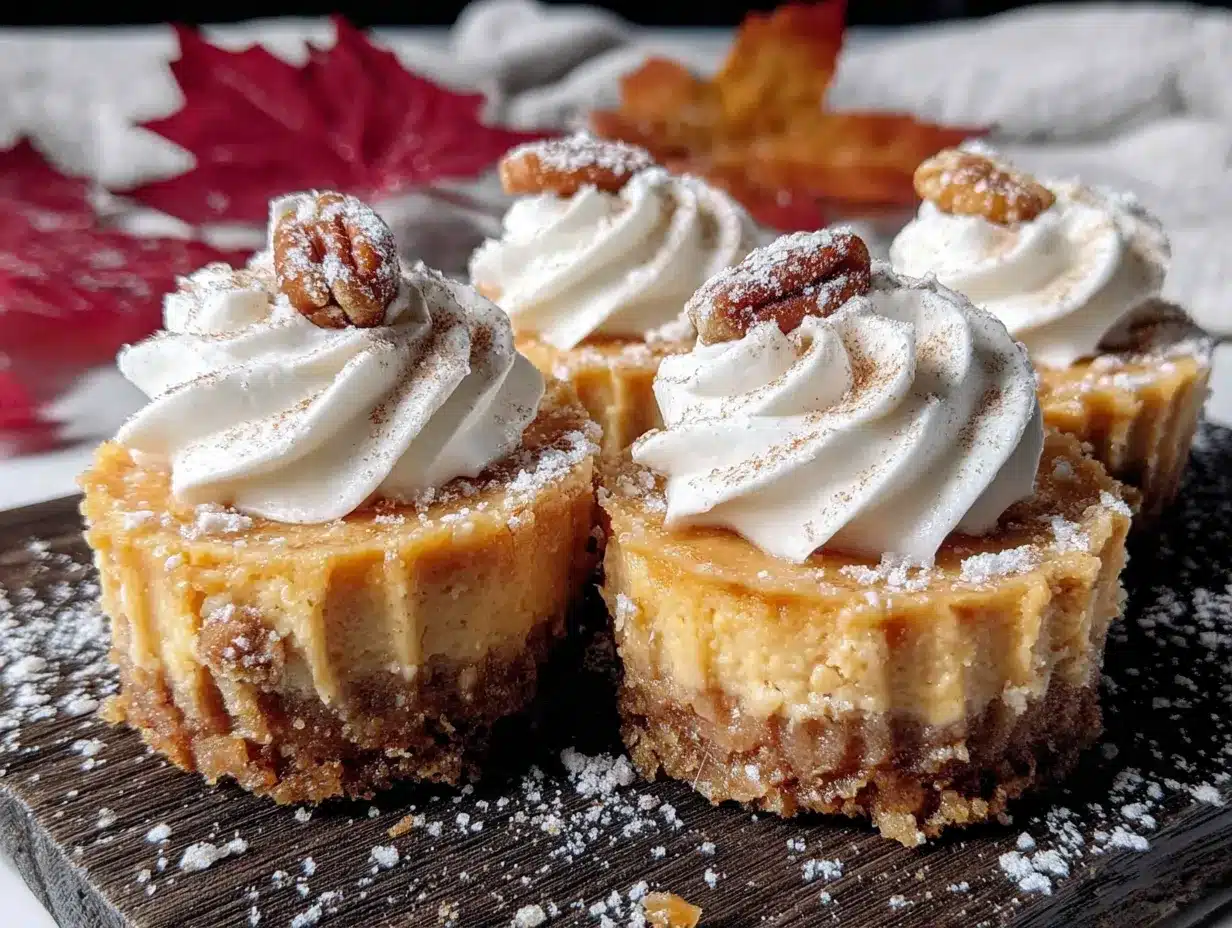
I unwrapped that foil right there, standing in the dirt, and found two perfect little cheesecake bites. They were barely two inches across, with that unmistakable fall color and a crumbly crust that held together just right. I mean, honestly, I almost cried. Not because they were that good—though they were—but because she saw me struggling and her first instinct was to share something she’d made. That’s the thing about good recipes, you know. They show up when you least expect them, wrapped in foil or scribbled on a napkin, carried by someone who just gets it.
I’ve been making my own version of those little bites ever since. They’re the answer to that question we all ask on a Tuesday night in October: what can I make that feels special but doesn’t take three hours? These mini pumpkin cheesecake bites are it. They come together fast, use mostly pantry staples, and somehow manage to taste like you fussed when you absolutely did not. Last week I made a batch while waiting for pasta water to boil. That’s the energy we’re working with here.
Why You’ll Love This Recipe
Let me be real with you for a second. I’ve tested this recipe seven times. Seven. The first batch was too wet. The second needed more spice. The third I forgot the sugar entirely—don’t ask. But by batch four, something clicked. These little cheesecake bites are the kind of dessert that makes you close your eyes after the first bite. And the best part? They’re actually easy.
- Quick & Easy: From start to finish, you’re looking at about 30 minutes of active time. The oven does the rest. Perfect for those nights when you want dessert but don’t want to commit to a whole production.
- Simple Ingredients: No weird specialty items. Cream cheese, canned pumpkin, graham crackers, sugar, eggs, and spices. That’s basically it. You probably have most of this right now.
- Perfect for Weeknights: These aren’t just for Thanksgiving. They’re for a random Wednesday when you need a little something. They’re for the night after a long day when you deserve a treat that doesn’t require a trip to the store.
- Crowd-Pleaser: I brought these to a potluck last month and three people asked for the recipe before I even sat down. Kids love them. Adults love them. Even my dad—who “doesn’t do dessert”—ate four.
- Unbelievably Delicious: The texture is what gets me. That creamy, almost mousse-like filling against the buttery graham cracker crust. It’s comfort food in two bites.
What makes this version different from all the other pumpkin cheesecake recipes out there? It’s the ratio. I spent way too long figuring out the perfect balance of pumpkin to cream cheese so the filling stays dense but light, rich but not heavy. Plus, I add a tiny pinch of black pepper to the spice mix. Sounds weird, I know. But it brings out the warmth of the cinnamon and ginger in a way that makes people go “what’s in this?”
What Ingredients You Will Need
This recipe uses simple, honest ingredients to create something that feels way more complicated than it is. Most of these are pantry staples, especially if you keep basic baking supplies around. Here’s what you’ll need and why each one matters.
For the Crust
- 1 ½ cups graham cracker crumbs (about 12 full sheets, crushed fine—I use a zip-top bag and a rolling pin, but a food processor works too)
- ¼ cup granulated sugar (just enough to sweeten the crust without making it candy-like)
- 6 tablespoons unsalted butter, melted (salted butter works too—just skip the pinch of salt below)
- Pinch of salt (balances the sweetness and keeps the crust from tasting flat)
For the Filling
- 16 ounces cream cheese, softened to room temperature (full-fat is best here—low-fat makes the filling less creamy and can cause cracking)
- ¾ cup granulated sugar (I’ve tried reducing this to ½ cup and it works, but the texture is slightly less silky)
- 2 large eggs, room temperature (cold eggs will seize the cream cheese mixture—trust me on this one)
- 1 cup canned pumpkin puree (not pumpkin pie filling—make sure you grab the 100% pure pumpkin, not the pre-sweetened stuff)
- 1 teaspoon vanilla extract (pure vanilla if you have it, imitation works fine, don’t stress)
- 1 teaspoon ground cinnamon (I prefer Saigon cinnamon for its stronger, sweeter flavor)
- ½ teaspoon ground ginger (adds that warm, slightly spicy note)
- ¼ teaspoon ground nutmeg (freshly grated if you’re fancy, pre-ground is totally fine)
- ¼ teaspoon ground cloves (goes a long way—don’t overdo it)
- Tiny pinch of black pepper (trust me—it doesn’t taste spicy, it just makes the other spices brighter)
Optional Topping
- Whipped cream (homemade or store-bought, no judgment here)
- Caramel sauce (for drizzling)
- Extra cinnamon for dusting
A quick note on the cream cheese: I really recommend Philadelphia or another full-fat block cream cheese. The tub-style spreadable kind has too much water and air whipped in, which can make your filling runny. Let it sit on the counter for about an hour before you start. If you forget—and I forget all the time—you can microwave it in 10-second bursts until it’s soft but not hot.
Equipment Needed
You don’t need a lot of fancy gear for these mini pumpkin cheesecake bites. Here’s what actually matters.
- Mini muffin tin (the 24-cup size works perfectly—if you only have a 12-cup, just bake in batches)
- Mini muffin liners (paper or foil—I prefer foil liners because they peel off easier, but paper works too)
- Large mixing bowl (for the filling)
- Medium mixing bowl (for the crust)
- Electric hand mixer or stand mixer (you can do this by hand with a whisk and some elbow grease, but a mixer makes it silky smooth)
- Measuring cups and spoons (the usual suspects)
- Zip-top bag or food processor (for crushing graham crackers)
- Rolling pin (if using the bag method)
- Spatula (for scraping down the bowl—don’t skip this step)
- Small cookie scoop or tablespoon (for portioning the filling evenly)
If you don’t have a mini muffin tin, you can use a regular muffin tin with liners. Just increase the baking time to about 18-20 minutes and check for doneness. I’ve also made these in silicone mini muffin molds and they work great—no liners needed, just a light spray of cooking oil.
Preparation Method
Alright, let’s make these little guys. The whole process takes about 30 minutes of active work, plus chilling time. Here’s how it goes.
- Preheat your oven to 325°F (165°C). Line your mini muffin tin with paper or foil liners. This makes 24 mini cheesecake bites, so if you only have one 24-cup tin, you’re golden. If you have two 12-cup tins, even better—you can bake them all at once.
- Make the crust. In a medium bowl, combine 1 ½ cups graham cracker crumbs, ¼ cup sugar, and a pinch of salt. Pour in 6 tablespoons of melted butter and stir with a fork until every crumb is moistened. It should look like wet sand and clump together when you squeeze it.
- Press the crust into the liners. Drop about 1 tablespoon of the crust mixture into each liner. Use the bottom of a small glass or a shot glass to press it down firmly. You want it compact so it holds together after baking. Don’t skip the pressing step—loose crust falls apart when you try to eat it.
- Bake the crusts for 5 minutes. This pre-baking step keeps the crust from getting soggy once you add the filling. Pull them out and let them cool while you make the filling. Leave the oven on.
- Beat the cream cheese. In a large bowl, beat 16 ounces of softened cream cheese with ¾ cup sugar until smooth and creamy. Scrape down the sides and bottom of the bowl with a spatula—cream cheese likes to hide there. Beat for about 2 minutes on medium speed.
- Add the eggs one at a time. Crack one egg into the cream cheese mixture and beat on low until just combined. Add the second egg and do the same. Overbeating at this stage adds too much air, which can cause cracks. You want it mixed, not fluffy.
- Add the pumpkin and flavorings. Add 1 cup pumpkin puree, 1 teaspoon vanilla, 1 teaspoon cinnamon, ½ teaspoon ginger, ¼ teaspoon nutmeg, ¼ teaspoon cloves, and that tiny pinch of black pepper. Mix on low until everything is combined and the color is uniform. Scrape the bowl again.
- Fill the liners. Use a small cookie scoop or a tablespoon to divide the filling evenly among the 24 cups. Fill each one almost to the top—the cheesecake will rise slightly and then settle as it cools. Don’t worry about being perfect; these are rustic little bites.
- Bake for 12-14 minutes. The edges should look set and slightly puffed, but the centers should still jiggle a tiny bit when you gently shake the pan. That jiggle is what gives you that creamy texture. Overbaking makes them dry and crumbly.
- Cool completely at room temperature. Let the pan sit on a wire rack for about 30 minutes. The cheesecakes will sink slightly in the center as they cool—this is normal and gives you a little well for whipped cream later.
- Chill for at least 2 hours. This is the hard part, I know. But the flavor and texture develop as they chill. Cover the pan with plastic wrap and refrigerate for at least 2 hours, or overnight. They actually taste better the next day.
One thing I learned the hard way: don’t try to remove the liners until the cheesecakes are fully chilled. Warm cheesecake is fragile and will stick to the paper. Cold cheesecake releases cleanly. Patience, my friend.
Cooking Tips & Techniques
I’ve messed up this recipe enough times to know exactly what can go wrong. Let me save you the trouble.
Room temperature ingredients matter. I know, I know—every recipe says this. But with cheesecake, it’s not optional. Cold cream cheese creates lumps that no amount of beating will fix. Cold eggs seize the mixture and make it grainy. Set everything out an hour before you start. If you forgot, submerge the cream cheese (still wrapped) in warm water for 10 minutes, and put the eggs in a bowl of warm water for 5 minutes.
Don’t overmix the filling. Once you add the eggs, mix on low speed and stop as soon as everything comes together. Overmixing incorporates too much air, which expands during baking and then collapses, leaving you with cracked cheesecake bites. They’ll still taste fine, but they won’t look as pretty.
The jiggle test is your friend. When you shake the pan gently, the centers should wobble like Jell-O, not slosh like soup. If they’re completely firm in the oven, they’re already overbaked. Pull them out when they’re still a little soft in the middle—they’ll continue cooking from residual heat.
Water bath? Nope. For mini cheesecake bites, a water bath is unnecessary. The small size means they bake quickly and evenly without the extra humidity. Just bake them directly on the oven rack. One less thing to worry about.
Let them cool gradually. After baking, turn off the oven and crack the door open for 5 minutes before taking the pan out. This gradual temperature change prevents sudden cracking. Then let them cool on the counter before refrigerating.
Make-ahead magic. These freeze beautifully. Once they’re fully chilled and set, pop them out of the liners and arrange them in a single layer in a freezer-safe container. They’ll keep for up to 3 months. Thaw in the refrigerator overnight, then add toppings just before serving.
Variations & Adaptations
One of the best things about this recipe is how easy it is to tweak. Here are some ways I’ve played with it.
Gluten-Free Version: Swap the graham cracker crumbs for gluten-free vanilla wafer crumbs or crushed gluten-free shortbread cookies. I’ve used both and honestly, the shortbread version might be even better. The texture is a little more delicate, so press the crust firmly.
Dairy-Free Adaptation: Use dairy-free cream cheese (I like Kite Hill or Violife) and a plant-based butter substitute. The texture will be slightly softer, so freeze the bites for 30 minutes before removing the liners. They taste great but handle more delicately.
Lower Sugar Option: Reduce the sugar in the filling to ½ cup and use a sugar substitute like monk fruit sweetener in the crust. The texture is slightly less creamy, but the pumpkin flavor shines through more. I’ve done this for a friend with diabetes and she said they were the best she’d had in years.
Chocolate Pumpkin Cheesecake Bites: Add 2 tablespoons of cocoa powder to the crust mixture and drizzle melted dark chocolate over the finished bites. The chocolate and pumpkin combo is surprisingly good—like a healthier version of a chocolate bar.
Maple Pecan Twist: Substitute ¼ cup of the sugar with maple syrup (reduce the pumpkin puree by 2 tablespoons to compensate for the extra liquid) and top each bite with a toasted pecan half before baking. The maple flavor pairs beautifully with the spices.
Spice Level Adjustment: If you like things spicy, add ¼ teaspoon of cayenne pepper to the filling. It sounds wild, but the heat cuts through the richness and makes the pumpkin flavor pop. Start with less—you can always add more next time.
My personal favorite variation? The chai-spiced version. I swap the cinnamon, ginger, nutmeg, and cloves for 2 teaspoons of chai spice blend and add ¼ cup of strongly brewed chai tea (cooled) in place of ¼ cup of the pumpkin puree. It’s like fall in a bite.
Serving & Storage Suggestions
These mini pumpkin cheesecake bites are incredibly versatile when it comes to serving. Here’s how I handle them.
Serving temperature: I prefer them cold, straight from the fridge. The texture is firmer and the flavors are more pronounced. But they’re also excellent at room temperature if you let them sit out for 15-20 minutes—the filling softens and becomes almost mousse-like.
Presentation ideas: Arrange them on a platter with a dollop of whipped cream on each one. Dust with cinnamon or nutmeg for a pretty finish. If you’re feeling fancy, drizzle caramel sauce over the top and add a tiny pinch of flaky sea salt. For a holiday spread, place them on a cake stand surrounded by fresh cranberries and rosemary sprigs.
What to serve with them: A cup of hot apple cider or spiced chai latte is perfect alongside these bites. For a dessert board, pair them with fresh apple slices, candied pecans, and dark chocolate squares. They also work great as part of a brunch spread—set them out next to mini quiches and fruit salad.
Storage instructions: Keep them in an airtight container in the refrigerator for up to 5 days. Place a paper towel on the bottom of the container to absorb any excess moisture, and another on top to prevent condensation from dripping onto the cheesecakes. Change the paper towels every other day if you’re keeping them longer.
Freezing instructions: Freeze them in a single layer on a baking sheet until solid (about 2 hours), then transfer to a freezer-safe bag or container. They’ll keep for up to 3 months. To thaw, move them to the refrigerator overnight. Don’t thaw at room temperature—they’ll get too soft and the texture will suffer.
Reheating note: These are meant to be served cold, so reheating isn’t really a thing. But if you want a warm dessert, pop one in the microwave for 10 seconds. The crust stays firm and the filling gets warm and gooey. It’s a different experience, but a good one.
One more thing: the flavors actually get better after 24 hours in the fridge. The spices meld together and the pumpkin flavor deepens. So if you can make them a day ahead, do it. Your future self will thank you.
Nutritional Information & Benefits
I’m not a nutritionist, but I’ve run these numbers through my tracking app and here’s what I’ve got for one mini cheesecake bite (without toppings).
- Calories: 145
- Fat: 9g
- Carbohydrates: 14g
- Protein: 3g
- Sugar: 10g
- Fiber: 1g
- Sodium: 115mg
These numbers will vary depending on your specific ingredients and portion sizes. If you use low-fat cream cheese, you’ll save about 30 calories and 4g of fat per bite. But honestly? I’d rather have the real thing and eat one less bite.
Health benefits worth noting: Pumpkin is packed with vitamin A (great for eye health and immune function) and fiber. The spices—cinnamon, ginger, nutmeg, cloves—all have anti-inflammatory properties. Even that weird pinch of black pepper helps your body absorb nutrients more effectively. So while these are definitely a treat, they’re not empty calories.
Dietary considerations: This recipe contains dairy, eggs, and gluten (from the graham crackers). For a gluten-free version, use the cookie substitution I mentioned above. For dairy-free, use plant-based alternatives. The eggs are harder to replace—I’ve tried flax eggs and the texture was off—so I’d recommend looking for a dedicated vegan pumpkin cheesecake recipe if you need egg-free.
My personal take? These are a dessert, not a health food. But compared to a full slice of traditional cheesecake, you’re getting a fraction of the calories and sugar. Two bites feel like enough. Three feel indulgent. And that’s a good place to be.
Conclusion
These mini pumpkin cheesecake bites have become my go-to fall dessert for a reason. They’re quick enough for a Tuesday night, special enough for Thanksgiving, and forgiving enough for a beginner baker. The first time I made them, I forgot the sugar and they were still decent. That’s how foolproof this recipe is.
What I love most about them is how they make people feel. There’s something about a tiny, perfect dessert that feels like a gift. When you hand someone a plate with a few of these on it, they smile. Every time. And in a world where we’re all busy and tired and stressed, that’s worth something.
I hope you make these your own. Add more spice if that’s your thing. Top them with whatever you have in the fridge. Forget an ingredient and see what happens—it might be your new favorite version. That’s how the best recipes are born, anyway. From someone sharing what they had, and someone else making it their own.
If you give these a try, I’d love to hear how they turn out. Drop a comment below or tag me in your photos. Happy baking, friend. You’ve got this.
Frequently Asked Questions
Can I use fresh pumpkin instead of canned?
You can, but you’ll need to roast and puree it first, then drain off any excess liquid. Canned pumpkin is more consistent in moisture content, which is why I recommend it. If you use fresh, reduce the pumpkin puree to ¾ cup and see how the batter looks—it should be thick, not runny.
Why did my cheesecake bites crack?
Cracking usually happens from overbaking or overmixing. Pull them out when the centers still jiggle slightly. Also make sure your cream cheese and eggs are at room temperature—cold ingredients create lumps that cause uneven baking and cracking.
Can I make these without a mixer?
Absolutely. Use a whisk and some muscle. Make sure the cream cheese is very soft first—leave it out for an extra 30 minutes. Beat it with a wooden spoon or whisk until smooth before adding the other ingredients. It takes a few extra minutes, but it works.
How do I get the liners off without tearing the cheesecake?
Chill them completely first—at least 2 hours, preferably overnight. Then gently peel the liner away from the cheesecake, not the other way around. If they’re still sticking, pop them in the freezer for 15 minutes. Foil liners are easier to remove than paper ones.
Can I double this recipe?
Yes, and I do it all the time. Double everything and bake in batches if you don’t have enough mini muffin tins. The batter keeps fine in the fridge for a few hours while you bake in rounds. Just let the batter come back to room temperature before filling the next batch of liners.
Pin This Recipe!
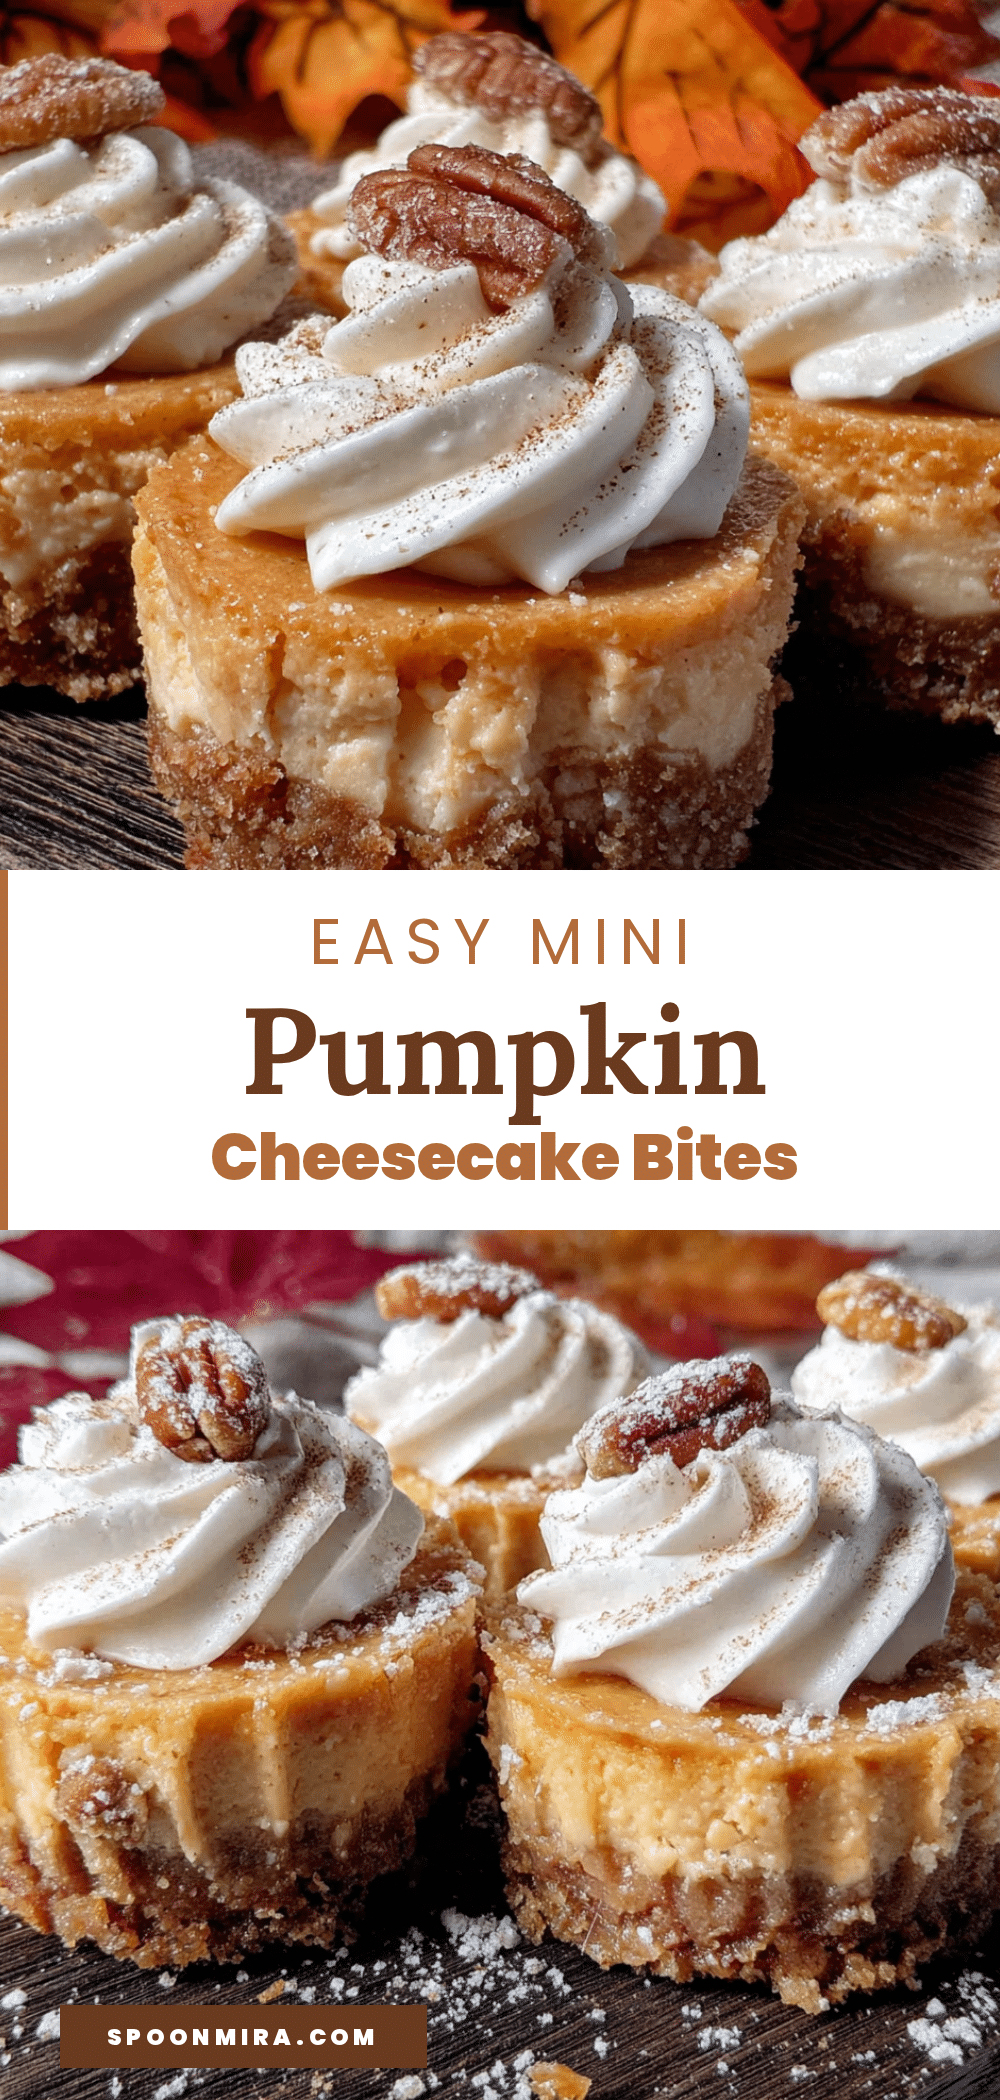
Easy Mini Pumpkin Cheesecake Bites: Best 2-Bite Fall Dessert
These mini pumpkin cheesecake bites are quick, easy, and perfect for fall. With a creamy pumpkin filling and buttery graham cracker crust, they’re a crowd-pleasing dessert that comes together in about 30 minutes of active time.
- Prep Time: 30 minutes
- Cook Time: 12-14 minutes
- Total Time: 2 hours 45 minutes (includes chilling)
- Yield: 24 mini cheesecake bites 1x
- Category: Dessert
- Cuisine: American
Ingredients
- 1 ½ cups graham cracker crumbs (about 12 full sheets)
- ¼ cup granulated sugar
- 6 tablespoons unsalted butter, melted
- Pinch of salt
- 16 ounces cream cheese, softened to room temperature
- ¾ cup granulated sugar
- 2 large eggs, room temperature
- 1 cup canned pumpkin puree (not pumpkin pie filling)
- 1 teaspoon vanilla extract
- 1 teaspoon ground cinnamon
- ½ teaspoon ground ginger
- ¼ teaspoon ground nutmeg
- ¼ teaspoon ground cloves
- Tiny pinch of black pepper
- Whipped cream (optional, for topping)
- Caramel sauce (optional, for drizzling)
- Extra cinnamon for dusting (optional)
Instructions
- Preheat your oven to 325°F (165°C). Line a mini muffin tin with paper or foil liners.
- In a medium bowl, combine graham cracker crumbs, ¼ cup sugar, and a pinch of salt. Pour in melted butter and stir with a fork until every crumb is moistened and the mixture clumps together.
- Drop about 1 tablespoon of the crust mixture into each liner. Use the bottom of a small glass or shot glass to press it down firmly.
- Bake the crusts for 5 minutes. Remove and let cool while you make the filling. Leave the oven on.
- In a large bowl, beat the softened cream cheese with ¾ cup sugar until smooth and creamy, about 2 minutes on medium speed. Scrape down the sides and bottom of the bowl.
- Add the eggs one at a time, beating on low until just combined after each addition. Do not overmix.
- Add pumpkin puree, vanilla, cinnamon, ginger, nutmeg, cloves, and black pepper. Mix on low until combined and uniform in color. Scrape the bowl again.
- Use a small cookie scoop or tablespoon to divide the filling evenly among the 24 cups, filling each almost to the top.
- Bake for 12-14 minutes, until the edges are set and slightly puffed but the centers still jiggle slightly when shaken.
- Cool completely in the pan on a wire rack for about 30 minutes. The cheesecakes will sink slightly in the center.
- Cover the pan with plastic wrap and refrigerate for at least 2 hours, or overnight, before serving.
Notes
For best results, use full-fat block cream cheese and let all ingredients come to room temperature. Do not overmix the filling to avoid cracks. The jiggle test is key: centers should wobble slightly when done. These freeze well for up to 3 months. Flavors deepen after 24 hours in the fridge.
Nutrition
- Serving Size: 1 mini cheesecake bi
- Calories: 145
- Sugar: 10
- Sodium: 115
- Fat: 9
- Saturated Fat: 5
- Carbohydrates: 14
- Fiber: 1
- Protein: 3
Keywords: mini pumpkin cheesecake bites, pumpkin cheesecake, fall dessert, easy cheesecake, two-bite dessert, pumpkin dessert, mini cheesecake


