I roasted butternut squash for ten years before I realized I’d been doing it all wrong. Not wrong enough to ruin dinner, but wrong enough that I was missing out on something genuinely better. See, I used to just toss cubed squash with oil, salt, and pepper, spread it on a sheet pan, and hope for the best. It was fine. Edible. Sometimes even good. But it never had that deep, sticky, almost-candy-like coating that makes you pick at the pan long after everyone’s left the table.
The turning point came during a particularly cold November evening. I had a half-used butternut squash sitting on the counter, a bag of Brussels sprouts that were starting to look sad, and a bottle of maple syrup that was almost empty. I figured, why not? I drizzled the syrup over everything, added a splash of something acidic (apple cider vinegar, it turns out, is the secret), and threw it in a hot oven. What came out was nothing short of a revelation. The edges were caramelized and crisp, the centers were tender, and the whole thing had this sweet-savory thing going on that made me wonder why I hadn’t tried this sooner.
That night, I ate half the pan standing at the counter. No shame. That’s when I knew this recipe was different. It’s not just a side dish—it’s the kind of thing that makes you look forward to vegetables. Honestly, if you’re someone who thinks roasted vegetables are boring, this is the recipe that will change your mind. I promise.
Why You’ll Love This Recipe
This isn’t just another roasted vegetable recipe. After testing this dish for family dinners, holiday gatherings, and even a few meal prep Sundays, I can confidently say it checks every box you’d want.
- Quick & Easy: From start to finish, this comes together in about 45 minutes. Most of that is hands-off oven time, so you can focus on the rest of your meal.
- Simple Ingredients: You probably already have everything in your pantry right now. No trips to specialty stores or hunting down obscure spices.
- Perfect for Fall & Winter: This is the ultimate seasonal side dish. It shows up at Thanksgiving, cozy Sunday dinners, and even weeknight meals when you need something comforting.
- Crowd-Pleaser: I’ve served this to picky eaters, vegetable skeptics, and hardcore foodies. Everyone goes back for seconds. It’s that good.
- Unbelievably Delicious: The caramelized maple coating creates a texture that’s simultaneously crispy and tender. The flavor is sweet, savory, and just a little tangy from the vinegar.
What makes this recipe different from the dozens of other roasted vegetable recipes out there? It’s the technique. Most recipes tell you to just toss everything together and roast. But I’ve learned that the order of operations matters. A little patience with the preheating, the right rack position in the oven, and a specific method for coating the vegetables make all the difference. Plus, that splash of apple cider vinegar? It cuts through the sweetness of the maple syrup and keeps the dish from being cloying. It’s a small detail, but it’s the kind of thing that turns a good recipe into a great one.
This recipe isn’t just good—it’s the kind that makes you close your eyes after the first bite. It’s comfort food reimagined: healthier, faster, but with the same soul-soothing satisfaction. Perfect for impressing guests without stress, or turning a simple meal into something memorable.
What Ingredients You Will Need
This recipe uses simple, wholesome ingredients that come together to create something truly special. Most of these are pantry staples, especially if you cook during the fall and winter months. Here’s what you’ll need and why each one matters.
- Butternut squash (1 medium, about 2-3 pounds): Look for one that feels heavy for its size with firm, unblemished skin. You’ll peel it, remove the seeds, and cut it into 1-inch cubes. I prefer using a whole squash rather than pre-cut cubes because they’re usually fresher and more evenly sized. (Pro tip: if you struggle with peeling butternut squash, microwave it for 2-3 minutes first to soften the skin slightly.)
- Brussels sprouts (1 pound): Choose sprouts that are bright green, firm, and tightly closed. Trim the tough ends and cut them in half lengthwise. If they’re particularly large, quarter them so they cook at the same rate as the squash.
- Maple syrup (3 tablespoons): Use real maple syrup, not pancake syrup. The flavor is deeper and less cloying. Grade A dark amber works beautifully here. (I like the brand from my local farmers’ market, but any pure maple syrup will do.)
- Olive oil (3 tablespoons): A good quality extra virgin olive oil adds richness and helps with caramelization. You can substitute avocado oil if you prefer a more neutral flavor.
- Apple cider vinegar (1 tablespoon): This is the secret ingredient. It balances the sweetness of the maple syrup and adds a subtle tang that keeps the dish from being one-dimensional.
- Garlic (3 cloves, minced): Fresh garlic is non-negotiable here. It adds a savory depth that complements the sweetness of the maple and the earthiness of the vegetables.
- Dried thyme (1 teaspoon): Thyme and winter vegetables are a classic pairing. You can substitute fresh thyme (use 1 tablespoon) or dried rosemary if that’s what you have.
- Salt (1 teaspoon, plus more to taste): I use kosher salt for even seasoning. Flaky sea salt at the end adds a nice finishing touch.
- Black pepper (½ teaspoon, freshly ground): Freshly ground pepper makes a noticeable difference in flavor.
- Optional: Red pepper flakes (¼ teaspoon): If you like a little heat, this adds a subtle warmth that plays nicely with the sweet maple.
Equipment Needed
You don’t need a fancy kitchen to make this recipe work. Here’s what I use and what you can substitute if needed.
- Large baking sheet (half-sheet pan, 18×13 inches): This is essential for giving the vegetables enough space to caramelize rather than steam. If your pan is too small, use two pans or cook in batches. I’ve ruined many batches by overcrowding the pan—don’t make my mistake!
- Sharp chef’s knife (8-inch): A good knife makes cutting butternut squash much safer and easier. A dull knife is more dangerous than a sharp one.
- Vegetable peeler: A Y-shaped peeler works best for butternut squash. It’s faster and gives you more control than a straight peeler.
- Cutting board: Use a sturdy board that won’t slip. I prefer wood, but plastic works fine.
- Mixing bowl (large): For tossing the vegetables with the maple mixture. A glass or stainless steel bowl works well.
- Measuring spoons: For accuracy with the maple syrup, vinegar, and spices.
- Parchment paper (optional but recommended): This makes cleanup a breeze and helps prevent sticking. If you don’t have parchment, you can grease the pan lightly with oil.
- Spatula or tongs: For flipping the vegetables halfway through roasting.
If you don’t have a large baking sheet, you can use a 9×13-inch baking dish, but the vegetables won’t caramelize as well because they’ll be closer together. For the best results, invest in a half-sheet pan. They’re inexpensive and endlessly useful. I got mine for under $15, and it’s one of the most-used items in my kitchen.
Preparation Method
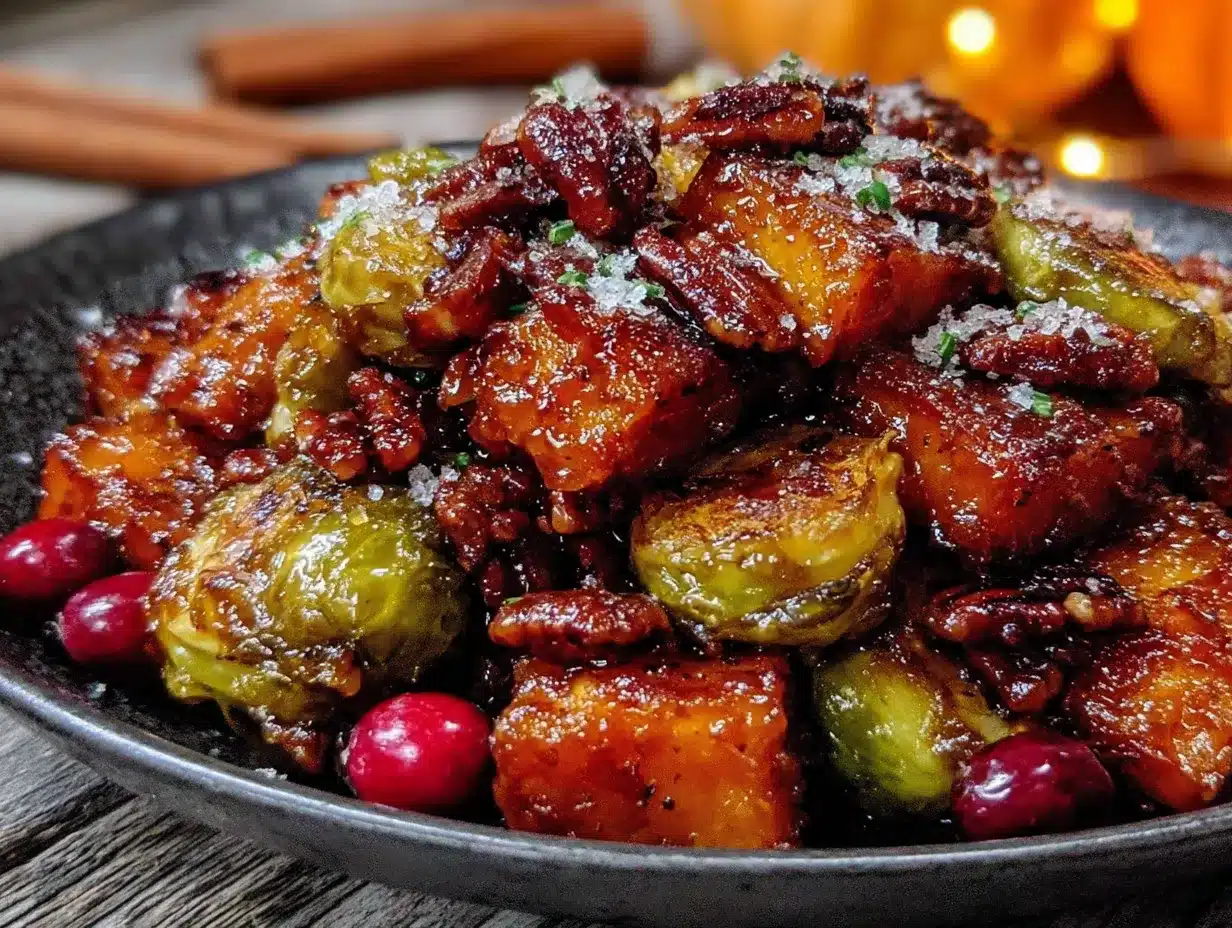
Let’s get cooking. Follow these steps carefully, and you’ll have the best caramelized maple roasted butternut squash and Brussels sprouts of your life.
- Preheat your oven to 425°F (220°C). This high temperature is crucial for caramelization. Place the oven rack in the middle position. While the oven heats, prepare your vegetables.
- Prepare the butternut squash. Using a sharp chef’s knife, cut off both ends of the squash. Stand it upright on the cutting board and carefully slice off the skin from top to bottom, following the curve of the squash. Cut the squash in half lengthwise and scoop out the seeds and stringy bits with a spoon. Cut the flesh into 1-inch cubes. Aim for uniform size so they cook evenly. (This takes about 5-7 minutes once you get the hang of it.)
- Prepare the Brussels sprouts. Rinse them under cold water and pat dry. Trim off the tough stem ends and remove any yellow or damaged outer leaves. Cut each sprout in half lengthwise. If any are particularly large (over 1 inch in diameter), quarter them.
- Make the maple mixture. In a small bowl, whisk together the maple syrup, olive oil, apple cider vinegar, minced garlic, dried thyme, salt, black pepper, and red pepper flakes (if using). Taste it—it should be sweet, tangy, and savory all at once.
- Toss the vegetables. Place the cubed butternut squash and halved Brussels sprouts in a large mixing bowl. Pour the maple mixture over them and toss well with your hands or a spatula until every piece is evenly coated. Make sure to get the mixture into the crevices of the Brussels sprouts.
- Arrange on the baking sheet. Line your large baking sheet with parchment paper (optional but recommended). Spread the vegetables in a single, even layer. Do not overcrowd—if they’re too close together, they’ll steam instead of caramelize. If necessary, use two baking sheets or cook in batches.
- Roast for 20 minutes. Place the baking sheet in the preheated oven. Set a timer. After 20 minutes, remove the pan from the oven and use a spatula or tongs to flip the vegetables. This ensures even browning.
- Roast for another 15-20 minutes. Return the pan to the oven and continue roasting until the vegetables are tender and deeply caramelized. The butternut squash should be easily pierced with a fork, and the Brussels sprouts should be crispy on the outside with tender centers. The edges should be dark brown and sticky-looking.
- Check for doneness. The total roasting time is typically 35-40 minutes, but ovens vary. If you like extra crispy edges, leave them in for another 5 minutes. Just watch closely so they don’t burn.
- Finish and serve. Remove from the oven and let rest for 2-3 minutes on the pan. Transfer to a serving dish. Taste and adjust seasoning with a pinch of flaky sea salt or a drizzle of extra maple syrup if desired. Serve warm.
Sensory cues to watch for: At the 20-minute mark, the vegetables should be starting to brown on the edges. When you flip them, you’ll see the caramelization beginning on the bottom. By the final 5-10 minutes, the kitchen will smell incredible—sweet, savory, and a little nutty. The Brussels sprouts should be dark brown on the cut sides, and the squash should have sticky, golden-brown edges.
Personal tip: Don’t skip the flipping step. I know it’s tempting to just let them roast undisturbed, but flipping ensures that both sides get that beautiful caramelization. Plus, it gives you a chance to check on their progress.
Cooking Tips & Techniques
Over the years, I’ve made every mistake you can imagine with roasted vegetables. Here’s what I’ve learned so you don’t have to repeat my failures.
Don’t overcrowd the pan. This is the number one mistake. If the vegetables are too close together, they release steam and never get that deep caramelization. Give them room to breathe. If they’re touching but not overlapping, you’re in good shape. If they’re piled up, spread them across two pans.
Cut uniform pieces. I once rushed through cutting the butternut squash and ended up with some pieces that were tiny and others that were huge. The small ones burned, and the large ones were undercooked. Take the extra minute to cut everything into similar-sized cubes. It makes a world of difference.
Use the right oil. Olive oil works beautifully here, but don’t use extra virgin olive oil for roasting at high heat—it has a lower smoke point and can turn bitter. Regular olive oil or avocado oil are better choices. I’ve also tried this with coconut oil, and while it works, the flavor is more pronounced and doesn’t complement the maple as well.
Preheat the pan. For extra crispy results, place the empty baking sheet in the oven while it preheats. When you add the vegetables, they’ll sizzle immediately. Just be careful when adding them—the pan is hot! I learned this trick from a chef friend, and it’s a game-changer for getting those crispy edges.
Watch the maple syrup. Maple syrup burns faster than you might expect. If you notice the vegetables browning too quickly, reduce the oven temperature to 400°F (200°C) for the last 10 minutes. You can also tent the pan loosely with foil if the tops are getting too dark before the centers are tender.
Timing and multitasking. While the vegetables roast, you can prepare the rest of your meal. This pairs beautifully with roasted chicken, pork chops, or even a simple grain bowl. I often make this alongside a creamy one-pan garlic parmesan chicken for a complete, satisfying dinner that comes together in under an hour.
Variations & Adaptations
This recipe is wonderfully adaptable. Here are some variations I’ve tried and loved.
Add protein. Toss in some cooked chickpeas or cubed tofu during the last 15 minutes of roasting for a vegetarian main dish. The chickpeas get crispy and caramelized, and they soak up the maple flavor beautifully.
Swap the vegetables. Not a fan of Brussels sprouts? Replace them with cauliflower florets, cubed sweet potatoes, or even halved baby carrots. Each vegetable brings its own texture and flavor. Sweet potatoes pair especially well with the maple syrup—just adjust the cooking time as needed since they may cook faster or slower.
Make it spicy. Increase the red pepper flakes to ½ teaspoon, or add a pinch of cayenne pepper for more heat. I’ve also tried this with a drizzle of sriracha mixed into the maple syrup, and it was surprisingly good.
Add nuts or seeds. Sprinkle toasted pecans, walnuts, or pepitas over the vegetables during the last 5 minutes of roasting. They add a lovely crunch and nutty flavor that complements the sweetness. I love using candied pecans for extra indulgence.
Try different herbs. Rosemary, sage, or even a pinch of smoked paprika work beautifully here. In the summer, I’ve used fresh basil chiffonade as a garnish—it’s unexpected but delicious.
Make it a complete meal. Serve the roasted vegetables over cooked quinoa or farro, topped with crumbled feta or goat cheese and a drizzle of balsamic glaze. It’s hearty enough for lunch or a light dinner.
Dietary adaptations: This recipe is naturally vegan, gluten-free, and dairy-free. For a lower-sugar option, reduce the maple syrup to 2 tablespoons and add an extra splash of apple cider vinegar to balance the flavor.
One variation I keep coming back to: I once added diced apples (Honeycrisp, specifically) to the pan during the last 15 minutes of roasting. The apples softened slightly and absorbed the maple mixture, creating these little pockets of sweet-tart goodness. It was an accident that turned into a happy discovery. Now I make it that way every time apples are in season.
Serving & Storage Suggestions
This dish is incredibly versatile when it comes to serving. Here’s how to make the most of it.
Serving temperature: Serve warm, straight from the oven. The contrast between the crispy edges and tender centers is at its peak when fresh. That said, it’s also delicious at room temperature—perfect for potlucks or holiday buffets.
Presentation: Transfer to a wide, shallow serving bowl or platter. Garnish with a sprinkle of flaky sea salt, fresh thyme leaves, or a drizzle of balsamic glaze for a beautiful finish. If you’re serving it for a holiday meal, arrange the vegetables in a single layer on a large platter so everyone can see the caramelization.
Complementary dishes: This pairs beautifully with roasted chicken, pork tenderloin, or grilled steak. For a vegetarian meal, serve alongside a hearty grain like farro or quinoa, or with a creamy cold sesame noodles with shredded chicken for a warm-cold contrast. It also works wonderfully as part of a Thanksgiving spread alongside turkey, stuffing, and cranberry sauce.
Storage: Store leftovers in an airtight container in the refrigerator for up to 4 days. The vegetables will soften over time, but the flavor will still be excellent.
Reheating: For best results, reheat in a 400°F (200°C) oven for 5-7 minutes. This helps restore some of the crispiness. You can also reheat in an air fryer at 350°F (175°C) for 3-4 minutes. Avoid microwaving if possible—it makes the vegetables soggy.
Freezing: While I don’t typically recommend freezing roasted vegetables (they become mushy upon thawing), you can freeze them if needed. Spread them on a baking sheet, freeze until solid, then transfer to a freezer bag. Reheat directly from frozen in a hot oven. They won’t be as crispy, but they’ll still taste great in soups or grain bowls.
How flavors develop: Interestingly, the flavors deepen and meld together overnight. The maple becomes more pronounced, and the garlic mellows out. I actually love eating these cold straight from the fridge the next day—they make a fantastic addition to salads or grain bowls.
Nutritional Information & Benefits
This dish is as nutritious as it is delicious. Here’s what you’re getting with each serving.
| Nutrient | Amount Per Serving (approx. 1 cup) |
|---|---|
| Calories | 180-200 |
| Total Fat | 8-10g |
| Saturated Fat | 1g |
| Carbohydrates | 28-32g |
| Fiber | 6-8g |
| Sugar | 12-15g (natural from maple and vegetables) |
| Protein | 4-5g |
| Vitamin A | 200% DV |
| Vitamin C | 120% DV |
| Potassium | 15% DV |
Health benefits: Butternut squash is packed with vitamin A (beta-carotene), which supports eye health and immune function. Brussels sprouts are a cruciferous vegetable rich in vitamin C, vitamin K, and fiber. Together, they provide a powerful antioxidant boost. The olive oil adds healthy monounsaturated fats, and the maple syrup provides a natural source of sweetness with a lower glycemic impact than refined sugar.
Dietary considerations: This recipe is naturally vegan, gluten-free, dairy-free, and nut-free. It’s also relatively low in calories for the volume of food you get. The fiber content makes it filling and satisfying. If you’re watching your sugar intake, you can reduce the maple syrup to 2 tablespoons without sacrificing too much flavor.
Potential allergens: None of the common allergens are present in this recipe. However, if you add nuts or seeds as a variation, be sure to note that for anyone with allergies.
Personally, I love that this dish lets me enjoy a generous serving of vegetables without feeling like I’m eating a “health food.” It’s nourishing and indulgent at the same time—the best kind of cooking, if you ask me.
Conclusion
This caramelized maple roasted butternut squash and Brussels sprouts recipe is more than just a side dish. It’s the kind of recipe that makes you actually look forward to eating your vegetables. It’s simple enough for a busy weeknight, yet impressive enough for a holiday table. The combination of sweet maple syrup, tangy apple cider vinegar, and savory garlic creates a flavor profile that’s both familiar and surprising.
I encourage you to make this recipe your own. Play with the variations, adjust the spices to your liking, and don’t be afraid to experiment. Maybe you’ll discover your own happy accident, like I did with the apples. That’s the beauty of cooking—it’s always evolving.
If you try this recipe, I’d love to hear about it. Leave a comment below and let me know how it turned out. Did you add any twists? Serve it with something unexpected? Share your experience—it might inspire someone else in the community. And if you’re looking for more cozy fall recipes, you might also enjoy this creamy hatch green chile corn chowder or this perfect fall pumpkin spice sheet cake for dessert.
Happy cooking, and remember—sometimes the best recipes come from a little bit of curiosity and a half-empty bottle of maple syrup.
Frequently Asked Questions
Can I use frozen butternut squash or Brussels sprouts?
You can, but I don’t recommend it for this recipe. Frozen vegetables release more moisture as they cook, which prevents proper caramelization. If you’re in a pinch, thaw and pat them very dry before roasting, and expect a softer, less crispy result.
How do I prevent the maple syrup from burning?
Keep an eye on the vegetables during the last 10 minutes of roasting. If they’re browning too quickly, reduce the oven temperature to 400°F (200°C) or tent the pan loosely with foil. Also, make sure you’re using a good quality maple syrup—some cheaper syrups have added sugars that burn faster.
Can I make this recipe ahead of time?
Yes! You can prep the vegetables up to 24 hours in advance. Peel and cube the butternut squash, trim and halve the Brussels sprouts, and store them separately in airtight containers in the refrigerator. When you’re ready to cook, just toss with the maple mixture and roast as directed.
What can I substitute for maple syrup?
Honey or agave nectar work well as substitutes, though the flavor will be slightly different. For a sugar-free option, try using a sugar-free maple syrup alternative or a monk fruit sweetener blended with a little water. Just note that the caramelization won’t be as pronounced.
How do I get the Brussels sprouts extra crispy?
Make sure they’re cut side down on the baking sheet, and don’t flip them too early. Let them roast undisturbed for at least 20 minutes before flipping. Also, pat them dry before tossing with the maple mixture—excess moisture is the enemy of crispiness.
Pin This Recipe!
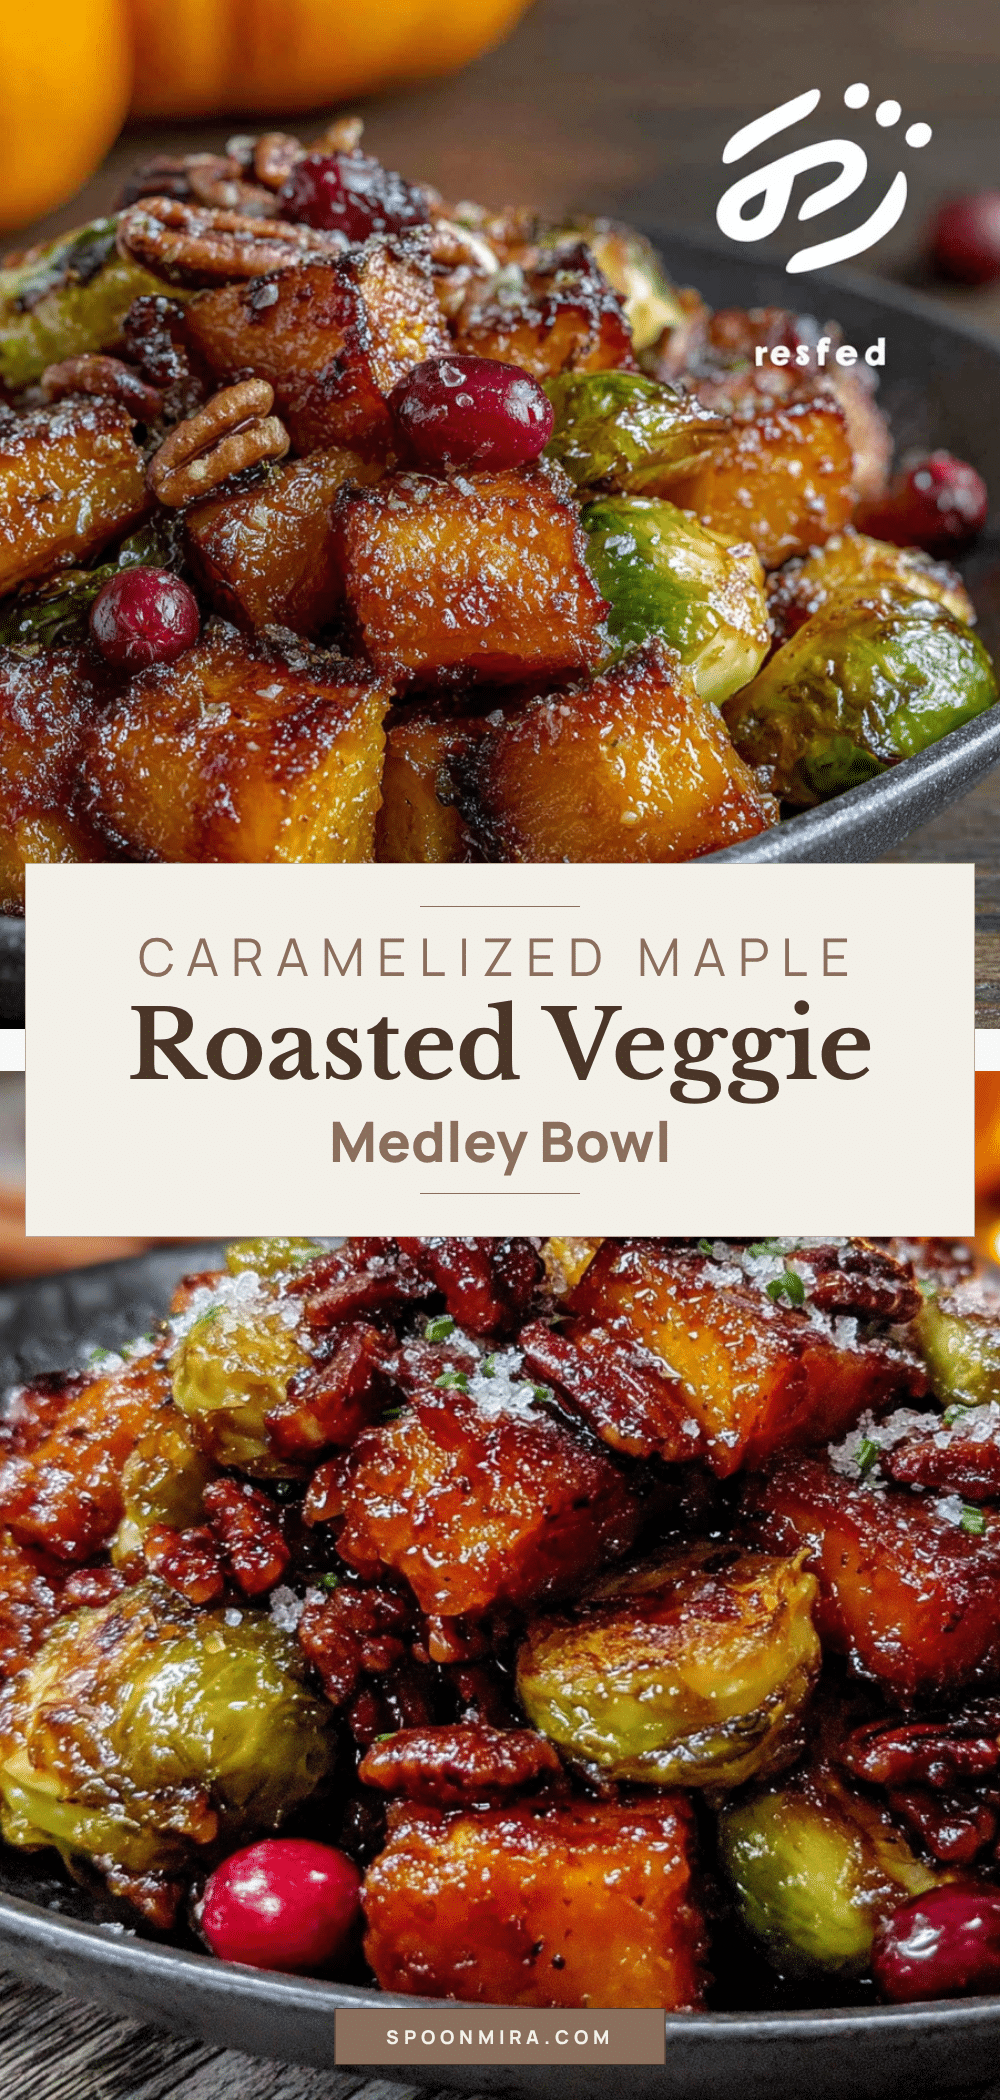
Best Easy Caramelized Maple Roasted Butternut Squash and Brussels Sprouts
This caramelized maple roasted butternut squash and Brussels sprouts recipe is a game-changer. The sweet maple syrup, tangy apple cider vinegar, and savory garlic create a deeply flavorful, crispy-edged side dish that will make you actually look forward to eating your vegetables.
- Prep Time: 15 minutes
- Cook Time: 35-40 minutes
- Total Time: 50-55 minutes
- Yield: 4 servings 1x
- Category: Side Dish
- Cuisine: American
Ingredients
- 1 medium butternut squash (about 2–3 pounds), peeled, seeded, and cut into 1-inch cubes
- 1 pound Brussels sprouts, trimmed and halved (quartered if large)
- 3 tablespoons pure maple syrup
- 3 tablespoons olive oil
- 1 tablespoon apple cider vinegar
- 3 cloves garlic, minced
- 1 teaspoon dried thyme
- 1 teaspoon kosher salt, plus more to taste
- ½ teaspoon freshly ground black pepper
- ¼ teaspoon red pepper flakes (optional)
Instructions
- Preheat your oven to 425°F (220°C). Place the oven rack in the middle position.
- Prepare the butternut squash: Cut off both ends, stand upright, and slice off the skin. Cut in half lengthwise, scoop out seeds, and cut into 1-inch cubes.
- Prepare the Brussels sprouts: Rinse, pat dry, trim tough ends, remove yellow leaves, and cut in half lengthwise. Quarter any large ones.
- Make the maple mixture: In a small bowl, whisk together maple syrup, olive oil, apple cider vinegar, minced garlic, dried thyme, salt, black pepper, and red pepper flakes (if using).
- Place cubed squash and halved Brussels sprouts in a large mixing bowl. Pour the maple mixture over them and toss well until evenly coated.
- Line a large baking sheet with parchment paper (optional). Spread vegetables in a single, even layer. Do not overcrowd; use two sheets if needed.
- Roast for 20 minutes. Remove from oven and flip vegetables with a spatula or tongs.
- Return to oven and roast for another 15-20 minutes, until tender and deeply caramelized. Squash should be easily pierced with a fork, and Brussels sprouts crispy on the outside.
- Total roasting time is typically 35-40 minutes. For extra crispy edges, roast 5 more minutes, watching closely.
- Remove from oven, let rest 2-3 minutes on the pan. Transfer to a serving dish. Adjust seasoning with flaky sea salt or extra maple syrup if desired. Serve warm.
Notes
Don’t overcrowd the pan—this is the number one mistake. Cut uniform pieces for even cooking. For extra crispy results, preheat the baking sheet in the oven. Watch the maple syrup as it can burn; reduce oven to 400°F if browning too quickly. The apple cider vinegar is the secret ingredient that balances the sweetness.
Nutrition
- Serving Size: 1 cup
- Calories: 190
- Sugar: 13
- Sodium: 600
- Fat: 9
- Saturated Fat: 1
- Carbohydrates: 30
- Fiber: 7
- Protein: 4.5
Keywords: roasted butternut squash, roasted Brussels sprouts, maple roasted vegetables, caramelized vegetables, fall side dish, Thanksgiving side dish, easy vegetable recipe, vegan, gluten-free


