That first bite — the kind where you close your eyes without meaning to — still takes me straight to my aunt’s tiny kitchen in Ohio. It was late October, the kind of gray afternoon where the light gets stuck behind clouds, and she pulled a baking dish from the oven that smelled like everything good about fall. Not pie. Not cheesecake. Something in between. Something I’d spend the next ten years trying to recreate in my own kitchen.
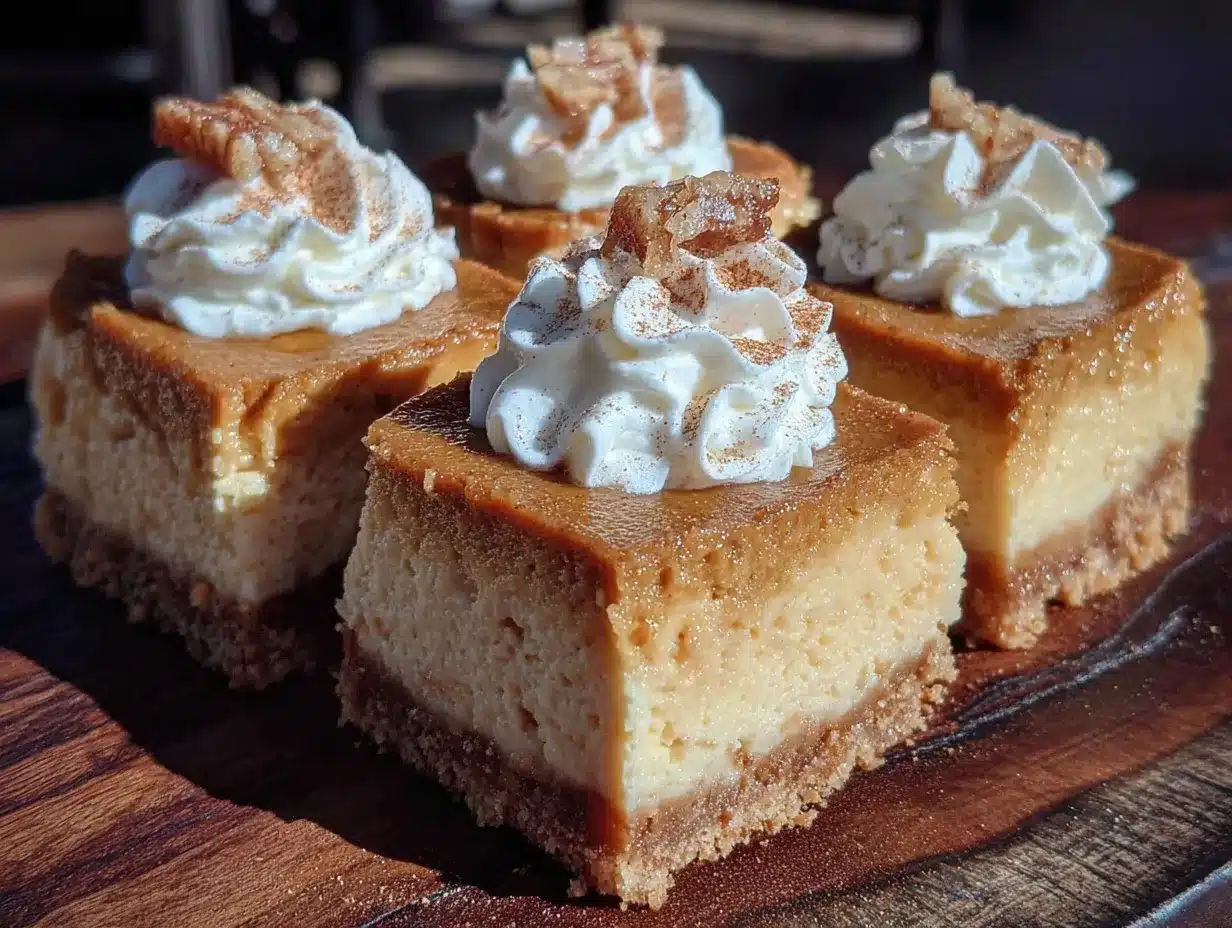
These creamy pumpkin pie cheesecake bars with graham crust are that something. They’ve got the rich, spiced soul of pumpkin pie and the silky, tangy heart of cheesecake, all held together by a buttery graham cracker crust that crumbles just right. No water bath. No fussy crust crimping. Just layers of flavor that somehow feel both decadent and familiar.
I’ve tested this recipe more times than I care to admit — cracked tops, soggy crusts, filling that refused to set. But this version? It works every single time. And honestly? It might just be the best thing you bake this fall.
Why You’ll Love This Recipe
- Two Desserts in One — You get the spiced warmth of pumpkin pie and the creamy richness of cheesecake in every single bite. No need to choose.
- No Water Bath Required — Traditional cheesecake can be fussy. These bars bake up perfectly without any complicated setup. Less stress, same silky texture.
- Make-Ahead Friendly — These bars actually taste better the next day. Bake them a day ahead and let the flavors meld overnight. Your future self will thank you.
- Crowd-Pleasing Appeal — I’ve brought these to Thanksgiving dinners, potlucks, and casual get-togethers. They disappear fast. Even folks who “don’t like pumpkin” have asked for seconds.
- Simple Ingredients — Nothing fancy here. You probably already have most of these in your pantry. No hunting down obscure spices or specialty items.
What makes these bars different from every other pumpkin cheesecake recipe out there? It’s the balance. The pumpkin layer isn’t too heavy, the cheesecake layer isn’t too tangy, and the crust stays crisp without getting soggy. I spent months tweaking the ratios — too much pumpkin and the cheesecake gets dense, too much cream cheese and you lose that pumpkin pie soul. This is the sweet spot.
These are the bars you make when you want to impress without the stress. They look stunning on a dessert table but come together with minimal effort. And that first bite? Pure comfort.
What Ingredients You Will Need
This recipe uses simple, wholesome ingredients that work together to create something truly special. Most are pantry staples, and I’ve included notes on what to look for at the store.
For the Graham Cracker Crust
- Graham cracker crumbs — 2 cups (about 16 full sheets, crushed). I prefer using a food processor for even crumbs, but a zip-top bag and rolling pin work just fine. Look for crumbs that are fine and uniform — large chunks can make the crust crumbly.
- Unsalted butter — ½ cup (1 stick), melted. Using unsalted lets you control the salt level. If you only have salted butter, just skip the added salt in the crust.
- Granulated sugar — ¼ cup. Just enough to give the crust a hint of sweetness without competing with the filling.
- Pinch of salt — ¼ teaspoon. Balances the sweetness and keeps the crust from tasting flat.
For the Cheesecake Layer
- Cream cheese — 16 ounces (two 8-ounce blocks), softened to room temperature. This is non-negotiable. Cold cream cheese creates lumpy filling. Let it sit on the counter for at least an hour. I recommend Philadelphia brand for the smoothest texture.
- Granulated sugar — ½ cup. Just enough sweetness to complement the tangy cream cheese.
- Large eggs — 2, room temperature. Cold eggs can seize up the filling. Pop them in a bowl of warm water for 5 minutes if you’re short on time.
- Vanilla extract — 1 teaspoon. Pure vanilla makes a difference here. Save the imitation stuff for cookies.
- Sour cream — ¼ cup. This is my secret for extra creamy cheesecake. It adds tang and helps prevent cracking. Full-fat works best.
For the Pumpkin Layer
- Pumpkin puree — 1 cup (not pumpkin pie filling). Look for 100% pure pumpkin. Libby’s is my go-to — it’s consistently thick and not watery.
- Granulated sugar — ¼ cup. Adds sweetness without overwhelming the pumpkin flavor.
- Light brown sugar — ¼ cup, packed. Adds molasses notes that deepen the fall flavor. Dark brown sugar works too, but the flavor will be more intense.
- Large egg — 1, room temperature. Helps bind the pumpkin layer.
- Pumpkin pie spice — 1½ teaspoons. You can use store-bought or make your own: ½ teaspoon cinnamon, ¼ teaspoon ginger, ¼ teaspoon nutmeg, ⅛ teaspoon cloves, and a pinch of allspice.
- Cinnamon — ½ teaspoon. Because you can never have too much cinnamon in fall baking.
- Vanilla extract — ½ teaspoon. Rounds out the spices beautifully.
Equipment Needed
You don’t need a professional bakery setup for these bars. Here’s what you’ll actually use:
- 9×9-inch baking pan — Glass or metal works. If using metal, line it well with parchment paper. Glass lets you see the crust color, which is handy.
- Parchment paper — Leave overhang on two sides for easy lifting. Trust me, this makes cutting clean bars so much easier.
- Food processor or zip-top bag — For crushing graham crackers. The food processor gives you the finest, most even crumbs.
- Medium mixing bowls — You’ll need at least two. One for crust, one for each filling layer.
- Electric hand mixer or stand mixer — Cream cheese needs to be whipped until smooth. A hand mixer works great. A whisk and some elbow grease will also do the job.
- Rubber spatula — For scraping every last bit of filling into the pan. Waste not, want not.
- Measuring cups and spoons — Accuracy matters in baking. Use dry measuring cups for dry ingredients and liquid measuring cups for wet.
If you don’t have a 9×9 pan, an 8×8 pan works too — you’ll just have slightly thicker bars and may need to add 5-8 minutes to the bake time. A 9×13 pan will give you thinner bars with a shorter bake time.
Preparation Method
Let’s walk through this step by step. I’ve included visual cues and troubleshooting tips along the way because that’s the kind of help I wish I’d had the first time I made these.
Step 1: Prepare the Crust
Preheat your oven to 325°F (163°C). Line your 9×9-inch pan with parchment paper, leaving about 2 inches of overhang on two opposite sides. This creates handles for lifting the bars out later.
In a medium bowl, combine 2 cups graham cracker crumbs, ¼ cup granulated sugar, and ¼ teaspoon salt. Pour in ½ cup melted butter and stir until every crumb is moistened. The mixture should look like wet sand and hold together when pressed between your fingers.
Press the mixture firmly into the bottom of your prepared pan. Use the bottom of a measuring cup or glass to get it even and compact. A loose crust will fall apart when you cut the bars, so really press it down.
Bake the crust for 10 minutes. It should look set and smell toasty but not browned. Set it aside to cool while you make the fillings. Leave the oven on.
Step 2: Make the Cheesecake Layer
In a large bowl, beat 16 ounces of softened cream cheese with an electric mixer on medium speed until completely smooth — about 2 minutes. Scrape down the sides and bottom of the bowl with a rubber spatula. Lumps here will stay lumpy forever.
Add ½ cup granulated sugar and beat for another minute until light and fluffy. Add 2 room-temperature eggs one at a time, beating on low after each just until combined. Overmixing at this stage adds too much air, which can cause cracks.
Mix in 1 teaspoon vanilla extract and ¼ cup sour cream on low speed until just combined. The batter should be silky and smooth. Set aside about ½ cup of this cheesecake mixture in a small bowl — you’ll use it for the marbled top later.
Step 3: Make the Pumpkin Layer
In a separate medium bowl, whisk together 1 cup pumpkin puree, ¼ cup granulated sugar, and ¼ cup packed light brown sugar until smooth. Add 1 room-temperature egg and whisk until fully incorporated.
Stir in 1½ teaspoons pumpkin pie spice, ½ teaspoon cinnamon, and ½ teaspoon vanilla extract. The mixture should be thick and fragrant — that smell is pure fall happiness.
Step 4: Layer the Fillings
Pour the remaining cheesecake batter (the larger portion) over the cooled crust. Spread it evenly with a spatula. Take your time here — an even layer means even baking.
Carefully spoon the pumpkin mixture over the cheesecake layer. Spread it gently to the edges, being careful not to disturb the cheesecake layer too much. It’s okay if they mix slightly at the edges — that’s part of the charm.
Drop spoonfuls of the reserved cheesecake batter on top of the pumpkin layer. Use a knife or toothpick to swirl them together gently. Don’t over-swirl or you’ll lose the distinct layers. A few figure-eight motions is all you need.
Step 5: Bake to Perfection
Bake at 325°F (163°C) for 40-45 minutes. The edges should look set and slightly puffed, but the center should still jiggle slightly when you gently shake the pan. This jiggle is your friend — it means the center will stay creamy as it cools.
Turn off the oven, crack the door open, and let the bars cool inside for 1 hour. This gradual cooling helps prevent cracking. I know it’s tempting to pull them out right away, but patience pays off here.
Step 6: Chill and Set
Remove the pan from the oven and let it cool completely on a wire rack — about another hour. Then cover with plastic wrap and refrigerate for at least 4 hours, preferably overnight. This is the hardest part, I know. But the bars need this time to set properly. Cutting them too early will give you a mess.
Step 7: Slice and Serve
Once fully chilled, use the parchment paper handles to lift the entire block out of the pan. Place it on a cutting board. Use a sharp chef’s knife to cut clean slices, wiping the blade between cuts. For the prettiest bars, dip your knife in hot water and dry it before each cut.
Cooking Tips & Techniques
I’ve made every mistake in the book with these bars so you don’t have to. Here’s what I’ve learned:
Room temperature ingredients matter. Cold cream cheese creates lumps that no amount of beating will fix. Cold eggs can make your filling seize up. Set everything out on the counter at least an hour before you start. If you forget, place the cream cheese (still wrapped) in a bowl of warm water for 10 minutes, and put the eggs in a separate bowl of warm water for 5 minutes.
Don’t overmix the cheesecake batter. Once you add the eggs, mix on low speed and stop as soon as everything is combined. Overmixing incorporates too much air, which expands during baking and then collapses, causing cracks. A few small streaks are fine — they’ll bake out.
Watch for the jiggle. The center should wobble like Jell-O when you shake the pan. If it’s completely firm, it’s overbaked. If it’s liquidy, it needs more time. That gentle jiggle zone is where creamy texture lives.
Cool slowly. The oven-off-door-open method is my favorite trick. It lets the bars acclimate gradually, which drastically reduces cracking. I’ve forgotten this step before and ended up with a canyon running through my bars. Learn from my mistakes.
Use a hot knife for clean cuts. Run your knife under hot water, dry it off, then slice. Wipe the blade clean between each cut. This gives you those beautiful, bakery-style slices with clean edges.
Variations & Adaptations
One of the best things about this recipe is how flexible it is. Here are some ways to make it your own:
Gluten-Free Version: Swap the graham cracker crumbs for gluten-free graham crackers or use crushed gluten-free shortbread cookies. The rest of the recipe is naturally gluten-free. I’ve tested this with Schär brand graham crackers and the texture was spot-on.
Dairy-Free Adaptation: Use dairy-free cream cheese (I like Kite Hill or Miyoko’s), coconut cream instead of sour cream, and vegan butter for the crust. The texture will be slightly softer, so chill the bars for a full 8 hours before slicing. I’ve made this version for a friend with dairy allergies and it was a hit.
Spice It Up: Add ¼ teaspoon cayenne pepper or chipotle powder to the pumpkin layer for a warm, spicy finish. The heat plays beautifully with the sweet pumpkin and tangy cream cheese. Start with less — you can always add more next time.
Nutty Crust: Replace ½ cup of graham cracker crumbs with finely chopped pecans or walnuts. Toast the nuts first for deeper flavor. This adds a lovely crunch and pairs perfectly with the pumpkin filling.
Chocolate Swirl: Melt ¼ cup semi-sweet chocolate chips and drizzle it over the top before swirling. The chocolate and pumpkin combination is surprisingly good — think pumpkin chocolate chip cookies in bar form.
Mini Version: Press the crust into a lined muffin tin and divide the filling among 12 cups. Bake for 18-20 minutes. These are perfect for parties or portion control. Just line the muffin cups with parchment strips for easy removal.
Serving & Storage Suggestions
These bars are best served chilled, straight from the refrigerator. The cold temperature keeps the layers firm and the texture creamy. Let them sit at room temperature for about 10 minutes before serving if you want a softer, more cheesecake-like texture.
For presentation, I like to dust the tops with a light sprinkle of cinnamon or pumpkin pie spice right before serving. A dollop of whipped cream and a few candied pecans make them feel extra special. In the fall, I sometimes add a drizzle of caramel sauce for that over-the-top effect.
Storage: Keep the bars in an airtight container in the refrigerator for up to 5 days. Place a paper towel in the container to absorb excess moisture, and change it daily. The flavors actually deepen after the first day, so don’t be surprised if they taste even better on day two.
Freezing: These bars freeze beautifully. Wrap individual slices tightly in plastic wrap, then place them in a freezer-safe bag or container. They’ll keep for up to 3 months. To thaw, transfer a slice to the refrigerator overnight. I always keep a few in the freezer for unexpected guests or late-night cravings.
Reheating: These are meant to be served cold, but if you prefer a warm dessert, microwave a single slice for 10-15 seconds. The crust will soften slightly, and the filling will become extra creamy. It’s a completely different experience — and honestly, sometimes that’s exactly what I want.
Flavor note: The pumpkin and spice flavors mellow and meld overnight. If you taste the batter or a freshly baked bar, it will be more intense. After a full day in the fridge, everything settles into a beautiful harmony. So don’t panic if the spices seem strong at first — they’ll calm down.
Nutritional Information & Benefits
Each bar (based on 9 servings) contains approximately:
- Calories: 410
- Fat: 28g
- Carbohydrates: 36g
- Protein: 7g
- Fiber: 2g
- Sugar: 24g
Pumpkin is the real star here nutritionally. It’s packed with vitamin A (over 200% of your daily needs per cup), fiber, and antioxidants like beta-carotene. It’s also low in calories and naturally sweet, which means we can use less sugar than in traditional pumpkin desserts.
The cream cheese adds calcium and protein, while the eggs contribute choline for brain health. This isn’t health food by any stretch, but it’s a dessert that gives you a little something back. I feel better about serving these at holiday gatherings knowing there’s actual vegetable content in there.
Dietary Considerations: This recipe contains dairy, gluten, and eggs. For gluten-free, see the variation above. For dairy-free, use the adaptations mentioned earlier. This recipe is naturally vegetarian and can be made nut-free by using a standard graham cracker crust.
Frequently Asked Questions
Can I use a larger pan for thinner bars?
Yes, a 9×13-inch pan works. The bars will be thinner and will bake faster — check them at 25-30 minutes. The crust will also be thinner, so reduce the crust ingredients by about one-third. You’ll get more bars this way, perfect for a crowd.
Why did my cheesecake layer crack?
Cracks usually happen from overbaking or sudden temperature changes. Make sure you pull the bars when the center still jiggles slightly. The gradual cooling in the oven (door cracked open) also helps prevent cracks. If cracks do appear, don’t worry — a swirl of caramel or a dusting of powdered sugar covers them beautifully.
Can I make these bars ahead of time?
Absolutely. In fact, they’re better made a day ahead. The flavors meld and the texture sets perfectly overnight. Bake them, cool them, and refrigerate for at least 8 hours before serving. They’ll keep in the fridge for up to 5 days, so you can prep them well in advance for gatherings.
Can I use fresh pumpkin instead of canned?
You can, but you’ll need to strain it first. Fresh pumpkin puree has more water than canned, which can make the filling watery. Roast a small sugar pumpkin until tender, puree it, then strain through cheesecloth or a fine-mesh sieve for several hours. You’ll end up with about half the volume you started with. Honestly, for this recipe, canned pumpkin works perfectly and saves time.
How do I get clean, neat slices?
Chill the bars for at least 4 hours (overnight is better). Use a sharp chef’s knife and run it under hot water, drying it between each cut. Wipe the blade clean after every slice. Cut slowly and steadily — rushing leads to ragged edges. For the prettiest presentation, trim the outer edges before cutting into squares.
Conclusion
These creamy pumpkin pie cheesecake bars with graham crust are the kind of recipe that becomes a tradition. They’ve been my go-to for fall gatherings for years now, and every time I pull that pan out of the fridge, I remember that gray October afternoon in Ohio. The one where I learned that the best desserts don’t have to choose between two favorites — they can be both.
I hope you’ll make these bars your own. Maybe you’ll add extra spice, or swap in a different crust, or serve them with a drizzle of caramel. However you make them, I’d love to hear about it. Drop a comment below and tell me how they turned out, or share a photo of your creation. There’s something special about knowing these bars are making someone else’s fall a little sweeter.
Go ahead — preheat that oven. Your new favorite fall dessert is waiting.
Pin This Recipe!
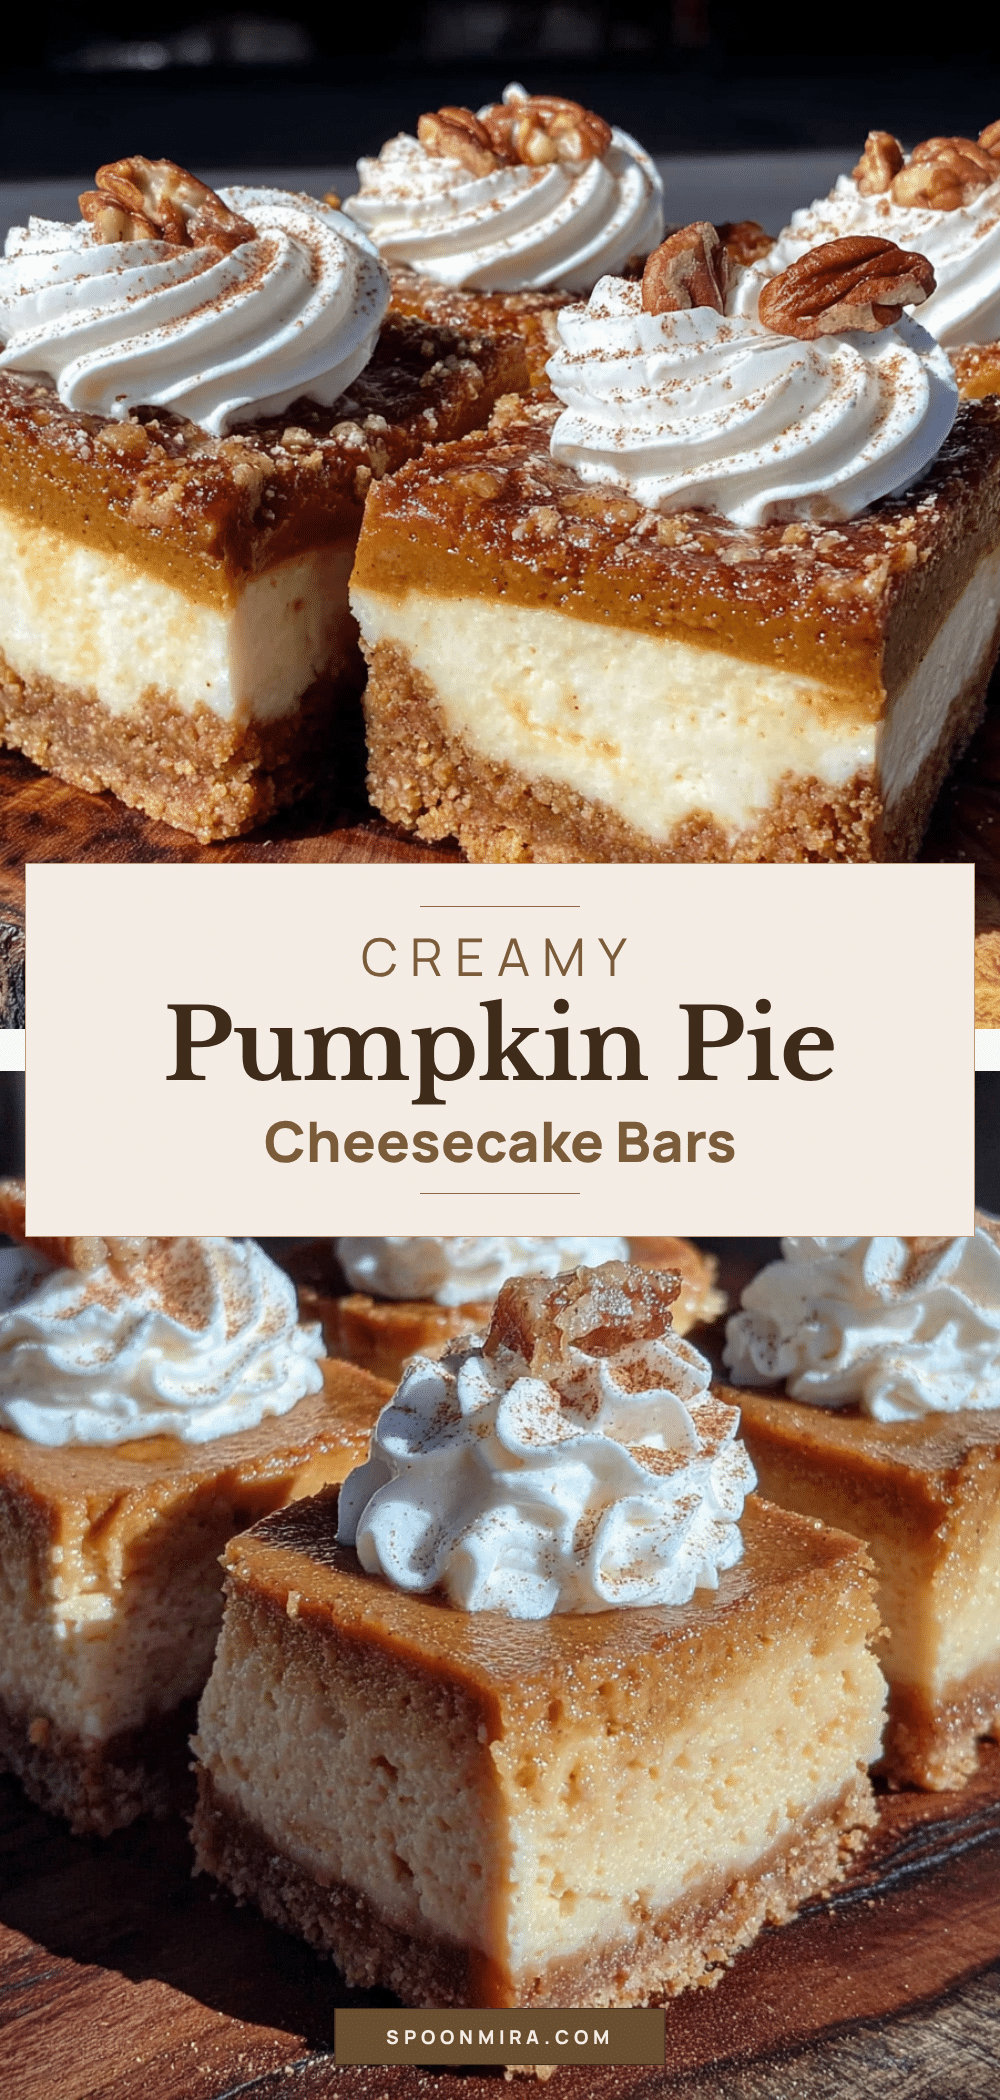
Creamy Pumpkin Pie Cheesecake Bars with Easy Graham Crust
These creamy pumpkin pie cheesecake bars with graham crust have the rich, spiced soul of pumpkin pie and the silky, tangy heart of cheesecake, all held together by a buttery graham cracker crust that crumbles just right. No water bath and no fussy crust crimping needed.
- Prep Time: 20 minutes
- Cook Time: 45 minutes
- Total Time: 5 hours 5 minutes (includes cooling and chilling)
- Yield: 9 servings 1x
- Category: Dessert
- Cuisine: American
Ingredients
- 2 cups graham cracker crumbs (about 16 full sheets, crushed)
- ½ cup unsalted butter, melted
- ¼ cup granulated sugar
- ¼ teaspoon salt
- 16 ounces cream cheese, softened to room temperature
- ½ cup granulated sugar
- 2 large eggs, room temperature
- 1 teaspoon vanilla extract
- ¼ cup sour cream
- 1 cup pumpkin puree (not pumpkin pie filling)
- ¼ cup granulated sugar
- ¼ cup light brown sugar, packed
- 1 large egg, room temperature
- 1½ teaspoons pumpkin pie spice
- ½ teaspoon cinnamon
- ½ teaspoon vanilla extract
Instructions
- Preheat your oven to 325°F (163°C). Line a 9×9-inch pan with parchment paper, leaving about 2 inches of overhang on two opposite sides.
- In a medium bowl, combine 2 cups graham cracker crumbs, ¼ cup granulated sugar, and ¼ teaspoon salt. Pour in ½ cup melted butter and stir until every crumb is moistened. Press the mixture firmly into the bottom of the prepared pan. Bake for 10 minutes. Set aside to cool.
- In a large bowl, beat 16 ounces of softened cream cheese with an electric mixer on medium speed until completely smooth, about 2 minutes. Add ½ cup granulated sugar and beat for another minute until light and fluffy. Add 2 room-temperature eggs one at a time, beating on low after each just until combined. Mix in 1 teaspoon vanilla extract and ¼ cup sour cream on low speed until just combined. Set aside about ½ cup of this cheesecake mixture in a small bowl.
- In a separate medium bowl, whisk together 1 cup pumpkin puree, ¼ cup granulated sugar, and ¼ cup packed light brown sugar until smooth. Add 1 room-temperature egg and whisk until fully incorporated. Stir in 1½ teaspoons pumpkin pie spice, ½ teaspoon cinnamon, and ½ teaspoon vanilla extract.
- Pour the remaining cheesecake batter (the larger portion) over the cooled crust. Spread it evenly. Carefully spoon the pumpkin mixture over the cheesecake layer and spread gently to the edges. Drop spoonfuls of the reserved cheesecake batter on top of the pumpkin layer. Use a knife or toothpick to swirl them together gently.
- Bake at 325°F (163°C) for 40-45 minutes. The edges should look set and slightly puffed, but the center should still jiggle slightly. Turn off the oven, crack the door open, and let the bars cool inside for 1 hour.
- Remove the pan from the oven and let it cool completely on a wire rack, about another hour. Cover with plastic wrap and refrigerate for at least 4 hours, preferably overnight.
- Once fully chilled, use the parchment paper handles to lift the entire block out of the pan. Use a sharp chef’s knife to cut clean slices, wiping the blade between cuts.
Notes
Room temperature ingredients are crucial for a smooth texture. Don’t overmix the cheesecake batter once eggs are added. The center should jiggle slightly when done. Cool slowly in the oven with the door cracked to prevent cracking. For clean slices, use a hot knife and wipe between cuts. Bars taste even better the next day.
Nutrition
- Serving Size: 1 bar
- Calories: 410
- Sugar: 24
- Fat: 28
- Carbohydrates: 36
- Fiber: 2
- Protein: 7
Keywords: pumpkin cheesecake bars, pumpkin pie cheesecake, fall dessert, graham crust, no water bath cheesecake, Thanksgiving dessert


