“You can’t just put figs on a board and call it dinner.” That’s what my sister said when I told her I was making a charcuterie board for our annual fall get-together. I laughed, but honestly, she had a point. I had this vision of something that felt like autumn on a platter—warm colors, sweet and salty bites, that kind of thing. But I needed it to actually feel like a meal, not just a snack you pick at before the real food comes out.
So I started thinking about what makes fall taste like fall. Apples, sure. Nuts, obviously. But the thing that kept coming back to me was figs. Those little jewels that show up for about five minutes at the farmer’s market and then disappear until next year. And honeycomb? That was a non-negotiable. There’s something about biting into a piece of honeycomb, the wax giving way to that rush of golden sweetness, that feels like a secret only fall knows.
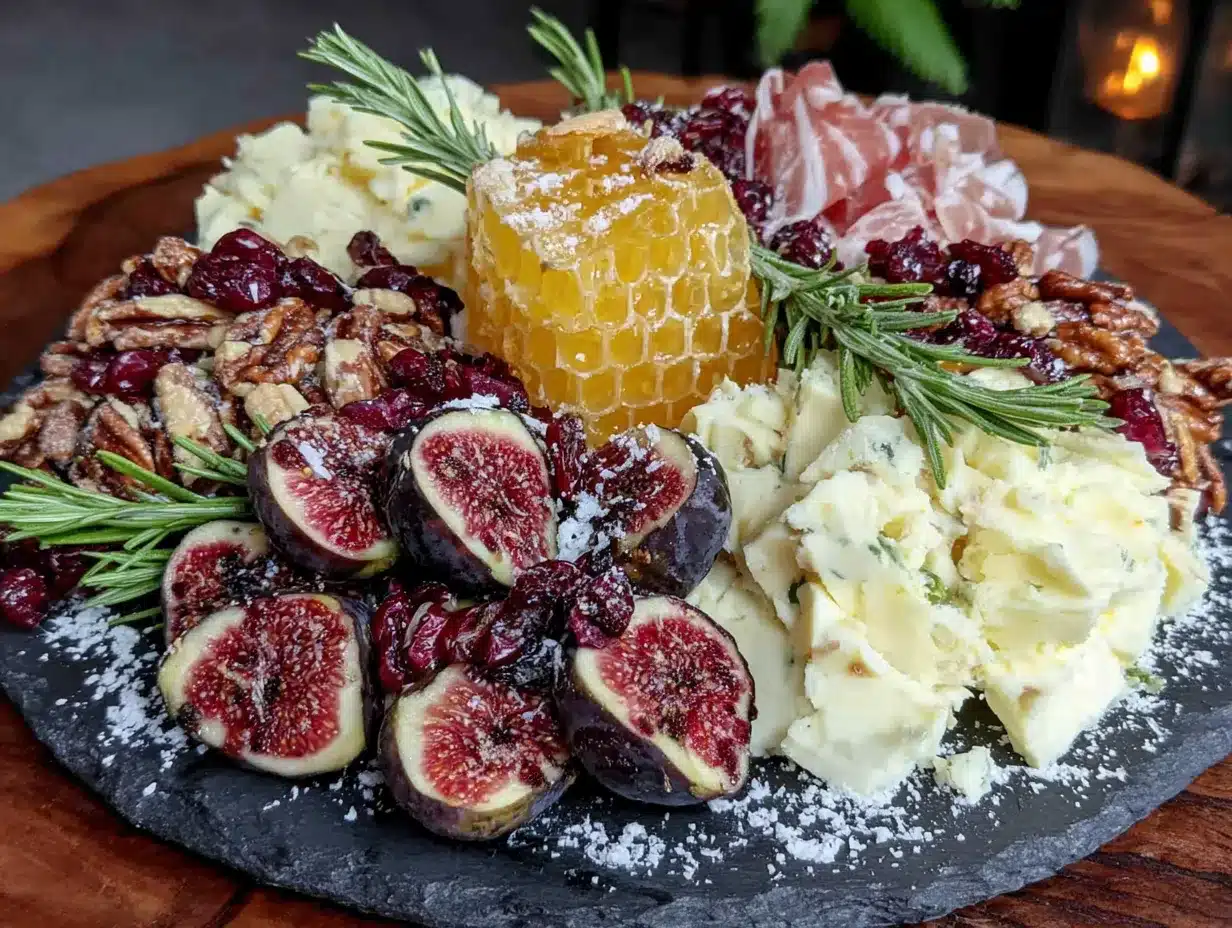
This Perfect Fall Harvest Charcuterie Board with Figs and Honeycomb became my little obsession that season. I tested it on my family first—tough crowd, let me tell you—and then on friends who stopped by for wine. Every time, the board came back empty. Not a single fig left, not a smear of cheese. That’s when I knew I had something worth sharing. It’s not just pretty to look at. It’s the kind of board that makes people slow down, talk, and actually eat together.
Why You’ll Love This Recipe
Let me tell you why this board is different from every other charcuterie spread you’ve seen on Pinterest. I’ve made probably fifty versions of this over the years, tweaking and tasting, and this one finally hits all the right notes.
- No Cooking Required : This is the ultimate no-stress entertaining. You arrange, you serve, you enjoy your own party. No oven timers, no worrying about things burning while you’re trying to make conversation.
- Seasonal and Stunning : The deep purples of the figs, the amber glow of the honeycomb, the creamy whites and blues of the cheeses—it’s a visual feast that screams autumn without trying too hard.
- Perfect for Entertaining : Whether it’s a casual Sunday gathering or a Thanksgiving appetizer spread, this board feeds a crowd and gets people talking. It’s the centerpiece that does all the work.
- Endlessly Customizable : Swap out cheeses, change up the meats, add whatever fruit looks good at the market. The structure stays the same, but the board changes with you.
- Sweet and Savory Balance : This isn’t just salty meats and cheese. The figs and honeycomb bring that natural sweetness that makes every bite feel complete. You get the tang of goat cheese, the salt of prosciutto, and then that burst of honey—it’s a symphony.
What really sets this board apart is the honeycomb. Most charcuterie boards use drizzled honey, which is fine, but the comb adds texture and a little bit of chew. It’s unexpected, and honestly, it’s the thing people remember. I’ve had friends text me weeks later asking where to buy honeycomb. That’s the power of a good board.
What Ingredients You Will Need
This recipe uses simple, high-quality ingredients that come together to create something truly special. The key is variety—different textures, flavors, and colors that keep every bite interesting.
For the Cheeses
- 8 ounces aged cheddar , sliced into thin wedges (I prefer a sharp white cheddar for its crumbly texture and nutty flavor)
- 6 ounces soft goat cheese , at room temperature (look for a log that’s creamy and spreadable, not too dry)
- 6 ounces blue cheese , such as Gorgonzola or Roquefort (the funkier the better, it balances the sweetness beautifully)
- 4 ounces brie , triple cream if you can find it (let it sit out for 30 minutes before serving for that perfect gooeyness)
For the Meats
- 4 ounces prosciutto , thinly sliced (I like to tear it into ribbons rather than leaving it in flat slices)
- 4 ounces soppressata , sliced into thin rounds (the spicy kind adds a nice kick)
- 4 ounces capicola , thinly sliced (ask your deli counter to slice it fresh)
For the Fruits and Sweeteners
- 8-10 fresh figs , halved lengthwise (look for ones that are soft but not mushy, with a little give when you squeeze them gently)
- 1 small piece honeycomb (about 4 ounces), placed in a small dish or directly on the board
- 1 apple , sliced thin (Honeycrisp or Fuji work great, toss them in a little lemon juice to prevent browning)
- 1 pear , sliced thin (Bosc or Anjou hold up well)
- 1/2 cup dried apricots
- 1/2 cup dried dates , pitted
For the Crunch and Garnish
- 1 cup mixed nuts (walnuts, pecans, and almonds work beautifully, toast them lightly for extra flavor)
- 1 small baguette , sliced into thin rounds and lightly toasted
- 1 cup assorted crackers (I love a mix of water crackers and seeded crisps)
- Fresh rosemary sprigs for garnish (they add that fall forest vibe)
- Flaky sea salt for sprinkling
Optional Additions
- 1/4 cup fig jam or mostarda for extra sweetness
- Fresh grapes , red or green, in small clusters
- Pickled vegetables like cornichons or pickled red onions for acidity
Equipment Needed
You don’t need fancy equipment for this board, but a few things make the process smoother. Trust me, I’ve made this on a cutting board in a pinch, and it worked fine. But if you want that wow factor, here’s what helps.
- A large wooden board or slate platter (at least 12×18 inches, or whatever fits your table)
- Small bowls or ramekins for the honeycomb, jam, and any loose items like olives
- A good cheese knife or two (one for soft cheeses, one for hard)
- Tongs or small forks for serving
- Parchment paper (optional, if you want easy cleanup)
I found my favorite board at a thrift store for five dollars. It’s a big round wooden slab that’s seen better days, but that’s what makes it perfect. The scratches and stains add character. If you’re buying new, look for untreated wood or food-safe slate. And don’t stress about having the perfect board. A clean cutting board works just as well.
Preparation Method
Building a charcuterie board is more art than science, but I’ve learned a few tricks over the years that make it look effortless. Here’s my step-by-step method.
- Start with the bowls. Place your small dishes on the board first. This is where the honeycomb, jam, and any loose items will go. I like to put them at different points around the board to create visual anchors. For this board, I put the honeycomb in a small ceramic dish near the center-left and the fig jam in a little ramekin on the right.
- Add the cheeses next. Cheeses are the stars of the show, so give them prominent placement. I space them out so there’s a cheese in each quadrant of the board. The brie goes on the left, the cheddar on the top right, the blue cheese on the bottom right, and the goat cheese near the center. Slice the cheddar and brie into wedges so people can see what they’re getting. Leave the goat cheese whole—it looks prettier that way.
- Layer on the meats. Fold or roll the sliced meats and place them near the cheeses. I like to arrange them in little piles or waves, not flat layers. The prosciutto gets folded into loose ribbons, the soppressata gets stacked in overlapping circles, and the capicola gets rolled into little cylinders. Think of it like creating texture—you want peaks and valleys, not a flat surface.
- Fill in with fruits. Now comes the fun part. Arrange the fig halves in clusters around the board. I put some near the goat cheese (they’re best friends) and some near the blue cheese (the contrast is incredible). Scatter the apple and pear slices in between, fanning them out slightly. Tuck the dried apricots and dates into any empty spaces.
- Add the crunch. Place the toasted baguette slices and crackers in small groups around the board. Don’t spread them out evenly—clusters look more natural. I put the baguette slices near the brie and the crackers near the cheddar. Sprinkle the nuts into any remaining gaps, letting them fall naturally.
- Garnish and finish. Tuck fresh rosemary sprigs around the board for that fall forest look. Sprinkle a little flaky sea salt over the figs and the apple slices. Step back and look at your board. Are there any empty spots? Fill them with a few extra nuts or a cluster of grapes. You want the board to look abundant but not crowded.
- Serve at room temperature. This is crucial. Let the board sit out for about 20 minutes before serving. Cold cheese doesn’t taste as good, and the honeycomb gets too hard. Room temperature brings out all the flavors.
One thing I learned the hard way—don’t overload the board. It’s tempting to pile everything on, but a crowded board looks messy and is hard to eat from. Leave a little breathing room. People will reach for things more easily, and the board will look more intentional.
Cooking Tips & Techniques
I’ve made this board so many times that I’ve collected a few tricks that make a real difference. Some came from trial and error, others from watching my grandmother arrange her holiday platters.
How to pick the best figs. Figs don’t ripen after they’re picked, so what you buy is what you get. Look for figs that are plump and soft but not mushy. They should have a slight give when you squeeze them gently, like a ripe avocado. If they smell sour or have any mold, skip them. Fresh figs are delicate, so handle them carefully and use them within a day or two of buying.
The honeycomb trick. Honeycomb is sticky, and it can be a pain to handle. Here’s what I do: pop it in the freezer for about 10 minutes before you’re ready to arrange it. It firms up just enough to cut cleanly without making a mess. Then let it come back to room temperature before serving. The texture is perfect—chewy but not hard.
Cheese temperature matters. This is the most common mistake I see. People pull cheese straight from the fridge and put it on the board. Cold cheese is flavorless and rubbery. Take your cheeses out of the fridge at least 30 minutes before serving. For soft cheeses like brie, give it a full hour. The difference is night and day.
How to prevent fruit from browning. Apples and pears turn brown quickly, which looks sad on a pretty board. Toss your sliced fruit in a little lemon juice or apple cider vinegar. It doesn’t take much—just a teaspoon or two—and it keeps them looking fresh for hours. Or you can slice them right before serving and arrange them quickly.
My biggest failure. The first time I made this board for a party, I arranged everything beautifully, then realized I had forgotten the crackers. I had to scramble to find something to use, and ended up with stale pretzels. Now I always lay everything out on the counter before I start arranging. It sounds obvious, but trust me, it’s easy to forget something when you’re in the zone.
Variations & Adaptations
This board is incredibly flexible. I’ve made versions for different seasons, diets, and occasions. Here are a few of my favorites.
Vegetarian Version
Skip the meats entirely and double up on the cheeses and fruits. Add some marinated artichoke hearts, roasted red peppers, and a good olive tapenade. The board will still feel abundant and satisfying. I’ve served this to vegetarian friends and they always rave about it.
Vegan Version
Use vegan cheeses (there are some amazing ones now, especially cashew-based brie alternatives) and load up on fruits, nuts, and vegetables. Add roasted chickpeas for protein, and use agave or maple syrup instead of honey. The honeycomb can be replaced with a vegan honey alternative or just extra dried fruit.
Seasonal Swaps
In summer, swap the figs for fresh peaches or nectarines and use berries instead of dried fruit. In winter, use persimmons and pomegranate seeds. In spring, try strawberries and rhubarb compote. The structure stays the same, but the flavors change with the season. I love making this board for each season and seeing how different it looks.
Spicy Twist
Add some spicy salami or chorizo, and include pickled jalapeños or a spicy honey drizzle. The heat contrasts beautifully with the sweet figs and honeycomb. This version is great for game day or a casual gathering with friends who like a little kick.
Breakfast Board
Yes, this works for breakfast too. Swap the meats for bacon or prosciutto, add some fresh berries, and include yogurt or a soft cheese like mascarpone. Serve with croissants or brioche instead of crackers. It’s indulgent and perfect for a lazy weekend morning.
Serving & Storage Suggestions
This board is best served at room temperature, so plan to assemble it about 20-30 minutes before your guests arrive. If you’re making it ahead, here’s what I do.
For serving: Arrange everything on the board as described, but leave the crackers and bread off until the last minute. They get stale if they sit out too long. I also keep the honeycomb in its dish until right before serving—it stays prettier that way. The board is meant to be shared, so encourage people to graze and come back for seconds.
What to serve with it: This board pairs beautifully with a crisp white wine like Sauvignon Blanc or a light red like Pinot Noir. For non-alcoholic options, try sparkling water with a splash of apple cider or a warm spiced tea. I also love serving it alongside a simple arugula salad with lemon vinaigrette to cut through the richness. If you’re feeling extra, add a bowl of Creamy Hatch Green Chile Corn Chowder on the side for a full fall meal.
Storage instructions: This board is best eaten the day it’s made, but leftovers can be stored. Separate the components—cheese, meat, fruit, crackers—and store them in airtight containers in the fridge. The cheese will keep for up to a week, the meat for 3-4 days, and the fruit for a day or two. The honeycomb can be stored at room temperature indefinitely. Don’t try to reassemble the board the next day; just serve the components separately.
Reheating tips: There’s nothing to reheat here, but if you want to refresh the bread or crackers, pop them in a 350°F oven for 5 minutes. The cheese should be brought back to room temperature before serving again. And the figs? They’re best eaten fresh, so don’t expect them to hold up overnight.
How flavors develop: One thing I’ve noticed is that the cheese and honeycomb actually taste better after sitting out for a while. The flavors meld together, and the honeycomb softens slightly. That’s why I always let the board sit for 20 minutes before serving. It’s not just about temperature—it’s about letting the ingredients get to know each other.
Nutritional Information & Benefits
This board is indulgent, but it also has some surprising health benefits. The key is balance and portion control.
- Estimated per serving (based on 8 servings): Calories: 450-550, Protein: 18g, Fat: 28g, Carbohydrates: 35g, Fiber: 6g, Sugar: 22g
- Figs are packed with fiber and antioxidants, and they’re a good source of calcium and potassium. They also contain prebiotics that support gut health.
- Honeycomb contains raw honey , which has antibacterial properties and can help soothe sore throats and boost immunity. The wax itself is edible and adds a unique texture.
- Cheese provides calcium and protein , but it’s also high in saturated fat, so enjoy in moderation. The fermented varieties like blue cheese contain probiotics that are good for digestive health.
- Nuts are rich in healthy fats , vitamin E, and magnesium. They’re great for heart health and keep you feeling full and satisfied.
This board can be part of a balanced diet when enjoyed as an occasional treat. I like to serve it as a meal rather than just an appetizer, pairing it with a big salad or some roasted vegetables to round things out.
Conclusion
This Perfect Fall Harvest Charcuterie Board with Figs and Honeycomb has become my go-to for every autumn gathering. It’s the kind of recipe that makes you look like you spent hours in the kitchen when really, you just arranged things on a board. And honestly, that’s the best kind of entertaining—effortless but impressive.
I love how this board brings people together. There’s something about sharing food from a communal platter that makes conversation flow easier. People lean in, reach across the table, and share bites. It’s not just about the food; it’s about the connection.
I’d love to hear how your board turns out. Did you add something unexpected? Did you swap out the figs for something else? Drop a comment below and let me know. And if you’re looking for more fall inspiration, check out this Perfect Fig and Goat Cheese Flatbread for another way to use those fresh figs. Happy entertaining, friends. Make it beautiful, make it yours, and don’t forget the honeycomb.
Frequently Asked Questions
Can I make this board ahead of time?
You can prep the components a day ahead—slice the cheese, wash the fruit, toast the bread—but arrange the board no more than an hour before serving. The fruit will start to brown, and the crackers will get stale if they sit out too long.
What if I can’t find fresh figs?
No problem. Use dried figs instead, or swap in sliced fresh pears or apples. You can also use fig jam or fig spread as a substitute. The flavor will be different but still delicious.
How do I store leftover honeycomb?
Honeycomb keeps at room temperature in an airtight container for months. It might crystallize over time, but that’s normal. Just let it sit in a warm spot for a few hours and it will soften up again.
Can I use different cheeses?
Absolutely. The key is variety—one soft, one hard, one blue, one creamy. Try a manchego instead of cheddar, or a camembert instead of brie. The board is flexible, so use what you love.
How many people does this board serve?
As a main course, this board serves 4-6 people. As an appetizer or part of a larger spread, it serves 8-10. If you’re serving it as a meal, I’d add a Hidden Veggie Pesto Pasta Salad or some crusty bread to round things out.
Pin This Recipe!
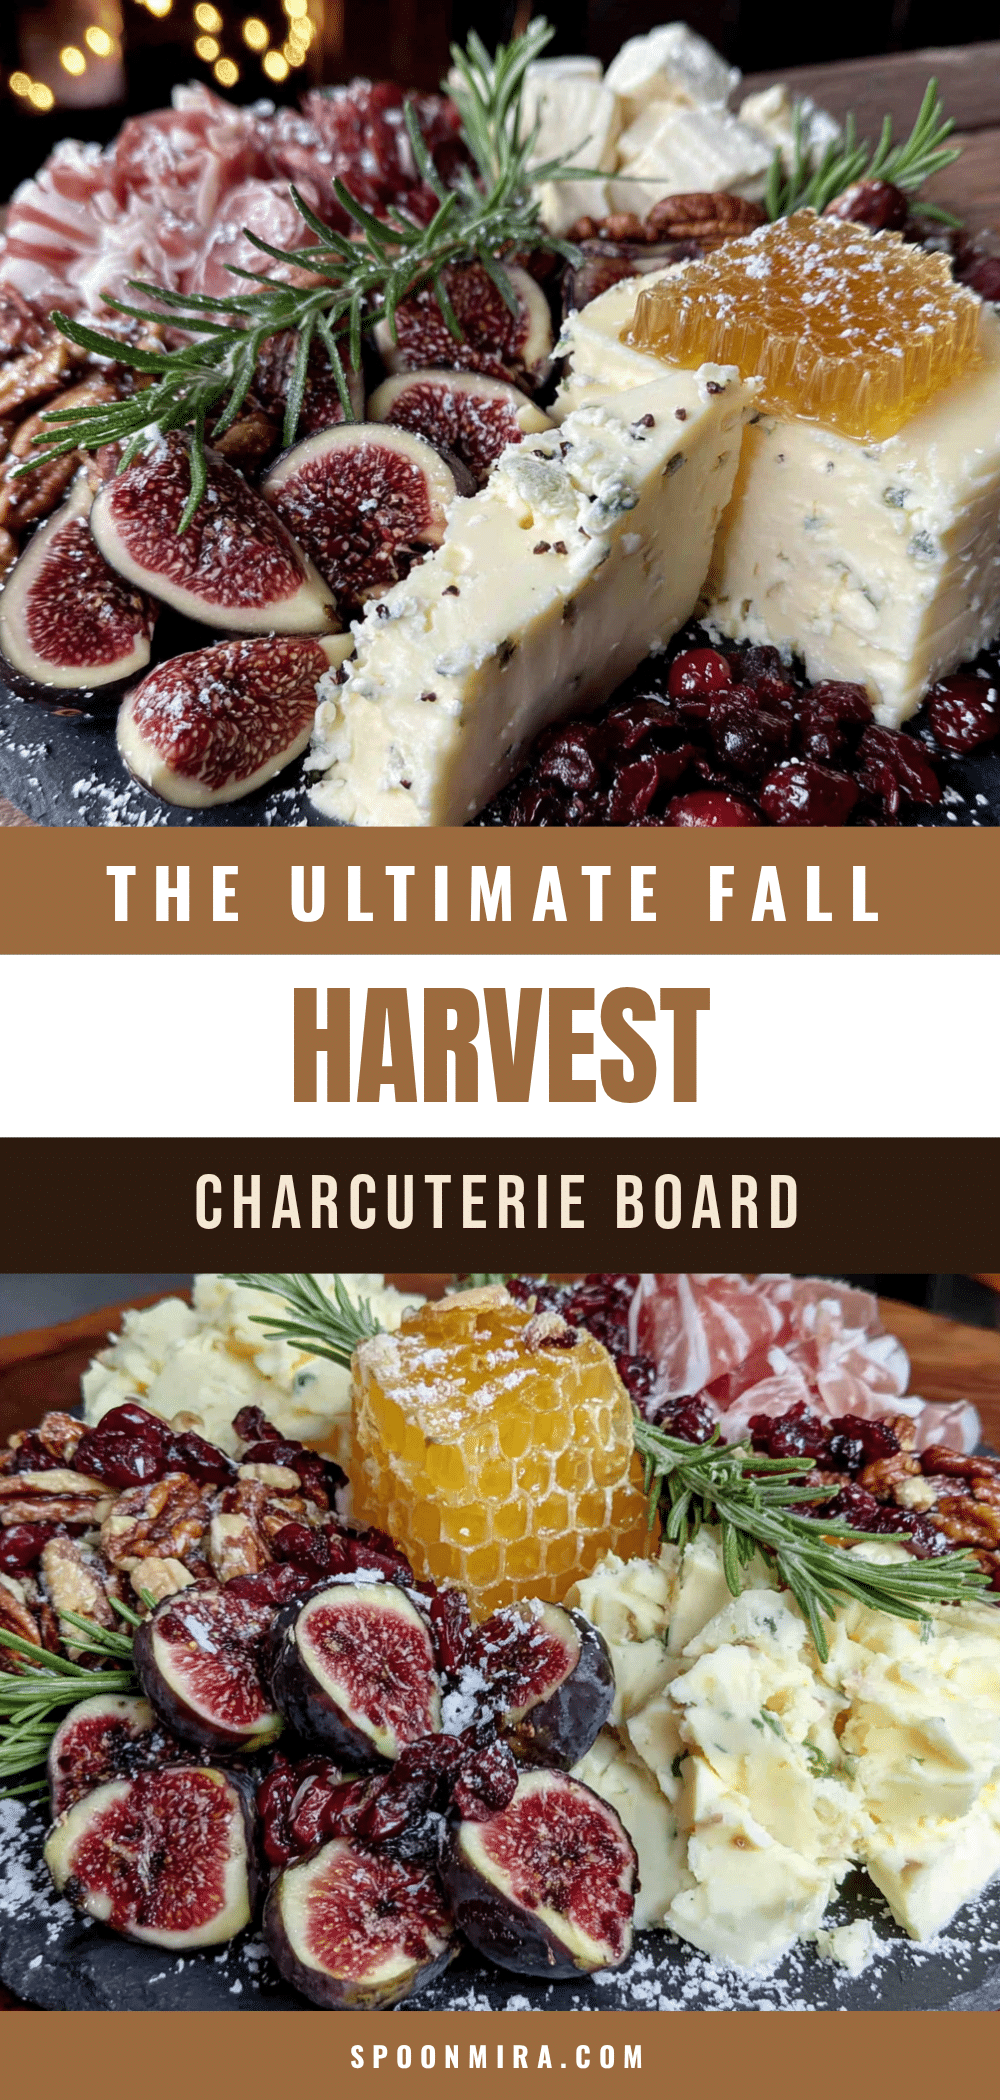
Perfect Fall Harvest Charcuterie Board with Figs & Honeycomb
A stunning no-cook charcuterie board featuring fresh figs, honeycomb, assorted cheeses, and cured meats. Perfect for autumn entertaining with a perfect balance of sweet and savory flavors.
- Prep Time: 20 minutes
- Cook Time: 0 minutes
- Total Time: 20 minutes
- Yield: 4-6 servings as main course, 8-10 as appetizer 1x
- Category: Appetizer
- Cuisine: American
Ingredients
- 8 ounces aged cheddar, sliced into thin wedges
- 6 ounces soft goat cheese, at room temperature
- 6 ounces blue cheese (such as Gorgonzola or Roquefort)
- 4 ounces brie, triple cream if available
- 4 ounces prosciutto, thinly sliced
- 4 ounces soppressata, sliced into thin rounds
- 4 ounces capicola, thinly sliced
- 8–10 fresh figs, halved lengthwise
- 1 small piece honeycomb (about 4 ounces)
- 1 apple (Honeycrisp or Fuji), sliced thin
- 1 pear (Bosc or Anjou), sliced thin
- 1/2 cup dried apricots
- 1/2 cup dried dates, pitted
- 1 cup mixed nuts (walnuts, pecans, almonds), lightly toasted
- 1 small baguette, sliced into thin rounds and lightly toasted
- 1 cup assorted crackers (water crackers and seeded crisps)
- Fresh rosemary sprigs for garnish
- Flaky sea salt for sprinkling
- 1/4 cup fig jam or mostarda (optional)
- Fresh grapes, red or green (optional)
- Pickled vegetables like cornichons or pickled red onions (optional)
Instructions
- Start with the bowls. Place small dishes on the board first for honeycomb, jam, and loose items. Position them at different points to create visual anchors.
- Add the cheeses next. Space them out so there’s a cheese in each quadrant of the board. Slice cheddar and brie into wedges; leave goat cheese whole.
- Layer on the meats. Fold or roll sliced meats and place near cheeses. Arrange prosciutto in loose ribbons, soppressata in overlapping circles, and capicola in little cylinders.
- Fill in with fruits. Arrange fig halves in clusters around the board. Scatter apple and pear slices in between, fanning them out slightly. Tuck dried apricots and dates into empty spaces.
- Add the crunch. Place toasted baguette slices and crackers in small groups around the board. Sprinkle nuts into remaining gaps.
- Garnish and finish. Tuck fresh rosemary sprigs around the board. Sprinkle flaky sea salt over figs and apple slices. Fill any empty spots with extra nuts or grapes.
- Serve at room temperature. Let the board sit out for about 20 minutes before serving.
Notes
For best results, take cheeses out of fridge 30 minutes before serving (1 hour for brie). To prevent fruit browning, toss apple and pear slices in lemon juice. Honeycomb can be frozen for 10 minutes to make cutting easier. Don’t overload the board – leave breathing room for easier eating.
Nutrition
- Serving Size: 1 serving (based on
- Calories: 450550
- Sugar: 22
- Sodium: 800
- Fat: 28
- Saturated Fat: 12
- Carbohydrates: 35
- Fiber: 6
- Protein: 18
Keywords: charcuterie board, fall harvest, figs, honeycomb, cheese board, prosciutto, entertaining, no-cook appetizer, autumn party food


