The first Saturday of September, and the light outside had that particular late-summer slant—golden, tired, almost dusty. My best friend was turning thirty-two, and she’d made one request: no fuss, no balloons, just a cake that looked like the inside of her favorite pottery studio. She wanted earth tones. Not green, not brown exactly, but the color of unfired clay, dried sage, and the soft terracotta of old garden pots. I stood in my kitchen with the mixer in front of me, wondering how to translate a personality into butter and flour. She’s a Virgo, through and through—organized, grounded, the kind of person who notices when a picture frame is crooked. This cake needed to feel like her.
I started with a simple vanilla base, knowing the flavor had to be as steady as she is. But the real work was in the colors. I pulled out my jars of natural food coloring—turmeric for a muted ochre, a bit of beet powder for the faintest blush, matcha for that dusty green. No electric blues or screaming pinks. Everything had to look like it had been dug up from the earth, then dusted off gently. I layered the batter, each shade barely different from the last, and watched it bake into something that looked like a cross-section of a canyon wall.
That cake sat on her kitchen table for three days, and every time I visited, someone had cut another slice. It was the kind of dessert that didn’t scream for attention but got it anyway, just by being exactly what it was—steady, beautiful, and completely itself. And honestly, that’s the best thing a Virgo birthday cake can be.
Why You’ll Love This Recipe
This isn’t your typical birthday cake. It’s a statement piece that happens to taste incredible, and it was built for people who appreciate subtlety over spectacle. Here’s why it works:
- Naturally Stunning: No artificial food coloring needed. You get these gorgeous, muted earth tones from simple pantry ingredients like turmeric, matcha, and cocoa powder. It looks like a piece of art.
- Virgo-Approved Precision: This recipe is forgiving enough for beginners but detailed enough for perfectionists. Each layer is deliberate, and the result is a cake that feels intentional, not chaotic.
- Perfect for Fall Birthdays: With its warm, grounded palette, this cake fits right into a September or October celebration. It pairs beautifully with the perfect fall pumpkin spice sheet cake with cream cheese frosting if you’re doing a dessert spread.
- Surprisingly Simple: The technique looks complex, but you’re really just swirling a few colored batters together. No piping skills required.
- Crowd-Pleasing Flavor: The base is a tender, moist vanilla cake with a subtle tang from buttermilk. The earth tones don’t affect the taste—just the mood.
- Builds a Moment: This cake starts conversations. People will ask how you did it, and you get to say, “Turmeric and matcha,” which sounds way cooler than “food coloring from a box.”
I’ve tested this recipe four times to get the color balance right. The first attempt was too muddy. The second was too pastel. The third was just right, and the fourth was a happy accident that I’ll share in the tips section. This is the version I’d make for anyone I love.
What Ingredients You Will Need
This recipe relies on simple, wholesome ingredients to create both flavor and color. Most of these are pantry staples, and the few specialty items are easy to find. Here’s what you need:
For the Cake Batter
- 2 ¾ cups (345g) all-purpose flour – Spoon and level for accuracy. Too much flour makes the cake dense.
- 2 ½ teaspoons baking powder – Make sure it’s fresh. Old baking powder won’t give you that perfect rise.
- ½ teaspoon baking soda – Helps the cake brown and rise evenly.
- 1 teaspoon fine sea salt – Balances the sweetness.
- 1 cup (226g) unsalted butter, softened – I prefer Kerrygold for the richness, but any good-quality butter works. Let it sit out for at least an hour.
- 1 ¾ cups (350g) granulated sugar – Standard white sugar keeps the crumb light.
- 4 large eggs, room temperature – Cold eggs seize the butter. Set them out with the butter.
- 1 tablespoon vanilla extract – Pure, not imitation. It makes a difference.
- 1 cup (240ml) buttermilk, room temperature – Adds tenderness and a slight tang. No buttermilk? Add 1 tablespoon lemon juice to regular milk and let it sit 5 minutes.
For the Earth-Tone Colors
- 1 tablespoon turmeric powder – For a warm ochre and soft gold. Start with less; turmeric is potent.
- 1 tablespoon matcha powder (culinary grade) – Creates a dusty sage green. Don’t use ceremonial grade—it’s too expensive and too delicate.
- 1 tablespoon unsweetened cocoa powder – For a deep terracotta brown when mixed with a tiny bit of beet powder (optional).
- 1 teaspoon beet powder (optional) – Adds a faint pinkish blush. Use sparingly.
For the Cream Cheese Frosting
- 8 oz (226g) cream cheese, softened – Full-fat is best for stability. Low-fat makes the frosting runny.
- ½ cup (113g) unsalted butter, softened – Gives the frosting structure.
- 3 ½ cups (420g) powdered sugar, sifted – Sifting prevents lumps.
- 1 teaspoon vanilla extract – Same rule—pure only.
- Pinch of salt – Cuts the sweetness.
For the Decorative Finish
- Dried edible flowers (optional) – Lavender, rose petals, or calendula for a natural topping.
- A light dusting of cinnamon or cocoa powder – Adds to the earthy aesthetic.
Equipment Needed
You don’t need a professional bakery setup for this, but a few specific tools make the process smoother. Here’s what I use:
- Three 8-inch round cake pans – I prefer light-colored metal pans for even baking. Dark pans can over-brown the edges.
- Parchment paper rounds – Cut them to fit the bottom of your pans. Non-stick spray alone isn’t enough.
- Stand mixer or hand mixer – A stand mixer makes creaming butter and sugar effortless, but a hand mixer works fine. I’ve used both.
- Small mixing bowls – At least three for dividing and coloring the batter.
- Rubber spatula – For gentle folding. Don’t use a whisk for this part.
- Offset spatula – For smoothing frosting. A butter knife works in a pinch, but an offset spatula is worth the $8.
- Cake turntable (optional but helpful) – Makes frosting look professional. I got mine for $15 at a craft store.
- Toothpicks or skewers – For swirling the colors.
- Cooling rack – Lets air circulate so the cake doesn’t get soggy on the bottom.
If you don’t have a turntable, just place the cake plate on an upside-down bowl. It’s not perfect, but it works. I did that for years.
Preparation Method
This method breaks down into clear stages. Take your time with the color portion—it’s the heart of the recipe. The baking itself is straightforward.
Step 1: Prep Your Pans and Oven
Preheat your oven to 350°F (175°C). Grease three 8-inch round cake pans with butter or non-stick spray, then line the bottoms with parchment paper rounds. Dust the sides lightly with flour and tap out the excess. This ensures clean release every time.
Step 2: Mix the Dry Ingredients
In a medium bowl, whisk together the flour, baking powder, baking soda, and salt. Set aside. This aerates the flour and distributes the leaveners evenly.
Step 3: Cream the Butter and Sugar
In the bowl of a stand mixer fitted with the paddle attachment (or using a hand mixer), beat the softened butter and granulated sugar on medium speed for 3 to 4 minutes. It should look pale, fluffy, and slightly lighter in texture. Scrape down the sides and bottom of the bowl once halfway through.
Step 4: Add Eggs and Vanilla
Add the eggs one at a time, beating well after each addition. The mixture might look slightly curdled after the second egg—don’t panic, that’s normal. Add the vanilla extract and beat for another 30 seconds.
Step 5: Alternate Dry and Wet Ingredients
With the mixer on low speed, add the flour mixture in three additions, alternating with the buttermilk in two additions. Start and end with the flour. Mix just until combined after each addition. Overmixing at this stage makes the cake tough. Use a rubber spatula to give the batter a final fold from the bottom up, ensuring everything is incorporated.
Step 6: Divide and Color the Batter
Divide the batter evenly into three separate bowls. You should have about 2 cups of batter per bowl. Now comes the fun part:
- Bowl 1 (Ochre/Gold): Add 1 teaspoon turmeric powder and stir gently until the color is even. It will look more yellow than gold at this stage, but it deepens during baking.
- Bowl 2 (Sage Green): Add 1 teaspoon matcha powder and fold until combined. The color should be a soft, dusty green.
- Bowl 3 (Terracotta/Brown): Add 1 tablespoon cocoa powder plus a tiny pinch of beet powder (optional). Stir until smooth. This creates a warm, earthy brown.
If you want more subtle shades, use less coloring. For a more dramatic look, double the matcha and turmeric slightly. I’ve done both, and honestly, the subtle version looks more sophisticated.
Step 7: Layer the Batter
Take your three prepared pans. Using a spoon or small ladle, drop dollops of each colored batter into each pan, alternating colors. You want a marbled effect, not a solid block. Once all the batter is distributed, use a toothpick or skewer to gently swirl the colors together. Don’t over-swirl—you want distinct ribbons, not mud. Aim for 5 to 6 figure-eight movements per pan.
Step 8: Bake the Layers
Place the pans in the oven, spaced evenly apart. Bake for 22 to 28 minutes, rotating the pans halfway through. The cakes are done when a toothpick inserted into the center comes out clean or with a few moist crumbs. The tops should spring back when lightly pressed. Let the cakes cool in the pans for 10 minutes, then turn them out onto a cooling rack and remove the parchment paper. Cool completely before frosting—at least 1 hour.
Step 9: Make the Frosting
While the cakes cool, make the cream cheese frosting. In a clean mixer bowl, beat the softened cream cheese and butter together on medium speed until smooth and creamy, about 2 minutes. Add the sifted powdered sugar one cup at a time, beating on low speed to avoid a sugar cloud. Add the vanilla and salt, then increase to medium-high speed and beat for 2 minutes until light and fluffy. Don’t overbeat, or the frosting can become too soft.
Step 10: Assemble and Frost
Place one cake layer on your serving plate or cake stand. Spread about ¾ cup of frosting evenly on top. Add the second layer, another ¾ cup of frosting, then the third layer. Apply a thin crumb coat (a base layer of frosting that traps crumbs) all over the cake. Refrigerate for 20 minutes to set. Then apply the final, thicker layer of frosting. Use an offset spatula for smooth sides, or leave it rustic with swirls. Top with dried edible flowers or a light dusting of cinnamon for that earthy finish.
Cooking Tips & Techniques
I’ve made this cake enough times to know exactly where things can go sideways. Here’s what I’ve learned the hard way so you don’t have to.
Don’t Overmix the Colored Batter: When you add the turmeric, matcha, or cocoa, fold them in gently. Vigorous stirring can deflate the batter and make the cake dense. I learned this on attempt number two, when my cake came out more like a brick than a cloud. Gentle folding is your friend.
Room Temperature Ingredients Are Non-Negotiable: Cold butter doesn’t cream properly. Cold eggs seize the batter. Cold buttermilk makes the mixture curdle. Set everything out on the counter at least an hour before you start. If you forget, place the eggs in a bowl of warm water for 5 minutes and microwave the buttermilk for 10 seconds.
Color Adjustment Tip: Turmeric can sometimes taste slightly earthy in large amounts. If you’re sensitive to that, use only ½ teaspoon turmeric and add a drop of yellow food coloring to boost the color without the flavor. The matcha and cocoa don’t have this issue.
Bake Even Layers: If your oven has hot spots, rotate the pans halfway through baking. I also recommend weighing the batter in each pan to ensure even layers. A kitchen scale is worth the investment for consistent results.
The Swirl Technique: When swirling the colors, use a light hand. Think of it as drawing a figure eight, not stirring soup. Too much swirling turns the layers into a single muddy color. I’ve done it, and it still tasted good, but it lost the visual magic.
Crumb Coat Is Your Safety Net: Even if your layers are a little uneven, a crumb coat plus 20 minutes in the fridge hides everything. Don’t skip this step.
Variations & Adaptations
This recipe is flexible. Here are a few ways to make it your own, based on what I’ve tried and what friends have requested.
Gluten-Free Version: Substitute the all-purpose flour with a 1:1 gluten-free baking flour blend that contains xanthan gum. I’ve used King Arthur Measure for Measure with excellent results. The texture is slightly more tender, but the color effect works just as well.
Dairy-Free Adaptation: Use vegan butter (like Miyoko’s) and a dairy-free cream cheese (like Tofutti or Kite Hill). Replace the buttermilk with 1 cup unsweetened almond milk mixed with 1 tablespoon apple cider vinegar. Let it sit for 5 minutes before using. The cake will be a bit denser but still delicious.
Different Color Palettes: For a winter birthday, try blue butterfly pea flower powder for a soft gray-blue, beet powder for dusty rose, and cocoa for brown. For spring, use matcha, beet, and a pinch of saffron. The technique stays the same—just swap the powders.
Layer Cake to Cupcakes: This batter makes about 24 standard cupcakes. Divide the batter into three colored bowls as directed, then spoon dollops into cupcake liners, alternating colors. Bake at 350°F (175°C) for 15 to 18 minutes. Frost with the same cream cheese frosting.
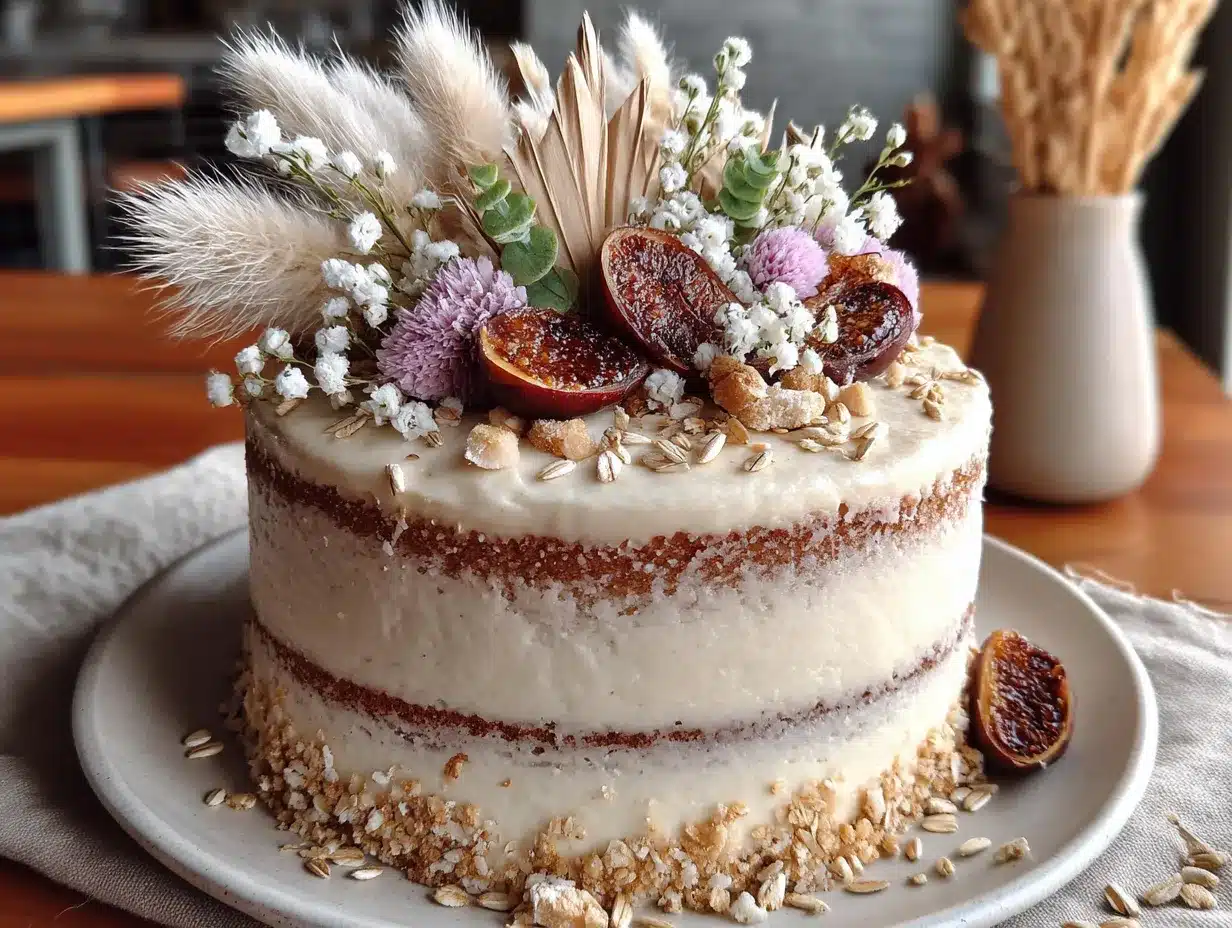
Naked Cake Style: Instead of fully frosting the cake, apply a thin layer of frosting between layers and on top, leaving the sides exposed. This shows off the beautiful earth-tone layers. Dust the top with cinnamon and arrange dried flowers for a rustic look.
Flavor Twist: Add 1 tablespoon of instant espresso powder dissolved in 1 tablespoon of hot water to the cocoa batter for a mocha undertone. It pairs beautifully with the cream cheese frosting.
Serving & Storage Suggestions
This cake is best served at room temperature, which allows the flavors to fully develop and the frosting to soften to a creamy consistency. Here’s how to handle it:
Serving Temperature: Remove the cake from the refrigerator about 30 to 45 minutes before serving. Let it sit on the counter, still covered, to take the chill off. Slice with a sharp, thin-bladed knife, wiping the blade clean between cuts for neat slices.
Presentation Ideas: Place the cake on a wooden cake stand or a simple ceramic plate to emphasize the earthy aesthetic. Scatter a few dried rose petals or lavender buds around the base. A dusting of cinnamon or cocoa powder on the plate adds to the visual story.
Complementary Dishes: This cake pairs beautifully with a cup of chai tea, a latte, or a glass of cold milk. For a full dessert spread, serve it alongside cozy brown butter snickerdoodle crinkle cookies for a contrast in textures. If you’re hosting a brunch, the creamy overnight oats with brown sugar cinnamon and toasted almonds make a great make-ahead breakfast to serve before cake.
Storage Instructions: Store the cake in an airtight cake carrier or under a cake dome in the refrigerator for up to 5 days. The cream cheese frosting requires refrigeration. Let slices come to room temperature before eating for the best flavor.
Freezing Instructions: You can freeze the unfrosted cake layers for up to 3 months. Wrap each cooled layer tightly in plastic wrap, then in aluminum foil. When ready to use, thaw overnight in the refrigerator, then bring to room temperature before frosting. I’ve also frozen the fully frosted cake with good results—just place it in the freezer unwrapped for 1 hour to harden the frosting, then wrap tightly and freeze.
Flavor Development: This cake actually tastes better on day two. The flavors meld together, and the texture becomes even more moist. If you can, make it a day ahead and refrigerate overnight before serving.
Nutritional Information & Benefits
This is a celebration cake, so it’s not health food. But the ingredients do offer some benefits worth noting:
- Turmeric: Contains curcumin, a compound known for its anti-inflammatory properties. It’s the star of the ochre color and a nice bonus in a dessert.
- Matcha: Packed with antioxidants called catechins, which support immune health. Plus, it provides a gentle energy lift without the jitters of coffee.
- Cocoa Powder: Rich in flavonoids that support heart health. The darker the cocoa, the more benefits.
- Buttermilk: Contains probiotics and calcium, plus it keeps the cake tender without adding excessive fat.
Estimated Nutritional Values (per slice, based on 12 servings):
| Nutrient | Amount |
|---|---|
| Calories | 485 |
| Total Fat | 26g |
| Saturated Fat | 16g |
| Cholesterol | 115mg |
| Sodium | 380mg |
| Total Carbohydrates | 58g |
| Dietary Fiber | 1g |
| Sugars | 42g |
| Protein | 6g |
Dietary Considerations: This recipe contains gluten, dairy, and eggs. For allergen-friendly versions, see the variations section above. This cake is not low-carb or keto-friendly due to the sugar content.
Conclusion
This earth-tone Virgo birthday cake is more than a dessert. It’s a way of saying, “I see you. I know what you love.” It’s for the friend who prefers a quiet dinner over a loud party, who notices the way light falls across a room, who finds beauty in the subtle and the grounded. It’s for the Virgos who keep the world organized and steady, and who deserve a cake that reflects their quiet strength.
I hope you make this cake for someone you love. Or for yourself, honestly. You don’t need a birthday to celebrate being grounded, intentional, and beautifully complex. Customize the colors, play with the flavors, and make it your own. That’s what this recipe is really about—creating something that feels personal and true.
If you make this cake, I’d love to hear about it. Leave a comment below with your color combinations or any tweaks you tried. Tag me in your photos. And if you’re looking for more earthy, seasonal desserts, check out the perfect huckleberry lemon pound cake with easy wild glaze or the moist chocolate zucchini cake with espresso cream cheese frosting. Both are made with the same love for natural flavors and beautiful presentation.
Happy baking, and happy birthday to the Virgo in your life.
Frequently Asked Questions
Can I use gel food coloring instead of natural powders?
Yes, absolutely. Gel food coloring will give you more vibrant, saturated colors. Use about 4 to 6 drops per bowl of batter for a similar effect. Just stick to earth-toned shades like warm yellow, sage green, and brown to keep the aesthetic consistent.
Why did my cake layers come out uneven?
Uneven layers usually happen for two reasons: the batter wasn’t distributed evenly, or the oven has hot spots. Use a kitchen scale to weigh each pan of batter for perfect layers. Also, rotate the pans halfway through baking to ensure even heat distribution.
Can I make this cake a day ahead?
Yes, and I actually recommend it. The flavors meld and the texture becomes even more moist overnight. Bake and frost the cake, then store it in the refrigerator covered. Let it sit at room temperature for 30 minutes before serving.
The colors turned muddy after baking. What went wrong?
This usually happens when the batters are over-swirled. Use a light hand with the toothpick—just 5 to 6 figure-eight movements per pan. Also, make sure your color ratios are distinct. If the colors are too similar in shade, they’ll blend together more easily.
Can I use this recipe for a different zodiac sign?
Absolutely. The technique works for any sign. For a fiery Leo, use red and orange tones with beet powder and turmeric. For a watery Pisces, try blue butterfly pea flower and lavender. Just adjust the color palette to match the personality of the birthday person.
Pin This Recipe!
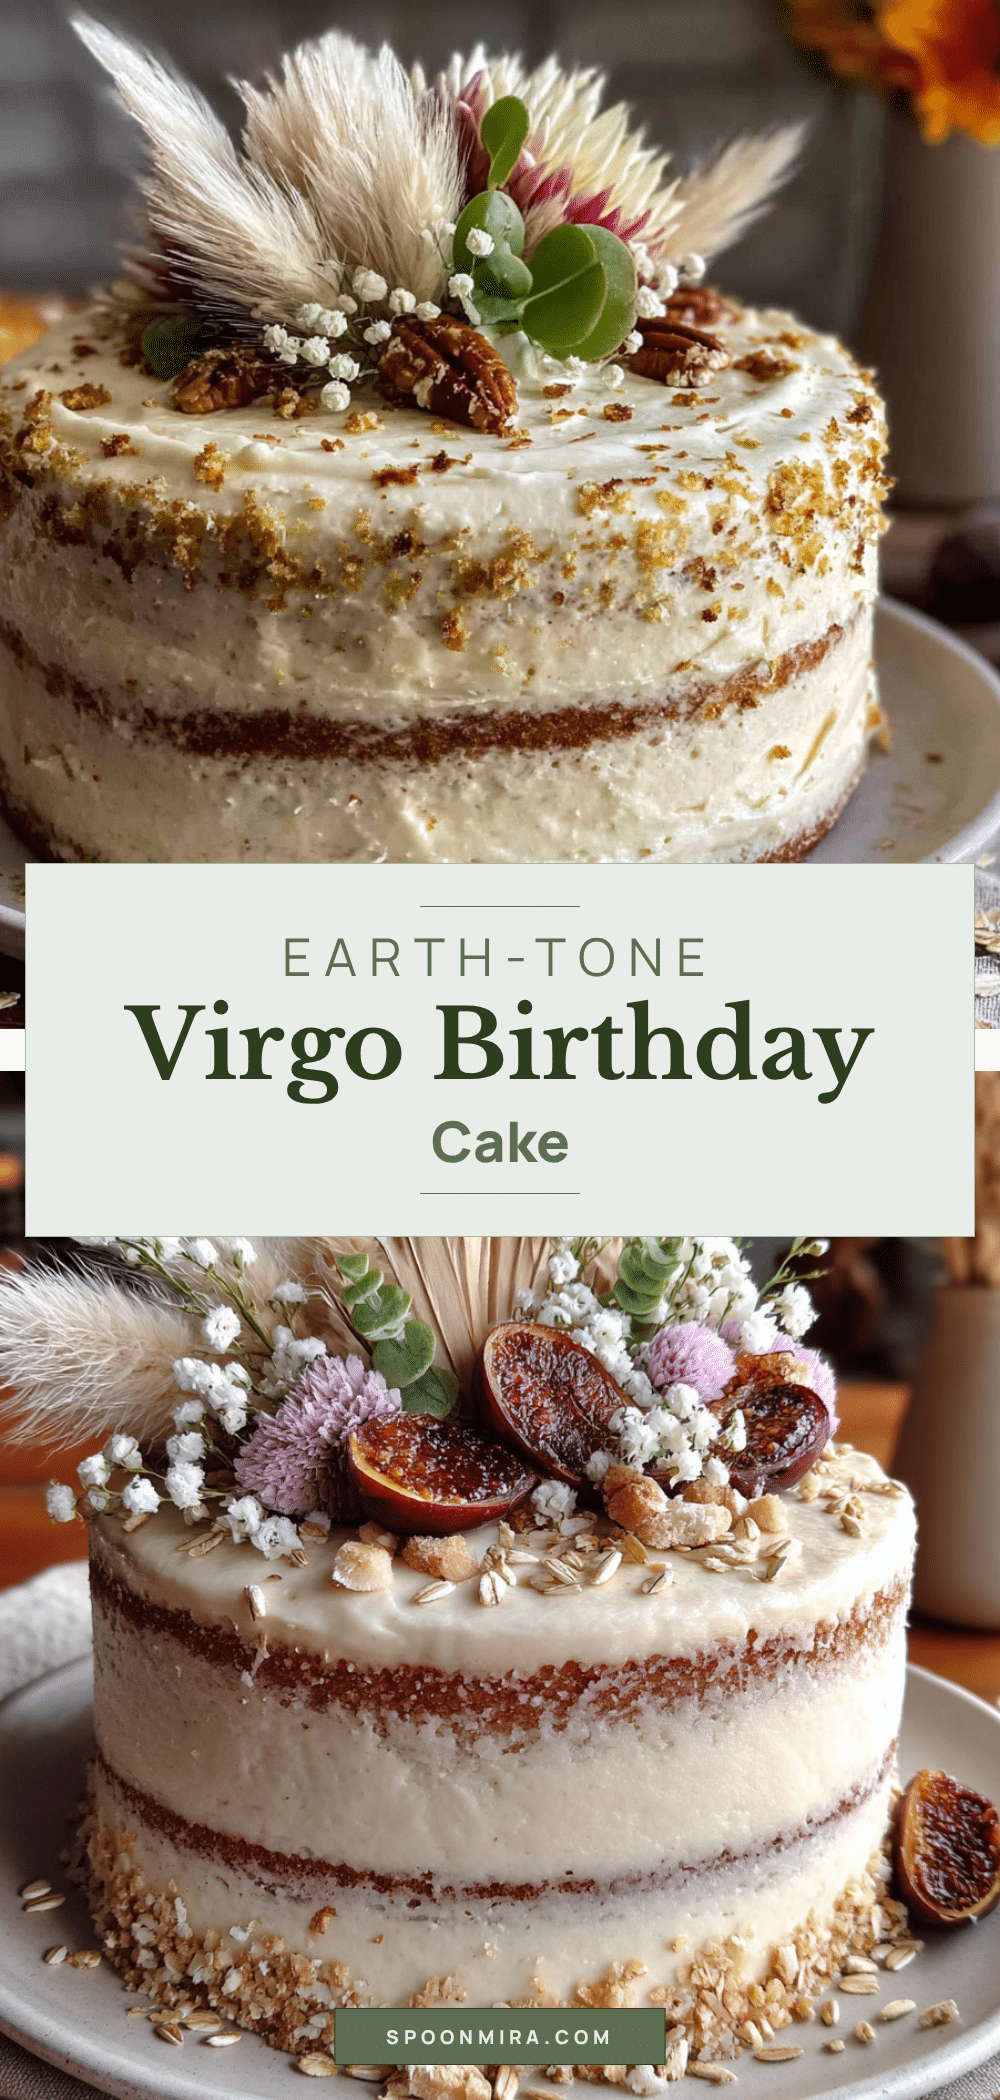
Perfect Earth-Tone Virgo Birthday Cake Recipe
A stunning vanilla cake with natural earth-tone colors from turmeric, matcha, and cocoa, topped with cream cheese frosting. Perfect for fall birthdays and Virgo personalities who appreciate subtlety and grounded beauty.
- Prep Time: 30 minutes
- Cook Time: 25 minutes
- Total Time: 1 hour 55 minutes
- Yield: 12 servings 1x
- Category: Dessert
- Cuisine: American
Ingredients
- 2 ¾ cups (345g) all-purpose flour
- 2 ½ teaspoons baking powder
- ½ teaspoon baking soda
- 1 teaspoon fine sea salt
- 1 cup (226g) unsalted butter, softened
- 1 ¾ cups (350g) granulated sugar
- 4 large eggs, room temperature
- 1 tablespoon vanilla extract
- 1 cup (240ml) buttermilk, room temperature
- 1 tablespoon turmeric powder
- 1 tablespoon matcha powder (culinary grade)
- 1 tablespoon unsweetened cocoa powder
- 1 teaspoon beet powder (optional)
- 8 oz (226g) cream cheese, softened
- ½ cup (113g) unsalted butter, softened
- 3 ½ cups (420g) powdered sugar, sifted
- 1 teaspoon vanilla extract
- Pinch of salt
- Dried edible flowers (optional)
- A light dusting of cinnamon or cocoa powder
Instructions
- Preheat oven to 350°F (175°C). Grease three 8-inch round cake pans, line bottoms with parchment paper, and dust sides with flour.
- In a medium bowl, whisk together flour, baking powder, baking soda, and salt. Set aside.
- In a stand mixer with paddle attachment, beat softened butter and sugar on medium speed for 3-4 minutes until pale and fluffy. Scrape down bowl.
- Add eggs one at a time, beating well after each. Add vanilla and beat 30 seconds.
- With mixer on low, add flour mixture in three additions, alternating with buttermilk in two additions, starting and ending with flour. Mix just until combined. Fold once with spatula.
- Divide batter evenly into three bowls (about 2 cups each). To Bowl 1, add 1 teaspoon turmeric; to Bowl 2, add 1 teaspoon matcha; to Bowl 3, add 1 tablespoon cocoa plus a pinch of beet powder. Fold gently until colors are even.
- Drop dollops of each colored batter into each pan, alternating colors. Use a toothpick to gently swirl with 5-6 figure-eight movements per pan.
- Bake for 22-28 minutes, rotating pans halfway. Cool in pans 10 minutes, then turn out onto cooling rack. Cool completely (at least 1 hour).
- For frosting: Beat softened cream cheese and butter until smooth. Add sifted powdered sugar one cup at a time, then vanilla and salt. Beat on medium-high 2 minutes until fluffy.
- Assemble cake: Place one layer on plate, spread ¾ cup frosting. Repeat with second and third layers. Apply thin crumb coat, refrigerate 20 minutes, then apply final frosting layer. Top with dried flowers or cinnamon dust.
Notes
Use room temperature ingredients for best results. Don’t overmix colored batters. For subtle colors, use less turmeric, matcha, or cocoa. The cake tastes better on day two. Store in refrigerator up to 5 days. Freeze unfrosted layers up to 3 months.
Nutrition
- Serving Size: 1 slice
- Calories: 485
- Sugar: 42
- Sodium: 380
- Fat: 26
- Saturated Fat: 16
- Carbohydrates: 58
- Fiber: 1
- Protein: 6
Keywords: earth tone cake, virgo birthday cake, natural food coloring, turmeric cake, matcha cake, cream cheese frosting, fall birthday cake, marbled cake


