Third time in three weeks, and I finally stopped trying to make it pretty. The first batch, I carefully arranged each slider in neat little rows, brushed the tops with garlic butter like I was painting a masterpiece. They looked gorgeous. They also fell apart the second anyone tried to pick one up. The second time, I got cocky with the cheese ratio—too much, too gooey, and the bottoms turned into a soggy mess that stuck to the pan. By attempt number three, I just dumped everything in, piled the cheese on without measuring (don’t tell my inner perfectionist), and slid it into the oven with zero expectations. That’s the batch that disappeared in twelve minutes flat. Twelve minutes. My husband actually licked the serving spoon.
That’s the thing about this Ultimate Cheesy Football Pull-Apart Slider Bake. It doesn’t care about your presentation skills. It doesn’t need you to measure precisely or arrange things just so. It rewards chaos, honestly. The more you just go for it—layering the meats, piling on the cheese, letting the butter sauce soak into every crevice—the better it turns out. It’s the kind of recipe that makes you feel like a kitchen genius even when you’re running on three hours of sleep and game-day adrenaline.
I keep coming back to it because it solves a very specific problem: how do you feed a crowd of hungry football fans without spending the entire game in the kitchen? You make these sliders. They come together in under thirty minutes, they’re infinitely customizable, and they have this magical quality where one batch is never enough. I’ve learned to make two pans at once. Trust me on that.
Why You’ll Love This Recipe
Let’s be real for a second. Game-day food has a reputation for being either complicated or disappointing. You either spend hours slaving over something fancy that people pick at, or you open a bag of chips and call it a day. This slider bake sits right in the sweet spot—impressive enough to get compliments, easy enough that you can make it while simultaneously yelling at the ref on TV.
- Ready in under 30 minutes : From fridge to table in about 25 minutes flat. That’s less time than a single quarter of football.
- No fancy ingredients : Hawaiian rolls, deli meat, cheese, butter, and a few pantry staples. That’s it. No trips to specialty stores.
- Perfect for game day crowds : Feeds 8-12 people easily. Double the recipe for bigger parties.
- Everyone loves them : Kids, adults, picky eaters, cheese snobs—I’ve never met someone who didn’t go back for seconds.
- Foolproof pull-apart magic : Each slider separates cleanly, no fighting over who gets the corner piece.
What makes this version different from the dozens of slider recipes floating around the internet? It’s the butter sauce. I spent three batches perfecting the balance—enough butter to keep the tops golden and crispy, but not so much that the bottoms turn into a greasy mess. The secret is brushing the sauce on halfway through baking, not before. That little change makes the tops shatteringly crisp while the insides stay soft and pillowy. It’s the kind of detail you’d only figure out after making this recipe obsessively (which, clearly, I did).
Honestly, this recipe is the one I turn to when I need a guaranteed win. It’s comfort food at its most unpretentious—warm, cheesy, slightly messy, and completely satisfying. The kind of food that makes people close their eyes and go “mm-hmm” mid-bite.
What Ingredients You Will Need
This recipe uses simple, everyday ingredients to create something that tastes far greater than the sum of its parts. Most of these are probably in your kitchen right now, which is exactly the point.
- 12-count package Hawaiian sweet rolls – These are non-negotiable for the authentic texture. The slight sweetness balances the savory fillings perfectly. I prefer King’s Hawaiian, but any brand works. Keep them connected in a single slab—don’t separate them yet.
- 1/2 pound deli-sliced roast beef – Go for medium-rare roast beef from the deli counter, not the pre-packaged stuff. The texture is better and it doesn’t get rubbery when baked. Ask for it sliced thin, but not shaved.
- 1/2 pound deli-sliced turkey breast – Oven-roasted turkey works best. Again, fresh-sliced from the deli counter makes a noticeable difference.
- 8 slices provolone cheese – Provolone melts beautifully without getting greasy. It has a mild flavor that doesn’t overpower the meats.
- 8 slices sharp cheddar cheese – The sharpness cuts through the richness. I use extra-sharp white cheddar for maximum flavor impact.
- 1/2 cup unsalted butter – Unsalted gives you control over the salt level. If you only have salted butter, reduce the added salt in the sauce.
- 2 tablespoons Dijon mustard – This adds a tangy kick that keeps the sliders from tasting one-note. Don’t skip it—it’s the secret weapon.
- 1 tablespoon Worcestershire sauce – Adds depth and umami. Lea & Perrins is my go-to brand.
- 1 tablespoon poppy seeds – These add a subtle crunch and nutty flavor. They’re optional but highly recommended.
- 1 teaspoon garlic powder – Not fresh garlic, which can burn. Garlic powder distributes evenly and gives that classic savory note.
- 1/2 teaspoon onion powder – Rounds out the savory flavors without being overpowering.
- 1/4 teaspoon black pepper – Freshly ground, please. Pre-ground pepper is fine in a pinch but fresh makes a difference.
- Optional: 2 tablespoons grated Parmesan cheese – Sprinkled on top before baking for an extra crispy, cheesy crust. I add this every time.
Ingredient notes and substitutions: You can swap the roast beef for ham or pastrami if that’s what you have. For a vegetarian version, use thick-sliced portobello mushrooms and roasted red peppers instead of the meat. For a lower-fat option, use reduced-fat cheese and skip the butter brushing on top—though honestly, that’s where most of the magic lives. If you’re feeding a crowd that includes picky eaters, stick with just turkey and cheddar. I’ve made this for my nephew who only eats “white food” and he crushed four sliders before anyone could stop him.
Equipment Needed
You don’t need a professional kitchen to pull these off. Here’s what you’ll need:
- 9×13-inch baking dish – Any standard size works. Glass, ceramic, or metal all work fine. Just make sure it’s deep enough to hold the rolls without overflowing.
- Sharp chef’s knife – For cutting the slab of rolls in half horizontally. A serrated bread knife works even better for this.
- Small saucepan – For melting the butter and mixing the sauce. Any small pot works.
- Pastry brush – For brushing the butter sauce. A silicone brush is easiest to clean, but a natural bristle brush works too. In a pinch, you can use a spoon.
- Aluminum foil – For covering the sliders during the first part of baking. This keeps them from burning before the cheese melts.
- Cutting board – For slicing the rolls and any prep work.
Budget-friendly alternatives: No pastry brush? Use the back of a spoon to drizzle the butter over the tops. No 9×13 dish? A rimmed baking sheet works—just line it with parchment paper. I’ve even made these in a disposable aluminum pan for tailgating, and they turned out perfectly.
My personal experience: I’ve made these sliders in three different ovens—a fancy convection model, a beat-up rental apartment oven that runs 25 degrees hot, and a campfire Dutch oven setup. They worked every single time. That’s the beauty of this recipe. It’s forgiving. Don’t overthink the equipment.
Preparation Method
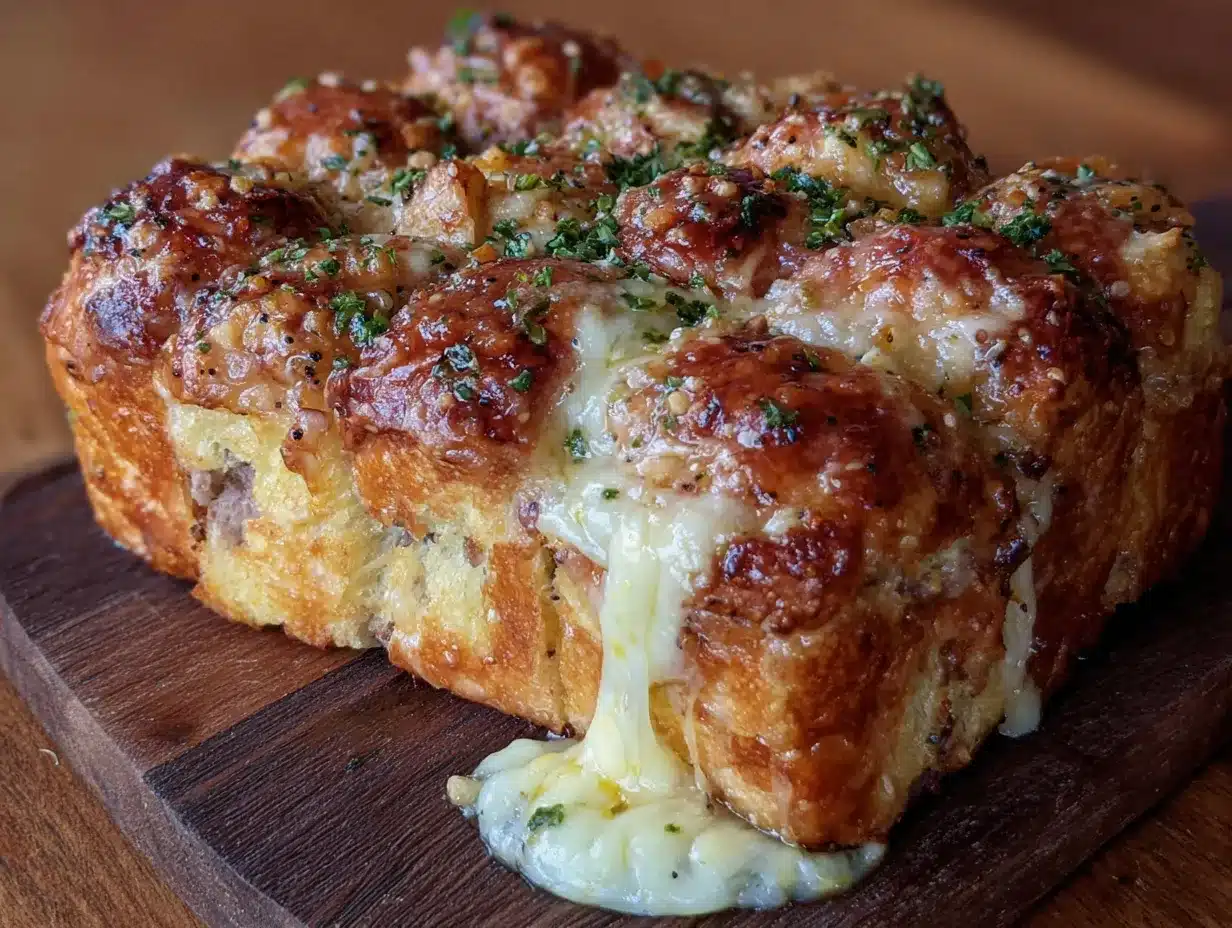
Let’s get into the actual making of these beauties. I’ll walk you through every step, including the little details that make the difference between good sliders and unforgettable ones.
- Preheat your oven to 350°F (175°C). Position the rack in the middle of the oven. While it’s heating, lightly grease your 9×13 baking dish with butter or non-stick spray. Don’t skip this—even with the butter sauce, the bottoms can stick if the dish isn’t greased.
- Prepare the rolls. Place the entire slab of Hawaiian rolls in the baking dish. Using a serrated knife, carefully slice the entire slab in half horizontally. You want to separate the top “lid” from the bottom half in one piece. Lift the top off and set it aside. It’s okay if a few rolls separate—just nestle them back together.
- Layer the bottom half with cheese. Arrange 4 slices of provolone over the bottom half of the rolls, overlapping slightly to cover evenly. Then layer 4 slices of cheddar on top. The double cheese layer ensures every bite gets that gooey, stretchy texture.
- Add the meats. Layer the roast beef evenly over the cheese, followed by the turkey. Don’t pile it too thick in the center—spread it out so every slider gets a good amount. I tear the slices in half if they’re too large to lay flat.
- Top with remaining cheese. Layer the remaining 4 slices of provolone over the meat, then the remaining 4 slices of cheddar. This top cheese layer is what creates that beautiful, melty pull-apart effect when you lift a slider out of the dish.
- Replace the top lid. Carefully place the top half of the rolls back over the fillings. Press down gently to help everything settle. Don’t squish it—just a gentle press.
- Make the butter sauce. In a small saucepan over medium heat, melt the butter. Once melted, remove from heat and whisk in the Dijon mustard, Worcestershire sauce, poppy seeds, garlic powder, onion powder, and black pepper. Taste it—it should be savory, slightly tangy, and buttery. Adjust seasoning if needed.
- Brush the tops. Using your pastry brush, generously brush the butter sauce over the tops of the rolls. Don’t be shy—every bit of that sauce is flavor. Let it soak in for about 2 minutes, then brush on another layer. Reserve about 2 tablespoons of sauce for later.
- First bake (covered). Cover the dish tightly with aluminum foil and bake for 10 minutes. This traps steam and ensures the cheese melts completely without the tops burning.
- Second bake (uncovered). Remove the foil and brush the remaining butter sauce over the tops. Sprinkle the Parmesan cheese on top if using. Bake uncovered for another 10-12 minutes, until the tops are golden brown and the edges are bubbling. The cheese should be visibly melted and slightly crisp around the edges.
- Rest before serving. Remove from the oven and let the sliders rest for 5 minutes. I know it’s tempting to dig in immediately, but this rest period is crucial—it lets the cheese set slightly so the sliders hold together when you pull them apart. If you skip this step, you’ll end up with a cheesy mess (speaking from experience).
- Serve and watch them disappear. Use a spatula to lift individual sliders out of the dish. They should pull apart cleanly, with strings of melted cheese stretching between them. Serve warm.
Sensory cues to watch for: When you remove the foil, the tops should look puffed and slightly damp from the steam. During the uncovered bake, listen for a gentle sizzle around the edges—that’s the butter sauce caramelizing. The finished sliders should be golden brown on top, with cheese visibly bubbling at the edges. The smell alone will draw people into the kitchen.
Cooking Tips & Techniques
I’ve made this recipe enough times to have a few hard-won lessons. Here’s what I wish someone had told me before my first attempt.
Don’t overstuff the rolls. I know it’s tempting to pile on the meat and cheese, but too much filling makes the sliders impossible to eat. They’ll fall apart the second you pick them up. Aim for a uniform layer—about 1/4 inch of meat and a single layer of cheese on each side.
Let the butter sauce soak in. After brushing the first layer of sauce, wait a full 2 minutes before adding the second layer. This gives the rolls time to absorb the butter, which keeps them moist and flavorful all the way through. If you rush this step, the sauce just runs off the top.
Watch the oven like a hawk during the last 5 minutes. Every oven runs differently. My old apartment oven would burn the tops at the 10-minute mark. Check at 8 minutes—if the tops are already deeply golden, pull them out early. You’re looking for a light golden brown, not dark amber.
Use a serrated knife to cut the rolls. A straight chef’s knife will squish the soft rolls. A serrated bread knife glides through cleanly, keeping the structure intact. If you don’t have one, use a long, sharp knife and a gentle sawing motion.
My biggest failure: The first time I made these, I used pre-shredded cheese from a bag. Big mistake. Pre-shredded cheese has anti-caking agents that prevent it from melting smoothly. The sliders came out with a grainy, clumpy texture instead of that silky, stretchy melt. Always buy block cheese and shred it yourself. Yes, it’s more work. Yes, it’s worth it.
Timing strategy: Assemble the sliders up to 4 hours ahead of time and keep them covered in the fridge. When you’re ready to bake, add 5 minutes to the covered baking time to account for the cold dish. This is a lifesaver on game day when you’re juggling multiple dishes.
Variations & Adaptations
One of the best things about this recipe is how easily it adapts to different tastes and dietary needs. Here are some variations I’ve tried and loved.
Buffalo Chicken Sliders: Swap the roast beef and turkey for shredded rotisserie chicken tossed in buffalo sauce. Use blue cheese crumbles instead of provolone, and add a drizzle of ranch dressing before baking. This version disappeared even faster than the original at my last watch party.
Italian Sub Sliders: Use salami, capicola, and pepperoni instead of roast beef and turkey. Swap the cheddar for mozzarella and add a layer of banana peppers. Brush the tops with garlic butter mixed with Italian seasoning. Serve with warm marinara for dipping. This one tastes like your favorite deli sandwich, but warm and melty.
Vegetarian Option: Layer roasted portobello mushrooms, caramelized onions, roasted red peppers, and spinach between the cheese. The mushrooms add that meaty, umami quality that even meat-eaters will love. I made this for a vegetarian friend and she asked for the recipe before she finished her first slider.
Spicy Southwestern Version: Add a layer of pickled jalapeños between the meats, use pepper jack cheese instead of cheddar, and mix a teaspoon of chipotle powder into the butter sauce. The heat builds gradually—it’s not overwhelming, just enough to keep things interesting.
Breakfast Sliders: Yes, this works for breakfast too. Use breakfast sausage patties, scrambled eggs, and cheddar cheese. Brush the tops with maple-butter sauce (melted butter mixed with a tablespoon of maple syrup). These are dangerous—I’ve eaten four in one sitting.
Low-Carb Adaptation: Skip the Hawaiian rolls entirely and use large portobello mushroom caps as the “buns.” Layer the fillings between two caps and bake until the cheese melts. It’s not quite the same experience, but it scratches the itch if you’re watching carbs.
Serving & Storage Suggestions
These sliders are best served hot and fresh from the oven, but they’re surprisingly good at room temperature too—which makes them perfect for buffets and potlucks.
Serving temperature: Serve immediately after the 5-minute rest. The cheese should be stretchy and warm, the tops crisp. If you’re serving at a party, keep the dish covered with foil on a warming tray or in a 200°F oven to maintain temperature.
Presentation ideas: Arrange the sliders on a large wooden board or platter. Garnish with fresh parsley or chives for color. Serve with small bowls of ranch dressing, spicy mayo, or marinara for dipping. For game day, I arrange them in the shape of a football—corny, but people love it.
Complementary dishes: These sliders pair beautifully with creamy grilled buffalo chicken dip for dipping, a fresh green salad with tangy vinaigrette to cut the richness, or crispy sweet potato fries. For a full spread, add a batch of crispy air fryer stuffed banana peppers with Italian sausage and a platter of fresh veggies with ranch.
Storage instructions: Store leftover sliders in an airtight container in the refrigerator for up to 3 days. To reheat, wrap individual sliders in foil and warm in a 350°F oven for 8-10 minutes. Avoid the microwave—it turns the bread rubbery and the cheese tough.
Freezer instructions: Assemble the sliders completely but don’t bake them. Wrap the dish tightly in plastic wrap, then foil, and freeze for up to 3 months. To bake from frozen, add 15-20 minutes to the covered baking time. This is my secret weapon for unexpected guests.
Flavor development: Honestly, these sliders taste even better the next day. The flavors meld together overnight, and the bread absorbs the butter sauce in a way that makes every bite incredibly moist. I sometimes make them a day ahead on purpose.
Nutritional Information & Benefits
Let’s be honest—these sliders are indulgence food. But knowing what’s in them helps you make informed choices. Here’s the estimated nutritional breakdown per slider (based on 12 servings):
| Nutrient | Amount per Slider |
|---|---|
| Calories | 385 |
| Total Fat | 22g |
| Saturated Fat | 13g |
| Cholesterol | 85mg |
| Sodium | 890mg |
| Total Carbohydrates | 28g |
| Dietary Fiber | 1g |
| Sugars | 8g |
| Protein | 22g |
Health considerations: These sliders are high in protein from the meats and cheese, which helps keep you full and satisfied. The calcium content is significant thanks to the double cheese layer. If you’re watching sodium, use low-sodium deli meats and skip the added salt in the butter sauce.
Dietary notes: This recipe contains gluten (from the rolls), dairy (from the cheese and butter), and is not suitable for vegans or those with lactose intolerance. For a gluten-free version, use gluten-free slider buns and check your Worcestershire sauce label (some brands contain gluten).
My personal take: I don’t make these every week, and that’s okay. They’re a treat—something to look forward to on game days, holidays, or when I need a guaranteed crowd-pleaser. Balance is everything. Enjoy them mindfully, savor every bite, and don’t stress about the numbers.
Conclusion
This Ultimate Cheesy Football Pull-Apart Slider Bake is the recipe I turn to when I need a guaranteed win. It’s simple enough for a beginner cook, flexible enough for endless customization, and delicious enough to make you look like a hero. Whether you’re hosting a Super Bowl party, feeding a hungry family on a busy weeknight, or just craving something warm and cheesy, these sliders deliver every single time.
What I love most about this recipe is how it brings people together. There’s something about a pan of warm, pull-apart sliders that makes everyone gather around. No fancy plating, no complicated instructions—just good food that makes people happy. That’s what cooking should be about, honestly.
I’d love to hear how your sliders turn out. Did you try a variation? Add your own twist? Burn the tops like I did the first time? Drop a comment below and let me know. And if you’re looking for more game-day inspiration, don’t miss my creamy crockpot crack chicken with bacon—it’s another crowd favorite that disappears fast. Happy cooking, friends. Now go make some sliders and watch them vanish.
Frequently Asked Questions
Can I make these sliders ahead of time?
Absolutely! Assemble the sliders completely, cover tightly, and refrigerate for up to 24 hours before baking. Add 5 minutes to the covered baking time to account for the cold dish. You can also freeze the unbaked sliders for up to 3 months.
What’s the best way to reheat leftover sliders?
Wrap individual sliders in foil and warm in a 350°F oven for 8-10 minutes. For a quicker option, use an air fryer at 325°F for 4-5 minutes. Avoid the microwave—it makes the bread rubbery and the cheese tough.
Can I use different types of bread?
Hawaiian sweet rolls are ideal because their slight sweetness balances the savory fillings, but you can use any soft slider buns. Brioche buns work well, as do potato rolls. Avoid crusty breads like sourdough—they don’t soften properly during baking.
How do I prevent the bottoms from getting soggy?
Don’t over-brush the butter sauce on the bottom half of the rolls, and make sure your baking dish is greased. The covered baking step also helps by steaming the rolls rather than soaking them. If you’re still having trouble, try toasting the bottom half of the rolls for 2 minutes before adding the fillings.
Can I make these in a slow cooker?
Yes! Assemble the sliders in a greased slow cooker, brush with the butter sauce, cover, and cook on low for 2-3 hours. For crispy tops, transfer the sliders to a baking sheet and broil for 2-3 minutes before serving. This method is great for potlucks when you don’t have oven access.
Pin This Recipe!
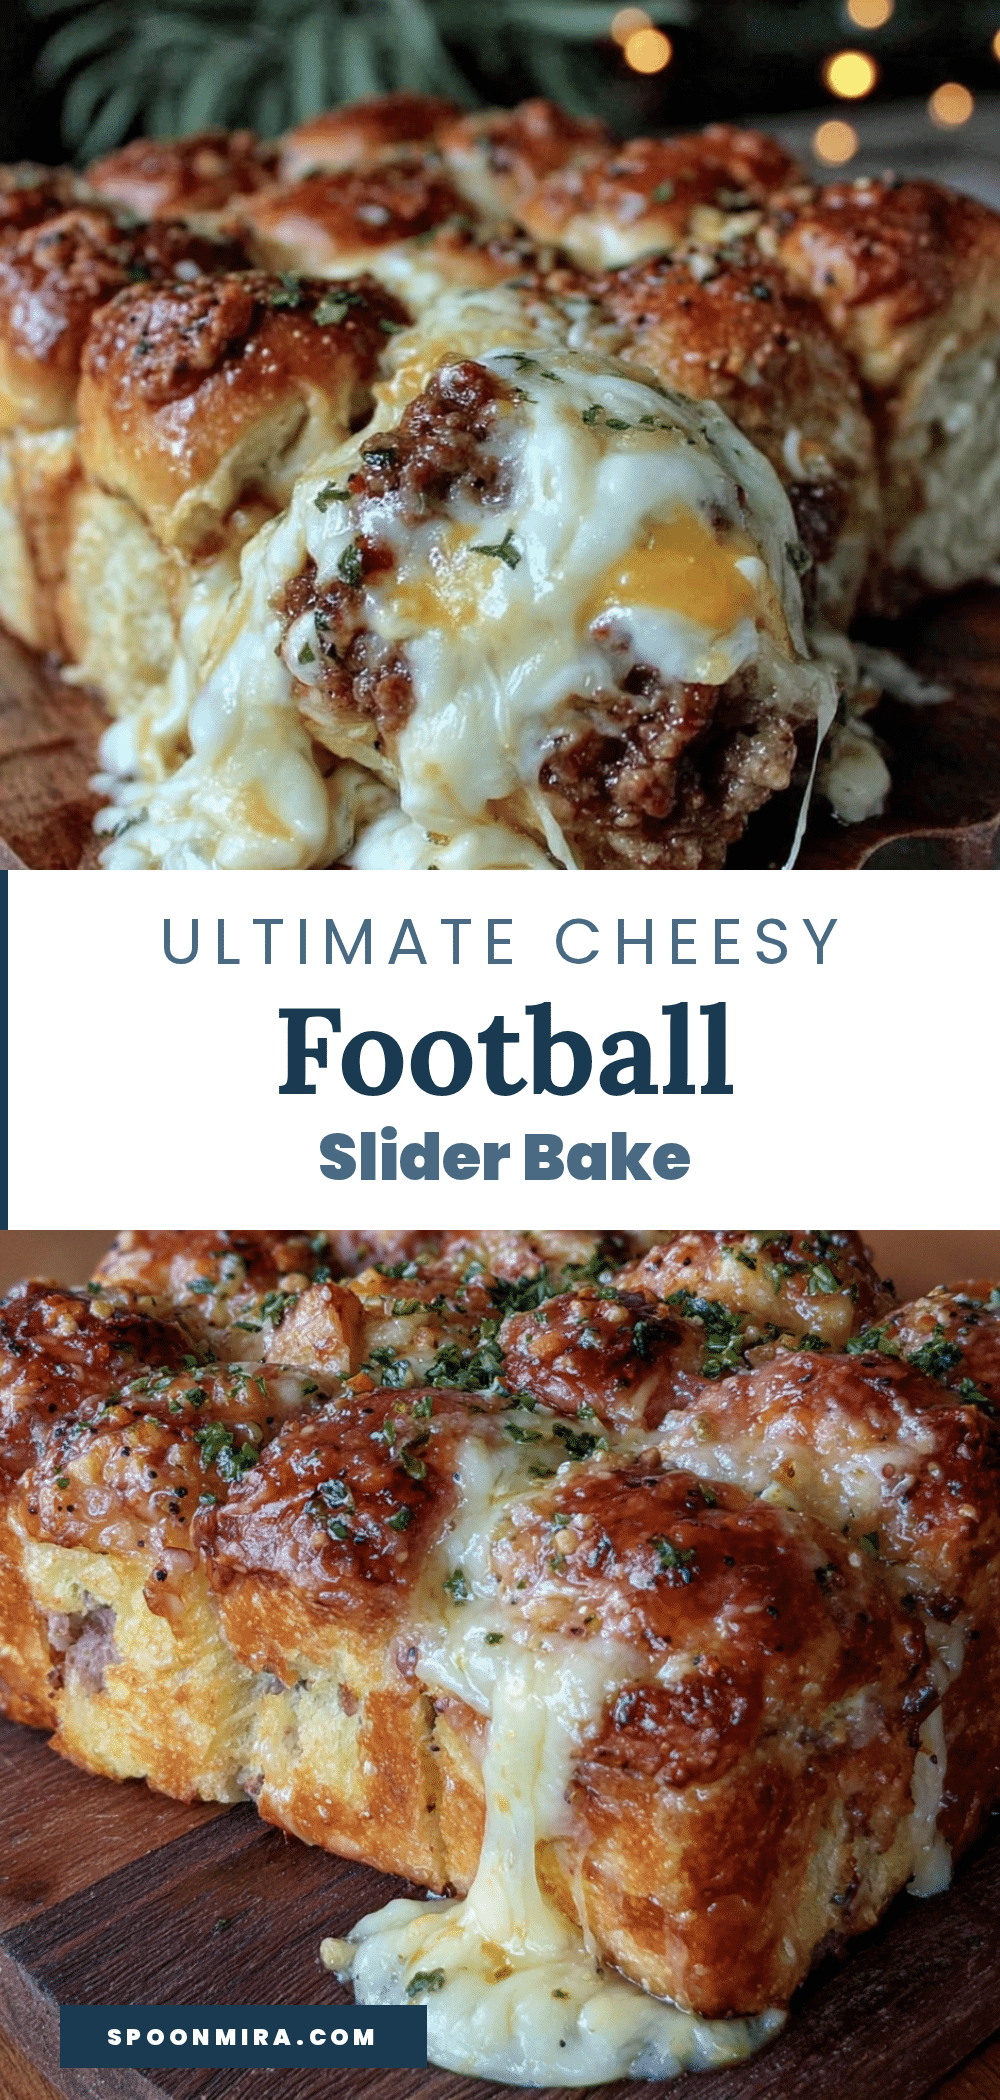
Ultimate Cheesy Football Pull-Apart Slider Bake
These irresistible pull-apart sliders are loaded with roast beef, turkey, provolone, and sharp cheddar, all baked on soft Hawaiian rolls with a savory butter sauce. Perfect for game day, they come together in under 30 minutes and disappear just as fast.
- Prep Time: 15 minutes
- Cook Time: 22 minutes
- Total Time: 37 minutes
- Yield: 12 servings 1x
- Category: Appetizer
- Cuisine: American
Ingredients
- 12-count package Hawaiian sweet rolls
- 1/2 pound deli-sliced roast beef
- 1/2 pound deli-sliced turkey breast
- 8 slices provolone cheese
- 8 slices sharp cheddar cheese
- 1/2 cup unsalted butter
- 2 tablespoons Dijon mustard
- 1 tablespoon Worcestershire sauce
- 1 tablespoon poppy seeds
- 1 teaspoon garlic powder
- 1/2 teaspoon onion powder
- 1/4 teaspoon black pepper
- Optional: 2 tablespoons grated Parmesan cheese
Instructions
- Preheat your oven to 350°F (175°C). Lightly grease a 9×13-inch baking dish with butter or non-stick spray.
- Place the entire slab of Hawaiian rolls in the baking dish. Using a serrated knife, carefully slice the entire slab in half horizontally. Lift the top off and set aside.
- Arrange 4 slices of provolone over the bottom half of the rolls, then layer 4 slices of cheddar on top.
- Layer the roast beef evenly over the cheese, followed by the turkey. Spread the meat out so every slider gets a good amount.
- Layer the remaining 4 slices of provolone over the meat, then the remaining 4 slices of cheddar.
- Carefully place the top half of the rolls back over the fillings. Press down gently.
- In a small saucepan over medium heat, melt the butter. Remove from heat and whisk in the Dijon mustard, Worcestershire sauce, poppy seeds, garlic powder, onion powder, and black pepper.
- Generously brush the butter sauce over the tops of the rolls. Let it soak in for about 2 minutes, then brush on another layer. Reserve about 2 tablespoons of sauce for later.
- Cover the dish tightly with aluminum foil and bake for 10 minutes.
- Remove the foil and brush the remaining butter sauce over the tops. Sprinkle the Parmesan cheese on top if using. Bake uncovered for another 10-12 minutes, until the tops are golden brown and the edges are bubbling.
- Remove from the oven and let the sliders rest for 5 minutes before serving.
- Use a spatula to lift individual sliders out of the dish. Serve warm.
Notes
For best results, use block cheese and shred it yourself—pre-shredded cheese contains anti-caking agents that prevent smooth melting. Assemble the sliders up to 4 hours ahead and refrigerate; add 5 minutes to the covered baking time. To freeze, assemble unbaked, wrap tightly, and freeze for up to 3 months; bake from frozen, adding 15-20 minutes to the covered baking time.
Nutrition
- Serving Size: 1 slider
- Calories: 385
- Sugar: 8
- Sodium: 890
- Fat: 22
- Saturated Fat: 13
- Carbohydrates: 28
- Fiber: 1
- Protein: 22
Keywords: sliders, game day, football, pull-apart, cheesy, Hawaiian rolls, roast beef, turkey, party food


