I figured a pumpkin roll was one of those things you just had to accept might crack. It took about four Thanksgivings for that theory to fall apart completely. The first one looked like a patchwork quilt of pumpkin and shame, held together by cream cheese frosting and sheer denial. The second one was more of a pumpkin crumble situation. By the third year, I was practically expecting the cracks, almost resigned to them. But then I got stubborn. I started paying attention not just to the recipe, but to the *feel* of the cake, the way it moved on the towel, the exact moment it was ready to roll. And you know what? It worked. The cake didn’t crack. It bent like it was made for it.
This Perfect Pumpkin Roll with Cream Cheese Filling isn’t just another dessert recipe. It’s the result of those years of pumpkin-flavored frustration. It’s the method I landed on after learning exactly what makes a pumpkin sponge cake flexible enough to roll without breaking. I’m sharing all those little secrets here, the ones that turn a notoriously finicky dessert into something you can actually, honestly, rely on. If you’ve ever stared at a cracked pumpkin roll and wondered where you went wrong, this is for you. The answer isn’t more flour or less baking time. It’s a few simple tweaks that make all the difference.
This is the kind of recipe that makes you look like a hero at a fall gathering. It’s impressive, it’s beautiful, and it tastes like the coziest sweater weather you can imagine. And now, you can make it without the stress.
Why You’ll Love This Recipe
Let’s be real for a second. Pumpkin rolls have a reputation. People love eating them, but they’re nervous about making them. This recipe is designed to take that nervousness and turn it into pure, unadulterated baking confidence. It’s not just a list of steps; it’s a guide that holds your hand through the tricky parts.
- No-Crack Guarantee (Seriously): The method here is built around preventing cracks. We’re talking about the perfect baking temperature, the ideal rolling technique, and the secret of rolling it while it’s still warm. You’re not just hoping it won’t crack; you’re making sure it can’t.
- Perfectly Spiced and Moist: This isn’t a dry, crumbly pumpkin cake. It’s incredibly moist and tender, with a warm, aromatic spice blend that screams autumn. The cream cheese filling is the perfect tangy, creamy counterpoint.
- Simple Ingredients: You probably have most of these in your pantry right now. No weird, hard-to-find items. Just classic baking staples that come together to create something magical.
- Holiday Showstopper: This is the dessert that gets the “oohs” and “aahs” at Thanksgiving, Friendsgiving, or any fall potluck. It looks like you spent hours on it, but the active time is surprisingly short.
- Make-Ahead Friendly: This is a lifesaver. You can make the pumpkin roll a day or two in advance. It actually gets even better as the flavors meld in the fridge. One less thing to worry about on the big day.
Honestly, this recipe is my best version of a classic. It’s the one I make for my family, the one I bring to parties, and the one I finally feel confident sharing because I know it works every single time. It’s comfort food that you can be proud of.
What Ingredients You Will Need
This recipe uses simple, wholesome ingredients that work together to create a tender, flavorful cake and a luscious, tangy filling. Most of these are pantry staples, which makes this an easy recipe to whip up on a whim. Let’s break down what you need and why each ingredient matters.
For the Pumpkin Cake
- ¾ cup all-purpose flour: This provides the structure for the cake. Be sure to spoon and level it for accuracy. Too much flour can make the cake dry and prone to cracking.
- 1 teaspoon baking powder: The leavening agent that gives the cake its lift. Make sure it’s fresh for the best results.
- ½ teaspoon salt: Balances the sweetness and enhances all the other flavors. Don’t skip it!
- 2 teaspoons pumpkin pie spice: The heart of the flavor. You can use store-bought or make your own with a mix of cinnamon, nutmeg, ginger, and cloves. I prefer using a good quality blend like McCormick for consistent flavor.
- ½ teaspoon ground cinnamon: For an extra layer of warm, cozy spice.
- 3 large eggs, at room temperature: Eggs provide structure and moisture. Room temperature eggs whip up better and create a more stable batter. Take them out of the fridge about 30 minutes before you start.
- 1 cup granulated sugar: Sweetens the cake and helps with its tender texture.
- ⅔ cup pumpkin puree (not pumpkin pie filling): This is crucial. You want 100% pure pumpkin puree. Pumpkin pie filling has added sugar and spices that will throw off the recipe. Libby’s is a reliable brand for this.
- 1 teaspoon vanilla extract: Adds depth and warmth to the flavor profile.
- Powdered sugar, for dusting: This is not just for decoration. It creates a non-stick surface on the towel and prevents the cake from sticking as it rolls.
For the Cream Cheese Filling
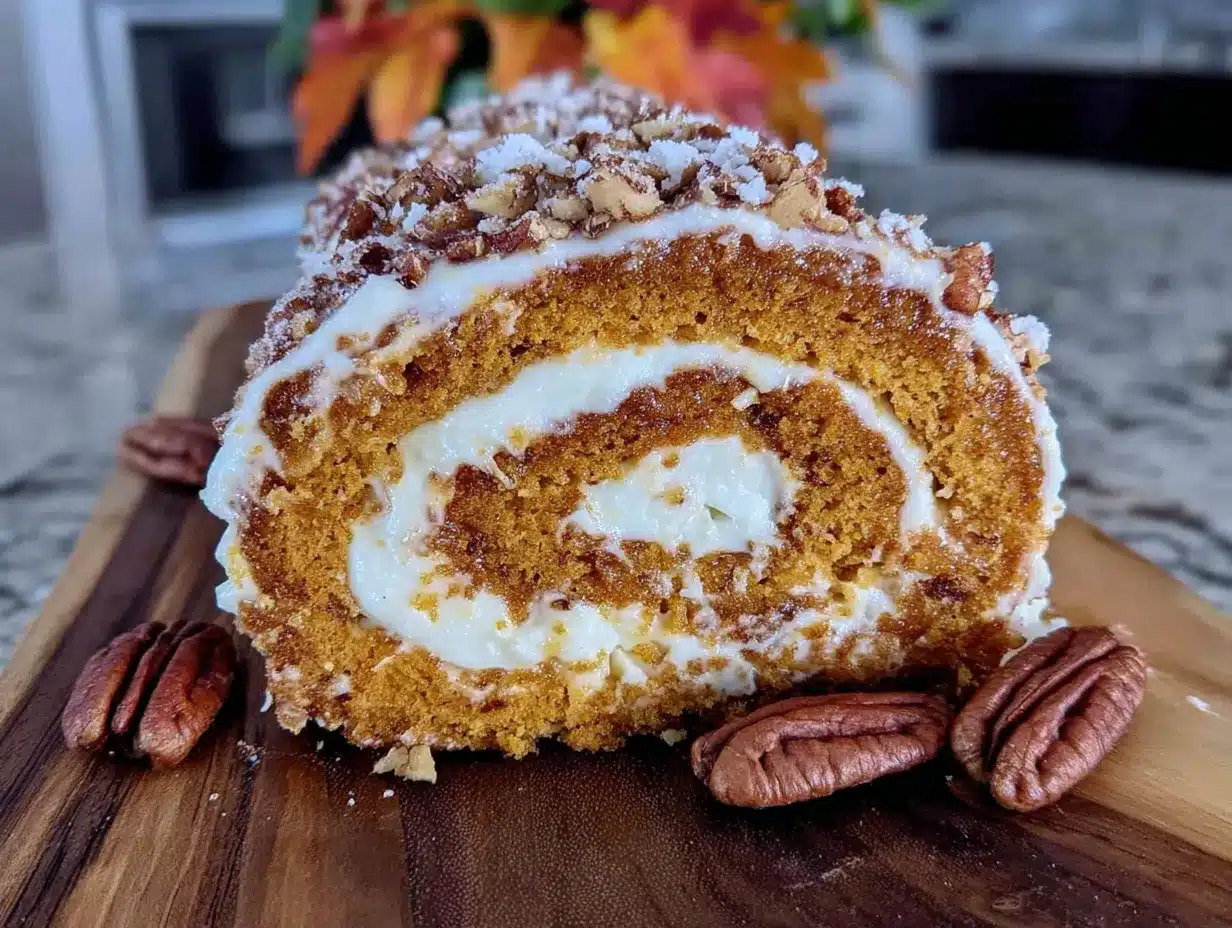
- 8 ounces cream cheese, softened: The base of the filling. Full-fat cream cheese is best for a rich, stable filling that won’t run. Let it soften completely to avoid lumps. Philadelphia is my go-to brand.
- ¼ cup unsalted butter, softened: Adds richness and helps the filling hold its shape. Use unsalted butter so you can control the salt level.
- 1 teaspoon vanilla extract: Enhances the flavor of the cream cheese and butter.
- 1 cup powdered sugar, sifted: Sweetens and thickens the filling. Sifting it prevents any lumps from forming.
Ingredient Selection Tip: For the best texture, use a block-style cream cheese, not the spreadable kind in a tub. The block has a higher fat content and less water, which makes for a much better, thicker filling.
Equipment Needed
You don’t need a lot of fancy gadgets to make this beautiful pumpkin roll, but a few key tools will make the process much smoother. Here’s what you’ll need:
- 15×10-inch Jelly Roll Pan: This is the standard size for a pumpkin roll. It has shallow sides that allow the cake to bake evenly and thinly.
- Parchment Paper: Absolutely essential. You’ll line the pan with it to prevent the cake from sticking. It also helps you lift the cake out easily.
- Clean Kitchen Towel: This is your rolling tool. Use a lint-free, thin kitchen towel (like a flour sack towel). The thinner the towel, the easier it is to roll the cake.
- Electric Mixer (Hand or Stand): You’ll need this to whip the eggs and sugar to the right consistency and to beat the cream cheese filling until it’s smooth and fluffy.
- Rubber Spatula: For spreading the batter evenly in the pan and for folding ingredients.
- Fine-Mesh Sieve: For sifting the powdered sugar over the towel and into the filling. It makes a big difference in texture.
If you don’t have a jelly roll pan, you can sometimes use a large, rimmed baking sheet of a similar size, but the depth might be slightly different. A dedicated jelly roll pan is a worthwhile investment if you make this often. And honestly, a good quality, lint-free towel is your best friend here—don’t use a thick, fluffy bath towel or you’ll end up with a textured cake!
Preparation Method
Alright, let’s get to the good part. Follow these steps carefully, and you’ll have a perfect, crack-free pumpkin roll. I’ve added all my little tips and tricks along the way to make sure you succeed.
- Preheat and Prep: Preheat your oven to 375°F (190°C). Line your 15×10-inch jelly roll pan with parchment paper, leaving a little overhang on the two long sides. This will act as handles to lift the cake out later. Lightly grease the parchment paper with a bit of non-stick spray or butter.
- Mix the Dry Ingredients: In a small bowl, whisk together the flour, baking powder, salt, pumpkin pie spice, and cinnamon. Set aside. This ensures the spices are evenly distributed.
- Whip the Eggs and Sugar: In a large mixing bowl, beat the eggs and granulated sugar with an electric mixer on high speed for about 3-5 minutes. You’re looking for a thick, pale, and fluffy mixture that falls in a ribbon when you lift the beaters. This step is crucial for incorporating air, which gives the cake its light texture.
- Add the Pumpkin and Vanilla: Beat in the pumpkin puree and vanilla extract on low speed until just combined. Don’t overmix here.
- Fold in the Dry Ingredients: Gently fold the flour mixture into the wet ingredients using a rubber spatula. Fold just until you see no more streaks of flour. Overmixing will develop the gluten and make the cake tough.
- Bake the Cake: Pour the batter into the prepared pan and spread it evenly into the corners with your spatula. It will be a thin layer. Bake for 13-15 minutes, or until the top of the cake springs back when you gently touch it with your finger. The edges will just start to pull away from the pan.
- Prepare the Rolling Surface: While the cake is baking, lay your clean kitchen towel flat on a work surface. Generously sift a layer of powdered sugar all over the towel. This is your non-stick surface.
- The Crucial Roll (While It’s Hot): As soon as the cake comes out of the oven, run a knife around the edges to loosen it. Using the parchment paper overhang, lift the cake out of the pan and flip it directly onto the powdered sugar-dusted towel. Carefully peel off the parchment paper. Do not skip this step.
- Roll It Up: Starting at one of the short ends, use the towel to help you roll the cake up tightly. Roll it up in the towel itself. The towel will be between the layers of the cake. Let the rolled-up cake cool completely on a wire rack. This is the secret to a crack-free roll! It sets the cake’s shape while it’s still warm and pliable.
- Make the Filling: While the cake is cooling, make the filling. In a medium bowl, beat the softened cream cheese and butter together until smooth and creamy. Beat in the vanilla extract. Then, gradually beat in the sifted powdered sugar until the filling is smooth and fluffy.
- Unroll and Fill: Once the cake is completely cool, gently unroll it. It will want to stay in a slight curve, which is perfect. Spread the cream cheese filling evenly over the cake, leaving a ½-inch border around the edges.
- Re-Roll and Chill: Carefully re-roll the cake, this time without the towel. Use the towel to help you lift it if needed. Wrap the finished pumpkin roll tightly in plastic wrap and refrigerate for at least 1 hour, or up to 2 days. This helps it set and makes it easier to slice cleanly.
Cooking Tips & Techniques
I’ve learned these lessons the hard way, so you don’t have to. Here are my best tips for a perfect pumpkin roll every time.
- The Temperature is Key: Baking at 375°F is important. Too low, and the cake can dry out before it’s set. Too high, and it can brown too quickly on the outside while staying raw in the middle.
- Don’t Overbake: This is the number one cause of cracks. A perfectly baked pumpkin roll is tender and moist. If it bakes for even a minute too long, it becomes brittle and will crack when you try to roll it. Trust the touch test—a gentle spring back means it’s done.
- Roll It While It’s Hot: This is non-negotiable. The cake is most flexible when it’s warm. If you let it cool flat on the counter, it will set in a flat shape and crack the moment you try to curve it. Rolling it in the towel while hot “trains” it to hold a curve.
- Don’t Skimp on the Powdered Sugar: Be generous with the powdered sugar on the towel. It prevents the cake from sticking to the fabric. A sticky cake will tear, and a torn cake is basically a cracked cake.
- Cool Completely Before Filling: If you try to fill the cake while it’s still warm, the cream cheese filling will melt and turn into a runny mess. Patience is a virtue here. Let that rolled cake cool all the way down on the rack.
I once forgot to roll the cake while it was hot and tried to do it after it had cooled for 20 minutes. It was like trying to roll a piece of cardboard. It shattered into several large, pumpkin-flavored pieces. I ended up making a pumpkin trifle that night. Learn from my mistakes!
Variations & Adaptations
This recipe is a fantastic base, and it’s easy to tweak it to your liking. Here are a few variations I’ve tried and loved.
- Gluten-Free Version: Substitute the all-purpose flour with a good quality 1-to-1 gluten-free baking flour blend (like King Arthur Measure for Measure). The texture will be slightly more delicate, but it works surprisingly well. Just be extra gentle when rolling.
- Spice It Up: If you love a bolder spice profile, add a pinch of ground cloves, allspice, or even a tiny pinch of black pepper to the dry ingredients. It gives the cake a more complex, warming flavor.
- Chocolate Pumpkin Roll: For a chocolate twist, replace ¼ cup of the flour with ¼ cup of unsweetened cocoa powder. You’ll have a beautiful chocolate-pumpkin swirl effect, and it pairs amazingly with the cream cheese filling.
- Nutty Addition: Fold ½ cup of finely chopped pecans or walnuts into the batter before baking. They add a wonderful crunch and a nutty flavor that complements the pumpkin beautifully.
- Maple Cream Cheese Filling: Replace the vanilla extract in the filling with 1-2 tablespoons of pure maple syrup. It adds a deep, autumnal sweetness that is just divine.
My personal favorite variation is the Maple Cream Cheese Filling. I tried it one year when I was out of vanilla and had a bottle of good maple syrup staring at me from the pantry. It was a happy accident, and now it’s my go-to for the holidays.
Serving & Storage Suggestions
This pumpkin roll is a star on any dessert table. Here’s how to serve and store it for the best experience.
- Serving: Serve the pumpkin roll cold, straight from the refrigerator. It slices much more cleanly when it’s well-chilled. Use a sharp, serrated knife and wipe it clean between slices for the prettiest presentation. A light dusting of powdered sugar and a few fresh cranberries or a sprig of rosemary on the plate make it look extra festive.
- What to Serve With It: A slice of this pumpkin roll is wonderful on its own, but it’s also fantastic with a dollop of lightly sweetened whipped cream or a scoop of vanilla bean ice cream. For a cozy treat, pair it with a warm cup of spiced apple cider or a pumpkin spice latte.
- Storage: Wrap the pumpkin roll tightly in plastic wrap and store it in the refrigerator. It will keep perfectly for up to 5 days. In fact, the flavors actually meld and improve after a day or two.
- Freezing: This pumpkin roll freezes beautifully! Wrap it tightly in a layer of plastic wrap, then a layer of aluminum foil. Freeze for up to 3 months. To thaw, transfer it to the refrigerator overnight. It will be just as perfect as the day you made it.
If you’re planning a big meal, this is the perfect make-ahead dessert. You can make it two days before Thanksgiving, and it will be one less thing on your plate—literally and figuratively.
Nutritional Information & Benefits
While this is definitely a treat, it’s not without its redeeming qualities! Pumpkin is a nutritional powerhouse, and this recipe lets it shine.
- Estimated per serving (1 slice, based on 10 servings): Calories: 320, Fat: 16g, Saturated Fat: 9g, Cholesterol: 95mg, Sodium: 250mg, Carbohydrates: 40g, Fiber: 1g, Sugar: 32g, Protein: 5g.
- Pumpkin Power: Pumpkin is packed with Vitamin A, which is fantastic for your vision and immune system. It’s also a good source of fiber and antioxidants.
- Dietary Considerations: This recipe can be made gluten-free (see variations above). It is not dairy-free or vegan, but it is a wonderful option for a fall dessert that feels a little more wholesome than a standard cake.
- Potential Allergens: This recipe contains wheat (gluten), dairy (butter, cream cheese), and eggs.
I like to think of this as a way to enjoy a seasonal vegetable in a truly delicious form. It’s not health food, but it’s a much better choice than a lot of other processed desserts, and it brings the whole family together.
Conclusion
So there you have it. A pumpkin roll recipe that doesn’t come with a side of anxiety. This Perfect Pumpkin Roll with Cream Cheese Filling is more than just a dessert; it’s proof that with the right technique, you can conquer even the most intimidating baking projects. It’s moist, it’s spiced to perfection, and the creamy, tangy filling is the stuff of dreams.
I really hope you give this recipe a try. Don’t be afraid to make it your own—maybe try that maple filling or add some nuts. The beauty of this recipe is that it’s a solid foundation for your own creativity. If you’re looking for another fall favorite, you might enjoy this pumpkin spice sheet cake for a simpler, equally delicious option. Or, if you want to use up some of that leftover cream cheese, these peach cream cheese danish braids are a fantastic brunch idea.
I can’t wait to hear how your pumpkin roll turns out! Did you try any of the variations? Drop a comment below and let me know. And if you loved this recipe, please share it with a friend who needs a little baking confidence. Happy baking, friends!
Frequently Asked Questions
Why did my pumpkin roll crack?
The most common reasons are overbaking the cake or letting it cool before rolling it. The cake must be rolled while it is still warm and pliable. Overbaking dries it out, making it brittle. Using the method in this recipe—rolling it immediately in a powdered sugar-dusted towel—is the best way to prevent cracks.
Can I use pumpkin pie filling instead of pumpkin puree?
No, you should not. Pumpkin pie filling is pre-sweetened and spiced, which will throw off the balance of the recipe. It also has a different texture and moisture content. Always use 100% pure pumpkin puree for the best results.
How do I get clean slices without the filling squishing out?
Chill the pumpkin roll for at least 1 hour (or up to 2 days) before slicing. This firms up the filling and the cake, making it much easier to cut. Use a sharp, serrated knife and wipe it clean with a damp paper towel between each slice for the prettiest presentation.
Can I make this pumpkin roll ahead of time?
Absolutely! This is a fantastic make-ahead dessert. You can prepare the pumpkin roll up to 2 days in advance. Wrap it tightly in plastic wrap and store it in the refrigerator. The flavors actually get better as they meld together.
Can I freeze the pumpkin roll?
Yes, it freezes beautifully. Once the pumpkin roll is assembled and chilled, wrap it tightly in a layer of plastic wrap, then a layer of aluminum foil. Freeze for up to 3 months. To thaw, place it in the refrigerator overnight. Slice and serve cold.
Pin This Recipe!
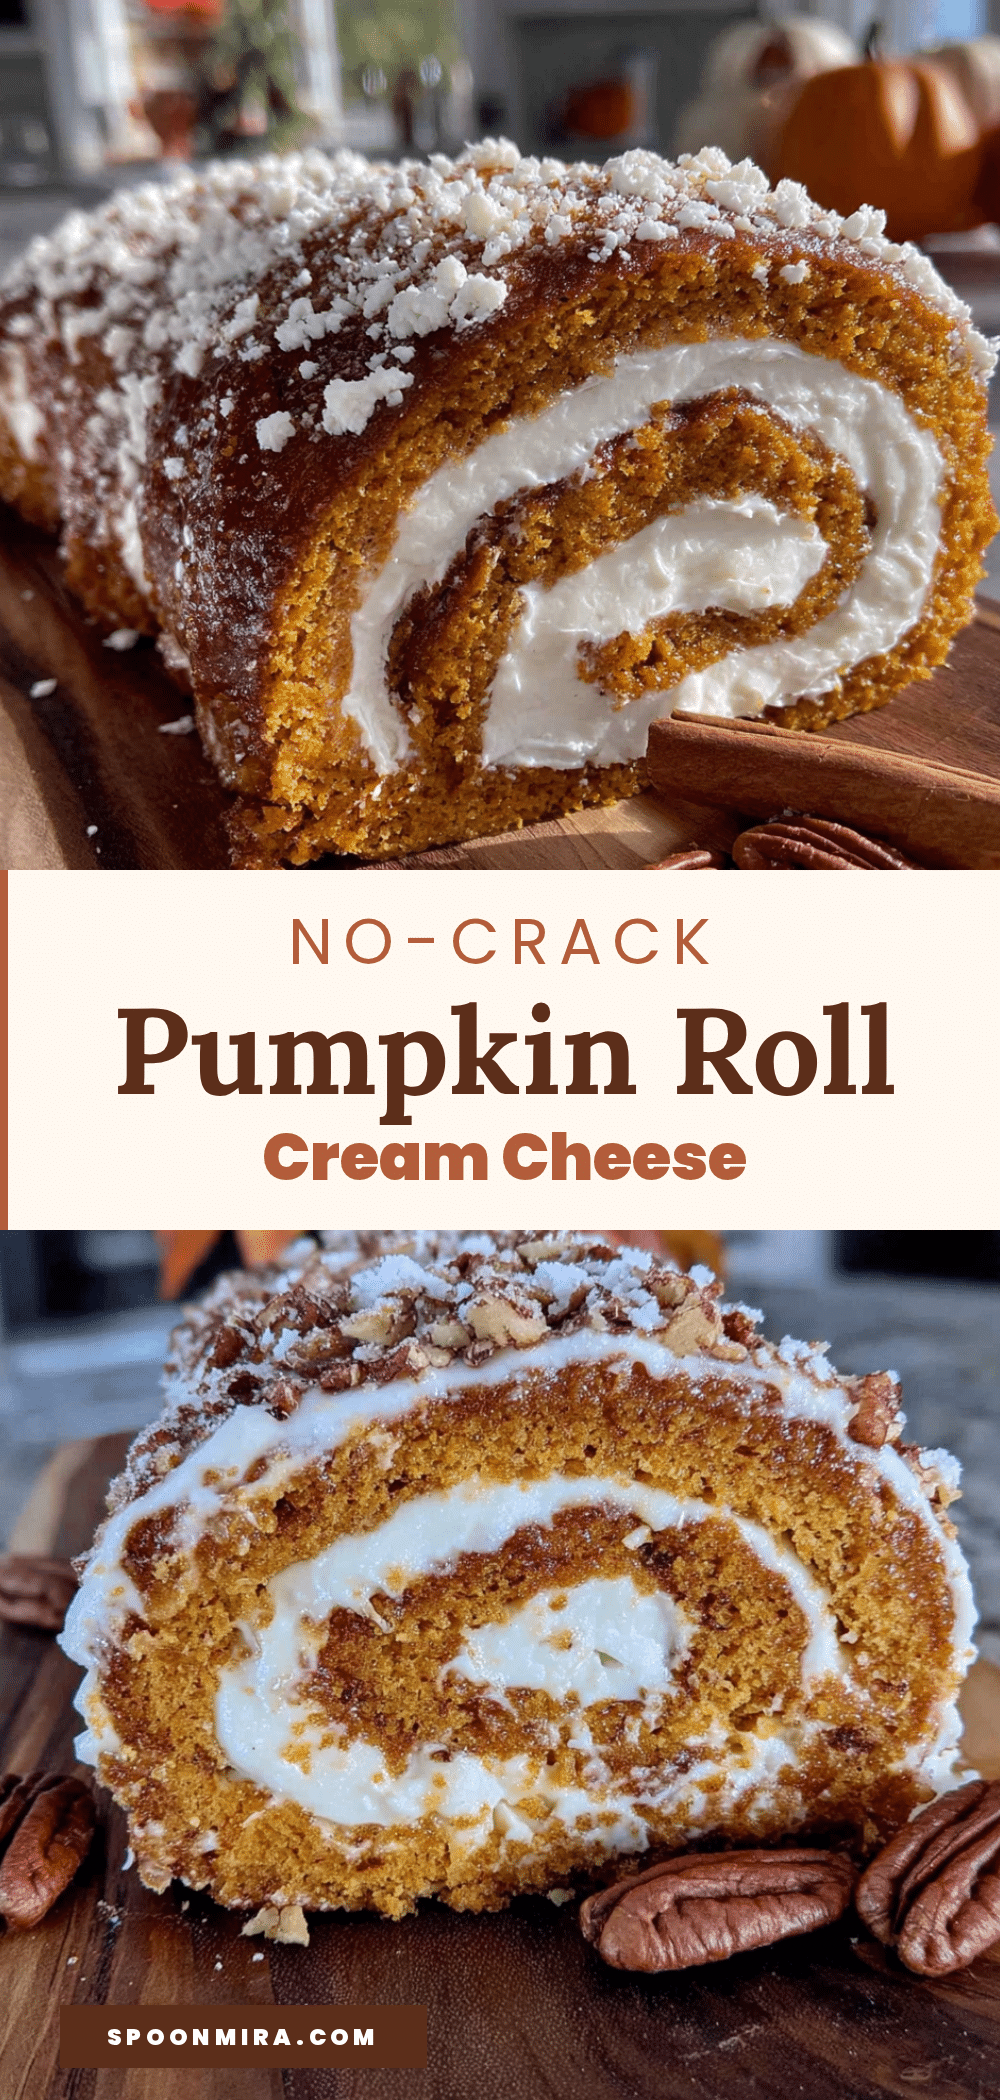
Perfect Pumpkin Roll with Cream Cheese Filling: Easy No-Crack Recipe
This Perfect Pumpkin Roll with Cream Cheese Filling is a foolproof, no-crack recipe that yields a moist, tender pumpkin cake rolled with a luscious cream cheese filling. It’s the ultimate fall showstopper, perfect for Thanksgiving or any autumn gathering.
- Prep Time: 20 minutes
- Cook Time: 15 minutes
- Total Time: 1 hour 35 minutes (includes chilling)
- Yield: 10 servings 1x
- Category: Dessert
- Cuisine: American
Ingredients
- ¾ cup all-purpose flour
- 1 teaspoon baking powder
- ½ teaspoon salt
- 2 teaspoons pumpkin pie spice
- ½ teaspoon ground cinnamon
- 3 large eggs, at room temperature
- 1 cup granulated sugar
- ⅔ cup pumpkin puree (not pumpkin pie filling)
- 1 teaspoon vanilla extract
- Powdered sugar, for dusting
- 8 ounces cream cheese, softened
- ¼ cup unsalted butter, softened
- 1 teaspoon vanilla extract
- 1 cup powdered sugar, sifted
Instructions
- Preheat your oven to 375°F (190°C). Line a 15×10-inch jelly roll pan with parchment paper, leaving overhang on the two long sides. Lightly grease the parchment paper.
- In a small bowl, whisk together the flour, baking powder, salt, pumpkin pie spice, and cinnamon. Set aside.
- In a large mixing bowl, beat the eggs and granulated sugar with an electric mixer on high speed for 3-5 minutes until thick, pale, and fluffy.
- Beat in the pumpkin puree and vanilla extract on low speed until just combined.
- Gently fold the flour mixture into the wet ingredients using a rubber spatula until no streaks of flour remain.
- Pour the batter into the prepared pan and spread evenly. Bake for 13-15 minutes, until the top springs back when gently touched.
- While the cake bakes, lay a clean kitchen towel flat on a work surface and generously sift powdered sugar over it.
- As soon as the cake comes out of the oven, run a knife around the edges. Using the parchment overhang, lift the cake and flip it onto the powdered sugar-dusted towel. Carefully peel off the parchment paper.
- Starting at one short end, use the towel to roll the cake up tightly. Let the rolled cake cool completely on a wire rack.
- While the cake cools, make the filling: In a medium bowl, beat the softened cream cheese and butter until smooth. Beat in the vanilla extract, then gradually beat in the sifted powdered sugar until smooth and fluffy.
- Once the cake is completely cool, gently unroll it. Spread the cream cheese filling evenly over the cake, leaving a ½-inch border.
- Carefully re-roll the cake without the towel. Wrap tightly in plastic wrap and refrigerate for at least 1 hour, or up to 2 days.
Notes
Roll the cake while it’s still hot to prevent cracks. Use 100% pure pumpkin puree, not pumpkin pie filling. For clean slices, chill the roll for at least 1 hour before slicing. The roll can be made up to 2 days ahead and stored in the refrigerator, or frozen for up to 3 months.
Nutrition
- Serving Size: 1 slice
- Calories: 320
- Sugar: 32
- Sodium: 250
- Fat: 16
- Saturated Fat: 9
- Carbohydrates: 40
- Fiber: 1
- Protein: 5
Keywords: pumpkin roll, pumpkin dessert, cream cheese filling, no-crack pumpkin roll, fall dessert, Thanksgiving dessert, pumpkin cake roll


