Third time in a week I’d made this dip, and I was still tweaking the sour cream-to-cream cheese ratio. My kids had stopped asking what was for dinner and started just checking the fridge for the black bean mummy taco dip. Honestly, that felt like a win. Halloween week had snuck up on me—as it always does—and I needed something that felt festive but didn’t require me to carve anything or dye frosting neon colors.
The first batch came out too runny. The second one? The “bandages” slid right off the beans. But by that third attempt, I had it. The beans held their shape, the cheese was perfectly melted, and the sour cream stripes stayed put like they were glued on (which, for the record, they kind of are—more on that later). I stood there in my kitchen, spatula in hand, eating straight out of the dish, and realized this was it. This was the one I’d bring to the neighborhood potluck and make every single Halloween from now on.
It’s not fancy. It’s not complicated. But this black bean mummy taco dip has a way of making people smile—and that’s the whole point, isn’t it?
Why You’ll Love This Recipe
Let me tell you why this dip has earned a permanent spot in my Halloween rotation. First off, it’s ridiculously easy. We’re talking 15 minutes of active prep time, max. You don’t need a food processor, a stand mixer, or any fancy gadgets. Just a baking dish, a spoon, and maybe a spatula if you’re feeling fancy.
Here’s what makes it stand out:
- Quick & Easy : From fridge to table in under 25 minutes. Seriously. Perfect for those nights when the kids are already hyped on candy and you need something on the table fast.
- Simple Ingredients : You probably have most of this in your pantry right now. Canned black beans, taco seasoning, cream cheese, sour cream, shredded cheese—all the good stuff.
- Perfect for Halloween Parties : It looks like a mummy! The sour cream stripes and olive eyes are so simple but everyone loses their minds over them. It’s the kind of dish that gets photographed before it gets eaten.
- Crowd-Pleaser : I’ve served this at three different gatherings now, and it disappears every single time. Kids love the fun design, adults love the flavor. It’s a win-win.
- Unbelievably Delicious : The combo of seasoned black beans, creamy cheese, and cool sour cream is just… perfect. It’s savory, a little tangy, and totally addictive.
This isn’t just another taco dip with a spooky name slapped on it. I tested the ratios so the dip holds its shape when you scoop it—no sad, soupy mess here. The beans are seasoned just right, and the cream cheese layer adds that rich, velvety base that makes every bite satisfying. It’s the kind of recipe you’ll make for Halloween and then find yourself making in July because you’re craving it.
And honestly? It’s the dip that makes you close your eyes after the first bite. Comfort food, Halloween style.
What Ingredients You Will Need
This recipe uses simple, everyday ingredients to deliver maximum flavor with minimal fuss. Most of these are probably already in your kitchen, which is exactly how I like it.
- 1 can (15 oz) black beans, drained and rinsed – Canned is totally fine here. No need to soak dried beans. Just drain, rinse, and pat them dry so they don’t make the dip watery.
- 1 packet (1 oz) taco seasoning – I use Ortega or Old El Paso. If you have homemade taco seasoning, even better. (adds a smoky, savory kick)
- 8 oz cream cheese, softened – Full-fat works best for that creamy texture. Let it sit on the counter for 20 minutes before mixing. (use dairy-free cream cheese if needed)
- 1/2 cup sour cream – This goes into the cream cheese layer AND gets used for the mummy stripes. Buy an extra small container if you want to be generous with the bandages.
- 1 cup shredded Mexican blend cheese – Sharp cheddar, Monterey Jack, or a mix. Don’t use pre-shredded if you can help it—it doesn’t melt as smoothly. (adds richness)
- 1/4 cup salsa (mild or medium) – Use your favorite jarred salsa. I like Pace or a chunky restaurant-style. (drain excess liquid if it’s watery)
- 1/2 teaspoon garlic powder – Optional but recommended. It adds depth without overpowering.
- 2 black olives, sliced into rounds – These become the mummy’s eyes. Use canned sliced olives for convenience.
- 1 tablespoon chopped fresh cilantro (optional) – For garnish. Not everyone loves cilantro, so I keep it on the side.
- Tortilla chips, for serving – Scoop-style chips work best. They hold up to the dip and make the mummy design easier to see.
Ingredient tips from my kitchen: I recommend using a block of cream cheese rather than the spreadable tub kind. The block melts into a thicker, creamier base. For the black beans, make sure they’re really dry after rinsing—pat them with a paper towel if you’re feeling extra. Wet beans make the dip runny, and nobody wants a sad, soupy mummy.
If you’re making this for a crowd with dietary restrictions, swap the cream cheese for a plant-based version and use dairy-free sour cream. The texture will be slightly less firm, but it still tastes great.
Equipment Needed
You don’t need much for this one. That’s the beauty of it.
- 9-inch pie plate or small baking dish – A round dish works best for the mummy shape, but an 8×8 square pan also works. I’ve used both.
- Mixing bowls – One medium bowl for the beans, one small bowl for the cream cheese mixture.
- Spatula – A rubber spatula is perfect for spreading the cream cheese layer. I also use it to scrape every last bit of bean mixture.
- Measuring cups and spoons – For the sour cream, salsa, and seasonings.
- Small offset spatula or butter knife – This helps create the mummy stripes. A piping bag works too, but honestly, a knife is easier to clean.
- Oven – Preheated to 375°F (190°C). No toaster oven recommendations here—this needs a full-size oven for even melting.
Budget-friendly tip: If you don’t have a pie plate, use a cast-iron skillet. It retains heat beautifully and gives the dip a nice, even melt. I’ve also made this in a disposable aluminum pan for potlucks—works perfectly and means zero cleanup.
Personal note: I used a glass pie dish for years, but last year I switched to a ceramic one. The heat distribution is more even, and the dip stays warm longer. Just something to think about if you’re in the market.
Preparation Method

Alright, let’s get to the fun part. Here’s how to make this dip step by step. I’ve included all the little details I wish someone had told me the first time.
- Preheat your oven to 375°F (190°C). While it’s heating up, take your cream cheese out of the fridge and let it sit on the counter. You want it soft but not melty—about 20 minutes should do it.
- Prepare the black bean layer. In a medium mixing bowl, combine the drained and rinsed black beans with the taco seasoning. Stir until every bean is coated. If the mixture looks dry, add a tablespoon of water—but only if needed. Set aside.
- Make the cream cheese base. In a small bowl, beat the softened cream cheese with a fork or spatula until it’s smooth and fluffy. Stir in 1/4 cup of the sour cream, the shredded cheese, salsa, and garlic powder. Mix until everything is combined. It should look like a thick, creamy paste. Taste it (I always do). Adjust salt if needed.
- Assemble the dip. Spread the cream cheese mixture evenly into the bottom of your pie plate or baking dish. Use a spatula to smooth it out. Then, spoon the seasoned black beans on top and spread them in an even layer. Don’t press too hard—you want the beans to sit on top, not sink into the cream cheese.
- Bake. Place the dish in the preheated oven and bake for 15-18 minutes, or until the edges are bubbly and the cheese is fully melted. You’ll know it’s done when the center is hot and the beans look slightly toasted on top. (Be careful not to overbake—the sour cream stripes go on after baking.)
- Create the mummy stripes. Remove the dip from the oven and let it cool for 2-3 minutes. While it’s still warm, use a small offset spatula or butter knife to drizzle the remaining 1/4 cup of sour cream in horizontal stripes across the top. Don’t worry about making them perfect—mummies are supposed to look a little messy. I usually do 5-6 stripes, leaving gaps for the eyes.
- Add the eyes. Place two olive slices in the gaps between the stripes, near the top of the dip. These are the mummy’s eyes. I like to position them slightly asymmetrical for a goofier look. Press them gently into the dip so they stay put.
- Garnish and serve. Sprinkle chopped cilantro on top if you’re using it. Serve immediately with tortilla chips. The dip is best warm, when the cheese is still stretchy and the sour cream stripes are cool and creamy.
Sensory cues: When you pull the dip out of the oven, it should smell like warm taco seasoning and melted cheese—that savory, comforting aroma that makes everyone wander into the kitchen. The top should be golden in spots, and you should see tiny bubbles around the edges. The beans will look slightly matte, not shiny. That’s how you know it’s done.
Pro tip: If the dip seems a little loose after baking, let it sit for 5 minutes. It firms up as it cools. I learned this the hard way after serving a soupy first batch to my family.
Cooking Tips & Techniques
I’ve made this dip more times than I care to admit, so let me save you some trouble. Here are the things I wish I’d known from the start.
Dry your beans. This is the number one mistake people make. If you skip patting the black beans dry after rinsing, the excess water will seep into the cream cheese layer and turn your dip into soup. I learned this the hard way on attempt number one. Just take 30 seconds to blot them with a paper towel. It makes a world of difference.
Soften your cream cheese properly. Cold cream cheese doesn’t mix well. You’ll end up with lumpy dip. Let it sit out for 20-30 minutes before you start. If you’re in a rush, microwave it for 10 seconds at 50% power—but watch it carefully. Nobody wants scrambled cream cheese.
Don’t overbake. The dip is done when the edges are bubbly and the cheese is melted. If you leave it in too long, the sour cream stripes will slide off when you add them. I usually set a timer for 15 minutes and check it. If it needs more time, I add 2-minute increments.
Use a piping bag for stripes (optional). If you want really clean, professional-looking mummy stripes, spoon the remaining sour cream into a small zip-top bag, snip off a tiny corner, and pipe the stripes on. It gives you more control. But honestly? I prefer the rustic look of using a knife. It feels more Halloween-y.
Multitask like a pro. While the dip is baking, set out your chips, arrange your serving platter, and pour yourself a drink. The dip only takes 15 minutes in the oven, so use that time wisely. I usually prep the olives and cilantro while it bakes.
Keep it warm. If you’re serving this at a party, transfer the baked dip to a small slow cooker on the “warm” setting. Add the sour cream stripes and olives right before serving. This keeps the dip hot and the stripes intact for hours.
Variations & Adaptations
This dip is super flexible. Here are some ways to switch it up depending on what you have on hand or who you’re feeding.
Vegetarian/Vegan Version: This recipe is already vegetarian! To make it vegan, use plant-based cream cheese and dairy-free sour cream. I’ve tried Kite Hill’s cream cheese and Forager Project’s sour cream—both work well. The texture is slightly thinner, so let the dip cool for an extra 5 minutes before adding the stripes.
Spicy Kick: If you like heat, add 1/2 teaspoon of cayenne pepper or a chopped jalapeño to the cream cheese mixture. You can also use hot salsa instead of mild. My husband adds a drizzle of sriracha to his portion—he’s a heat fiend.
Meat Lover’s Version: Stir 1/2 cup of cooked, crumbled ground beef or turkey into the black bean layer before baking. Season the meat with extra taco seasoning for maximum flavor. I’ve done this for game day parties, and it always gets devoured.
Gluten-Free: This recipe is naturally gluten-free as long as your taco seasoning and salsa are certified gluten-free. Most brands are, but double-check the labels if you’re serving someone with celiac disease.
Different Bean Options: Not a fan of black beans? Use refried beans instead. Spread them directly over the cream cheese layer. The texture will be smoother, but the flavor is still fantastic. I’ve also used pinto beans—just mash them slightly with a fork before adding the seasoning.
Personal variation I love: One year, I added a layer of guacamole between the cream cheese and the black beans. It added a creamy, fresh element that balanced the richness. Just make sure the guac is thick—if it’s too runny, it’ll make the dip slide around. I use creamy coleslaw on the side for extra crunch.
Serving & Storage Suggestions
This dip is best served warm, straight from the oven. The contrast between the hot, melty cheese and the cool sour cream stripes is what makes it special.
Presentation tips: Serve it in the same dish you baked it in—it looks rustic and inviting. Surround it with tortilla chips in a circular pattern. I like to use a mix of scoop-style chips and thin, crispy ones. The scoops hold the dip, and the thin ones are great for scraping up every last bit.
What to serve with it: This dip pairs beautifully with other Halloween snacks. I often serve it alongside creamy loaded buffalo chicken dip for a full appetizer spread. For a main meal, it goes great with one-pan ground beef and rice skillet on the side. And if you’re hosting a fall gathering, a bowl of cozy fall harvest chicken and wild rice soup makes a perfect starter.
Storage: Leftover dip (if you have any—it’s rare) can be stored in an airtight container in the refrigerator for up to 3 days. The sour cream stripes will soften and blend into the dip, but it still tastes great.
Reheating: Reheat individual portions in the microwave for 30-45 seconds. For the whole dish, cover it with foil and reheat in a 350°F oven for 10-12 minutes. The stripes won’t look as pretty, but the flavor will be just as good.
How flavors develop: Honestly, this dip is best fresh. The cream cheese layer is at its creamiest right after baking. That said, if you’re making it ahead, prepare everything except the sour cream stripes and olives. Bake it, let it cool, cover it, and refrigerate. When you’re ready to serve, reheat it in the oven and add the stripes and olives right before serving. The stripes stay bright and fresh this way.
Freezer tip: I don’t recommend freezing this dip. The cream cheese gets grainy when thawed, and the sour cream separates. Make it fresh—it only takes 25 minutes!
Nutritional Information & Benefits
Here’s the breakdown for one serving (about 1/4 of the dip, not including chips):
| Nutrient | Amount |
|---|---|
| Calories | 280 |
| Total Fat | 18g |
| Saturated Fat | 10g |
| Cholesterol | 50mg |
| Sodium | 620mg |
| Total Carbohydrates | 18g |
| Dietary Fiber | 6g |
| Sugars | 3g |
| Protein | 12g |
Health benefits of key ingredients: Black beans are packed with fiber and plant-based protein, which help keep you full and support digestive health. They’re also rich in iron and folate. Cream cheese provides calcium and vitamin A, while the salsa adds a dose of lycopene from the tomatoes—a powerful antioxidant.
Dietary considerations: This recipe is naturally vegetarian and can be made gluten-free with a few label checks. It’s not low-fat, but it’s a treat—Halloween only comes once a year! If you’re watching your sodium, use low-sodium black beans and a reduced-sodium taco seasoning.
Potential allergens: Dairy (cream cheese, sour cream, shredded cheese). If you’re serving someone with a dairy allergy, use plant-based alternatives as mentioned in the variations section.
Personal wellness perspective: I’m a big believer in balance. This dip isn’t health food, and it’s not supposed to be. It’s a fun, festive treat that brings people together. Serve it with plenty of veggies alongside the chips if you want to add some greens. I often put out carrot sticks and bell pepper strips for dipping too.
FAQs
Can I make this dip ahead of time?
Yes! Assemble the dip completely (without the sour cream stripes and olives), cover it, and refrigerate for up to 24 hours. When you’re ready to serve, bake it as directed, then add the stripes and olives. You may need to add 5 minutes to the baking time since it’s starting from cold.
Can I use homemade taco seasoning?
Absolutely. Homemade seasoning is actually better because you can control the salt and spice levels. Mix together 1 tablespoon chili powder, 1 teaspoon cumin, 1/2 teaspoon paprika, 1/2 teaspoon garlic powder, 1/2 teaspoon onion powder, 1/4 teaspoon oregano, and a pinch of cayenne. Use 2 tablespoons of this mix for the recipe.
Why did my dip turn out watery?
Most likely, the black beans weren’t dry enough. Make sure to drain and rinse them thoroughly, then pat them dry with a paper towel before adding the taco seasoning. Another culprit could be watery salsa—drain off any excess liquid before measuring.
Can I use Greek yogurt instead of sour cream?
Yes, but the texture will be slightly tangier and thinner. For the cream cheese layer, full-fat Greek yogurt works fine. For the mummy stripes, I recommend sticking with sour cream—it’s thicker and holds its shape better. If you use yogurt, pipe it on gently.
How do I get the mummy stripes to stay put?
The key is letting the dip cool for 2-3 minutes after baking. If it’s too hot, the sour cream will melt and slide off. If it’s too cold, the stripes won’t stick. Aim for warm but not piping hot. Also, use a thick sour cream—avoid light or fat-free versions, which are too thin.
Conclusion
This black bean mummy taco dip is everything I want in a Halloween recipe: it’s fun, it’s easy, and it tastes genuinely good. Not just “cute for a party” good, but “I would eat this on a random Tuesday in March” good. The mummy design is simple enough that kids can help, and the flavor is crowd-pleasing enough that even the pickiest eaters will go back for seconds.
I love how this dip brings a little joy to the table. Halloween can be chaotic—between costumes, candy, and last-minute decorations—but this recipe is a moment of calm. It’s a dish that makes people smile, and honestly, that’s the best kind of cooking.
So go ahead and make it your own. Add extra spice, swap the beans, or double the batch for a party. Whatever you do, just know that this dip was made to be shared. I’d love to hear how yours turns out—drop a comment below and tell me about your Halloween spread. Did the kids help with the stripes? Did you add your own twist? Let’s make this recipe a tradition together.
Happy Halloween, and happy dipping!
Pin This Recipe!
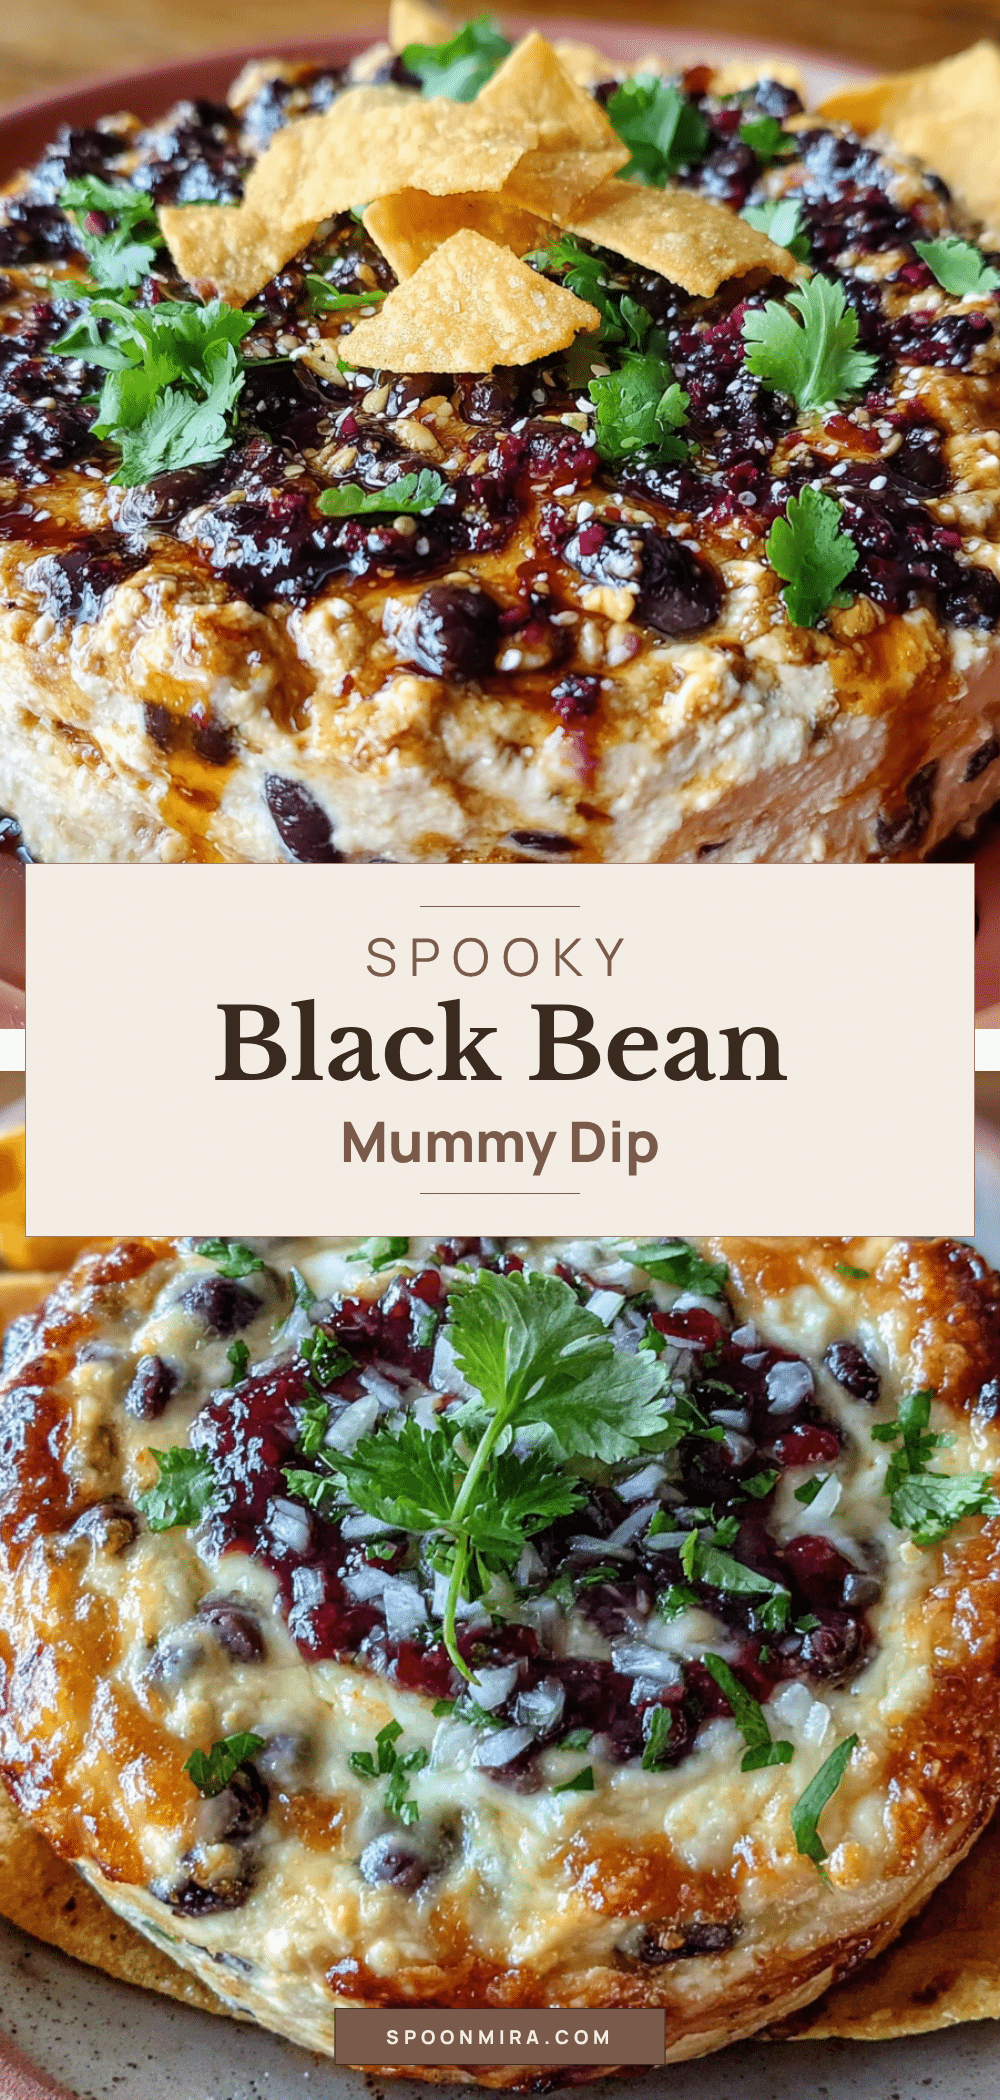
Easy Black Bean Mummy Taco Dip: Best Halloween Recipe
A fun and festive Halloween dip featuring seasoned black beans, creamy cheese, and sour cream stripes that look like mummy bandages. Ready in under 25 minutes, it’s a crowd-pleaser that’s as delicious as it is adorable.
- Prep Time: 15 minutes
- Cook Time: 18 minutes
- Total Time: 25 minutes
- Yield: 4 servings 1x
- Category: Appetizer
- Cuisine: Mexican
Ingredients
- 1 can (15 oz) black beans, drained and rinsed
- 1 packet (1 oz) taco seasoning
- 8 oz cream cheese, softened
- 1/2 cup sour cream
- 1 cup shredded Mexican blend cheese
- 1/4 cup salsa (mild or medium)
- 1/2 teaspoon garlic powder
- 2 black olives, sliced into rounds
- 1 tablespoon chopped fresh cilantro (optional)
- Tortilla chips, for serving
Instructions
- Preheat your oven to 375°F (190°C). Let cream cheese sit out to soften for about 20 minutes.
- In a medium mixing bowl, combine the drained and rinsed black beans with the taco seasoning. Stir until every bean is coated. If the mixture looks dry, add a tablespoon of water—but only if needed. Set aside.
- In a small bowl, beat the softened cream cheese with a fork or spatula until smooth and fluffy. Stir in 1/4 cup of the sour cream, the shredded cheese, salsa, and garlic powder. Mix until combined.
- Spread the cream cheese mixture evenly into the bottom of a 9-inch pie plate or small baking dish. Spoon the seasoned black beans on top and spread in an even layer.
- Bake for 15-18 minutes, or until the edges are bubbly and the cheese is fully melted.
- Remove the dip from the oven and let it cool for 2-3 minutes. Use a small offset spatula or butter knife to drizzle the remaining 1/4 cup of sour cream in horizontal stripes across the top.
- Place two olive slices in the gaps between the stripes, near the top of the dip, to create the mummy’s eyes. Press them gently into the dip.
- Sprinkle chopped cilantro on top if using. Serve immediately with tortilla chips.
Notes
Dry the black beans thoroughly after rinsing to prevent a watery dip. Let the dip cool for 2-3 minutes before adding sour cream stripes so they stay put. For a vegan version, use plant-based cream cheese and dairy-free sour cream.
Nutrition
- Serving Size: 1/4 of the dip (with
- Calories: 280
- Sugar: 3
- Sodium: 620
- Fat: 18
- Saturated Fat: 10
- Carbohydrates: 18
- Fiber: 6
- Protein: 12
Keywords: Halloween, mummy dip, black bean dip, taco dip, easy appetizer, party dip, Halloween recipe


