The deep, dark crumb of this black velvet cupcake—that’s what I was after. Not the color, though that’s undeniably part of the fun. I mean the way the cake feels when you press it gently: impossibly soft, almost velvety (hence the name), with a tenderness that makes you wonder if it’s even real. I developed this recipe for a Halloween party where I wanted something that looked dramatic but tasted like actual dessert, not a gimmick. Honestly, most black cupcakes I’d tried before were dry, crumbly messes that tasted more like charcoal than chocolate. That wasn’t going to fly.
So I played around with my go-to red velvet base, swapped the cocoa ratio, and added a little something extra (black cocoa powder, if you must know—it changes everything). The result? A cupcake that’s moist, rich, and just sweet enough, with a color so deep it almost looks blacker than black. And then there’s the buttercream—a bright, bold orange that tastes like a creamsicle dream. Together, they’re the kind of treat that makes people stop and stare before they even take a bite.
These Perfect Black Velvet Halloween Cupcakes with Orange Buttercream aren’t just for show. They’re the kind of recipe you’ll come back to year after year, not because they’re trendy, but because they actually deliver. Trust me on this one.
Why You’ll Love This Recipe
I’ve tested this recipe more times than I care to admit. The first batch? Edible, but the cupcakes were a little dense—not quite the light, tender crumb I was chasing. The second batch? Better, but the orange buttercream was too sweet (I accidentally doubled the powdered sugar). By the third round, I had it dialed in. Here’s why I think you’ll love it too:
- Bold Flavor, Not Just Color: These aren’t just black for the sake of being black. The black cocoa powder gives them a subtle Oreo-like taste that pairs perfectly with the sweet, citrusy buttercream.
- Moist and Tender Every Time: The secret is a combination of buttermilk and a touch of oil—keeps them soft for days (if they last that long).
- Easy to Decorate: The orange buttercream pipes like a dream, and you can go as simple or as spooky as you want. Sprinkles, candy eyes, or a little black sanding sugar—it’s all fair game.
- Perfect for Halloween Parties: They’re dramatic enough to impress and delicious enough that people will actually eat them (not just admire them).
- Crowd-Pleaser: Kids love the color, adults love the flavor, and everyone loves the buttercream. It’s a win-win-win.
- Made with Simple Ingredients: No weird additives or hard-to-find items—just pantry staples plus a little black cocoa powder (which you can order online or find at specialty stores).
This isn’t just another Halloween cupcake recipe. It’s the one I make every year, and it’s the one my friends now request weeks in advance. That’s the kind of recipe you want in your back pocket.
What Ingredients You Will Need
This recipe uses straightforward ingredients, but a few key players make all the difference. Here’s what you’ll need and why each one matters.
For the Black Velvet Cupcakes
- All-purpose flour (1 ½ cups / 180g): The backbone of the cake. Spoon and level it—don’t scoop directly from the bag, or you’ll end up with dry cupcakes.
- Black cocoa powder (¼ cup / 25g): This is the star. It’s darker and less acidic than regular cocoa, giving the cupcakes that deep black color and a mild Oreo flavor. I use the brand from King Arthur Flour—it’s reliable and easy to find online.
- Unsweetened natural cocoa powder (2 tablespoons / 10g): Adds a bit more chocolate depth without lightening the color. Don’t skip it—the black cocoa alone can be a little one-note.
- Baking soda (1 teaspoon) + Baking powder (½ teaspoon): The double lift ensures a light, tender crumb. Make sure both are fresh—stale leaveners are the number one reason cupcakes fall flat.
- Salt (½ teaspoon): Balances the sweetness and enhances the chocolate flavor.
- Granulated sugar (1 cup / 200g): Sweetens the cake and helps with browning (even though we can’t see it).
- Vegetable oil (½ cup / 120ml): Keeps the cupcakes moist. I prefer a neutral oil like canola or grapeseed—olive oil will overpower the delicate cocoa flavor.
- Buttermilk (1 cup / 240ml), room temperature: Reacts with the baking soda for lift and adds a subtle tang. No buttermilk? No problem—add 1 tablespoon of lemon juice or white vinegar to regular milk and let it sit for 5 minutes.
- Eggs (2 large), room temperature: Provide structure and richness. Cold eggs can seize the batter, so let them sit out for 30 minutes before starting.
- Vanilla extract (2 teaspoons): Rounds out the flavor.
- White vinegar (1 teaspoon): Sounds weird, I know. But it reacts with the baking soda for extra lift and helps keep the crumb tender. You won’t taste it, I promise.
- Black gel food coloring (1-2 teaspoons): Optional but helpful if you want an even darker crumb. The black cocoa does a lot of the work, but a little gel color takes it over the edge. Avoid liquid food coloring—it’ll throw off the liquid balance.
For the Orange Buttercream
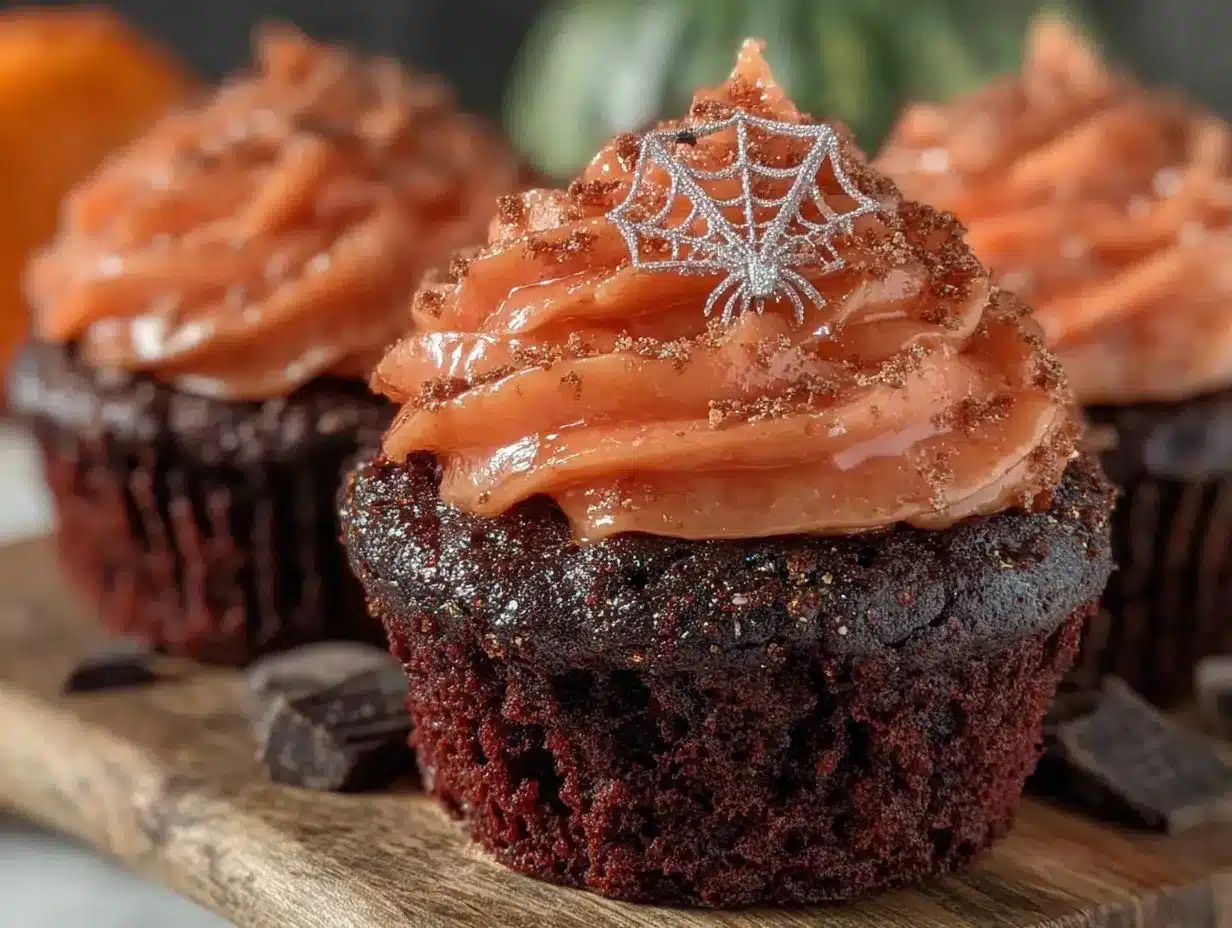
- Unsalted butter (1 cup / 226g or 2 sticks), softened: The base of the frosting. Make sure it’s truly soft—if it’s still cold, your buttercream will be lumpy.
- Powdered sugar (3 ½ cups / 420g), sifted: Sifting prevents clumps and gives you a silky-smooth frosting.
- Heavy cream (3-4 tablespoons / 45-60ml): Thins the buttercream to the perfect piping consistency. Use as needed.
- Orange zest (from 1 medium orange): Adds natural citrus flavor and a bit of brightness. Don’t skip it—it’s what makes the frosting taste like real oranges, not artificial flavoring.
- Orange extract (½ teaspoon): Boosts the orange flavor without adding liquid. You can also use orange oil, but start with a few drops—it’s potent.
- Orange gel food coloring (a few drops): For that vibrant Halloween orange. Gel colors are more concentrated than liquid, so you’ll use less and the frosting won’t get runny.
- Salt (a pinch): Balances the sweetness.
Equipment Needed
You don’t need a ton of fancy equipment for these cupcakes, but a few tools will make your life easier.
- Standard 12-cup muffin tin: For baking the cupcakes. I use a non-stick one from Wilton—it’s affordable and releases cakes easily.
- Paper cupcake liners: Go with black or orange liners for extra Halloween flair. I love the foil-lined ones—they peel off cleanly and look polished.
- Mixing bowls (medium and large): One for dry ingredients, one for wet. Glass or stainless steel works best.
- Whisk and spatula: A whisk for combining dry ingredients and a rubber spatula for folding the batter.
- Hand mixer or stand mixer: For the buttercream. You can beat it by hand, but your arm will thank you for using a mixer. I use my KitchenAid stand mixer with the paddle attachment.
- Piping bags and tips: A large star tip (like Wilton 1M) creates those beautiful swirls. If you don’t have piping bags, a zip-top bag with the corner snipped off works in a pinch.
- Cooling rack: Essential for cooling the cupcakes evenly. No one likes a soggy bottom.
- Microplane or zester: For zesting the orange. A box grater’s finest side works too, but a microplane is easier and gives you fluffier zest.
If you’re just starting out, don’t stress about having every single tool. A whisk, a bowl, and a muffin tin will get you 90% of the way there. I’ve made these cupcakes with a fork and a lot of determination—and they turned out just fine.
Preparation Method
Let’s get baking. I’ve broken this down into clear steps so you can follow along without any surprises. Take your time, read through the whole method once before starting, and you’ll be golden.
Step 1: Preheat and Prep (5 minutes)
Preheat your oven to 350°F (175°C). Line your muffin tin with paper liners—this recipe makes exactly 12 standard cupcakes, so no need to grease anything. Set the pan aside.
Step 2: Mix the Dry Ingredients (5 minutes)
In a medium bowl, whisk together the all-purpose flour, black cocoa powder, natural cocoa powder, baking soda, baking powder, and salt. Whisk for a good 30 seconds—this aerates the flour and distributes the leaveners evenly. Set aside.
Step 3: Combine the Wet Ingredients (5 minutes)
In a large bowl, whisk the granulated sugar and vegetable oil together until combined—it’ll look a little grainy, and that’s fine. Add the buttermilk, eggs, vanilla extract, and white vinegar. Whisk until smooth and glossy. If you’re using black gel food coloring, add it now and whisk until the batter is uniformly dark. (Pro tip: start with 1 teaspoon and add more if you want it blacker—you can always add, but you can’t take away.)
Step 4: Combine Wet and Dry (5 minutes)
Pour the dry ingredients into the wet ingredients. Use a rubber spatula to fold everything together gently. Stop as soon as no streaks of flour remain—overmixing will make the cupcakes tough. The batter will be thin and silky, almost like a thick milkshake. That’s exactly what you want.
Step 5: Fill and Bake (20-22 minutes)
Divide the batter evenly among the 12 liners. I use a large cookie scoop (about 3 tablespoons) for consistent portions. Fill each liner about ⅔ full—any more and they’ll overflow, any less and you’ll get flat tops. Bake for 18-22 minutes, or until a toothpick inserted into the center of a cupcake comes out clean or with a few moist crumbs. The tops should spring back when lightly touched. Let them cool in the pan for 5 minutes, then transfer to a wire rack to cool completely. Do not frost warm cupcakes—the buttercream will melt into a puddle.
Step 6: Make the Orange Buttercream (10 minutes)
While the cupcakes cool, make the frosting. In a large bowl (or the bowl of a stand mixer), beat the softened butter on medium speed for 2-3 minutes until pale and creamy. Scrape down the sides. Add the sifted powdered sugar, one cup at a time, beating on low speed to prevent a sugar cloud. Add the orange zest, orange extract, and a pinch of salt. Beat on medium-high for 2 minutes until light and fluffy. Add the heavy cream, one tablespoon at a time, until the buttercream is smooth and pipeable. Add a few drops of orange gel food coloring and mix until you get the shade you want. (I like a deep, almost neon orange for Halloween—a little goes a long way.)
Step 7: Pipe and Decorate (10 minutes)
Fit a piping bag with a large star tip (Wilton 1M or similar). Fill the bag with the orange buttercream. Starting at the outer edge of a cooled cupcake, pipe a continuous swirl inward and upward, lifting the tip at the end to create a peak. Repeat with the remaining cupcakes. Add sprinkles, candy eyes, or a dusting of black sanding sugar if you’re feeling fancy. Serve immediately or store as directed below.
Cooking Tips & Techniques
I’ve made these cupcakes at least a dozen times, and I’ve learned a few things along the way. Here are my best tips for getting them perfect every time.
- Room temperature ingredients matter: Cold eggs and buttermilk can make the batter seize up, resulting in dense cupcakes. Set them out 30-45 minutes before you start. If you’re in a hurry, place the eggs in a bowl of warm water for 5 minutes and microwave the buttermilk for 10-15 seconds (stir first).
- Don’t overmix the batter: I know I said it already, but it’s worth repeating. Once the flour hits the wet ingredients, gluten starts developing. Mix just until combined—a few small lumps are okay. Overmixing leads to tough, rubbery cupcakes.
- Use a cookie scoop for even portions: It’s the easiest way to get uniform cupcakes that bake evenly. If you don’t have one, use a ¼-cup measure and fill it about ¾ full.
- Check for doneness early: Ovens vary wildly. Start checking at 18 minutes—if the toothpick comes out clean, they’re done. If not, give them another 2 minutes and check again. Overbaked cupcakes are dry and sad.
- Cool completely before frosting: I know it’s tempting to rush, but warm cupcakes will make the buttercream slide right off. Patience, my friend. Pop them in the fridge for 15 minutes if you’re in a hurry.
- Pipe with confidence: If your buttercream seems too stiff, add a little more cream (one teaspoon at a time). If it’s too soft, pop the bowl in the fridge for 10 minutes. A good buttercream should hold its shape but still be easy to pipe.
- One mistake I made: The first time I made these, I forgot to add the vinegar. The cupcakes were flat and dense—still edible, but not the light, tender crumb I wanted. Don’t skip it. It’s a small ingredient with a big job.
Variations & Adaptations
One of the best things about this recipe is how flexible it is. Here are a few ways to switch things up based on your needs or cravings.
- Gluten-Free Option: Swap the all-purpose flour with a 1:1 gluten-free baking flour blend. I’ve used Bob’s Red Mill with great results—just make sure the blend includes xanthan gum. The texture will be slightly more delicate, but the flavor is spot on.
- Dairy-Free Version: Use a dairy-free buttermilk substitute (like almond milk + 1 tablespoon lemon juice) and replace the butter in the frosting with a high-quality vegan butter. I like Miyoko’s—it’s creamy and behaves like real butter. Use coconut cream instead of heavy cream, but add it slowly—it can thin the frosting quickly.
- Spice It Up: Add ½ teaspoon of cinnamon and a pinch of cayenne pepper to the dry ingredients for a subtle warmth that pairs beautifully with the orange buttercream. It’s not spicy, just cozy.
- Different Frosting Flavors: Not in the mood for orange? Try cream cheese frosting (a classic with red velvet) or a simple chocolate buttercream. You can also swap the orange extract for peppermint or almond extract for a different vibe.
- Mini Cupcakes: Use a mini muffin tin and bake for 10-12 minutes. You’ll get about 36 mini cupcakes—perfect for parties or lunchboxes. (Speaking of lunchboxes, if you’re looking for more kid-friendly treats, these easy after-school protein energy balls are a hit in our house.)
- Black Velvet Cake: Turn this into a layer cake by doubling the recipe and baking in two 9-inch round pans for 25-30 minutes. Adjust the frosting recipe accordingly (you’ll need about 1.5 times the buttercream).
I’ve tried the gluten-free version myself, and honestly, I’d serve it to anyone without mentioning the swap. It’s that good.
Serving & Storage Suggestions
These cupcakes are best enjoyed at room temperature, when the cake is tender and the buttercream is soft but not melting. Here’s how to serve and store them like a pro.
- Serving Temperature: Pull them out of the fridge about 30 minutes before serving. Cold buttercream can be a bit firm, and the cake’s flavor really shines at room temp.
- Presentation Ideas: Arrange them on a black cake stand or a wooden board for contrast. Add some faux spiders, candy eyeballs, or a sprinkle of orange and black sanding sugar for extra Halloween flair. I like to top each one with a small candy pumpkin or a chocolate spider web—it’s an easy way to make them look professional.
- Complementary Dishes: Serve these alongside a warm mug of creamy hatch chili corn chowder with bacon for a savory-sweet Halloween spread. Or pair them with a perfect fall pumpkin spice sheet cake if you’re feeding a crowd.
- Storage: Store unfrosted cupcakes in an airtight container at room temperature for up to 2 days. Frosted cupcakes should be stored in the fridge in a single layer (or stacked with parchment paper between layers) for up to 4 days. The buttercream will firm up in the cold, so let them sit out for 20 minutes before serving.
- Freezing: You can freeze unfrosted cupcakes for up to 3 months. Wrap each one tightly in plastic wrap, then place them in a freezer bag. Thaw at room temperature before frosting. I don’t recommend freezing frosted cupcakes—the buttercream can get grainy when thawed.
- Flavor Development: Honestly, these cupcakes taste even better the next day. The flavors meld together, and the crumb gets even more tender. If you can resist eating them all on day one, you’re in for a treat on day two.
Nutritional Information & Benefits
Let’s be real—these are cupcakes, not health food. But that doesn’t mean they can’t have a few redeeming qualities. Here’s the nutritional breakdown per cupcake (based on 12 servings):
| Nutrient | Amount per Cupcake |
|---|---|
| Calories | ~380 |
| Total Fat | 18g |
| Saturated Fat | 9g |
| Carbohydrates | 52g |
| Sugar | 38g |
| Protein | 3g |
| Fiber | 1g |
| Sodium | 220mg |
Now, for the silver lining: black cocoa powder is rich in antioxidants (more than regular cocoa, actually), and the buttermilk adds a dose of calcium and probiotics. The orange zest provides a little vitamin C, too. Is it a health food? No. But is it a treat you can feel okay about enjoying in moderation? Absolutely.
If you’re looking for something a little lighter, these easy 3-ingredient peanut butter energy balls are a great no-bake snack that satisfies a sweet tooth without the sugar crash. And for a fun lunchbox option, these easy mini bagel pizzas with hidden veggie sauce are a hit with kids and adults alike.
FAQ
Can I use regular cocoa powder instead of black cocoa powder?
You can, but the color won’t be as dark, and the flavor will be more like a standard chocolate cupcake. If you want that deep black color, black cocoa powder is the way to go. You can find it online or at specialty baking stores.
How do I get the cupcakes really black without using food coloring?
The black cocoa powder does most of the work—it’s naturally very dark. But if you want an even deeper color, add 1-2 teaspoons of black gel food coloring. Avoid liquid food coloring, as it can thin the batter and affect the texture.
Can I make these cupcakes ahead of time?
Absolutely. Bake the cupcakes up to 2 days in advance and store them in an airtight container at room temperature. Make the buttercream up to 3 days ahead and keep it in the fridge—just let it come to room temperature and re-whip it before piping.
My buttercream is too thick. What do I do?
Add a little more heavy cream, one teaspoon at a time, and beat on medium speed until it reaches your desired consistency. If it gets too thin, add a bit more sifted powdered sugar to thicken it back up.
Can I make these into a cake instead of cupcakes?
Yes! Double the recipe and bake in two 9-inch round pans for 25-30 minutes. Use 1.5 times the buttercream recipe for a layered cake. The baking time may vary, so start checking at 25 minutes.
Conclusion
These Perfect Black Velvet Halloween Cupcakes with Orange Buttercream are everything I want in a holiday treat: dramatic, delicious, and surprisingly easy to pull off. The cake is tender and rich, the frosting is bright and creamy, and together they make a statement that’s hard to forget. Whether you’re hosting a Halloween party, bringing a treat to a school event, or just want to make something fun for the family, these cupcakes deliver every single time.
I love how versatile they are, too. You can dress them up with sprinkles and candy, keep them simple with just the swirl, or experiment with different frostings and add-ins. The recipe is a solid foundation that invites creativity—and that’s the kind of recipe I keep coming back to.
So go ahead—preheat that oven, dig out your piping bag, and make something that’ll make people smile. And when you do, I’d love to hear about it. Drop a comment below, share a photo, or tell me how you made them your own. Happy Halloween, and happy baking!
Pin This Recipe!
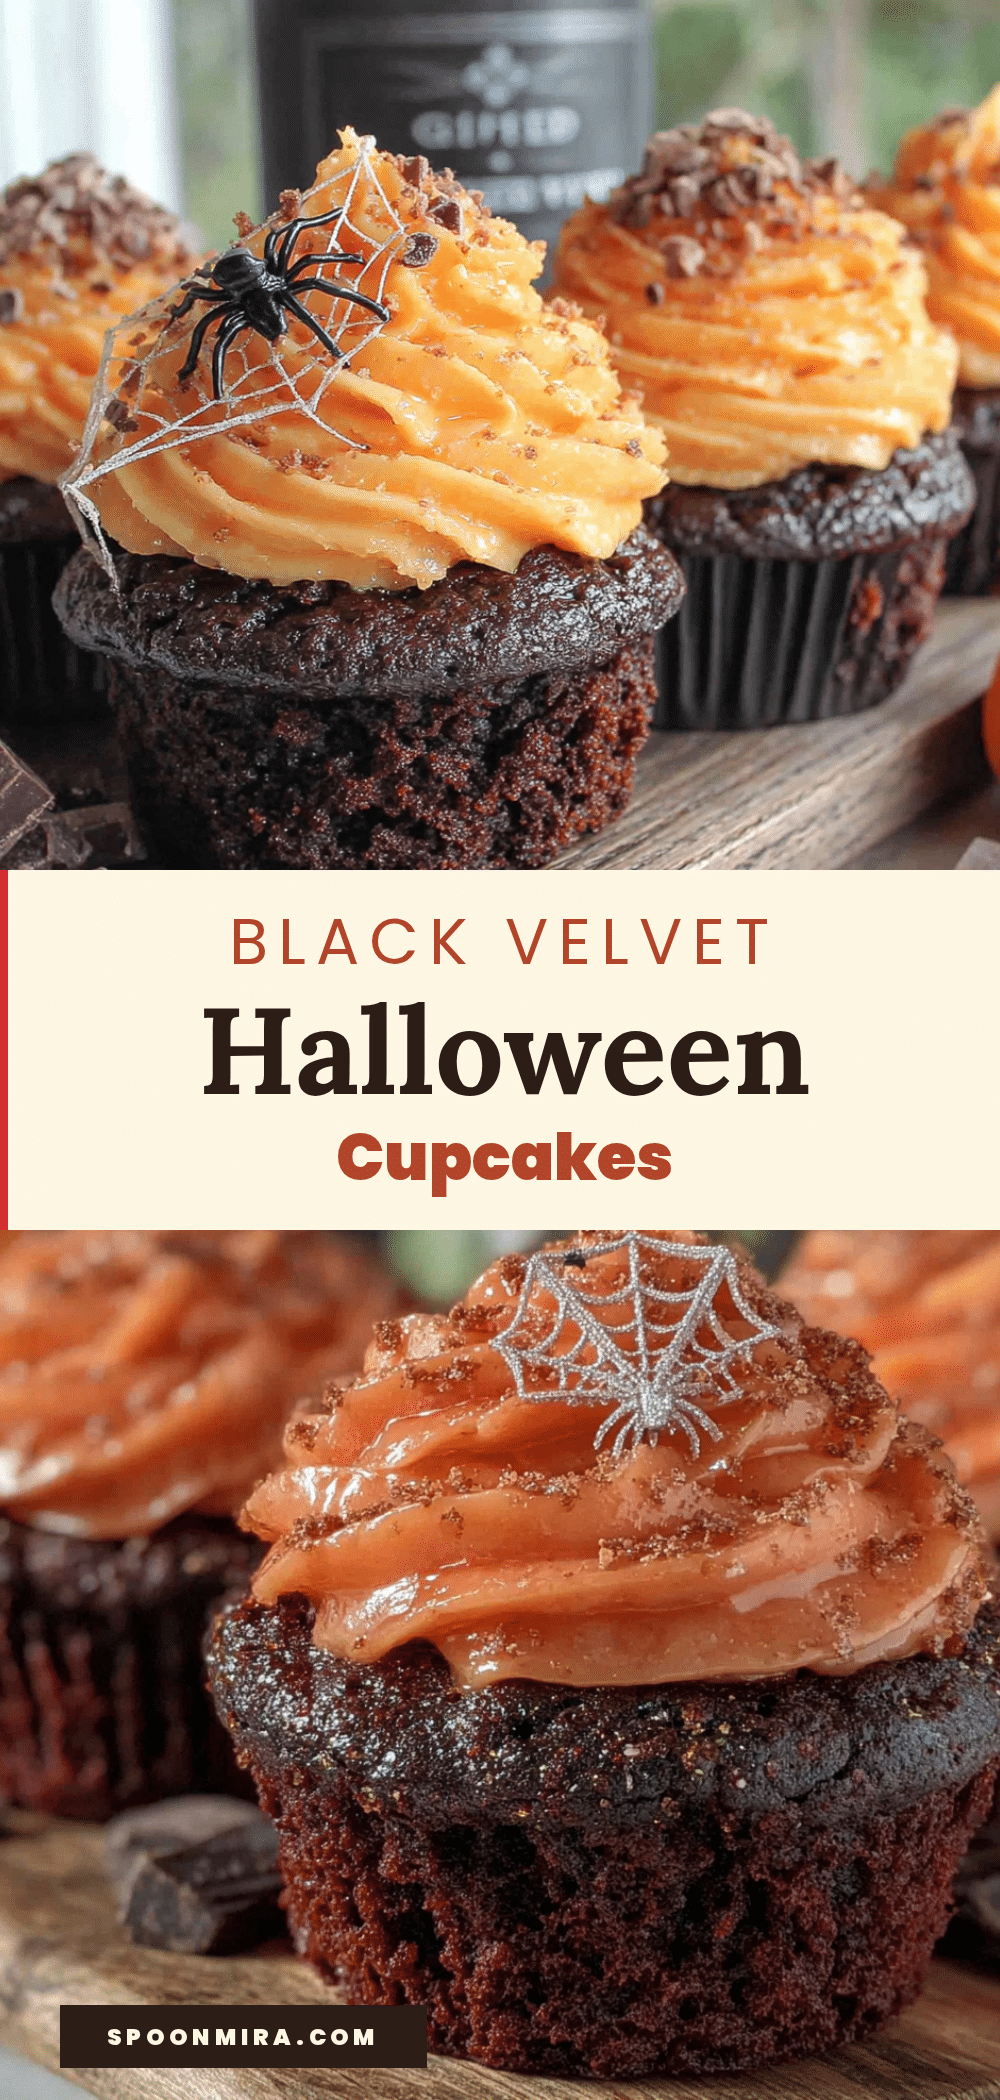
Perfect Black Velvet Halloween Cupcakes Recipe
Deep, dark black velvet cupcakes with a tender crumb and rich Oreo-like flavor, topped with a bright orange buttercream that tastes like a creamsicle dream. Perfect for Halloween parties, these cupcakes are moist, delicious, and surprisingly easy to make.
- Prep Time: 15 minutes
- Cook Time: 20 minutes
- Total Time: 35 minutes
- Yield: 12 cupcakes 1x
- Category: Dessert
- Cuisine: American
Ingredients
- 1 ½ cups (180g) all-purpose flour
- ¼ cup (25g) black cocoa powder
- 2 tablespoons (10g) unsweetened natural cocoa powder
- 1 teaspoon baking soda
- ½ teaspoon baking powder
- ½ teaspoon salt
- 1 cup (200g) granulated sugar
- ½ cup (120ml) vegetable oil
- 1 cup (240ml) buttermilk, room temperature
- 2 large eggs, room temperature
- 2 teaspoons vanilla extract
- 1 teaspoon white vinegar
- 1–2 teaspoons black gel food coloring (optional)
- 1 cup (226g or 2 sticks) unsalted butter, softened
- 3 ½ cups (420g) powdered sugar, sifted
- 3–4 tablespoons (45-60ml) heavy cream
- Zest from 1 medium orange
- ½ teaspoon orange extract
- A few drops orange gel food coloring
- A pinch of salt
Instructions
- Preheat oven to 350°F (175°C). Line a 12-cup muffin tin with paper liners.
- In a medium bowl, whisk together flour, black cocoa powder, natural cocoa powder, baking soda, baking powder, and salt for 30 seconds.
- In a large bowl, whisk sugar and vegetable oil until combined. Add buttermilk, eggs, vanilla extract, and white vinegar; whisk until smooth. If using black gel food coloring, add 1-2 teaspoons and whisk until uniformly dark.
- Pour dry ingredients into wet ingredients. Fold gently with a rubber spatula until just combined (batter will be thin and silky).
- Divide batter evenly among the 12 liners, filling each about ⅔ full. Bake for 18-22 minutes, until a toothpick inserted in the center comes out clean or with a few moist crumbs. Cool in pan for 5 minutes, then transfer to a wire rack to cool completely.
- For the buttercream: In a large bowl, beat softened butter on medium speed for 2-3 minutes until pale and creamy. Add sifted powdered sugar one cup at a time, beating on low. Add orange zest, orange extract, and salt; beat on medium-high for 2 minutes until fluffy. Add heavy cream one tablespoon at a time until smooth and pipeable. Add a few drops of orange gel food coloring and mix until desired shade.
- Fit a piping bag with a large star tip (e.g., Wilton 1M). Fill with buttercream. Pipe a continuous swirl onto each cooled cupcake, starting at the outer edge and working inward and upward. Decorate as desired.
Notes
Room temperature ingredients are key for a tender crumb. Do not overmix the batter. Cool cupcakes completely before frosting. For a deeper black color, use black gel food coloring. The cupcakes taste even better the next day.
Nutrition
- Serving Size: 1 cupcake
- Calories: 380
- Sugar: 38
- Sodium: 220
- Fat: 18
- Saturated Fat: 9
- Carbohydrates: 52
- Fiber: 1
- Protein: 3
Keywords: black velvet cupcakes, Halloween cupcakes, orange buttercream, black cocoa, Halloween dessert, black velvet cake


