My son did not trust air fryer chicken tenders. At all. He’d seen me ruin a batch of chicken in that machine once before—rubbery, sad-looking strips that even the ketchup bottle couldn’t save. So when I told him I was trying again with a new coating method, he just gave me that look. You know the one. The “mom, please don’t waste the chicken” look. I couldn’t blame him honestly. I had my own doubts. Air fryers are great for fries and reheating pizza, but chicken tenders? That felt like a stretch.
But here’s the thing about kids—they’re brutally honest. And after that first batch came out of the basket, golden and actually crunchy, he grabbed one before I could even set the plate down. He took a bite, chewed for a second, and then just said, “Okay, these are good.” That’s basically a standing ovation in our house. I’ve made them four times since then, and he’s asked for them in his lunchbox twice. That never happens. So yeah, I’m a believer now.
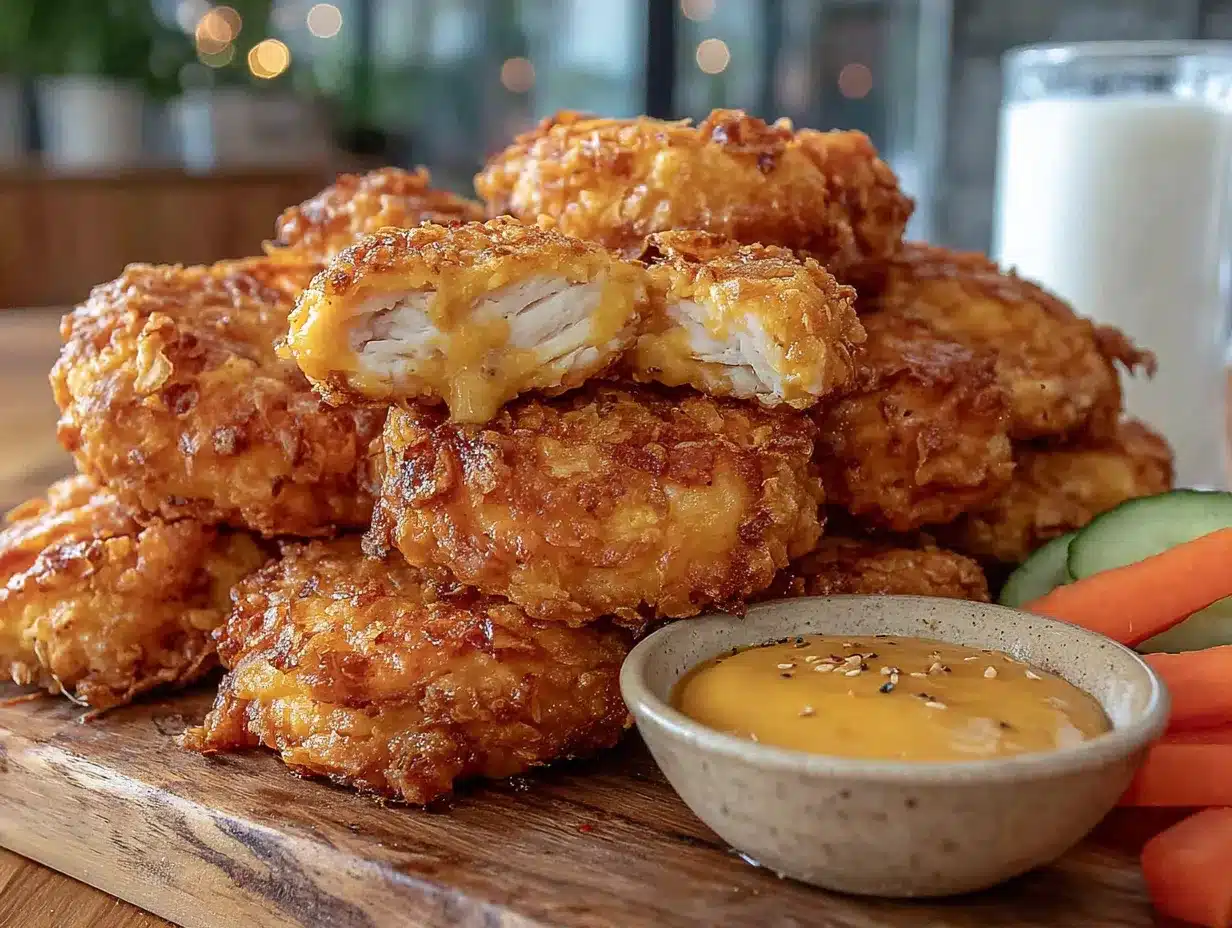
These crispy air fryer chicken tenders kids love are the kind of recipe that makes you feel like you’ve finally cracked the code. They’re crunchy on the outside, juicy on the inside, and they come together in under 20 minutes. No deep frying. No oily mess. Just honest, good chicken that actually stays crispy. If you’ve got a picky eater at home, or honestly if you just want a quick dinner that doesn’t feel like a compromise, this one’s for you.
Why You’ll Love This Recipe
I tested this recipe six times before I got it right. Six. The first batch was soggy. The second was dry. The third had a coating that fell off halfway through cooking. But by the end, I had a method that actually works—and it’s simpler than you’d think. Here’s why this version stands out:
- Quick & Easy: From start to finish, these tenders are ready in about 18 minutes. That’s faster than takeout and way less stressful.
- Simple Ingredients: You probably already have everything in your pantry. No weird flours or specialty breadcrumbs required.
- Perfect for Lunchboxes: These hold up surprisingly well in a lunchbox. They stay crispy even after they cool down, which is basically magic. If you’re looking for more lunchbox ideas, these pair great with our easy mini banana muffins for a complete meal.
- Crowd-Pleaser: I’ve served these to kids ranging from age 4 to 14, and they all disappeared. No leftovers. Ever.
- Unbelievably Delicious: The secret is a combination of panko breadcrumbs and a little bit of oil sprayed at the right time. It gives you that deep-fried crunch without the deep fryer.
What makes this recipe different from the dozens of other air fryer chicken tender recipes out there? It’s the double-coating technique. Most recipes just dip the chicken in egg and then breadcrumbs, but that coating can slide off in the air fryer. My method uses a light flour dusting first, then egg, then seasoned panko. It creates a crust that actually sticks. And honestly, the texture is so good you won’t miss the deep fryer at all.
This recipe isn’t just good—it’s the kind that makes you close your eyes after the first bite. And when your kid asks for seconds? That’s the win.
What Ingredients You Will Need
This recipe uses simple, straightforward ingredients to deliver that crispy, golden exterior and tender, juicy interior. Nothing fancy here—just smart choices that work together.
- Chicken tenders (1 lb): You can use pre-cut chicken tenders or cut boneless skinless chicken breasts into strips about 1-inch thick. I prefer using chicken tenders because they’re already the right size and shape. Look for tenders that are similar in thickness so they cook evenly.
- All-purpose flour (½ cup): This creates the first layer that helps the egg stick. You can swap this for almond flour if you need a gluten-free option, but the texture will be slightly different.
- Large eggs (2): Beaten well. The eggs act as the glue that holds the breadcrumb coating in place. Make sure they’re at room temperature for easier mixing.
- Panko breadcrumbs (1 ½ cups): This is non-negotiable for maximum crunch. Regular breadcrumbs just don’t give you that same crispy texture. I use the unseasoned kind so I can control the flavor myself. Kikkoman is my go-to brand because the flakes are larger and stay crunchier.
- Paprika (1 tsp): Adds color and a mild smoky flavor. Sweet paprika works best here—smoked paprika can be overpowering for kids.
- Garlic powder (½ tsp): Just enough to add depth without being too strong. Kids tend to be sensitive to garlic, so this is a gentle amount.
- Onion powder (½ tsp): Adds savory notes that round out the flavor. Don’t skip this—it makes a difference.
- Salt (½ tsp): Essential for bringing out the flavor of the chicken and the coating.
- Black pepper (¼ tsp): Just a touch. You can skip this if your kids are extra sensitive to spice.
- Avocado oil spray (or any neutral oil spray): This is the secret weapon. Spraying the tenders halfway through cooking gives them that golden, crunchy finish. Don’t use olive oil spray—it burns at higher temperatures.
For serving (optional but recommended):
- Ketchup, honey mustard, or ranch dressing for dipping
- Lemon wedges for a fresh squeeze
If you’re looking for a healthier dipping option, try serving these with our healthy rainbow fruit and yogurt dip on the side—it adds a fun, colorful element that kids love.
Equipment Needed
You don’t need much for this recipe, which is part of what makes it so easy. Here’s what you’ll need:
- Air fryer: Any model works, but I use a 5.8-quart Cosori and it handles a full pound of tenders in two batches. If yours is smaller, you might need three batches. Don’t overcrowd the basket—that’s the number one reason tenders turn out soggy.
- Three shallow bowls: For the flour, egg, and breadcrumb mixture. I use wide pasta bowls because they make the dipping process less messy.
- Tongs: For transferring the chicken from bowl to bowl. Your fingers will get sticky otherwise.
- Cutting board and knife: If you’re using chicken breasts instead of pre-cut tenders.
- Meat thermometer: Not strictly necessary, but helpful if you’re new to cooking chicken. You’re looking for 165°F internally.
- Spray bottle with oil: I love my Misto sprayer because it gives a fine, even mist. But a store-bought avocado oil spray works just fine.
If you don’t have an air fryer yet, a convection oven works similarly. Just place the tenders on a wire rack over a baking sheet and bake at 400°F for about 15 minutes, flipping halfway through. The texture won’t be quite as crunchy, but it’s still really good.
Preparation Method
Alright, let’s get cooking. This method is straightforward, but there are a few small details that make a big difference. Follow these steps and you’ll have perfect tenders every time.
- Set up your breading station. Grab three shallow bowls. In the first bowl, add the ½ cup all-purpose flour. In the second bowl, beat the 2 eggs until they’re smooth and slightly frothy. In the third bowl, combine the 1 ½ cups panko breadcrumbs, 1 tsp paprika, ½ tsp garlic powder, ½ tsp onion powder, ½ tsp salt, and ¼ tsp black pepper. Mix the breadcrumb mixture well with a fork so the seasoning is evenly distributed.
- Prep the chicken. If you’re using chicken tenders, pat them dry with paper towels. This helps the flour stick better. If you’re using chicken breasts, cut them into strips about 1-inch thick and 4 inches long. Try to keep them similar in size so they cook evenly. I usually get about 10-12 strips from one pound of chicken.
- Bread the chicken. Take one piece of chicken and dredge it in the flour. Shake off any excess—you want a light, even coating. Then dip it into the beaten egg, letting any extra drip off. Finally, press it into the panko mixture, making sure it’s fully coated on all sides. Don’t be shy here—really press the breadcrumbs in so they stick. Place the breaded tender on a plate and repeat with the remaining chicken.
- Preheat the air fryer. Set your air fryer to 400°F and let it preheat for 3 minutes. This step is easy to skip, but it really helps the tenders start crisping up immediately.
- Arrange the tenders in the basket. Place the breaded tenders in a single layer in the air fryer basket. Make sure they’re not touching each other—leave a little space between each piece so the hot air can circulate. You’ll probably need to cook them in two batches depending on the size of your air fryer. Don’t overcrowd or they’ll steam instead of crisp.
- Spray with oil. Lightly spray the tops of the tenders with avocado oil. This is what gives them that golden, crunchy finish. Don’t soak them—just a light mist will do.
- Cook for 8 minutes. Air fry at 400°F for 8 minutes. At the 4-minute mark, open the basket, flip each tender over, and spray the other side lightly with oil. Close the basket and continue cooking for the remaining 4 minutes.
- Check for doneness. The tenders should be golden brown and crispy on the outside. If you’re using a meat thermometer, the internal temperature should read 165°F. If they need more time, cook in 1-minute increments until done. My air fryer usually takes exactly 8 minutes, but yours might vary slightly.
- Rest for 2 minutes. Let the tenders rest in the basket for 2 minutes after cooking. This helps the coating set and keeps it from falling off when you move them to a plate.
- Serve immediately. Transfer the tenders to a plate and serve with your favorite dipping sauces. They’re best eaten right away while the coating is still super crunchy.
One thing I learned the hard way—don’t stack the cooked tenders on top of each other while you’re waiting to serve the second batch. The steam from the bottom ones will make the top ones soggy. Instead, keep them in a single layer on a wire rack if you need to hold them.
Cooking Tips & Techniques
I’ve made enough mistakes with air fryer chicken to fill a small notebook. Here are the biggest lessons I’ve learned so you don’t have to repeat them.
Don’t skip the flour step. I know it seems like an extra step, but the flour layer is what gives the egg something to grip onto. Without it, the breadcrumb coating slides right off during cooking. Trust me on this one—I learned it the messy way.
Use panko, not regular breadcrumbs. Regular breadcrumbs are too fine and they absorb oil differently. Panko stays crunchier because the flakes are larger and more irregular. If you only have regular breadcrumbs, you can toast them in a dry pan for 2-3 minutes first to get a similar texture.
Spray halfway through, not at the beginning. I used to spray all the oil on at the start, but the coating would get soggy by the time the chicken was cooked through. Now I spray lightly at the beginning, flip at the 4-minute mark, and spray the other side. That second spray is what creates that deep golden crunch.
Let the breaded tenders rest for 5 minutes before cooking. This is a tip I picked up from a fried chicken recipe, and it works for air frying too. Letting the breaded chicken sit on a plate for 5 minutes helps the coating adhere better. It gives the flour and egg time to bond with the chicken.
Don’t be afraid to adjust the seasoning. The amounts I’ve listed are kid-friendly, but you can easily dial it up. Add a pinch of cayenne for heat, or swap the paprika for smoked paprika for a deeper flavor. My husband likes his with extra garlic powder and a dash of chili powder.
Variations & Adaptations
One of the best things about this recipe is how flexible it is. Here are some ways to switch it up depending on what you have on hand or who you’re feeding.
Gluten-free version: Swap the all-purpose flour for a gluten-free flour blend, and use gluten-free panko breadcrumbs. I’ve tested this with both and the texture is almost identical. Just make sure your gluten-free panko is sturdy enough—some brands are too fine and don’t crisp up well.
Spicy version for adults: Add ½ tsp cayenne pepper and ½ tsp chili powder to the breadcrumb mixture. You can also add a few dashes of hot sauce to the beaten egg. Just be warned—your kids might not touch these, so make them separately if you’re feeding a mixed crowd.
Parmesan-crusted tenders: Mix ¼ cup grated Parmesan cheese into the panko breadcrumbs. The cheese adds a salty, nutty flavor and helps the coating get extra crispy. This is my personal favorite variation for when I’m making these just for myself.
Baked version (no air fryer): If you don’t have an air fryer, bake these in a 400°F oven for 15-18 minutes, flipping halfway through. Place them on a wire rack set over a baking sheet so the air can circulate underneath. They won’t be quite as crunchy as the air fryer version, but they’re still really good.
Dairy-free option: This recipe is naturally dairy-free as written, which is great for kids with dairy sensitivities. Just double-check your panko breadcrumbs—some brands contain dairy.
If you’re planning a game day spread, these tenders pair beautifully with our easy football field taco dip for a fun, crowd-pleasing meal.
Serving & Storage Suggestions
These tenders are best served fresh out of the air fryer while the coating is still crackly. But let’s be real—sometimes you need to make them ahead or deal with leftovers. Here’s how to handle both.
Serving temperature: Serve these hot, right after cooking. The coating starts to soften after about 10 minutes, so don’t let them sit around too long. If you’re serving a crowd, cook them in batches and keep the finished ones warm in a 200°F oven on a wire rack.
What to serve with them: These tenders go with just about anything. For a quick weeknight dinner, pair them with a simple green salad or roasted vegetables. For a kid-friendly meal, serve them with easy ham and cheese sliders and some apple slices for a fun lunchbox combo. And don’t forget the dipping sauces—ketchup, honey mustard, ranch, and barbecue sauce are all excellent choices.
Storage: Leftover tenders can be stored in an airtight container in the refrigerator for up to 3 days. The coating will soften in the fridge, but don’t worry—you can bring the crunch back.
Reheating: The air fryer is the best way to reheat these. Pop them back in at 350°F for 3-4 minutes, and they’ll come out almost as crispy as the first time. You can also reheat them in a toaster oven or a regular oven at 350°F for 5-7 minutes. Avoid the microwave at all costs—it turns them into sad, rubbery strips.
Freezing: You can freeze these tenders either before or after cooking. To freeze uncooked, place the breaded tenders on a baking sheet in a single layer and freeze for 2 hours, then transfer to a freezer bag. Cook from frozen at 400°F for 10-12 minutes, flipping halfway through. To freeze cooked tenders, let them cool completely, then freeze in a single layer on a baking sheet before transferring to a freezer bag. Reheat from frozen at 350°F for 5-7 minutes.
Nutritional Information & Benefits
Here’s the rough nutritional breakdown for one serving (about 3-4 tenders, based on a 1-pound batch serving 4 people):
| Nutrient | Amount |
|---|---|
| Calories | 290 |
| Protein | 28g |
| Carbohydrates | 22g |
| Fat | 9g |
| Saturated Fat | 2g |
| Fiber | 1g |
| Sodium | 480mg |
These numbers will vary depending on the exact ingredients you use and how much oil you spray. But overall, these tenders are a solid source of lean protein with less fat than traditional fried chicken. Chicken breast is naturally low in fat and high in protein, which makes these a great option for growing kids and active adults.
Dietary considerations: This recipe is dairy-free and nut-free as written. For gluten-free, use the substitutions mentioned in the variations section. It’s also lower in carbs than breaded and fried versions, especially if you use almond flour instead of all-purpose flour.
Allergen note: This recipe contains eggs and wheat (gluten). If you have allergies, make sure to use certified gluten-free panko and a suitable flour alternative.
From a wellness perspective, I love that this recipe lets us enjoy a childhood favorite without the guilt. My son gets his crunchy chicken tenders, and I get to feel good about what he’s eating. That’s a win-win in my book.
Conclusion
These crispy air fryer chicken tenders kids love really are everything you want in a quick dinner—crunchy, juicy, and so simple you’ll wonder why you ever bothered with the deep fryer. They’ve become a regular in our weekly rotation, and I honestly don’t see that changing anytime soon.
What I love most about this recipe is how customizable it is. You can adjust the seasoning, swap the breadcrumbs, or change up the dipping sauces based on what your family likes. It’s forgiving enough for beginner cooks but satisfying enough for experienced ones too. And when your kids ask for them in their lunchbox? That’s the kind of feedback you can’t argue with.
I’d love to hear how these turn out for you. Did your kids love them? Did you try a fun variation? Drop a comment below and let me know—I read every single one. And if you’ve got a picky eater at home, don’t give up. Sometimes it just takes the right recipe to turn things around.
Happy cooking, friends. Here’s to crunchy chicken and happy kids.
Frequently Asked Questions
Can I use frozen chicken tenders in the air fryer?
Yes, but the texture will be different. Frozen pre-breaded tenders are usually par-fried and then frozen, so they’ll crisp up fine in the air fryer. But this recipe is designed for fresh chicken, and the coating is way crunchier. If you’re in a pinch, frozen tenders work—just follow the package instructions for cooking time and temperature.
Why did my breading fall off in the air fryer?
This usually happens for one of three reasons: you skipped the flour step, the chicken was too wet when you breaded it, or you overcrowded the basket. Make sure to pat the chicken dry before starting, use the flour-egg-breadcrumb sequence, and leave space between each tender in the basket. Also, letting the breaded chicken rest for 5 minutes before cooking helps the coating stick.
Can I make these ahead of time for meal prep?
Absolutely. You can bread the chicken up to 24 hours in advance and keep it covered in the refrigerator. When you’re ready to cook, just pop them in the air fryer straight from the fridge—no need to let them come to room temperature. Cooked tenders also reheat beautifully in the air fryer, so you can make a big batch and enjoy them throughout the week.
What’s the best oil to spray on the tenders?
Avocado oil is my top choice because it has a high smoke point (520°F) and a neutral flavor. Canola oil and vegetable oil also work well. Avoid olive oil spray—it has a lower smoke point and can burn in the air fryer, leaving a bitter taste. And definitely don’t use butter or margarine, as they’ll burn quickly.
How do I make these extra crispy?
Two things make a big difference: double-spraying with oil (once at the start and once at the halfway point) and using panko breadcrumbs instead of regular ones. You can also toast the panko in a dry skillet for 2-3 minutes before breading the chicken—it gives them a head start on crunchiness. And don’t skip the resting step after breading—it really does help the coating stay put.
Pin This Recipe!
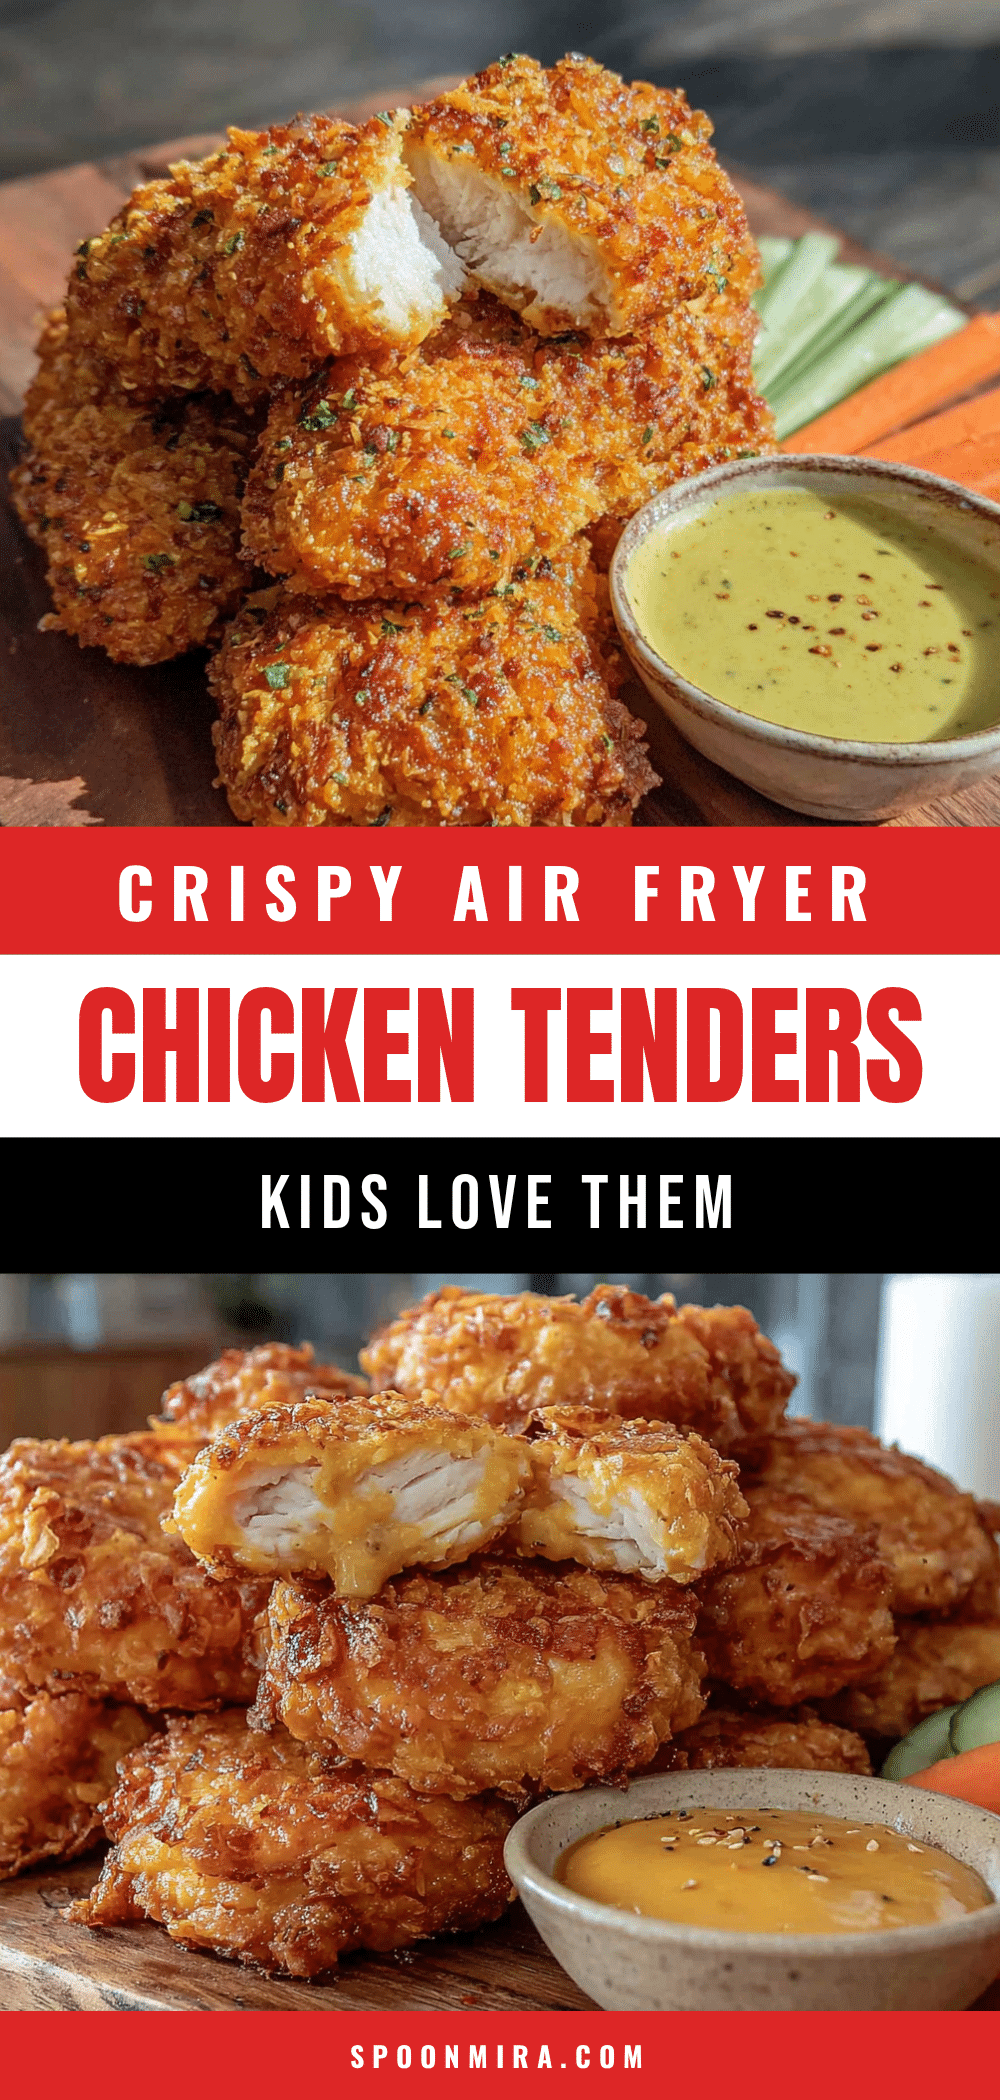
Easy Crispy Air Fryer Chicken Tenders Kids Love

These crispy air fryer chicken tenders are crunchy on the outside, juicy on the inside, and ready in under 20 minutes. A kid-friendly recipe that uses a double-coating technique for a perfect crust that stays crispy.
- Prep Time: 10 minutes
- Cook Time: 8 minutes
- Total Time: 18 minutes
- Yield: 4 servings 1x
- Category: Main Course
- Cuisine: American
Ingredients
- 1 lb chicken tenders (or boneless skinless chicken breasts cut into 1-inch strips)
- ½ cup all-purpose flour
- 2 large eggs, beaten
- 1 ½ cups panko breadcrumbs
- 1 tsp paprika
- ½ tsp garlic powder
- ½ tsp onion powder
- ½ tsp salt
- ¼ tsp black pepper
- Avocado oil spray (or any neutral oil spray)
- For serving: ketchup, honey mustard, or ranch dressing (optional)
- Lemon wedges (optional)
Instructions
- Set up your breading station with three shallow bowls: one with flour, one with beaten eggs, and one with panko mixed with paprika, garlic powder, onion powder, salt, and pepper.
- Pat chicken tenders dry with paper towels. If using chicken breasts, cut into 1-inch thick strips about 4 inches long.
- Dredge each piece of chicken in flour, shaking off excess. Dip in egg, letting excess drip off. Press into panko mixture until fully coated. Place on a plate and repeat with remaining chicken.
- Preheat air fryer to 400°F for 3 minutes.
- Arrange breaded tenders in a single layer in the air fryer basket, leaving space between each piece. Cook in batches if needed.
- Lightly spray tops of tenders with avocado oil.
- Air fry at 400°F for 8 minutes. At the 4-minute mark, flip each tender and spray the other side lightly with oil. Continue cooking for remaining 4 minutes.
- Check for doneness: internal temperature should reach 165°F. Cook in 1-minute increments if needed.
- Let tenders rest in the basket for 2 minutes before serving.
- Serve immediately with dipping sauces and lemon wedges if desired.
Notes
Don’t skip the flour step—it helps the coating stick. Use panko breadcrumbs for maximum crunch. Spray oil halfway through cooking for a golden finish. Let breaded chicken rest 5 minutes before cooking for better adhesion. Avoid overcrowding the basket to prevent sogginess.
Nutrition
- Serving Size: 3-4 tenders
- Calories: 290
- Sodium: 480
- Fat: 9
- Saturated Fat: 2
- Carbohydrates: 22
- Fiber: 1
- Protein: 28
Keywords: air fryer chicken tenders, crispy chicken tenders, kid-friendly chicken, quick dinner, easy chicken recipe


