That first hit of browned butter — the one that smells like toasted hazelnuts and warm caramel wrapped in a single, impossible aroma — still stops me every time. I was standing in my sister’s tiny apartment kitchen three Octobers ago, stirring a pot of butter while she chopped apples for a pie she’d never actually finish (she gets distracted, it’s a thing). The butter began to foam, then settle, and those little golden flecks appeared at the bottom of the pan. I wasn’t planning to make pumpkin bars that day. Honestly, I was just testing a theory about whether brown butter could make a boxed cake mix taste homemade. Spoiler: it absolutely can. But what came out of that afternoon was something better — a recipe that felt like fall in a single, tender bite.
These Perfect Brown Butter Pumpkin Bars with Cream Cheese Frosting are that recipe. They are not overly spiced or aggressively sweet. They are soft, almost pillow-like, with a nutty depth from the brown butter that makes the pumpkin taste richer, earthier. The cream cheese frosting is tangy and thick, the kind that cracks just a little when you cut into it. I have made these for Thanksgiving, for random Tuesday cravings, and for a friend who swore she didn’t like pumpkin desserts (she ate three). They are the kind of bar that makes people close their eyes after the first bite. And honestly? That’s the only review that matters.
Why You’ll Love This Recipe
I have tested this recipe more times than I care to admit. The first batch was good. The fifth batch was dangerous. Here is why these bars will become your new fall obsession:
- Brown Butter Magic: The nutty, toasty flavor of browned butter transforms simple pumpkin bars into something that tastes bakery-made. It adds a layer of complexity without any extra work.
- Perfectly Soft Texture: These bars are moist but not dense, tender but not crumbly. The combination of pumpkin and brown butter creates a melt-in-your-mouth texture that stays soft for days.
- Simple Ingredients: You likely have everything in your pantry right now. No strange flours, no hard-to-find extracts. Just real, whole ingredients that work together beautifully.
- Make-Ahead Friendly: These bars actually taste better the next day. The flavors meld, the frosting sets, and they slice like a dream. Perfect for stress-free entertaining.
- Crowd-Pleaser: I have brought these to potlucks, office parties, and family dinners. They disappear fast. Even people who claim they are “not pumpkin people” come back for seconds.
What makes this recipe different from every other pumpkin bar out there is that brown butter step. It is not just a gimmick. It changes the entire flavor profile, making the pumpkin taste deeper and the spices feel more balanced. You get that warm, nutty aroma in every single bite. And the cream cheese frosting? It is not too sweet. It is tangy, creamy, and thick enough to hold a swirl. This is not just another pumpkin bar recipe. This is the one you will make every single fall.
What Ingredients You Will Need
This recipe uses simple, wholesome ingredients to deliver that deep, nutty flavor and tender texture. Most of these are pantry staples, which makes these bars dangerously easy to whip up on a whim.
- Unsalted butter: 1 cup (2 sticks). You will brown this, so do not use salted butter — you want full control over the salt level. I prefer using a high-fat European-style butter like Kerrygold for the richest browning.
- Pumpkin puree: 1 (15-ounce) can. Make sure you grab 100% pure pumpkin puree, not pumpkin pie filling. The filling has added sugar and spices that will throw off the balance. Libby’s is my go-to brand for consistent texture.
- Granulated sugar: 1 cup. Provides sweetness and helps keep the bars tender.
- Light brown sugar: ½ cup, packed. Adds moisture and a subtle molasses note that pairs beautifully with the brown butter and pumpkin.
- Large eggs: 2, at room temperature. Room temperature eggs incorporate more easily into the batter, creating a smoother, more uniform crumb.
- Vanilla extract: 2 teaspoons. Pure vanilla extract makes a difference here. The brown butter and vanilla together create a warm, almost toffee-like flavor.
- All-purpose flour: 1 ¾ cups. Spoon and level your flour — do not scoop directly from the bag. Packed flour will make the bars dense and dry.
- Baking powder: 1 teaspoon. Helps the bars rise and stay light.
- Baking soda: ½ teaspoon. Works with the acidity of the pumpkin and brown sugar for a tender crumb.
- Salt: ½ teaspoon. Balances the sweetness and enhances the brown butter flavor. I use fine sea salt.
- Pumpkin pie spice: 1 ½ teaspoons. You can use store-bought or make your own blend (cinnamon, nutmeg, ginger, cloves, allspice). I prefer using a slightly heavier hand on the cinnamon in my homemade mix.
- Cinnamon: ½ teaspoon. Adds an extra layer of warmth.
For the Cream Cheese Frosting:
- Cream cheese: 8 ounces, softened. Full-fat, block-style cream cheese is essential. Do not use the spreadable kind in a tub — it has too much water and will make your frosting runny. Philadelphia is my trusted brand.
- Unsalted butter: ¼ cup (½ stick), softened. Adds richness and helps the frosting hold its shape.
- Powdered sugar: 2 cups, sifted. Sifting removes lumps and creates a silky-smooth frosting.
- Vanilla extract: 1 teaspoon.
- Pinch of salt: Just a tiny one. It cuts the sweetness and brightens the tanginess of the cream cheese.
Equipment Needed
You do not need a fancy kitchen to pull these off. Here is what you will need:
- 9×13-inch baking pan: A light-colored metal pan works best for even baking. Glass pans can cause the edges to overbake before the center is done.
- Light-colored saucepan or skillet: Essential for browning the butter. A dark pan makes it hard to see the color change, which is how you know when the butter is perfectly browned. I use a stainless steel saucepan.
- Stand mixer or hand mixer: Either works fine. A hand mixer is actually easier for this recipe since the batter is not heavy.
- Parchment paper: Line your pan with parchment paper, leaving an overhang on the sides. This makes lifting the bars out clean and easy.
- Rubber spatula: For scraping every last bit of that brown butter into the bowl. Trust me, you do not want to waste any.
- Cooling rack: Allows air to circulate around the pan, preventing the bottom from getting soggy.
- Offset spatula: Optional, but it makes spreading the cream cheese frosting look effortless and professional.
Preparation Method
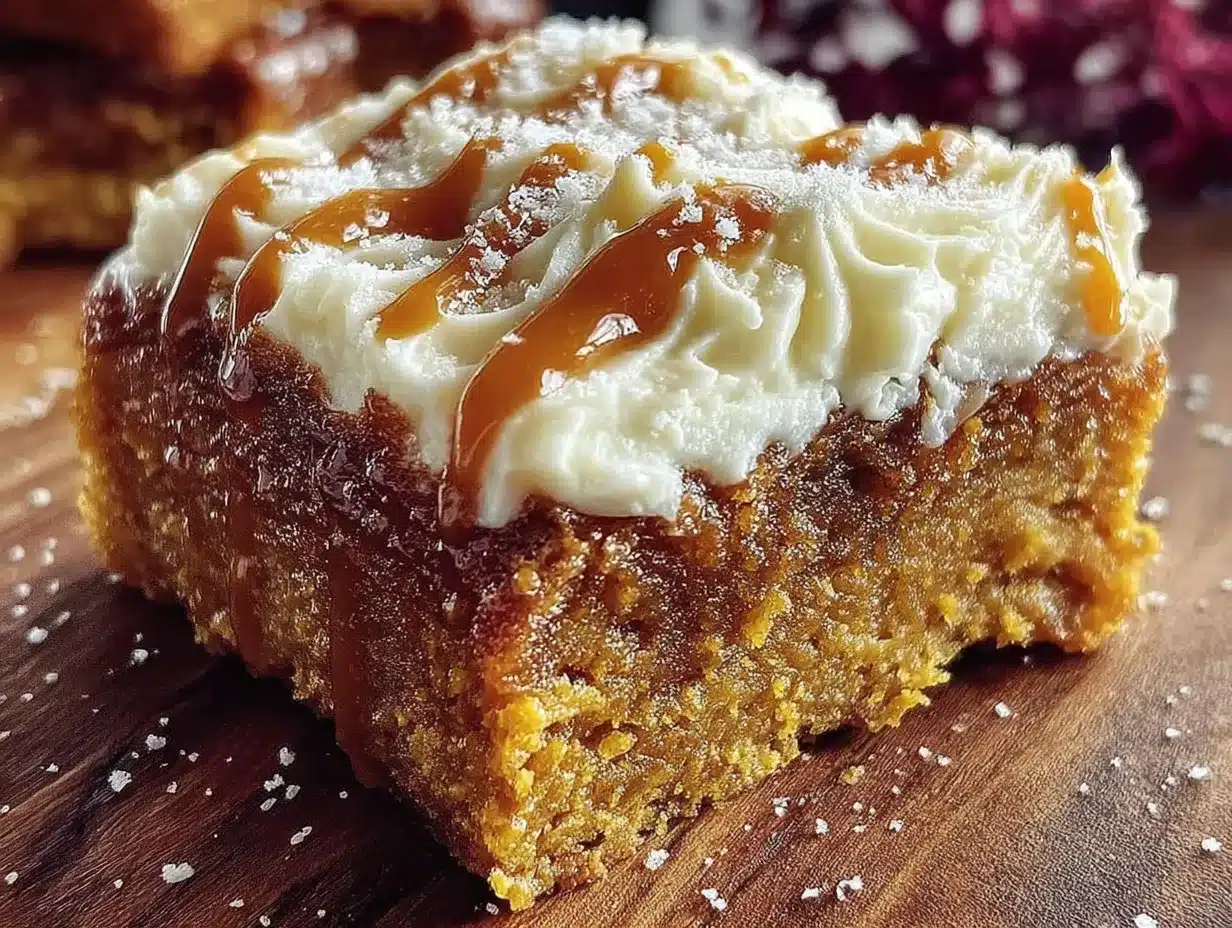
Let us walk through this step by step. I promise, it is easier than it sounds, and the results are absolutely worth the extra few minutes.
- Preheat and prep: Preheat your oven to 350°F (175°C). Line a 9×13-inch baking pan with parchment paper, leaving a 2-inch overhang on the long sides. Lightly grease the parchment and the exposed sides of the pan with butter or non-stick spray.
- Brown the butter: Place the 1 cup of unsalted butter in a light-colored saucepan over medium heat. Stir frequently with a rubber spatula or wooden spoon. The butter will melt, then foam, then begin to crackle and pop. Keep stirring. After about 5-7 minutes, the foam will subside and you will see tiny golden-brown specks forming at the bottom of the pan. The butter will smell intensely nutty and toasty. As soon as it turns a warm amber color and smells like toasted hazelnuts, remove it from the heat immediately. Pour the browned butter into a heatproof bowl (including all those lovely brown specks) and let it cool for 10-15 minutes. Do not skip the cooling step — hot butter will cook the eggs.
- Mix the wet ingredients: In a large mixing bowl, whisk together the cooled brown butter, granulated sugar, and packed light brown sugar until well combined. It will look a bit grainy, and that is okay. Add the pumpkin puree, room temperature eggs, and vanilla extract. Whisk until smooth and fully incorporated. The mixture will be thick and glossy.
- Combine the dry ingredients: In a separate medium bowl, whisk together the all-purpose flour, baking powder, baking soda, salt, pumpkin pie spice, and cinnamon. Whisking aerates the flour and ensures the leavening agents are evenly distributed.
- Combine wet and dry: Gradually add the dry ingredients to the wet ingredients, stirring gently with a rubber spatula or wooden spoon. Mix just until no streaks of flour remain. Do not overmix. Overmixing develops gluten, which will make the bars tough instead of tender. A few small lumps are perfectly fine.
- Bake the bars: Pour the batter into the prepared pan and spread it evenly with a spatula. Bake for 22-28 minutes, or until a toothpick inserted into the center comes out clean or with just a few moist crumbs. The edges will be lightly golden and pulling away from the sides of the pan. My oven runs hot, so I start checking at 22 minutes. Let the bars cool completely in the pan on a wire rack. This is crucial — warm bars will melt the frosting into a puddle.
- Make the frosting: While the bars cool, make the cream cheese frosting. In a large bowl, beat the softened cream cheese and softened butter together with a hand mixer until smooth, creamy, and completely lump-free. About 2 minutes. Gradually add the sifted powdered sugar, one cup at a time, beating on low speed until incorporated. Add the vanilla extract and a tiny pinch of salt. Increase the speed to medium-high and beat for 1-2 minutes until the frosting is light, fluffy, and spreadable. Do not overbeat or it can become too soft.
- Frost and chill: Once the bars are completely cool, spread the cream cheese frosting evenly over the top using an offset spatula or a butter knife. For clean, neat slices, refrigerate the frosted bars for at least 30 minutes before cutting. This sets the frosting and makes slicing much easier. Use the parchment overhang to lift the entire block of bars out of the pan, then cut into squares.
Cooking Tips & Techniques
I have made this recipe enough times to know exactly where things can go sideways. Here is what I have learned the hard way so you do not have to.
On browning butter: Do not walk away from the saucepan. Brown butter goes from perfect to burnt in about 15 seconds. Swirl the pan occasionally and watch for that moment when the foam clears and the specks appear. The color should be a deep amber, like the color of a new penny. If it looks dark brown, you have gone too far. Also, pour it into a separate bowl immediately — the hot pan will continue to cook the butter even off the heat.
On room temperature ingredients: Cold eggs and cold cream cheese are the enemy of smooth batter and frosting. Cold eggs can seize the brown butter, and cold cream cheese will leave lumps in your frosting that no amount of beating will fix. Leave your eggs and cream cheese on the counter for about 30 minutes before you start. If you are in a rush, place the eggs in a bowl of warm water for 5 minutes, and microwave the cream cheese in 5-second bursts until it is soft to the touch but not warm.
On measuring flour: This is the most common mistake I see in baking. Scooping your measuring cup directly into the flour bag packs in way too much flour, leading to dry, dense bars. Instead, fluff the flour with a spoon, then spoon it into your measuring cup and level it off with a flat edge. It takes an extra 10 seconds and makes a world of difference.
On checking doneness: Pumpkin bars can be tricky because the batter is so moist. The toothpick test is your best friend, but look for a few moist crumbs, not a completely dry toothpick. Overbaked pumpkin bars are dry and crumbly. When in doubt, take them out a minute or two early. They will continue to set as they cool.
On slicing cleanly: For those picture-perfect squares, chill the frosted bars for at least 30 minutes. Use a sharp chef’s knife and wipe it clean between each cut with a damp paper towel. This prevents the frosting from smearing and gives you those beautiful, clean edges.
Variations & Adaptations
One of the best things about this recipe is how easily it adapts. Here are some of my favorite ways to switch it up.
- Gluten-Free Option: Substitute the all-purpose flour with a good quality 1:1 gluten-free baking flour blend, like Bob’s Red Mill or King Arthur’s. Make sure the blend contains xanthan gum. The texture will be slightly more delicate, but still incredibly delicious.
- Dairy-Free Adaptation: Use a high-quality vegan butter stick (like Miyoko’s or Country Crock Plant Butter) for both the bars and the frosting. For the cream cheese frosting, use a dairy-free cream cheese alternative like Kite Hill or Tofutti. The texture will be slightly less firm, so chill the bars well before slicing.
- Spice It Up: If you love a bolder spice profile, add ¼ teaspoon of ground ginger, ¼ teaspoon of ground cloves, and a pinch of black pepper to the dry ingredients. The black pepper is a secret trick that enhances the warmth of the other spices without making it spicy.
- Nutty Crunch: Sprinkle ½ cup of toasted chopped pecans or walnuts over the frosting while it is still soft. The crunch contrasts beautifully with the soft bars and creamy frosting. I have done this for Thanksgiving and it was a huge hit.
- Pumpkin Chocolate Chip Bars: Fold ¾ cup of semi-sweet or dark chocolate chips into the batter before baking. The chocolate and pumpkin combination is classic for a reason. The bitterness of the dark chocolate balances the sweetness of the brown butter beautifully.
- Maple Cream Cheese Frosting: Replace the vanilla extract in the frosting with 1-2 tablespoons of pure maple syrup (reduce the powdered sugar by 2 tablespoons to compensate). The maple flavor adds another layer of fall warmth that pairs perfectly with the brown butter.
I once made a batch with a swirl of salted caramel sauce on top of the frosting before chilling. It was messy, but absolutely unforgettable. Do not be afraid to experiment.
Serving & Storage Suggestions
These bars are versatile enough for any occasion. Here is how to serve and store them for the best experience.
Serving: These bars are best served chilled or at room temperature. I actually prefer them straight from the fridge — the frosting is firmer and the flavor is more concentrated. If you want that softer, melt-in-your-mouth texture, let them sit at room temperature for about 15 minutes before serving. For an extra special touch, serve with a warm mug of our Homemade Iced Pumpkin Spice Latte or a cozy Pumpkin Chai Latte with Steamed Oat Milk. The combination is pure fall comfort.
Storage: Store the bars in an airtight container in the refrigerator for up to 5 days. Because of the cream cheese frosting, they must be refrigerated. I like to layer them between sheets of parchment paper to prevent sticking. These bars also freeze beautifully. To freeze, place the unfrosted bars (or frosted bars, if you prefer) in a single layer on a baking sheet and freeze until solid, about 1 hour. Then wrap each bar individually in plastic wrap and place them in a freezer-safe bag or container. They will keep for up to 3 months. Thaw in the refrigerator overnight before serving. If you froze them unfrosted, make the frosting fresh and spread it on after thawing.
Flavor Development: Here is a little secret — these bars actually taste better the day after you make them. The brown butter flavor deepens, the pumpkin and spices meld together, and the texture becomes even more tender. If you can resist, make them a day ahead. Your future self will thank you.
Nutritional Information & Benefits
While these are definitely a treat, they do offer some surprising nutritional benefits thanks to the pumpkin.
- Estimated per bar (based on 24 servings): Calories: 285 | Fat: 16g | Carbohydrates: 34g | Fiber: 1g | Sugar: 24g | Protein: 3g
- Vitamin A Powerhouse: Pumpkin is packed with beta-carotene, which your body converts into vitamin A. This supports eye health, immune function, and healthy skin. One bar provides a meaningful amount of your daily vitamin A needs.
- Fiber and Fullness: Pumpkin contains dietary fiber, which aids digestion and helps you feel satisfied. Combined with the protein from the eggs and cream cheese, these bars are more filling than your average dessert.
- Antioxidant Boost: The spices in this recipe — cinnamon, ginger, cloves — are all rich in antioxidants that help fight inflammation and support overall health.
- Dietary Considerations: This recipe can be made gluten-free and dairy-free with the substitutions listed above. It is vegetarian-friendly as written.
- Potential Allergens: Contains dairy (butter, cream cheese), eggs, and gluten (flour).
I truly believe that dessert should be enjoyed without guilt. These bars are a celebration of fall flavors, made with real ingredients. One bar is perfectly satisfying. Two? Well, that is just good decision-making.
Conclusion
These Perfect Brown Butter Pumpkin Bars with Cream Cheese Frosting are everything I want in a fall dessert. They are deeply flavorful without being complicated, impressive without being fussy. That brown butter step takes about 7 extra minutes, but it transforms the entire recipe into something you will crave all season long. The bars are soft and tender, the frosting is tangy and creamy, and together they create a bite that tastes like autumn in the best possible way.
I hope you make these for your next gathering, for a quiet weekend treat, or just because you deserve something delicious. Customize them with the variations above, or keep them classic — either way, they will not last long. If you make them, I would love to hear about it. Leave a comment below and let me know how they turned out, or share your own twist on the recipe. And if you are looking for more pumpkin inspiration, do not miss our Creamy Pumpkin Pie Cheesecake Bars or this Chocolate Chip Pumpkin Bread for even more cozy fall baking. Happy baking, friends. You have got this.
Frequently Asked Questions
Can I use salted butter instead of unsalted for browning?
You can, but I recommend sticking with unsalted. Salted butter has a higher water content and can brown unevenly. Plus, you lose control over the final salt level in the recipe. If you only have salted butter on hand, reduce the added salt in the recipe to ¼ teaspoon.
Why did my cream cheese frosting turn out runny?
Runny frosting usually means one of two things: your cream cheese was too soft (almost melted), or you used low-fat or spreadable cream cheese. Always use full-fat, block-style cream cheese that is softened but still cool to the touch. If your frosting is still too soft, pop it in the fridge for 15-20 minutes to firm up before spreading.
Can I make these bars without the brown butter?
Technically yes, but you will lose the signature nutty flavor that makes these bars so special. If you are short on time, you can use 1 cup of melted and slightly cooled unsalted butter instead. The bars will still be delicious, just not as complex. I really encourage you to try the brown butter at least once — it is a game-changer.
How do I know when the brown butter is done?
Watch for the color and the smell. The butter will go from bright yellow to golden, then to a warm amber color. You will see tiny brown specks forming at the bottom of the pan. The smell will shift from buttery to intensely nutty and toasty, like toasted hazelnuts. As soon as that happens, remove it from the heat. It happens fast, so stay close.
Can I freeze these pumpkin bars?
Absolutely. You can freeze them frosted or unfrosted. For best results, freeze the bars on a baking sheet until solid, then wrap each one individually in plastic wrap and store in a freezer-safe bag. They will keep for up to 3 months. Thaw in the refrigerator overnight. If frozen unfrosted, make a fresh batch of frosting after thawing.
Pin This Recipe!
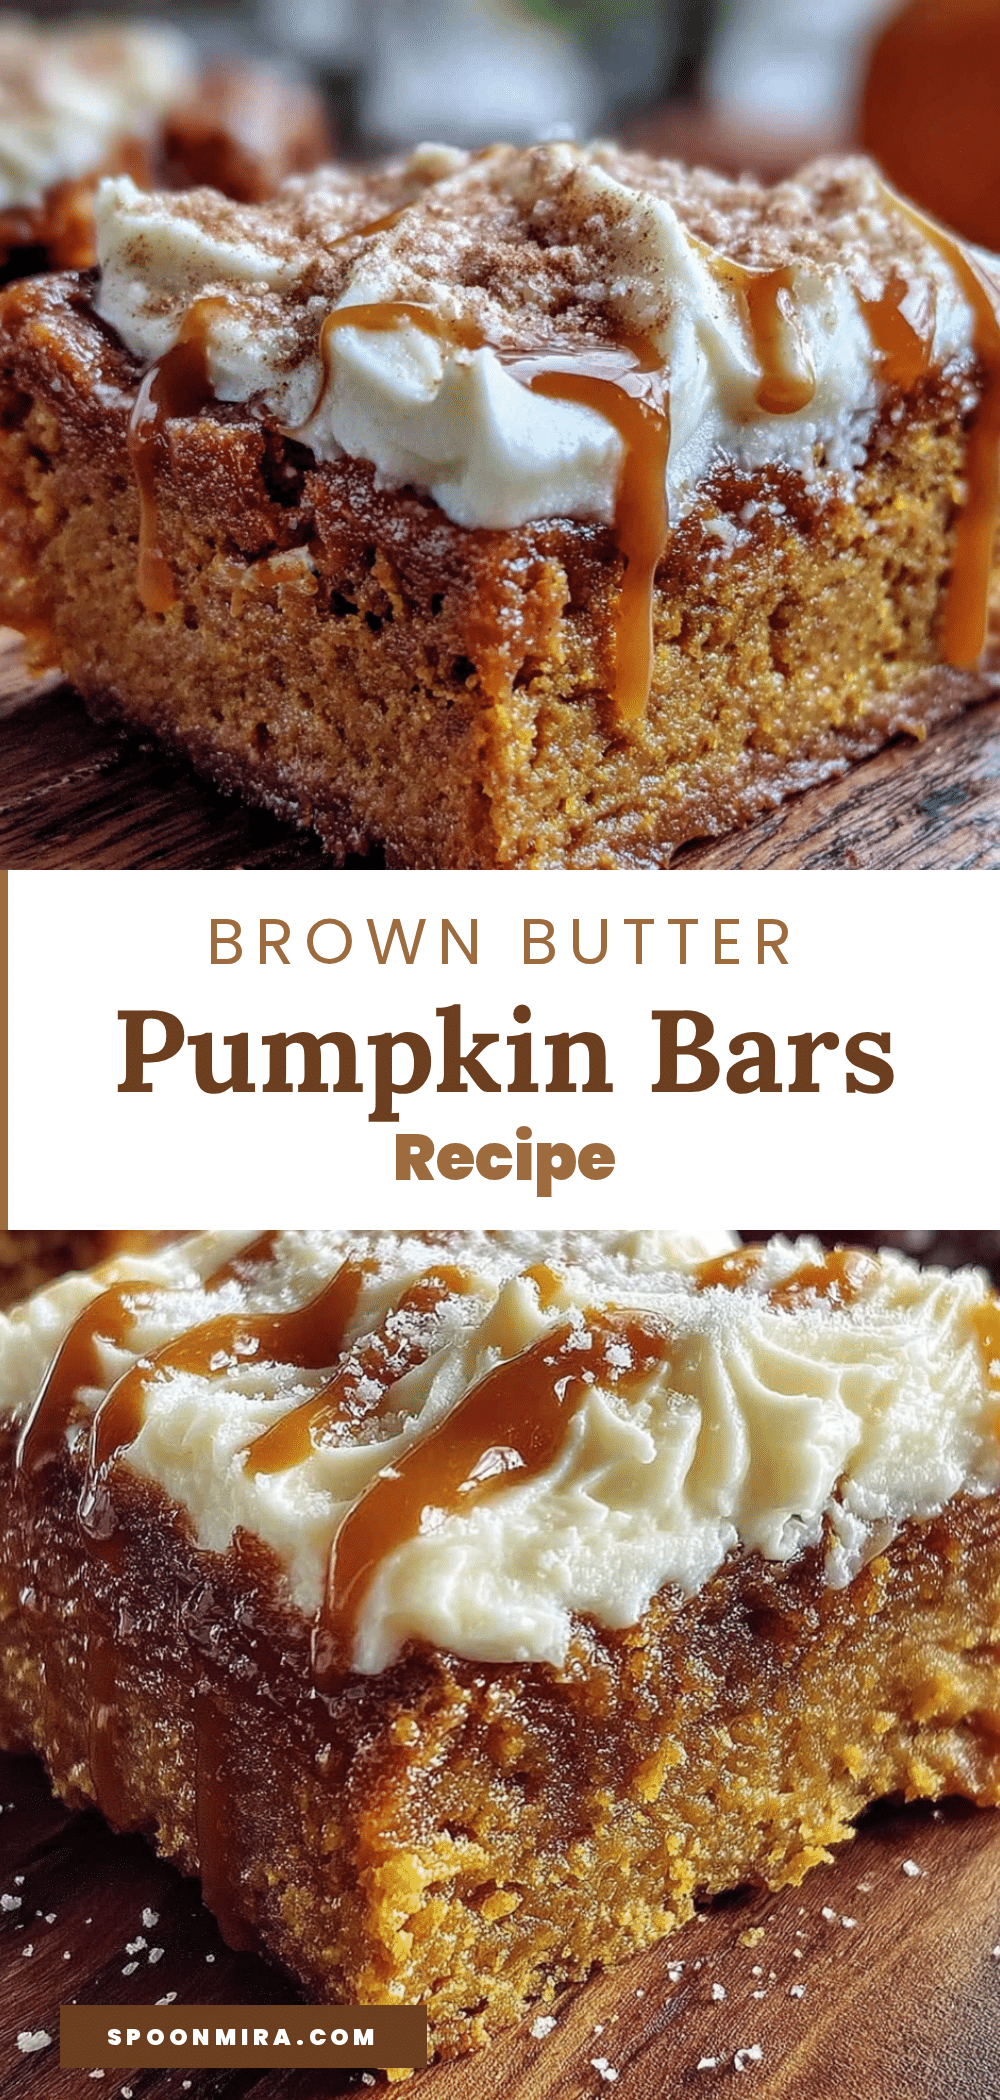
Perfect Brown Butter Pumpkin Bars with Cream Cheese Frosting
Soft, tender pumpkin bars with a nutty depth from brown butter, topped with a tangy cream cheese frosting. The perfect fall dessert that tastes even better the next day.
- Prep Time: 20 minutes
- Cook Time: 25 minutes
- Total Time: 1 hour 15 minutes (includes cooling and chilling)
- Yield: 24 servings 1x
- Category: Dessert
- Cuisine: American
Ingredients
- 1 cup (2 sticks) unsalted butter
- 1 (15-ounce) can pumpkin puree (100% pure, not pumpkin pie filling)
- 1 cup granulated sugar
- ½ cup light brown sugar, packed
- 2 large eggs, at room temperature
- 2 teaspoons vanilla extract
- 1 ¾ cups all-purpose flour
- 1 teaspoon baking powder
- ½ teaspoon baking soda
- ½ teaspoon salt
- 1 ½ teaspoons pumpkin pie spice
- ½ teaspoon cinnamon
- 8 ounces cream cheese, softened (full-fat, block-style)
- ¼ cup (½ stick) unsalted butter, softened
- 2 cups powdered sugar, sifted
- 1 teaspoon vanilla extract
- Pinch of salt
Instructions
- Preheat oven to 350°F (175°C). Line a 9×13-inch baking pan with parchment paper, leaving a 2-inch overhang on the long sides. Lightly grease the parchment and exposed sides of the pan.
- Brown the butter: Place 1 cup unsalted butter in a light-colored saucepan over medium heat. Stir frequently. The butter will melt, foam, then crackle. After about 5-7 minutes, the foam will subside and tiny golden-brown specks will form. When the butter turns warm amber and smells nutty, remove from heat immediately. Pour into a heatproof bowl and let cool for 10-15 minutes.
- In a large bowl, whisk together cooled brown butter, granulated sugar, and brown sugar until combined. Add pumpkin puree, eggs, and vanilla extract. Whisk until smooth and glossy.
- In a separate bowl, whisk together flour, baking powder, baking soda, salt, pumpkin pie spice, and cinnamon.
- Gradually add dry ingredients to wet ingredients, stirring gently with a rubber spatula until just combined. Do not overmix.
- Pour batter into prepared pan and spread evenly. Bake for 22-28 minutes, until a toothpick inserted in the center comes out clean or with a few moist crumbs. Cool completely in the pan on a wire rack.
- Make frosting: In a large bowl, beat softened cream cheese and butter with a hand mixer until smooth. Gradually add sifted powdered sugar, beating on low. Add vanilla and a pinch of salt. Beat on medium-high for 1-2 minutes until light and fluffy.
- Spread frosting over cooled bars. Refrigerate for at least 30 minutes before slicing. Use parchment overhang to lift bars out, then cut into squares.
Notes
Do not walk away while browning butter; it can burn quickly. Use room temperature eggs and cream cheese for best results. For clean slices, chill frosted bars for at least 30 minutes. Bars taste even better the next day.
Nutrition
- Serving Size: 1 bar
- Calories: 285
- Sugar: 24
- Sodium: 180
- Fat: 16
- Saturated Fat: 10
- Carbohydrates: 34
- Fiber: 1
- Protein: 3
Keywords: pumpkin bars, brown butter, cream cheese frosting, fall dessert, pumpkin dessert, easy pumpkin bars


