Third time in as many days I’d made these Halloween Rice Krispie Spiderweb Treats, and the kitchen counter had a fine dusting of powdered sugar that I kept telling myself I’d wipe up later. The first batch came out looking like a sad, melted doily. The second batch? Closer, but the chocolate lines bled into the marshmallow like a bad watercolor. By the third try, I finally figured out the trick—chill the treats first, then pipe the chocolate, and for the love of all things spooky, don’t use a piping bag that’s too hot. I stood there in the quiet of my kitchen, a spiderweb pattern finally crisp and clean on top of a golden square, and I just… smiled. It wasn’t about perfection. It was about that moment when a sticky, buttery, marshmallow-y mess turned into something that looked like it belonged at a Halloween party. And honestly? I couldn’t stop making them.
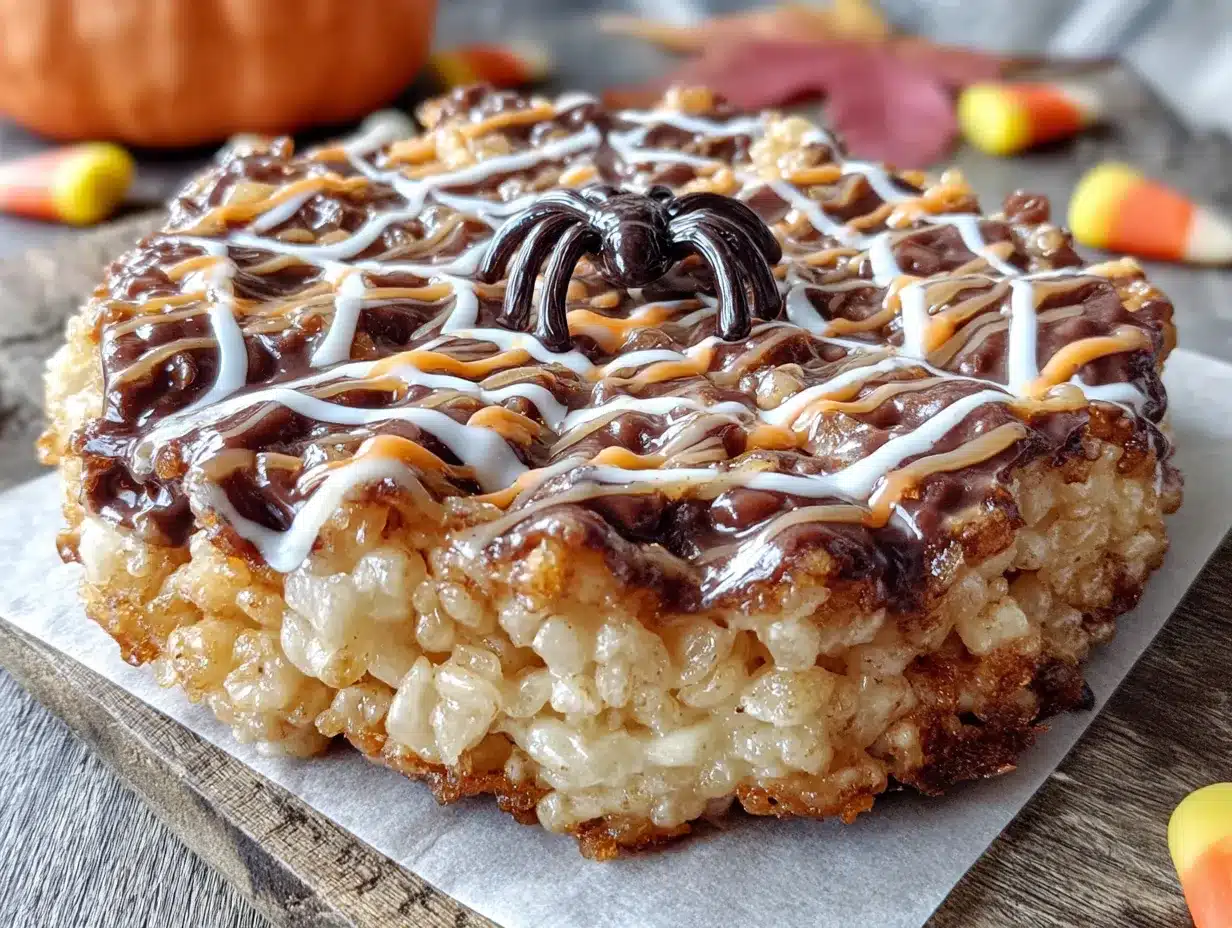
These aren’t just another rice cereal treat. They’re the kind of no-bake dessert that saves you when you realize the school Halloween party is tomorrow, or when you need a quick, impressive treat for a spooky movie night. They’re buttery, chewy, and topped with a simple chocolate spiderweb that looks way harder than it actually is. Once you get the hang of the piping, it’s almost meditative. Almost. Let’s get into it—because you deserve a Halloween treat that doesn’t require a pastry degree.
Why You’ll Love This Recipe
Look, I’ve tested a lot of Halloween treats over the years. Some are too finicky, some taste like pure sugar with no texture, and some just don’t look like the picture. These spiderweb treats are the real deal. Here’s why they work.
- No-Bake & Quick: You’re looking at about 15 minutes of active work. No oven, no complicated steps. Just a stovetop and a microwave.
- Simple Ingredients: Butter, marshmallows, rice cereal, and chocolate. That’s it. You probably have most of this in your pantry right now.
- Perfect for Halloween Parties: Whether it’s a classroom celebration, a trunk-or-treat event, or just a fun Friday night, these treats are a guaranteed hit.
- Crowd-Pleaser: Kids love the marshmallow crunch, and adults love the nostalgic twist with the chocolate web. I’ve never seen a plate of these go untouched.
- Unbelievably Adorable: The spiderweb design is deceptively simple. It looks professional, but it’s just a few concentric circles and a knife drag. You’ll feel like a decorating genius.
What really sets this recipe apart is the texture. I’ve found that using a specific ratio of butter to marshmallows gives you a treat that’s chewy but not greasy, and holds its shape perfectly for cutting. Plus, the chocolate web adds a slight snap that contrasts beautifully with the soft, marshmallow-y base. It’s the kind of treat that makes you close your eyes after the first bite—and then reach for another one.
What Ingredients You Will Need
This recipe uses simple, pantry-friendly ingredients to deliver a spooky, delicious treat without any fuss. Each component plays a specific role, so let’s break it down.
- Unsalted butter (6 tablespoons / 85g): This is the fat that gives the treats their rich flavor and prevents them from sticking. I always use unsalted so I can control the salt level. If you only have salted butter, just skip adding any extra salt later. Cut it into cubes so it melts evenly.
- Mini marshmallows (10 oz / 284g, about 6 cups): Mini marshmallows melt faster and more evenly than the big ones, which is key for a smooth, uniform mixture. I’ve tried using jumbo marshmallows, and they take forever to melt and can lead to a lumpy texture. Stick with the minis. For the best results, use a fresh bag; stale marshmallows won’t melt as smoothly.
- Crispy rice cereal (6 cups / 170g): The classic choice. I recommend a brand like Kellogg’s Rice Krispies for that signature snap and crunch. You can use generic brands, but the texture might be slightly different—some are more puffy and less crispy. Don’t crush the cereal; you want those whole, airy pieces for the perfect bite.
- Vanilla extract (1 teaspoon): A little vanilla rounds out the sweetness and adds a warm, comforting flavor. It’s a small addition, but it makes a big difference. Don’t skip it.
- Salt (¼ teaspoon): This is your secret weapon. A pinch of salt balances the sweetness of the marshmallows and butter, preventing the treats from tasting cloying. It also enhances the overall flavor profile.
- Semi-sweet chocolate chips (1 cup / 175g): For the spiderweb design. I prefer semi-sweet because it’s not too sweet and provides a nice contrast to the sugary marshmallow base. Use a good quality brand like Ghirardelli or Guittard for the smoothest melting and best flavor. You can also use dark chocolate if you prefer a more intense taste.
- Coconut oil or shortening (1 teaspoon): This is optional but highly recommended. Adding a tiny bit of coconut oil to the chocolate when melting helps it become thinner and smoother, making it much easier to pipe those delicate spiderweb lines. It also gives the chocolate a beautiful shine.
- Powdered sugar (for dusting, optional): A light dusting of powdered sugar over the finished spiderweb gives it a magical, frosty look, like a web in the morning dew. It’s purely aesthetic, but it adds a lovely finishing touch. Use a fine-mesh sieve to dust it evenly.
Equipment Needed
You don’t need a lot of fancy gear for this recipe, which is part of its charm. Here’s what you’ll need to pull it off.
- Large pot (4-5 quart): You need a pot big enough to hold all the marshmallow mixture and cereal without overflowing. A heavy-bottomed pot helps prevent the butter and marshmallows from burning.
- Rubber spatula: A good, sturdy rubber spatula is essential for folding the cereal into the marshmallow mixture without crushing it. Silicone is best because it won’t melt or scratch your pot.
- 9×13-inch baking dish: This is the perfect size for these treats. You want them to be about 1-inch thick. If you use a smaller dish, the treats will be too thick and hard to cut. If you use a larger one, they’ll be too thin and flimsy.
- Parchment paper: Line your baking dish with parchment paper, leaving some overhang on the sides. This is the single best trick for getting the treats out of the pan cleanly. No greasing, no sticking, no mess.
- Small piping bag or zip-top bag: For the chocolate spiderweb. A simple zip-top bag works perfectly. You don’t need a fancy piping tip—just snip a tiny corner off the bag.
- Toothpick or skewer: This is your spiderweb-dragging tool. A toothpick is perfect for the small, precise lines. A skewer works for a wider web.
- Microwave-safe bowl: For melting the chocolate. I prefer a glass bowl.
Preparation Method
Let’s get to the fun part. Follow these steps, and you’ll have a pan of spooky, delicious spiderweb treats in no time.
- Prepare your pan. Line a 9×13-inch baking dish with parchment paper, making sure the paper hangs over the two long sides. This will be your “handle” to lift the treats out later. Lightly grease the parchment paper with a little butter or non-stick spray to prevent sticking.
- Melt the butter and marshmallows. In your large pot, melt the 6 tablespoons of unsalted butter over medium-low heat. Once it’s melted, add the entire bag of mini marshmallows. Stir constantly with your rubber spatula until the marshmallows are completely melted and the mixture is smooth and glossy. This should take about 5-7 minutes. Don’t walk away—marshmallows can burn quickly if the heat is too high. You’ll know it’s ready when you can drag the spatula across the bottom of the pot and the mixture doesn’t immediately flow back together.
- Add the vanilla and salt. Remove the pot from the heat. Stir in the 1 teaspoon of vanilla extract and the ¼ teaspoon of salt. Mix until they are fully incorporated. The mixture will smell incredible at this point.
- Fold in the cereal. Add the 6 cups of crispy rice cereal to the pot. Using your rubber spatula, gently fold the cereal into the marshmallow mixture. Be careful not to crush the cereal too much. You want to coat every piece evenly. Work quickly, as the mixture will start to set as it cools. It might seem a little stiff at first, but keep folding—it will come together.
- Press into the pan. Transfer the mixture to your prepared baking dish. Using a second piece of parchment paper or a lightly greased spatula, press the mixture evenly into the pan. Don’t press too hard, or the treats will become dense and hard. You just want a flat, even layer. Let the treats cool completely at room temperature. This takes about 30-45 minutes. For best results, pop the pan in the fridge for 15 minutes to speed up the process and make them easier to cut.
- Melt the chocolate. While the treats are cooling, prepare the chocolate. Place the 1 cup of semi-sweet chocolate chips and 1 teaspoon of coconut oil (if using) in a microwave-safe bowl. Microwave in 30-second intervals, stirring after each, until the chocolate is completely smooth and melted. Be careful not to overheat it, or the chocolate will seize. Let it cool slightly for a minute or two—you want it to be pipeable but not hot.
- Create the spiderweb. Once the treats are cool and firm, lift them out of the pan using the parchment paper overhang. Place them on a cutting board. Fill your small piping bag or zip-top bag with the melted chocolate. Snip a tiny corner off the bag. Start by piping a small circle of chocolate in the center of a treat. Then, pipe a larger circle around it. Repeat until you have 3-4 concentric circles. Don’t worry about them being perfect. Now, take a toothpick and start from the center. Gently drag the toothpick through the chocolate circles outward toward the edge of the treat. Do this in 6-8 places around the circle, creating a classic spiderweb pattern. Wipe the toothpick clean between each drag for the cleanest lines.
- Let the chocolate set. Allow the chocolate spiderwebs to set completely. You can let them sit at room temperature for about 20 minutes, or pop them back in the fridge for 10 minutes to speed things up. Once the chocolate is firm, your spiderweb treats are ready to serve.
Cooking Tips & Techniques
I’ve made these treats more times than I care to admit, and I’ve learned a few things the hard way. Here are my best tips to make sure yours turn out perfectly.
- Don’t over-melt the marshmallows. This is the most common mistake. You want the marshmallows to be just melted and smooth. If you cook them too long, they become tough and the treats will be hard as rocks the next day. Low and slow is the key.
- Work fast once the cereal is added. The marshmallow mixture starts to set almost immediately. Have your pan ready and your spatula greased so you can press the mixture in without it becoming a sticky mess.
- Use a light hand when pressing. Seriously, just a gentle press is all you need. If you compact the mixture, you’ll end up with treats that are too dense and hard to bite into. You want them to be light and airy.
- Chill before cutting and decorating. This is the secret to clean cuts and perfect spiderwebs. Cold treats are much easier to slice without crumbling, and the chocolate will set faster on a cold surface.
- Pipe the chocolate while it’s warm, but not hot. If the chocolate is too hot, it will melt the marshmallow surface and bleed into the treat. If it’s too cool, it will be too thick to pipe smoothly. Aim for a warm, fluid consistency.
- Practice on a piece of parchment first. If you’re nervous about the spiderweb design, pipe a few test lines on a piece of parchment paper. It’s a great way to get the feel for the pressure and flow of the chocolate before you commit to the treat.
Variations & Adaptations
One of the best things about this recipe is how easy it is to change up. Here are a few of my favorite variations.
- Spooky Color Twist: Add a few drops of orange or black gel food coloring to the marshmallow mixture before adding the cereal. This gives the treats a fun, festive look even before the spiderweb goes on. Gel coloring works better than liquid, which can make the mixture too sticky.
- Peanut Butter Spiderweb: For a richer flavor, melt ¼ cup of creamy peanut butter along with the butter and marshmallows. The peanut butter adds a savory note that pairs beautifully with the chocolate. It’s like a Reese’s-inspired Halloween treat.
- White Chocolate Web: Swap the semi-sweet chocolate for white chocolate chips. The white web against a regular golden treat looks incredibly elegant and ghostly. You can even add a tiny drop of black food coloring to the white chocolate to create a gray, shadowy web.
- Gluten-Free Option: This recipe is naturally gluten-free as long as you use a certified gluten-free crispy rice cereal. Most major brands are, but always double-check the label if you’re serving someone with celiac disease.
- Add-Ins for Extra Crunch: Before pressing the mixture into the pan, fold in ½ cup of mini pretzel twists or chopped peanuts. This adds a salty, crunchy contrast that takes these treats to the next level. I tried this for a Halloween party last year, and they were gone in minutes.
Serving & Storage Suggestions
These treats are best enjoyed at room temperature, where the marshmallow base is soft and chewy and the chocolate web has a satisfying snap. Here’s how to serve and store them like a pro.
- Serving: Arrange the spiderweb treats on a festive platter or a Halloween-themed cake stand. A light dusting of powdered sugar right before serving makes them look magical. They’re perfect for a Halloween party, a school bake sale, or a spooky movie night with the kids.
- Pairings: These treats are sweet and rich, so they pair wonderfully with a cold glass of milk or a warm mug of apple cider. For a grown-up twist, serve them alongside a cozy homemade pumpkin chai latte with steamed oat milk. The warm spices balance the sweetness perfectly. If you’re planning a full Halloween spread, they also go great with a fun Halloween boo-cuterie board for a sweet and savory mix.
- Storage: Store leftover treats in an airtight container at room temperature for up to 3 days. Do not refrigerate them, as the cold will make the marshmallow base hard and stale. If you live in a humid climate, add a piece of bread to the container to absorb excess moisture and keep the treats chewy.
- Freezing: You can freeze these treats for up to 2 months. Place them in a single layer in a freezer-safe container, with parchment paper between layers. Thaw at room temperature for about 30 minutes before serving. The chocolate web might lose a bit of its snap after freezing, but they’ll still be delicious.
- Flavor Development: Honestly, these treats are best on the day they’re made. The marshmallow is at its peak chewiness, and the chocolate is perfectly snappy. After a day, the treats will start to soften slightly, but they’re still fantastic.
Nutritional Information & Benefits
Let’s be real—these are a treat, not a health food. But here’s a rough idea of what you’re getting per serving (based on 16 servings).
- Calories: Approximately 220-250 per treat.
- Fat: About 10g, mostly from butter and chocolate.
- Carbohydrates: Around 35g, primarily from sugar and cereal.
- Protein: About 2g.
On the bright side, the semi-sweet chocolate does contain some antioxidants, and the crispy rice cereal provides a little bit of iron and B vitamins. But the real benefit here is the joy factor. These treats are a celebration. They’re about making memories with your kids, impressing your friends, and enjoying a little bit of Halloween magic. If you’re looking for a slightly healthier option, you could try using a lower-sugar cereal or a dark chocolate with a higher cocoa percentage. But honestly, this is one recipe where I say just enjoy it. Pair it with a cozy copycat Starbucks pumpkin cold foam cold brew for a balanced fall treat.
Conclusion
These Easy Halloween Rice Krispie Spiderweb Treats are the perfect blend of nostalgia and creativity. They’re simple enough to make with your kids on a rainy October afternoon, yet impressive enough to be the star of any Halloween party. The process is forgiving, the ingredients are basic, and the result is undeniably adorable.
I love this recipe because it reminds me that you don’t need fancy equipment or a pastry chef’s skills to make something beautiful. All you need is a little patience, a steady hand with a toothpick, and a willingness to get a little marshmallow stuck to your fingers. It’s messy, it’s fun, and it tastes amazing.
Now it’s your turn. I want to see your spiderwebs! Tag me in your photos, leave a comment below with your favorite Halloween treat memory, and let me know if you tried any fun variations. Did you add peanut butter? Did you use white chocolate? I’d love to hear about it. And if you’re looking for more spooky snack ideas, be sure to check out these easy mummy pigs in a blanket or these fluffy pastel ghost meringue cookies for a full Halloween spread. Happy haunting, and happy baking!
Frequently Asked Questions
Can I use a different type of cereal?
Absolutely. While crispy rice cereal is the classic choice, you can use other puffed rice cereals or even corn flakes. Just be aware that the texture will change. Corn flakes will give you a crunchier, more substantial treat, while other puffed cereals might be more delicate.
My chocolate seized and became lumpy. What happened?
Chocolate seizes when it comes into contact with even a tiny amount of water. Make sure your bowl and utensils are completely dry before melting the chocolate. Also, avoid overheating it. Microwave in short bursts and stir frequently. If it does seize, you can try adding a teaspoon of coconut oil or vegetable shortening and stirring vigorously to bring it back.
Can I make these treats ahead of time?
Yes! You can make the base treats a day or two in advance. Store them in an airtight container at room temperature. Wait to pipe the spiderweb until the day you plan to serve them for the freshest look. The chocolate web can be piped and set the night before, but it’s best within 24 hours.
How do I get clean cuts without the treats crumbling?
The key is to let the treats cool completely—and I mean completely. Chilling them in the fridge for 15-20 minutes makes a huge difference. Use a sharp, serrated knife and use a gentle sawing motion. Wipe the knife clean between cuts for the most professional-looking squares.
My spiderweb lines are bleeding into the marshmallow. Why?
This usually happens if the chocolate is too hot when you pipe it, or if the treats haven’t cooled down enough. Make sure the treats are at room temperature or slightly chilled before you start decorating. Let your melted chocolate cool for a minute or two after microwaving so it’s warm but not hot. A cooler surface will help the chocolate set instantly and prevent bleeding.
Pin This Recipe!

Easy Halloween Rice Krispie Spiderweb Treats

These no-bake Halloween treats are buttery, chewy, and topped with a simple chocolate spiderweb that looks way harder than it actually is. Perfect for parties, school events, or a spooky movie night.
- Prep Time: 15 minutes
- Cook Time: 10 minutes
- Total Time: 45 minutes
- Yield: 16 servings 1x
- Category: Dessert
- Cuisine: American
Ingredients
- 6 tablespoons (85g) unsalted butter
- 10 oz (284g, about 6 cups) mini marshmallows
- 6 cups (170g) crispy rice cereal (e.g., Kellogg’s Rice Krispies)
- 1 teaspoon vanilla extract
- ¼ teaspoon salt
- 1 cup (175g) semi-sweet chocolate chips
- 1 teaspoon coconut oil or shortening (optional)
- Powdered sugar for dusting (optional)
Instructions
- Line a 9×13-inch baking dish with parchment paper, leaving overhang on two sides. Lightly grease the parchment with butter or non-stick spray.
- In a large pot over medium-low heat, melt the butter. Add the mini marshmallows and stir constantly until completely melted and smooth (about 5-7 minutes).
- Remove from heat. Stir in vanilla extract and salt until fully incorporated.
- Add the crispy rice cereal and gently fold with a rubber spatula until evenly coated. Work quickly.
- Transfer the mixture to the prepared pan. Using a second piece of parchment paper or a lightly greased spatula, press evenly into a flat layer. Do not press too hard. Let cool completely at room temperature (30-45 minutes) or refrigerate for 15 minutes.
- While treats cool, melt chocolate chips and coconut oil (if using) in a microwave-safe bowl in 30-second intervals, stirring after each, until smooth. Let cool slightly.
- Once treats are firm, lift them out using the parchment overhang. Place on a cutting board. Transfer melted chocolate to a small piping bag or zip-top bag and snip a tiny corner.
- Pipe a small circle of chocolate in the center of each treat, then pipe larger concentric circles around it (3-4 circles total).
- Starting from the center, drag a toothpick through the chocolate circles outward toward the edge in 6-8 places to create a spiderweb pattern. Wipe the toothpick clean between each drag.
- Let chocolate set at room temperature for 20 minutes or refrigerate for 10 minutes until firm. Dust with powdered sugar if desired. Serve at room temperature.
Notes
Chill the treats before piping chocolate for clean lines. Let melted chocolate cool slightly to prevent bleeding into the marshmallow. For best results, pipe chocolate when treats are cool and chocolate is warm but not hot. Store in an airtight container at room temperature for up to 3 days. Freeze for up to 2 months.
Nutrition
- Serving Size: 1 treat
- Calories: 235
- Sugar: 22
- Sodium: 120
- Fat: 10
- Saturated Fat: 6
- Carbohydrates: 35
- Fiber: 1
- Protein: 2
Keywords: Halloween treats, Rice Krispie treats, spiderweb, no-bake, easy dessert, Halloween party, chocolate spiderweb