My six-year-old stared at the Halloween charcuterie board I’d thrown together for her classroom party and said, “Mom, this is the best thing you’ve ever made,” without even taking a bite. Honestly, that stopped me mid-reach for a rogue grape that had rolled off the edge. She wasn’t talking about the candy corn or the store-bought cookies I’d panic-bought the night before. She was pointing at the little ghost-shaped cheese slices and the cluster of green grapes I’d arranged to look like a spooky eyeball. I hadn’t even tried that hard—it was just cheese, fruit, and a few strategically placed pretzel sticks. But the way her face lit up, you’d think I’d pulled off a culinary miracle.
That moment stuck with me. I realized that this easy Halloween boo-cuterie board with grapes and cheese wasn’t just a snack—it was a way to make a holiday feel special without spending hours in the kitchen. I’ve since made it for Halloween parties, movie nights, and even a random Tuesday when we needed a little joy. It’s the kind of thing that looks impressive but takes maybe fifteen minutes to assemble. And the best part? You can use whatever cheese and fruit you have on hand, so there’s no stress about finding the “right” ingredients.
This isn’t a fancy recipe from a chef’s notebook. It’s a real-life, tired-mom-approved platter that somehow becomes the star of any gathering. I’ve learned a few tricks along the way—like how to keep grapes from sliding off the board and which cheeses hold their shape best for cutting—and I’m sharing them all here. If you need a quick, crowd-pleasing Halloween snack that actually looks like you tried, this is it.
Why You’ll Love This Recipe
I’ve tested this board at four different events now, and every single time, it’s the first thing to disappear. There’s something about the combination of sweet grapes, salty cheese, and crunchy crackers that hits every craving at once. Plus, it’s so forgiving—you can swap out ingredients based on what’s in your fridge and it still works.
- Quick & Easy: This comes together in under 15 minutes, which is perfect when you’re juggling Halloween costumes and last-minute decorations. No cooking required.
- Simple Ingredients: You likely already have most of these items in your kitchen. Grapes, cheese, crackers, and a few spooky decorations—that’s it.
- Perfect for Halloween Parties: Whether it’s a classroom party, a family gathering, or a spooky movie night, this board fits right in. Kids and adults both go crazy for it.
- Crowd-Pleaser: I’ve yet to meet someone who doesn’t like cheese and grapes. It’s universally loved, even by picky eaters.
- Unbelievably Delicious: The flavor combo is simple but perfect—the sweetness of the grapes balances the saltiness of the cheese, and the crackers add that satisfying crunch.
What makes this recipe different from the usual charcuterie board is the playful Halloween twist. I use a small cookie cutter to shape cheese slices into ghosts and bats, and I arrange the grapes to look like spooky eyeballs or creepy clusters. It’s a small detail that makes a huge impact. You don’t need any special skills or expensive ingredients—just a little creativity and a willingness to have fun.
This board isn’t just good; it’s the kind of thing that makes people smile when they walk into the room. It’s comfort food reimagined for the holiday—familiar, but with a playful edge. Perfect for impressing guests without any stress, or turning a simple snack into something memorable.
What Ingredients You Will Need
This recipe uses simple, everyday ingredients that come together to create something surprisingly festive. The key is choosing items that contrast well in flavor and texture—sweet, salty, creamy, and crunchy. Here’s what you’ll need:
- Green grapes – 2 cups, washed and dried. I prefer seedless green grapes because they look like little eyeballs when arranged on the board. Red grapes work too, but the green ones really pop against the white cheese.
- Red grapes – 1 cup, washed and dried. Adds color contrast and a slightly sweeter flavor. Mix them in for variety.
- Cheddar cheese block – 8 ounces, preferably a sharp cheddar. I recommend Tillamook or Cabot for the best flavor and texture. The block shape makes it easy to cut into fun shapes.
- Mozzarella cheese block – 8 ounces, low-moisture. This is perfect for cutting into ghost shapes because it’s soft but holds its shape well. Avoid fresh mozzarella in brine—it’s too wet.
- Colby Jack cheese block – 8 ounces (optional, for color variety). The orange and white marbling adds a festive look.
- Crackers – About 2 cups of your favorite variety. I like a mix of buttery round crackers (like Ritz) and whole wheat squares. They provide the perfect base for stacking.
- Pretzel sticks – 1 cup. Use these for making “spider legs” or as a crunchy dipper. They add saltiness and structure.
- Halloween-themed cookie cutters – Small ghost, bat, and pumpkin shapes (about 1-2 inches). These are the secret to making the board look professional without any artistic skill.
- Olive slices or black sesame seeds – For making “eyes” on the cheese shapes. I’ve used both, and they work great.
- Fresh rosemary or parsley sprigs – For garnish. Adds a pop of green that makes the board look complete.
- Optional: Pepperoni or salami slices – ½ cup, for a meaty addition. Not necessary, but some folks love it.
When selecting grapes, look for ones that are firm and plump—not wrinkly or soft. They should snap when you bite into them. For the cheese, I always buy blocks instead of pre-sliced because they’re easier to cut into shapes. If you’re on a budget, store-brand cheddar works just fine; the key is getting a good sharp flavor.
Equipment Needed
You don’t need much for this recipe, which is part of the beauty. Here’s what I use:
- Large wooden or slate board – At least 12×16 inches. I use a bamboo cutting board I got from Target for $15. Slate boards look great for Halloween, but any flat surface works.
- Small cookie cutters – Ghost, bat, and pumpkin shapes. I found a set online for under $10. They’re worth the investment if you make these boards often.
- Sharp knife – For cutting cheese blocks into slabs. A chef’s knife or a serrated knife works best.
- Cutting board – For prepping the cheese and fruit. Keep it separate from the serving board to avoid cross-contamination.
- Small bowls or ramekins – For holding olives, dip, or loose items. I use 4-ounce ramekins from the dollar store.
- Toothpicks or small skewers – For assembling “spiders” or picking up individual pieces. They also help keep things tidy.
- Paper towels – For drying grapes thoroughly. Wet grapes make the board soggy and cause crackers to lose their crunch.
If you don’t have Halloween cookie cutters, you can use a small knife to cut cheese into simple shapes—squares, triangles, or even free-hand ghosts. It’s not as precise, but it still looks cute. I’ve also used a paring knife to carve little faces into cheese rounds, which works in a pinch.
Preparation Method
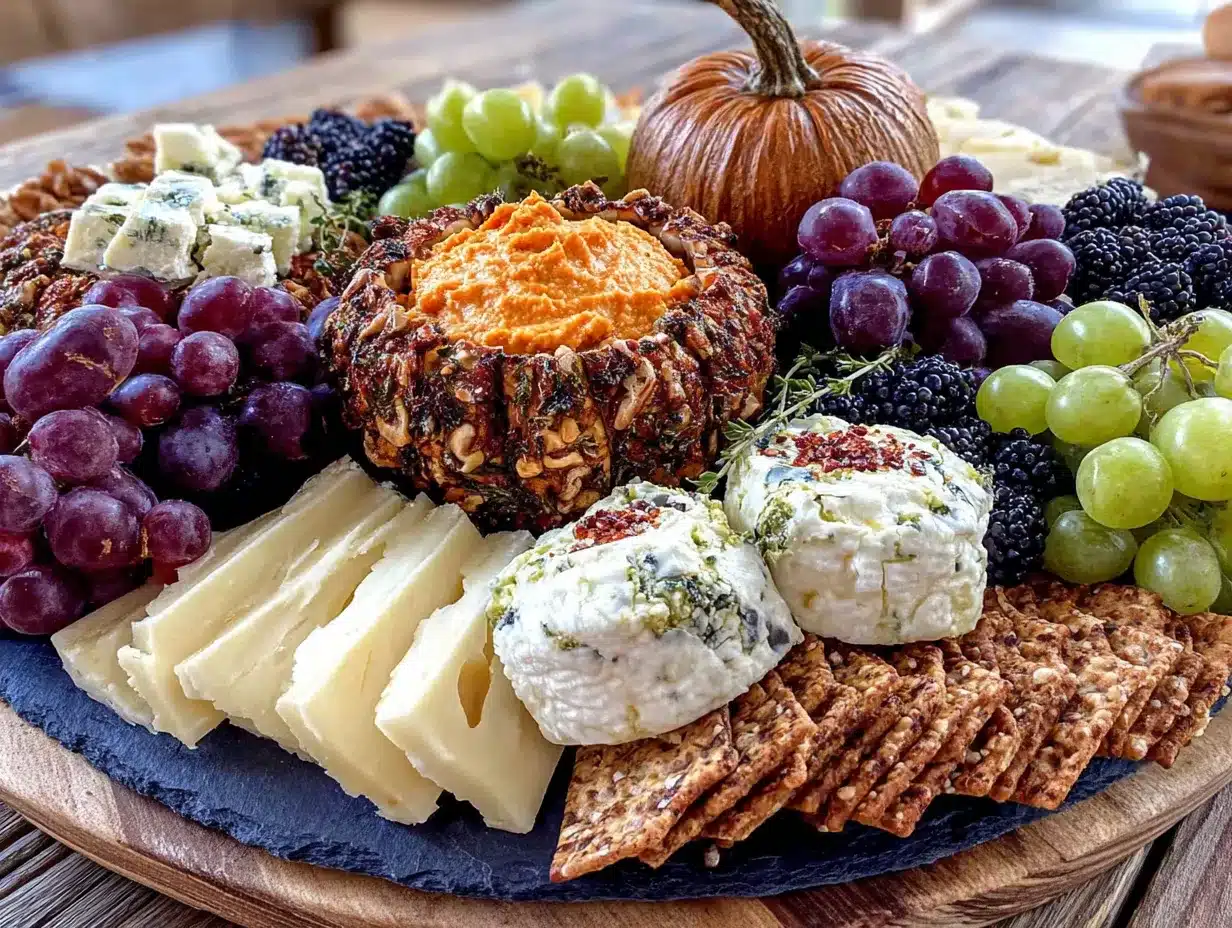
Making this board is more about assembly than cooking, but there are a few tricks to get it looking professional. Follow these steps:
- Wash and dry the grapes – Rinse both the green and red grapes under cold water, then pat them dry thoroughly with paper towels. Any moisture will make the board soggy and cause the crackers to soften. Spread them on a clean towel and let them air dry for a few minutes while you prep the cheese.
- Slice the cheese blocks – Using a sharp knife, cut the cheddar, mozzarella, and Colby Jack blocks into slabs about ¼-inch thick. You want them thin enough to cut easily with cookie cutters but thick enough to hold their shape. If the cheese is too cold, it will crack—let it sit at room temperature for 10 minutes before cutting.
- Cut cheese into shapes – Press the Halloween cookie cutters firmly into the cheese slabs. For ghosts, use the mozzarella. For bats and pumpkins, use the cheddar or Colby Jack. Gently push the cheese out of the cutter with your fingers. If the cheese sticks, dip the cutter in a little water first. You should get about 6-8 shapes per block.
- Create grape “eyeballs” – Take a few green grapes and cut a small slit in the top. Insert an olive slice or a black sesame seed into the slit to create a pupil. Arrange these on the board in pairs to look like creepy eyes staring out. I usually make 4-5 of these for a fun effect.
- Assemble the board – Start by placing the small bowls or ramekins on the board (if using). Then arrange the cheese shapes in clusters around the board—ghosts on one side, bats on another. Leave space between them for the grapes and crackers.
- Add the grapes – Scatter the green and red grapes around the cheese shapes. Try to create little “clusters” rather than spreading them evenly. This makes the board look more intentional. Place the grape eyeballs in visible spots where they’ll be noticed.
- Fill in with crackers – Arrange the crackers in small groups around the board. I like to fan them out in a semi-circle near the cheese shapes. Add pretzel sticks in a few places, standing upright or lying flat.
- Add decorations – Stick a few pretzel sticks into cheese shapes to create “spider legs” (push them gently into the side of a cheese ghost). Use toothpicks to assemble small “spiders” from olives and set them on the board. Garnish with rosemary or parsley sprigs for a touch of green.
- Final check – Step back and look at the board. Fill any empty spots with extra grapes or crackers. Make sure the colors are balanced—green, red, orange, and white should all be visible. Add more cheese shapes if needed.
A few notes: Don’t overcrowd the board. You want people to be able to pick up pieces without knocking everything over. If you’re making this ahead of time, cover the board loosely with plastic wrap and refrigerate for up to 2 hours. Take it out 15 minutes before serving to let the cheese soften slightly.
Cooking Tips & Techniques
I’ve made this board about a dozen times now, and I’ve learned a few things the hard way. Here are my best tips:
Keep grapes bone-dry – This is the number one mistake I see. If you put wet grapes on the board, the moisture seeps into the crackers and makes them soggy within minutes. After washing, lay the grapes on a paper towel-lined plate and pat them dry individually. It takes an extra minute but makes a huge difference.
Let cheese come to room temperature – Cold cheese is brittle and hard to cut. It also doesn’t taste as good. Take the cheese blocks out of the fridge 15-20 minutes before you start cutting. This makes the cookie cutter process much smoother and the flavor more pronounced.
Use a sharp cookie cutter – If your cutter is dull or bent, it will squish the cheese instead of cutting cleanly. I sharpen mine with a small file every few uses. You can also use a paring knife to trace around the cutter for a cleaner edge.
Don’t overthink the arrangement – The best boards look effortless. Start with the largest items (cheese shapes) and fill in with smaller items (grapes, crackers). Trust your eye—if it looks balanced to you, it’s fine. I’ve had boards that looked chaotic but still got devoured.
Prep ingredients separately – Cut all the cheese shapes first, then wash and dry the grapes, then arrange everything. This keeps your workspace organized and prevents cross-contamination. Trust me, trying to cut cheese while grapes are rolling around is a recipe for frustration.
Make extra cheese shapes – The first time I made this, I ran out of ghost-shaped cheese because people kept eating them as I arranged the board. Now I make double what I think I need. They’re always the first thing to disappear.
Variations & Adaptations
This board is endlessly customizable. Here are a few variations I’ve tried:
Sweet Version – Swap the cheddar for brie or camembert, and add dark chocolate squares, dried cranberries, and honeycomb. The grapes pair beautifully with creamy cheese and chocolate. I made this for a Halloween dessert table and it was a hit.
Savory Meat Lover’s Board – Add slices of prosciutto, salami, and pepperoni. Roll the prosciutto into little roses and place them around the board. The saltiness of the meat balances the sweetness of the grapes. This version is great for adult parties.
Dairy-Free Option – Use vegan cheese blocks (I like Violife or Daiya) and dairy-free crackers. The vegan cheddar cuts well with cookie cutters and has a similar texture. Pair with extra nuts and seeds for protein.
Spooky Spider Theme – Use black olives to create little spiders (cut an olive in half for the body, use pretzel sticks for legs). Arrange them crawling over the cheese shapes. Kids love this version—it’s creepy but cute.
Mini Individual Boards – For parties, make small personal boards on wooden cheese plates or even paper plates. Each person gets their own ghost-shaped cheese, a cluster of grapes, and a few crackers. This is perfect for social distancing or if you’re serving a crowd.
I’ve tried the sweet version with a friend who doesn’t like cheddar, and she said it was the best Halloween snack she’d ever had. The dairy-free option worked well for my sister-in-law who’s lactose intolerant—she ate half the board herself.
Serving & Storage Suggestions
This board is best served at room temperature. Take it out of the fridge about 15 minutes before you plan to serve it. The cheese will be softer and more flavorful, and the crackers will stay crisp. If you’re serving outdoors, keep it in a shaded spot to prevent the cheese from sweating.
For presentation, I like to add a few sprigs of fresh rosemary or parsley around the edges. It adds a pop of green that makes the board look complete. You can also scatter a few candy corn or pumpkin-shaped chocolates for extra Halloween flair.
Complementary dishes include:
- Spooky punch – A non-alcoholic fruit punch with floating “eyeballs” (lychee with blueberry centers) pairs perfectly.
- Mini pumpkin pies – For a sweet ending after the savory board.
- Warm apple cider – The warmth contrasts nicely with the cool cheese and grapes.
For storage, any leftovers (if you have any!) can be kept in the refrigerator. Separate the cheese shapes from the grapes and crackers—the moisture from the fruit will make the cheese soggy. Store cheese in an airtight container for up to 3 days. Grapes will last 2-3 days in the fridge. Crackers should be kept in a sealed bag at room temperature.
Reheating isn’t really applicable here, but if you’ve made this ahead and it’s been refrigerated, let it sit at room temperature for 20 minutes before serving. The flavors will develop more fully.
Nutritional Information & Benefits
This board is surprisingly balanced. Here’s an estimated breakdown per serving (based on 8 servings):
- Calories: 280-320 per serving
- Protein: 12-15g (from cheese)
- Carbohydrates: 28-32g (from grapes and crackers)
- Fat: 14-18g (from cheese)
- Fiber: 2-3g (from grapes)
- Sugar: 18-22g (natural from grapes)
Grapes are a good source of vitamin C and antioxidants, particularly resveratrol, which supports heart health. Cheese provides calcium and protein, which are essential for bone health and muscle repair. The crackers add complex carbohydrates for energy.
This recipe is vegetarian-friendly and can be made gluten-free by using gluten-free crackers. It’s not suitable for vegans unless you use dairy-free cheese, but the dairy-free variation works well. Potential allergens include dairy (cheese) and gluten (crackers). If you’re serving a crowd, label the board with a small sign noting the allergens.
From a wellness perspective, I love that this board feels indulgent but is actually quite balanced. You get protein, healthy fats, and natural sugars from the fruit. It’s a treat you can feel good about eating.
Conclusion
This easy Halloween boo-cuterie board with grapes and cheese has become my go-to for every spooky season event. It’s quick, it’s fun, and it always makes people smile. I love that it doesn’t require any cooking skills or fancy equipment—just a little creativity and a willingness to play with your food.
I encourage you to customize this board based on what you and your family love. Swap in your favorite cheeses, add extra fruits, or go wild with the Halloween decorations. The beauty of this recipe is that it’s forgiving and flexible. You can’t really mess it up.
I’d love to hear how your board turns out. Drop a comment below and let me know what shapes you made or what variations you tried. And if you’re looking for more easy snack ideas, check out my after-school protein energy balls for another quick treat. If you’re planning a Halloween party, my creamy buffalo chicken dip is always a hit, too. And for a sweet finish, try my fresh fruit pizza—it’s perfect for fall gatherings.
Happy Halloween, and happy snacking!
Frequently Asked Questions
Can I make this board ahead of time?
Yes, you can assemble the board up to 2 hours ahead. Cover it loosely with plastic wrap and refrigerate. Take it out 15 minutes before serving to let the cheese come to room temperature.
What if I don’t have Halloween cookie cutters?
No problem! Use a small knife to cut cheese into simple shapes—squares, triangles, or circles. You can also use a paring knife to carve little faces into rounds of cheese for a jack-o’-lantern effect.
How do I keep the crackers from getting soggy?
The key is to dry the grapes thoroughly before placing them on the board. Also, keep crackers away from wet items like grapes or olives. I like to place crackers in a separate cluster on the board, away from the fruit.
Can I use different types of cheese?
Absolutely! This board works with any firm cheese. Try gouda, Swiss, or pepper jack for a spicy kick. Just make sure the cheese is firm enough to hold its shape when cut.
How many people does this board serve?
This recipe serves about 6-8 people as a snack or appetizer. If you’re serving it as a main dish for a party, you might want to double the ingredients. It’s always better to have extra—trust me, it disappears fast!
Pin This Recipe!
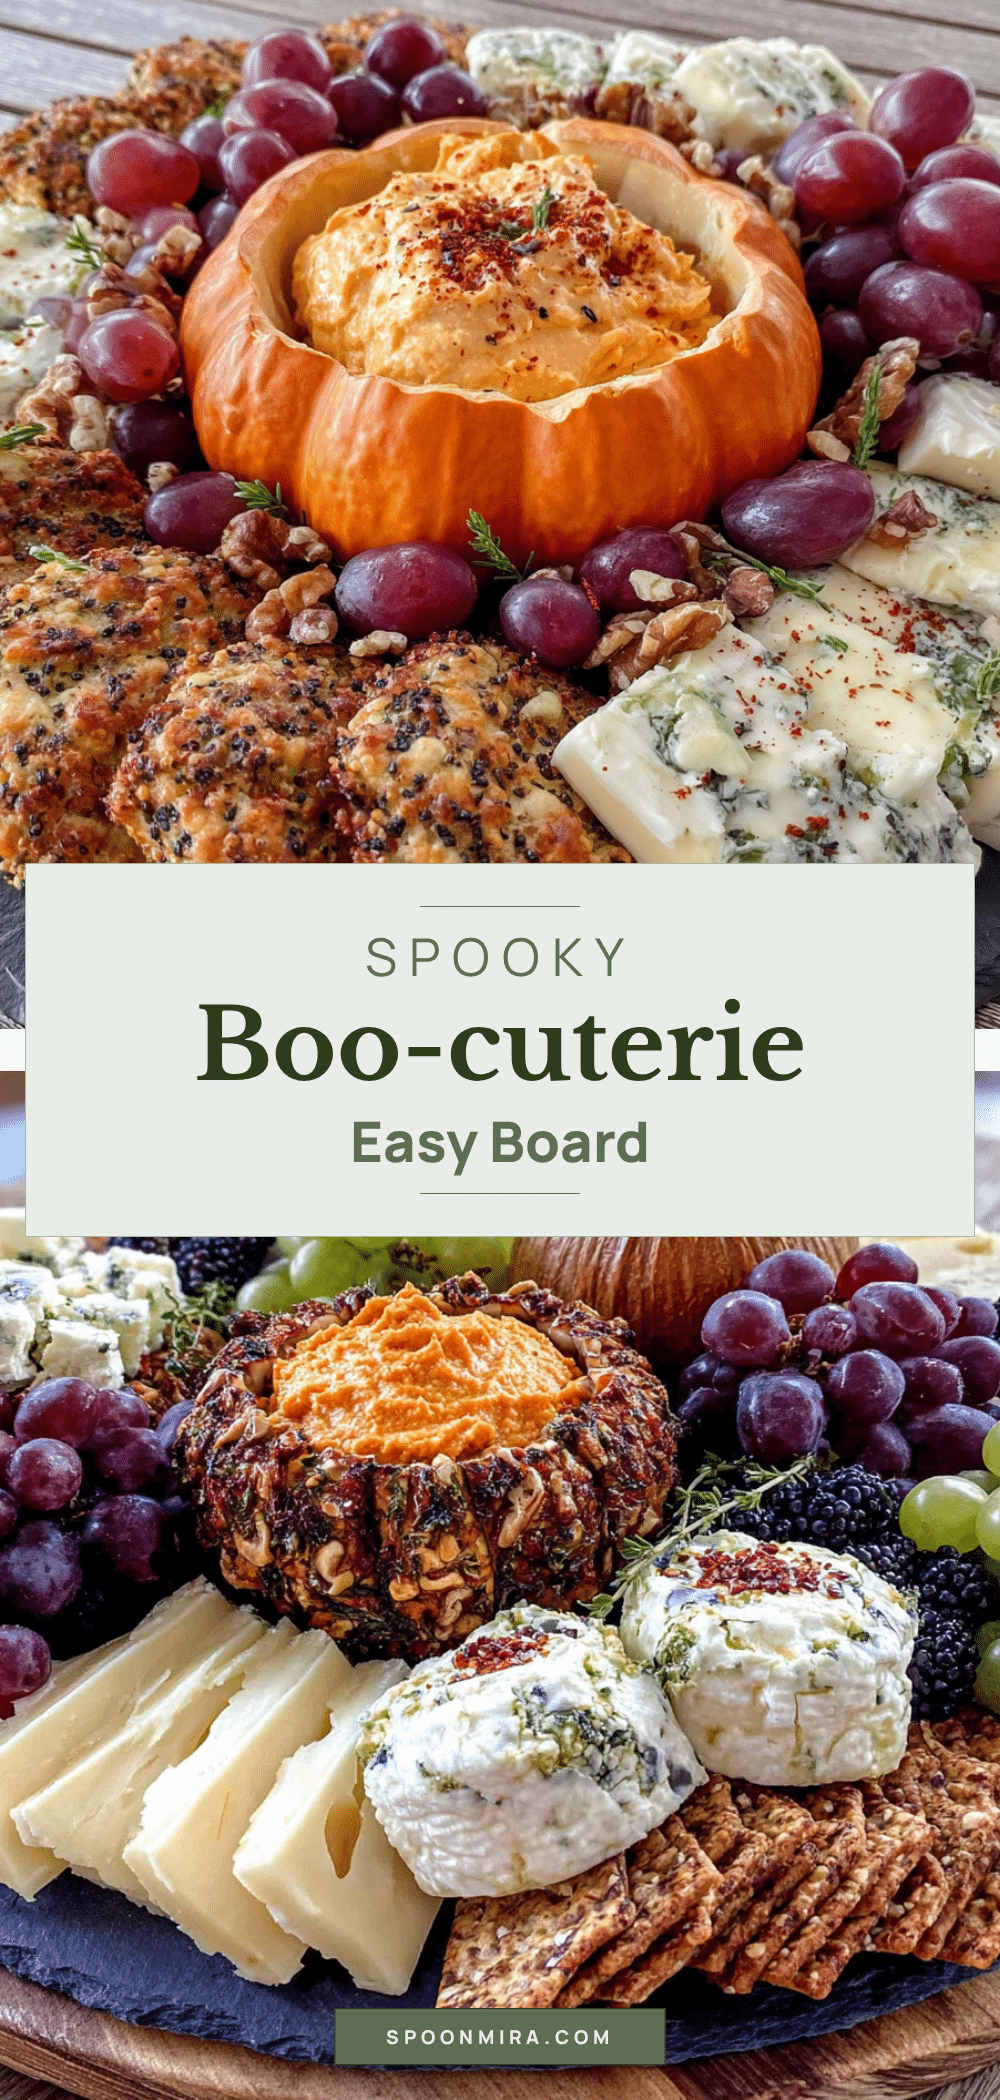
Easy Halloween Boo-cuterie Board: Best Grape & Cheese Platter
A quick and easy Halloween charcuterie board featuring grape ‘eyeballs’ and ghost-shaped cheese slices. This no-cook, crowd-pleasing snack comes together in under 15 minutes and is perfect for parties, movie nights, or a fun family treat.
- Prep Time: 15 minutes
- Cook Time: 0 minutes
- Total Time: 15 minutes
- Yield: 6-8 servings 1x
- Category: Appetizer
- Cuisine: American
Ingredients
- 2 cups green grapes, washed and dried
- 1 cup red grapes, washed and dried
- 8 ounces sharp cheddar cheese block (e.g., Tillamook or Cabot)
- 8 ounces low-moisture mozzarella cheese block
- 8 ounces Colby Jack cheese block (optional, for color variety)
- 2 cups crackers (mix of buttery round and whole wheat squares)
- 1 cup pretzel sticks
- Small Halloween-themed cookie cutters (ghost, bat, pumpkin shapes, 1-2 inches)
- Olive slices or black sesame seeds (for making ‘eyes’)
- Fresh rosemary or parsley sprigs (for garnish)
- ½ cup pepperoni or salami slices (optional)
Instructions
- Wash and dry the grapes thoroughly with paper towels. Spread them on a clean towel and let air dry for a few minutes.
- Slice the cheese blocks into slabs about ¼-inch thick. Let cheese sit at room temperature for 10 minutes before cutting to prevent cracking.
- Press Halloween cookie cutters firmly into the cheese slabs. Use mozzarella for ghosts, cheddar or Colby Jack for bats and pumpkins. Gently push cheese out of cutter. Dip cutter in water if cheese sticks.
- Create grape ‘eyeballs’: Cut a small slit in the top of a few green grapes and insert an olive slice or black sesame seed to create a pupil. Make 4-5 of these.
- Place small bowls or ramekins on the serving board if using. Arrange cheese shapes in clusters around the board.
- Scatter green and red grapes around the cheese shapes in small clusters. Place grape eyeballs in visible spots.
- Arrange crackers in small groups around the board, fanning them out near cheese shapes. Add pretzel sticks in a few places.
- Add decorations: Stick pretzel sticks into cheese shapes to create ‘spider legs’. Use toothpicks to assemble small ‘spiders’ from olives. Garnish with rosemary or parsley sprigs.
- Step back and check the board. Fill empty spots with extra grapes or crackers. Ensure colors are balanced.
Notes
Keep grapes bone-dry to prevent soggy crackers. Let cheese come to room temperature for easier cutting and better flavor. Make extra cheese shapes as they disappear first. Board can be assembled up to 2 hours ahead; cover loosely with plastic wrap and refrigerate. Take out 15 minutes before serving. For dairy-free, use vegan cheese blocks like Violife or Daiya. For gluten-free, use gluten-free crackers.
Nutrition
- Serving Size: 1 serving (based on
- Calories: 300
- Sugar: 20
- Sodium: 450
- Fat: 16
- Saturated Fat: 9
- Carbohydrates: 30
- Fiber: 2.5
- Protein: 13.5
Keywords: Halloween charcuterie board, boo-cuterie, grape and cheese platter, easy Halloween snack, spooky snack board, no-cook appetizer, kid-friendly Halloween


