I figured making Halloween treats with my niece would be a simple, fun afternoon—dip a pretzel, sprinkle some sugar, call it a day. It took about ten minutes of her holding up a pretzel rod, demanding it look like a “real witch finger,” for that plan to fall apart completely. She wanted knuckles, nails, the whole creepy works. So there I was, staring at a bag of pretzel rods and a block of white chocolate, realizing I had absolutely no idea how to make a pretzel look like a jointed finger. The first few attempts were hilarious failures—lumpy, sad-looking things that looked more like alien thumbs than witch fingers. But somewhere around the fifth try, something clicked. The almond nail went on straight, the jam looked eerily like blood, and the little knuckle lines actually looked like knuckles. She grabbed one, cackled, and said, “This is the best Halloween ever.” And honestly? She wasn’t wrong. These spooky white chocolate witch finger pretzel rods are now our official Halloween tradition, and they’re way easier to nail than I ever expected.
Why You’ll Love This Recipe
Let me tell you why these have become my go-to for every Halloween party, classroom treat, and movie night. They hit that perfect sweet spot between genuinely creepy and completely delicious.
- Incredibly Easy : You don’t need any baking skills for this one. If you can melt chocolate and dip a pretzel, you can make these. Seriously, it’s that simple.
- Simple Ingredients : A quick trip to the grocery store is all it takes. Pretzel rods, white chocolate chips, slivered almonds, and a bit of red food coloring or jam—that’s it.
- Perfect for Halloween Parties : These are the star of any spooky spread. They look so creepy that people can’t help but grab one, and then they can’t stop eating them.
- Crowd-Pleaser : Kids go absolutely wild for them, and adults sneak them when they think no one is looking. The sweet and salty combo is just too good.
- Unbelievably Delicious : The crunch of the pretzel, the creamy sweetness of the white chocolate, and the nutty bite of the almond—it’s a texture party in your mouth.
What makes these different from every other Halloween treat? It’s the attention to detail. The way the almond nail sits perfectly at the tip, the little jam “blood” droplet, the knuckle lines that make people do a double-take. It’s not just a dipped pretzel—it’s a tiny, edible work of spooky art. And the best part? You get to watch people’s faces go from “ew, gross” to “omg, give me another one” in seconds.
This recipe is the one that makes you feel like a Halloween hero without spending hours in the kitchen. It’s the kind of treat that builds memories—I still remember my niece’s face when she bit into her first one and pretended it was a real witch’s finger. Pure magic.
What Ingredients You Will Need
This recipe uses simple, mostly pantry-friendly ingredients to create something that looks far more complicated than it is. Here’s what you’ll need to gather:
- Pretzel Rods (1 bag, about 40 rods) — The base of our witch fingers. Look for thick, sturdy rods that won’t snap easily when you dip them. I like the Snyder’s of Hanover brand—they’re consistently good quality and have a nice, salty crunch that balances the sweet chocolate.
- White Chocolate Chips or Melting Wafers (12 oz or 2 cups) — This is the “skin” of the witch finger. I prefer Ghirardelli white chocolate chips for their smooth melt and creamy flavor. If you use melting wafers, they’ll be even easier to work with and set up faster. Avoid white chocolate that’s too cheap—it can seize up or taste waxy.
- Slivered Almonds (about 40 pieces) — These become the witch’s fingernails. Look for slivered almonds that are relatively flat and uniform in size. You want them to look like long, slightly creepy nails. Toast them lightly for extra flavor if you want, but it’s not necessary.
- Red Food Coloring Gel or Strawberry Jam (a small amount) — For that bloody cuticle effect. I’ve used both, and honestly, the jam gives a more realistic, slightly congealed look. Seedless strawberry jam works best. If you use food coloring, a tiny drop mixed with a bit of corn syrup gives a nice glossy “blood” effect.
- Green or Purple Gel Food Coloring (optional) — If you want to tint the white chocolate for a more “witchy” skin tone. A few drops of green make them look truly otherworldly. I skip this sometimes if I’m in a hurry, but it adds a nice touch.
- Flaky Sea Salt (optional, for garnish) — A tiny sprinkle on top of the chocolate before it sets adds a lovely salty finish that contrasts with the sweetness. Maldon sea salt is my go-to.
Substitution Guidance: If you’re dairy-free, use a good-quality dairy-free white chocolate. If you don’t have slivered almonds, whole almonds cut in half lengthwise work too. For the “blood,” raspberry jam is a great alternative to strawberry. And if you’re out of food coloring, just leave the chocolate plain—they still look creepy with the almond nails alone.
Equipment Needed
You don’t need a fancy kitchen setup for these. Here’s what I use:
- Microwave-Safe Bowl or Double Boiler — For melting the white chocolate. I use a glass Pyrex bowl because it heats evenly and is easy to clean.
- Parchment Paper or Silicone Baking Mat — To set the finished pretzels on. The chocolate won’t stick, and cleanup is a breeze.
- Baking Sheet — To hold the parchment paper and give you a stable surface to work on.
- Small Offset Spatula or Butter Knife — For spreading the chocolate evenly and creating the knuckle lines. A butter knife works in a pinch.
- Toothpicks or Small Skewers — For moving the almond nail into place and for dabbing on the jam “blood.”
- Tweezers (optional but helpful) — For placing the almond nails precisely. I know it sounds silly, but it makes a big difference when you’re trying to get them perfectly straight.
- Piping Bag or Small Zip-Top Bag — If you want to pipe the chocolate for a cleaner look. I usually just dip and spread, but piping gives you more control.
Honestly, you can get by with just a bowl, a baking sheet, and a butter knife. The other tools just make the process a little smoother. I’ve made these at my sister’s house with her basic kitchen tools, and they turned out great.
Preparation Method

Alright, let’s get our hands dirty—or rather, chocolatey. Follow these steps, and you’ll have a tray of creepy witch fingers in no time.
- Prep Your Workspace (5 minutes) — Line a large baking sheet with parchment paper or a silicone mat. Make sure it’s completely clean and dry. Set it aside where it can sit undisturbed for at least 30 minutes. This is your “drying rack.”
- Melt the White Chocolate (2-3 minutes) — Place your white chocolate chips or wafers in a microwave-safe bowl. Microwave in 30-second intervals, stirring well after each one. White chocolate burns easily, so don’t rush this. It should be completely smooth and glossy when you’re done. If you’re adding green or purple food coloring, stir it in now until the color is even. I always add a tiny splash of coconut oil (about 1/2 teaspoon) to help the chocolate stay fluid and give it a nice sheen.
- Set Up Your Assembly Line — Arrange your pretzel rods, slivered almonds, and a small bowl of strawberry jam (or your “blood” of choice) within easy reach. Have your toothpicks and tweezers ready. Trust me, you don’t want to be searching for an almond while your chocolate is cooling.
- Dip the Pretzels (2-3 minutes per pretzel) — Take one pretzel rod and dip it into the melted white chocolate, leaving about 1 to 1.5 inches undipped at the bottom. This bare end is the “wrist” of the witch finger. Gently twist and lift the pretzel, letting the excess chocolate drip back into the bowl. You want a nice, even coating—not too thick, not too thin. Place the dipped pretzel on the parchment paper.
- Create the Fingernail (30 seconds per pretzel) — While the chocolate is still wet, take a slivered almond and press it gently into the tip of the dipped end. It should look like a long, pointy fingernail extending from the “finger.” Angle it slightly upward for a more natural (or unnatural) look. Use your tweezers or a toothpick to adjust it if needed.
- Form the Knuckles (1 minute per pretzel) — This is where the magic happens. Use the back of a small offset spatula or a butter knife to gently press lines into the chocolate, creating the appearance of knuckles. I usually make two or three lines about halfway down the dipped portion. Don’t press too hard—you just want an indentation, not a cut. If the chocolate starts to stick to your spatula, dip it in a little melted chocolate first.
- Add the “Blood” (15 seconds per pretzel) — Using a toothpick, dab a tiny amount of strawberry jam at the base of the almond nail, where it meets the chocolate. This creates a bloody cuticle effect that really sells the look. Less is more here—you want it to look like a small, creepy detail, not a murder scene.
- Optional: Add Sea Salt — While the chocolate is still wet, sprinkle a tiny pinch of flaky sea salt over the dipped portion. This step is totally optional but adds a wonderful salty crunch that balances the sweetness.
- Let Them Set (20-30 minutes) — Allow the pretzels to sit at room temperature until the chocolate is completely firm. Don’t put them in the fridge unless you’re in a huge hurry—condensation can make the chocolate look dull and streaky. If you must refrigerate, let them come to room temperature before serving.
- Repeat — Continue the process with the remaining pretzel rods and melted chocolate. If the chocolate starts to thicken as it cools, pop it back in the microwave for 10-15 seconds and stir.
Pro Tip: Work in batches of 5-6 pretzels at a time. The chocolate sets faster than you think, and you want to get all the details done while it’s still wet and workable. I learned this the hard way when my first batch of knuckle lines just smeared the half-set chocolate.
Cooking Tips & Techniques
I’ve made these witch finger pretzels more times than I can count, and I’ve learned a few things the hard way. Let me save you from my mistakes.
Don’t Overheat the Chocolate. White chocolate is finicky. If you overheat it, it seizes up into a grainy, unusable mess. Always microwave in short bursts and stir, stir, stir. If it does seize, you can try adding a teaspoon of vegetable oil or shortening and stirring vigorously, but honestly, it’s easier to just start over with fresh chocolate.
Use Room-Temperature Pretzels. If your pretzels are cold from the pantry, the chocolate will set too quickly and you won’t have time to add the details. Let them sit out for a bit before you start dipping. Same goes for the almonds—room temperature helps the chocolate adhere better.
Get the Right Chocolate Consistency. The melted chocolate should be thin enough to coat the pretzel smoothly but thick enough to stay put. If it’s too thin, it will run off and pool on the parchment. If it’s too thick, it will be clumpy and uneven. A splash of coconut oil or shortening helps achieve that perfect dipping consistency.
Practice Your Knuckle Lines. The first few might not look perfect, and that’s okay. The key is to use a light, steady hand. I like to make the lines slightly curved, like real knuckle joints. If you mess up, just dip the pretzel back in the chocolate and start that one over. No one has to know.
Timing is Everything. I once tried to multitask and answer a text while adding the almond nails. Bad idea. The chocolate set, the almond fell off, and I ended up with a sad, bald witch finger. Focus on one pretzel at a time, and you’ll get into a rhythm.
Make Extra Jam. The strawberry jam “blood” can get a little messy if you’re not careful. I like to put a small dollop on a plate and dip my toothpick in it, rather than dipping straight into the jar. It keeps things cleaner and gives you more control over the amount.
Variations & Adaptations
These witch finger pretzels are incredibly versatile. Here are some of my favorite ways to mix them up:
- Dark Chocolate Witch Fingers — Swap the white chocolate for dark or milk chocolate. The dark chocolate gives them a more sinister, gothic look, and the bitterness pairs beautifully with the salt. Use white chocolate chips for the almond nail if you want it to stand out.
- Witchy Color Swirls — Instead of tinting the whole batch one color, melt a small amount of green, purple, and orange candy melts. Use a toothpick to swirl them into the white chocolate before it sets for a marbled, magical effect.
- Gluten-Free Version — Use gluten-free pretzel rods. They’re widely available now and work just as well. Everything else in the recipe is naturally gluten-free, so this is an easy swap.
- Spooky Sprinkle Fingers — Before the chocolate sets, roll the dipped pretzel in Halloween-themed sprinkles (orange, black, and purple jimmies or eyeball sprinkles). It adds a fun, festive crunch and hides any imperfections in your dipping.
- “Zombie” Fingers — Instead of a clean almond nail, use a broken pretzel piece or a sliver of dried cranberry for a gnarly, rotting fingernail look. Add a few extra dabs of jam for a truly gruesome effect. My nephew requested these last year, and they were a hit with the older kids.
- Spicy Witch Fingers — Add a pinch of cayenne pepper or chili powder to the melted chocolate for a sweet-and-spicy kick. The heat sneaks up on you after the first bite, and it’s surprisingly addictive.
Serving & Storage Suggestions
These are best served at room temperature, right when the chocolate is firm but not rock hard. Arrange them on a platter with the “fingers” pointing in different directions for maximum creepiness. I like to scatter a few loose slivered almonds around the platter, like fallen fingernails—it’s a gross little detail that always gets a laugh.
For a Halloween party, I serve them alongside a bowl of creamy butternut squash soup or a batch of harvest chicken and wild rice soup for a spooky but cozy meal. They also pair perfectly with a hot cup of apple cider or a pumpkin spice latte.
Storage: Store the finished pretzels in an airtight container at room temperature for up to 5 days. Layer them between sheets of parchment paper to prevent them from sticking together. Do not refrigerate—the chocolate can develop condensation and lose its shine. If you live in a humid climate, you can store them in a cool, dry place, but they’re best enjoyed within a couple of days.
Freezing: You can freeze these for up to 2 months. Place them in a single layer on a baking sheet and freeze until solid, then transfer to a freezer-safe container or zip-top bag. Thaw at room temperature for about 20 minutes before serving. The chocolate might lose a bit of its gloss, but they’ll still taste amazing.
One thing I love about these is that the flavors actually get better after a day or two. The salt from the pretzel melds with the sweet chocolate, and the jam “blood” sets into a slightly chewy, candylike texture. They’re perfect for making a day ahead of your Halloween party.
Nutritional Information & Benefits
Let’s be real—these are a treat, not a health food. But here’s the breakdown if you’re curious:
Per serving (1 witch finger pretzel):
- Calories: ~120-150
- Fat: 6-8g
- Carbohydrates: 15-18g
- Sugar: 10-12g
- Protein: 2-3g
- Sodium: 150-200mg
Health Highlights: The almonds provide a small amount of healthy fats, vitamin E, and magnesium. White chocolate contains calcium from the milk solids. And hey, pretzels are low in fat (before the chocolate, anyway).
Dietary Considerations: This recipe is vegetarian and can be made gluten-free with a simple swap. It contains dairy (white chocolate) and nuts (almonds). For a nut-free version, use a sunflower seed or a piece of dried fruit for the fingernail instead of the almond.
My personal take? These are Halloween treats. They’re meant to be fun, indulgent, and a little bit spooky. I don’t stress about the nutritional stats on a holiday. I focus on the joy of making them with my family and the smiles they bring to people’s faces. Life’s too short not to enjoy a witch finger pretzel now and then.
Conclusion
These spooky white chocolate witch finger pretzel rods are everything a Halloween treat should be—creepy, delicious, and ridiculously fun to make. They look like they came from a professional bakery, but they’re so simple that even a beginner can pull them off. The sweet white chocolate, the salty pretzel crunch, the eerie almond nail, and that little dab of jam “blood” all come together to create something truly memorable.
I love that this recipe has become a tradition in my family. Every year, my niece and I sit down with a bag of pretzels and a block of chocolate, and we just create. We experiment with colors, try different “blood” flavors, and come up with new ways to make them even more disgusting-looking. It’s messy, it’s silly, and it’s absolutely perfect.
I’d love to hear how yours turn out! Did you add a spooky twist? Did your kids scream with delight (or disgust)? Drop a comment below and share your witch finger creations. And if you’re looking for more Halloween inspiration, check out my creamy buffalo chicken dip or these bacon-wrapped jalapeño poppers for a complete spooky spread. Happy Halloween, and happy snacking!
Frequently Asked Questions
Can I use milk chocolate instead of white chocolate?
Absolutely! Milk or dark chocolate works great. The witch fingers will just look less “pale and creepy” and more “gothic and sinister.” Both are delicious.
How do I keep the almond nails from falling off?
Make sure you press the almond into the chocolate while it’s still very wet. If the chocolate has started to set, the almond won’t stick. You can also dab a tiny bit of melted chocolate on the back of the almond before pressing it onto the pretzel for extra adhesion.
Can I make these ahead of time for a party?
Yes! They’re perfect for making 1-2 days in advance. Store them in an airtight container at room temperature. The jam might dry out a little, but they’ll still look and taste great.
What can I use instead of slivered almonds for the fingernails?
Try sunflower seeds, pumpkin seeds, sliced dried apricots, or even a small piece of white chocolate shaped into a nail. For a truly gnarly look, use a broken piece of pretzel or a dried cranberry.
My white chocolate seized up and became grainy. What went wrong?
White chocolate is sensitive to heat and moisture. You likely overheated it or got a drop of water in the bowl. Always microwave in short bursts, and make sure your bowl and utensils are completely dry. If it seizes, you can try adding a teaspoon of vegetable oil and stirring, but it’s often easier to start fresh.
Pin This Recipe!

Spooky White Chocolate Witch Finger Pretzels
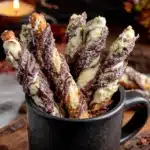
These spooky white chocolate witch finger pretzel rods are a fun and easy Halloween treat that looks like creepy witch fingers. Made with pretzel rods, white chocolate, slivered almonds, and a dab of jam for blood, they are perfect for Halloween parties and are sure to be a crowd-pleaser.
- Prep Time: 15 minutes
- Cook Time: 5 minutes
- Total Time: 40 minutes
- Yield: 40 servings 1x
- Category: Dessert
- Cuisine: American
Ingredients
- 1 bag pretzel rods (about 40 rods)
- 12 oz (2 cups) white chocolate chips or melting wafers
- 40 slivered almonds
- 1 small amount red food coloring gel or strawberry jam
- 1 few drops green or purple gel food coloring (optional)
- 1 pinch flaky sea salt (optional, for garnish)
Instructions
- Prep Your Workspace: Line a large baking sheet with parchment paper or a silicone mat. Set aside where it can sit undisturbed for at least 30 minutes.
- Melt the White Chocolate: Place white chocolate chips or wafers in a microwave-safe bowl. Microwave in 30-second intervals, stirring well after each, until completely smooth and glossy. If adding food coloring, stir it in now. Optionally, add 1/2 teaspoon coconut oil for a fluid consistency.
- Set Up Your Assembly Line: Arrange pretzel rods, slivered almonds, and a small bowl of strawberry jam within easy reach. Have toothpicks and tweezers ready.
- Dip the Pretzels: Take one pretzel rod and dip it into the melted white chocolate, leaving about 1 to 1.5 inches undipped at the bottom (the ‘wrist’). Gently twist and lift, letting excess chocolate drip back into the bowl. Place on parchment paper.
- Create the Fingernail: While chocolate is still wet, press a slivered almond gently into the tip of the dipped end to look like a long, pointy fingernail. Angle slightly upward. Use tweezers or a toothpick to adjust if needed.
- Form the Knuckles: Use the back of a small offset spatula or butter knife to gently press 2-3 lines into the chocolate about halfway down the dipped portion to create knuckles. Don’t press too hard.
- Add the ‘Blood’: Using a toothpick, dab a tiny amount of strawberry jam at the base of the almond nail where it meets the chocolate.
- Optional: Add Sea Salt: While chocolate is still wet, sprinkle a tiny pinch of flaky sea salt over the dipped portion.
- Let Them Set: Allow pretzels to sit at room temperature until chocolate is completely firm, about 20-30 minutes. Do not refrigerate unless in a hurry, as condensation can dull the chocolate.
- Repeat: Continue with remaining pretzel rods and melted chocolate. If chocolate thickens, microwave for 10-15 seconds and stir.
Notes
Work in batches of 5-6 pretzels at a time to ensure chocolate stays wet for details. Do not overheat white chocolate; microwave in short bursts. Use room-temperature pretzels and almonds for better chocolate adhesion. For a nut-free version, use sunflower seeds or dried fruit for the fingernail. Store in an airtight container at room temperature for up to 5 days. Can be frozen for up to 2 months.
Nutrition
- Serving Size: 1 witch finger pretz
- Calories: 135
- Sugar: 11
- Sodium: 175
- Fat: 7
- Saturated Fat: 4
- Carbohydrates: 16
- Protein: 2
Keywords: Halloween treats, witch finger pretzels, white chocolate pretzels, easy Halloween recipe, spooky snacks, pretzel rods, white chocolate, almond nails, Halloween party food


