My niece was turning six, and I’d promised a monster-themed party. I spent a week scrolling through Pinterest boards, bookmarking everything from creamy loaded buffalo chicken dip to creepy-crawly cupcakes. But for the treat bags, I wanted something specific. Something the kids could hold in one hand while they chased each other around the backyard. Something that looked like a little monster but didn’t require fondant sculpting skills I definitely don’t have. For a while, I just accepted that the treat table was going to be a mismatched collection of store-bought cookies and sad fruit cups. Then I remembered the classic crispy rice cereal bar—the one my mom made for every school bake sale—and it hit me. What if I shaped them into little green faces, stuck them on sticks, and called them Frankensteins? It was one of those ideas that feels so obvious once you have it. No frosting piping bags, no complicated decorating. Just melted marshmallows, cereal, and a handful of candy pieces. The kids devoured them before the party even officially started.
These Easy Frankenstein Rice Krispie Treats on a Stick became the unexpected star of the afternoon. The parents asked for the recipe. The birthday girl requested them again for her next party. And honestly, they’re so simple that I’ve made them for Halloween movie nights and classroom parties ever since. They’re the kind of treat that looks like you spent way more time on them than you actually did—and that’s my favorite kind of recipe.
Why You’ll Love This Recipe
Let’s be real—most cute holiday treats require patience, steady hands, and a trip to the craft store for specialty supplies. These Frankenstein treats? Not so much. Here’s why they work:
- No Baking Required: You don’t even turn on the oven. Everything comes together on the stovetop or in the microwave. Perfect for hot days or when you want to keep the kitchen cool.
- Kid-Friendly Assembly: Let the little ones help shape the faces and press on the candy pieces. It’s messy in the best way, and they’ll be so proud of their monster creations.
- Budget-Friendly Ingredients: Rice cereal, marshmallows, butter, and a few basic candies. You probably have most of this in your pantry right now.
- Perfect for Parties: Serving them on sticks means zero plates needed. Kids can grab one, run off, and come back for another. They’re also fantastic for Halloween parties, classroom celebrations, or even a spooky movie night.
- Customizable Faces: No two monsters need to look alike. Use different candy eyes, swap the pretzel bolts for chocolate chips, or give them silly smiles. It’s totally up to you.
What makes this version different from the usual rice krispie treat? The stick. It transforms a simple bar into a handheld, shareable monster that feels like a real party favor. Plus, the marshmallow mixture stays soft and chewy for days, so you can make them ahead without worrying about them going stale.
What Ingredients You Will Need
This recipe uses simple, everyday ingredients to create something that looks like it came from a bakery. Here’s what you’ll need:
- 3 tablespoons unsalted butter (adds richness and helps the marshmallows melt smoothly; salted butter works too, just reduce any added salt)
- 1 package (10 ounces) regular marshmallows (about 4 cups; mini marshmallows melt faster, but regular ones work perfectly fine)
- 6 cups crispy rice cereal (I use Kellogg’s Rice Krispies for that classic snap, but any generic brand works)
- Green gel food coloring (gel works better than liquid because it won’t thin out the marshmallow mixture; start with a few drops and add more until you get that Frankenstein green)
- 30 lollipop sticks (available at craft stores or online; you can also use sturdy paper straws or popsicle sticks)
- 60 candy eyes (the little edible ones with black pupils; you’ll need two per treat)
- 30 small pretzel sticks (broken in half to make the neck bolts; you can also use chocolate-covered pretzels for a sweeter version)
- Black decorating gel or melted chocolate chips (for drawing the mouth and scars; a piping bag or a small zip-top bag with the corner snipped off works great)
- Non-stick cooking spray (for greasing your hands and the pan; you cannot skip this or you’ll be peeling marshmallow off your fingers for days)
For the green coloring, I prefer Wilton’s Leaf Green gel. It gives a nice, vibrant shade without being neon. If you’re making these for a different holiday, you can easily swap the color—orange for pumpkins, red for hearts, or blue for a monster mash.
Equipment Needed
You don’t need much for this recipe, which is part of the charm.
- Large saucepan or pot (big enough to hold all the marshmallows and cereal; a 5-quart pot is ideal)
- Rubber spatula or wooden spoon (for stirring the marshmallow mixture; silicone spatulas work best because nothing sticks to them)
- 9×13-inch baking pan (for setting the cereal mixture; you can also use a rimmed baking sheet if you want thinner treats)
- Parchment paper or wax paper (for lining the pan and for shaping the treats without sticking)
- Small microwave-safe bowl (if you prefer to melt the marshmallows in the microwave; just be careful not to overheat them)
- Lollipop sticks (see ingredients above)
- Small piping bag or zip-top bag (for the decorating gel or melted chocolate)
If you don’t have a 9×13 pan, a large rimmed baking sheet works perfectly. The treats will be a little thinner, but they’ll still hold together well. I’ve also used a silicone mold shaped like monster faces before, and it was a fun variation—just make sure to grease it really well.
Preparation Method
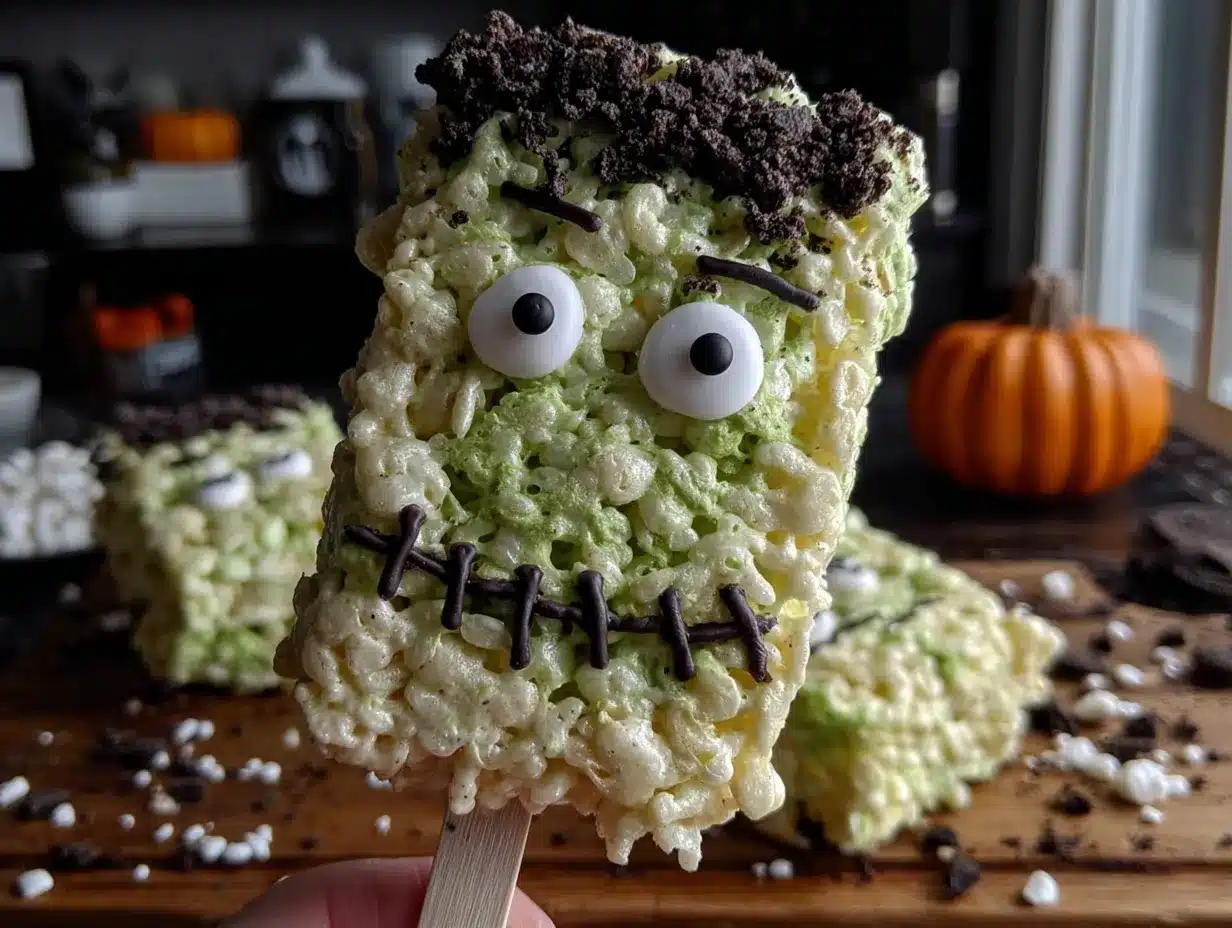
Follow these steps closely, and you’ll have a batch of adorable Frankenstein treats in about 30 minutes.
- Line your pan. Grease a 9×13-inch baking pan with non-stick cooking spray, then line it with parchment paper, leaving some overhang on the sides. Grease the parchment too. This makes lifting the treats out later so much easier.
- Melt the butter. In a large saucepan over medium-low heat, melt the 3 tablespoons of unsalted butter. Stir occasionally so it doesn’t burn. You want it fully melted and just starting to bubble.
- Add the marshmallows. Pour in the entire package of marshmallows. Stir constantly with your rubber spatula until they’re completely melted and smooth. This takes about 5-7 minutes. Don’t walk away—marshmallows can scorch quickly if left unattended.
- Add the green color. Remove the pot from the heat. Add about 8-10 drops of green gel food coloring. Stir until the color is evenly distributed. Start with less—you can always add more, but you can’t take it out. You’re aiming for a pale, minty green, not neon slime.
- Mix in the cereal. Pour the 6 cups of crispy rice cereal into the pot. Fold it gently with your spatula until all the cereal is coated in the green marshmallow mixture. It will look like a big, sticky, green cloud. Work quickly—the mixture starts to set as it cools.
- Press into the pan. Scrape the mixture into your prepared pan. Grease your hands with a little cooking spray (or rub them with butter) and press the mixture evenly into the pan. Be gentle—you want them to hold together, but pressing too hard makes them dense and hard. Aim for an even layer about ¾-inch thick.
- Cool slightly. Let the mixture cool in the pan for about 10 minutes. You want it firm enough to hold its shape but still warm enough to be pliable. If it cools completely, it will be too hard to cut and stick.
- Cut into rectangles. Use the parchment overhang to lift the entire block onto a cutting board. Using a sharp knife or a pizza cutter, cut into 30 rectangles, roughly 2×3 inches each. A pizza cutter works beautifully here—it glides through without dragging the marshmallow.
- Insert the sticks. Gently push a lollipop stick into the bottom of each rectangle, about an inch deep. The warmth of the treat will help the stick stay in place. If the treat cracks, just press the crack back together with your fingers.
- Decorate the faces. While the treats are still slightly warm, press two candy eyes onto each one. Break the pretzel sticks in half and press one half on each side of the face for the neck bolts. Use the black decorating gel to draw a mouth—a zigzag line or a simple frown works great. Add a small scar on the forehead if you’re feeling fancy.
- Set completely. Place the decorated treats on a parchment-lined baking sheet. Let them sit at room temperature for about 15-20 minutes so the decorations set. The marshmallow will firm up as it cools, holding everything in place.
A quick note: if the mixture starts to harden while you’re shaping, pop it in the microwave for 10-15 seconds to soften it up again. Just be careful not to melt the candy decorations.
Cooking Tips & Techniques
I’ve made these treats more times than I can count, and I’ve learned a few things the hard way so you don’t have to.
Don’t overheat the marshmallows. Low and slow is the way to go. If you rush and use high heat, the marshmallows will turn into a hard, sugary mess. Keep the heat on medium-low and stir constantly. The mixture should be smooth and glossy, not bubbly.
Grease everything. Your hands, the spatula, the pan, the parchment—everything. Marshmallow mixture sticks to everything like glue. A light coat of cooking spray makes cleanup a breeze and prevents the treats from tearing when you press them into the pan.
Work quickly but calmly. Once the cereal is mixed in, you have about 10-15 minutes before the mixture starts to set. That’s plenty of time to press it into the pan and cut it, but don’t dawdle. If you’re making a big batch, consider doing it in two smaller batches.
Use a pizza cutter for clean cuts. A knife tends to drag and squish the treats. A pizza cutter rolls through cleanly, giving you neat rectangles. If you don’t have one, a bench scraper works too.
Keep the treats warm for decorating. If you let them cool completely, the candy eyes and pretzel bolts won’t stick. Work while they’re still slightly warm, but not hot enough to melt the candy. A good test: if you can hold the treat comfortably in your hand, it’s ready.
Make them ahead of time. These treats actually taste better the next day—the marshmallow softens the cereal just a little, making them perfectly chewy. Store them in an airtight container at room temperature for up to 3 days. Don’t refrigerate them, or they’ll get hard.
I once forgot to grease my hands before pressing the mixture into the pan. Let’s just say I spent the next 20 minutes peeling marshmallow off my knuckles. Learn from my mistake—coat your hands generously with spray.
Variations & Adaptations
One of the best things about this recipe is how easily it adapts to different tastes and occasions.
- Gluten-Free Version: Use a certified gluten-free crispy rice cereal (like Nature’s Path or Erewhon). The rest of the ingredients are naturally gluten-free, so this is an easy swap.
- Vegan Option: Use vegan marshmallows (Dandies is a great brand) and a plant-based butter like Earth Balance. The texture will be slightly different—vegan marshmallows don’t get quite as stretchy—but the taste is still fantastic.
- Chocolate Frankenstein: Swap the green food coloring for a tablespoon of cocoa powder. You’ll get a brown monster face that looks like a chocolate version. Use white candy eyes and red decorating gel for the mouth.
- Monster Mash-Up: Instead of the classic Frankenstein face, make different monsters. Use orange coloring and draw a jack-o-lantern face. Or leave them white and make ghost faces with black eyes and a wavy mouth.
- Add-Ins: Before pressing the mixture into the pan, fold in ½ cup of mini chocolate chips or colorful sprinkles. It adds a fun pop of flavor and texture. Just make sure the mixture isn’t too hot, or the chips will melt.
- Different Shapes: Instead of rectangles, use a monster-shaped cookie cutter to cut out the treats. You’ll need to press the mixture into a thicker layer (about 1 inch) and work quickly. This is a fun option for older kids who want more creative control.
I once made a batch with crushed Oreos folded in, and they were a huge hit. The chocolate cookies added a nice crunch and made the treats look even more monstrous. Just be careful not to overmix—you want chunks of cookie, not a gray mess.
Serving & Storage Suggestions
These treats are best served at room temperature. The marshmallow stays soft and chewy, and the candy decorations stay firmly in place. If you’re serving them at a party, arrange them on a platter standing upright so the faces are visible. You can also stick them into a foam block or a small pumpkin for a fun display.
For storage, place the treats in a single layer in an airtight container. Separate layers with parchment paper so the faces don’t stick together. They’ll stay fresh for up to 3 days at room temperature. Do not refrigerate—the cold air will make the marshmallow hard and tough.
If you want to make them a day ahead, go for it. In fact, they’re often better the next day because the flavors have a chance to meld. Just keep them in a cool, dry place away from direct sunlight. If you’re transporting them, place them in a single layer in a shallow box or on a tray covered with plastic wrap.
These treats also freeze surprisingly well. Wrap each one individually in plastic wrap, then place them in a freezer-safe bag. They’ll keep for up to a month. To thaw, let them sit at room temperature for about 30 minutes. The texture will be slightly softer, but they’ll still taste great. I’ve pulled them out for last-minute playdates and no one ever knew they were frozen.
Nutritional Information & Benefits
Let’s be honest—these are a treat, not a health food. But here’s a rough estimate per serving (one treat with decorations): about 120 calories, 3 grams of fat, 22 grams of carbohydrates, and 1 gram of protein. They’re relatively low in sodium and contain no cholesterol.
The crispy rice cereal provides a small amount of iron and B vitamins. Marshmallows are mostly sugar, so this is definitely a “sometimes” food. But for a party or holiday treat, they’re a fun, portion-controlled option that won’t leave you with a ton of leftovers.
If you’re looking to make them a little lighter, you can use a lower-sugar cereal or reduce the butter by a tablespoon. The texture will be slightly less rich, but they’ll still hold together. For a protein boost, stir in a scoop of unflavored collagen powder along with the cereal—it dissolves completely and adds a few grams of protein without changing the taste.
As always, be mindful of allergens. The candy eyes and pretzels may contain traces of wheat, soy, or dairy. If you’re serving a crowd with allergies, check the labels carefully or make your own decorations from scratch.
Conclusion
These Easy Frankenstein Rice Krispie Treats on a Stick are proof that you don’t need fancy skills or expensive tools to make something that looks amazing. They’re fun, they’re fast, and they’re guaranteed to make kids (and adults) smile. Whether you’re throwing a Halloween party, packing a lunchbox surprise, or just want a rainy afternoon project, this recipe delivers.
I love how forgiving this recipe is. If the faces turn out lopsided or the pretzel bolts fall off, it only adds to the monster charm. There’s no pressure to make them perfect—just have fun with it. And if you come up with your own monster variations, I’d love to hear about them. Drop a comment below and tell me what kind of faces you created. Happy haunting!
Frequently Asked Questions
Can I use a different cereal besides rice cereal?
Absolutely. Corn flakes or puffed rice work well too. Just keep in mind that different cereals have different textures—corn flakes will give you a crunchier treat, while puffed rice will be softer. Stick with a similar volume measurement (6 cups) and adjust as needed.
How do I keep the lollipop sticks from falling out?
Make sure you insert the stick while the treat is still warm. The marshmallow acts like glue when it cools. If the stick still feels loose, dip the end in a little melted white chocolate before inserting it—it will harden and lock the stick in place.
Can I make these treats without a stick?
Yes! Simply skip the stick and serve them as regular bars. They’re just as delicious. You can also cut them into squares and decorate the tops with candy eyes for a simpler version.
How far in advance can I make these?
You can make them up to 3 days ahead. Store them in an airtight container at room temperature. If you’re making them for a party, I recommend decorating them the day before so the faces have time to set.
My marshmallow mixture is too stiff. What did I do wrong?
You likely overheated the marshmallows or let the mixture cool too long before pressing it into the pan. Next time, keep the heat low and work quickly. If it’s already too stiff, try microwaving it for 10-15 seconds to soften it up again.
Pin This Recipe!
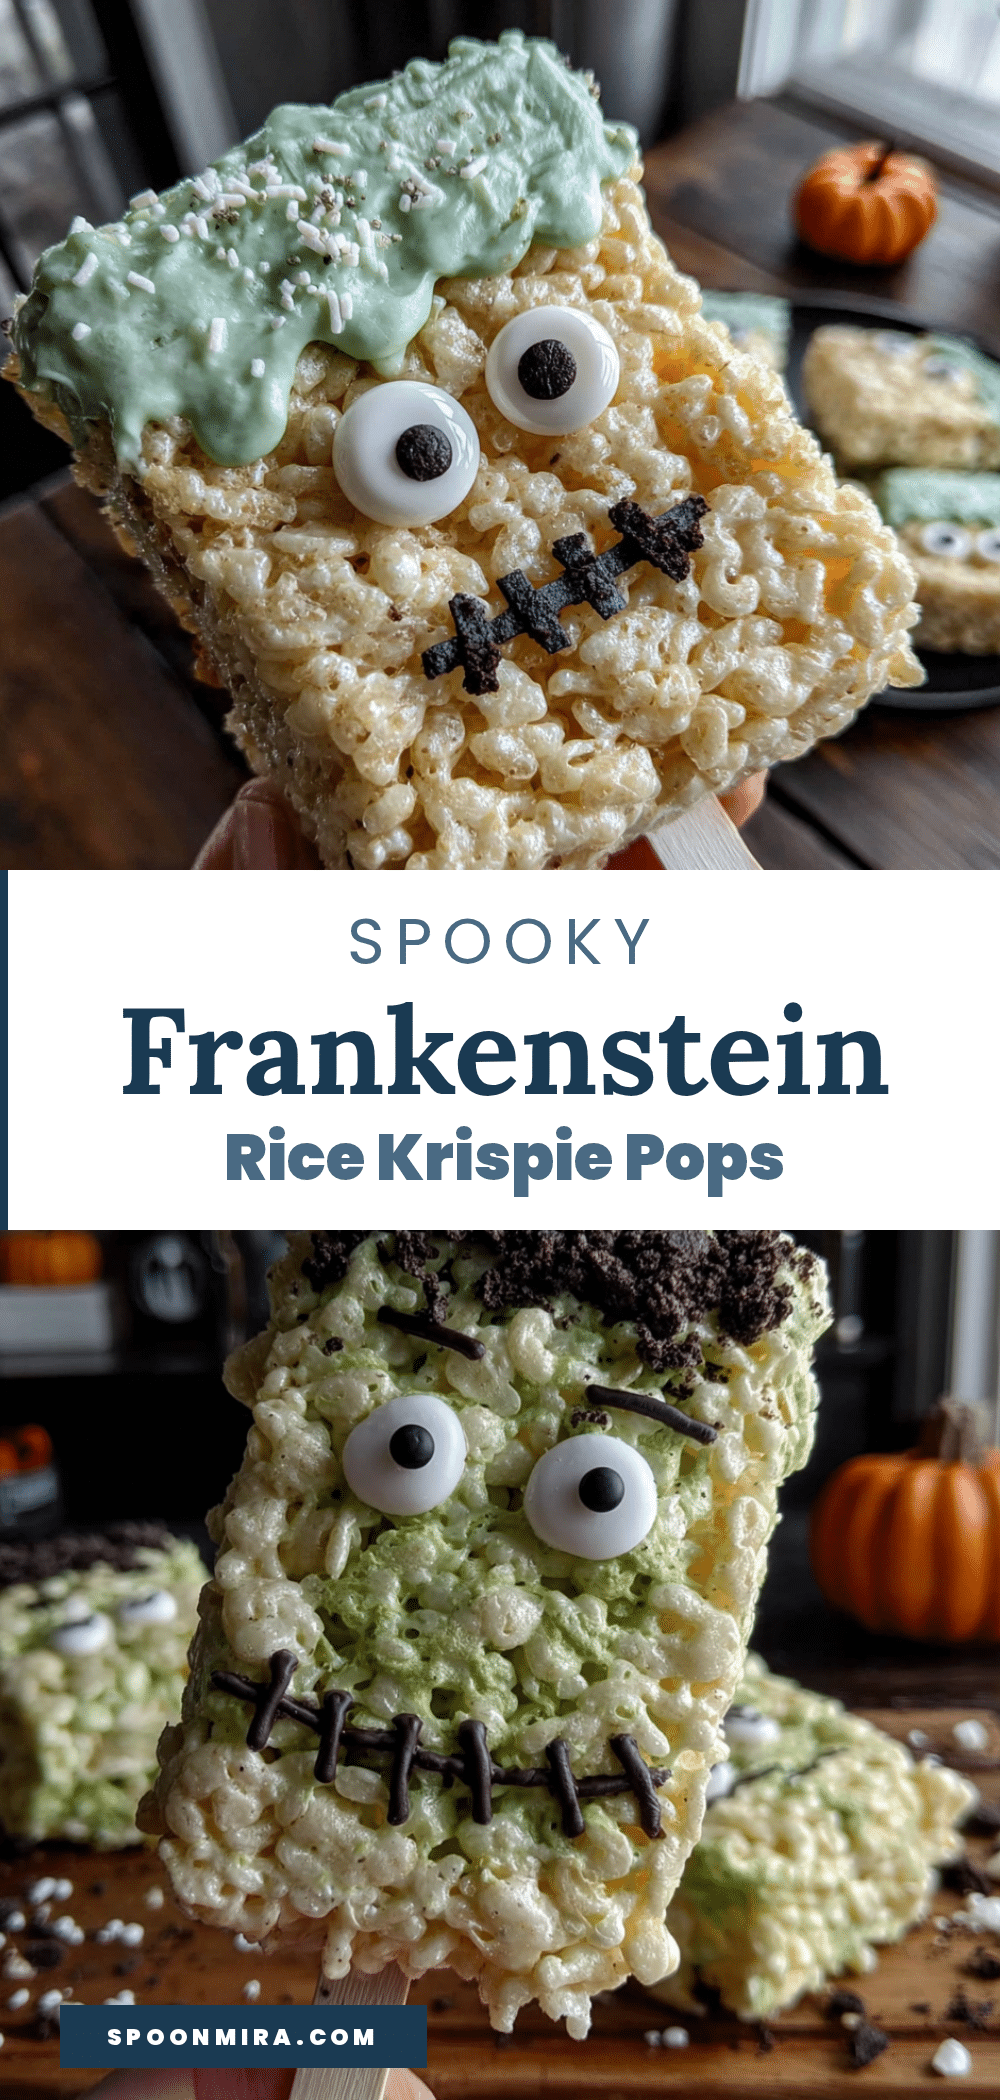
Easy Frankenstein Rice Krispie Treats on a Stick
These no-bake Frankenstein Rice Krispie treats on a stick are a fun, kid-friendly Halloween party snack. Made with crispy rice cereal, marshmallows, and green food coloring, they’re easy to assemble and perfect for monster-themed celebrations.
- Prep Time: 15 minutes
- Cook Time: 10 minutes
- Total Time: 30 minutes
- Yield: 30 servings 1x
- Category: Dessert
- Cuisine: American
Ingredients
- 3 tablespoons unsalted butter
- 1 package (10 ounces) regular marshmallows (about 4 cups)
- 6 cups crispy rice cereal
- Green gel food coloring
- 30 lollipop sticks
- 60 candy eyes
- 30 small pretzel sticks (broken in half)
- Black decorating gel or melted chocolate chips
- Non-stick cooking spray
Instructions
- Line a 9×13-inch baking pan with parchment paper and grease with non-stick cooking spray.
- In a large saucepan over medium-low heat, melt the butter.
- Add the marshmallows and stir constantly until completely melted and smooth, about 5-7 minutes.
- Remove from heat and stir in 8-10 drops of green gel food coloring until evenly distributed.
- Pour in the crispy rice cereal and fold gently until all cereal is coated.
- Scrape the mixture into the prepared pan. Grease your hands with cooking spray and press the mixture evenly into the pan to about 3/4-inch thickness.
- Let cool for 10 minutes until firm but still warm.
- Lift the block onto a cutting board using the parchment overhang. Cut into 30 rectangles, about 2×3 inches each.
- Gently push a lollipop stick into the bottom of each rectangle, about 1 inch deep.
- While still slightly warm, press two candy eyes onto each treat. Break pretzel sticks in half and press one half on each side for neck bolts. Use black decorating gel to draw a mouth and optional scar.
- Place decorated treats on a parchment-lined baking sheet and let set at room temperature for 15-20 minutes.
Notes
Grease everything (hands, spatula, pan) to prevent sticking. Work quickly as the mixture sets fast. If it hardens, microwave for 10-15 seconds to soften. Store in an airtight container at room temperature for up to 3 days. Do not refrigerate.
Nutrition
- Serving Size: 1 treat
- Calories: 120
- Sugar: 12
- Sodium: 80
- Fat: 3
- Saturated Fat: 1.5
- Carbohydrates: 22
- Protein: 1
Keywords: Frankenstein treats, Rice Krispie treats on a stick, Halloween snacks, no-bake dessert, kid-friendly party food


