I figured making peppermint bark at home was one of those things you just didn’t do. It seemed too fussy, too precise, the kind of project that leaves you with a sticky kitchen and a bag of burnt chocolate you try to pass off as “artisanal.” It took about one December afternoon for that assumption to fall apart completely. I was staring down a half-empty bag of candy canes and a serious craving for something minty and chocolatey, but I did not want a whole sheet pan of the stuff. That is how the best small batch peppermint bark was born—out of pure, lazy necessity. Honestly, I was shocked at how simple it was. No tempering chocolate, no double boiler drama, just a microwave and a few minutes of patience.
The first time I made it, I used a regular chocolate bar I had stashed away for baking. It worked, but it was a little too sweet. The second time, I tried a higher quality dark chocolate, and that was the moment everything clicked. The bitterness of the dark chocolate plays off the sweet white chocolate and the crunchy peppermint in a way that feels intentional, not accidental. This is the kind of recipe that makes you look like you put in way more effort than you actually did. It is the gift that keeps on giving—literally, because it makes a great last-minute hostess gift. And the best part? You can have it made, set, and ready to eat in under an hour, with only five minutes of actual hands-on work. That is a Christmas miracle I can get behind.
Why You’ll Love This Recipe
This best small batch peppermint bark is the ultimate holiday shortcut. It delivers that classic, festive flavor without the hassle of a full-blown candy-making project. I have tested this recipe more times than I care to count, tweaking the chocolate ratios and crushing techniques until it was just right. Here is why it has become my go-to for holiday gifting and late-night snacking.
- Quick & Easy: Five minutes of active prep is all it takes. The microwave does all the heavy lifting.
- Simple Ingredients: You only need three ingredients: dark chocolate, white chocolate, and candy canes. No special equipment or hard-to-find items.
- Perfect for Gifting: This is the ideal last-minute gift. Break it into pieces, pop it in a cute bag, and you are done. It is also perfect for holiday cookie exchanges or as a simple treat to leave out for Santa.
- Crowd-Pleaser: Everyone loves the combination of chocolate and mint. It is a nostalgic flavor that appeals to both kids and adults.
- Small Batch: This recipe makes just enough to satisfy a craving without leaving you with a mountain of leftovers. It is perfect for when you want a little something sweet without the commitment of a full sheet pan.
What makes this recipe different from the rest is the texture. I have perfected the ratio of dark to white chocolate so the bark snaps cleanly when you break it. The peppermint is crushed to the perfect size—not too fine that it disappears, but not in huge chunks that are hard to bite into. It is a carefully balanced, incredibly satisfying treat.
This is the kind of recipe that makes you close your eyes after the first bite. It is comfort food in its purest form—a little bit of holiday magic that comes together in minutes. It is perfect for when you need a quick hit of festive cheer, or for impressing guests with minimal effort.
What Ingredients You Will Need
This recipe uses simple, pantry-friendly ingredients to deliver a flavor that feels way more complex than it is. The quality of your chocolate really matters here, so try to use a brand you love.
- Dark Chocolate (6 oz / 170g): This is the base of your bark. I prefer a 70% dark chocolate for a nice, rich bitterness that balances the sweetness. You can use chocolate chips or a chopped chocolate bar. I have found that Ghirardelli or Lindt bars melt beautifully and have a great snap. Avoid using chocolate with a very high cocoa percentage (over 80%), as it can be too bitter and will not set up as nicely.
- White Chocolate (6 oz / 170g): The creamy, sweet layer on top. Do not use white chocolate chips that are labeled as “white morsels” or “white baking chips,” as they often contain stabilizers that prevent them from melting smoothly. Look for a good quality white chocolate bar or chips that contain cocoa butter. Guittard and Ghirardelli are my go-to brands. If you are dairy-free, there are excellent plant-based white chocolate options available now.
- Candy Canes (4-5 large, or about 1/2 cup crushed): The star of the show. You want classic peppermint candy canes for the best flavor. Avoid the “natural” or “organic” ones that can taste a little dull. You want that bright, bold peppermint kick. Crush them yourself for the best texture—the pre-crushed stuff in a bag is often too fine and dusty.
- Optional: Coconut Oil or Shortening (1/2 teaspoon): If you are having trouble with your chocolate seizing up or not melting smoothly, a tiny bit of coconut oil or vegetable shortening can help thin it out. I rarely need it, but it is a good trick to have in your back pocket.
Equipment Needed
You do not need a lot of fancy gear for this recipe. That is part of its charm.
- Microwave-Safe Bowls: You will need two separate bowls for melting the dark and white chocolate. Glass or ceramic works best.
- Small Baking Sheet or Plate: A small sheet pan (like a quarter sheet pan) or even a dinner plate will work. You just need a flat surface that can fit in your fridge.
- Parchment Paper: This is non-negotiable. It prevents the bark from sticking and makes clean-up a breeze.
- Ziploc Bag & Rolling Pin (or Meat Tenderizer): For crushing the candy canes. This method contains the mess and gives you control over the texture.
- Spatula or Offset Spatula: For spreading the chocolate into an even layer. A regular butter knife will also work in a pinch.
Preparation Method

Follow these steps, and you will have a perfect batch of best small batch peppermint bark in no time. The key is to work quickly and not overheat the chocolate.
- Prepare Your Workspace: Line your small baking sheet or plate with a piece of parchment paper. Make sure the paper is large enough to hang over the edges slightly, which will help you lift the bark out later. Have your crushed candy canes ready to go.
- Crush the Candy Canes: Place 4-5 large candy canes in a sturdy Ziploc bag. Seal it, removing as much air as possible. Use a rolling pin or the bottom of a heavy pan to gently crush them. You want a mix of fine pieces and small chunks. Aim for pieces that are about the size of a pea or smaller. You do not want any huge shards that could hurt someone. Set aside.
- Melt the Dark Chocolate: Place the dark chocolate in a microwave-safe bowl. Microwave in 30-second intervals, stirring well after each interval. It is crucial to stir, even if the chocolate looks like it has not melted yet. The residual heat will continue to melt the chips. Stop when the chocolate is about 75% melted and stir until it is completely smooth and glossy. Do not overheat it, or it will seize up and become grainy. This usually takes about 1 minute to 1 minute 30 seconds total.
- Spread the First Layer: Pour the melted dark chocolate onto the center of your parchment-lined sheet. Use your spatula to spread it into a thin, even rectangle. It does not have to be perfect—a rustic shape is part of the charm. Aim for a thickness of about 1/4 inch. Place the sheet in the refrigerator for 10-15 minutes, or until the chocolate is firm to the touch.
- Melt the White Chocolate: While the dark chocolate is setting, melt the white chocolate in a clean, dry microwave-safe bowl. Use the same 30-second interval method, stirring well each time. White chocolate is more delicate and can burn easily, so watch it closely. It will look like it is not melting, and then suddenly it will be ready. Stop when it is mostly melted and stir until smooth.
- Assemble the Bark: Remove the dark chocolate layer from the fridge. It should be firm and no longer sticky. Pour the melted white chocolate over the top and quickly spread it into an even layer that covers the dark chocolate completely. Work fast, as the cold chocolate will start to set the white chocolate.
- Add the Peppermint: Immediately sprinkle the crushed candy canes evenly over the top of the white chocolate. Press them down gently with your fingers or the back of a spoon so they stick. Do not wait or the white chocolate will set, and the peppermint will just fall off.
- Set the Bark: Return the sheet to the refrigerator for at least 30 minutes, or until the bark is completely firm and snaps when you bend the parchment paper. You can leave it in for up to an hour if you have the time.
- Break and Serve: Once set, lift the bark out of the pan using the parchment paper. Place it on a cutting board. Use your hands to break it into irregular pieces. The bark should break cleanly with a satisfying snap. If it is bending, it needs more time in the fridge.
Cooking Tips & Techniques
I have made this best small batch peppermint bark more times than I can count, and I have definitely learned a few things the hard way. Here are my best tips for success.
Do not rush the chocolate melting. This is the most common mistake. Patience is your friend. If you microwave the chocolate on high for too long, it will burn and seize up into a thick, clumpy mess. Low and slow is the way to go. If your chocolate does seize, you can sometimes save it by adding a teaspoon of coconut oil and stirring vigorously, but it is better to just avoid it in the first place.
Make sure your bowls are completely dry. Any water, even a single drop, will cause your chocolate to seize. This is especially important with white chocolate, which is more sensitive. Dry your bowls thoroughly before you start.
Crush your candy canes in advance. Having everything prepped and ready to go makes the assembly process so much smoother. The white chocolate will start to set as soon as it hits the cold dark chocolate layer, so you do not have time to be fumbling with a bag of candy canes.
Use a good quality chocolate. I cannot stress this enough. The flavor of the bark is entirely dependent on the chocolate you use. Cheap chocolate chips often have stabilizers that prevent them from melting smoothly and can leave a waxy taste in your mouth. Spend a little extra on a good bar or high-end chips. Your taste buds will thank you.
Let it come to room temperature before serving. The bark will be very hard straight out of the fridge. Let it sit at room temperature for about 5 minutes before you break it and serve it. This will give it the perfect snap and melt-in-your-mouth texture.
Variations & Adaptations
This recipe is incredibly versatile. Once you have the basic method down, you can play around with different flavors and add-ins.
- Milk Chocolate Version: If dark chocolate is too bitter for you, swap it out for milk chocolate. The result will be sweeter and creamier, like a candy bar. Just be aware that milk chocolate can be a bit softer, so it might not snap as cleanly.
- Spicy Peppermint Bark: Add a pinch of cayenne pepper or a tiny dash of cinnamon to the melted dark chocolate for a spicy kick. The heat pairs beautifully with the cool mint. I tried this on a whim last year, and it was a huge hit with my friends who love a little heat.
- Cookie Crunch Bark: Sprinkle some crushed Oreos or shortbread cookies over the white chocolate along with the peppermint. It adds a wonderful buttery crunch and makes the bark even more decadent. This is a great way to use up leftover holiday cookies.
- Dairy-Free/Vegan Option: Use high-quality dairy-free dark chocolate and a plant-based white chocolate. There are some really good options on the market now. Just make sure to check the ingredients, as some vegan white chocolates melt differently. This version is just as delicious and perfect for anyone with dietary restrictions.
Serving & Storage Suggestions
This best small batch peppermint bark is a star on any holiday dessert table. Here is how to serve and store it for the best results.
Serve the bark at room temperature. Arrange the broken pieces on a festive plate or in a decorative tin. It is perfect on its own, but it also pairs beautifully with a cup of hot coffee, a steaming mug of hot cocoa, or a glass of cold milk. For a really special treat, try it alongside a slice of perfect brown butter pumpkin bars for a dessert board that has something for everyone.
Store the bark in an airtight container at room temperature for up to two weeks. Do not store it in the refrigerator, as the humidity can cause the chocolate to bloom (develop white streaks) and lose its snap. If your kitchen is very warm, you can store it in the fridge, but let it come to room temperature before serving to restore the texture.
This bark also freezes beautifully. Place the pieces in a single layer in a freezer-safe container or bag, separating layers with parchment paper. Freeze for up to 3 months. Thaw at room temperature for about 15 minutes before serving. The flavor and texture will be just as good as the day you made it. This makes it a perfect make-ahead gift for the holiday season.
Nutritional Information & Benefits
This is a treat, so it is not exactly a health food. But there are a few redeeming qualities to this best small batch peppermint bark. The dark chocolate is rich in antioxidants and can be good for your heart in moderation. Peppermint is known for its digestive benefits and can help soothe an upset stomach.
Here are the estimated nutritional values for one serving (about 1 ounce or 28g, which is one decent-sized piece):
- Calories: 150-170
- Fat: 10-12g
- Carbohydrates: 18-20g
- Sugar: 15-17g
- Protein: 2g
Please note that these are estimates and will vary based on the specific brands of chocolate you use. This recipe is naturally gluten-free, but always check the labels on your chocolate and candy canes to be sure. If you have a dairy allergy, be sure to use dairy-free chocolate options. I personally love that this recipe allows me to enjoy a small, satisfying portion of something sweet without feeling like I have to eat an entire cake.
Conclusion
This best small batch peppermint bark is more than just a recipe; it is a little moment of holiday joy that you can create in your own kitchen. It is proof that you do not need a ton of time, a ton of ingredients, or a ton of skill to make something that looks and tastes absolutely incredible. It is forgiving, it is fast, and it is genuinely delicious.
I encourage you to make this your own. Use your favorite chocolate, add a sprinkle of sea salt, or throw in some crushed pretzels for a salty-sweet twist. The possibilities are endless. I love this recipe because it reminds me that the best things in life are often the simplest. It is a small batch of happiness, ready in five minutes.
I would love to hear how your peppermint bark turns out! Leave a comment below and let me know if you tried any fun variations. Do not forget to share this recipe with a friend who needs a little last-minute holiday magic. Happy snacking!
Frequently Asked Questions
Can I use milk chocolate instead of dark chocolate?
Absolutely! If you prefer a sweeter, creamier bark, swap the dark chocolate for milk chocolate. Just keep in mind that milk chocolate is softer, so the bark might not snap as cleanly, but it will still taste amazing.
My chocolate seized up and became grainy. What did I do wrong?
This usually happens when a tiny bit of water gets into the chocolate, or if the chocolate is overheated in the microwave. Make sure your bowls are completely dry and always microwave in short intervals, stirring frequently. If it does seize, you can try stirring in a teaspoon of coconut oil to help smooth it out.
Can I use pre-crushed peppermint from a bag?
You can, but I do not recommend it. Pre-crushed peppermint is often ground too fine and can turn into a dusty powder that does not provide the same satisfying crunch. Crushing your own candy canes gives you much better control over the texture and a brighter, fresher flavor.
How long does this peppermint bark last?
Stored in an airtight container at room temperature, it will stay fresh for up to two weeks. You can also freeze it for up to three months. Just make sure it is in a freezer-safe container and let it come to room temperature before serving.
Can I double this recipe to make a larger batch?
Yes, absolutely! Simply double all of the ingredients and use a larger baking sheet. You may need to add an extra minute or so to the melting times, but the process is exactly the same. This is perfect for making big batches for holiday gifting.
Pin This Recipe!
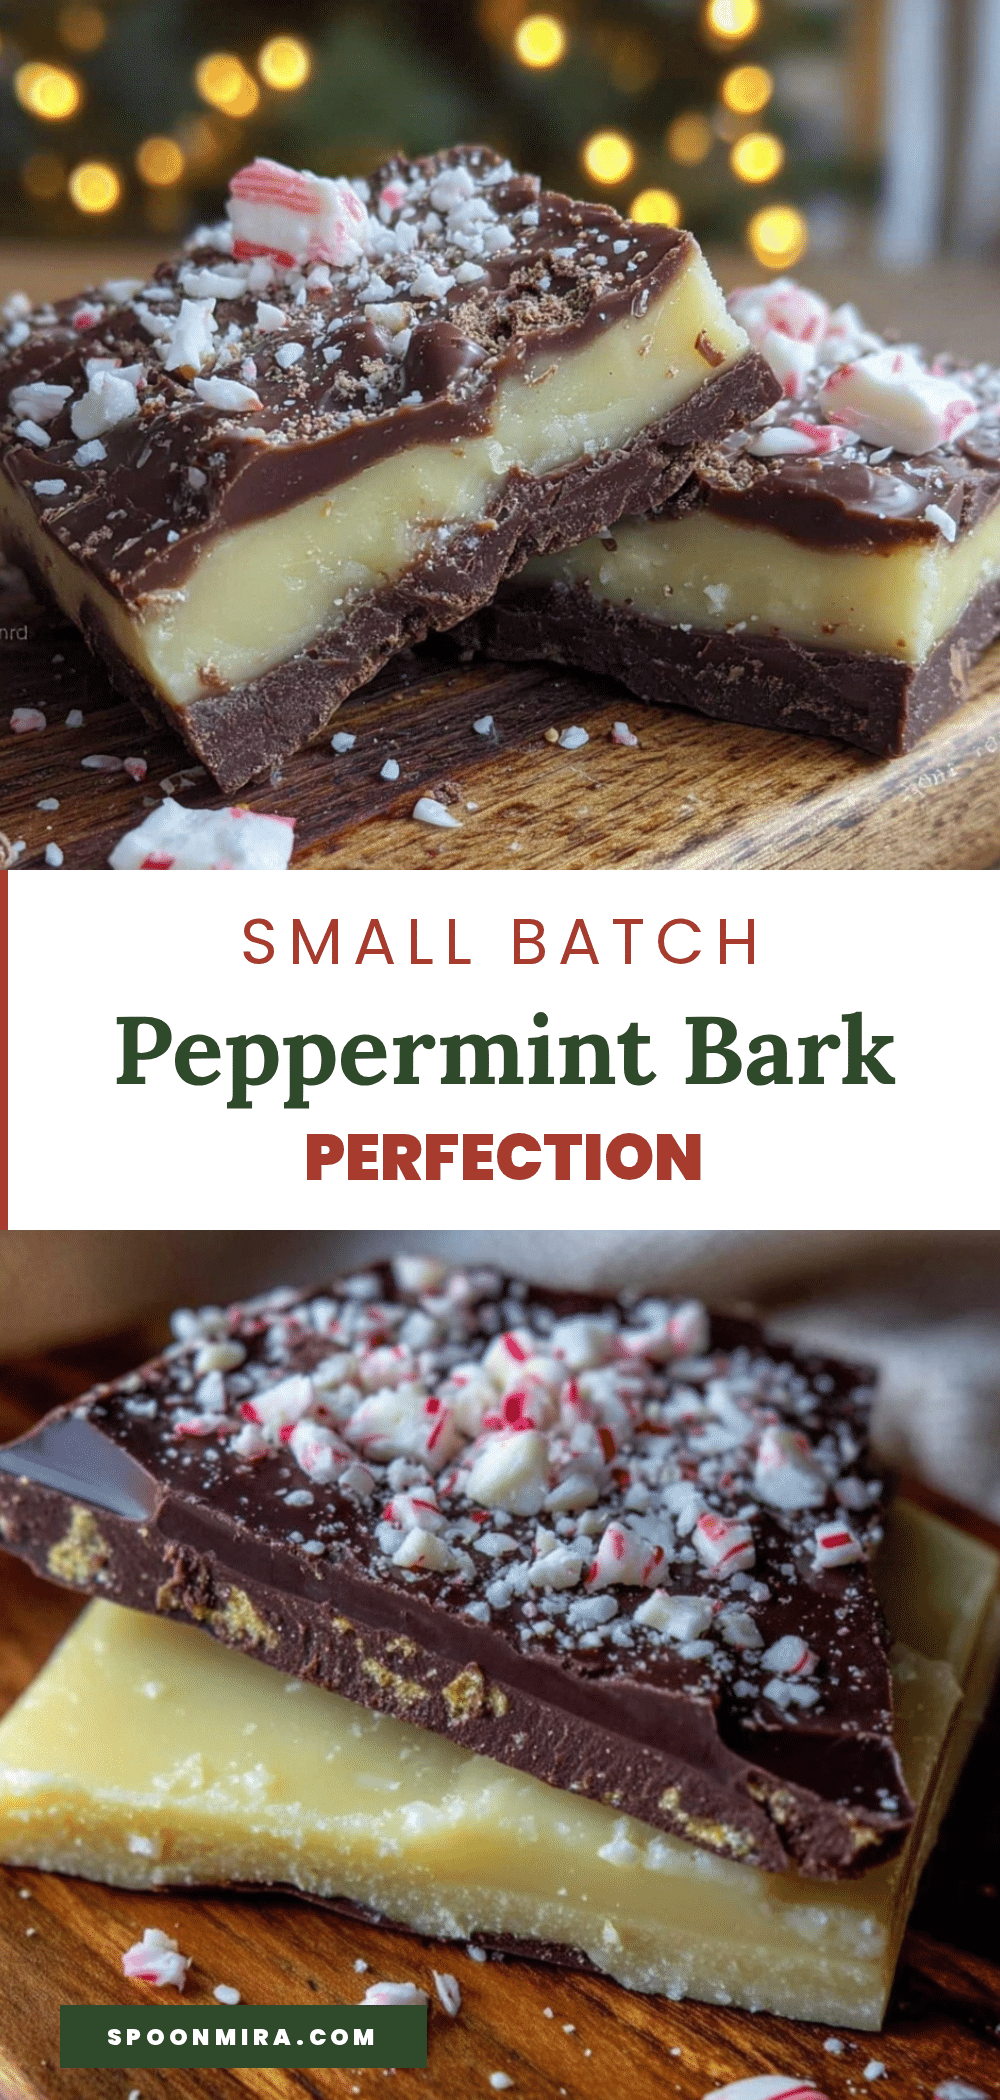
Best Small Batch Peppermint Bark: Easy 5-Minute Recipe

This best small batch peppermint bark is the ultimate holiday shortcut. It delivers that classic, festive flavor without the hassle of a full-blown candy-making project, with only five minutes of actual hands-on work.
- Prep Time: 5 minutes
- Cook Time: 0 minutes
- Total Time: 50 minutes (including chilling time)
- Yield: 8 servings 1x
- Category: Dessert
- Cuisine: American
Ingredients
- 6 oz (170g) dark chocolate (70% cocoa recommended)
- 6 oz (170g) white chocolate (containing cocoa butter)
- 4–5 large candy canes (about 1/2 cup crushed)
- 1/2 teaspoon coconut oil or shortening (optional, for smoother melting)
Instructions
- Line a small baking sheet or plate with parchment paper. Crush 4-5 large candy canes in a sealed Ziploc bag using a rolling pin until pieces are pea-sized or smaller. Set aside.
- Melt dark chocolate in a microwave-safe bowl in 30-second intervals, stirring well after each, until smooth (about 1-1.5 minutes total). Do not overheat.
- Pour melted dark chocolate onto parchment-lined sheet and spread into a thin, even rectangle (about 1/4 inch thick). Refrigerate for 10-15 minutes until firm.
- While dark chocolate sets, melt white chocolate in a clean, dry microwave-safe bowl using the same 30-second interval method. Stir until smooth.
- Remove dark chocolate from fridge. Pour melted white chocolate over it and quickly spread into an even layer covering the dark chocolate completely.
- Immediately sprinkle crushed candy canes evenly over the white chocolate. Gently press them in with fingers or a spoon so they stick.
- Return sheet to refrigerator for at least 30 minutes, or until bark is completely firm and snaps when bent.
- Once set, lift bark out using parchment paper. Break into irregular pieces with your hands. Let sit at room temperature for 5 minutes before serving.
Notes
Do not rush the chocolate melting; microwave in short intervals and stir frequently. Ensure all bowls are completely dry to prevent chocolate from seizing. Crush candy canes in advance for smoother assembly. Use high-quality chocolate for best flavor and texture. Let bark come to room temperature before serving for perfect snap.
Nutrition
- Serving Size: 1 ounce (28g), about
- Calories: 160
- Sugar: 16
- Sodium: 20
- Fat: 11
- Saturated Fat: 6
- Carbohydrates: 19
- Fiber: 1
- Protein: 2
Keywords: peppermint bark, small batch, easy holiday candy, 5-minute recipe, dark chocolate, white chocolate, candy cane, Christmas treat, last-minute gift


