I was standing in my kitchen last Tuesday, staring into the fridge like it owed me money. You know that feeling—when you’re hungry, tired, and the only thing staring back is a half-empty jar of minced garlic, some chicken thighs, and a vague hope that dinner will somehow make itself. Honestly, I was this close to ordering takeout again. But then I remembered the bag of jasmine rice in the pantry and that stick of butter I’d been saving for something special. And just like that, the idea hit me: garlic butter chicken and rice, all in one pan, on the table in twenty minutes flat.
The first time I made this, I wasn’t trying to create anything groundbreaking. I was just trying to get dinner done before my brain completely checked out for the night. But the smell—that sizzle when the butter hits the hot pan with the garlic—it stopped me mid-step. I closed my eyes for a second and thought about my neighbor Mrs. Chen, who used to let me stir her fried rice when I was maybe eight years old. Her kitchen always smelled like garlic and butter and something warm and safe. I haven’t thought about that in years. But there I was, standing in my own kitchen with a spatula in my hand, chasing that exact feeling.
This recipe isn’t fancy. It’s not going to win any plating awards. But it’s the kind of dinner that makes you breathe a little easier after a long day. The chicken comes out juicy, the rice soaks up all that garlicky butter goodness, and you only have one pan to wash. I mean, that’s a win in my book any night of the week. Maybe you’ve been there—standing in your kitchen, just needing something good to happen fast. This one’s for you.
Why You’ll Love This Recipe
Let me tell you why this one-pan garlic butter chicken and rice has become my weeknight hero. I’ve tested this recipe at least a dozen times—sometimes with bone-in chicken, sometimes with thighs, once when I was so tired I almost used frozen rice (don’t do that, by the way). Every single time, it delivered. And here’s why I think you’ll feel the same way:
- Quick & Easy: From fridge to table in 20 minutes flat. No marinating, no complicated steps, no waiting around. Perfect for those nights when you’re running on empty.
- Simple Ingredients: You probably already have most of this in your kitchen. Butter, garlic, rice, chicken, broth—that’s it. No fancy grocery store trips required.
- One-Pan Cleanup: This is the part that honestly makes me happiest. One pan, one spatula, done. Less time washing dishes means more time actually relaxing.
- Crowd-Pleaser: I’ve made this for my family, for friends who showed up hungry, and even for my picky-eating cousin who usually pushes food around her plate. Everyone goes back for seconds.
- Unbelievably Delicious: The rice turns out fluffy and fragrant, the chicken gets that golden crust, and the garlic butter flavor just ties everything together. It’s comfort food without the fuss.
What makes this recipe different from all the other chicken and rice recipes out there? It’s the technique. Most recipes have you cook the rice separately or use canned soup as a shortcut. Not this one. You get that deep, rich flavor by browning the chicken first in real butter, then letting the rice cook in the same pan with all those browned bits. It’s a restaurant-quality result with weeknight-level effort. And honestly? That first bite—the one where the garlic hits your tongue and the butter coats everything—it’s the kind of moment that makes you close your eyes and forget about your long day for just a second.
What Ingredients You Will Need
This recipe uses simple, everyday ingredients to create something that tastes like you spent way more effort than you actually did. Here’s what you’ll need:
- Chicken thighs (boneless, skinless) — about 1 pound (450g). I prefer thighs because they stay juicy and don’t dry out as quickly as breasts. If you only have chicken breasts, that works too—just keep an eye on the cooking time so they don’t overcook.
- Unsalted butter — 3 tablespoons (42g). This is non-negotiable for that rich flavor. I use unsalted so I can control the salt level. If you only have salted butter, just reduce the added salt by a pinch.
- Garlic — 4 to 5 cloves, minced. Fresh garlic makes a huge difference here. I know, I know, the jarred stuff is convenient, but trust me on this one. Fresh garlic gives you that aromatic punch that makes the whole kitchen smell amazing.
- Long-grain white rice — 1 cup (200g). Jasmine rice is my go-to for this recipe. It cooks up fluffy and slightly fragrant. Basmati works great too. Avoid short-grain rice as it can get too sticky.
- Chicken broth — 2 cups (480ml). Use low-sodium if you can, so you have more control over the salt. I’ve used vegetable broth in a pinch and it still tasted great, just a little different.
- Onion — 1 small yellow onion, diced (about ½ cup). It adds sweetness and depth. If you’re in a rush, you can skip it, but I really think it’s worth the extra minute of chopping.
- Salt — ½ teaspoon, plus more to taste
- Black pepper — ¼ teaspoon, freshly ground if you have it
- Dried thyme — ½ teaspoon (or 1 teaspoon fresh). This adds a subtle earthy note that complements the garlic beautifully. Feel free to swap in rosemary or oregano if that’s what you have.
- Fresh parsley — for garnish (optional, but pretty). A little green on top makes it look like you tried harder than you did.
Ingredient Selection Tips: When buying chicken thighs, look for ones that are even in thickness so they cook evenly. For the rice, I recommend Lundberg Family Farms jasmine rice—it consistently gives me perfect fluffy results. And for the garlic, pick heads that feel firm and heavy for their size. If the cloves are starting to sprout, they’ll taste bitter.
Substitution Guidance: Need this dairy-free? Use ghee or a good quality vegan butter—just make sure it’s the stick kind, not the spreadable tub kind. Gluten-free? This recipe is naturally gluten-free as long as you check your broth label. Low-carb? Swap the rice for cauliflower rice, but add it in the last 5 minutes so it doesn’t get mushy.
Equipment Needed
One of the best things about this recipe is how little equipment you need. Here’s the short list:
- A large skillet with a lid — 10 to 12 inches (25-30 cm). A deep skillet works best so the rice has room to cook without spilling over. I use my trusty Lodge cast iron skillet for this—it holds heat beautifully and gives the chicken a gorgeous golden crust. A stainless steel or non-stick pan works great too.
- A sharp knife — for mincing garlic and dicing onion. A dull knife makes everything harder and honestly, it’s more dangerous too.
- A cutting board — any kind will do
- A measuring cup — for the rice and broth
- A wooden spoon or spatula — for stirring. Wood is gentle on your pan and won’t scratch non-stick surfaces.
- Tongs — for flipping the chicken. If you don’t have tongs, two forks work fine.
Budget-Friendly Options: Don’t have a lid that fits your skillet? A large baking sheet or piece of aluminum foil works as a makeshift cover. No cast iron? A regular non-stick pan from the grocery store works perfectly—just be careful not to use high heat with non-stick coatings. And if you don’t have a wooden spoon, a regular metal spoon is totally fine, just be gentle with non-stick pans.
I’ll be honest—the first time I made this, I used a pan that was slightly too small and ended up with rice all over my stovetop. Learn from my mistake and use a pan with some room to spare. Your future self (and your stovetop) will thank you.
Preparation Method
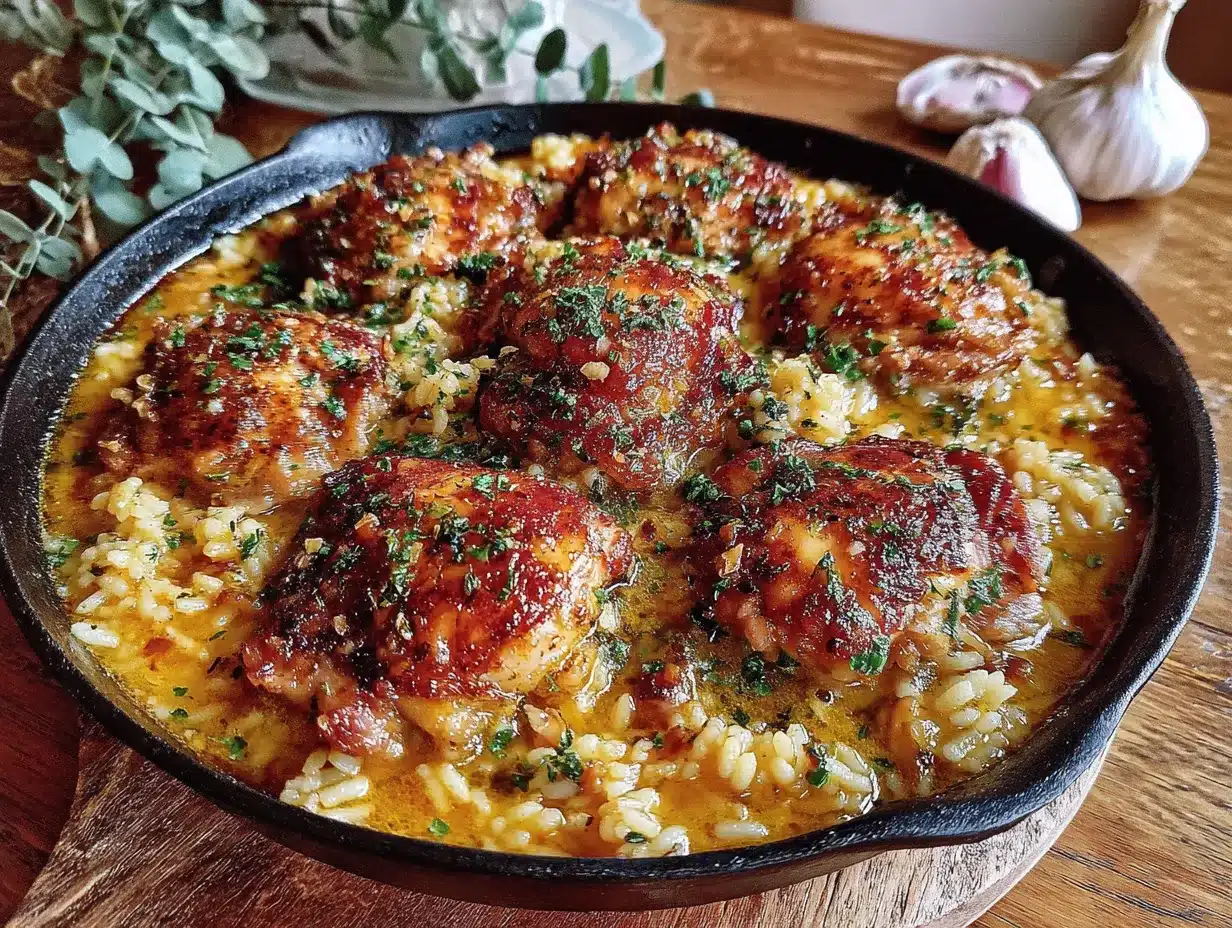
Alright, let’s get cooking. This comes together fast, so have everything ready before you start. Trust me, you don’t want to be hunting for the salt while your garlic is burning.
- Prep your ingredients. Dice the onion, mince the garlic, and pat the chicken thighs dry with paper towels. Season the chicken on both sides with ¼ teaspoon salt and a pinch of pepper. Set aside.
- Melt the butter. Place your skillet over medium-high heat and add 2 tablespoons of the butter. Let it melt and sizzle—it should foam up a bit, then settle down. That’s your signal that it’s hot enough.
- Brown the chicken. Place the chicken thighs in the pan in a single layer. Don’t crowd them—if your pan is small, do this in two batches. Let them cook undisturbed for 4-5 minutes until the bottom is golden brown and releases easily from the pan. Flip and cook another 3-4 minutes. The chicken doesn’t need to be fully cooked through yet—it’ll finish cooking with the rice. Transfer the chicken to a plate and set aside.
- Sauté the aromatics. Reduce the heat to medium. Add the remaining 1 tablespoon of butter to the pan. Once melted, add the diced onion and cook for 2 minutes until it starts to soften and turn translucent. Add the minced garlic and cook for 30 seconds—just until fragrant. Be careful not to burn the garlic, or it’ll turn bitter. (I’ve done this more times than I’d like to admit.)
- Toast the rice. Add the rice to the pan and stir it around for about 1 minute. You want each grain to get coated in that buttery, garlicky goodness. This step adds so much flavor—don’t skip it!
- Add the broth and seasonings. Pour in the chicken broth, scraping the bottom of the pan with your wooden spoon to release all those browned bits (that’s where the flavor lives). Add the remaining ¼ teaspoon salt, the dried thyme, and another pinch of pepper. Stir everything together.
- Return the chicken. Nestle the chicken thighs back into the pan on top of the rice. They should be sitting partially submerged in the liquid. Bring the mixture to a gentle boil.
- Cover and cook. Reduce the heat to low, cover the skillet with a tight-fitting lid, and let it simmer for 15 minutes. Do NOT lift the lid during this time—I know it’s tempting, but the steam is what cooks the rice perfectly. Set a timer and walk away.
- Rest and fluff. After 15 minutes, turn off the heat and let the pan sit covered for another 5 minutes. This resting time lets the rice finish absorbing any remaining liquid. Remove the lid, fluff the rice with a fork, and check the chicken for doneness (it should reach 165°F / 74°C at the thickest part).
- Garnish and serve. Sprinkle fresh parsley over the top if you’re using it. Serve hot straight from the pan—that’s the beauty of one-pan meals!
Sensory Cues: When the chicken is browning, you should hear a steady sizzle—not a violent pop, not silence. When you add the garlic, it should smell fragrant and nutty within 30 seconds. When you lift the lid after cooking, the rice should look fluffy and tender, and the chicken should be golden and juicy. If the rice still looks wet, let it sit covered for another 2-3 minutes off the heat.
Cooking Tips & Techniques
After making this recipe more times than I can count, I’ve picked up a few tricks that make a real difference. Here’s what I’ve learned:
Don’t skip the browning step. I know it adds a few minutes, but that golden crust on the chicken is where the flavor lives. It’s called the Maillard reaction, and it’s basically chemistry magic that makes everything taste better. Plus, those browned bits left in the pan? That’s liquid gold for your rice.
Use the right rice-to-liquid ratio. For long-grain white rice, the magic number is 1 cup rice to 2 cups liquid. I’ve tried using 1¾ cups of broth once when I was short, and the rice came out slightly crunchy. Learn from my mistake—measure carefully.
Resist the urge to peek. I know, I know—you want to see how it’s doing. But every time you lift that lid, steam escapes, and your cooking time gets thrown off. Set a timer and walk away. Do something else for 15 minutes. Fold laundry. Scroll your phone. Just don’t lift the lid.
If your rice is still crunchy after 15 minutes: Don’t panic. Add 2-3 tablespoons of broth or water, replace the lid, and cook on low for another 3-5 minutes. This happens sometimes with different pans or stovetops. It’s fixable.
For extra flavor: Try adding a bay leaf to the broth while it cooks, or a squeeze of lemon juice right before serving. The acidity cuts through the richness of the butter beautifully. I once added a splash of white wine instead of some of the broth, and let me tell you—that was a happy accident.
Multitasking tip: While the rice is cooking, use those 15 minutes to wipe down your counter, wash your cutting board, and set the table. That way, when dinner’s ready, your kitchen is already clean. It’s a small thing, but it makes the whole evening feel less chaotic.
Variations & Adaptations
One of the reasons I keep coming back to this recipe is how easy it is to change up. Here are some of my favorite variations:
- Lemon Herb Version: Add the zest of one lemon and 2 tablespoons of fresh lemon juice along with the broth. Swap the thyme for fresh rosemary or oregano. The brightness is perfect for spring or summer evenings.
- Spicy Kick: Add ½ teaspoon of red pepper flakes along with the garlic, or stir in a chopped jalapeño with the onion. For extra heat, drizzle some sriracha over the finished dish. My husband loves this version—I think he’d put hot sauce on ice cream if he could.
- Vegetable Loaded: Add a cup of frozen peas and carrots during the last 5 minutes of cooking, or stir in a handful of fresh spinach right before serving. It’s an easy way to sneak in extra veggies without any extra effort.
- Creamy Version: Stir in ¼ cup of heavy cream or full-fat coconut milk right before serving. It makes the rice extra luxurious and rich. Perfect for when you need a little extra comfort.
- Dairy-Free Adaptation: Use olive oil or avocado oil instead of butter, and make sure your broth is dairy-free. The flavor profile changes a bit, but it’s still delicious. I’ve made this for friends with dairy sensitivities and they always ask for the recipe.
Different Cooking Methods: If you have an Instant Pot, you can adapt this recipe easily. Brown the chicken using the sauté function, then add the rice, broth, and seasonings. Pressure cook on high for 5 minutes with a natural release. If you’re using a slow cooker, brown the chicken first on the stovetop, then transfer everything to the slow cooker and cook on low for 3-4 hours. The rice might get a bit softer, but it’s still tasty.
Serving & Storage Suggestions
This dish is best served hot, straight from the pan. The rice is at its fluffiest, the chicken is juiciest, and that garlic butter flavor is at its peak. But let’s be real—leftovers are a beautiful thing too.
Serving Suggestions: I like to serve this with a simple side salad dressed with lemon vinaigrette to cut through the richness. Steamed green beans or roasted broccoli also pair beautifully. If you’re feeling extra hungry, a slice of crusty bread to soak up any leftover garlic butter sauce is never a bad idea.
Storage Instructions: Let any leftovers cool completely, then transfer to an airtight container. Store in the refrigerator for up to 4 days. The flavors actually meld together overnight, so day-two leftovers are sometimes even better than day one.
Freezer Tips: This dish freezes surprisingly well. Portion it into freezer-safe containers and freeze for up to 3 months. Thaw overnight in the refrigerator before reheating.
Reheating Methods: The best way to reheat is on the stovetop with a splash of broth or water to rehydrate the rice. Add a pat of butter if you’re feeling indulgent. Microwave works too—just cover the bowl with a damp paper towel to create steam and prevent the rice from drying out. Heat in 1-minute intervals, stirring between each.
Flavor Development Note: The rice will continue to absorb moisture as it sits, so leftovers will be slightly softer than the fresh version. That’s not a bad thing—it just means the flavors have had more time to get cozy with each other. I actually look forward to the leftover lunch the next day.
Nutritional Information & Benefits
Here’s an approximate nutritional breakdown per serving (based on 4 servings):
- Calories: 485
- Protein: 32g
- Fat: 18g
- Carbohydrates: 42g
- Fiber: 1g
- Sugar: 2g
- Sodium: 680mg
Health Benefits: Chicken thighs are a great source of lean protein, which helps keep you full and supports muscle health. Garlic is known for its immune-boosting properties and anti-inflammatory benefits. The butter provides a small amount of vitamin A and healthy fats that help your body absorb fat-soluble vitamins from other foods you eat alongside this dish.
Dietary Considerations: This recipe is naturally gluten-free and nut-free. For a lower-calorie option, use chicken breast instead of thighs and reduce the butter to 2 tablespoons. For a lower-carb version, swap the rice for cauliflower rice (add it in the last 5 minutes of cooking). If you’re watching your sodium intake, use low-sodium broth and skip the added salt at the end.
Allergen Note: This recipe contains dairy (butter). For a dairy-free version, substitute with olive oil or a high-quality vegan butter.
I’m not a nutritionist, and these numbers are estimates based on standard ingredient brands. But I do believe in balance—this dish is hearty and satisfying, and paired with a simple vegetable side, it makes for a well-rounded weeknight meal that won’t leave you feeling guilty.
Conclusion
Look, I know there are a million chicken and rice recipes out there. But this one? It’s different. It’s the one I come back to on Tuesday nights when I’m tired and hungry and just need something good to happen in my kitchen. It’s the one that makes my whole house smell like comfort. It’s the one that leaves me with just one pan to wash.
This easy 20-minute one-pan garlic butter chicken and rice is proof that you don’t need complicated techniques or fancy ingredients to make something genuinely delicious. You just need good butter, fresh garlic, and a little bit of patience while the rice does its thing. It’s the kind of recipe that becomes a habit—the one you make without thinking, the one you can practically cook in your sleep.
I’d love to hear how it turns out for you. Did you add your own twist? Use a different herb? Burn the garlic like I did the first three times? Drop a comment below and let me know. And if you’re looking for another quick weeknight dinner, you might want to try my crispy garlic chicken—it uses a similar technique and is just as easy. Happy cooking, friend. You’ve got this.
Frequently Asked Questions
Can I use chicken breast instead of thighs?
Absolutely! Just keep an eye on the cooking time. Chicken breasts cook faster and can dry out more easily. I recommend using boneless, skinless breasts and checking for doneness at the 12-minute mark instead of 15.
What if I don’t have a lid for my skillet?
No problem! Use a large baking sheet, a piece of aluminum foil tightly crimped around the edges, or even a large dinner plate that fits over the top. The key is trapping the steam so the rice cooks properly.
Can I make this with brown rice?
You can, but you’ll need to adjust the cooking time and liquid. Brown rice typically needs about 40-45 minutes to cook and requires a bit more liquid (about 2¼ cups per cup of rice). I’d recommend sticking with white rice for the 20-minute promise.
My rice came out mushy. What went wrong?
This usually happens if there was too much liquid or if the heat was too high. Next time, make sure you’re using exactly 2 cups of broth for 1 cup of rice, and keep the heat on low once you cover the pan. Also, make sure your lid fits tightly so steam doesn’t escape.
Can I double this recipe?
Definitely! Just make sure you have a large enough skillet (at least 12 inches) and increase the cooking time by about 5 minutes. You may need to brown the chicken in batches to avoid overcrowding the pan.
Pin This Recipe!
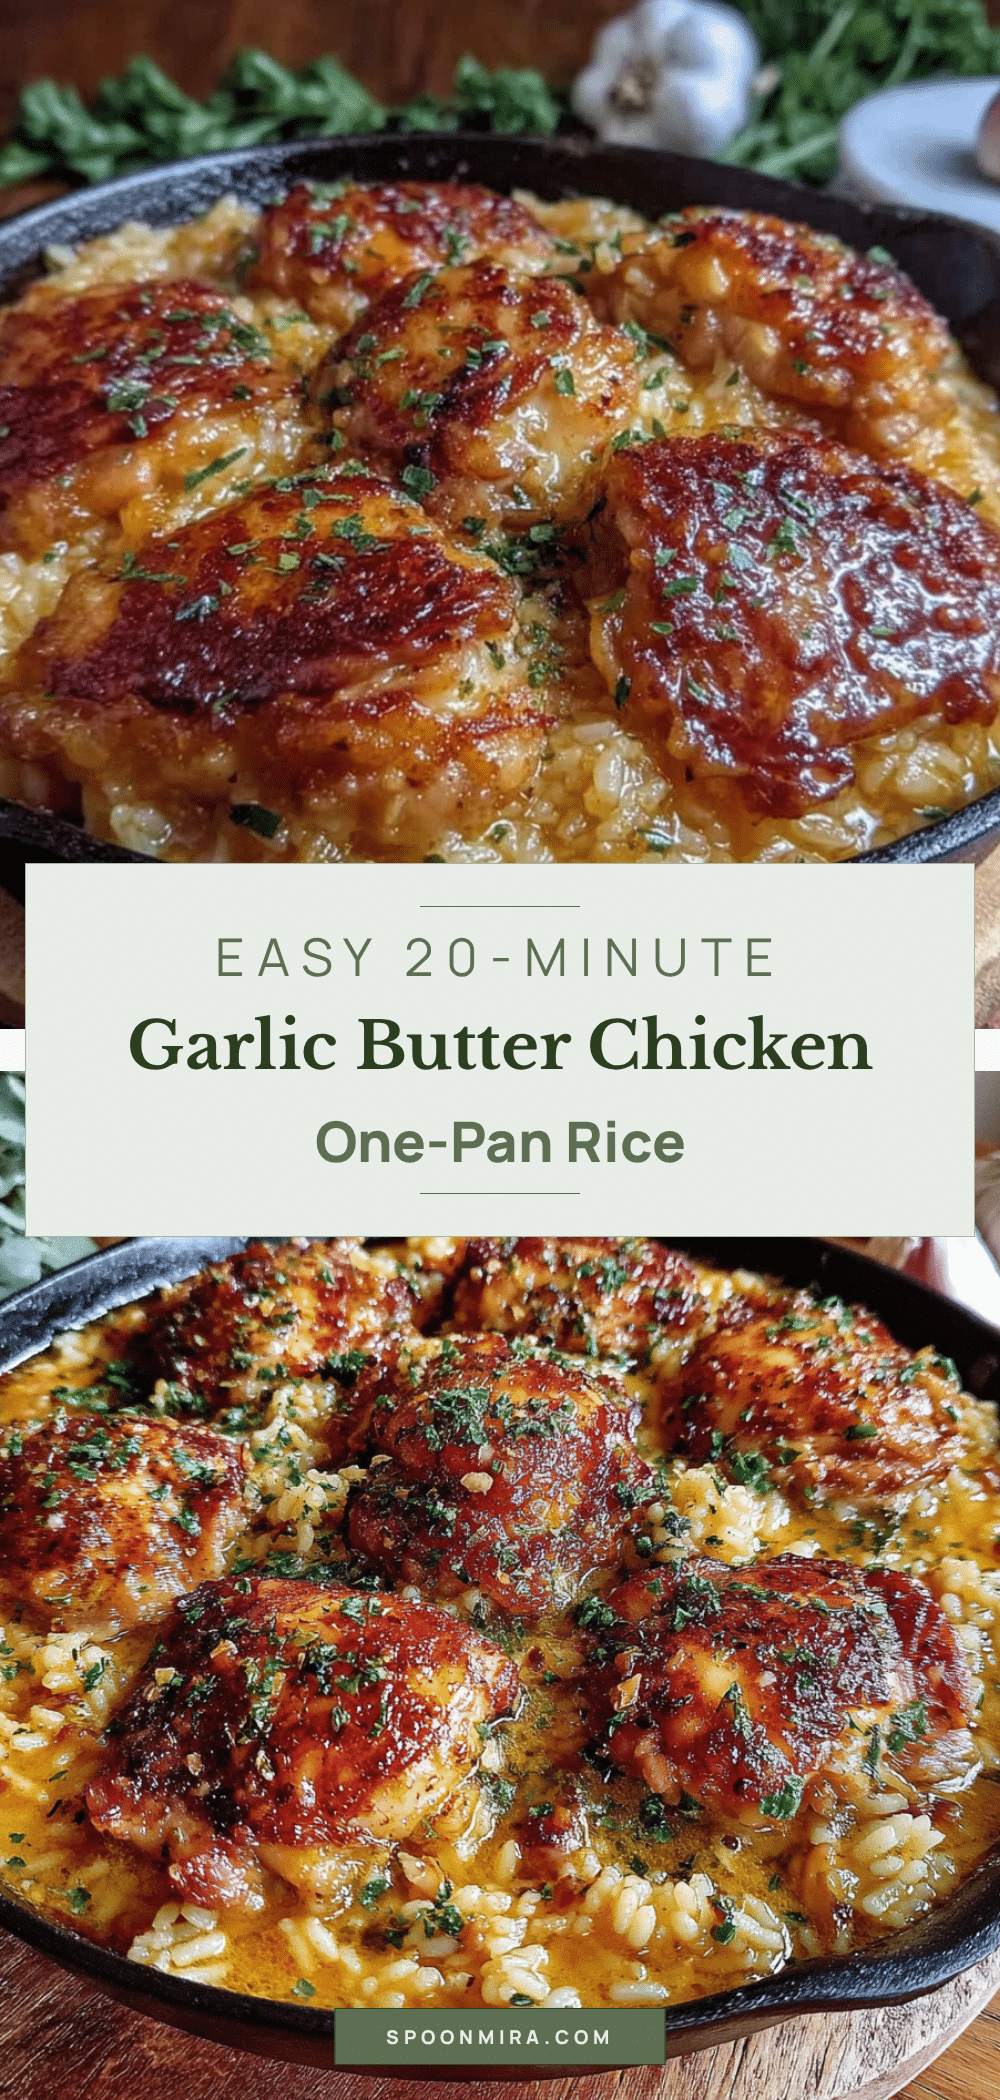
Easy 20-Minute One-Pan Garlic Butter Chicken and Rice

A quick and easy one-pan meal featuring juicy chicken thighs and fluffy rice cooked in a rich garlic butter sauce. Ready in just 20 minutes with minimal cleanup.
- Prep Time: 5 minutes
- Cook Time: 15 minutes
- Total Time: 20 minutes
- Yield: 4 servings 1x
- Category: Main Course
- Cuisine: American
Ingredients
- 1 pound (450g) boneless, skinless chicken thighs
- 3 tablespoons (42g) unsalted butter
- 4 to 5 cloves garlic, minced
- 1 cup (200g) long-grain white rice (jasmine or basmati)
- 2 cups (480ml) low-sodium chicken broth
- 1 small yellow onion, diced (about ½ cup)
- ½ teaspoon salt, plus more to taste
- ¼ teaspoon black pepper, freshly ground
- ½ teaspoon dried thyme (or 1 teaspoon fresh)
- Fresh parsley for garnish (optional)
Instructions
- Prep your ingredients. Dice the onion, mince the garlic, and pat the chicken thighs dry with paper towels. Season the chicken on both sides with ¼ teaspoon salt and a pinch of pepper. Set aside.
- Melt the butter. Place your skillet over medium-high heat and add 2 tablespoons of the butter. Let it melt and sizzle until it foams and settles.
- Brown the chicken. Place the chicken thighs in the pan in a single layer. Cook undisturbed for 4-5 minutes until golden brown, then flip and cook another 3-4 minutes. Transfer to a plate.
- Sauté the aromatics. Reduce heat to medium. Add remaining 1 tablespoon butter. Cook diced onion for 2 minutes until softened. Add minced garlic and cook 30 seconds until fragrant.
- Toast the rice. Add rice to the pan and stir for 1 minute until coated in butter and garlic.
- Add the broth and seasonings. Pour in chicken broth, scraping up browned bits. Add remaining ¼ teaspoon salt, dried thyme, and another pinch of pepper. Stir.
- Return the chicken. Nestle chicken thighs back into the pan on top of the rice. Bring to a gentle boil.
- Cover and cook. Reduce heat to low, cover tightly, and simmer for 15 minutes. Do not lift the lid.
- Rest and fluff. Turn off heat and let sit covered for 5 minutes. Remove lid, fluff rice with a fork. Check chicken reaches 165°F (74°C).
- Garnish and serve. Sprinkle with fresh parsley if desired. Serve hot straight from the pan.
Notes
Don’t skip browning the chicken for best flavor. Use a tight-fitting lid and resist lifting it during cooking. If rice is still crunchy after 15 minutes, add 2-3 tablespoons broth and cook 3-5 more minutes. For extra flavor, add a bay leaf or lemon juice.
Nutrition
- Serving Size: 1 serving (about 1/4
- Calories: 485
- Sugar: 2
- Sodium: 680
- Fat: 18
- Saturated Fat: 8
- Carbohydrates: 42
- Fiber: 1
- Protein: 32
Keywords: one-pan chicken and rice, garlic butter chicken, quick weeknight dinner, easy chicken recipe, 20-minute meal


