The neighborhood cookie swap was in three hours and I’d completely forgotten. Everyone else would be bringing those elaborate, multi-day creations—you know the ones. The kind with homemade caramel drizzled over hand-dipped chocolate, or layers of something that required a pastry degree. I had a half-used stick of butter, a can of pumpkin that had been hiding in the back of my pantry since last Thanksgiving, and honestly, a mild panic setting in.
I mean, let’s face it—I was the person who showed up to these things hoping my store-bought pie would go unnoticed. But this time, I had nothing. Not even a backup plan. I stared at that sad little butter stick and thought, “Well, you can brown it, at least.” And then my eyes landed on the pumpkin. And the cinnamon. And suddenly, I was throwing flour and sugar into a bowl like a woman possessed, muttering to myself that this had to work.
The kitchen got messy—there’s always that moment, right? I spilled flour down my favorite sweater and burned my finger on the saucepan handle. But the smell? That nutty, toasty, warm-hug scent of brown butter mixing with pumpkin and cinnamon? It filled my whole apartment and made me forget I was racing against the clock. I pulled those cookies out of the oven, slightly lopsided, a little too golden on the edges, and thought, “Well, they look like a happy accident.”
At the swap, I set my plate down next to the fancy tarts and the perfectly frosted cupcakes. Honestly, I felt a little embarrassed. But then people started grabbing them. And then they went quiet. And then someone actually said, “Where did you get these?” And I had to admit—I made them in a panic with half the ingredients I was supposed to have. That’s the thing about this Perfect Brown Butter Pumpkin Snickerdoodle Cookies recipe. It doesn’t need to show off. It just wins. Maybe you’ve been there, scrambling for something to bring and feeling totally outmatched. This one’s for you.
Why You’ll Love This Recipe
Let me tell you why these cookies have become my secret weapon for every fall gathering. I’ve tested this recipe at least a dozen times—burned a batch, underbaked another, even accidentally used salted butter once (which, honestly, wasn’t terrible). But through all those trials, I landed on a version that just works. Every. Single. Time.
- Quick & Easy: From start to finish, these come together in under 35 minutes. Perfect for those “I need something now” moments before a party.
- Simple Ingredients: No weird specialty items. Butter, pumpkin puree, flour, sugar, and spices. You probably have most of this in your kitchen right now.
- Perfect for Fall Gatherings: These are made for potlucks, Friendsgivings, and cookie swaps. They travel well and look gorgeous on a plate.
- Crowd-Pleaser: I’ve watched kids grab three at a time and adults try to sneak extras into their napkins. No judgment here.
- Unbelievably Delicious: The brown butter adds this nutty, toasty depth that regular snickerdoodles just can’t touch. And the pumpkin keeps them impossibly soft.
What makes this different from every other pumpkin cookie out there? It’s the brown butter, hands down. That one extra step—browning the butter until it smells like toasted hazelnuts—changes everything. Plus, I’ve balanced the pumpkin and spice ratios so you get that fall flavor without the cookies turning into soggy little discs. This isn’t just another pumpkin cookie. It’s the one that makes people close their eyes after the first bite. Trust me on this.
What Ingredients You Will Need
This recipe uses simple, wholesome ingredients that work together to create that perfect balance of chewy, soft, and spiced. Most of these are pantry staples, which makes this even better for last-minute baking emergencies.
For the Cookies
- 1 cup unsalted butter (2 sticks) — I prefer Kerrygold for the richness, but any good unsalted butter works. You’ll be browning this, so quality matters.
- 1 cup granulated sugar — Adds sweetness and helps with that signature crackly top.
- 1/2 cup packed light brown sugar — Gives moisture and a deeper caramel note that plays beautifully with the brown butter.
- 1/2 cup pumpkin puree — Not pumpkin pie filling! Make sure it’s 100% pure pumpkin. Libby’s is my go-to.
- 1 large egg — Room temperature, please. Cold egg will seize up your brown butter.
- 2 teaspoons vanilla extract — Pure, not imitation. It makes a difference.
- 2 1/2 cups all-purpose flour — Spoon and level it. Scooping directly can give you too much flour and dry cookies.
- 1 teaspoon baking soda — For that slight puff and spread.
- 1/2 teaspoon cream of tartar — The secret to the classic snickerdoodle tang and chewy texture.
- 1 teaspoon pumpkin pie spice — Or make your own with cinnamon, nutmeg, ginger, and cloves.
- 1 teaspoon ground cinnamon — Because you can never have too much cinnamon in fall cookies.
- 1/2 teaspoon salt — Balances the sweetness and enhances the brown butter flavor.
For the Cinnamon Sugar Coating
- 1/4 cup granulated sugar
- 1 tablespoon ground cinnamon
- Pinch of nutmeg (optional but lovely)
A quick note on the pumpkin puree: If you open a can and only use half, freeze the rest in an ice cube tray. You’ll thank me later when you’re making these again in November. And yes, you can use homemade pumpkin puree if you have it—just make sure it’s well-drained so your cookies don’t turn into puddles.
Equipment Needed
You don’t need a fancy bakery setup for these. Here’s what I use every single time:
- Medium saucepan — Light-colored is best so you can see the butter browning. Dark pans make it hard to tell when it’s done.
- Large mixing bowls — One for dry ingredients, one for wet. I use glass or stainless steel.
- Whisk — For combining dry ingredients and smoothing out the brown butter mixture.
- Rubber spatula — For folding everything together without overmixing.
- Cookie scoop — A 1.5-tablespoon scoop gives consistent cookies. I’ve used a regular spoon in a pinch, but the scoop is worth it.
- Baking sheets — Two, so you can batch bake. Line with parchment paper or silicone mats.
- Cooling rack — Lets the bottoms stay crisp instead of steaming on the hot pan.
- Small bowl — For the cinnamon sugar coating.
If you don’t have cream of tartar, you can substitute with 1 teaspoon lemon juice or white vinegar added to the wet ingredients. But honestly, cream of tartar is cheap and gives that signature snickerdoodle tang that makes these cookies special.
Preparation Method
Alright, let’s get baking. I’ve broken this down so even a nervous baker can nail it.
- Brown the butter first. Cut your 1 cup of butter into pieces and toss them in a medium saucepan over medium heat. Stir constantly with a rubber spatula. First it’ll melt, then it’ll foam, then it’ll start to smell amazing—like toasted nuts. You’ll see little brown specks forming at the bottom. That’s the milk solids toasting. Once it turns a deep amber color and smells nutty (about 5-7 minutes), pull it off the heat immediately. Pour it into a heatproof bowl to stop the cooking. Let it cool for 10 minutes. Don’t skip the stirring—burnt butter is sad butter.
- Preheat your oven to 350°F (175°C). Line two baking sheets with parchment paper.
- Mix the wet ingredients. In a large bowl, whisk the cooled brown butter with 1 cup granulated sugar and 1/2 cup brown sugar until smooth. It should look like wet sand. Add the 1/2 cup pumpkin puree, 1 large egg, and 2 teaspoons vanilla. Whisk until everything is combined and glossy. The mixture might look slightly separated—that’s okay, the pumpkin will bring it together.
- Whisk the dry ingredients. In a separate bowl, whisk together 2 1/2 cups flour, 1 teaspoon baking soda, 1/2 teaspoon cream of tartar, 1 teaspoon pumpkin pie spice, 1 teaspoon cinnamon, and 1/2 teaspoon salt. Make sure there are no lumps.
- Combine wet and dry. Pour the dry ingredients into the wet mixture. Fold gently with a rubber spatula until just combined. Stop when you no longer see streaks of flour. Overmixing will make tough cookies. The dough will be soft and slightly sticky—that’s perfect.
- Chill the dough. This is crucial. Cover the bowl and pop it in the fridge for 20-30 minutes. Chilling prevents the cookies from spreading too thin and develops the flavors. I’ve skipped this step when I was in a rush and regretted it—flat, sad cookies. Don’t be like me.
- Make the coating. In a small bowl, mix 1/4 cup sugar, 1 tablespoon cinnamon, and a pinch of nutmeg.
- Scoop and roll. Use your cookie scoop to portion out dough balls (about 1.5 tablespoons each). Roll each ball between your palms until smooth, then toss it in the cinnamon sugar mixture until completely coated. Place them 2 inches apart on the prepared baking sheets.
- Bake. Bake for 10-12 minutes. The edges should look set and slightly golden, but the centers will still look soft and puffy. That’s exactly what you want. They’ll continue baking on the hot sheet after you pull them out.
- Cool properly. Let the cookies rest on the baking sheet for 5 minutes. This is hard, I know. But trust me—they need that time to set up. Then transfer them to a wire rack to cool completely. Or, you know, eat one warm. I won’t tell.
Cooking Tips & Techniques
I’ve made these cookies at least twenty times now, and I’ve learned a few things the hard way. Let me save you the trouble.
Watch the brown butter like a hawk. I burned my first batch because I walked away to answer a text. The difference between perfectly browned and burnt is about 15 seconds. Swirl the pan constantly and trust your nose—when it smells like toasted almonds, it’s done. Pour it into a cool bowl immediately.
Don’t overmix the dough. I know it’s tempting to keep stirring until everything looks perfectly smooth, but that develops gluten and makes your cookies dense. Stop folding as soon as the flour disappears. A few streaks are fine.
Chill the dough, seriously. I once tried to skip this step because I was running late for a party. The cookies spread into flat, greasy disks that looked nothing like the pretty pictures. The chill time lets the brown butter solidify slightly and the flavors meld. Twenty minutes makes all the difference.
Use a cookie scoop for consistency. When I first made these, I used a spoon and ended up with cookies ranging from tiny bites to monster-sized. They baked unevenly—some burned, some were underdone. A simple scoop gives you uniform cookies that bake at the same rate.
Check for doneness by the edges, not the centers. The centers will look soft and puffy when you pull them out. That’s good! If you wait until the centers look firm, you’ll have dry, crunchy cookies. The residual heat from the baking sheet finishes the job.
Variations & Adaptations
One of the best things about this recipe is how flexible it is. Here are some ways I’ve adapted it depending on who I’m serving.
Gluten-Free Version: Substitute the all-purpose flour with a 1:1 gluten-free baking flour blend. I’ve used Bob’s Red Mill with great results. Add an extra tablespoon of flour since gluten-free blends tend to absorb liquid differently. The texture will be slightly more tender, but still delicious.
Vegan Adaptation: Use vegan butter (I like Miyoko’s) for browning—it browns beautifully. Replace the egg with a flax egg (1 tablespoon ground flaxseed mixed with 3 tablespoons water, let sit for 5 minutes). The cookies will be a bit more delicate, so handle them gently.
Spice It Up: For a bolder flavor, add 1/4 teaspoon ground cardamom or a pinch of cayenne pepper to the dough. The cardamom adds an unexpected floral note that pairs wonderfully with the pumpkin. I tried this last Thanksgiving and my sister-in-law demanded the recipe.
White Chocolate Drizzle: Melt 1/2 cup white chocolate chips with 1 teaspoon coconut oil and drizzle over cooled cookies. It adds a gorgeous look for holiday cookie platters and a sweet contrast to the spiced cookie.
Stuffed Cookies: Press a small piece of cream cheese or a caramel square into the center of each dough ball before rolling in cinnamon sugar. Bake as directed. The gooey center is next-level for dinner parties.
Serving & Storage Suggestions
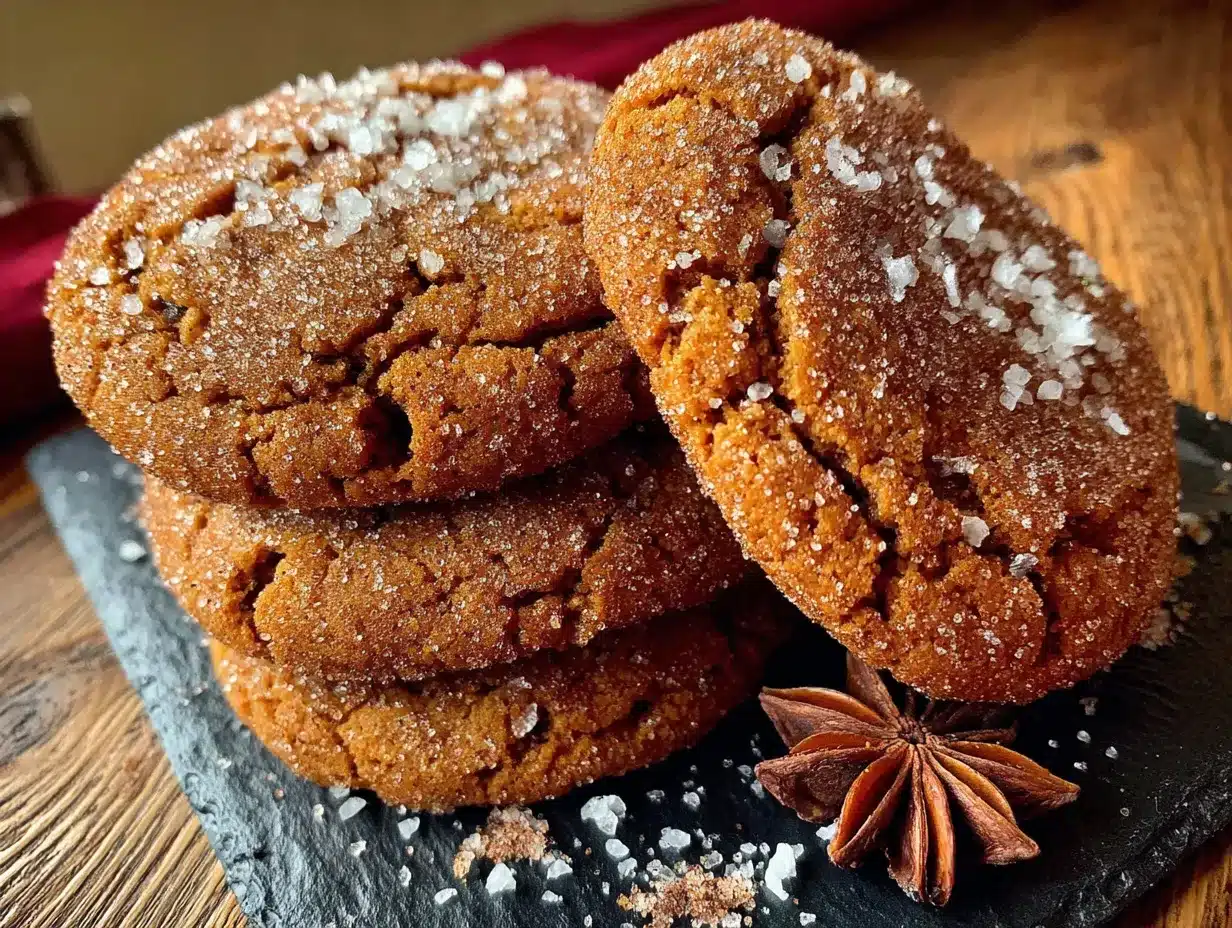
These cookies are best served slightly warm, when the edges are still a little soft and the cinnamon sugar coating is perfectly set. If you’re hosting, arrange them on a wooden board or a pretty cake stand. They look gorgeous piled high with a few cinnamon sticks and star anise scattered around for that fall aesthetic.
For a full dessert spread, serve these alongside a warm apple crisp or a pumpkin cheesecake. They also pair beautifully with a scoop of vanilla bean ice cream or a drizzle of salted caramel sauce. If you’re doing a cookie swap, pack them in clear cellophane bags tied with baker’s twine—they make adorable hostess gifts.
Storage: Keep these in an airtight container at room temperature for up to 5 days. Place a slice of bread in the container to keep them soft—the bread absorbs excess air and releases moisture. Replace the bread slice every other day.
Freezing: These freeze beautifully. Bake and cool the cookies completely, then layer them between sheets of parchment paper in a freezer-safe container. They’ll keep for up to 3 months. Thaw at room temperature for 15 minutes before serving. You can also freeze the unbaked dough balls—just roll them in cinnamon sugar, place on a baking sheet, freeze until solid, then transfer to a freezer bag. Bake directly from frozen, adding 2-3 minutes to the baking time.
Reheating: Pop a cookie in the microwave for 8-10 seconds for that fresh-from-the-oven warmth. Or place them on a baking sheet in a 300°F oven for 5 minutes if you’re reheating a whole batch.
The flavors actually get better after a day or two. The brown butter and pumpkin meld together, and the spices become more pronounced. So don’t worry if you’re making these a day ahead—they’ll be even more delicious.
Nutritional Information & Benefits
Let’s be real—these are cookies, not health food. But they do have some redeeming qualities. Here’s a rough breakdown per cookie (based on 24 cookies):
- Calories: 185
- Fat: 9g
- Carbohydrates: 26g
- Protein: 2g
- Fiber: 1g
- Sugar: 16g
The pumpkin puree adds vitamin A and fiber, which is more than most cookies can claim. The brown butter, while indulgent, provides a rich flavor that means you’re satisfied with one or two cookies instead of half a dozen. And the cinnamon has anti-inflammatory properties—so really, these are practically wellness cookies. (I’m only half kidding.)
If you’re watching your sugar intake, you can reduce the granulated sugar to 3/4 cup and the brown sugar to 1/3 cup. The cookies will be less sweet but still delicious, with the pumpkin and spices shining through more.
For a lower-fat option, substitute half the butter with unsweetened applesauce. The texture will be more cake-like, but the flavor will still be there.
Conclusion
These Perfect Brown Butter Pumpkin Snickerdoodle Cookies have become my fall baking staple, and I honestly don’t see that changing anytime soon. They’re the recipe I turn to when I need to impress without stress, when I want something that tastes like autumn but doesn’t require a day in the kitchen. The brown butter adds that little bit of magic that makes people ask, “What’s your secret?” And the pumpkin keeps everything soft and tender.
I love that this recipe is forgiving enough for a beginner but impressive enough for a seasoned baker. It’s the kind of cookie that disappears from the plate before you’ve even had a chance to grab one for yourself. And honestly? That’s the best compliment a cookie can get.
Try these for your next gathering, and let me know how they turn out. Did you add your own twist? Did someone ask for the recipe? I’d love to hear about it in the comments below. And don’t forget to share this with a friend who needs a last-minute cookie swap hero. Happy baking!
Frequently Asked Questions
Can I use salted butter instead of unsalted?
Yes, but reduce the added salt in the recipe to 1/4 teaspoon. Salted butter has varying salt levels, so it’s safer to start with unsalted and control the salt yourself.
Why did my cookies turn out flat?
Most likely the dough wasn’t chilled long enough, or the butter was too warm when you mixed it. Make sure to chill the dough for at least 20 minutes. Also, check that your baking soda is fresh—old baking soda loses its leavening power.
Can I make these without cream of tartar?
Absolutely. Substitute with 1 teaspoon lemon juice or white vinegar added to the wet ingredients. The cookies will have a slightly different texture—less tangy and a bit softer—but they’ll still be delicious.
How do I know when the brown butter is done?
Look for a deep amber color and a nutty aroma. You’ll see brown specks forming at the bottom of the pan. When it smells like toasted almonds or hazelnuts, it’s ready. Pour it into a cool bowl immediately to stop the cooking process.
Can I freeze the baked cookies?
Yes! Cool them completely, then layer between parchment paper in a freezer-safe container. They’ll keep for up to 3 months. Thaw at room temperature for 15 minutes, or microwave for 8-10 seconds for that fresh-baked warmth.
Pin This Recipe!
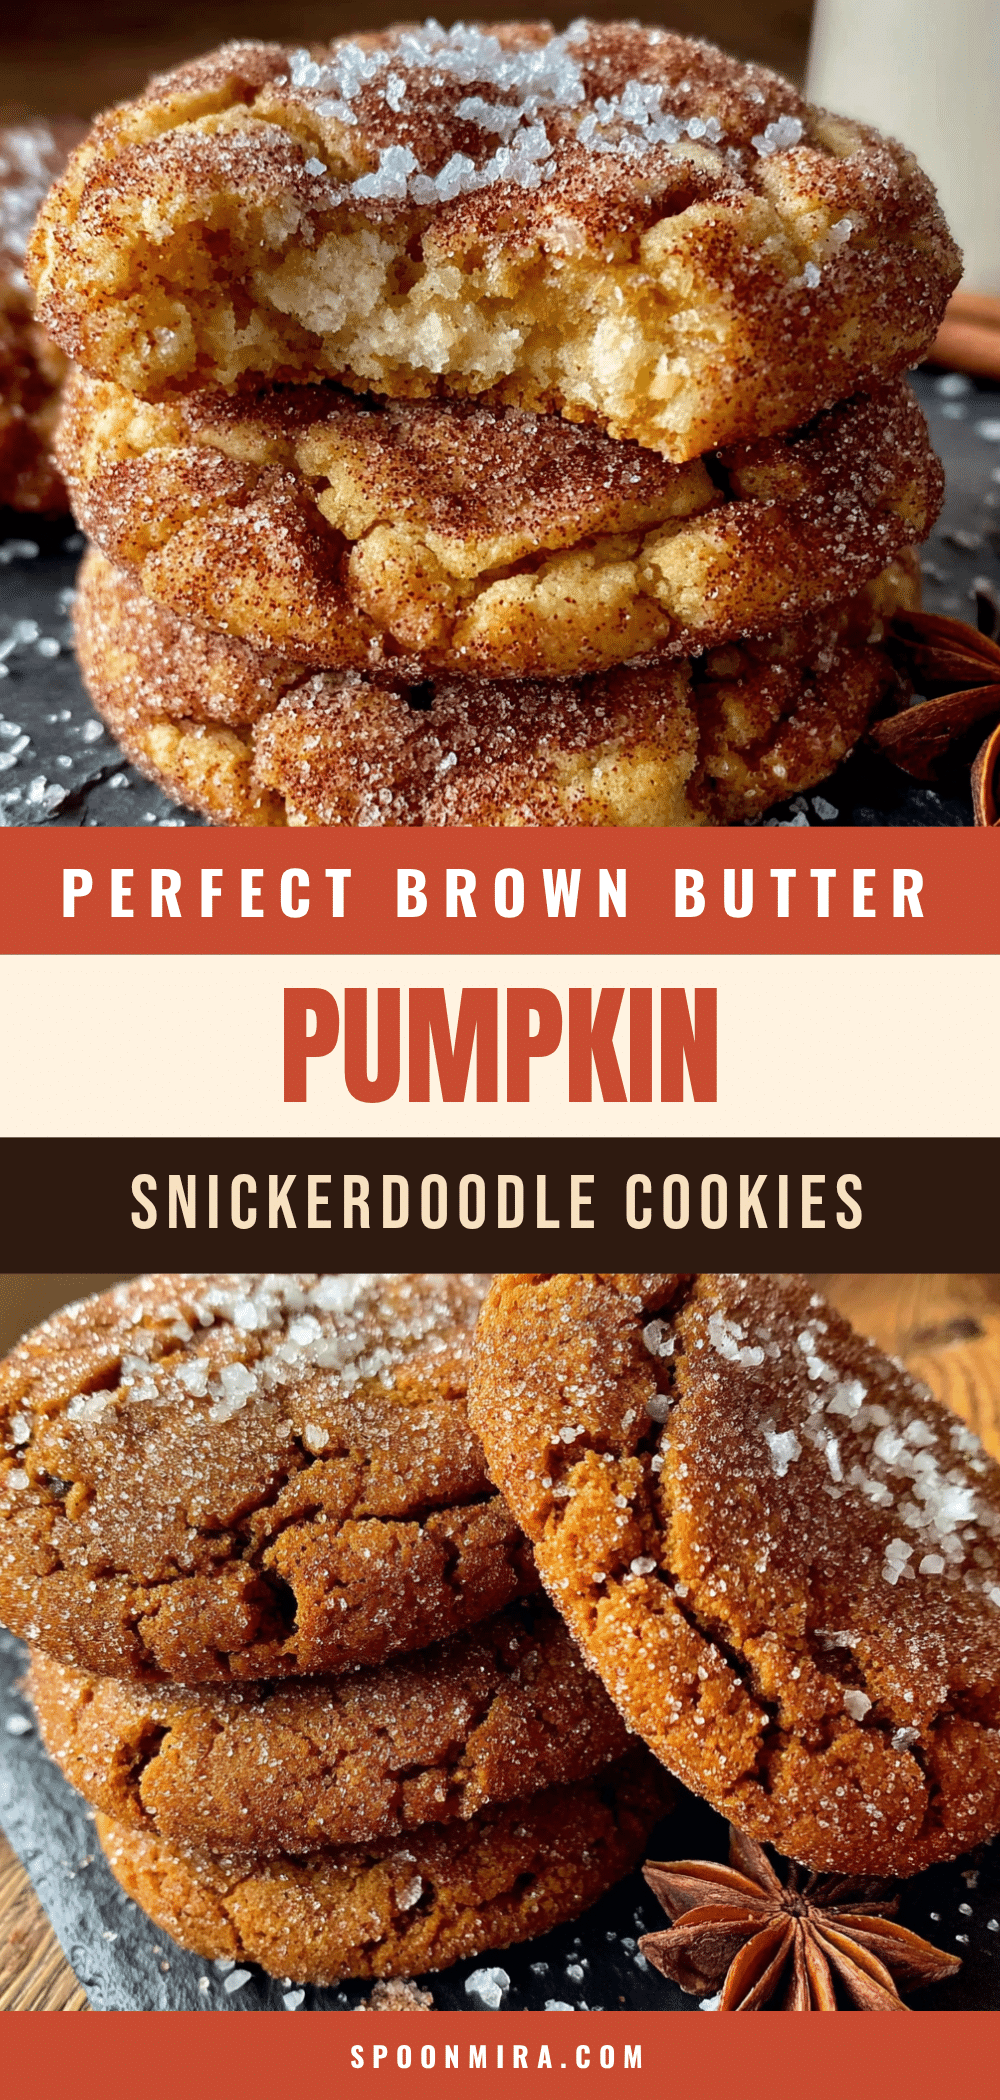
Perfect Brown Butter Pumpkin Snickerdoodle Cookies
These soft, chewy snickerdoodle cookies combine nutty brown butter with pumpkin and warm spices for the ultimate fall treat. Quick to make with simple ingredients, they’re perfect for cookie swaps, potlucks, and holiday gatherings.
- Prep Time: 15 minutes
- Cook Time: 12 minutes
- Total Time: 35 minutes
- Yield: 24 cookies 1x
- Category: Dessert
- Cuisine: American
Ingredients
- 1 cup unsalted butter (2 sticks)
- 1 cup granulated sugar
- 1/2 cup packed light brown sugar
- 1/2 cup pumpkin puree (100% pure, not pie filling)
- 1 large egg (room temperature)
- 2 teaspoons vanilla extract (pure)
- 2 1/2 cups all-purpose flour (spooned and leveled)
- 1 teaspoon baking soda
- 1/2 teaspoon cream of tartar
- 1 teaspoon pumpkin pie spice
- 1 teaspoon ground cinnamon
- 1/2 teaspoon salt
- 1/4 cup granulated sugar (for coating)
- 1 tablespoon ground cinnamon (for coating)
- Pinch of nutmeg (optional, for coating)
Instructions
- Brown the butter: Cut 1 cup butter into pieces and place in a medium saucepan over medium heat. Stir constantly with a rubber spatula. The butter will melt, foam, then turn a deep amber color with brown specks and a nutty aroma (about 5-7 minutes). Immediately pour into a heatproof bowl to stop cooking. Let cool for 10 minutes.
- Preheat oven to 350°F (175°C). Line two baking sheets with parchment paper.
- Mix wet ingredients: In a large bowl, whisk cooled brown butter with 1 cup granulated sugar and 1/2 cup brown sugar until smooth. Add 1/2 cup pumpkin puree, 1 large egg, and 2 teaspoons vanilla. Whisk until combined and glossy.
- Whisk dry ingredients: In a separate bowl, whisk together 2 1/2 cups flour, 1 teaspoon baking soda, 1/2 teaspoon cream of tartar, 1 teaspoon pumpkin pie spice, 1 teaspoon cinnamon, and 1/2 teaspoon salt until no lumps remain.
- Combine wet and dry: Pour dry ingredients into wet mixture. Fold gently with a rubber spatula until just combined (do not overmix). Dough will be soft and slightly sticky.
- Chill dough: Cover bowl and refrigerate for 20-30 minutes.
- Make coating: In a small bowl, mix 1/4 cup sugar, 1 tablespoon cinnamon, and a pinch of nutmeg.
- Scoop and roll: Using a 1.5-tablespoon cookie scoop, portion dough into balls. Roll each ball between palms until smooth, then coat completely in cinnamon sugar mixture. Place 2 inches apart on prepared baking sheets.
- Bake for 10-12 minutes. Edges should be set and slightly golden; centers will look soft and puffy.
- Cool: Let cookies rest on baking sheet for 5 minutes, then transfer to a wire rack to cool completely.
Notes
Watch the brown butter carefully—it can go from perfect to burnt in 15 seconds. Chill the dough for at least 20 minutes to prevent spreading. For gluten-free, use a 1:1 gluten-free flour blend. For vegan, use vegan butter and a flax egg. Cookies keep in an airtight container at room temperature for up to 5 days. Freeze baked cookies for up to 3 months, or freeze unbaked dough balls and bake directly from frozen (add 2-3 minutes).
Nutrition
- Serving Size: 1 cookie
- Calories: 185
- Sugar: 16
- Sodium: 120
- Fat: 9
- Saturated Fat: 5
- Carbohydrates: 26
- Fiber: 1
- Protein: 2
Keywords: brown butter, pumpkin, snickerdoodle, cookies, fall, Thanksgiving, cookie swap, easy, quick


