The office pumpkin-themed potluck was in 24 hours and I’d completely forgotten. Everyone else would be bringing elaborate, multi-day projects—I’d overheard Karen talking about her grandmother’s famous pumpkin roll, and Dave was apparently making a spiced pumpkin cheesecake with a homemade gingersnap crust. I had a can of pumpkin puree, some butter that was about to expire, and roughly forty-five minutes before I needed to leave for a dentist appointment. Honestly, I almost just grabbed a bag of chips from the vending machine on the way.
But then I spotted the cream cheese in the fridge, and this weird little idea started forming. I mean, maple and pumpkin together? That’s basically fall in a bite. I threw together a quick cookie dough—no chilling time, because who has that?—and whipped up a simple maple cream cheese icing while they cooled. I didn’t even have a proper piping bag, so I used a zip-top bag with the corner snipped off. Let me tell you, it looked a little rough.
I walked into the potluck the next day feeling like I was bringing the culinary equivalent of a participation trophy. My cookies were sitting on a paper plate next to Karen’s perfectly spiraled pumpkin roll, and I wanted to hide them under the table. But you know that feeling when something unexpected happens? By the end of the lunch hour, my plate was completely empty. People kept coming back for “just one more,” and I overheard someone say they were the best thing there. I actually had to give a coworker the recipe on a napkin. These Quick Pumpkin Cookies with Maple Cream Cheese Icing became my accidental office legend, and honestly, I still can’t believe something so simple stole the show.
Why You’ll Love This Recipe
Let’s talk about why these cookies are about to become your new fall obsession. I’ve tested this recipe more times than I can count, tweaking the spice blend and the icing consistency until it was just right. Here’s what makes them special:
- Quick & Easy : From start to finish, these cookies are on your plate in about 25 minutes. No chilling the dough, no complicated steps—just mix, scoop, and bake. Perfect for those weeknights when you need a little something sweet but don’t want to spend hours in the kitchen.
- Simple Ingredients : You probably already have most of these in your pantry. Canned pumpkin, basic baking staples, and cream cheese. No fancy trips to a specialty store required.
- Perfect for Fall Gatherings : Whether it’s a potluck, a Thanksgiving dessert table, or just a cozy Tuesday night, these cookies fit right in. They’re festive without being fussy.
- Crowd-Pleaser : I’ve served these to kids, adults, and even my picky neighbor who “doesn’t really like pumpkin.” The plate always comes back empty.
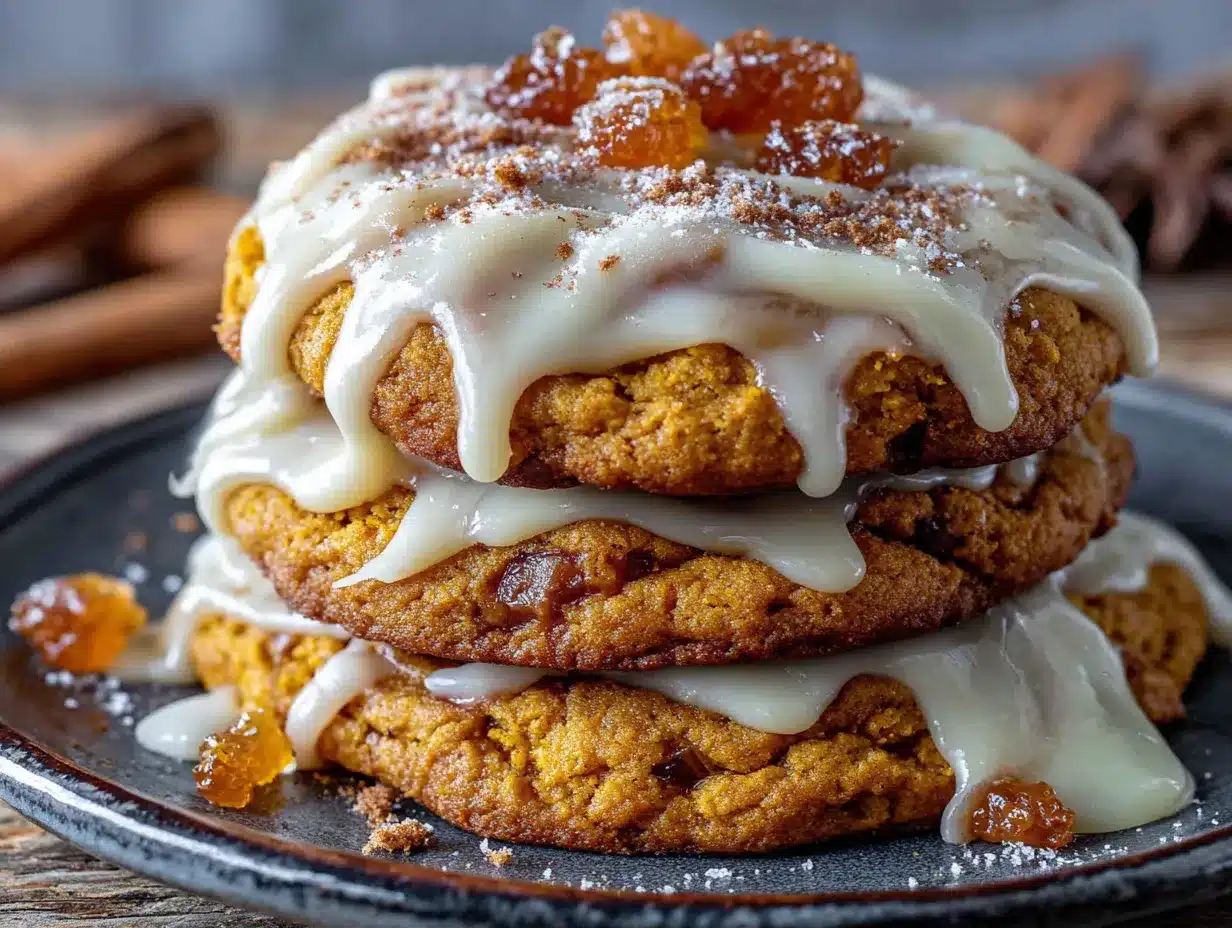
- Unbelievably Delicious : The cookies are soft and cakey with that warm pumpkin spice flavor, and the maple cream cheese icing is honestly the star. It’s tangy, sweet, and has that rich maple flavor that just screams autumn.
What makes this recipe different from all the other pumpkin cookie recipes out there? It’s the balance. A lot of pumpkin cookies are either too dense or too dry. I’ve worked on getting the texture just right—soft, almost like a little pumpkin cake, but sturdy enough to hold a generous swirl of icing. And that icing? It’s not too sweet, not too tangy. It’s just right. This isn’t just another pumpkin cookie recipe. It’s the one you’ll come back to year after year.
What Ingredients You Will Need
This recipe uses simple, wholesome ingredients to deliver that cozy fall flavor without any fuss. Most of these are pantry staples, so you can probably whip up a batch right now.
For the Pumpkin Cookies
- 1/2 cup (1 stick) unsalted butter, softened to room temperature (I like using Land O’Lakes for consistent results)
- 1 cup granulated sugar (adds sweetness and helps create that soft texture)
- 1/2 cup canned pumpkin puree (not pumpkin pie filling! Make sure it’s 100% pure pumpkin)
- 1 large egg, room temperature
- 1 teaspoon vanilla extract
- 1 1/2 cups all-purpose flour (spooned and leveled for accuracy)
- 1 teaspoon baking powder
- 1/2 teaspoon baking soda
- 1/2 teaspoon salt
- 1 1/2 teaspoons pumpkin pie spice (or make your own with cinnamon, nutmeg, ginger, and cloves)
- 1/2 teaspoon ground cinnamon (for extra warmth)
For the Maple Cream Cheese Icing
- 4 ounces cream cheese, softened (full-fat works best for a rich, creamy texture)
- 1/4 cup (1/2 stick) unsalted butter, softened
- 1 1/2 cups powdered sugar, sifted (to avoid lumps)
- 3 tablespoons pure maple syrup (please don’t use pancake syrup—the real stuff makes all the difference)
- 1/2 teaspoon vanilla extract
- Pinch of salt (to balance the sweetness)
Ingredient Tips: For the pumpkin, I recommend Libby’s canned pumpkin—it’s consistently thick and not too watery. If you’re using a different brand, you might need to blot the pumpkin with a paper towel to remove excess moisture. For the maple syrup, look for Grade A dark amber for the strongest maple flavor. And yes, you can use dairy-free cream cheese and butter if needed, but the texture will be slightly different.
Equipment Needed
You don’t need a lot of fancy equipment for these cookies, which is part of their charm. Here’s what you’ll need:
- Mixing bowls: One large bowl for the wet ingredients, one medium for the dry. I use my trusty Pyrex set.
- Electric hand mixer or stand mixer: You can cream the butter and sugar by hand, but a mixer makes it much easier and faster. I’ve done it both ways, and the mixer gives a fluffier result.
- Baking sheets: Two standard baking sheets work well. If you only have one, just bake in batches.
- Parchment paper or silicone baking mats: These prevent sticking and make cleanup a breeze. I prefer parchment paper for these cookies.
- Cookie scoop: A 1.5-tablespoon scoop gives you perfectly uniform cookies. If you don’t have one, just use a spoon and try to make them roughly the same size.
- Wire cooling rack: Essential for cooling the cookies properly before icing. A hot cookie will melt that beautiful cream cheese icing.
- Piping bag or zip-top bag: For drizzling the icing. A zip-top bag with a tiny corner snipped off works perfectly and costs nothing.
Preparation Method
Alright, let’s make some cookies! I’ve broken this down into clear steps so you can follow along easily.
- Preheat your oven to 350°F (175°C). Line your baking sheets with parchment paper or silicone mats. This is a step you don’t want to skip—it makes all the difference for even baking and easy cleanup.
- Cream the butter and sugar. In a large mixing bowl, beat the softened butter and granulated sugar together until light and fluffy, about 2-3 minutes. You want it to look pale and airy. Scrape down the sides of the bowl once or twice. If you’re using a hand mixer, medium speed is perfect.
- Add the wet ingredients. Beat in the pumpkin puree, egg, and vanilla extract until everything is well combined. Don’t worry if the mixture looks a little curdled at this point—that’s normal. The pumpkin will make it look a bit separated, but it’ll come together once you add the flour.
- Mix the dry ingredients. In a separate medium bowl, whisk together the all-purpose flour, baking powder, baking soda, salt, pumpkin pie spice, and cinnamon. Whisking ensures everything is evenly distributed. I’ve made the mistake of skipping this step before, and you end up with one cookie that’s super spicy and another that’s bland.
- Combine wet and dry. Gradually add the dry ingredients to the wet mixture, mixing on low speed until just combined. Do not overmix! Stop as soon as you don’t see any more streaks of flour. Overmixing will make the cookies tough instead of soft and tender.
- Scoop the dough. Using your cookie scoop or a spoon, drop rounded tablespoons of dough onto the prepared baking sheets, spacing them about 2 inches apart. They will spread a little, but not too much. I usually fit about 12 cookies per standard baking sheet.
- Bake. Bake for 10-12 minutes, or until the edges are set and the tops look slightly dry. The centers will still look a little soft—that’s okay. They’ll continue to set as they cool. For softer cookies, bake for 10 minutes. For a slightly firmer cookie, go for 12.
- Cool completely. Let the cookies cool on the baking sheet for 5 minutes, then transfer them to a wire cooling rack to cool completely. This is crucial. If you try to ice them while they’re still warm, the icing will melt into a puddle. Trust me, I learned this the hard way.
- Make the icing. While the cookies are cooling, make the maple cream cheese icing. In a medium bowl, beat the softened cream cheese and butter together until smooth and creamy, about 2 minutes. Gradually add the sifted powdered sugar, then beat in the maple syrup, vanilla extract, and a pinch of salt. Mix until everything is smooth and fluffy. If the icing is too thick, add a teaspoon of milk. If it’s too thin, add a little more powdered sugar.
- Ice the cookies. Once the cookies are completely cool, transfer the icing to a piping bag or a zip-top bag with a tiny corner snipped off. Drizzle the icing back and forth over each cookie in a zigzag pattern. You can also just spread it with a knife if you prefer a more rustic look.
- Let the icing set. Place the iced cookies on a plate or baking sheet and let them sit at room temperature for about 15-20 minutes so the icing can set slightly. Or, if you’re impatient like me, just eat one right away. No judgment here.
Cooking Tips & Techniques
After making these cookies more times than I can count, I’ve picked up a few tricks that make a real difference. Let me share them so you don’t have to learn the hard way.
Don’t overmix the dough. This is probably the most important tip. When you add the flour mixture, mix just until it disappears. Overmixing develops the gluten, which will make your cookies tough and dense instead of soft and cakey. I’ve ruined a batch by getting distracted and overmixing, and they came out almost rubbery. Not good.
Blot your pumpkin. If your canned pumpkin looks a little watery, blot it with a paper towel before adding it to the batter. Too much moisture will make your cookies spread too much and turn out flat. This is especially important if you’re using a generic store brand. Libby’s is usually thick enough, but it’s always worth checking.
Room temperature ingredients matter. I know it’s tempting to use cold butter and a cold egg straight from the fridge, but taking the time to let them come to room temperature makes a huge difference. Room temperature butter creams better with the sugar, and room temperature egg incorporates more smoothly into the batter. Your cookies will be lighter and more evenly textured.
Use a cookie scoop for uniform sizes. This isn’t just about aesthetics. When all your cookies are the same size, they bake evenly. Some won’t be overdone while others are underdone. A simple 1.5-tablespoon scoop is one of the best kitchen tools I own.
Watch the bake time. Every oven is different, so start checking your cookies at the 10-minute mark. You want the edges to be set and the tops to look dry, but the centers should still look a little soft. They’ll continue to bake on the hot baking sheet for a few minutes after you take them out. If you wait until the centers look fully baked, they’ll be overdone and dry.
Let the icing set before stacking. If you’re planning to store these cookies or take them somewhere, make sure the icing has fully set before you stack them. Otherwise, you’ll end up with a sticky mess. Give them at least 30 minutes at room temperature, or pop them in the fridge for 15 minutes to speed things up.
Variations & Adaptations
One of the best things about this recipe is how easy it is to adapt. Here are some variations I’ve tried and loved.
Gluten-Free Version
Swap the all-purpose flour with a 1:1 gluten-free baking flour blend. I’ve used Bob’s Red Mill with great results. The texture will be slightly more delicate, but they’re still delicious. Just be careful not to overmix the dough, as gluten-free flours can be a bit more finicky.
Dairy-Free Version
Use dairy-free butter and dairy-free cream cheese. I recommend Miyoko’s or Violife for the best texture and flavor. The cookies might be a tiny bit less tender, and the icing won’t be quite as creamy, but it’s still a fantastic option for those with dairy sensitivities.
Spice It Up
If you love a warm, spicy cookie, add an extra 1/2 teaspoon of ginger and a pinch of cloves to the dry ingredients. You can also add a pinch of cardamom for a more complex flavor. I made a batch with extra ginger once, and it was perfect for a chilly November evening.
Add-Ins
Fold in 1/2 cup of chopped pecans, walnuts, or white chocolate chips before scooping the dough. The nuts add a lovely crunch, and the white chocolate complements the pumpkin and maple flavors beautifully. I’ve also added dried cranberries for a tart pop of flavor.
Pumpkin Spice Latte Twist
Add 1 tablespoon of instant espresso powder to the dry ingredients for a subtle coffee flavor that pairs perfectly with the pumpkin and maple. It gives the cookies a little something extra that makes them feel even more special.
Serving & Storage Suggestions
These cookies are best served at room temperature, with the icing slightly set but still soft. They’re perfect on their own, but they also pair beautifully with a hot cup of coffee, a chai latte, or a glass of cold milk. For a dessert table, arrange them on a beautiful platter and watch them disappear.
Storing: Store the cookies in an airtight container in the refrigerator for up to 5 days. The icing contains cream cheese, so it needs to be kept cold. Let them sit at room temperature for about 10 minutes before serving to take the chill off.
Freezing: You can freeze the baked, un-iced cookies for up to 3 months. Place them in a single layer in a freezer-safe container with parchment paper between layers. When you’re ready to enjoy them, thaw them in the refrigerator overnight, then make the fresh icing and drizzle it over the top. I do this all the time when I want to get ahead for the holidays.
Reheating: If you want a warm cookie, pop one in the microwave for about 10 seconds. The icing will soften, and the cookie will be all warm and cozy. Just don’t overdo it, or the icing will melt completely.
One thing I love about these cookies is that the flavors actually develop over time. They’re delicious on day one, but on day two, the pumpkin and spice flavors have melded together even more. If you can resist eating them all right away, they might be even better the next day.
Nutritional Information & Benefits
Here’s an approximate nutritional breakdown per cookie (based on 24 cookies):
- Calories: 145
- Total Fat: 7g
- Saturated Fat: 4g
- Cholesterol: 25mg
- Sodium: 105mg
- Total Carbohydrates: 20g
- Dietary Fiber: 1g
- Sugars: 14g
- Protein: 2g
Health Benefits: Pumpkin is packed with vitamin A, which is great for your eyes and immune system. It’s also a good source of fiber. The cream cheese adds a bit of calcium, and the maple syrup contains antioxidants and minerals like zinc and manganese. Of course, these are still cookies, so enjoy them in moderation. But honestly, a little pumpkin and maple make them feel a tiny bit virtuous, right?
Dietary Considerations: This recipe contains gluten, dairy, and eggs. For gluten-free and dairy-free options, check out the variations section above. The recipe can also be made with a flax egg for a vegan version, though the texture will be slightly different.
Conclusion
These Quick Pumpkin Cookies with Maple Cream Cheese Icing have become my go-to fall recipe for a reason. They’re fast, simple, and absolutely delicious. Whether you need a last-minute dessert for a potluck, a sweet treat for a cozy night in, or just something to make your kitchen smell amazing, these cookies deliver every time.
I love how forgiving this recipe is. You can tweak the spices, add some nuts, or change up the icing, and it still works. It’s the kind of recipe that feels like a warm hug in cookie form. And honestly, who doesn’t need that sometimes?
I’d love to hear how yours turn out. Did you add any fun variations? Did they disappear as fast as mine always do? Drop a comment below and let me know. And if you’re looking for another quick fall dessert, you might want to try my crispy garlic chicken for a savory option, or my easy apple crisp if you’re in the mood for something fruity. Happy baking, friends!
Frequently Asked Questions
Can I use fresh pumpkin instead of canned?
Yes, you can! Just make sure to roast and puree the pumpkin first, then drain any excess moisture using a cheesecloth or paper towels. Fresh pumpkin can be more watery than canned, so blotting is key to avoid flat cookies.
Why did my cookies turn out flat?
Flat cookies usually mean the butter was too soft, the dough was overmixed, or the pumpkin had too much moisture. Make sure your butter is softened but not melted, mix the dough just until combined, and blot your pumpkin if it looks watery.
Can I make the dough ahead of time?
Absolutely. You can refrigerate the dough for up to 2 days before baking. Let it sit at room temperature for about 10 minutes to soften slightly before scooping and baking. You may need to add a minute or two to the bake time if the dough is very cold.
How do I get the icing to look pretty without a piping bag?
Just use a zip-top bag! Spoon the icing into a corner of the bag, snip off a tiny bit of the tip, and drizzle away. You can also use a spoon to dollop the icing and then spread it gently with the back of the spoon for a more rustic look.
Can I freeze the iced cookies?
I don’t recommend freezing the cookies once they’re iced, as the cream cheese icing can become watery when thawed. Instead, freeze the un-iced cookies and make the fresh icing when you’re ready to serve them. It takes just a few minutes and tastes so much better.
Pin This Recipe!
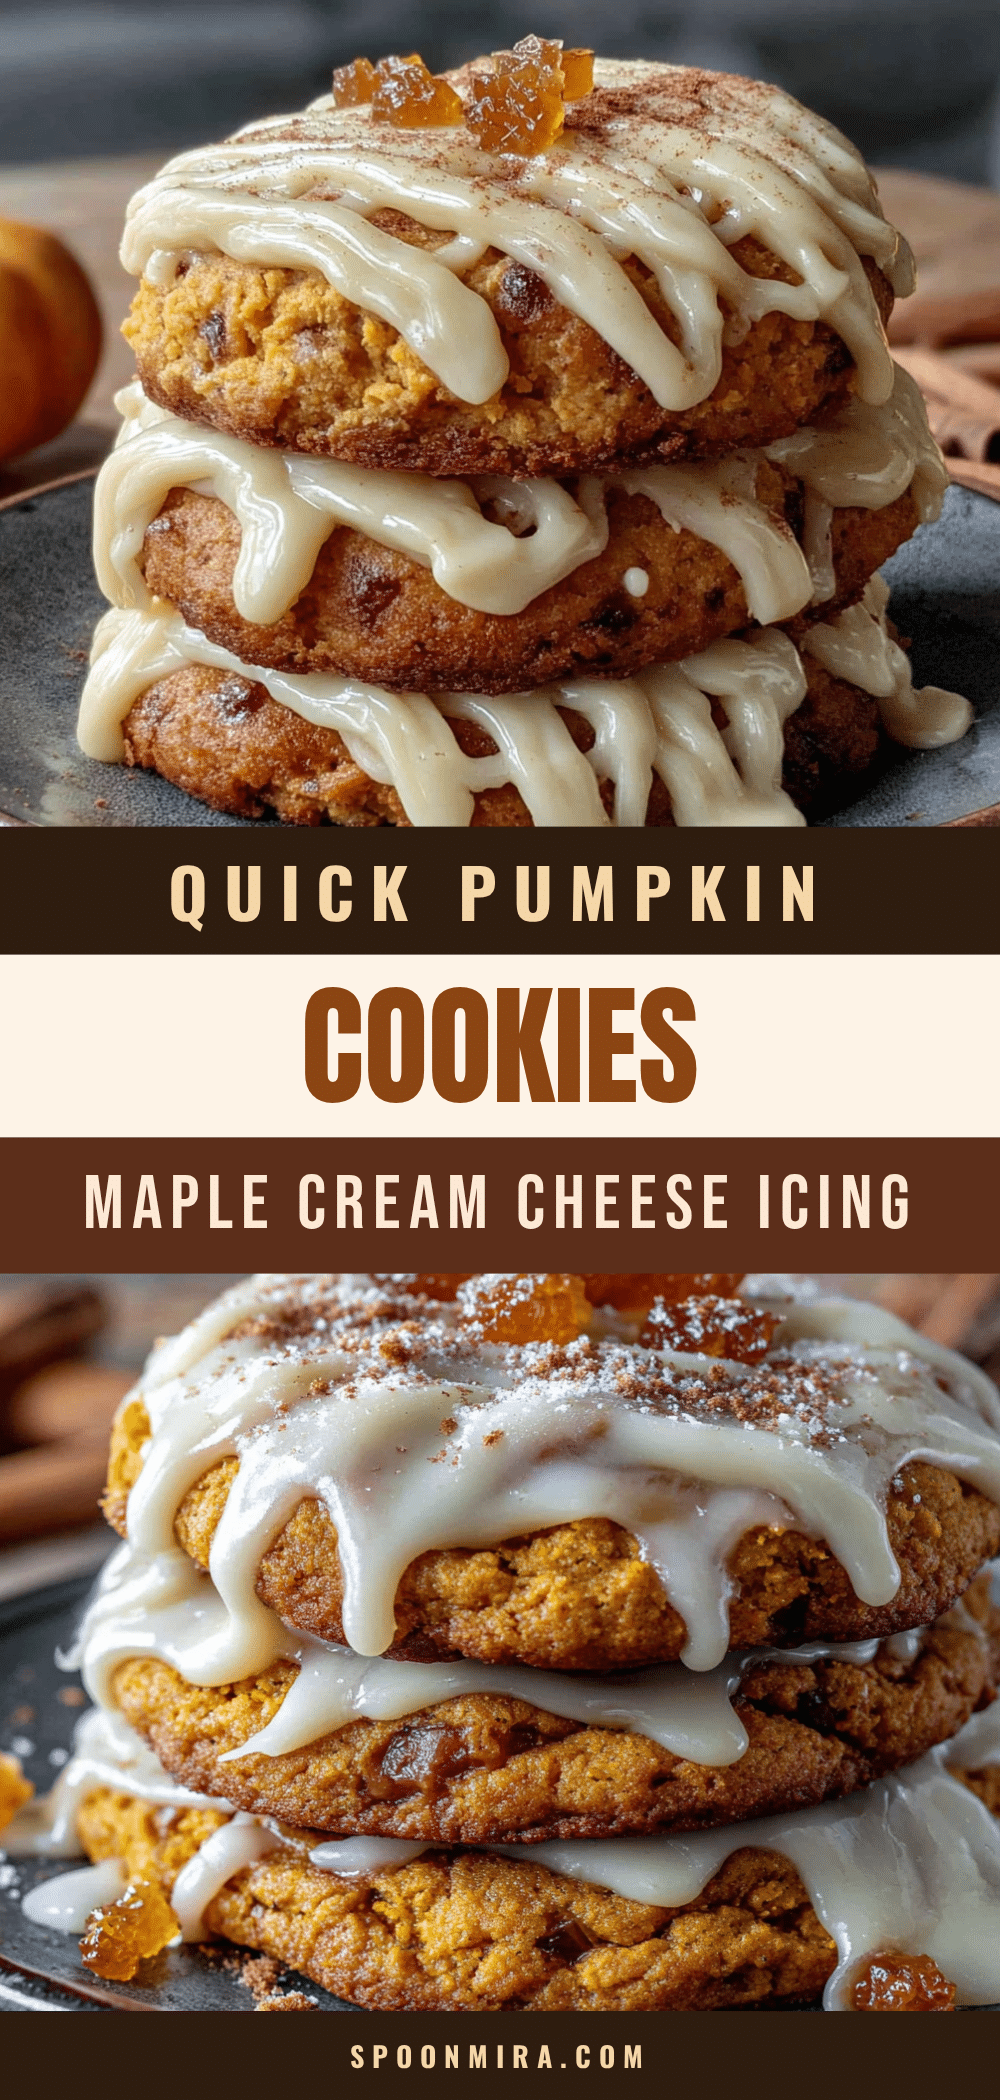
Quick Pumpkin Cookies with Maple Cream Cheese Icing
Soft, cakey pumpkin cookies topped with a tangy maple cream cheese icing. Ready in about 25 minutes with no chilling required, these are the perfect last-minute fall dessert that always steals the show.
- Prep Time: 15 minutes
- Cook Time: 10-12 minutes
- Total Time: 25 minutes
- Yield: 24 cookies 1x
- Category: Dessert
- Cuisine: American
Ingredients
- 1/2 cup (1 stick) unsalted butter, softened to room temperature
- 1 cup granulated sugar
- 1/2 cup canned pumpkin puree (not pumpkin pie filling)
- 1 large egg, room temperature
- 1 teaspoon vanilla extract
- 1 1/2 cups all-purpose flour, spooned and leveled
- 1 teaspoon baking powder
- 1/2 teaspoon baking soda
- 1/2 teaspoon salt
- 1 1/2 teaspoons pumpkin pie spice
- 1/2 teaspoon ground cinnamon
- 4 ounces cream cheese, softened
- 1/4 cup (1/2 stick) unsalted butter, softened
- 1 1/2 cups powdered sugar, sifted
- 3 tablespoons pure maple syrup
- 1/2 teaspoon vanilla extract
- Pinch of salt
Instructions
- Preheat your oven to 350°F (175°C). Line your baking sheets with parchment paper or silicone mats.
- In a large mixing bowl, beat the softened butter and granulated sugar together until light and fluffy, about 2-3 minutes. Scrape down the sides of the bowl once or twice.
- Beat in the pumpkin puree, egg, and vanilla extract until well combined.
- In a separate medium bowl, whisk together the all-purpose flour, baking powder, baking soda, salt, pumpkin pie spice, and cinnamon.
- Gradually add the dry ingredients to the wet mixture, mixing on low speed until just combined. Do not overmix.
- Using a cookie scoop or spoon, drop rounded tablespoons of dough onto the prepared baking sheets, spacing them about 2 inches apart.
- Bake for 10-12 minutes, or until the edges are set and the tops look slightly dry. The centers will still look a little soft.
- Let the cookies cool on the baking sheet for 5 minutes, then transfer them to a wire cooling rack to cool completely.
- While the cookies are cooling, make the icing. In a medium bowl, beat the softened cream cheese and butter together until smooth and creamy, about 2 minutes.
- Gradually add the sifted powdered sugar, then beat in the maple syrup, vanilla extract, and a pinch of salt. Mix until smooth and fluffy.
- Once the cookies are completely cool, transfer the icing to a piping bag or a zip-top bag with a tiny corner snipped off. Drizzle the icing back and forth over each cookie in a zigzag pattern.
- Let the iced cookies sit at room temperature for about 15-20 minutes so the icing can set slightly.
Notes
Don’t overmix the dough to keep cookies soft. Blot pumpkin if watery to prevent flat cookies. Room temperature ingredients are important for best texture. Let icing set before stacking cookies. Store in refrigerator for up to 5 days. Freeze un-iced cookies for up to 3 months.
Nutrition
- Serving Size: 1 cookie
- Calories: 145
- Sugar: 14
- Sodium: 105
- Fat: 7
- Saturated Fat: 4
- Carbohydrates: 20
- Fiber: 1
- Protein: 2
Keywords: pumpkin cookies, maple cream cheese icing, fall cookies, quick dessert, potluck dessert, pumpkin spice, easy cookies


