“Why can’t you just swirl the peanut butter right into the chocolate layer before it sets?” My sister-in-law, Jen, asked me this on a Tuesday afternoon while I was trying to show her how to make a layered dessert bar for our family’s Halloween potluck. I started to explain why that wouldn’t work—something about the layers needing to set separately, about how the peanut butter would just sink and disappear into the chocolate. Then I stopped. Honestly, I had no real reason why it wouldn’t work. I was just repeating what I’d always done. So, with a shrug and a “fine, let’s try it your way,” I poured the chocolate over the peanut butter base and handed her a toothpick. She dragged it through the top, creating these delicate, spidery lines. I was fully prepared to say “I told you so.” Instead, I watched the most beautiful spiderweb pattern emerge, perfectly suspended between the two layers. I was wrong. Completely, delightfully wrong. That moment of being the student instead of the teacher gave me my new favorite dessert bar. And honestly, maybe you’ve been there—stuck in your cooking ways, only to have a beginner’s suggestion completely change the game. These Crowd-Pleasing Spiderweb Chocolate Peanut Butter Bars are the delicious result of that little kitchen rebellion.
Why You’ll Love This Recipe
Let me tell you, after years of testing and tweaking, this version of a chocolate peanut butter bar is the one I bring to every single gathering. It’s not just another dessert; it’s a showstopper that looks way harder than it actually is. The spiderweb design on top makes people think you spent hours piping and detailing, when really, it’s a five-second swirl with a toothpick. That’s the kind of magic we all need.
- Quick & Easy: This recipe comes together in about 20 minutes of active time. The hardest part is waiting for the bars to chill in the fridge.
- Simple Ingredients: You probably have 90% of these in your pantry right now. No hunting for obscure ingredients at three different stores.
- Perfect for Hosting: These bars are my go-to for Halloween parties, fall potlucks, and even Thanksgiving dessert tables. They feed a crowd and slice beautifully.
- Crowd-Pleaser: I have never, and I mean never, had a leftover bar. The combination of a buttery shortbread crust, creamy peanut butter filling, and rich chocolate topping is universally adored.
- Unbelievably Delicious: The texture is what gets everyone. That crisp crust gives way to a soft, almost fudge-like peanut butter center, all topped with a snappy chocolate shell. It’s next-level comfort food.
What makes this recipe different from the rest is the technique. Most recipes have you drizzle the chocolate on top of a set peanut butter layer. By swirling the peanut butter into the chocolate while it’s still wet, you get that integrated flavor in every single bite. This isn’t just another version of a layered bar—it’s my best version. It’s the kind of dessert that makes you close your eyes after the first bite, the kind that steals the table at a dinner party without you breaking a sweat.
What Ingredients You Will Need
This recipe uses simple, wholesome ingredients to deliver that bold, nostalgic flavor without any fuss. Most of these are pantry staples, making it perfect for a last-minute dessert craving or when you need to whip something up for guests.
- For the Crust:
- 1 ½ cups (190g) all-purpose flour
- ½ cup (100g) granulated sugar
- ¾ cup (170g) unsalted butter, cold and cut into small cubes (I use Kerrygold for its rich flavor)
- ¼ teaspoon salt
- For the Peanut Butter Filling:
- 1 cup (250g) creamy peanut butter (I recommend Skippy or Jif for a stable texture; natural peanut butter can separate)
- ½ cup (115g) unsalted butter, softened
- 2 cups (240g) powdered sugar
- 1 teaspoon vanilla extract
- Pinch of salt
- For the Chocolate Topping:
- 1 ½ cups (260g) semi-sweet chocolate chips (I prefer Ghirardelli for a smooth melt)
- 3 tablespoons (45g) unsalted butter
- 2 tablespoons (30ml) creamy peanut butter, slightly warmed (for the spiderweb swirl)
Ingredient Selection Tips: For the crust, make sure your butter is truly cold. It’s the key to a flaky, not greasy, base. When it comes to the peanut butter in the filling, stick with the processed kind for this one. The stabilizers help the filling hold its shape when you cut the bars. If you use natural peanut butter, you risk the bars being too soft and oily. For the chocolate, don’t use chocolate chips that have a waxy coating—those are meant for baking cookies, not for a smooth ganache-like top. A good quality semi-sweet chip or a chopped chocolate bar will give you a beautiful shine and snap.
Substitution Guidance: Need these to be gluten-free? Swap the all-purpose flour for a 1-to-1 gluten-free baking blend. For a dairy-free version, use a plant-based butter substitute in the crust and topping, and ensure your chocolate chips are dairy-free. You can also swap the peanut butter for sunflower seed butter if you have a nut allergy, though the flavor will change slightly.
Equipment Needed
You don’t need a professional pastry kitchen to pull these off, which is part of their charm. Here’s what you’ll need:
- 9×13-inch baking pan: This is the standard size for feeding a crowd. If you only have an 8×8 pan, the bars will be much thicker and you’ll need to increase the baking time for the crust by about 5-7 minutes.
- Parchment paper: A lifesaver. Line the pan with two overlapping sheets that hang over the edges. This creates “handles” that let you lift the entire block of bars out cleanly for easy slicing.
- Food processor or pastry cutter: For the crust. A food processor makes it a 30-second job. If you don’t have one, a pastry cutter or even your fingertips work fine—just work quickly so the butter stays cold.
- Electric hand mixer or stand mixer: For beating the peanut butter filling until it’s light and fluffy. A strong arm and a wooden spoon can work, but it’s a workout.
- Small microwave-safe bowls: For melting the chocolate. I prefer glass bowls over plastic.
- Toothpick or skewer: The magic tool for creating the spiderweb pattern. A skewer gives you a slightly thicker line than a toothpick.
Budget-Friendly Tip: Don’t have a food processor? You can make the crust by rubbing the cold butter into the flour and sugar with your fingers until it looks like coarse meal. It takes a little longer, but it works perfectly.
Preparation Method
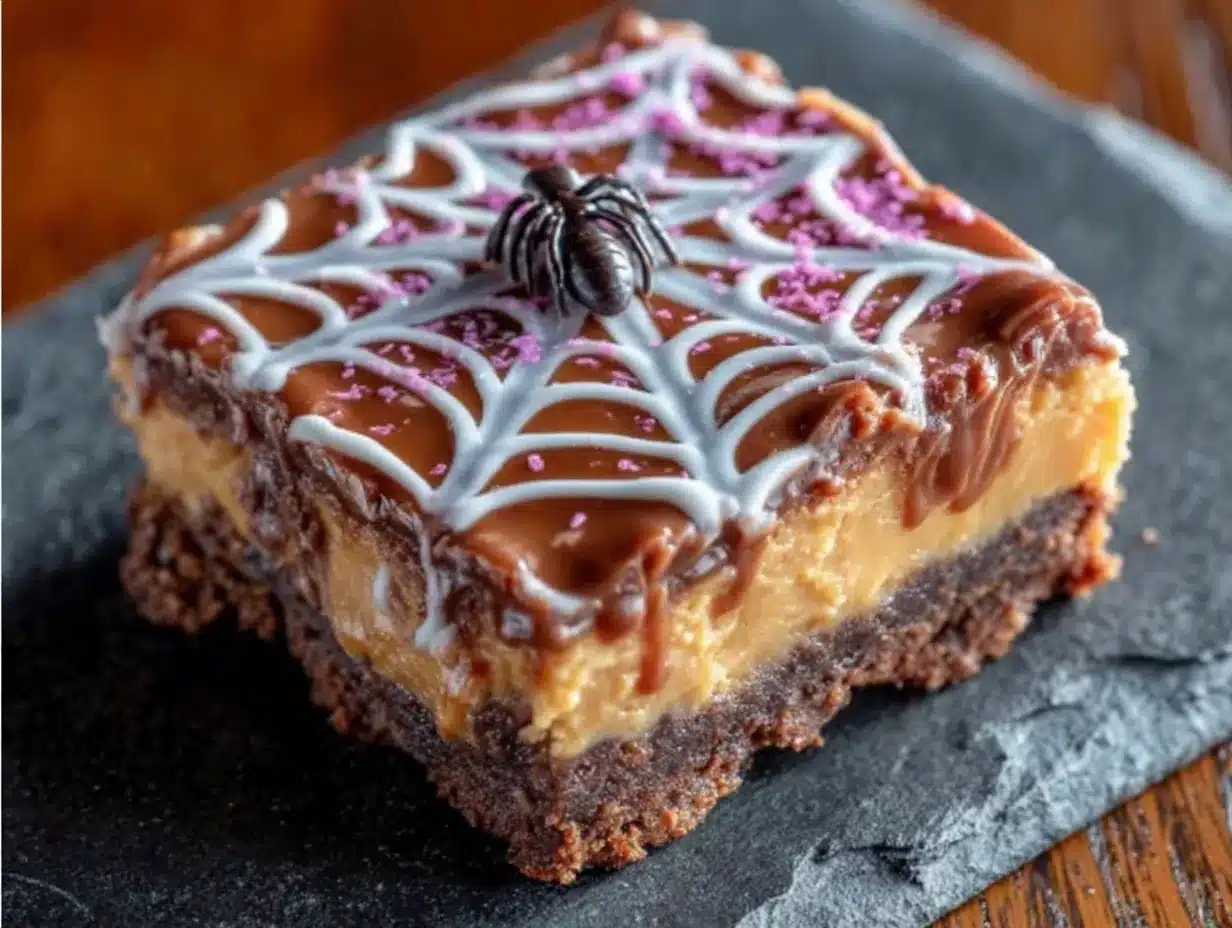
Let’s get to the fun part. Remember, this recipe is all about those layers and that beautiful web. Take your time with each step, and you’ll have a dessert that looks like you spent hours on it.
- Prep the Pan and Oven: Preheat your oven to 350°F (175°C). Line your 9×13-inch baking pan with parchment paper, leaving an overhang on two opposite sides. This is your lifting device later.
- Make the Crust: In a food processor, pulse together the flour, sugar, and salt. Add the cold butter cubes and pulse until the mixture looks like coarse sand with a few pea-sized butter pieces remaining. Don’t over-process; you want some texture. Dump the mixture into your prepared pan and press it firmly and evenly into the bottom. Use the bottom of a flat measuring cup to get it really compact. Bake for 18-20 minutes, until the edges are just starting to turn golden. The center should still be pale. Let it cool completely on a wire rack. This is important—a warm crust will melt your filling.
- Make the Peanut Butter Filling: In a large bowl, beat the softened butter and peanut butter together with an electric mixer until smooth and combined, about 1 minute. Add the powdered sugar, vanilla, and salt. Start mixing on low speed so the sugar doesn’t fly everywhere, then increase to medium-high and beat for 2-3 minutes until the mixture is light, fluffy, and holds its shape. It should look like a thick frosting. Spread this filling evenly over the cooled crust. Use an offset spatula for the smoothest finish. Place the pan in the refrigerator for 15 minutes to firm up the filling.
- Make the Chocolate Topping: In a small microwave-safe bowl, combine the chocolate chips and 3 tablespoons of butter. Microwave in 30-second bursts, stirring well after each, until the mixture is completely smooth and glossy. Be careful not to overheat, or the chocolate will seize. Let it cool for about 2-3 minutes—it should still be liquid but not hot to the touch.
- Pour and Swirl: Remove the pan from the fridge. Pour the melted chocolate over the peanut butter filling and tilt the pan gently to spread it into an even layer. Now, for the star of the show. Warm the 2 tablespoons of peanut butter in the microwave for about 10 seconds until it’s thin and drizzly. Drop small spoonfuls of this warm peanut butter across the surface of the chocolate. Use a toothpick or skewer to drag through the peanut butter dollops in a continuous, swirling motion. You can create a classic spiderweb by starting in the center and dragging the toothpick outward in concentric circles. Don’t over-swirl, or the pattern will muddy. A few confident strokes are all you need.
- Chill to Set: Place the pan back in the refrigerator for at least 2 hours, or until the chocolate is completely firm to the touch. For cleanest slices, chill for 3-4 hours or even overnight.
- Slice and Serve: Once fully set, use the parchment paper handles to lift the entire block of bars out of the pan. Place it on a cutting board. Use a large, sharp chef’s knife to cut into squares. For the cleanest cuts, wipe the knife clean between each slice. I like to cut them into 24 small squares for a party, or 12 larger ones if they’re the main dessert.
Sensory Cue: When you press the crust into the pan, it should feel like wet sand holding together. When you bite into a finished bar, you should hear a clean snap from the chocolate, followed by the soft give of the peanut butter filling.
Cooking Tips & Techniques
I’ve made these bars about a dozen times, and I’ve learned a few things the hard way. Let me save you from my mistakes.
The Cold Butter Rule: I once tried to rush the crust by using room-temperature butter. The result was a greasy, tough base that crumbled everywhere. Cold butter is non-negotiable. It creates steam pockets in the oven, giving you that tender, shortbread-like texture. If your kitchen is warm, pop your butter cubes in the freezer for 10 minutes before you start.
The Perfect Swirl: My first spiderweb was a muddy mess. I swirled too much, trying to be artistic. The key is to use warm, runny peanut butter and to stop after three or four passes. You want distinct lines, not a blended brown blob. Think of it like drawing—a few confident lines are better than a hundred timid ones.
Multitasking Strategy: While the crust is baking, you can make the peanut butter filling. While the filling chills in the fridge, you can melt your chocolate. This way, everything flows together without you standing around waiting. I also recommend lining your pan with parchment before you even turn on the oven—it’s a small step that saves a lot of frustration later.
Cutting Clean Lines: This was the biggest lesson. If you slice into the bars while they’re too cold, the chocolate can shatter. If they’re too warm, the filling squishes out. The sweet spot is after 2-3 hours in the fridge. Let the block sit on the counter for 5 minutes before slicing. Use a long, sharp knife and wipe it clean with a damp paper towel between each cut. It takes an extra minute, but you get those perfect, Instagram-worthy squares.
Variations & Adaptations
One of the best things about this base recipe is how easily it adapts to different tastes and occasions. Here are a few ways I’ve changed it up.
- Halloween Spiderweb: This is the classic. Use orange and black sprinkles on top of the chocolate before it sets, or add a few candy eyeballs to the web for a spooky touch. It’s a huge hit at costume parties.
- Peanut Butter Cup Explosion: After you spread the peanut butter filling, press a layer of mini Reese’s cups into it before adding the chocolate. You get pockets of extra peanut butter and chocolate in every bite. Dangerous, but delicious.
- Gluten-Free Adaptation: I’ve made this for a friend with celiac disease by swapping the all-purpose flour for a 1-to-1 gluten-free baking blend. I found that adding ¼ teaspoon of xanthan gum (if your blend doesn’t already have it) helps the crust hold together better. The texture is slightly more crumbly, but just as delicious.
- Flavor Twist – S’mores Bars: Add ½ cup of crushed graham crackers to the crust mixture. After you pour the chocolate, sprinkle mini marshmallows on top and broil for 30 seconds (watch it closely!) until they’re toasted. It’s a campfire treat without the fire.
Serving & Storage Suggestions
These bars are best served cold, straight from the fridge. The chocolate has a satisfying snap, and the filling is firm but creamy. If you let them sit at room temperature for too long, the chocolate can get a little soft and sticky.
For a Dinner Party: Place the bars on a nice platter and dust them with a little flaky sea salt right before serving. It cuts the sweetness and looks professional. They pair beautifully with a cold glass of milk, a strong cup of coffee, or even a dessert wine like a tawny port.
Storage: Keep the bars in an airtight container in the refrigerator. They will stay fresh for up to a week, though I doubt they’ll last that long. You can also freeze them for up to 3 months. To freeze, place the sliced bars on a baking sheet and freeze until solid, then transfer them to a freezer-safe bag. Thaw in the refrigerator overnight before serving.
Flavor Development: Honestly, these bars taste even better the next day. The flavors meld together, and the crust softens just slightly from the moisture of the filling. If you can resist eating them all on day one, you’ll be rewarded on day two.
Nutritional Information & Benefits
Let’s be real—these are a treat, not a health food. But knowing what’s in them can help you enjoy them mindfully. Here are the estimated values for one bar (based on 24 servings).
| Nutrient | Amount per Bar |
|---|---|
| Calories | 285 |
| Total Fat | 18g |
| Saturated Fat | 9g |
| Cholesterol | 25mg |
| Sodium | 95mg |
| Total Carbohydrates | 29g |
| Dietary Fiber | 2g |
| Sugars | 20g |
| Protein | 5g |
Health Highlights: Peanut butter provides a good amount of protein and healthy fats, which can help keep you full. Dark chocolate contains antioxidants called flavonoids. Of course, these benefits come with sugar and butter, so portion control is key. If you’re watching your sugar intake, you can use a sugar-free chocolate chip and a powdered sugar substitute like Swerve, though the texture will be slightly different.
Dietary Considerations: This recipe contains peanuts, dairy, and gluten. It is not suitable for those with nut allergies unless you substitute the peanut butter. For a vegan version, use plant-based butter and dairy-free chocolate chips.
Conclusion
These Crowd-Pleasing Spiderweb Chocolate Peanut Butter Bars are more than just a pretty dessert. They’re a reminder that sometimes the best ideas come from the people we least expect—and that being wrong in the kitchen can taste incredibly right. The combination of a buttery crust, a fluffy peanut butter heart, and a glossy chocolate shell is a classic for a reason. It’s comfort food that looks like you fussed, but is secretly one of the easiest things you’ll ever make.
I love this recipe because it always gets the same reaction. People see the spiderweb and their eyes go wide. They take a bite and their shoulders relax. It’s the dessert that makes everyone at the table feel special. I truly hope you try it for your next gathering. Don’t be afraid to make it your own—add a sprinkle of sea salt, a drizzle of caramel, or a handful of crushed pretzels on top. The base is perfect, but the possibilities are endless.
I’d love to hear how yours turn out. Drop a comment below and tell me about your swirl technique, or tag me in your photos if you share them online. Happy baking, and here’s to being delightfully wrong once in a while!
Frequently Asked Questions
Can I use natural peanut butter for the filling?
I don’t recommend it. Natural peanut butter tends to separate and is oilier, which can make the filling soft and greasy. Processed peanut butter like Skippy or Jif has stabilizers that help the filling hold its shape when you slice the bars.
How do I get the spiderweb pattern to look perfect?
The trick is to use warm, runny peanut butter for the dollops and a toothpick for the swirl. Work quickly and confidently. Don’t over-swirl—three or four concentric circles are plenty. If the pattern gets muddy, you can scrape the chocolate off and start over.
Can I make these bars ahead of time for a party?
Absolutely. In fact, they taste better the next day. You can make them up to 3 days in advance and keep them in the refrigerator. Just wait to cut them until you’re ready to serve for the freshest look.
My crust came out crumbly. What went wrong?
This usually happens if you didn’t press the crust firmly enough into the pan, or if you used too much butter. Make sure you pack it down tightly with the bottom of a measuring cup. If the mixture feels too dry, add a tablespoon of melted butter next time.
Can I freeze these bars?
Yes! Freeze the sliced bars in a single layer on a baking sheet, then transfer them to a freezer-safe bag. They’ll keep for up to 3 months. Thaw them in the refrigerator overnight before serving. They might lose a tiny bit of their snap, but they’ll still be delicious.
Pin This Recipe!
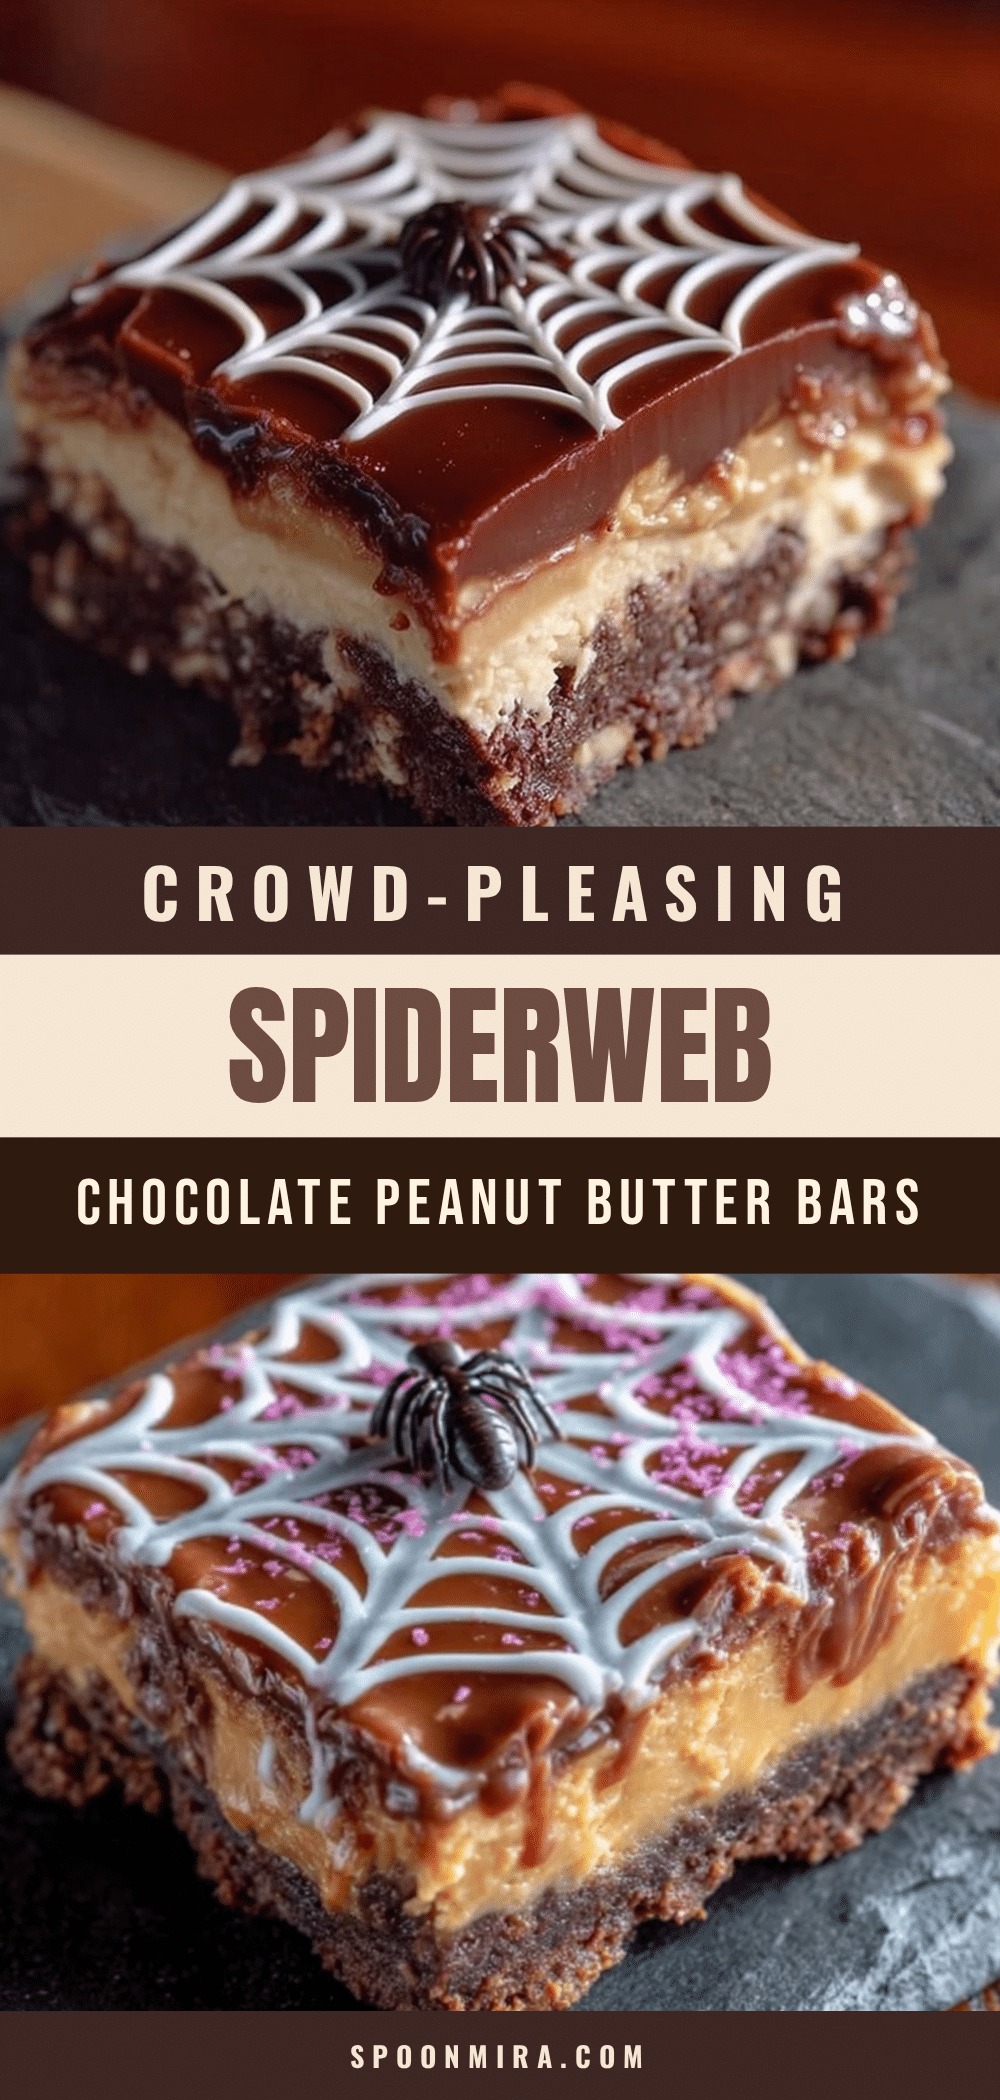
Best Spiderweb Chocolate Peanut Butter Bars Easy Recipe
These crowd-pleasing spiderweb chocolate peanut butter bars feature a buttery shortbread crust, a creamy peanut butter filling, and a rich chocolate topping with a beautiful spiderweb design. They are quick, easy, and perfect for Halloween parties or any gathering.
- Prep Time: 20 minutes
- Cook Time: 20 minutes
- Total Time: 2 hours 40 minutes (including chilling)
- Yield: 24 servings 1x
- Category: Dessert
- Cuisine: American
Ingredients
- 1 ½ cups (190g) all-purpose flour
- ½ cup (100g) granulated sugar
- ¾ cup (170g) unsalted butter, cold and cut into small cubes
- ¼ teaspoon salt
- 1 cup (250g) creamy peanut butter (e.g., Skippy or Jif)
- ½ cup (115g) unsalted butter, softened
- 2 cups (240g) powdered sugar
- 1 teaspoon vanilla extract
- Pinch of salt
- 1 ½ cups (260g) semi-sweet chocolate chips
- 3 tablespoons (45g) unsalted butter
- 2 tablespoons (30ml) creamy peanut butter, slightly warmed (for spiderweb swirl)
Instructions
- Preheat oven to 350°F (175°C). Line a 9×13-inch baking pan with parchment paper, leaving an overhang on two opposite sides.
- In a food processor, pulse together flour, sugar, and salt. Add cold butter cubes and pulse until mixture resembles coarse sand with a few pea-sized butter pieces. Press firmly into the prepared pan. Bake for 18-20 minutes until edges are golden. Let cool completely.
- In a large bowl, beat softened butter and 1 cup peanut butter with an electric mixer until smooth. Add powdered sugar, vanilla, and pinch of salt. Mix on low, then beat on medium-high for 2-3 minutes until light and fluffy. Spread evenly over cooled crust. Refrigerate for 15 minutes.
- In a small microwave-safe bowl, combine chocolate chips and 3 tablespoons butter. Microwave in 30-second bursts, stirring after each, until smooth. Let cool for 2-3 minutes.
- Remove pan from fridge. Pour melted chocolate over filling and tilt to spread evenly. Warm 2 tablespoons peanut butter for 10 seconds until drizzly. Drop small spoonfuls over chocolate. Use a toothpick to drag through dollops in a swirling motion to create a spiderweb pattern.
- Refrigerate for at least 2 hours until chocolate is firm. For cleanest slices, chill 3-4 hours or overnight.
- Use parchment handles to lift bars out of pan. Place on cutting board. Use a sharp knife to cut into squares, wiping knife clean between cuts. Serve cold.
Notes
For best results, use cold butter for the crust and processed peanut butter (like Skippy or Jif) for the filling. The spiderweb pattern works best with warm, runny peanut butter and a few confident strokes. Bars taste even better the next day. Store in an airtight container in the refrigerator for up to a week, or freeze for up to 3 months.
Nutrition
- Serving Size: 1 bar
- Calories: 285
- Sugar: 20
- Sodium: 95
- Fat: 18
- Saturated Fat: 9
- Carbohydrates: 29
- Fiber: 2
- Protein: 5
Keywords: spiderweb bars, chocolate peanut butter bars, Halloween dessert, easy dessert bars, no-bake dessert, crowd-pleasing dessert


