The summer I turned thirty, my neighbor Dot—a retired home economics teacher with cat-eye glasses and a suspicious amount of energy for someone who’d been alive since the Great Depression—decided I needed a hobby. Not just any hobby, but one that involved “edible presentation,” as she put it. I was watering my sad little tomato plants when she marched over with a cookbook from 1987, its spine held together with duct tape. “Page forty-three,” she said. “You’re making this for the block party.”
I opened it right there, expecting Jell-O molds or something with aspic. Instead, I found a photo of brie wrapped in crescent dough, sliced to look like little wrapped bundles. No spooky theme, no Halloween connection—just cheese in dough, which honestly sounded perfect. Dot stood there watching me flip through the yellowed pages. “Don’t overthink it,” she said. “Cheese and bread. That’s all it is.”
So I made it. And it was good—warm, melty, ridiculous in the best way. But it wasn’t until years later, staring at a package of refrigerated crescent rolls and a wheel of brie, that it clicked. Add some olive eyes and call it a mummy. That’s it. That’s the whole trick. Suddenly Dot’s 1987 cookbook recipe turned into the easiest Halloween appetizer I’d ever made. No fancy decorating skills required, no obscure ingredients. Just cheese, dough, and two little olive slices that somehow make everyone at the party smile.
Maybe you’ve been there—staring down a Halloween party spread, wondering if you have the energy to make something that looks impressive without actually requiring effort. This easy mummy-wrapped baked brie is that recipe. It’s the one you’ll pull out every October, the one people will ask for by name. And honestly? It came from a retired teacher’s duct-taped cookbook and a moment of pure, accidental inspiration.
Why You’ll Love This Recipe
Let me tell you why this easy mummy-wrapped baked brie has become my go-to for every Halloween gathering. I’ve tested it at least a dozen times now—different cheeses, different doughs, different eye placements—and it never fails to deliver.
Here’s what makes it stand out:
- Ready in under 30 minutes: From fridge to table in about 25 minutes flat. That’s faster than ordering pizza, and way more fun to look at.
- Just 3 main ingredients: Brie, crescent dough, and olive eyes. You probably have everything else in your pantry already.
- Zero decorating skill required: If you can wrap a gift badly, you can make this mummy. The messier the wrapping, the better it looks.
- Always gets a reaction: Kids love it, adults love it, and people who claim they don’t like brie suddenly become converts when it’s warm and wrapped in buttery dough.
- Completely customizable: Swap the jam, change the cheese, use different dough—it’s forgiving in every possible way.
What makes this different from every other baked brie recipe out there? It’s the presentation, obviously. But it’s also the fact that it actually works for a real weeknight Halloween dinner situation. You’re not spending hours on fondant or piping bags. You’re wrapping cheese in dough, sticking two olive slices on top, and calling it a night. And somehow, that’s exactly what makes it so good.
This isn’t just another appetizer—it’s the kind that makes you close your eyes after the first bite. Warm, gooey brie mingling with flaky, golden crust, all wrapped up in a package that looks like it came from a haunted bakery. It’s comfort food disguised as Halloween decor, and honestly, that’s the best kind of party food there is.
What Ingredients You Will Need
This recipe uses simple, everyday ingredients to create something that looks way more complicated than it actually is. Most of these are pantry staples or easy to find at any grocery store, which is exactly what you want when you’re scrambling to throw together a Halloween appetizer on a busy weeknight.
- 1 (8-ounce) wheel of brie cheese: Look for a wheel that’s firm but gives slightly when pressed. I prefer the double-cream variety for extra richness. (If the brie is too soft, pop it in the freezer for 10 minutes before wrapping—trust me on this one.)
- 1 (8-ounce) can refrigerated crescent roll dough: This is the shortcut that makes the whole thing possible. Pillsbury works great, but store brands are fine too. Just make sure you get the seamless sheet version if you can find it—it saves you the trouble of pinching seams together.
- 2 pitted black olives: For the mummy eyes. You can use sliced olives from a can, or whole pitted olives that you slice yourself. Kalamata olives work too if you want a slightly different look.
- 1 large egg: For the egg wash that gives the mummy that golden, glossy finish. (Use a splash of milk instead if you’re out of eggs.)
- 1 tablespoon water: To mix with the egg for the wash. Nothing fancy here—just tap water works perfectly.
- Optional: jam or honey for serving: A little sweetness cuts through the richness of the brie beautifully. Fig jam is my personal favorite, but raspberry preserves or a drizzle of honey work just as well.
- Optional: fresh herbs for garnish: A sprinkle of fresh thyme or rosemary adds a nice pop of green and a subtle earthy flavor that complements the cheese.
- Optional: flaky sea salt: A pinch on top before baking elevates the whole thing. Maldon salt is my go-to, but any flaky salt will do.
When it comes to the brie, I recommend going with a brand like Président or Ile de France for consistent quality. They’re widely available and reliably creamy. If you’re feeling adventurous, try a triple-cream brie for an even more decadent result—just be prepared for extra oozing when you cut into it.
For the crescent dough, keep it cold until you’re ready to use it. Warm dough is sticky dough, and sticky dough makes for messy mummies. If you’re using the perforated crescent sheets instead of the seamless version, just pinch the seams together firmly—they’ll disappear during baking anyway.
The olives are where you can get creative. Regular canned black olives give that classic Halloween look, but green olives stuffed with pimentos add a little extra color. Just make sure whatever you use is pitted, unless you want your guests accidentally crunching down on an olive pit mid-bite.
Equipment Needed
You don’t need much to pull off this easy mummy-wrapped baked brie. That’s the beauty of it—minimal equipment, maximum impact.
- Baking sheet: A standard half-sheet pan works perfectly. Line it with parchment paper for easy cleanup, because nobody wants to scrub baked-on cheese on a weeknight.
- Parchment paper: Non-negotiable in my kitchen. It prevents sticking and makes cleanup a breeze. Plus, you can lift the whole mummy off the pan and onto a serving board without disturbing the wrapping.
- Small knife or pizza cutter: For cutting the dough into strips. A pizza cutter gives you cleaner lines, but a sharp knife works just fine.
- Pastry brush: For applying the egg wash. If you don’t have one, use the back of a spoon or even your fingers—it’s not a pastry competition, it’s Halloween.
- Cutting board: To work on when you’re cutting the dough strips. Nothing fancy needed.
- Small bowl: For whisking together the egg wash.
- Offset spatula (optional): Handy for transferring the finished mummy to a serving platter, but not essential.
I’ve made this recipe with nothing but a butter knife and my hands when I was camping once—okay, glamping—and it still turned out great. The equipment list is more of a suggestion than a requirement. Don’t let a missing pastry brush stop you from making the best Halloween appetizer of the season.
Preparation Method
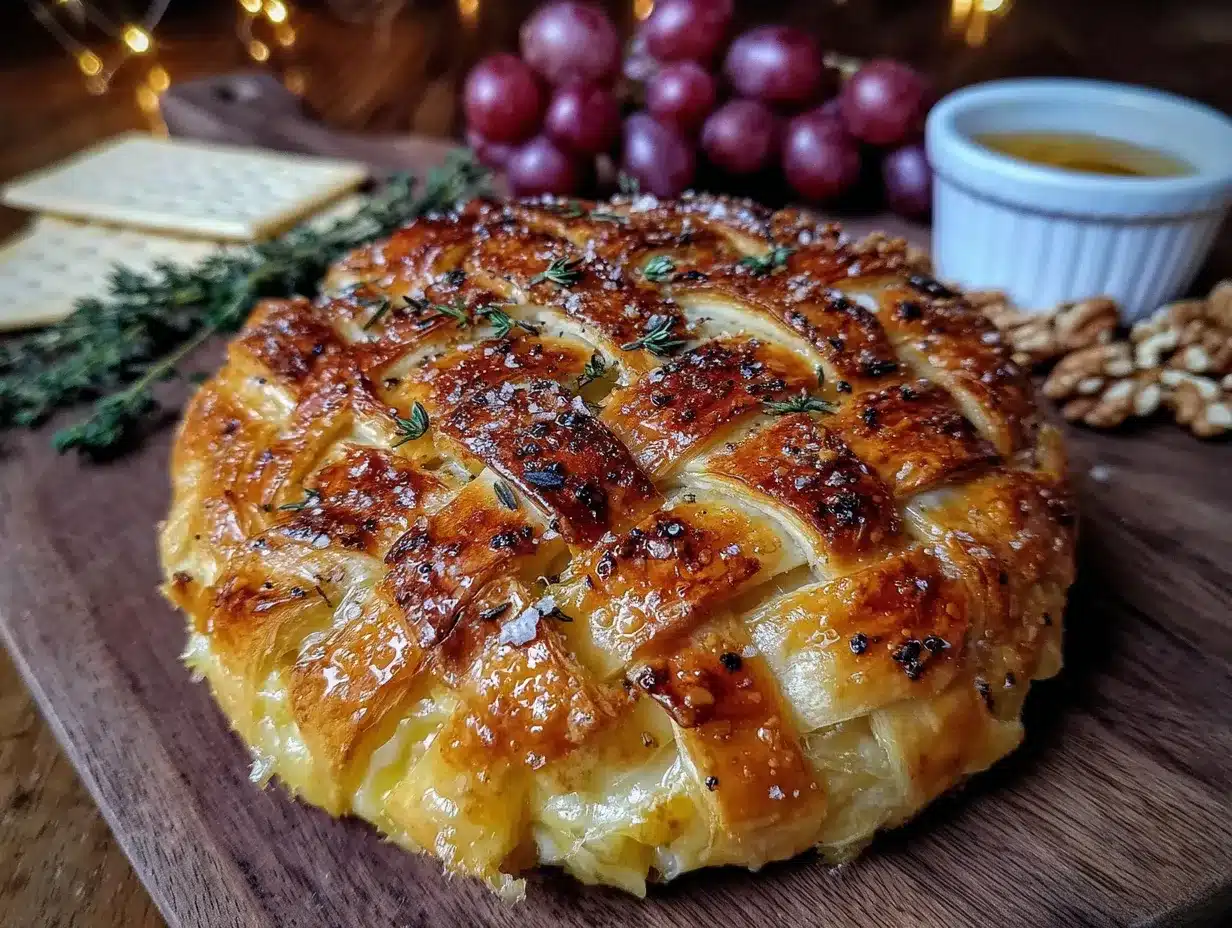
Ready to make the easiest Halloween appetizer you’ll ever create? Here’s exactly how to do it, step by step. I’ve included all the little details I wish someone had told me the first time I made this.
- Preheat your oven to 375°F (190°C). Line a baking sheet with parchment paper. While the oven heats up, take the brie out of the fridge and let it sit on the counter for about 10 minutes. You want it slightly softened but still firm enough to hold its shape. (If it’s too cold, the dough won’t bake evenly around it. If it’s too warm, it’ll turn into a puddle before the dough sets.)
- Unroll the crescent dough onto a cutting board. If you’re using the perforated sheets, pinch the diagonal seams together firmly so you have one solid rectangle of dough. Use your fingers to smooth out any thick spots—you want an even thickness across the whole sheet.
- Using a pizza cutter or sharp knife, cut the dough into strips. Aim for strips about 1 inch wide. You should get roughly 8 to 10 strips from one can of dough. Don’t stress about making them perfectly straight—mummies are supposed to look a little messy. In fact, uneven strips actually look more authentic.
- Place the brie wheel in the center of the parchment-lined baking sheet. Position it so you have room to wrap the strips around it. (I learned this the hard way—my first attempt had the brie too close to the edge, and I ended up with dough strips dangling off the pan.)
- Start wrapping the dough strips around the brie. Lay one strip across the top of the brie, letting the ends hang down the sides. Repeat with another strip, crossing it over the first one slightly. Continue until the brie is completely wrapped, leaving a small gap at the top for the eyes. You want the wrapping to look haphazard—think “I wrapped this in a hurry while escaping a haunted house.” That’s the look we’re going for.
- Press the ends of the dough strips underneath the brie to secure them. If any strips are too long, just trim them with your knife. Tuck any loose ends under the brie so they don’t burn or uncurl during baking.
- In a small bowl, whisk together the egg and water until well combined. Brush the egg wash generously over all the exposed dough. This is what gives the mummy that beautiful golden-brown color. Don’t skip this step—I once forgot the egg wash, and the mummy came out pale and sad-looking, like it hadn’t seen sunlight in centuries.
- Place the baking sheet in the preheated oven and bake for 12 to 15 minutes. Start checking at the 12-minute mark. You’re looking for the dough to be golden brown and puffed, with the brie starting to ooze slightly through the gaps. The cheese should be warm and melty in the center.
- While the mummy bakes, prepare the olive eyes. Slice two rounds from a pitted black olive, each about ¼ inch thick. You want them to look like little eyeballs—round and dark. (If you’re feeling extra creative, use a tiny dot of cream cheese or sour cream in the center of each olive slice to make pupils. It’s a small touch that gets big reactions.)
- Remove the baked brie from the oven and let it cool for 2 to 3 minutes. This is important—the cheese inside is molten hot and will burn your mouth if you dig in immediately. Plus, the dough needs a moment to set so it doesn’t fall apart when you add the eyes.
- Gently press the olive slices into the dough at the top of the mummy, positioning them to look like eyes. The residual heat from the brie will help them stick. If they don’t stay put, use a tiny dab of honey or jam as edible glue.
- Serve immediately while the cheese is still warm and gooey. Place the baking sheet or a serving board on the table with a small knife for spreading. Watch as everyone realizes the mummy is made of cheese and dough—the looks on their faces are worth every second of effort.
A few extra notes from my many trials: If the dough starts browning too quickly but the brie isn’t warm yet, tent a piece of foil loosely over the top and continue baking. If the brie leaks out during baking, don’t panic—it happens to the best of us. Just call it “ghost brie” and move on. Nobody will care once they taste it.
Cooking Tips & Techniques
After making this easy mummy-wrapped baked brie more times than I care to count, I’ve collected a few tricks that make the process smoother and the results more consistent. Here’s what I’ve learned—sometimes through success, sometimes through spectacular failure.
Keep everything cold. Cold dough is easier to work with and holds its shape better during baking. If your kitchen is warm, pop the wrapped brie in the fridge for 10 minutes before brushing with egg wash and baking. This little pause helps the dough stay defined and prevents it from spreading into a shapeless blob.
Don’t over-wrap the brie. I know it’s tempting to cover every inch of cheese with dough, but leaving a few small gaps is actually the goal. Those gaps let the brie peek through as it bakes, creating that oozy, melty effect that makes everyone’s mouth water. Plus, it gives the mummy a more authentic “wrapped in a hurry” look.
Use a serrated knife for serving. A regular knife can squish the brie out instead of cutting cleanly through it. A serrated knife saws through the dough without compressing the soft cheese inside. I learned this after my first attempt resulted in a sad, squished mess on the cutting board.
Watch the oven like a hawk. Every oven runs a little differently. My old apartment oven would brown the dough in 10 minutes flat, while my current oven takes the full 15. Start checking early and adjust accordingly. Burnt dough tastes bitter, and nobody wants a bitter mummy.
If the brie leaks, embrace it. The first time this happened to me, I nearly cried. But you know what? The leaked cheese caramelizes on the parchment paper and turns into these crispy, cheesy bits that are absolutely delicious. Scrape them up and serve them alongside the mummy. They’re like the crispy edges of a grilled cheese sandwich—the best part.
Prep ahead for sanity. You can wrap the brie in the dough up to a day in advance and keep it covered in the fridge. Just add the egg wash right before baking. This is a lifesaver for Halloween parties when you’re juggling a dozen other tasks. I’ve done this multiple times, and the results are just as good as fresh-wrapped.
Double the recipe if you’re feeding a crowd. One wheel of brie serves about 4 to 6 people as an appetizer. For a party, make two—trust me, the first one will disappear in minutes, and you’ll want a backup. I learned this the hard way at a Halloween potluck where I showed up with one mummy and watched it vanish before I even got a bite.
Variations & Adaptations
One of the best things about this easy mummy-wrapped baked brie is how adaptable it is. I’ve tried several variations over the years, and each one brought something new to the table. Here are some of my favorites.
Savory herb version: Sprinkle dried rosemary, thyme, or everything bagel seasoning over the dough before baking. The herbs add an aromatic layer that complements the rich brie beautifully. I did this for a Friendsgiving gathering, and someone asked if I’d “gone to culinary school.” I just smiled and nodded.
Sweet honey version: Drizzle honey over the top of the baked mummy before serving, then sprinkle with flaky sea salt and fresh thyme. The sweet-salty combination is addictive. This version works especially well if you’re serving the brie as part of a dessert board or after-dinner cheese course.
Spicy pepper jelly version: Spread a thin layer of pepper jelly on the brie before wrapping it in dough. The heat from the jelly cuts through the richness of the cheese and adds a surprising kick. I made this for a Halloween party where everyone expected the usual sweet treats, and it was the first thing to disappear from the table.
Gluten-free adaptation: Use gluten-free crescent dough or puff pastry instead of standard crescent rolls. Most grocery stores carry gluten-free options now, and they work surprisingly well. Just note that gluten-free dough tends to brown faster, so start checking at the 10-minute mark.
Vegan version: Substitute the brie with a wheel of vegan brie or cashew cheese, and use vegan crescent dough (many brands are accidentally vegan). Brush with plant-based milk instead of egg wash. The texture will be slightly different, but the presentation is just as fun.
Pumpkin spice twist: For a fall-themed variation, mix a teaspoon of pumpkin pie spice into a tablespoon of maple syrup and drizzle it over the baked mummy. It sounds weird, but the warm spices actually pair beautifully with the creamy brie. I tried this on a whim one October afternoon, and it’s become my secret weapon for autumn gatherings.
Mini mummy bites: Cut the brie into smaller cubes and wrap each one individually with a single strip of dough. Bake for 8 to 10 minutes instead of 12 to 15. These bite-sized versions are perfect for parties where people want to grab and go without cutting into a larger wheel.
Serving & Storage Suggestions
This easy mummy-wrapped baked brie is best served warm, straight from the oven. The contrast between the flaky, golden dough and the molten, creamy cheese is at its peak within the first 15 minutes of baking. Place the whole mummy on a wooden serving board or a slate platter, and surround it with an assortment of dippers and accompaniments.
For the perfect serving spread, I like to include:
- Crackers and crostini: Plain water crackers, buttery Ritz, or thin slices of baguette all work beautifully. The neutral flavors let the brie shine.
- Sliced apples and pears: The crisp, tart fruit cuts through the richness of the cheese. Granny Smith apples are my go-to, but any firm apple will do.
- Grapes: Red or green, they add a pop of color and a burst of sweetness that complements the savory notes.
- Honey or fig jam: A small bowl of either gives guests the option to add a touch of sweetness to their bite.
- Nuts: Toasted walnuts or pecans add crunch and a earthy flavor that pairs beautifully with brie.
If you have leftovers—which, let’s be honest, is rare—store them in an airtight container in the refrigerator for up to 3 days. The dough will lose its crispness, but the flavor will still be good. To reheat, place the leftover mummy on a baking sheet and warm it in a 350°F oven for 5 to 7 minutes. Avoid the microwave, which will turn the flaky dough into a soggy, sad mess.
I’ve also frozen a fully baked and cooled mummy with good results. Wrap it tightly in plastic wrap, then foil, and freeze for up to 2 months. Thaw overnight in the refrigerator, then reheat in a 350°F oven until warmed through. The texture won’t be quite as perfect as fresh, but it’s still delicious—and still way cuter than anything else at the party.
One thing I love about this recipe is how the flavors develop as it sits. The brie continues to meld with the dough, and any jam or honey you’ve added seeps into the cheese, creating little pockets of sweetness. It’s almost better the next day, if you can believe it. Almost.
Nutritional Information & Benefits
Let’s be real—this easy mummy-wrapped baked brie is a treat, not a health food. But that doesn’t mean it’s completely devoid of nutritional value. Here’s what you’re looking at per serving (based on 6 servings from one wheel of brie):
- Calories: Approximately 280-320 per serving
- Protein: 10-12 grams
- Fat: 18-22 grams
- Carbohydrates: 18-22 grams
- Calcium: 10-15% of daily value
- Vitamin A: 8-10% of daily value
Brie cheese is a good source of calcium and protein, which are essential for bone health and muscle function. It also contains beneficial fats that help your body absorb fat-soluble vitamins. The crescent dough provides quick energy from carbohydrates, making this a satisfying appetizer that will keep you going through a long evening of Halloween festivities.
For those with dietary concerns, please note that this recipe contains gluten (from the crescent dough), dairy (from the brie), and eggs (from the wash). It is not suitable for vegans or those with lactose intolerance unless modified with the substitutions mentioned in the variations section.
I personally view this recipe as a celebration food—something to enjoy in moderation during special occasions. It’s not about the nutritional profile; it’s about the joy of gathering around a table, sharing something delicious and silly, and making memories with the people you love. Sometimes that’s worth more than any vitamin or mineral.
Conclusion
This easy mummy-wrapped baked brie has become more than just a Halloween appetizer in my kitchen. It’s the recipe I turn to when I want to impress without stress, when I need something that looks like it took hours but actually took minutes, and when I want to see the delighted smiles of people discovering that a mummy can be delicious. It came from a retired teacher’s duct-taped cookbook and a moment of accidental inspiration, and now it’s a staple of my fall entertaining repertoire.
I encourage you to make this recipe your own. Add your favorite jam, experiment with different cheeses, or try the mini mummy bites for a party-friendly twist. The beauty of this recipe is its flexibility—it works with whatever you have on hand and whatever mood strikes you.
I’d love to hear how your mummy turns out! Drop a comment below with your variations, tag me in your photos, or share your own Halloween entertaining tips. This recipe is meant to be shared, adapted, and enjoyed by as many people as possible. After all, that’s what good food is all about—bringing people together, one cheesy mummy at a time.
Now go make some magic happen in your kitchen. And maybe save me a slice.
Frequently Asked Questions
Can I make this easy mummy-wrapped baked brie ahead of time?
Absolutely! You can wrap the brie in the dough up to 24 hours in advance and keep it covered in the refrigerator. Add the egg wash just before baking. This is perfect for party prep when you want to minimize last-minute work.
What if I can’t find crescent roll dough?
No problem! Puff pastry works beautifully as a substitute. Just thaw it according to package directions, roll it out slightly, and cut it into strips the same way you would with crescent dough. The result will be extra flaky and buttery—almost like a croissant wrapped around cheese.
Can I use a different type of cheese?
Yes, but stick with soft-ripened cheeses that melt well. Camembert is the obvious substitute, but I’ve also had great results with small wheels of goat cheese or even wedges of triple-cream cheese. Just avoid hard cheeses like cheddar or gouda, which won’t get that same oozy, molten texture.
How do I keep the mummy from leaking cheese everywhere?
Make sure the brie is well-chilled before wrapping—cold cheese holds its shape better during baking. Also, leave small gaps in the dough wrapping rather than trying to seal everything completely. The cheese will bubble through those gaps instead of bursting out in one big leak. And always line your baking sheet with parchment paper, just in case.
What should I serve with this appetizer?
The possibilities are endless! I love serving it with an assortment of crackers, sliced apples and pears, grapes, and a bowl of honey or fig jam for drizzling. For a heartier spread, add some cured meats like prosciutto or salami, and a handful of toasted nuts. It’s also wonderful alongside a simple green salad for a light dinner.
Pin This Recipe!
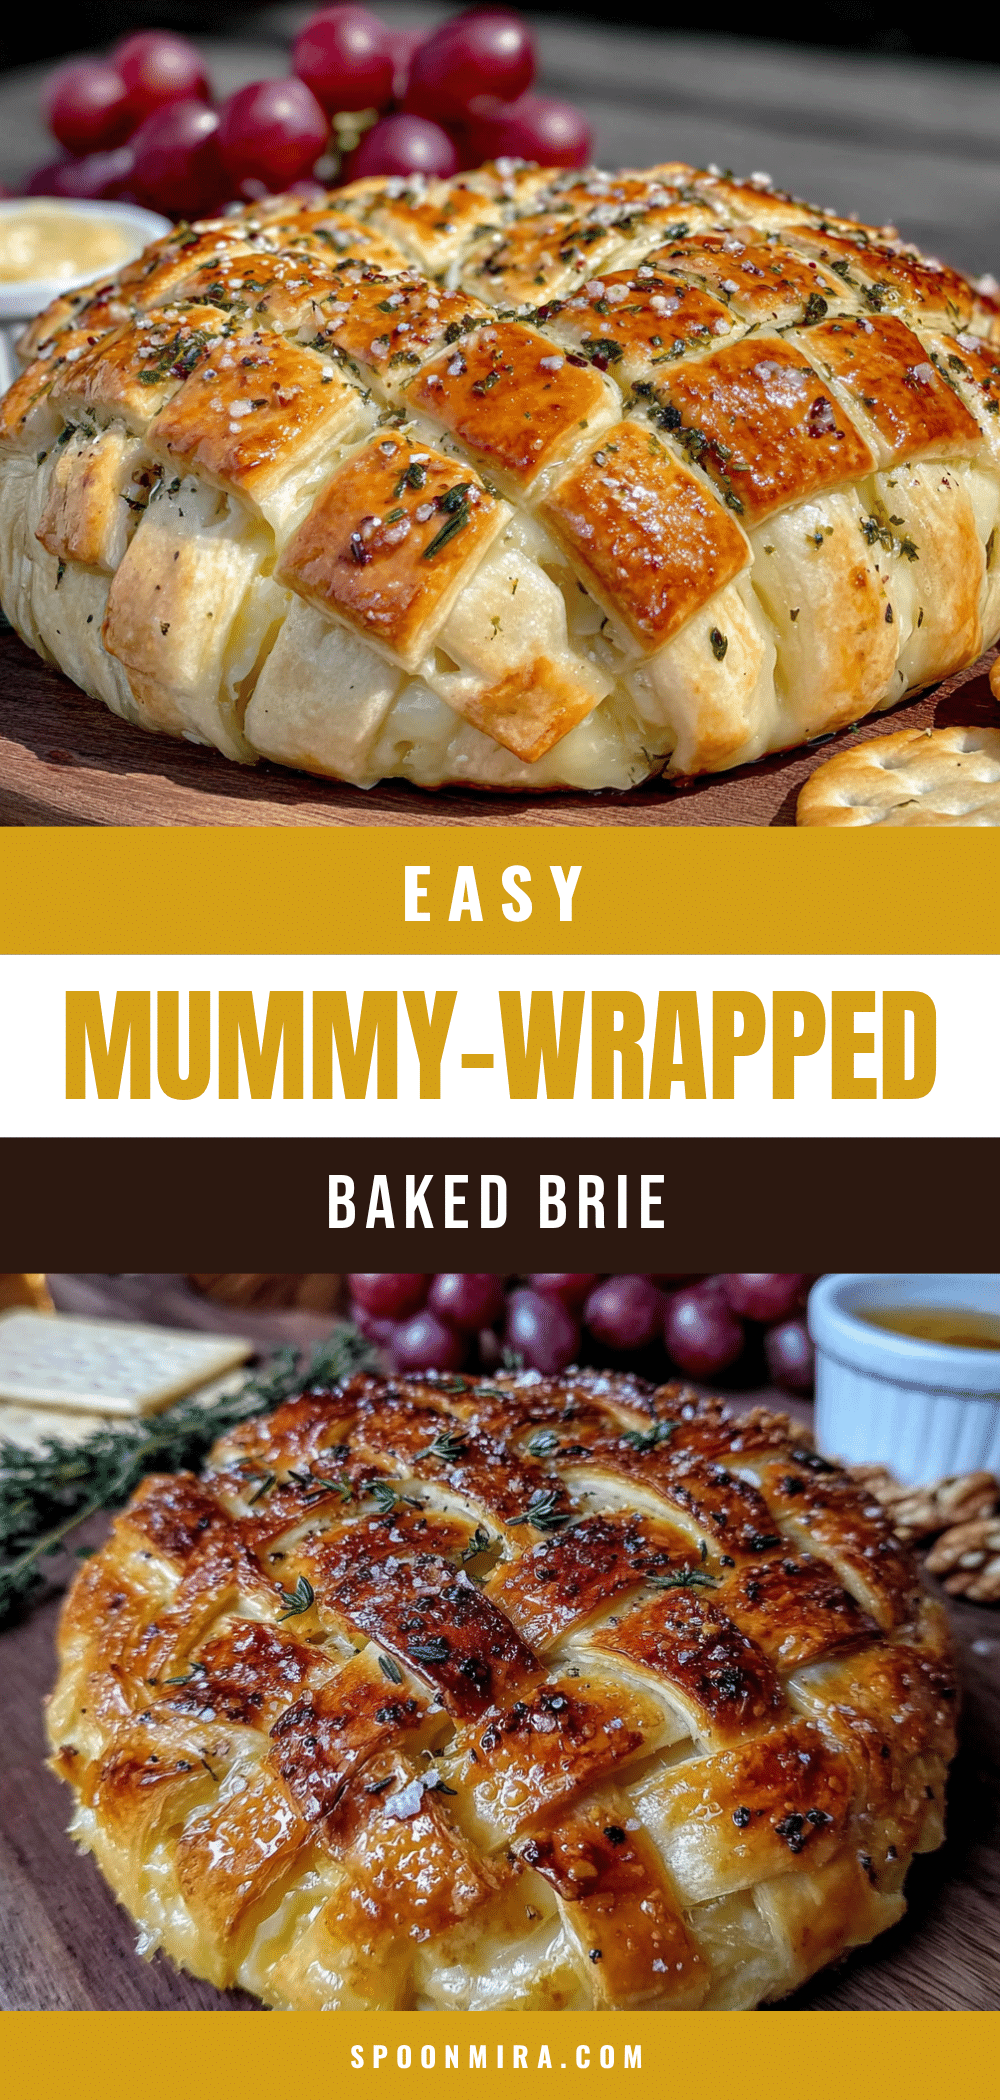
Easy Mummy-Wrapped Baked Brie: Best Halloween Appetizer

A fun and easy Halloween appetizer featuring brie cheese wrapped in crescent dough to look like a mummy, baked until golden and gooey. Ready in under 30 minutes with just 3 main ingredients.
- Prep Time: 10 minutes
- Cook Time: 15 minutes
- Total Time: 25 minutes
- Yield: 6 servings 1x
- Category: Appetizer
- Cuisine: American
Ingredients
- 1 (8-ounce) wheel of brie cheese
- 1 (8-ounce) can refrigerated crescent roll dough
- 2 pitted black olives
- 1 large egg
- 1 tablespoon water
- Optional: jam or honey for serving
- Optional: fresh herbs for garnish
- Optional: flaky sea salt
Instructions
- Preheat your oven to 375°F (190°C). Line a baking sheet with parchment paper. Let the brie sit at room temperature for about 10 minutes.
- Unroll the crescent dough onto a cutting board. If using perforated sheets, pinch the diagonal seams together to form a solid rectangle.
- Using a pizza cutter or sharp knife, cut the dough into strips about 1 inch wide (8 to 10 strips).
- Place the brie wheel in the center of the parchment-lined baking sheet.
- Wrap the dough strips around the brie, crossing them over each other, leaving a small gap at the top for the eyes. Press the ends underneath the brie to secure.
- In a small bowl, whisk together the egg and water. Brush the egg wash generously over all exposed dough.
- Bake for 12 to 15 minutes, until the dough is golden brown and puffed, and the brie starts to ooze slightly.
- While baking, slice two rounds from a pitted black olive, each about ¼ inch thick, for the eyes.
- Remove from oven and let cool for 2 to 3 minutes. Gently press the olive slices into the dough at the top for eyes.
- Serve immediately while warm and gooey.
Notes
Keep the dough cold for easier handling. Leave small gaps in the wrapping for the brie to peek through. If the dough browns too quickly, tent with foil. Prep ahead by wrapping the brie up to 24 hours in advance and refrigerating; add egg wash just before baking.
Nutrition
- Serving Size: 1 serving (1/6 of re
- Calories: 300
- Sugar: 4
- Sodium: 450
- Fat: 20
- Saturated Fat: 10
- Carbohydrates: 20
- Protein: 11
Keywords: Halloween appetizer, baked brie, mummy brie, easy appetizer, crescent roll brie, holiday appetizer


