My sister-in-law, Jen, wasn’t trying to impress anyone. I’d stopped by her place on a random Tuesday afternoon to drop off a casserole dish she’d left at my house, and the smell of paprika and something slightly vinegary hit me before I even got through the front door. She was standing at the kitchen counter, a dozen hard-boiled eggs on the cutting board, with a piping bag that was really just a zip-top bag with the corner snipped off. Her two kids, ages five and seven, were covered in a fine dusting of what I later realized was turmeric, giggling as they tried to stick tiny black olive slices onto the egg whites.
“Halloween party at school,” Jen said, shrugging like it was no big deal. “Gotta make them look like little monsters or something.”
I stood there, honestly a little stunned. The eggs weren’t just cute—they were genius. She’d dyed some of the whites a pale, spooky green using pickle juice, and the yolks were mixed with just a little mustard and mayo because, as she put it, “the store-brand stuff works fine, you know.” She wasn’t following a fancy blog recipe or using any special equipment. She was just making do with what she had, and the result was absolutely perfect. I mean, I’ve made deviled eggs for years, and mine never looked this fun or cost this little. Maybe you’ve been there—staring at a Pinterest board full of elaborate Halloween treats that require fondant and food coloring and a second mortgage. This wasn’t that. This was real.
That Tuesday afternoon, I learned more about smart cooking than I had from a dozen cookbooks. Jen’s eggs were the hit of the party, and the whole batch cost her less than three dollars. I’ve been making them every October since, and I still think about her standing there in her faded apron, completely nonchalant about something that had stopped me cold. That’s the whole point of this recipe—it’s made like it’s nothing, but it’s everything.
Why You’ll Love This Recipe
Let’s be honest—most Halloween recipes are a huge pain. They require specialty ingredients, hours of decorating, and a level of patience that just doesn’t exist after a long day of work. These Kid-Friendly Halloween Deviled Eggs That Cost Pennies are the exact opposite. They are the kind of recipe that makes you look like a superhero parent without actually having to try that hard.
- Budget-Friendly: Seriously, the title isn’t lying. A dozen eggs, a little mustard, some mayo, and a few pantry staples—that’s it. You probably have most of this stuff already.
- Kid-Approved: My own nephew, who swears he hates eggs, ate four of these at the party. The fun shapes and colors trick them into trying something new.
- Quick & Easy: The active prep time is maybe 20 minutes. The hardest part is boiling the eggs, and you can do that a day ahead.
- Perfect for Halloween Parties: Whether it’s a school event, a potluck, or just a spooky movie night at home, these are a guaranteed crowd-pleaser.
- Naturally Customizable: Don’t have black olives? Use a sliver of red bell pepper. No pickle juice? A drop of red food coloring works, too. The recipe bends to you.
What makes this recipe different from every other deviled egg out there is the “why.” It’s not about perfection—it’s about fun. The eggs don’t need to look like they came from a bakery. In fact, the slightly imperfect, wobbly “monster” faces are what make them so charming. It’s comfort food that’s been reimagined for a holiday, using ingredients you already have, and it brings that same soul-soothing satisfaction without the stress. Honestly, I’ve never had a recipe disappear faster at a gathering.
What Ingredients You Will Need
This recipe uses simple, wholesome ingredients to deliver bold flavor and a spooky look without the fuss. Most of these are pantry staples, which is exactly what you want when you’re feeding a family on a sensible budget.
- Large Eggs (12): The star of the show. Make sure they’re at least a week old for easier peeling. Fresh eggs are a nightmare to peel, trust me on this one.
- Mayonnaise (1/3 cup): I use Hellmann’s or Duke’s for the creamiest texture, but any brand works. If you’re watching pennies, the store brand is totally fine here.
- Yellow Mustard (1 tablespoon): Adds that classic tang. Don’t use Dijon for this one—the yellow mustard gives it that kid-friendly, familiar taste.
- Apple Cider Vinegar (1 teaspoon): A little acidity balances the richness of the yolks. White vinegar works in a pinch.
- Salt (1/4 teaspoon) & Black Pepper (1/8 teaspoon): Simple seasonings that make a big difference.
- Paprika (for garnish): Smoked or sweet, it doesn’t matter. It adds color and a tiny bit of warmth.
- Black Olives (1 can): These become the “eyes” and “mouths” of your little monsters. Buy the sliced ones to save time, or buy whole and slice them yourself.
- Pickle Juice (1/4 cup, optional): This is my secret trick for turning the egg whites a spooky, pale green. It’s completely optional, but it makes the “monster” effect way more convincing. If you don’t have it, skip it or use a drop of green food coloring.
- Turmeric (a pinch, optional): If you want to dye the yolks a brighter, more “alien” yellow, a tiny pinch of turmeric does the trick. It’s also a great anti-inflammatory, so bonus points for health!
That’s it. No fancy cheeses, no specialty sauces, no expensive garnishes. You probably have 90% of this in your fridge and pantry right now. The beauty of these Kid-Friendly Halloween Deviled Eggs That Cost Pennies is that they’re designed to be made from what you already have. If you don’t have olives, you can use small slices of carrot or even a tiny dot of ketchup for the eyes. The kids won’t care—they’ll just think it’s funny.
Equipment Needed
You don’t need a fancy kitchen for this. In fact, I made my first batch with a fork and a sandwich bag. Here’s what you’ll actually use:
- Medium Saucepan: For boiling the eggs. Any size works, as long as the eggs fit in a single layer.
- Mixing Bowl: For mashing the yolks. A medium-sized one is perfect.
- Fork or Potato Masher: To break up the yolks. A fork works fine, but a potato masher makes it even faster.
- Piping Bag or Zip-Top Bag: For filling the eggs. I use a gallon-sized zip-top bag with a tiny corner snipped off. It’s cheaper and easier to clean than a real piping bag.
- Sharp Knife & Cutting Board: For halving the eggs and slicing the olives.
- Small Bowl: For the pickle juice (if using) to soak the egg whites.
If you don’t have a piping bag, seriously, just use a sandwich bag. I’ve been doing it for years and it works perfectly. The only “specialty” item here is the saucepan, which I’m guessing you already own. This is a low-equipment recipe, which is exactly what we want when we’re trying to keep costs down.
Preparation Method
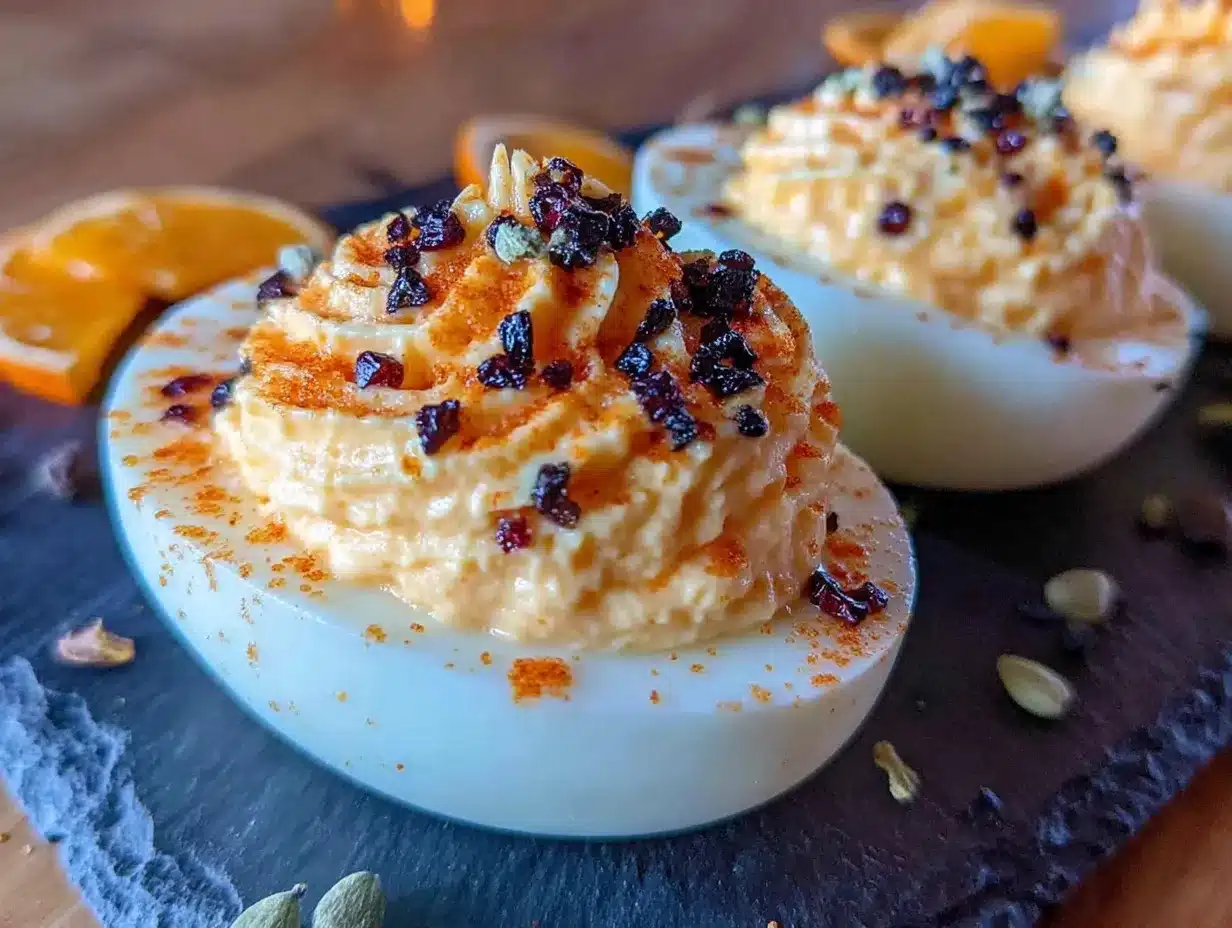
Alright, let’s get to the fun part. This is where the magic happens. Follow these steps, and you’ll have a platter of spooky, kid-friendly deviled eggs that look like they took hours—but really only took minutes.
- Boil the Eggs (15 minutes): Place your 12 eggs in a single layer in your saucepan. Cover them with cold water by about an inch. Bring the water to a rolling boil over high heat. Once it’s boiling, cover the pot, turn off the heat, and let it sit for exactly 12 minutes. That’s the sweet spot for hard-boiled eggs with a solid yolk. While they sit, fill a large bowl with ice water.
- Shock the Eggs (5 minutes): After 12 minutes, use a slotted spoon to transfer the eggs to the ice water bath. Let them sit for at least 5 minutes. This stops the cooking process and makes the shells much easier to peel. I’ve forgotten this step before, and let me tell you, peeling hot eggs is a disaster. Don’t skip it.
- Peel and Halve the Eggs (5 minutes): Gently tap each egg on the counter to crack the shell all over, then peel under running cold water. The water helps separate the shell from the white. Once peeled, slice each egg in half lengthwise. Gently pop the yolks out into your mixing bowl. Place the white halves on your serving platter.
- Make the Monster Color (5 minutes, optional): If you want the spooky green effect, place your empty egg white halves in a shallow dish and pour the 1/4 cup of pickle juice over them. Let them sit for 10-15 minutes, turning once. They’ll absorb a pale, creepy green color. Rinse them lightly and pat them dry before filling. If you’re skipping this, just move to the next step.
- Make the Filling (5 minutes): To the yolks in your bowl, add the 1/3 cup mayonnaise, 1 tablespoon yellow mustard, 1 teaspoon apple cider vinegar, 1/4 teaspoon salt, and 1/8 teaspoon black pepper. If you’re using the turmeric for a brighter color, add a tiny pinch now. Mash everything together with your fork until it’s completely smooth. Taste it and adjust the salt or mustard to your liking. This is your base.
- Fill the Eggs (5 minutes): Scoop the yolk mixture into your zip-top bag. Seal it, squeezing out as much air as possible. Snip a tiny corner off the bag—like, really tiny, about 1/4 inch. Pipe the filling into each egg white half, swirling it a little to make a nice mound. Don’t overfill them; you want a little dome, not a volcano.
- Decorate the Monsters (5 minutes): Now for the fun part. Take your sliced black olives and create faces. Two slices for eyes, and one slice cut in half for a mouth. Press them gently into the filling. You can make them look angry, surprised, or silly—let the kids help with this part. I’ve had some truly creative “monsters” come out of my kitchen, and they always make me laugh.
- Chill and Serve (30 minutes): Sprinkle a little paprika over the top for color. Cover the platter loosely with plastic wrap and refrigerate for at least 30 minutes before serving. This helps the filling firm up and the flavors meld together. They’re best served cold.
That’s it. Eight simple steps, and you’ve got a platter of Halloween magic. The key is not to overthink the decorating—imperfect faces are way more charming than perfect ones.
Cooking Tips & Techniques
I’ve made these Kid-Friendly Halloween Deviled Eggs That Cost Pennies more times than I can count, and I’ve definitely learned a few things the hard way. Here are my best tips to make sure yours turn out perfect.
- The Age of the Egg Matters: I cannot stress this enough. Fresh eggs are a nightmare to peel. If you can, buy your eggs a week before you plan to make these. The older the egg, the more the inner membrane shrinks away from the shell, making peeling a breeze. If you’re in a pinch, add a teaspoon of baking soda to the boiling water—it helps loosen the shells.
- Don’t Overcook the Yolks: A green ring around the yolk is a sign of overcooking. It’s harmless, but it doesn’t look great. That’s why the “boil and rest” method is so reliable. The residual heat cooks the yolks perfectly without turning them into rubber.
- Make the Filling Ahead: You can boil and peel the eggs up to two days in advance. Store the whites and yolks separately in the fridge. You can even make the filling a day ahead and keep it in the piping bag. Just snip the corner when you’re ready to fill.
- The Pickle Juice Trick: If you don’t have pickle juice, you can use a drop of green food coloring mixed with a tablespoon of water. But honestly, pickle juice is better—it adds a tiny bit of tangy flavor that complements the filling perfectly. Plus, it’s free if you have pickles in the fridge.
- Keep Them Stable: If your egg whites are wobbling on the platter, slice a tiny sliver off the bottom of each white to create a flat surface. This is a game-changer for transport.
One time, I forgot to add the mustard to my filling. I realized it after I’d already piped all the eggs. I had to scoop the filling back out, mix in the mustard, and re-pipe everything. It was a mess, but honestly, the eggs still tasted great. So don’t panic if you make a mistake—deviled eggs are forgiving.
Variations & Adaptations
This recipe is a blank canvas, and I love playing around with it. Here are some of my favorite variations that still keep the cost low and the fun factor high.
- Spooky Spider Eggs: Instead of faces, pipe the filling into a tall mound. Take a whole black olive and slice it in half lengthwise. Place one half on top of the filling for the spider’s body. Then, take thin strips of chive or green onion and stick four on each side for legs. It’s creepy and cute at the same time.
- Ghost Eggs: Skip the pickle juice and keep the whites plain. Pipe the filling into a tall, ghost-like shape. Use two tiny dots of black sesame seeds for eyes. They look like little ghosts floating on the plate.
- Mummy Eggs: Pipe the filling in thin, crisscrossing lines across the egg white, leaving a small gap for the eyes. Place two olive slices in the gap. It looks like a mummy wrapped in bandages. Kids love this one.
- Dairy-Free Version: Swap the mayonnaise for a vegan mayo (like Follow Your Heart or Hellmann’s plant-based). The texture will be slightly different, but it still tastes great. My sister-in-law is dairy-free, and she swears by this swap.
- Spicy Adult Version: If you’re making these for an adult party, add a teaspoon of sriracha or a pinch of cayenne pepper to the filling. The heat pairs beautifully with the cool, creamy yolk.
I once tried a version where I added a tiny bit of canned pumpkin to the filling for an orange color. It was… interesting. The flavor was fine, but the texture was a little grainy. I wouldn’t recommend it, but hey, experimentation is part of the fun.
Serving & Storage Suggestions
These deviled eggs are best served cold, straight from the fridge. I like to arrange them on a dark-colored platter to make the “monster” faces pop. A sprinkle of paprika or a few chive “legs” adds a nice finishing touch.
For a Halloween party, I serve them alongside other spooky snacks like spooky snack mix or pumpkin dip. They also pair beautifully with a batch of mummy hot dogs for a full Halloween spread. The combination of savory and fun is unbeatable.
Storage: Store any leftovers in an airtight container in the refrigerator. They will keep for up to 2 days, but they’re best eaten within 24 hours. The filling might start to weep a little after that, so don’t make them too far in advance.
Reheating: Do not reheat deviled eggs. They are meant to be served cold. If they’ve been sitting out for more than 2 hours, it’s safer to toss them.
Flavor Development: Interestingly, the flavors actually get a little better after a few hours in the fridge. The mustard and vinegar meld together, and the filling becomes creamier. So if you can, make them the morning of your party and let them chill until serving.
Nutritional Information & Benefits
While these are a treat, they’re actually not terrible for you. Here’s the breakdown per deviled egg (based on 24 halves):
| Nutrient | Amount |
|---|---|
| Calories | ~60 |
| Protein | 5g |
| Fat | 4g |
| Carbohydrates | 1g |
| Cholesterol | 95mg |
| Sodium | 120mg |
Eggs are a fantastic source of high-quality protein and choline, which is great for brain health. The turmeric, if you use it, is a powerful anti-inflammatory. And the olives provide healthy monounsaturated fats.
These are naturally gluten-free and low-carb, making them a great option for a variety of dietary needs. If you’re watching your cholesterol, you can use a combination of whole eggs and egg whites for the filling. I’ve done this before, and while the texture is slightly less rich, it’s still delicious.
Conclusion
Honestly, these Kid-Friendly Halloween Deviled Eggs That Cost Pennies are the recipe I look forward to making every single October. They remind me of that Tuesday afternoon at Jen’s house, when I realized that the best recipes don’t come from a fancy blog or a celebrity chef—they come from a mom in her kitchen, just trying to make her kids happy without spending a fortune.
I hope you give these a try, and I hope you make them your own. Let your kids help with the decorating, don’t stress about the faces being perfect, and remember that the whole point is to have fun. If you make them, I’d love to hear about it—leave a comment below and tell me what kind of monster faces your family came up with! Share this recipe with a friend who needs a budget-friendly Halloween win, and let’s keep the tradition of simple, joyful cooking alive.
Happy Halloween, and happy cooking!
Frequently Asked Questions
Can I make these deviled eggs a day ahead?
Yes, absolutely. You can boil and peel the eggs up to two days in advance. Store the whites and yolks separately in the fridge. You can also make the filling a day ahead and keep it in a piping bag. Assemble the eggs on the day of your party for the best presentation.
How do I get the eggs to peel easily?
Use older eggs (at least a week old) and shock them in an ice water bath immediately after boiling. Peeling under running cold water also helps separate the shell from the white. Adding a teaspoon of baking soda to the boiling water can help, too.
Can I use a different color for the egg whites?
Sure! You can use beet juice for a pink color, red cabbage water for blue, or a drop of any food coloring mixed with water. Just keep in mind that the flavor might change slightly depending on what you use. Pickle juice is my favorite because it adds a subtle tang.
How long do these deviled eggs last at a party?
They should not sit out at room temperature for more than 2 hours. If you’re serving them at a party, keep the platter on ice or in the refrigerator until just before serving. After 2 hours, it’s safer to discard any leftovers.
Can I freeze deviled eggs?
No, I really don’t recommend it. The texture of the egg white becomes rubbery and watery when thawed, and the filling can separate. These are best made fresh or up to a day in advance and stored in the refrigerator.
Pin This Recipe!
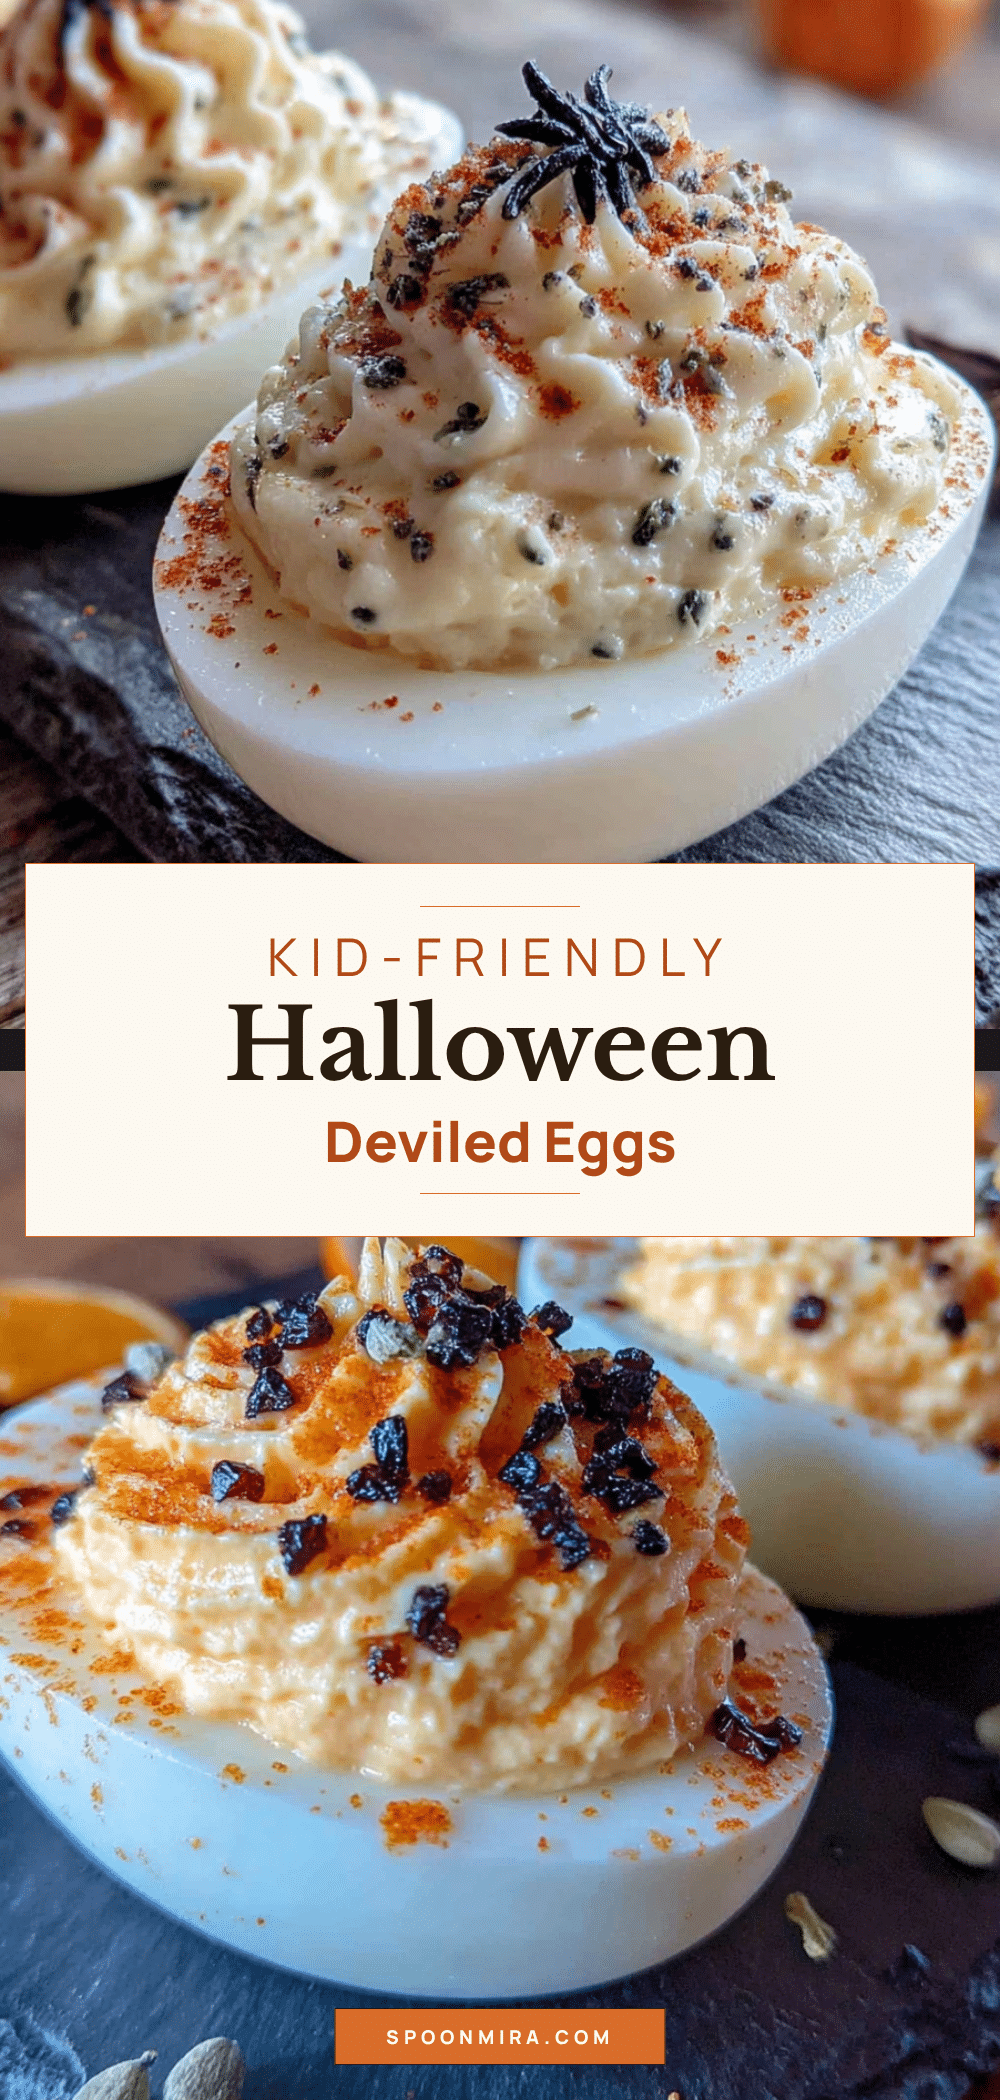
Kid-Friendly Halloween Deviled Eggs That Cost Pennies
These spooky, budget-friendly deviled eggs are perfect for Halloween parties. Made with simple pantry staples, they’re quick to prepare and guaranteed to be a hit with kids and adults alike.
- Prep Time: 20 minutes
- Cook Time: 15 minutes
- Total Time: 35 minutes
- Yield: 24 deviled eggs 1x
- Category: Appetizer
- Cuisine: American
Ingredients
- 12 large eggs
- 1/3 cup mayonnaise
- 1 tablespoon yellow mustard
- 1 teaspoon apple cider vinegar
- 1/4 teaspoon salt
- 1/8 teaspoon black pepper
- Paprika for garnish
- 1 can black olives
- 1/4 cup pickle juice (optional)
- Pinch of turmeric (optional)
Instructions
- Place eggs in a single layer in a saucepan and cover with cold water by about an inch. Bring to a rolling boil over high heat, then cover, turn off heat, and let sit for exactly 12 minutes.
- Transfer eggs to an ice water bath and let sit for at least 5 minutes to stop cooking and make peeling easier.
- Peel eggs under cold running water, then slice each in half lengthwise. Remove yolks to a mixing bowl and place whites on a serving platter.
- For spooky green color, place egg white halves in a shallow dish, pour pickle juice over them, and let sit for 10-15 minutes, turning once. Rinse lightly and pat dry before filling.
- To the yolks, add mayonnaise, yellow mustard, apple cider vinegar, salt, pepper, and turmeric (if using). Mash until smooth. Taste and adjust seasoning.
- Scoop yolk mixture into a zip-top bag, seal, and snip a tiny corner. Pipe filling into each egg white half, creating a small dome.
- Decorate with black olive slices to create monster faces—two slices for eyes and one slice cut in half for a mouth.
- Sprinkle with paprika, cover loosely with plastic wrap, and refrigerate for at least 30 minutes before serving.
Notes
Use older eggs (at least a week old) for easier peeling. The pickle juice trick adds a tangy flavor and spooky green color. Don’t overthink the decorating—imperfect faces are charming. Store leftovers in an airtight container in the refrigerator for up to 2 days. Do not reheat.
Nutrition
- Serving Size: 1 deviled egg
- Calories: 60
- Sodium: 120
- Fat: 4
- Saturated Fat: 1
- Carbohydrates: 1
- Protein: 5
Keywords: Halloween deviled eggs, kid-friendly, budget-friendly, spooky, monster eggs, easy appetizer


