There used to be a tiny Italian restaurant tucked behind a dry cleaner on the south side of town called Rosalina’s that made the most unforgettable stuffing. When they closed their doors three years ago after the owner retired, I honestly felt a little lost. That stuffing wasn’t just a side dish—it was the whole reason I’d go there. After twelve tries—some burnt, some soggy, one that my husband politely called “interesting”—I finally cracked the code. Let me tell you, the secret was simpler than I ever imagined.
This Budget-Friendly Brown Butter Sage Sourdough Stuffing is my love letter to that lost recipe. It has that same nutty, aromatic depth that made Rosalina’s version so special, but it uses ingredients you probably already have in your kitchen. I mean, who keeps fancy bread on hand? Not me. Day-old sourdough from the discount rack works perfectly here. The brown butter does all the heavy lifting flavor-wise, so you don’t need expensive add-ins or specialty items.
The first time I made this for Thanksgiving, my mother-in-law asked for the recipe before she even finished her plate. That’s when I knew I had something. Maybe you’ve been there—searching for that one dish that brings back a specific memory or makes everyone at the table go quiet for a second. This stuffing does that. It’s the kind of recipe that feels like a hug, and honestly, we could all use more of those around the dinner table.
Why You’ll Love This Recipe
This stuffing isn’t just another side dish—it’s the one that’ll earn you a permanent spot on the holiday menu rotation. Here’s why it works so well for real families on real budgets:
- Budget-Friendly Ingredients: Day-old bread, pantry staples, and a single stick of butter. No expensive sausage, dried fruit, or nuts required. Your grocery bill will thank you.
- Simple, Honest Technique: Brown butter sounds fancy, but it’s just butter cooked until it smells like toasted nuts. I’ll walk you through it so you can’t mess it up.
- Perfect for Family Meals: This stuffing pleases picky eaters and adventurous foodies alike. The sage and brown butter combo is universally loved.
- Make-Ahead Friendly: Assemble it the day before and bake when ready. Perfect for busy holiday mornings or stress-free weeknight dinners.
- Reheats Like a Dream: Leftovers stay moist and flavorful for days. Honestly, I sometimes like it better the next day.
What makes this recipe different from every other stuffing out there is the brown butter technique. It adds a deep, nutty richness that you usually only get from expensive ingredients like pancetta or prosciutto. Plus, using sourdough bread gives it that perfect chewy texture that holds up beautifully against the broth. No mushy stuffing here, I promise.
This isn’t just good stuffing—it’s the kind that makes you close your eyes after the first bite. The kind that makes everyone ask, “What did you put in this?” It’s comfort food that feels special without the stress or the price tag.
What Ingredients You Will Need
This recipe uses simple, everyday ingredients to create something truly special. Most of these are probably in your kitchen right now, which is exactly how I like to cook.
- 1 large loaf day-old sourdough bread (about 12 cups cubed, roughly chopped) — Stale bread is key here; fresh bread turns to mush. I buy discount bakery loaves a few days ahead and leave them out on the counter.
- 1/2 cup unsalted butter (1 stick) — Don’t use salted butter here; you need to control the salt level yourself. I like Kerrygold for the best brown butter flavor.
- 1 large yellow onion, diced (about 2 cups) — Sweet onions work too, but yellow onions give the best savory backbone.
- 3 celery stalks, diced (about 1 1/2 cups) — Include the leaves if they’re attached; they add extra flavor.
- 4 cloves garlic, minced — Fresh garlic only, please. The jarred stuff won’t do this recipe justice.
- 2 tablespoons fresh sage leaves, roughly chopped (about 10-12 leaves) — Fresh sage is non-negotiable here. Dried sage has a different, more medicinal flavor that I don’t love in this recipe.
- 1 tablespoon fresh rosemary, finely chopped (about 2 sprigs) — Strip the leaves off the woody stem before chopping.
- 1 tablespoon fresh thyme leaves (about 5-6 sprigs) — Run your fingers down the stem to strip the leaves easily.
- 2 cups low-sodium chicken or vegetable broth — Low-sodium is important so you can control the salt. I use Better Than Bouillon paste mixed with water—it’s cheap and flavorful.
- 2 large eggs, lightly beaten — These help bind the stuffing so it holds together nicely.
- 1 teaspoon salt — I use fine sea salt. Adjust based on your broth’s saltiness.
- 1/2 teaspoon black pepper, freshly ground — Freshly ground makes a real difference here.
- Optional: 1/2 cup grated Parmesan cheese — This isn’t traditional, but it adds a salty, umami kick that my family loves. Totally optional.
Ingredient notes: If you can’t find day-old sourdough, spread fresh cubes on a baking sheet and toast at 300°F for 10-15 minutes. For a gluten-free version, use your favorite sturdy gluten-free bread. The texture will be slightly different, but the flavor will still be amazing.
Equipment Needed
You don’t need fancy kitchen gear for this recipe. Here’s what you’ll need:
- Large skillet or frying pan — A 12-inch skillet works perfectly for browning the butter and sautéing the vegetables. I use my trusty cast iron skillet because it heats evenly.
- Large mixing bowl — Big enough to hold all the bread cubes and vegetable mixture without spilling. I use my grandmother’s old ceramic bowl, but any large bowl works.
- 9×13-inch baking dish — A standard casserole dish is perfect. Glass or ceramic both work fine.
- Sharp knife and cutting board — For chopping vegetables and herbs. A dull knife makes this job miserable.
- Wooden spoon or spatula — For stirring the brown butter and vegetables. A silicone spatula works too.
- Measuring cups and spoons — For accuracy, especially with the broth and butter.
- Whisk — For beating the eggs and broth together.
If you don’t have a 9×13 dish, a large cast iron skillet or a 10-inch round baking dish works too. Just adjust the baking time slightly—a deeper dish will need a few extra minutes.
Preparation Method
- Preheat your oven to 375°F (190°C). Position the rack in the middle of the oven. While it heats, get your bread ready. If your bread isn’t stale, spread the cubes on a baking sheet and toast for 10 minutes. Set aside to cool slightly.
- Make the brown butter. Place the 1/2 cup butter in your large skillet over medium heat. Let it melt completely, then swirl the pan occasionally. After about 5-7 minutes, the butter will start to foam and turn golden. Watch carefully—when you see tiny brown specks forming at the bottom and it smells like toasted nuts, it’s ready. This happens fast, so don’t walk away. Remove from heat immediately and pour into a heat-safe bowl to stop the cooking. Reserve about 2 tablespoons for later.
- Sauté the vegetables. Return the skillet to medium heat with the remaining brown butter. Add the diced onion and celery. Cook for 6-8 minutes, stirring occasionally, until the onions are translucent and the celery is softened. Add the minced garlic and cook for 1 more minute until fragrant. The kitchen should smell amazing at this point.
- Add the fresh herbs. Stir in the chopped sage, rosemary, and thyme. Cook for 1 minute, stirring constantly. The herbs will become fragrant and release their oils. Remove from heat.
- Combine the bread and vegetables. Place the bread cubes in your large mixing bowl. Pour the sautéed vegetable mixture over the bread. Toss gently with your hands or a large spoon until everything is evenly distributed. Don’t crush the bread cubes—you want some texture.
- Make the egg-broth mixture. In a separate bowl or measuring cup, whisk together the 2 cups broth, 2 beaten eggs, 1 teaspoon salt, and 1/2 teaspoon pepper. Whisk until the eggs are fully incorporated and the mixture looks smooth.
- Pour the liquid over the bread mixture. Slowly pour the broth mixture over the bread and vegetables. Gently fold everything together with a spatula or your hands. The bread should be evenly moistened but not swimming in liquid. If it looks dry, add a splash more broth. If it looks soupy, don’t worry—the bread will absorb it as it bakes.
- Transfer to the baking dish. Pour the stuffing into your greased 9×13 baking dish. Spread it into an even layer. Drizzle the reserved 2 tablespoons of brown butter over the top. If using Parmesan, sprinkle it over now.
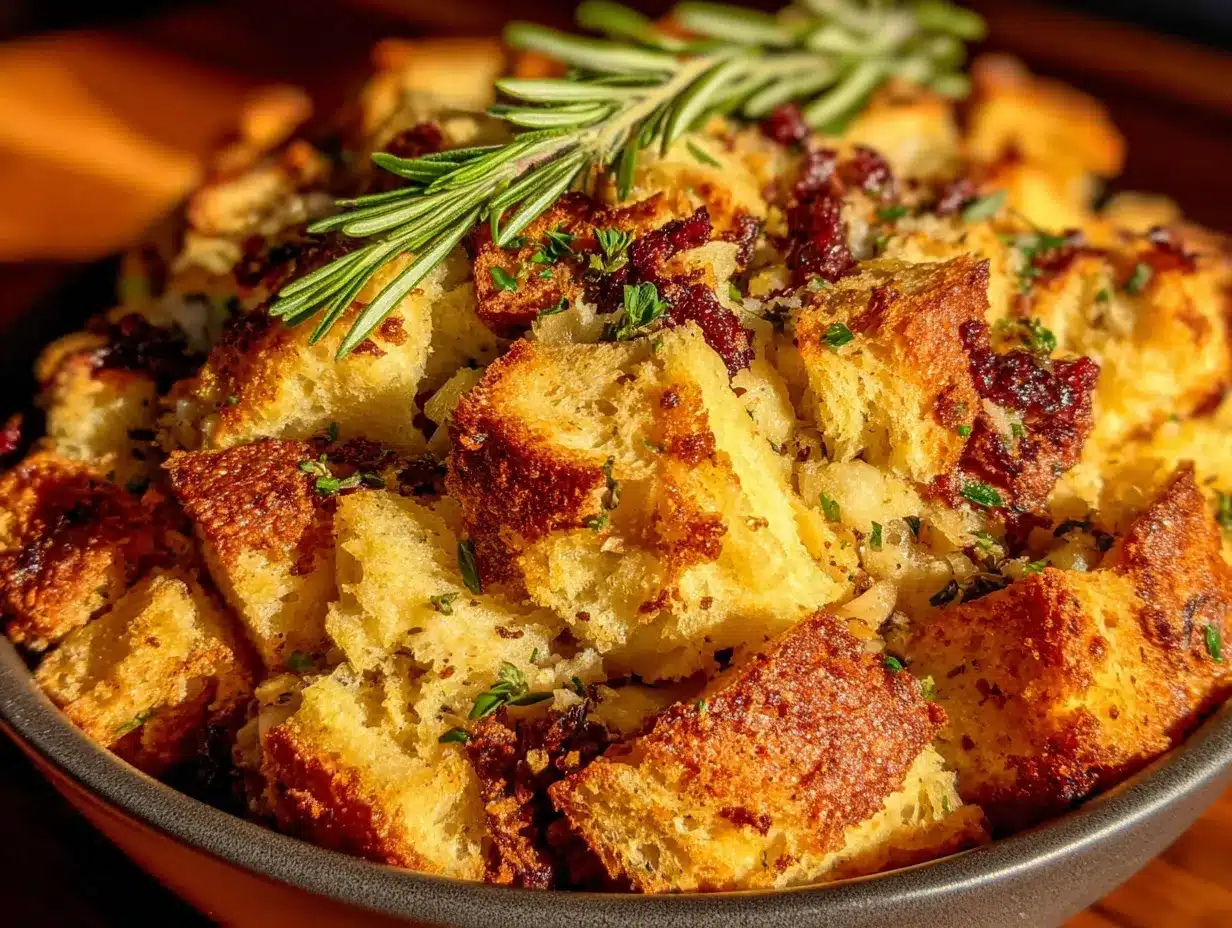
- Bake uncovered for 35-40 minutes. The top should be golden brown and crispy, while the inside stays moist and tender. If the top is browning too quickly after 25 minutes, tent loosely with foil for the remaining time.
- Let it rest for 10 minutes before serving. This allows the stuffing to set up properly. I know it’s hard to wait, but trust me on this one. The texture will be so much better.
Cooking Tips & Techniques
Let me save you from the mistakes I made during those twelve failed attempts. Here’s what I learned the hard way:
Don’t rush the brown butter. I burned three batches before I got it right. The key is medium heat and constant attention. When you see the foam subside and brown specks appear, pull it off the heat immediately. The butter will continue to cook in the hot pan, so pouring it into a separate bowl stops the process.
Dry bread is your friend. Wet bread makes soggy stuffing. I learned this lesson when my first attempt came out looking like bread pudding. Day-old bread that’s slightly stale absorbs the broth perfectly without falling apart. If you’re in a hurry, toast the cubes in the oven for 10 minutes at 300°F.
Season as you go. Don’t wait until the end to add all the salt and pepper. Season the vegetables as they cook, and season the broth mixture before pouring it over the bread. This builds layers of flavor that make the final dish taste complex.
Use your hands. I know it’s messy, but using your hands to toss the bread with the vegetables and broth gives you better control. You can feel when the bread is evenly moistened without over-mixing. Just wash your hands thoroughly first.
Check for doneness with a thermometer. The stuffing should reach 165°F in the center. This is especially important if you’re making it ahead and reheating it. Food safety matters, even with something as comforting as stuffing.
Variations & Adaptations
This recipe is wonderfully flexible. Here are some variations I’ve tried and loved:
- Add cooked sausage: Brown 1/2 pound of Italian sausage or breakfast sausage, crumble it, and stir it in with the vegetables. This makes it more of a main dish. My husband requests this version every year.
- Make it vegetarian: Use vegetable broth instead of chicken broth and skip the optional Parmesan. It’s still incredibly flavorful thanks to the brown butter and herbs.
- Add mushrooms: Sauté 8 ounces of sliced cremini mushrooms with the onions and celery. They add an earthy, meaty texture that even mushroom skeptics love.
- Gluten-free option: Use your favorite gluten-free bread. I’ve had good luck with Schar brand sourdough. Toast the cubes well to prevent mushiness.
- Add dried fruit: Stir in 1/2 cup dried cranberries or chopped dried apricots with the herbs. The sweetness balances the savory brown butter beautifully.
- Make it dairy-free: Use vegan butter or olive oil instead of butter. The flavor won’t be quite as rich, but it’s still delicious. Add an extra tablespoon of olive oil for moisture.
My personal favorite variation is adding caramelized onions instead of sautéed ones. It takes an extra 20 minutes, but the sweetness is incredible. I did this for a Friendsgiving last year and people literally fought over the leftovers.
Serving & Storage Suggestions
Serve this stuffing warm, straight from the oven. The top should be crispy and golden, while the inside stays moist and tender. I like to garnish with a few fresh sage leaves for a pop of color.
This stuffing pairs beautifully with roasted turkey or chicken, but honestly, it’s hearty enough to be a main dish with a simple green salad on the side. For holiday meals, I serve it alongside mashed potatoes, roasted vegetables, and cranberry sauce.
To store leftovers: Let the stuffing cool completely, then transfer to an airtight container. It will keep in the refrigerator for up to 4 days. The flavor actually gets better as the herbs meld together.
To reheat: Place individual portions in the microwave for 1-2 minutes, or reheat the whole dish in a 350°F oven for 15-20 minutes. Add a splash of broth if it seems dry. I actually prefer leftovers reheated in a skillet with a little butter—the bottom gets crispy again.
To freeze: Assemble the stuffing but don’t bake it. Cover tightly with foil and freeze for up to 3 months. Thaw overnight in the refrigerator, then bake as directed, adding 10-15 minutes to the baking time. I do this every year for Thanksgiving prep.
The flavors develop beautifully over time. I honestly think this stuffing tastes even better the next day, when the herbs have had time to really infuse into the bread. That’s assuming there are leftovers, of course.
Nutritional Information & Benefits
Per serving (based on 8 servings): Approximately 320 calories, 14g fat, 8g saturated fat, 40g carbohydrates, 3g fiber, 8g protein, 720mg sodium.
This stuffing offers some surprising nutritional benefits:
- Sourdough bread is easier to digest than regular bread thanks to the fermentation process. It also has a lower glycemic index, which means steadier energy levels.
- Sage is packed with antioxidants and has anti-inflammatory properties. It’s also been traditionally used to support memory and brain health.
- Brown butter contains conjugated linoleic acid, which has been linked to various health benefits. Plus, a little goes a long way flavor-wise, so you use less overall.
- Celery and onions provide fiber, vitamins, and antioxidants. They’re the unsung heroes of this dish.
Dietary considerations: This recipe contains gluten and dairy. For gluten-free and dairy-free adaptations, see the variations section above. It can be made vegetarian with vegetable broth.
Conclusion
This Budget-Friendly Brown Butter Sage Sourdough Stuffing is proof that you don’t need expensive ingredients or complicated techniques to create something truly memorable. It’s the dish that’ll have everyone asking for seconds—and the recipe. I’ve made it for Thanksgivings, Christmas dinners, and random Tuesday nights when I needed a little comfort food. It never disappoints.
I’d love to hear how this turns out for you. Did you add any fun variations? Did your family love it as much as mine does? Drop a comment below and let me know. And if you share a photo on Pinterest, tag me—I love seeing your creations. Happy cooking, friends. You’ve got this.
Frequently Asked Questions
Can I make this stuffing ahead of time?
Absolutely. Assemble the stuffing completely, cover it, and refrigerate for up to 24 hours before baking. Add 10-15 minutes to the baking time since you’re starting from cold. This is my go-to strategy for stress-free holiday cooking.
Can I use dried sage instead of fresh?
You can, but I really recommend fresh sage for this recipe. Dried sage has a stronger, more medicinal flavor that can overpower the dish. If you must use dried, use 1 tablespoon instead of 2 and add it with the other dried seasonings.
Why did my stuffing turn out soggy?
This usually happens when the bread isn’t dry enough or when too much liquid is added. Make sure your bread is truly stale or toasted before using. Also, add the broth gradually—you might not need the full 2 cups. The bread should be moist but not swimming.
Can I cook this stuffing inside a turkey?
I don’t recommend it for food safety reasons. Stuffing cooked inside a turkey takes longer to reach a safe temperature, which can lead to overcooked meat. Baking it separately gives you better control and a crispier top.
How do I make this stuffing vegan?
Use vegan butter or olive oil instead of butter, and replace the eggs with 2 tablespoons of ground flaxseed mixed with 6 tablespoons of water (let it sit for 5 minutes to gel). Use vegetable broth. The texture will be slightly different, but the flavor will still be wonderful.
Pin This Recipe!
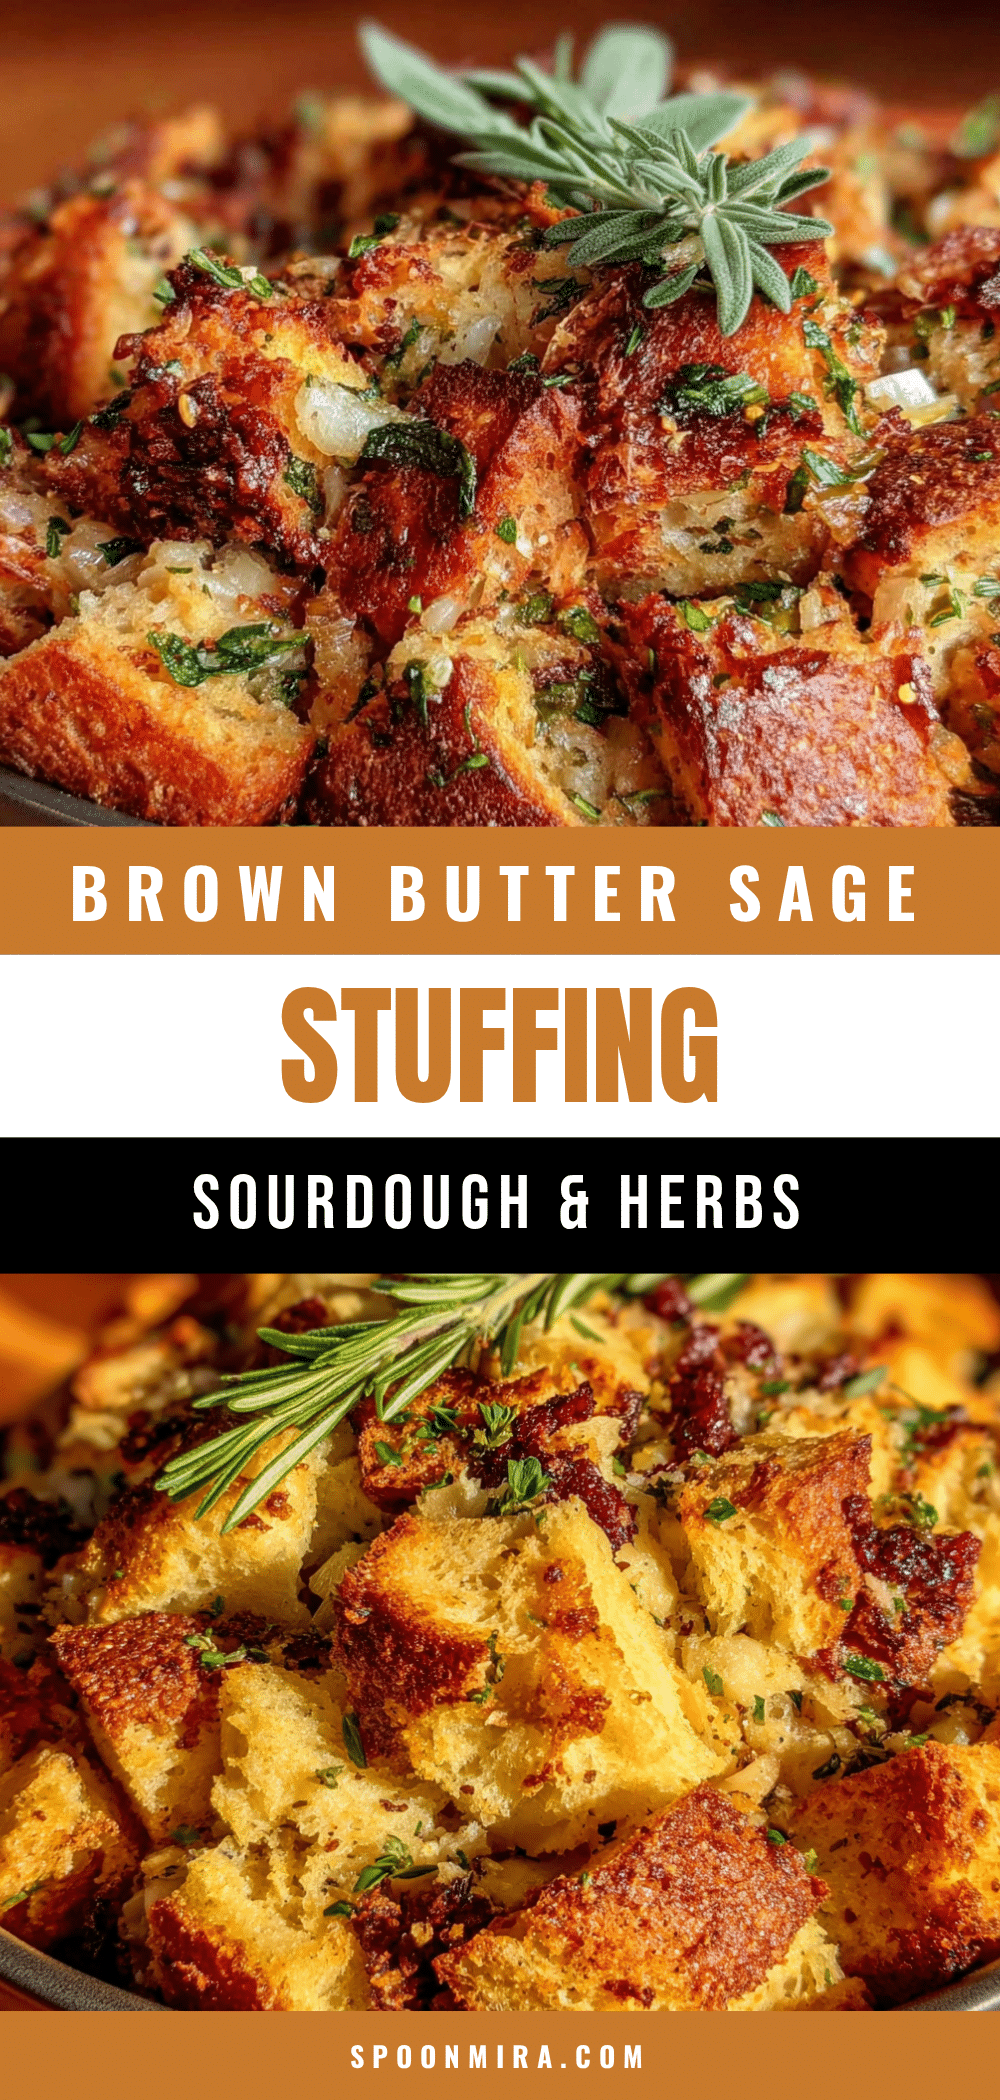
Budget-Friendly Brown Butter Sage Sourdough Stuffing

This Budget-Friendly Brown Butter Sage Sourdough Stuffing is a love letter to a lost Italian restaurant recipe, using day-old sourdough and brown butter for deep, nutty flavor without expensive ingredients. It’s the perfect holiday side dish that pleases everyone and reheats beautifully.
- Prep Time: 20 minutes
- Cook Time: 40 minutes
- Total Time: 1 hour
- Yield: 8 servings 1x
- Category: Side Dish
- Cuisine: American
Ingredients
- 1 large loaf day-old sourdough bread (about 12 cups cubed)
- 1/2 cup unsalted butter (1 stick)
- 1 large yellow onion, diced (about 2 cups)
- 3 celery stalks, diced (about 1 1/2 cups)
- 4 cloves garlic, minced
- 2 tablespoons fresh sage leaves, roughly chopped (about 10–12 leaves)
- 1 tablespoon fresh rosemary, finely chopped (about 2 sprigs)
- 1 tablespoon fresh thyme leaves (about 5–6 sprigs)
- 2 cups low-sodium chicken or vegetable broth
- 2 large eggs, lightly beaten
- 1 teaspoon salt
- 1/2 teaspoon black pepper, freshly ground
- Optional: 1/2 cup grated Parmesan cheese
Instructions
- Preheat your oven to 375°F (190°C). Position the rack in the middle of the oven. If your bread isn’t stale, spread the cubes on a baking sheet and toast for 10 minutes. Set aside to cool slightly.
- Make the brown butter. Place the 1/2 cup butter in your large skillet over medium heat. Let it melt completely, then swirl the pan occasionally. After about 5-7 minutes, the butter will start to foam and turn golden. Watch carefully—when you see tiny brown specks forming at the bottom and it smells like toasted nuts, it’s ready. Remove from heat immediately and pour into a heat-safe bowl to stop the cooking. Reserve about 2 tablespoons for later.
- Sauté the vegetables. Return the skillet to medium heat with the remaining brown butter. Add the diced onion and celery. Cook for 6-8 minutes, stirring occasionally, until the onions are translucent and the celery is softened. Add the minced garlic and cook for 1 more minute until fragrant.
- Add the fresh herbs. Stir in the chopped sage, rosemary, and thyme. Cook for 1 minute, stirring constantly. Remove from heat.
- Combine the bread and vegetables. Place the bread cubes in your large mixing bowl. Pour the sautéed vegetable mixture over the bread. Toss gently with your hands or a large spoon until everything is evenly distributed.
- Make the egg-broth mixture. In a separate bowl or measuring cup, whisk together the 2 cups broth, 2 beaten eggs, 1 teaspoon salt, and 1/2 teaspoon pepper until smooth.
- Pour the liquid over the bread mixture. Slowly pour the broth mixture over the bread and vegetables. Gently fold everything together with a spatula or your hands. The bread should be evenly moistened but not swimming in liquid.
- Transfer to the baking dish. Pour the stuffing into your greased 9×13 baking dish. Spread it into an even layer. Drizzle the reserved 2 tablespoons of brown butter over the top. If using Parmesan, sprinkle it over now.
- Bake uncovered for 35-40 minutes. The top should be golden brown and crispy, while the inside stays moist and tender. If the top is browning too quickly after 25 minutes, tent loosely with foil for the remaining time.
- Let it rest for 10 minutes before serving.
Notes
Don’t rush the brown butter; watch carefully to avoid burning. Dry bread is key to avoid soggy stuffing. Season as you go for layered flavor. Use your hands to toss for better control. Check for doneness with a thermometer (165°F in center).
Nutrition
- Serving Size: 1 serving
- Calories: 320
- Sugar: 4
- Sodium: 720
- Fat: 14
- Saturated Fat: 8
- Carbohydrates: 40
- Fiber: 3
- Protein: 8
Keywords: stuffing, sourdough stuffing, brown butter, sage, Thanksgiving, holiday, budget-friendly, make-ahead


