The neighborhood fall potluck was in six hours and I’d completely forgotten. I mean, I’d known about it for weeks, but somehow it slipped my mind until my phone buzzed with a reminder. Everyone else would be bringing elaborate dishes—I’d seen the Facebook posts. There was a from-scratch apple pie with a lattice crust, a caramel cake that looked like it belonged in a bakery window, and someone had even mentioned a smoked brisket that had been marinating for two days. I had a block of cream cheese, a can of pumpkin puree, and about forty-five minutes before I had to leave. Honestly, I almost just grabbed a store-bought pie and called it a day. But something in me—maybe stubbornness, maybe denial—decided I could pull something together. I remembered a cheesecake bar recipe I’d been tinkering with, the one where I swapped out half the cream cheese for cottage cheese to make it a little lighter. I figured, why not? If it flopped, at least I’d have a funny story. I threw ingredients together, crossed my fingers, and slid the pan into the oven. The bars came out of the oven looking golden and smelling like a pumpkin spice dream. I let them cool, cut them into squares, and walked into that potluck feeling like a fraud. By the end of the night, three people had asked for the recipe. The brisket guy asked for seconds. That’s the thing about these lighter pumpkin pie cheesecake bars—they sneak up on you. They’re not trying to be the fanciest thing on the table. They’re just quietly, deliciously good.
Maybe you’ve been there—wanting to bring something to a gathering that feels special but doesn’t require a full day in the kitchen. Or maybe you just want a fall dessert that satisfies that pumpkin cheesecake craving without derailing your week. These bars are exactly that. They’ve got the creamy, tangy filling of cheesecake, the warm spice of pumpkin pie, and a buttery graham cracker crust that holds it all together. And the best part? They’re lighter. Not in a “you won’t notice the difference” way, but in a “I actually feel good after eating one” way. I keep making them because they work for everything—weekend baking, holiday gatherings, or just a Tuesday night when you need a little comfort. These lighter pumpkin pie cheesecake bars aren’t just a recipe I stumbled upon; they’re the ones I turn to again and again.
Why You’ll Love This Recipe
Let me tell you why these lighter pumpkin pie cheesecake bars have earned a permanent spot in my fall baking rotation. I’ve tested this recipe more times than I can count, tweaking the ratios, swapping ingredients, and even making a few disastrous versions that ended up in the trash. What I landed on is a dessert that hits every note just right.
- Quick & Easy: From start to finish, these bars come together in about an hour, with only 15 minutes of active prep. Perfect for those last-minute potluck panic moments I just described.
- Simple Ingredients: You probably have most of these in your kitchen right now. No hunting down obscure specialty items—just good, honest ingredients.
- Perfect for Fall Gatherings: Whether it’s a Thanksgiving dessert table, a Friendsgiving potluck, or a cozy weekend treat, these bars fit right in.
- Crowd-Pleaser: I’ve served these to everyone from picky toddlers to my health-conscious sister-in-law, and they disappear every time.
- Unbelievably Delicious: The texture is what gets people. It’s creamy without being heavy, sweet without being cloying, and that pumpkin spice flavor is just right.
What makes these bars different from every other pumpkin cheesecake recipe out there? It’s the cottage cheese. I know it sounds weird, but blending it until completely smooth creates a filling that’s impossibly creamy with less cream cheese and fewer calories. You honestly can’t taste it—you just get that luscious cheesecake texture without the guilt. It’s a trick I learned from a nutritionist friend who swears by it, and now I can’t go back. This isn’t just another version of pumpkin cheesecake bars; it’s the one that makes you wonder why you haven’t been doing this all along.
What Ingredients You Will Need
This recipe uses simple, wholesome ingredients that come together to create something truly special. Most of these are pantry staples, especially if you do any fall baking, and the substitutions are easy if you need them.
For the Crust
- Graham cracker crumbs – 1 ½ cups (about 12 full sheets, crushed). I recommend using store-bought crumbs for convenience, but crushing your own gives a better texture.
- Unsalted butter – 5 tablespoons, melted. Use salted butter if that’s all you have, just reduce the added salt elsewhere.
- Granulated sugar – 2 tablespoons. This adds a touch of sweetness to the crust.
- Cinnamon – ½ teaspoon. A little warmth in the crust ties everything together.
For the Cheesecake Layer
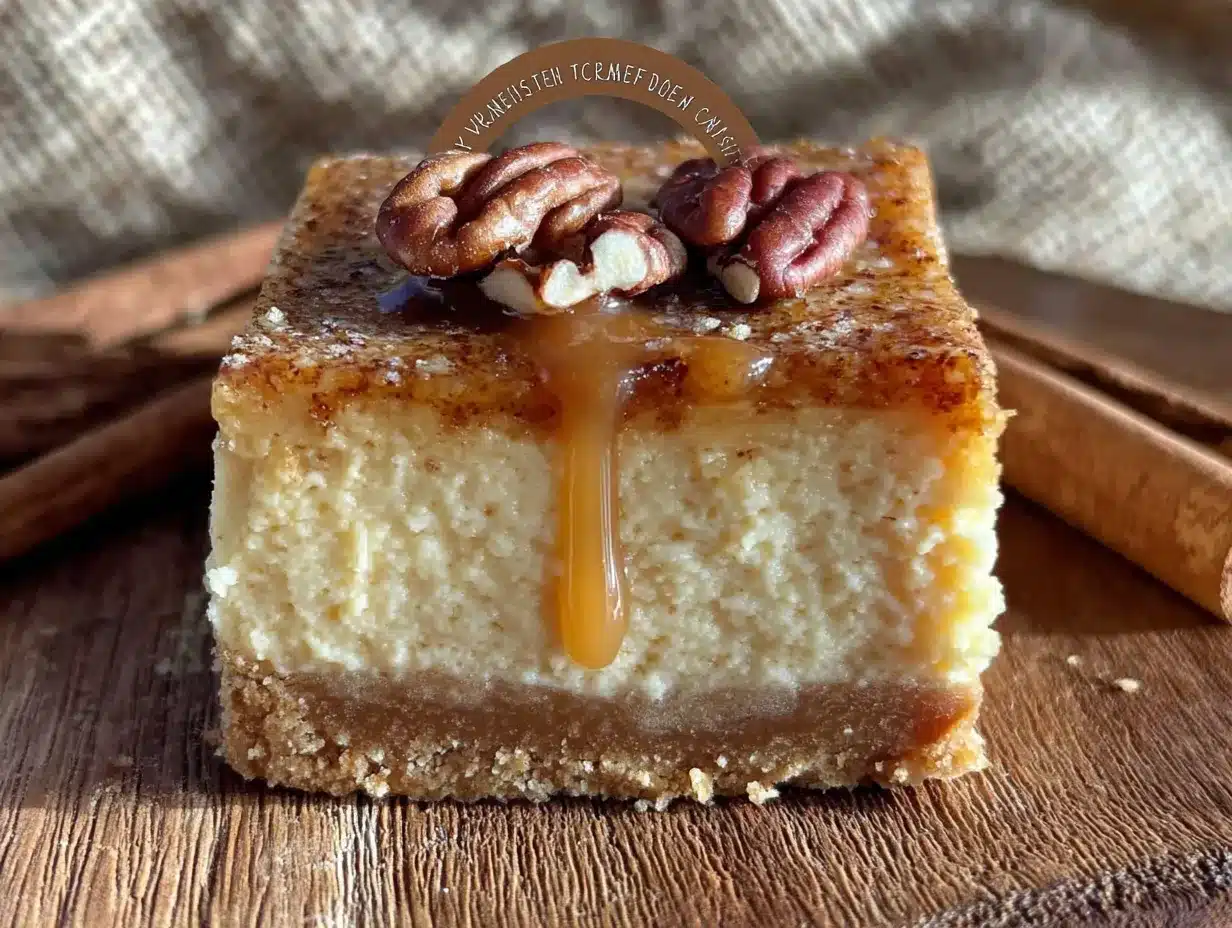
- Reduced-fat cream cheese – 8 ounces, softened. Neufchâtel cream cheese works beautifully here and saves about 30 calories per ounce.
- Low-fat cottage cheese – 1 cup (small curd is best). This is the secret ingredient—blend it until completely smooth for the best texture.
- Granulated sugar – ½ cup. You could reduce this to ⅓ cup if you prefer a less sweet dessert.
- Vanilla extract – 1 teaspoon. Pure vanilla extract makes a difference, but imitation works in a pinch.
- Large eggs – 2, at room temperature. Cold eggs can cause the filling to seize, so let them sit out for 20 minutes first.
- All-purpose flour – 2 tablespoons. This helps stabilize the filling and prevents cracking.
For the Pumpkin Layer
- Pumpkin puree – 1 cup (not pumpkin pie filling). Libby’s is my go-to brand for consistent texture and flavor.
- Light brown sugar – ¼ cup, packed. Dark brown sugar adds more molasses flavor if you want a deeper taste.
- Pumpkin pie spice – 1 ½ teaspoons. You can make your own with ¾ teaspoon cinnamon, ¼ teaspoon nutmeg, ¼ teaspoon ginger, and ¼ teaspoon cloves.
- Large egg – 1, at room temperature.
Substitution Notes: For a gluten-free version, use gluten-free graham crackers or crushed gluten-free cookies for the crust. The flour in the cheesecake layer can be swapped with almond flour or cornstarch. If you’re dairy-free, use vegan cream cheese and dairy-free cottage cheese—just know the texture will be slightly different. And if you can’t find pumpkin pie spice, don’t stress. Just mix cinnamon, nutmeg, ginger, and a pinch of cloves. I’ve done it more times than I can count.
Equipment Needed
You don’t need a fancy kitchen to make these lighter pumpkin pie cheesecake bars. Here’s what you’ll need:
- 8×8-inch baking pan – This is the perfect size for these bars. A 9×9 works too, but the bars will be slightly thinner.
- Parchment paper – Line your pan with two overlapping strips, leaving overhang on two sides. This makes lifting the bars out a breeze.
- Food processor or blender – Essential for getting that cottage cheese silky smooth. A high-speed blender works best, but a food processor does the job.
- Mixing bowls – You’ll need a medium bowl for the crust and a large one for the fillings.
- Electric hand mixer or stand mixer – A hand mixer is fine for this recipe. You don’t need a stand mixer unless you want one.
- Rubber spatula – For scraping every last bit of filling into the pan. Trust me, you don’t want to waste any.
- Measuring cups and spoons – Precise measurements matter in baking, especially with the lighter ingredients.
I’ve made these bars with a cheap hand mixer I bought at a discount store and they turned out just as good as when I use my fancy KitchenAid. Don’t let equipment intimidate you. If you don’t have a food processor, you can blend the cottage cheese in a blender or even press it through a fine-mesh sieve—it’s more work, but it works.
Preparation Method
Let’s walk through this step by step. I’ll include all the little details I’ve learned from making these bars more times than I can count.
Step 1: Prep Your Pan and Preheat
Preheat your oven to 350°F (175°C). Line your 8×8-inch baking pan with parchment paper, leaving about 2 inches of overhang on two opposite sides. This creates “handles” for lifting the bars out later. Lightly spray the parchment with non-stick cooking spray, just to be safe.
Step 2: Make the Crust
In a medium bowl, combine 1 ½ cups graham cracker crumbs, 2 tablespoons granulated sugar, and ½ teaspoon cinnamon. Pour in 5 tablespoons melted unsalted butter and stir with a fork until the mixture looks like wet sand and all the crumbs are evenly moistened. Press the mixture firmly into the bottom of your prepared pan. I use the bottom of a measuring cup to get it really even and compact. Bake for 8 minutes, then set aside to cool slightly while you make the fillings. The crust should be lightly golden and fragrant.
Step 3: Blend the Cottage Cheese
This is the most important step. Add 1 cup low-fat cottage cheese to your food processor or blender. Blend on high for 60-90 seconds, stopping to scrape down the sides as needed. You want it completely smooth—no lumps whatsoever. I once rushed this step and ended up with tiny curds in my cheesecake. Not the end of the world, but not ideal. Take your time here.
Step 4: Make the Cheesecake Layer
In a large mixing bowl, beat 8 ounces softened reduced-fat cream cheese with an electric mixer until smooth and creamy, about 2 minutes. Add the blended cottage cheese, ½ cup granulated sugar, and 1 teaspoon vanilla extract. Beat until combined, scraping down the bowl as needed. Add 2 room-temperature eggs, one at a time, beating on low speed after each addition until just incorporated. Finally, add 2 tablespoons all-purpose flour and mix until smooth. Be careful not to overmix—you don’t want to incorporate too much air, which can cause cracks.
Step 5: Make the Pumpkin Layer
In a separate bowl, whisk together 1 cup pumpkin puree, ¼ cup packed light brown sugar, and 1 ½ teaspoons pumpkin pie spice. Add 1 room-temperature egg and whisk until smooth and well combined. The mixture should be thick and fragrant—that’s how you know it’s right.
Step 6: Layer the Fillings
Pour about two-thirds of the cheesecake mixture over the pre-baked crust and spread it evenly. Drop spoonfuls of the pumpkin mixture over the top, then dollop the remaining cheesecake mixture on top of that. Here’s the fun part: use a butter knife or skewer to gently swirl the two mixtures together. You want a marbled effect, not a fully combined mixture. I like to do a figure-eight pattern, then a few vertical strokes. Don’t over-swirl or you’ll lose the distinct layers.
Step 7: Bake
Place the pan in the preheated oven and bake for 35-40 minutes. The edges should be set and slightly puffed, but the center should still have a slight jiggle when you gently shake the pan. This is normal—it will continue to set as it cools. If the top starts browning too quickly, tent loosely with foil after 25 minutes. I’ve had to learn this the hard way after a few over-baked bars.
Step 8: Cool and Chill
Let the bars cool completely in the pan on a wire rack, about 1 hour. Then transfer the pan to the refrigerator and chill for at least 4 hours, but overnight is best. This is crucial for clean slices and the best texture. I know it’s hard to wait, but trust me—it’s worth it.
Step 9: Slice and Serve
Once fully chilled, use the parchment overhang to lift the entire block of bars out of the pan. Place on a cutting board and use a sharp knife to slice into 16 squares. For clean cuts, wipe the knife clean between each slice. I learned this trick from a pastry chef, and it makes a world of difference.
Cooking Tips & Techniques
Over the years, I’ve made every mistake you can imagine with these bars. Let me save you the trouble.
Room temperature ingredients matter. I know it’s annoying to wait, but cold eggs and cream cheese create a lumpy filling that never smooths out. Set everything out 20-30 minutes before you start. I once made these bars in a hurry with cold ingredients and ended up with a grainy texture that was… not great.
Don’t overmix the cheesecake batter. Once you add the flour, mix just until it disappears. Overmixing incorporates too much air, which can cause the bars to puff up and then collapse, leaving cracks on the surface. I speak from experience here.
The water bath isn’t necessary. Unlike a full cheesecake, these bars are forgiving enough to bake without a water bath. The lower oven temperature and shorter baking time mean they’re less prone to cracking. But if you’re worried, place a pan of hot water on the lower rack of your oven while they bake. It adds moisture and helps prevent cracks.
Test for doneness with a gentle jiggle. The center should wobble slightly when you shake the pan. If it’s completely firm, it’s overbaked. If it’s liquid, it needs more time. That perfect jiggle is your target.
Patience is a virtue. I cannot stress this enough. Chilling these bars for at least 4 hours is non-negotiable. I’ve cut into them after 2 hours and ended up with a mess. Overnight chilling gives you those clean, beautiful slices that look like they came from a bakery.
Multitasking tip: While the crust is baking, blend the cottage cheese and measure out your other ingredients. This saves time and keeps the process flowing smoothly. I’ve learned to always prep ingredients before starting—it makes everything less stressful.
Variations & Adaptations
One of the things I love about these lighter pumpkin pie cheesecake bars is how adaptable they are. Here are some variations I’ve tried and loved:
Gluten-Free Version: Use gluten-free graham crackers or crushed gluten-free ginger snaps for the crust. Replace the all-purpose flour in the cheesecake layer with almond flour or cornstarch. I’ve tested this with almond flour and it works perfectly—just make sure it’s finely ground.
Vegan Adaptation: Use vegan cream cheese and dairy-free cottage cheese (or silken tofu blended smooth). Replace eggs with flax eggs (1 tablespoon ground flaxseed mixed with 3 tablespoons water per egg). The texture will be slightly softer, but the flavor is still incredible. I made this for a vegan friend’s birthday and she asked for the recipe immediately.
Low-Carb/Keto Option: Use a crust made from almond flour, melted butter, and a low-carb sweetener like erythritol. Replace the sugar in the fillings with your preferred low-carb sweetener. The pumpkin puree has some natural carbs, but it’s still lower than the original. I’ve tried this with monk fruit sweetener and it was surprisingly good.
Spice It Up: Add ½ teaspoon of cardamom or a pinch of cayenne pepper to the pumpkin layer for a warm, unexpected kick. I did this accidentally once—grabbed the wrong spice jar—and it turned out to be a happy mistake.
Chocolate Swirl: Melt 2 ounces of dark chocolate and swirl it into the cheesecake layer before adding the pumpkin. The combination of pumpkin and chocolate is underrated. My kids request this version every time now.
Mini Bars: Make these in a mini muffin tin for bite-sized treats. Reduce baking time to 15-18 minutes. Perfect for parties or portion control. I brought these to a book club once and they were gone in minutes.
Feel free to experiment. These bars are forgiving, and half the fun is making them your own.
Serving & Storage Suggestions
These lighter pumpkin pie cheesecake bars are delicious at any temperature, but I prefer them cold straight from the fridge. The texture is firmer and the flavors are more pronounced. If you like a softer texture, let them sit at room temperature for 10-15 minutes before serving.
Presentation ideas: Dust with a light sprinkle of cinnamon or pumpkin pie spice before serving. Add a dollop of whipped cream (regular or coconut) for a little extra indulgence. For a fall-themed presentation, serve on a wooden board with cinnamon sticks and star anise as garnish. I’ve also drizzled a little caramel sauce over the top for special occasions.
What to serve with them: These bars pair beautifully with a cup of hot coffee, chai tea, or a warm apple cider. For a dessert spread, serve alongside vanilla ice cream or a simple fruit compote. I once served them with a side of roasted pears and it was heavenly.
Storage: Store leftover bars in an airtight container in the refrigerator for up to 5 days. The flavors actually deepen over time, so they might taste even better on day two. I’ve found they’re at their best between 24-48 hours after baking.
Freezing: These bars freeze beautifully. Wrap individual bars in plastic wrap, then place them in a freezer-safe bag or container. They’ll keep for up to 3 months. To thaw, transfer to the refrigerator overnight or let sit at room temperature for about 30 minutes. I always keep a stash in the freezer for unexpected guests or late-night cravings.
Reheating: If you prefer them warm, microwave an individual bar for 10-15 seconds. Just don’t overdo it—you want it slightly warm, not hot. The texture changes if you heat it too much.
Nutritional Information & Benefits
Here’s the honest truth: these bars are lighter, but they’re still a dessert. That said, they’re a smarter choice than traditional pumpkin cheesecake bars, and you can feel good about enjoying one.
Estimated nutrition per bar (1 of 16):
- Calories: ~185
- Fat: 9g
- Saturated Fat: 5g
- Carbohydrates: 21g
- Fiber: 1g
- Sugar: 14g
- Protein: 6g
Health Benefits: Pumpkin is packed with vitamin A, which supports eye health and immune function. It’s also a good source of fiber, which helps keep you full and satisfied. The cottage cheese adds protein, making these bars more balanced than your average dessert. And by using reduced-fat cream cheese and less sugar than traditional recipes, you’re saving about 80 calories and 7 grams of fat per serving. Not bad for a dessert that tastes this indulgent.
Dietary Considerations: This recipe can be made gluten-free, low-carb, or vegan with simple substitutions (see variations above). It contains dairy and eggs in its standard form, so keep that in mind for allergies. I’ve served these to friends with various dietary needs and always found a way to adapt them.
My personal take: I don’t believe in “guilt-free” eating. Food is meant to be enjoyed. But I do believe in making choices that support how I want to feel. These bars let me have my pumpkin cheesecake and feel good about it. That’s a win in my book.
Conclusion
These lighter pumpkin pie cheesecake bars are proof that you don’t have to choose between delicious and smart. They’re creamy, spiced, and satisfying—everything you want in a fall dessert, without the heavy feeling that often comes with it. Whether you’re bringing them to a potluck, serving them at Thanksgiving, or just treating yourself on a cozy autumn evening, they deliver every time.
I love this recipe because it’s honest. It doesn’t pretend to be something it’s not. It’s a dessert made with a few smart swaps that make it a little lighter, but it never sacrifices flavor or texture. That’s the kind of recipe I want in my life—and I hope you do too.
Now I want to hear from you! Have you tried these bars? Did you add your own twist? Drop a comment below and let me know how they turned out. And if you loved them, share this recipe with a friend who needs a little fall baking in their life. Happy baking, friends!
Frequently Asked Questions
Can I use full-fat cream cheese instead of reduced-fat?
Absolutely. The bars will be slightly richer and creamier, and the calorie difference isn’t huge. Use whatever you have on hand. I’ve made them both ways and honestly, they’re both delicious.
Can I make these bars ahead of time?
Yes, and I actually recommend it. They need at least 4 hours to chill, but making them a day ahead is ideal. The flavors meld together and the texture becomes even better. Store them in the fridge until you’re ready to serve.
Why did my bars crack on top?
Cracking usually happens from overmixing the batter, overbaking, or sudden temperature changes. Make sure your ingredients are at room temperature, don’t overmix, and let the bars cool gradually in the pan before refrigerating. A little cracking is normal and doesn’t affect the taste—just cover it with a dusting of cinnamon or a dollop of whipped cream.
Can I use a different crust?
Of course! Ginger snaps, shortbread cookies, or even crushed vanilla wafers all work beautifully. For a nutty twist, try a pecan or walnut crust. Just adjust the butter amount if needed—you want the mixture to hold together when pressed.
How do I know when the bars are done baking?
The edges should be set and slightly puffed, but the center should still jiggle a little when you gently shake the pan. If you insert a toothpick near the center, it should come out with a few moist crumbs attached, not wet batter. Remember, they’ll continue to set as they cool.
Pin This Recipe!
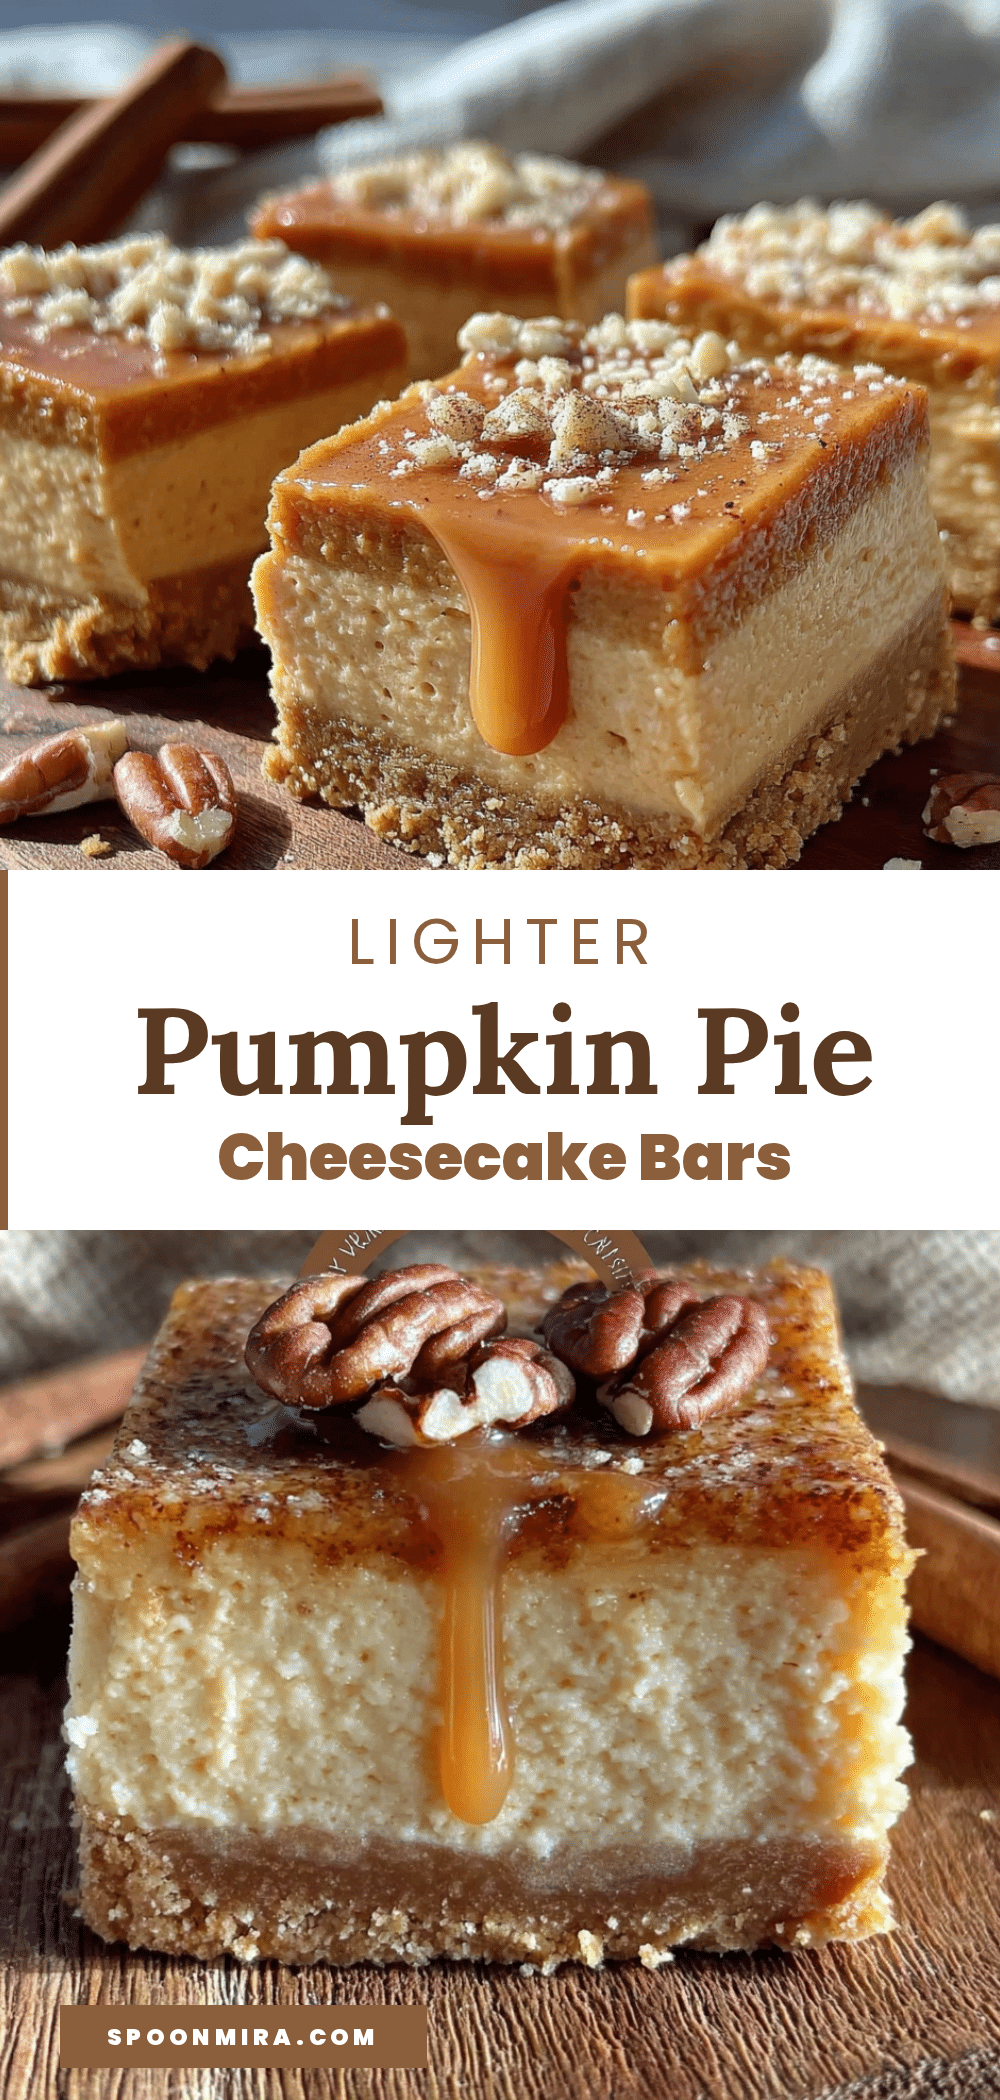
Lighter Pumpkin Pie Cheesecake Bars: Easy Fall Dessert
These lighter pumpkin pie cheesecake bars are creamy, spiced, and satisfying—everything you want in a fall dessert, without the heavy feeling. Made with a secret ingredient (cottage cheese), they’re quick to prepare and perfect for potlucks, Thanksgiving, or a cozy treat.
- Prep Time: 15 minutes
- Cook Time: 35-40 minutes
- Total Time: About 1 hour (plus 4 hours chilling)
- Yield: 16 bars 1x
- Category: Dessert
- Cuisine: American
Ingredients
- 1 ½ cups graham cracker crumbs (about 12 full sheets, crushed)
- 5 tablespoons unsalted butter, melted
- 2 tablespoons granulated sugar
- ½ teaspoon cinnamon
- 8 ounces reduced-fat cream cheese, softened
- 1 cup low-fat cottage cheese (small curd)
- ½ cup granulated sugar
- 1 teaspoon vanilla extract
- 2 large eggs, at room temperature
- 2 tablespoons all-purpose flour
- 1 cup pumpkin puree (not pumpkin pie filling)
- ¼ cup light brown sugar, packed
- 1 ½ teaspoons pumpkin pie spice
- 1 large egg, at room temperature
Instructions
- Preheat oven to 350°F (175°C). Line an 8×8-inch baking pan with parchment paper, leaving overhang on two sides. Lightly spray with non-stick cooking spray.
- In a medium bowl, combine graham cracker crumbs, 2 tablespoons granulated sugar, and cinnamon. Pour in melted butter and stir until mixture resembles wet sand. Press firmly into the bottom of the prepared pan. Bake for 8 minutes, then set aside to cool slightly.
- In a food processor or blender, blend cottage cheese on high for 60-90 seconds until completely smooth. Set aside.
- In a large mixing bowl, beat cream cheese with an electric mixer until smooth, about 2 minutes. Add blended cottage cheese, ½ cup granulated sugar, and vanilla extract; beat until combined. Add 2 eggs, one at a time, beating on low after each addition. Add flour and mix until smooth. Do not overmix.
- In a separate bowl, whisk together pumpkin puree, brown sugar, and pumpkin pie spice. Add 1 egg and whisk until smooth.
- Pour about two-thirds of the cheesecake mixture over the crust and spread evenly. Drop spoonfuls of pumpkin mixture over the top, then dollop remaining cheesecake mixture on top. Gently swirl with a knife or skewer to create a marbled effect.
- Bake for 35-40 minutes, until edges are set and center jiggles slightly. If top browns too quickly, tent with foil after 25 minutes.
- Cool completely in the pan on a wire rack (about 1 hour), then refrigerate for at least 4 hours, preferably overnight.
- Use parchment overhang to lift bars out of pan. Slice into 16 squares with a sharp knife, wiping blade clean between cuts.
Notes
Room temperature ingredients are key for a smooth filling. Do not overmix the cheesecake batter to avoid cracks. Chilling for at least 4 hours (preferably overnight) is essential for clean slices. For a gluten-free version, use gluten-free graham crackers and substitute flour with almond flour or cornstarch.
Nutrition
- Serving Size: 1 bar
- Calories: 185
- Sugar: 14
- Fat: 9
- Saturated Fat: 5
- Carbohydrates: 21
- Fiber: 1
- Protein: 6
Keywords: pumpkin cheesecake bars, lighter cheesecake, fall dessert, pumpkin dessert, cottage cheese cheesecake, easy dessert, potluck dessert


