My nephew, Leo, looked at the mountain of Thanksgiving leftovers in my fridge and asked why I couldn’t just pile it all onto a dinner roll and call it dinner. I started to explain why that wouldn’t work — the turkey would be dry, the cranberry sauce would make the bread soggy, it needed to be a proper meal. Then I stopped. He was eight. He didn’t care about proper meals. He cared about eating something that felt like a reward, not a reheat.
So I did it. I piled shredded turkey onto soft Hawaiian rolls, added a smear of leftover cranberry sauce, a slice of Swiss cheese, and a quick brush of melted butter with a little garlic powder. I baked them for ten minutes and pulled out a tray of golden, toasty little sandwiches that smelled like game day, not the day after a feast. Leo ate four. I mean, four. And I stood there, spatula in hand, realizing the kid had been right all along. Sometimes the simplest idea is the one you overthink right out of existence. Honestly, I’ve been making these sliders every year since, and they’ve become the most anticipated part of my post-Thanksgiving weekend. Maybe you’ve been there — staring at containers of turkey and sides, wondering how to make them exciting again. This is your answer.
Why You’ll Love This Recipe
These Thanksgiving Leftover Turkey Sliders are the kind of recipe that makes you feel like a genius with almost zero effort. I’ve tested this method with different breads, cheeses, and leftover configurations, and it works every single time. Here is why this version is the one you will come back to:
- Quick & Easy: From fridge to table in under 30 minutes. Perfect for the day after Thanksgiving when nobody wants to cook.
- Simple Ingredients: You likely have everything already sitting in your refrigerator. No special shopping trip required.
- Perfect for Leftovers: This is the ultimate way to use up turkey, cranberry sauce, stuffing, and cheese in one delicious bite.
- Crowd-Pleaser: Kids devour these. Adults go back for seconds. I have never had leftovers of the leftovers.
- Unbelievably Delicious: The combination of savory turkey, tangy cranberry, melted cheese, and buttery toasted bread is pure comfort food magic.
What makes this recipe different from the rest? It is the butter-brush technique. Brushing the tops of the rolls with melted butter mixed with garlic powder and a pinch of dried onion before baking creates a golden, slightly crispy top that contrasts beautifully with the soft, warm interior. It is a small step that makes a huge difference. This isn’t just another leftover sandwich — it is the best version of a leftover sandwich. The kind that makes you close your eyes after the first bite and forget you were eating leftovers at all.
What Ingredients You Will Need
This recipe uses simple, leftover-friendly ingredients to deliver big flavor without any fuss. Most of these are already in your fridge or pantry, especially if you just hosted or attended a Thanksgiving dinner.
- 12 Hawaiian sweet rolls (1 package) — these are soft, slightly sweet, and hold up perfectly to the fillings. I recommend King’s Hawaiian for the best texture.
- 2 cups cooked turkey, shredded or chopped — use white meat, dark meat, or a mix. Leftover Thanksgiving turkey works perfectly.
- 1/2 cup leftover cranberry sauce — whole berry or jellied, either works. The tartness balances the richness of the turkey and cheese.
- 6 slices Swiss cheese (or provolone, mozzarella, or cheddar) — Swiss melts beautifully and has a mild nutty flavor that pairs well with turkey.
- 1/2 cup leftover stuffing (optional but highly recommended) — adds texture and extra savory flavor. Crumble it over the turkey before adding the cheese.
- 3 tablespoons unsalted butter, melted — for brushing the tops of the rolls. Use salted butter if that is what you have, just reduce any added salt.
- 1 teaspoon garlic powder — mixed into the melted butter for savory depth.
- 1/2 teaspoon dried minced onion (or onion powder) — adds a subtle savory note to the butter topping.
- 1 tablespoon Dijon mustard (optional) — spread a thin layer on the bottom rolls for a tangy kick.
- 1 teaspoon poppy seeds (optional) — sprinkled on top for a classic slider look and slight crunch.
For ingredient selection, look for Hawaiian rolls that are soft and fresh, not stale. If your leftover turkey is dry, add a tablespoon of turkey gravy or chicken broth to the shredded meat before assembling. For a dairy-free version, use vegan cheese and plant-based butter. If you don’t have leftover cranberry sauce, you can use whole berry cranberry sauce from a can or even a spoonful of raspberry jam in a pinch.
Equipment Needed
You do not need any fancy gadgets for this recipe, which is part of its beauty. Here is what you will need:
- 9×13-inch baking dish (or a rimmed baking sheet) — large enough to hold all 12 sliders in a single layer.
- Sharp knife — for slicing the entire block of rolls in half horizontally. A serrated bread knife works best.
- Small bowl — for mixing the melted butter, garlic powder, and dried onion.
- Pastry brush (or a small spoon) — for brushing the butter mixture over the tops of the rolls. A silicone brush works great and is easy to clean.
- Aluminum foil — for covering the sliders during the first part of baking to prevent over-browning.
- Spatula — for lifting the hot sliders out of the dish after baking.
If you don’t have a pastry brush, you can use the back of a spoon to drizzle the butter over the tops. A 9×13 dish is ideal, but a large cast iron skillet or even a baking sheet with edges will work. I’ve made these in a disposable aluminum pan for potlucks and they turned out perfectly.
Preparation Method
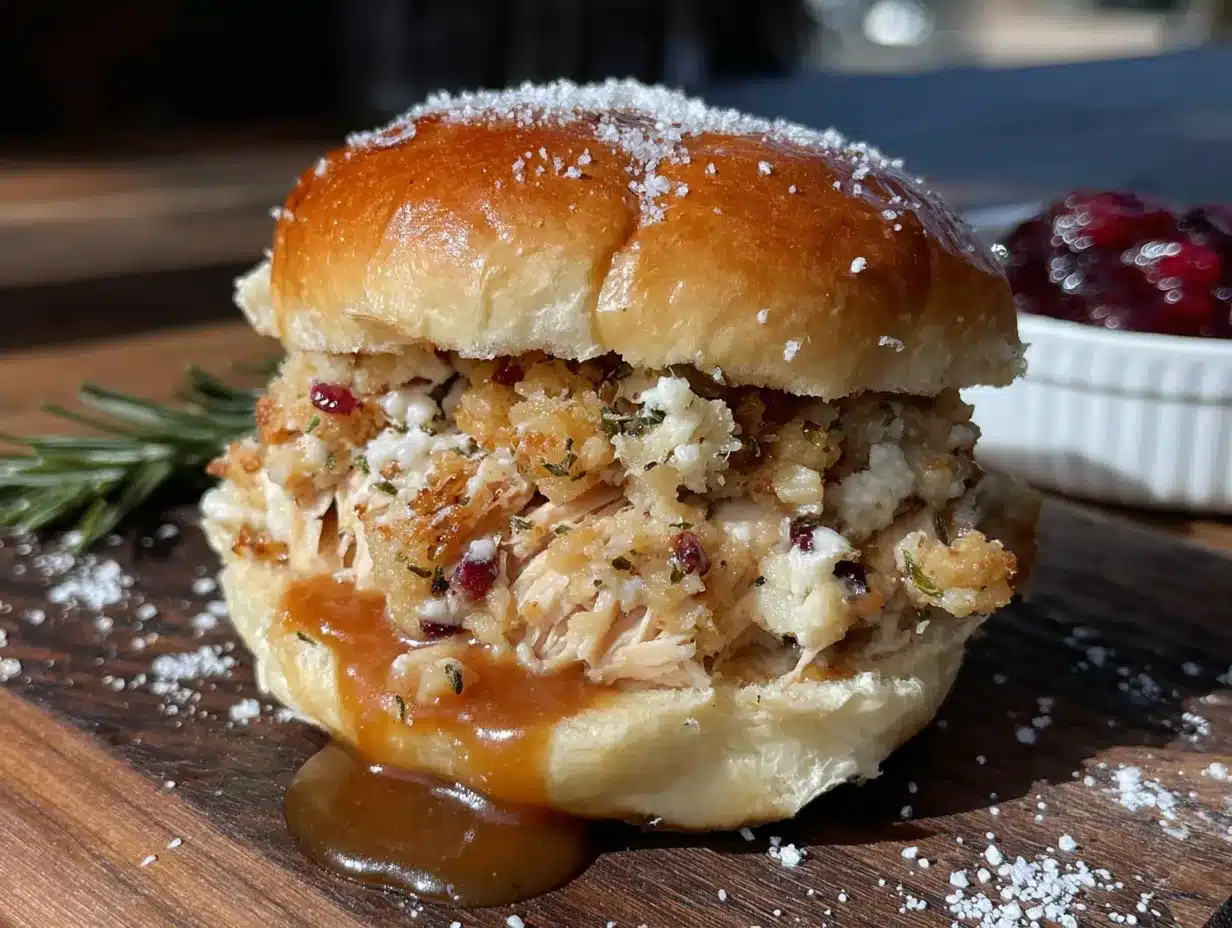
Follow these steps for perfect Thanksgiving Leftover Turkey Sliders every time. The total time is about 30 minutes, with 10 minutes of prep and 20 minutes of baking.
- Preheat your oven to 350°F (175°C). While the oven heats, take the leftover turkey out of the fridge so it comes to room temperature slightly. This helps it heat through more evenly.
- Prepare the rolls. Place the entire block of 12 Hawaiian rolls on a cutting board. Using a serrated knife, carefully slice the entire block in half horizontally, like you are splitting a giant hamburger bun. Keep the tops and bottoms intact as a single piece. Place the bottom half of the rolls in your greased 9×13-inch baking dish.
- Spread the cranberry sauce. Using a spatula or the back of a spoon, spread the leftover cranberry sauce evenly over the bottom half of the rolls. If your cranberry sauce is very thick, warm it in the microwave for 10-15 seconds to make it spreadable. You want a thin, even layer — about 1 tablespoon per slider.
- Add the turkey. Distribute the shredded or chopped turkey evenly over the cranberry sauce. If you are using leftover stuffing, crumble it over the turkey now. Don’t pack it down — you want a light, even layer so the sliders aren’t too dense.
- Layer the cheese. Place the Swiss cheese slices over the turkey. If you are using slices, tear them in half and arrange them so every slider gets a piece. The cheese will melt and hold everything together.
- Place the tops back on. Carefully lift the top half of the rolls and place it over the cheese and turkey. Gently press down to compact the sliders slightly. This helps everything stay together when you cut them later.
- Make the butter topping. In a small bowl, combine the melted butter, garlic powder, and dried minced onion. Stir until well mixed. Brush this mixture generously over the tops of the rolls, making sure to get the edges. If using, sprinkle poppy seeds over the buttered tops.
- Cover and bake. Cover the baking dish loosely with aluminum foil. Bake for 10 minutes. The foil traps steam and helps the insides heat through without the tops burning.
- Uncover and finish baking. Remove the foil and bake for an additional 8-10 minutes, until the tops are golden brown and the cheese is fully melted and bubbly. The edges of the rolls should be slightly crispy.
- Rest and serve. Let the sliders rest in the pan for 5 minutes before cutting. This allows the cheese to set slightly so the sliders hold their shape. Use a sharp knife to cut along the individual roll seams. Serve warm.
Sensory cue: When the sliders come out of the oven, the tops should be a deep golden brown, the butter will be bubbling at the edges, and the smell of garlic and toasted bread will fill your kitchen. The cheese should be visibly melted and stretching slightly when you lift a slider.
Cooking Tips & Techniques
I have made these sliders at least a dozen times, and I have learned a few things the hard way. Here are my best tips for success:
Don’t skip the foil. The first time I made these, I baked them uncovered the entire time. The tops got dark and crispy while the inside was still cold. Covering them for the first 10 minutes ensures the turkey and cheese heat through without burning the bread. Trust me on this one.
Shred the turkey, don’t slice it. Sliced turkey tends to slide out of the sliders when you bite into them. Shredded or chopped turkey stays put and distributes more evenly. Use two forks to pull the meat apart — it takes an extra 30 seconds and makes a big difference.
Watch the cheese. Swiss cheese melts beautifully, but if you use cheddar, it can get greasy if over-baked. Keep an eye on the sliders during the last few minutes of baking. You want the cheese melted and bubbly, not bubbling over the edges and burning on the pan.
Multitask wisely. While the sliders are baking in the foil-covered stage, use that time to clean up your prep mess or set the table. When you uncover them, stay nearby — the last few minutes go fast and you don’t want to walk away and come back to burnt tops.
Make ahead tip. You can assemble the sliders up to 24 hours in advance. Keep them covered in the refrigerator, then add the butter topping and bake when ready. Add 5 minutes to the covered baking time if starting from cold.
Variations & Adaptations
This recipe is incredibly flexible. Here are some ways to change it up based on what you have or who you are feeding:
Stuffing Lover’s Version: Add a generous layer of leftover stuffing between the turkey and cheese. The stuffing soaks up some of the juices and adds incredible texture. I tried this one year when I had way too much stuffing, and it was a game changer.
Spicy Cranberry Twist: Mix a teaspoon of sriracha or a pinch of red pepper flakes into the cranberry sauce before spreading. The heat cuts through the richness and adds a nice kick. My brother-in-law requests this version every year.
Turkey Club Sliders: Add a few slices of crispy bacon and a thin layer of mayonnaise mixed with black pepper. It turns these into a turkey club sandwich in slider form. Perfect if you have leftover bacon from breakfast.
Vegetarian Version: Replace the turkey with roasted portobello mushrooms or a plant-based turkey alternative. Use vegan cheese and butter. The cranberry and stuffing elements remain the same, so it still feels like Thanksgiving.
Gluten-Free Adaptation: Use gluten-free Hawaiian rolls or any soft gluten-free dinner roll. The rest of the ingredients are naturally gluten-free, so this is an easy swap. Just watch the baking time — gluten-free rolls can dry out faster.
Serving & Storage Suggestions
These sliders are best served warm, straight from the oven. The cheese is stretchy, the bread is soft but slightly crispy on top, and the flavors are at their peak. Here is how to serve and store them:
Serving temperature: Serve immediately after the 5-minute rest. If you are making them for a crowd, you can keep them warm in a low oven (200°F) for up to 30 minutes. Cover loosely with foil to prevent drying out.
Presentation: Arrange the sliders on a large platter or wooden board. Garnish with fresh parsley or rosemary sprigs for a pop of color. Serve with extra cranberry sauce on the side for dipping — some people like extra tang.
Complementary dishes: These sliders pair beautifully with a simple green salad, roasted vegetables, or a bowl of leftover turkey soup. For a game day spread, serve them alongside sweet potato fries or coleslaw.
Storage: Store leftover sliders in an airtight container in the refrigerator for up to 3 days. The bread will soften slightly, but the flavor remains excellent. To reheat, place them on a baking sheet in a 350°F oven for 8-10 minutes, or until warmed through. The microwave works in a pinch, but the bread will be much softer.
Freezing: You can freeze assembled, unbaked sliders for up to 2 months. Wrap the entire pan tightly in plastic wrap, then aluminum foil. To bake, thaw overnight in the refrigerator, add the butter topping, and bake as directed. The flavor develops beautifully after freezing.
Nutritional Information & Benefits
These sliders are a satisfying meal that makes good use of nutrient-rich leftovers. Here is an approximate nutritional breakdown per slider (based on 12 sliders):
Calories: 280 | Protein: 18g | Carbohydrates: 28g | Fat: 12g | Fiber: 1g | Sugar: 8g
Turkey is an excellent source of lean protein, which supports muscle repair and keeps you feeling full. Cranberries are packed with antioxidants and vitamin C, which support immune health — especially welcome during cold and flu season. Swiss cheese provides calcium for bone health, and the whole-grain option (if you choose whole wheat rolls) adds fiber.
For a lighter version, use reduced-fat cheese, skip the butter topping, and choose whole wheat rolls. For a lower-carb option, serve the filling in lettuce cups instead of rolls. This recipe is naturally nut-free and can be made gluten-free with the right bread. Always check your ingredients for allergens if serving a crowd.
Conclusion
These Thanksgiving Leftover Turkey Sliders are proof that the best recipes often come from the simplest ideas — and sometimes from an eight-year-old who just wanted a good sandwich. They are quick, affordable, and use up leftovers in a way that feels fresh and exciting. I love this recipe because it turns the day-after-Thanksgiving scramble into something to look forward to. No sad plates of reheated turkey here. Just warm, buttery, cheesy sliders that disappear in minutes.
I encourage you to make this recipe your own. Use whatever leftovers you have, swap the cheese, add bacon, or keep it classic. The beauty of this dish is its flexibility. And if you come up with a variation that knocks your socks off, I would love to hear about it. Drop a comment below, share a photo of your sliders, or tag me when you make them. Let’s make leftover season something to celebrate.
Frequently Asked Questions
Can I use frozen turkey for this recipe?
Yes, but thaw it completely in the refrigerator first. Frozen turkey will release too much water during baking and make the sliders soggy. Shred or chop the thawed turkey before using.
What if I don’t have Hawaiian rolls?
Any soft dinner roll or slider bun will work. Brioche buns, potato rolls, or even small ciabatta rolls are great options. Avoid very crusty bread, as it can be too hard for sliders.
Can I make these sliders ahead of time?
Absolutely. Assemble the sliders up to 24 hours in advance, cover, and refrigerate. Add the butter topping just before baking. You may need to add 5 minutes to the covered baking time if starting from cold.
How do I keep the sliders from getting soggy?
The key is not to overload them with wet ingredients. Use a thin layer of cranberry sauce and avoid adding too much gravy or extra liquid. The butter topping also helps create a barrier that keeps the tops from absorbing moisture.
Can I grill these sliders instead of baking?
Yes! Wrap the assembled sliders in aluminum foil and place them on a medium-hot grill for 10-12 minutes, flipping once halfway through. Unwrap and let the tops toast directly on the grill for 2-3 minutes. This works great for outdoor gatherings.
Pin This Recipe!
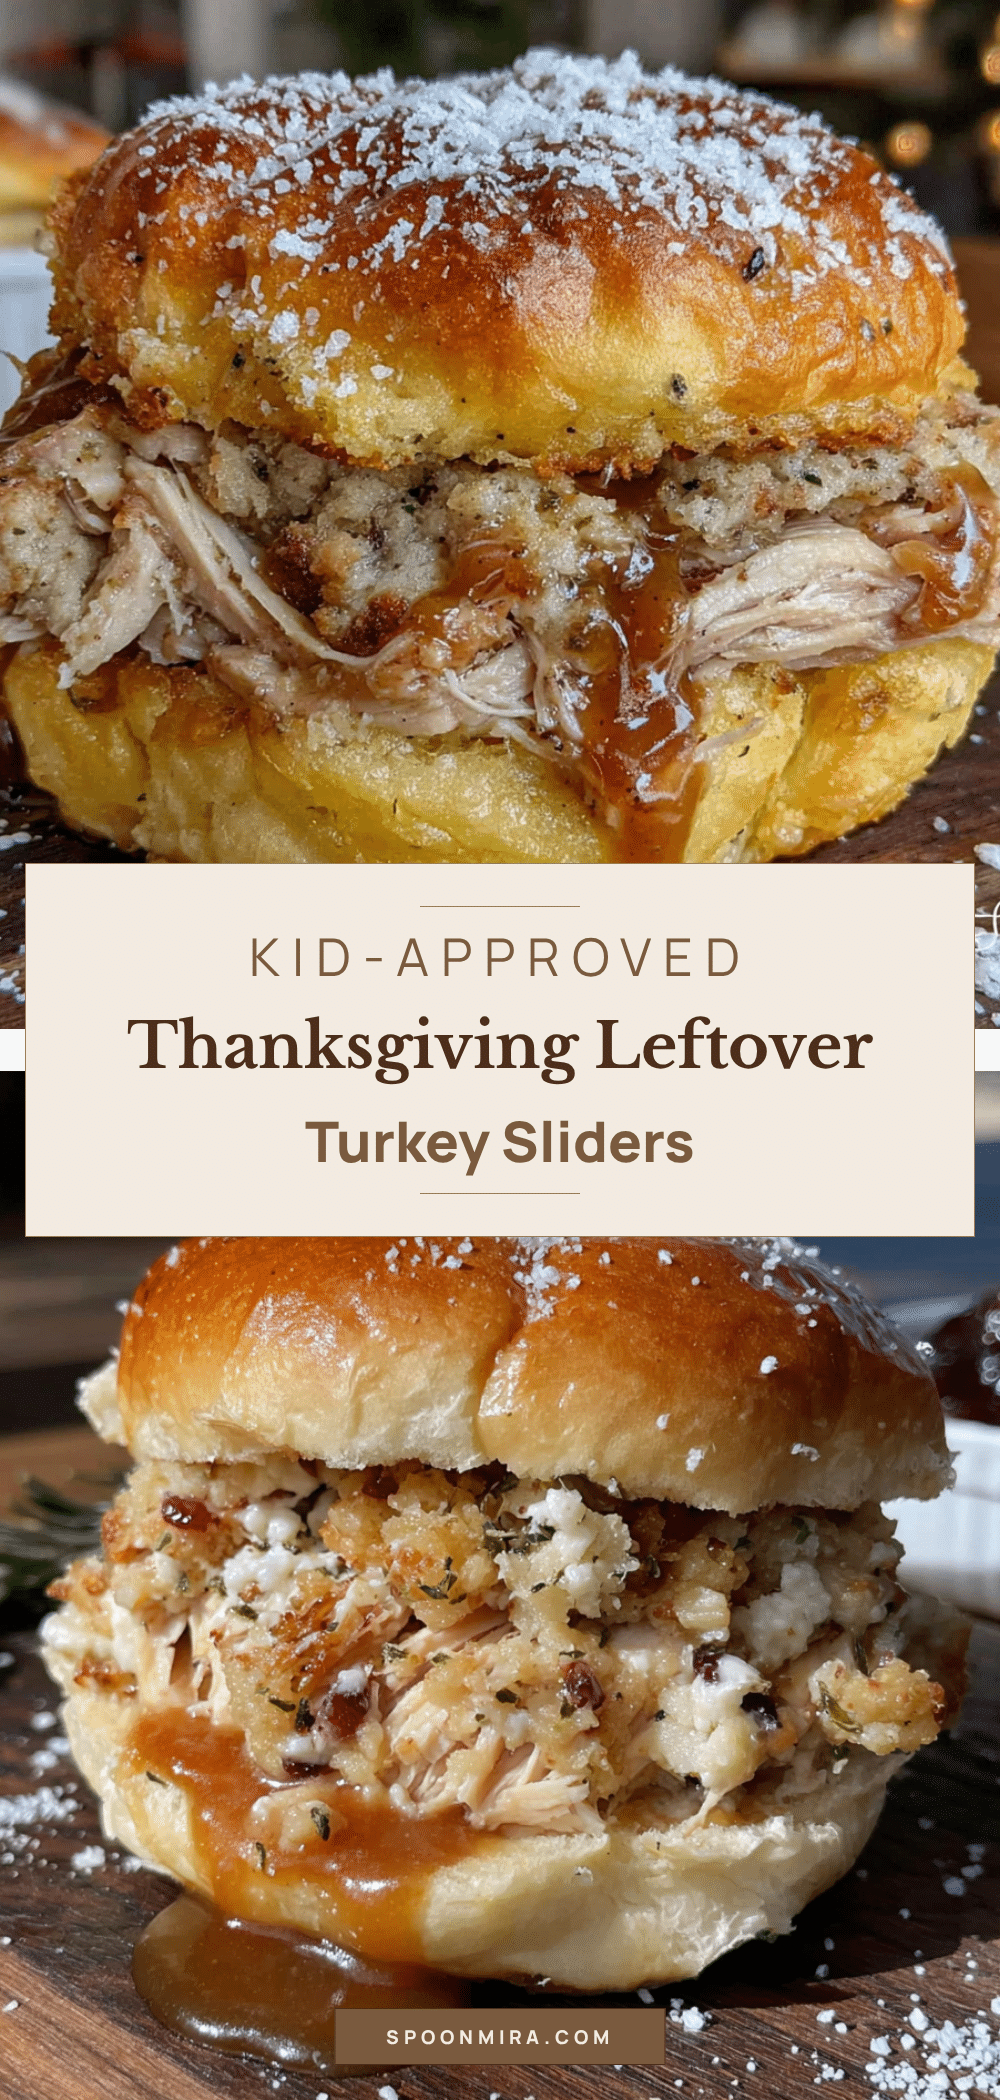
Thanksgiving Leftover Turkey Sliders: 30-Min Easy Recipe
These Thanksgiving Leftover Turkey Sliders are the ultimate way to use up turkey, cranberry sauce, stuffing, and cheese in one delicious bite. From fridge to table in under 30 minutes, they’re a crowd-pleaser that makes leftover season something to celebrate.
- Prep Time: 10 minutes
- Cook Time: 20 minutes
- Total Time: 30 minutes
- Yield: 12 sliders 1x
- Category: Main Course
- Cuisine: American
Ingredients
- 12 Hawaiian sweet rolls (1 package)
- 2 cups cooked turkey, shredded or chopped
- 1/2 cup leftover cranberry sauce
- 6 slices Swiss cheese (or provolone, mozzarella, or cheddar)
- 1/2 cup leftover stuffing (optional but highly recommended)
- 3 tablespoons unsalted butter, melted
- 1 teaspoon garlic powder
- 1/2 teaspoon dried minced onion (or onion powder)
- 1 tablespoon Dijon mustard (optional)
- 1 teaspoon poppy seeds (optional)
Instructions
- Preheat your oven to 350°F (175°C). While the oven heats, take the leftover turkey out of the fridge so it comes to room temperature slightly.
- Prepare the rolls. Place the entire block of 12 Hawaiian rolls on a cutting board. Using a serrated knife, carefully slice the entire block in half horizontally. Keep the tops and bottoms intact as a single piece. Place the bottom half of the rolls in your greased 9×13-inch baking dish.
- Spread the cranberry sauce. Using a spatula or the back of a spoon, spread the leftover cranberry sauce evenly over the bottom half of the rolls. If your cranberry sauce is very thick, warm it in the microwave for 10-15 seconds to make it spreadable.
- Add the turkey. Distribute the shredded or chopped turkey evenly over the cranberry sauce. If you are using leftover stuffing, crumble it over the turkey now.
- Layer the cheese. Place the Swiss cheese slices over the turkey. If you are using slices, tear them in half and arrange them so every slider gets a piece.
- Place the tops back on. Carefully lift the top half of the rolls and place it over the cheese and turkey. Gently press down to compact the sliders slightly.
- Make the butter topping. In a small bowl, combine the melted butter, garlic powder, and dried minced onion. Stir until well mixed. Brush this mixture generously over the tops of the rolls, making sure to get the edges. If using, sprinkle poppy seeds over the buttered tops.
- Cover and bake. Cover the baking dish loosely with aluminum foil. Bake for 10 minutes.
- Uncover and finish baking. Remove the foil and bake for an additional 8-10 minutes, until the tops are golden brown and the cheese is fully melted and bubbly.
- Rest and serve. Let the sliders rest in the pan for 5 minutes before cutting. Use a sharp knife to cut along the individual roll seams. Serve warm.
Notes
Don’t skip the foil covering for the first 10 minutes to ensure the turkey and cheese heat through without burning the bread. Shred the turkey instead of slicing it to prevent it from sliding out. You can assemble the sliders up to 24 hours in advance and refrigerate; add 5 minutes to the covered baking time if starting from cold. For a dairy-free version, use vegan cheese and plant-based butter. For gluten-free, use gluten-free Hawaiian rolls.
Nutrition
- Serving Size: 1 slider
- Calories: 280
- Sugar: 8
- Sodium: 380
- Fat: 12
- Saturated Fat: 6
- Carbohydrates: 28
- Fiber: 1
- Protein: 18
Keywords: Thanksgiving leftovers, turkey sliders, leftover turkey recipe, easy sliders, 30-minute recipe, holiday leftovers, comfort food


