The PTA potluck was in six hours and I’d completely forgotten. I mean, I’d signed up. I’d even put it on the calendar. But there it was, Tuesday morning, and I was staring into my fridge like it owed me money. Everyone else would be bringing those perfectly arranged salads in glass bowls and fancy store-bought quiches. I had a pack of chicken thighs, some soy sauce that was almost expired, and a jar of honey from that time I tried to be a beekeeper (it didn’t work out).
Honestly, I almost just grabbed a frozen pizza and called it a day. But then I remembered my neighbor, Karen, who always brings those Pinterest-perfect appetizers. The competitive side of me kicked in. I grabbed a skillet, threw the chicken in, and started mixing whatever looked promising in my pantry. The garlic was getting soft, so that went in too. I figured I’d just brown the chicken and hope for the best.
The smell that filled my kitchen was honestly ridiculous. My kids came running in asking what was for dinner, and I had to shoo them away because this was for the potluck. I didn’t even taste it before I left — I just poured the sticky, golden sauce over the chicken, crossed my fingers, and ran out the door. At the potluck, I set my sad little skillet down next to Karen’s elaborate charcuterie board and prepared to be humbled.
You know what happened next. That skillet was empty in twenty minutes. People were asking for the recipe. Karen asked for the recipe. I stood there with a plastic fork, holding a piece of chicken I’d snagged for myself, feeling like I’d accidentally won the lottery. That’s the thing about this easy one-pan honey garlic chicken thighs recipe — it doesn’t try hard, but it wins anyway. Maybe you’ve been there, scrambling for something to bring and coming up short. This one’s for those days. It’s been my go-to ever since, and I keep making it because it never lets me down.
Why You’ll Love This Recipe
Let me tell you why this recipe has become a staple in my kitchen and probably will in yours too. I’ve tested it about a dozen times — sometimes on purpose, sometimes because I forgot to write down what I did the first time. Every single time, it works. That’s the kind of reliability you need when you’re feeding a family on a budget.
- Quick & Easy : This comes together in under 30 minutes, start to finish. On those nights when the kids are hangry and you’re exhausted, you can have dinner on the table before anyone melts down completely.
- Simple Ingredients : No fancy grocery trips needed. Chicken thighs, honey, soy sauce, garlic — these are things you probably already have. I’ve made this with the last sad cloves of garlic in my drawer and it was still amazing.
- Perfect for Busy Weeknights : One pan means less cleanup. Less cleanup means more time to sit down and actually enjoy your meal with the family. It’s a win-win.
- Crowd-Pleaser : My kids used to look at chicken thighs suspiciously. Now they ask for this recipe by name. Even my picky eater, who once declared all meat “suspicious,” cleans her plate.
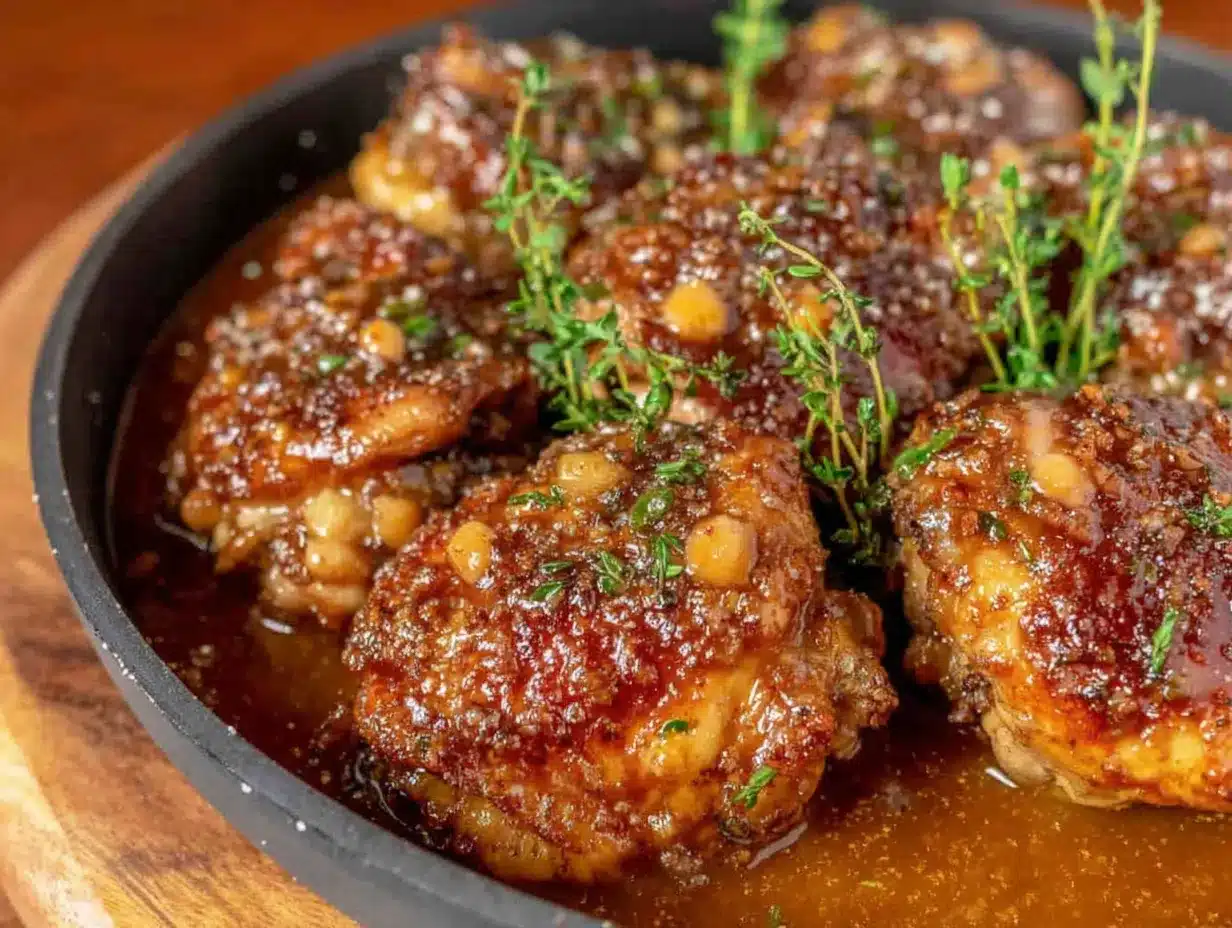
- Unbelievably Delicious : The combination of sweet honey and savory garlic creates this sticky, caramelized coating that’s absolutely irresistible. The chicken stays juicy because thighs are forgiving like that.
What makes this different from other honey garlic chicken recipes? It’s the technique. Most recipes have you bake the chicken separately or make the sauce in a different pot. This one-pan method lets the sauce reduce right around the chicken, creating this concentrated flavor that you just can’t get any other way. The chicken absorbs the sauce as it cooks, so every bite is packed with that sweet-savory goodness. It’s comfort food that comes together fast, uses what you already have, and makes everyone at the table happy. That’s the kind of recipe worth holding onto.
What Ingredients You Will Need
This recipe uses simple, honest ingredients that work together to create something special. Nothing fancy here — just good food that does its job. Here’s what you’ll need:
For the Chicken
- 6 bone-in, skin-on chicken thighs (about 2 pounds) — The bone keeps the meat juicy, and the skin gets beautifully crispy. If you’re watching your budget, thighs are almost always cheaper than breasts.
- 1 tablespoon olive oil — Just enough to get a good sear. You can use avocado oil or vegetable oil if that’s what you have.
- Salt and black pepper — To taste. Don’t be shy here. Seasoning the chicken well makes all the difference.
For the Honey Garlic Sauce
- 1/3 cup honey — Use a good quality honey here. The flavor really comes through. I like using local honey when I can find it.
- 1/4 cup low-sodium soy sauce — Low-sodium is important so the dish doesn’t end up too salty. You can use tamari or coconut aminos if you’re gluten-free.
- 4 cloves garlic, minced — Fresh garlic is non-negotiable here. The jarred stuff won’t give you the same punch. Trust me on this one.
- 1 tablespoon rice vinegar — This brightens up the sauce and balances the sweetness. Apple cider vinegar works in a pinch.
- 1 teaspoon sesame oil — Optional, but it adds a lovely nutty flavor. Leave it out if you don’t have it.
- 1/2 teaspoon red pepper flakes — Optional for a little heat. My kids don’t mind a tiny kick, so I add just a pinch.
- 1 tablespoon cornstarch mixed with 2 tablespoons water — This thickens the sauce at the end. Don’t skip it — it’s what gives you that glossy, sticky finish.
For Garnish
- Sesame seeds — For that restaurant-style look. Totally optional but nice.
- Chopped green onions — Adds a fresh pop of color and flavor. I always have these in my fridge.
A quick note on ingredients: I’ve made this with boneless, skinless thighs when that’s all I had, and it works fine — just reduce the cooking time by about 5 minutes. The skin-on version is definitely more flavorful and the texture is better, so I recommend going that route when you can. For the soy sauce, I really do suggest low-sodium. Regular soy sauce can make the sauce overwhelmingly salty once it reduces. Learn from my mistakes, friends.
Equipment Needed
You don’t need a lot of fancy equipment for this recipe, which is part of why I love it. Here’s what you’ll need:
- A large oven-safe skillet — I use a 12-inch cast iron skillet because it holds heat beautifully and gives the chicken a gorgeous sear. A stainless steel or non-stick skillet works too, just make sure it’s oven-safe if you’re finishing it in the oven.
- Tongs — For flipping the chicken without tearing the skin. A spatula works too, but tongs give you more control.
- A small bowl — For mixing the sauce ingredients together before adding them to the pan.
- A whisk or fork — For mixing the cornstarch slurry. A fork works just fine.
- A meat thermometer — Not strictly necessary, but helpful if you’re new to cooking chicken. You’re looking for 165°F in the thickest part.
If you don’t have an oven-safe skillet, you can transfer the chicken to a baking dish after searing. I’ve done it that way before and it works perfectly. My cast iron skillet was a thrift store find — you don’t need to spend a lot of money to cook good food. Just use what you have and make it work.
Preparation Method
Alright, let’s get cooking. This recipe moves quickly, so I like to have everything prepped before I start. Here’s how it goes:
- Preheat your oven to 400°F (200°C). This gives it time to come to temperature while you’re working on the stovetop. Position the rack in the middle of the oven.
- Pat the chicken thighs dry with paper towels. This is important — dry skin means crispy skin. Season both sides generously with salt and pepper. Don’t be shy here. I use about a teaspoon of salt total for six thighs.
- Heat the olive oil in your skillet over medium-high heat. You want the oil shimmering but not smoking. Place the chicken thighs skin-side down in the skillet. Don’t crowd them — if your skillet isn’t big enough, work in batches. Let them cook undisturbed for 5-6 minutes until the skin is golden brown and crispy. The skin should release easily from the pan when it’s ready.
- Flip the chicken thighs using your tongs. Cook for another 3-4 minutes on the other side. The chicken won’t be cooked through yet — that’s fine. Remove the chicken to a plate and set aside. Pour off most of the fat from the skillet, leaving about a tablespoon behind for flavor.
- In a small bowl, whisk together the honey, soy sauce, minced garlic, rice vinegar, sesame oil, and red pepper flakes. Give it a good stir to combine. The garlic should be evenly distributed.
- Reduce the heat to medium and pour the sauce into the hot skillet. It will bubble up immediately — that’s good. Let it cook for about 1 minute, stirring constantly, until it starts to thicken slightly. Scrape up any browned bits from the bottom of the pan — that’s where all the flavor is.
- Return the chicken thighs to the skillet, skin-side up. Spoon some of the sauce over the top of each thigh. Transfer the skillet to the preheated oven.
- Bake for 15-20 minutes, until the chicken is cooked through and the internal temperature reaches 165°F (74°C). The sauce should be bubbling and thickened around the chicken. If you want extra sticky sauce, you can broil for the last 2 minutes — just watch it carefully so it doesn’t burn.
- Remove the skillet from the oven and transfer the chicken to a serving platter. Place the skillet back on the stovetop over medium heat. Stir the cornstarch slurry and add it to the sauce. Cook for 1-2 minutes, stirring constantly, until the sauce thickens to a glossy, syrupy consistency. If it’s too thick, add a tablespoon of water. If it’s too thin, let it simmer a minute longer.
- Spoon the thickened sauce over the chicken. Sprinkle with sesame seeds and chopped green onions. Let it rest for 5 minutes before serving — this helps the juices redistribute and makes the chicken even more tender.
A few things I’ve learned the hard way: Don’t skip the patting-dry step. I did once because I was in a hurry, and the skin steamed instead of crisping. Also, keep an eye on the sauce in the oven — honey can burn if it gets too dark. Every oven is different, so check at the 15-minute mark. And if your sauce seems too thin at the end, don’t panic. Just let it simmer a bit longer on the stovetop. It will thicken up.
Cooking Tips & Techniques
I’ve made this recipe enough times to have some hard-won wisdom to share. Here are the things I wish someone had told me:
Don’t move the chicken while it’s searing. I know it’s tempting to peek, but that’s how you tear the skin. Let it sit in the hot oil and develop that golden crust. You’ll know it’s ready when it releases easily from the pan. If it sticks, it’s not done yet.
Watch the garlic. Minced garlic burns fast. When you add it to the sauce, keep stirring and don’t walk away. Burnt garlic turns bitter and ruins the whole dish. I’ve done it. It’s sad. Learn from me.
Use a meat thermometer. Chicken thighs are forgiving, but undercooked chicken is no joke. I use an instant-read thermometer and pull the chicken at 165°F. If you don’t have one, cut into the thickest thigh — the juices should run clear and the meat should be opaque all the way through.
Let it rest. I know you’re hungry. I know the kitchen smells amazing. But letting the chicken rest for 5 minutes makes a real difference. The juices settle back into the meat, and every bite is more tender. Use that time to set the table or pour yourself a glass of water.
Double the sauce. This is my pro tip. The recipe as written gives you a nice amount of sauce, but if you’re serving this with rice, you’ll want extra. I always make 1.5 times the sauce ingredients. Leftover sauce is amazing drizzled over vegetables the next day.
Variations & Adaptations
One of the best things about this recipe is how flexible it is. Here are some ways I’ve changed it up depending on what I have on hand or who I’m feeding:
Spicy Honey Garlic Chicken — Add an extra teaspoon of red pepper flakes or a chopped fresh chili to the sauce. My husband loves this version. The kids, not so much. I make it for date night when we’re feeling adventurous.
Garlic Lovers Version — Use 6-8 cloves of garlic instead of 4. Roast a whole head of garlic alongside the chicken and squeeze the soft cloves into the sauce at the end. This is my personal favorite. Garlic is life.
Gluten-Free Adaptation — Swap the soy sauce for tamari or coconut aminos. Everything else is naturally gluten-free. I’ve made this for friends with celiac disease and they couldn’t tell the difference.
Honey Garlic Chicken Thighs in the Slow Cooker — Sear the chicken as directed, then transfer to a slow cooker with the sauce. Cook on low for 4-6 hours. Thicken the sauce on the stovetop before serving. This is perfect for busy days when you want dinner ready when you walk in the door.
Honey Garlic Chicken Thighs with Vegetables — Add quartered red potatoes, baby carrots, and broccoli florets to the skillet before baking. Toss them in the sauce and roast everything together. It turns into a complete one-pan meal. I do this when I’m too tired to make a side dish.
Serving & Storage Suggestions
This honey garlic chicken is incredibly versatile when it comes to serving. Here’s how I like to do it:
Serving Temperature: Serve the chicken hot, right out of the oven. The sauce should be bubbling and sticky. I let it rest for 5 minutes on the counter before serving — just enough time for the sauce to set without getting cold.
What to Serve With It: Steamed jasmine rice is my go-to — it soaks up all that gorgeous sauce. For vegetables, I like roasted broccoli or green beans. A simple cucumber salad with rice vinegar is also amazing on the side — the freshness cuts through the richness of the chicken. If you’re feeling extra, serve it with garlic naan for dipping into the leftover sauce.
Storage Instructions: Store leftovers in an airtight container in the refrigerator for up to 4 days. The flavors actually get better overnight as the chicken continues to absorb the sauce. I’ve been known to make a double batch just for leftovers.
Reheating Tips: Reheat in a skillet over medium-low heat with a splash of water to loosen the sauce. The microwave works in a pinch, but the stovetop gives you better texture. If the sauce seems too thick, add a little water or chicken broth. Don’t use high heat — it will burn the honey.
Freezing Instructions: This recipe freezes beautifully. Let the chicken cool completely, then transfer to a freezer-safe container with the sauce. Freeze for up to 3 months. Thaw overnight in the refrigerator and reheat gently. I’ve done this for busy weeks and it’s a lifesaver.
Flavor Development: The chicken is delicious the day you make it, but I honestly think it’s even better the next day. The sauce penetrates deeper into the meat, and the flavors meld together. If you can plan ahead, make it a day before and reheat gently. Your future self will thank you.
Nutritional Information & Benefits
Here’s the nutritional breakdown for one serving (one chicken thigh with sauce, without rice or sides):
| Nutrient | Amount Per Serving |
|---|---|
| Calories | 320 |
| Protein | 28g |
| Fat | 18g |
| Saturated Fat | 5g |
| Carbohydrates | 18g |
| Sugar | 16g |
| Sodium | 580mg |
| Fiber | 0g |
Chicken thighs are a great source of protein and iron, which is especially important if you’re feeding growing kids. The honey provides quick energy, and garlic has immune-boosting properties — not a bad thing during cold season. This recipe is naturally gluten-free (with tamari) and can be made dairy-free easily. It’s also relatively low in carbs compared to many comfort food dishes, making it suitable for those watching their carbohydrate intake. Just watch your portion sizes if you’re serving it with rice.
Frequently Asked Questions
Can I use chicken breasts instead of thighs?
Yes, you can. Boneless, skinless chicken breasts will work, but they cook faster and can dry out more easily. Reduce the baking time to 12-15 minutes and check the internal temperature. I recommend pounding the breasts to even thickness first so they cook evenly. The thighs are more forgiving and stay juicier, but breasts work in a pinch.
How do I prevent the honey from burning?
Keep an eye on the oven temperature and don’t let it get too high. If your oven runs hot, reduce the temperature to 375°F. Also, make sure the sauce is well distributed around the chicken — don’t let it pool in one spot. If you notice the edges of the sauce getting dark, stir it gently with a spoon. Broiling at the end is optional and should be watched carefully.
Can I make this recipe in advance?
Absolutely. You can prepare the entire dish up to the point of baking, then cover and refrigerate for up to 24 hours. When you’re ready to eat, add about 5-10 minutes to the baking time since you’re starting from cold. Alternatively, you can bake it fully and reheat gently. The flavors actually deepen overnight, so this is a great make-ahead option for busy weeks.
What if I don’t have an oven-safe skillet?
No problem. Sear the chicken in any skillet, then transfer everything to a baking dish or casserole dish. Pour the sauce over the chicken and bake as directed. Make sure the baking dish is large enough to hold the chicken in a single layer. I’ve used a 9×13-inch baking dish before and it worked perfectly.
How can I make the sauce thicker?
If your sauce is too thin after baking, remove the chicken and simmer the sauce on the stovetop for a few minutes to reduce it. You can also add a little more cornstarch slurry — mix 1 teaspoon cornstarch with 2 teaspoons water and stir it in. Cook for another minute until it thickens. The sauce should be glossy and coat the back of a spoon.
Conclusion
This easy one-pan honey garlic chicken thighs recipe is exactly what I need on a busy weeknight — quick, simple, and guaranteed to make everyone happy. It uses ingredients I already have, comes together in one pan (less dishes, hallelujah), and delivers that sticky, sweet-savory flavor that makes you close your eyes after the first bite. I’ve made it for potlucks, for family dinners, and for those nights when I just need dinner to work without a lot of effort. It always delivers.
I hope you give this recipe a try and make it your own. Add more garlic if you’re a garlic lover. Throw in some vegetables. Double the sauce. Whatever feels right. That’s the beauty of cooking — you get to make it yours. And if your kids ask for seconds, don’t say I didn’t warn you.
I’d love to hear how it turns out for you. Drop a comment below and let me know if your family loved it as much as mine does. Share your variations, your successes, your happy kitchen moments. That’s what this is all about — good food, shared with the people we love. Happy cooking, friends.
Pin This Recipe!

Easy One-Pan Honey Garlic Chicken Thighs Recipe

This easy one-pan honey garlic chicken thighs recipe is quick, simple, and guaranteed to make everyone happy. It uses ingredients you already have, comes together in one pan, and delivers sticky, sweet-savory flavor that makes you close your eyes after the first bite.
- Prep Time: 10 minutes
- Cook Time: 25 minutes
- Total Time: 35 minutes
- Yield: 6 servings 1x
- Category: Main Course
- Cuisine: Asian-inspired
Ingredients
- 6 bone-in, skin-on chicken thighs (about 2 pounds)
- 1 tablespoon olive oil
- Salt and black pepper to taste
- 1/3 cup honey
- 1/4 cup low-sodium soy sauce
- 4 cloves garlic, minced
- 1 tablespoon rice vinegar
- 1 teaspoon sesame oil (optional)
- 1/2 teaspoon red pepper flakes (optional)
- 1 tablespoon cornstarch mixed with 2 tablespoons water
- Sesame seeds for garnish (optional)
- Chopped green onions for garnish (optional)
Instructions
- Preheat your oven to 400°F (200°C). Position the rack in the middle of the oven.
- Pat the chicken thighs dry with paper towels. Season both sides generously with salt and pepper.
- Heat the olive oil in a large oven-safe skillet over medium-high heat until shimmering. Place the chicken thighs skin-side down in the skillet. Cook undisturbed for 5-6 minutes until the skin is golden brown and crispy.
- Flip the chicken thighs using tongs. Cook for another 3-4 minutes on the other side. Remove the chicken to a plate and set aside. Pour off most of the fat from the skillet, leaving about a tablespoon behind.
- In a small bowl, whisk together the honey, soy sauce, minced garlic, rice vinegar, sesame oil, and red pepper flakes.
- Reduce the heat to medium and pour the sauce into the hot skillet. Cook for about 1 minute, stirring constantly, until it starts to thicken slightly. Scrape up any browned bits from the bottom of the pan.
- Return the chicken thighs to the skillet, skin-side up. Spoon some of the sauce over the top of each thigh. Transfer the skillet to the preheated oven.
- Bake for 15-20 minutes, until the chicken is cooked through and the internal temperature reaches 165°F (74°C). For extra sticky sauce, broil for the last 2 minutes, watching carefully.
- Remove the skillet from the oven and transfer the chicken to a serving platter. Place the skillet back on the stovetop over medium heat. Stir the cornstarch slurry and add it to the sauce. Cook for 1-2 minutes, stirring constantly, until the sauce thickens to a glossy, syrupy consistency.
- Spoon the thickened sauce over the chicken. Sprinkle with sesame seeds and chopped green onions. Let it rest for 5 minutes before serving.
Notes
Don’t skip patting the chicken dry for crispy skin. Watch the garlic carefully as it burns quickly. Let the chicken rest for 5 minutes before serving. For extra sauce, make 1.5 times the sauce ingredients. The flavors deepen overnight, making this a great make-ahead option.
Nutrition
- Serving Size: 1 chicken thigh with
- Calories: 320
- Sugar: 16
- Sodium: 580
- Fat: 18
- Saturated Fat: 5
- Carbohydrates: 18
- Protein: 28
Keywords: honey garlic chicken, one-pan chicken, chicken thighs, easy weeknight dinner, quick chicken recipe, sticky chicken, potluck recipe


