It was 11:47 PM on a random Tuesday, and I had that familiar, almost embarrassing craving for a warm chocolate chip cookie. You know the one—it hits out of nowhere, usually when the kitchen is clean and you’re already in your pajamas. I didn’t have the energy for a full batch of dough that needs to chill for hours, and honestly, I didn’t have the patience either. But I did have a half-stick of butter sitting on the counter, a bag of chocolate chips that was almost empty, and this wild idea that maybe, just maybe, I could skip the chilling step entirely without ruining everything.
So there I was, barefoot on the cold kitchen tile, mixing bowl in one hand and a measuring cup in the other, muttering to myself about whether this was going to be a triumph or a total disaster. I’ll be honest—I was half-expecting flat, greasy pucks. But something about the late hour made me reckless. I melted the butter instead of creaming it, tossed in an extra splash of vanilla, and used a tablespoon to scoop out four perfectly imperfect mounds onto a baking sheet. The kitchen smelled like pure comfort within minutes.
When I pulled those cookies out of the oven, they were golden around the edges and soft in the center—exactly what I’d been dreaming of. No chilling, no fuss, no waiting until tomorrow. That night, standing at the counter with a glass of cold milk and a cookie that was still warm in my hand, I knew I had stumbled onto something special. It wasn’t just a recipe; it was a solution to every late-night craving that would ever strike again. And honestly? It’s been my go-to ever since. Maybe you’ve been there too—standing in your kitchen at an ungodly hour, wondering if a perfect cookie is worth the wait. Let me tell you, it is—but only if you don’t have to wait at all.
Why You’ll Love This Recipe
This isn’t just another chocolate chip cookie recipe—it’s the one you’ll turn to again and again. After testing this method more times than I care to admit (including a few batches that ended up in the trash), I can confidently say this version delivers everything you want without the hassle.
- No Chilling Required: From bowl to oven in under 15 minutes. Perfect for those moments when patience isn’t a virtue you’re practicing.
- Small Batch Perfection: Makes exactly 4-6 cookies. No more, no less. Ideal for when you want a treat without a week’s worth of leftovers tempting you.
- Simple Pantry Ingredients: You probably have everything already. Butter, sugar, flour, an egg, and chocolate chips—that’s it.
- Perfect for Hosting: Imagine pulling warm cookies out of the oven right as your guests walk through the door. This recipe makes that effortless. No planning ahead, no stressing over dough that needs to rest.
- Consistently Delicious: The texture is spot-on every time—crispy edges, chewy centers, and melty chocolate in every bite. I’ve made this for dinner parties, potlucks, and casual get-togethers, and it never fails to impress.
- Always a Crowd-Pleaser: Kids, adults, cookie snobs—everyone loves these. They have that classic bakery-style taste that feels special but takes minimal effort.
What makes this recipe different is the technique. By melting the butter and using a specific ratio of brown to white sugar, you get that perfect chewy texture without any chilling time. It’s not just another version—it’s the best version for real life. Whether you’re hosting friends for a casual dinner or just treating yourself on a quiet night, these cookies deliver every single time.
What Ingredients You Will Need
This recipe uses simple, everyday ingredients to create something truly special. Each one plays a crucial role in getting that perfect texture and flavor, so let’s break down what you’ll need and why it matters.
- Unsalted Butter (4 tablespoons, melted): Melting the butter is the secret here. It creates a denser, chewier cookie because it incorporates less air than creaming cold butter. I use unsalted to control the salt level, but if you only have salted, just reduce the added salt by a pinch.
- Granulated Sugar (2 tablespoons): This helps with spreading and gives the cookies those crispy, golden edges. It also adds a bit of sweetness without making things cloying.
- Light Brown Sugar (3 tablespoons, packed): The molasses in brown sugar is what makes the centers soft and chewy. Pack it firmly into your measuring spoon for the best results. Dark brown sugar works too if that’s what you have—it’ll just give a slightly deeper flavor.
- Large Egg Yolk (1): Just the yolk—no whites. This adds richness and tenderness while reducing the moisture that would make the cookies cakey. Save the egg white for an omelet or scramble tomorrow morning.
- Vanilla Extract (½ teaspoon): Pure vanilla makes a noticeable difference here. I recommend Nielsen-Massey or simply organic—the flavor is cleaner and more pronounced. If you only have imitation vanilla, it’ll still work, but the taste won’t be quite as lovely.
- All-Purpose Flour (½ cup plus 1 tablespoon, about 75g): Standard all-purpose flour gives the best structure. Spoon it into your measuring cup and level it off—don’t scoop directly from the bag or you’ll end up with too much flour and dry cookies.
- Baking Soda (¼ teaspoon): This is our leavening agent. It helps the cookies spread just enough while keeping them tender. Make sure your baking soda is fresh—test it by dropping a little into vinegar; it should fizz immediately.
- Salt (¼ teaspoon): Salt isn’t just for flavor—it balances the sweetness and enhances the chocolate. I use fine sea salt for even distribution. Flaky salt on top before baking is optional but highly recommended for that fancy bakery look.
- Semi-Sweet Chocolate Chips (⅓ cup, about 60g): Semi-sweet is my go-to because it’s not too sweet and not too bitter. Ghirardelli or Guittard are my favorites for their melt quality. Feel free to use dark chocolate, milk chocolate, or even chopped chocolate bars if you want those melty pools.
Equipment Needed
You don’t need a fancy kitchen to make these cookies. Here’s what you’ll actually use:
- Mixing Bowl: Any medium-sized bowl works. I use a glass one because I can see when everything is fully combined, but ceramic or stainless steel is fine too.
- Whisk or Fork: For mixing the wet ingredients. A whisk is faster, but a fork gets the job done in a pinch—I’ve done it both ways.
- Rubber Spatula or Wooden Spoon: For folding in the flour and chocolate chips. A spatula is gentler and reduces the risk of over-mixing.
- Measuring Cups and Spoons: Accurate measurements matter here since it’s a small batch. If you have a kitchen scale, even better—weighing the flour ensures perfect results every time.
- Baking Sheet: A standard half-sheet pan works perfectly. No need to grease it—the butter in the dough will prevent sticking.
- Parchment Paper or Silicone Baking Mat: This ensures easy removal and cleanup. Parchment paper is my preference because it’s disposable and gives slightly crisper bottoms.
- Cookie Scoop or Tablespoon: For portioning the dough evenly. A #40 cookie scoop (about 1.5 tablespoons) is ideal, but a regular tablespoon works too.
- Cooling Rack: Optional but recommended. It lets air circulate around the cookies so they cool evenly without getting soggy on the bottom.
Preparation Method
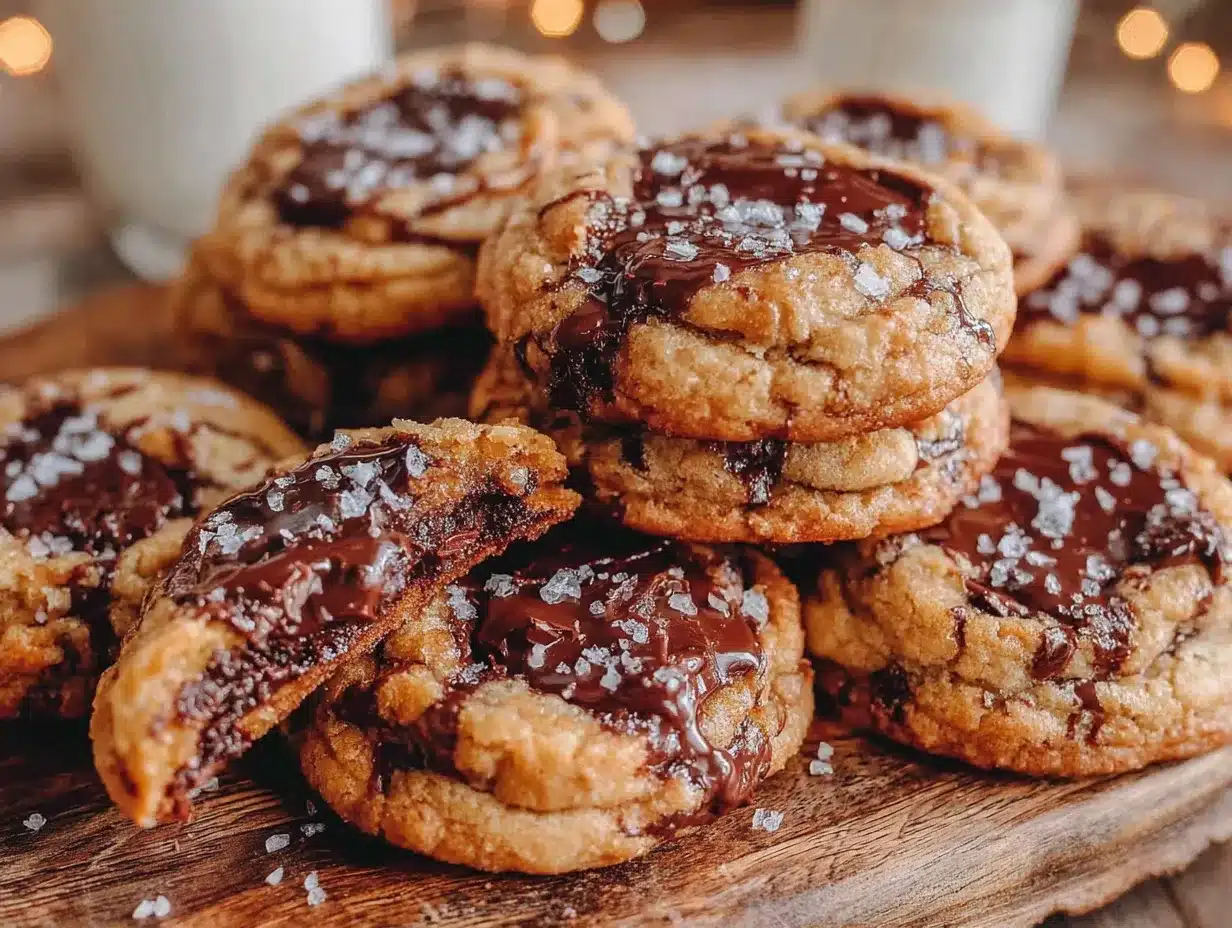
Let’s make some cookies. This whole process takes about 20 minutes from start to finish, so preheat your oven to 350°F (175°C) right now and let’s get going.
- Melt the butter: Place the 4 tablespoons of unsalted butter in a microwave-safe bowl and heat in 15-second intervals until fully melted. Alternatively, melt it in a small saucepan over low heat. Let it cool for about 2 minutes—you don’t want it hot enough to cook the egg yolk when you add it later.
- Mix the sugars and butter: Add the granulated sugar and packed brown sugar to the melted butter. Whisk vigorously for about 30 seconds until the mixture looks smooth and slightly thickened. This step is important—it helps dissolve the sugar and creates that chewy texture.
- Add the egg yolk and vanilla: Drop in the egg yolk and vanilla extract. Whisk again until everything is well combined and the mixture looks glossy. It should smell amazing at this point—that’s the vanilla and brown sugar doing their thing.
- Combine the dry ingredients: In a separate small bowl, whisk together the flour, baking soda, and salt. This ensures the leavening agent is evenly distributed so your cookies rise consistently.
- Fold in the dry ingredients: Add the flour mixture to the wet ingredients. Use a rubber spatula to fold gently—just until no streaks of flour remain. Over-mixing at this stage will develop gluten and make your cookies tough. A few small lumps are fine.
- Add the chocolate chips: Fold in the chocolate chips until they’re evenly distributed. The dough will be soft and slightly sticky—that’s exactly what you want. If it feels too sticky to handle, let it rest for 2-3 minutes; the flour will absorb some moisture.
- Portion the dough: Using a cookie scoop or tablespoon, scoop out 4-6 equal portions of dough. Place them on a parchment-lined baking sheet, spacing them about 2 inches apart. They’ll spread a bit, so don’t crowd them.
- Optional: Add sea salt: Sprinkle a tiny pinch of flaky sea salt on top of each dough ball. This isn’t mandatory, but it takes the cookies from great to extraordinary by balancing the sweetness.
- Bake: Place the baking sheet in the preheated oven and bake for 10-12 minutes. At 10 minutes, the edges should be golden brown and the centers will still look slightly underdone and puffy. That’s perfect—they’ll continue cooking on the hot sheet as they cool.
- Cool on the baking sheet: Leave the cookies on the baking sheet for 5 minutes. This allows them to set up without breaking apart. Then transfer them to a cooling rack to cool completely—or eat them warm, which is honestly the best way.
Cooking Tips & Techniques
After making these cookies dozens of times (and failing a few times along the way), I’ve picked up some tricks that make all the difference. Let me save you from my mistakes.
Don’t skip cooling the melted butter: I learned this the hard way. If your butter is too hot when you add the egg yolk, you’ll end up with scrambled eggs in your cookie dough. Let the melted butter sit for 2-3 minutes until it’s warm but not hot to the touch.
Measure flour correctly: The most common mistake with small-batch baking is using too much flour. Spoon the flour into your measuring cup and level it with a knife. Scooping directly from the bag can add up to 25% more flour, which leads to dry, cakey cookies. If you have a scale, 75 grams is your target.
Watch the bake time carefully: Ovens vary wildly. My oven runs hot, so I start checking at 9 minutes. The cookies should look golden around the edges but still soft and slightly puffy in the center. They’ll flatten as they cool, so don’t wait for them to look fully done in the oven.
Use room temperature egg yolk: Cold egg yolk can seize the butter and make the dough harder to mix. If your eggs are straight from the fridge, place the yolk in a small bowl and let it sit for 10 minutes before using. Or warm it slightly by placing the bowl in a shallow dish of warm water for a minute.
Let them rest on the sheet: I know it’s tempting to grab a cookie immediately, but those 5 minutes on the hot baking sheet are crucial. The cookies are fragile right out of the oven, and moving them too soon will cause them to fall apart. Patience pays off here.
Variations & Adaptations
One of the best things about this recipe is how easily it adapts to different cravings and dietary needs. Here are some variations I’ve tried and loved:
- Double Chocolate Chip: Replace 1 tablespoon of flour with 1 tablespoon of unsweetened cocoa powder. Use dark chocolate chips instead of semi-sweet. The result is a rich, fudgy cookie that feels incredibly decadent for such a small batch.
- Gluten-Free Version: Substitute the all-purpose flour with a 1:1 gluten-free baking blend (I like Bob’s Red Mill or King Arthur). Add an extra tablespoon of the blend since gluten-free flours absorb differently. The texture will be slightly more tender, but still delicious.
- Nutty Crunch: Fold in 2 tablespoons of toasted chopped walnuts or pecans along with the chocolate chips. Toast them in a dry pan over medium heat for 3-4 minutes until fragrant—this brings out their natural oils and adds incredible depth.
- Vegan Adaptation: Use vegan butter (I recommend Miyoko’s or Earth Balance) and replace the egg yolk with 1 tablespoon of aquafaba (the liquid from a can of chickpeas) mixed with ½ teaspoon of cornstarch. The texture won’t be exactly the same, but it’s surprisingly close.
- Flavor Twists: Add ¼ teaspoon of cinnamon or espresso powder to the dry ingredients for a subtle flavor boost. Or use white chocolate chips and dried cranberries for a completely different cookie experience.
Serving & Storage Suggestions
These cookies are best enjoyed warm, straight from the oven, with a tall glass of cold milk. But let’s talk about serving them for guests and storing any leftovers.
For Hosting: If you’re having people over, prepare the dough just before guests arrive and bake while everyone is settling in. The smell of fresh cookies is an instant mood-lifter and makes your home feel incredibly welcoming. Serve them on a nice plate with a dusting of powdered sugar or a drizzle of melted chocolate for a polished look.
What to Serve Alongside: These cookies pair beautifully with vanilla ice cream, a dollop of whipped cream, or even a scoop of coffee gelato for an adult twist. For brunch gatherings, serve them next to fresh fruit and a hot cup of coffee or tea.
Storage: Store leftover cookies in an airtight container at room temperature for up to 3 days. To keep them soft, add a slice of bread to the container—the cookies will absorb the moisture from the bread and stay chewy longer. For longer storage, freeze the baked cookies in a single layer on a baking sheet, then transfer to a freezer bag for up to 3 months.
Reheating: Pop a cookie in the microwave for 10-15 seconds to bring back that fresh-from-the-oven warmth. Or reheat in a 300°F oven for 5 minutes if you’re doing a whole batch. The texture won’t be exactly the same as fresh, but it’s close enough to satisfy.
Nutritional Information & Benefits
Let’s be real—these are cookies, not health food. But knowing what’s in them helps you enjoy them mindfully. Per cookie (based on 6 cookies per batch):
- Calories: approximately 210
- Fat: 12g
- Carbohydrates: 26g
- Protein: 3g
- Sugar: 16g
While these aren’t low-calorie treats, there are some redeeming qualities. Dark chocolate contains antioxidants and flavonoids that support heart health. The butter provides fat-soluble vitamins A, D, E, and K. And honestly, the mental health benefit of enjoying a warm, homemade cookie is worth its weight in gold. I firmly believe that food should bring joy, and these cookies do exactly that.
If you’re watching your sugar intake, you can reduce the granulated sugar by half—the cookies will be less sweet but still satisfying. For a lower-fat version, substitute half the butter with unsweetened applesauce, though the texture will be more cake-like.
Conclusion
These perfect small-batch chocolate chip cookies are proof that you don’t need complicated techniques or hours of chilling time to make something truly delicious. They’re quick, reliable, and endlessly adaptable—exactly what a home baker needs in their recipe collection.
I love this recipe because it meets me where I am. Whether it’s 11 PM on a Tuesday or I’m scrambling to whip up a dessert for unexpected guests, these cookies never let me down. They’ve become my secret weapon for impressing people without breaking a sweat, and I hope they become yours too.
So go ahead—preheat that oven, melt that butter, and treat yourself to something warm and wonderful. And when you do, come back and let me know how they turned out. Did you try a variation? Add something unexpected? I’d love to hear about your cookie adventures in the comments below. Happy baking, friend!
Frequently Asked Questions
Can I double this recipe?
Absolutely! Simply double all the ingredients. The method stays the same, though you may need to bake in batches since the dough doesn’t need chilling and should be baked immediately.
Why did my cookies turn out flat?
Flat cookies usually mean the butter was too warm or the dough was over-mixed. Make sure your melted butter has cooled slightly before adding the egg, and stop mixing as soon as the flour disappears.
Can I use margarine instead of butter?
You can, but the texture will be different. Margarine has more water content, which can make cookies spread more and become less chewy. Butter really is best here for flavor and texture.
How do I make these cookies softer?
For softer cookies, reduce the bake time by 1-2 minutes and remove them when the centers still look slightly underdone. You can also add an extra tablespoon of brown sugar for more moisture.
Can I freeze the dough for later?
Yes! Scoop the dough into balls, place them on a baking sheet, and freeze until solid. Transfer to a freezer bag and bake directly from frozen, adding 2-3 minutes to the bake time. No need to thaw first.
Pin This Recipe!
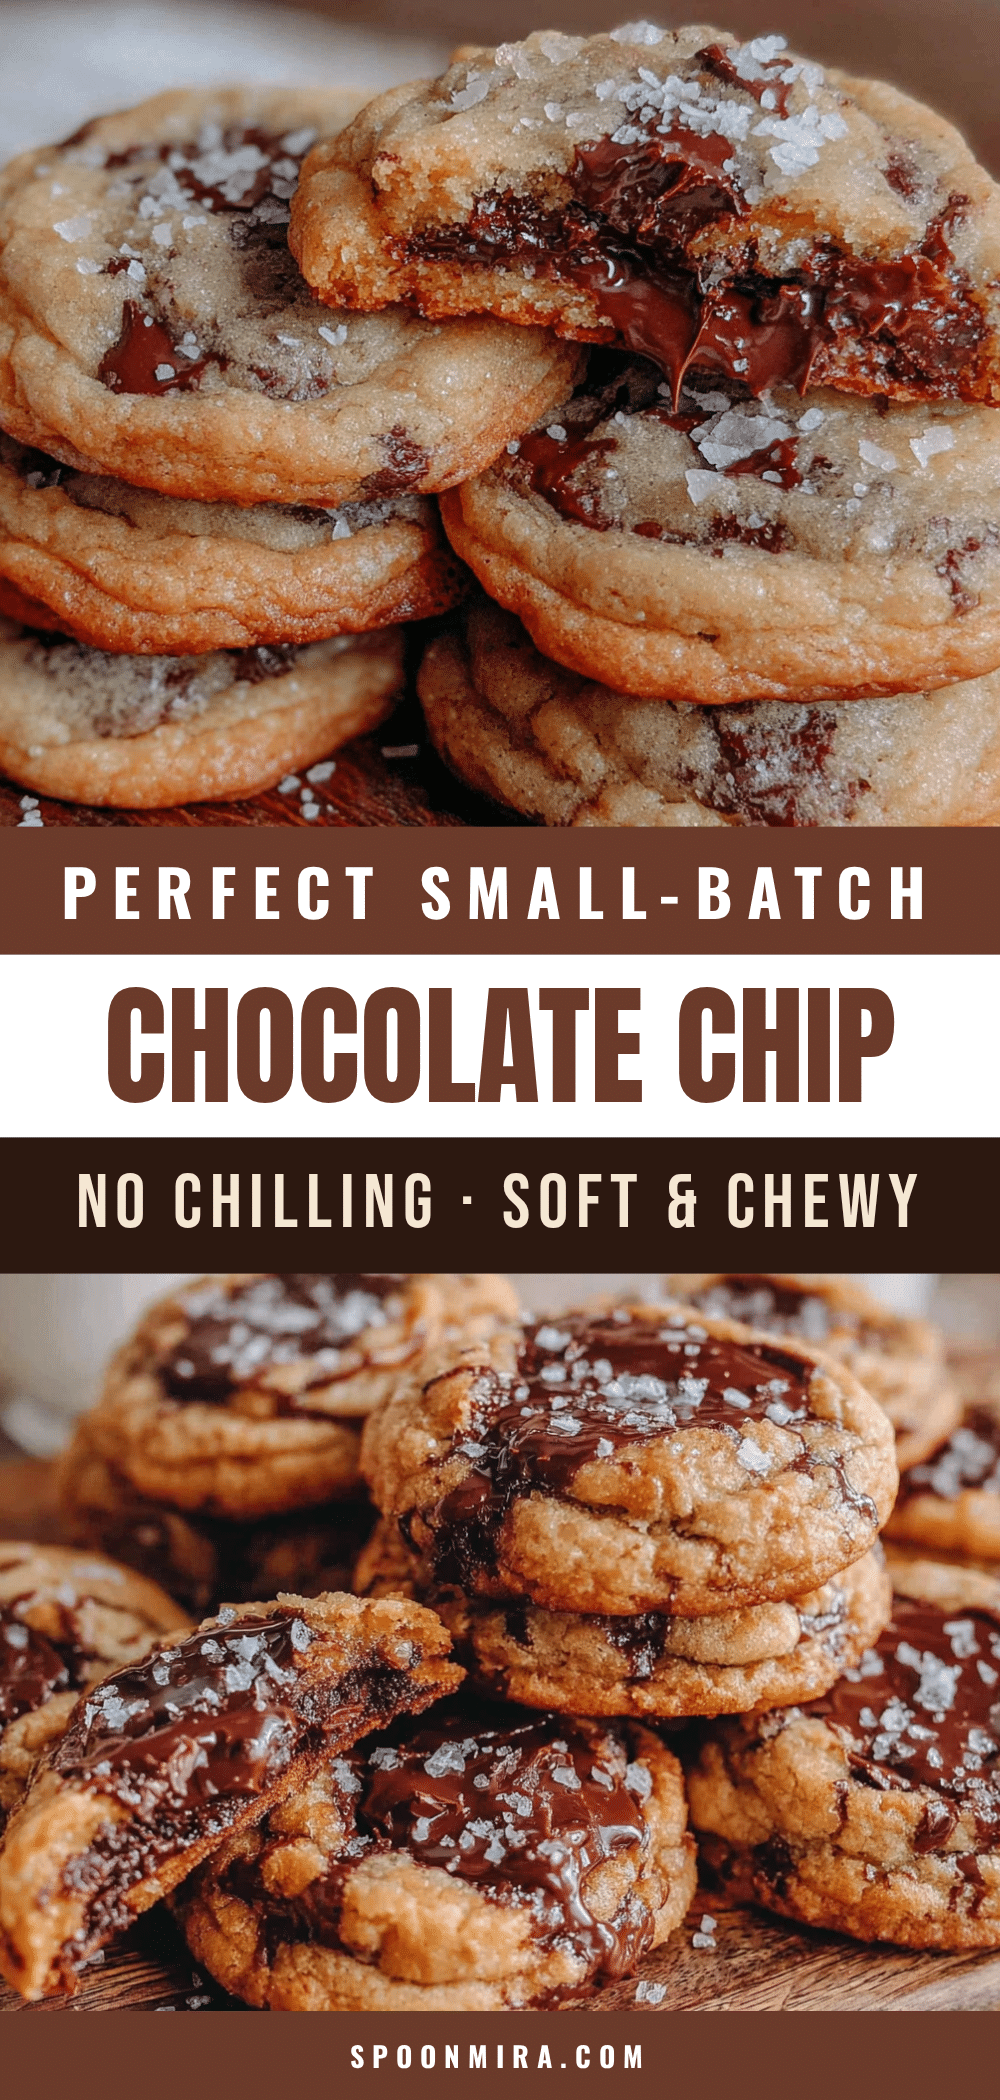
Perfect Small-Batch Chocolate Chip Cookies: No Chilling Needed

These quick and easy chocolate chip cookies require no chilling and are ready in under 20 minutes. Made with simple pantry ingredients, they deliver crispy edges, chewy centers, and melty chocolate in every bite—perfect for late-night cravings or last-minute hosting.
- Prep Time: 10 minutes
- Cook Time: 10-12 minutes
- Total Time: 20 minutes
- Yield: 4-6 cookies 1x
- Category: Dessert
- Cuisine: American
Ingredients
- 4 tablespoons unsalted butter, melted
- 2 tablespoons granulated sugar
- 3 tablespoons light brown sugar, packed
- 1 large egg yolk
- ½ teaspoon vanilla extract
- ½ cup plus 1 tablespoon all-purpose flour (about 75g)
- ¼ teaspoon baking soda
- ¼ teaspoon salt
- ⅓ cup semi-sweet chocolate chips (about 60g)
Instructions
- Preheat oven to 350°F (175°C). Line a baking sheet with parchment paper.
- Melt the butter in a microwave-safe bowl in 15-second intervals or in a small saucepan over low heat. Let cool for about 2 minutes.
- Add granulated sugar and packed brown sugar to the melted butter. Whisk vigorously for about 30 seconds until smooth and slightly thickened.
- Add egg yolk and vanilla extract. Whisk until well combined and glossy.
- In a separate small bowl, whisk together flour, baking soda, and salt.
- Add dry ingredients to wet ingredients. Fold gently with a rubber spatula until just combined—do not over-mix.
- Fold in chocolate chips until evenly distributed. Dough will be soft and slightly sticky.
- Using a cookie scoop or tablespoon, portion dough into 4-6 equal balls. Place on prepared baking sheet, spacing about 2 inches apart.
- Optional: Sprinkle a tiny pinch of flaky sea salt on top of each dough ball.
- Bake for 10-12 minutes, until edges are golden brown and centers still look slightly underdone and puffy.
- Let cookies cool on the baking sheet for 5 minutes, then transfer to a cooling rack. Serve warm or at room temperature.
Notes
For best results, use room temperature egg yolk and measure flour correctly by spooning into the cup and leveling. If dough is too sticky, let rest 2-3 minutes. Cookies continue to cook on the hot sheet after removal. Store in an airtight container at room temperature for up to 3 days; add a slice of bread to keep them soft. Freeze baked cookies for up to 3 months.
Nutrition
- Serving Size: 1 cookie
- Calories: 210
- Sugar: 16
- Sodium: 180
- Fat: 12
- Saturated Fat: 7
- Carbohydrates: 26
- Fiber: 1
- Protein: 3
Keywords: small batch chocolate chip cookies, no chill cookies, quick cookies, easy cookies, late night cookies, homemade cookies


