It was 10:47 PM on a rainy Thursday in late September, and I had a very specific craving for something crispy, salty, and deeply savory. I didn’t have the patience for a full oven roast or the energy to stand over a splattering stovetop skillet, but I had a pack of bone-in, skin-on chicken thighs in the fridge and this air fryer I’d barely touched since buying it on impulse last spring. Honestly, I was skeptical. Air fryers felt like one of those gadgets that promised the world but delivered lukewarm disappointment. But something about the rain tapping against the window and the quiet of the house made me think, “Why not? What’s the worst that could happen?”
So there I was, bleary-eyed and determined, seasoning those thighs with whatever I could grab from the spice cabinet without turning on the overhead light. I patted the skin dry with paper towels—a trick I’d read about somewhere but never actually tried—and rubbed them with a mix of smoked paprika, garlic powder, and a pinch of cayenne that I probably added more out of late-night recklessness than actual planning. I tossed them in the air fryer basket, set the timer, and waited. The smell that started drifting through the kitchen about ten minutes in was ridiculous. I mean, it smelled like a Sunday dinner I’d put actual effort into, not a weeknight experiment born from laziness and a growling stomach.
When that timer went off, I pulled out the most gorgeous, golden-brown chicken thighs I’d ever made. The skin was crackling, the meat was impossibly juicy, and I stood there in my pajamas eating one straight from the basket, genuinely stunned. That’s the thing about late-night cooking—you’re not trying to impress anyone, so you take risks you wouldn’t during daylight hours. And sometimes, those risks turn into the recipes you end up making on purpose. This crispy air fryer chicken thighs recipe is exactly that: a happy accident that became my go-to for cozy fall dinners when I want something satisfying without the fuss.
Why You’ll Love This Recipe
Let me tell you why these crispy air fryer chicken thighs have earned a permanent spot in my fall dinner rotation. I’ve tested this recipe more times than I care to admit—through different brands of air fryers, varying thicknesses of chicken thighs, and even one disastrous attempt where I forgot to pat the skin dry (we don’t talk about that). What I landed on is a method that delivers consistent, restaurant-quality results with almost zero effort.
- Quick & Easy: From fridge to plate in under 30 minutes. No marinating overnight, no complicated steps. Just season, cook, and eat. Perfect for those busy weeknights when you need dinner on the table fast.
- Simple Ingredients: You probably have everything in your kitchen right now. No fancy marinades, no hard-to-find spices. Just pantry staples that come together to create something magical.
- Perfect for Cozy Fall Dinners: There’s something about the combination of crispy skin and tender meat that just hits different when the weather turns cool. Pair it with roasted vegetables or a simple salad, and you’ve got a meal that feels like a hug.
- Crowd-Pleaser: I’ve served these to picky eaters, health-conscious friends, and die-hard fried chicken fans. Every single person has asked for the recipe. The skin gets that shatteringly crisp texture that everyone craves, but without the mess and oil of deep frying.
- Unbelievably Delicious: The contrast between the crackling exterior and the juicy, flavorful meat is honestly next-level. And because the air fryer circulates hot air so efficiently, you get even cooking without any dry spots.
What makes this recipe different from all the other air fryer chicken recipes out there? It’s the technique. Most recipes tell you to just toss the chicken in and hope for the best. But I’ve learned that patting the skin dry, using a light coating of oil, and not overcrowding the basket makes all the difference between good chicken and chicken that makes you close your eyes after the first bite. This isn’t just another version of air fryer chicken—it’s the version I’ve perfected through trial and error so you don’t have to make the same mistakes I did.
This recipe is comfort food reimagined for real life. It’s healthier than traditional fried chicken, faster than oven-roasted, and so satisfying that you’ll find yourself making excuses to cook it. Whether you’re feeding a family on a busy Tuesday or treating yourself to a cozy dinner for one, these crispy air fryer chicken thighs deliver every single time.
What Ingredients You Will Need
This recipe uses simple, wholesome ingredients that work together to create that perfect crispy exterior and juicy interior. The beauty of this dish is that you don’t need anything fancy—just quality chicken and the right seasoning approach.
- Bone-in, skin-on chicken thighs (4-6 thighs, about 2 pounds total) — This is non-negotiable for the best results. The bone keeps the meat moist during cooking, and the skin is what gives you that incredible crispy texture. I prefer thighs from Bell & Evans or Mary’s Free Range Chicken for their superior flavor and texture. Look for thighs that are roughly the same size so they cook evenly.
- Olive oil or avocado oil (1 tablespoon) — Just enough to help the seasoning stick and encourage browning. Avocado oil has a higher smoke point, which works beautifully in the air fryer, but regular olive oil works just fine too.
- Smoked paprika (2 teaspoons) — This is my secret weapon for that deep, smoky flavor that makes the chicken taste like it’s been cooking all day. Regular paprika works in a pinch, but smoked adds a whole other dimension.
- Garlic powder (1 teaspoon) — Not garlic salt, please. Garlic powder distributes evenly and doesn’t add extra sodium. I use Simply Organic brand for its consistent quality.
- Onion powder (1 teaspoon) — Adds a subtle sweetness that balances the savory elements.
- Dried thyme (1 teaspoon) — Fall herbs just belong with chicken. Thyme adds an earthy, slightly floral note that screams cozy season.
- Salt (1 teaspoon, or to taste) — I use fine sea salt for even distribution. If you’re using kosher salt, you might need a bit more since the crystals are larger.
- Black pepper (½ teaspoon, freshly ground) — Freshly ground makes a noticeable difference here. Don’t skip it.
- Cayenne pepper (¼ teaspoon, optional) — This is for those of us who like a little heat. It doesn’t make the chicken spicy, just gives it a subtle warmth that lingers. Omit if you’re serving kids or sensitive palates.
Ingredient Selection Tips: When shopping for chicken thighs, look for ones with the skin still attached and intact. The skin should be pale yellow and not torn. If the skin has been removed or damaged, you won’t get that crispy result we’re after. Also, try to get thighs that are similar in weight—I aim for about 6-8 ounces each. This ensures they all finish cooking at the same time.
Substitution Guidance: If you’re out of smoked paprika, use regular paprika and add a drop of liquid smoke if you have it. No dried thyme? Dried oregano or rosemary work beautifully too. For a completely different flavor profile, try swapping the spices for a Cajun seasoning blend or a simple lemon-pepper mix. The technique stays the same, but the flavor changes completely.
Seasonal Variations: In the fall, I love adding a pinch of ground sage or a sprinkle of pumpkin pie spice (trust me on this one—it’s weird but amazing with the smoky paprika). In summer, fresh herbs like rosemary or oregano are gorgeous here. The air fryer method is versatile enough to adapt to whatever you have on hand.
Equipment Needed
You don’t need a professional kitchen to make these crispy air fryer chicken thighs, but having the right tools makes the process smoother and the results more consistent.
- Air fryer (6-quart or larger) — This is obviously essential. I use a Cosori Pro II 5.8-quart and love how evenly it cooks. If you have a smaller basket, you’ll need to cook in batches to avoid overcrowding. Basket-style air fryers work best for this recipe, but oven-style models work too—just check the chicken a few minutes early since cooking times vary.
- Paper towels — For patting the chicken skin dry. This step is crucial, so don’t skip it just because it seems fussy. Those paper towels are doing real work.
- Mixing bowl — Any medium bowl will do for tossing the chicken with oil and seasonings.
- Tongs — For flipping the chicken halfway through cooking. Metal tongs are best since they can handle the heat.
- Instant-read thermometer — This is my non-negotiable tool for any meat cooking. The ThermoPop by ThermoWorks is affordable and incredibly accurate. Chicken thighs need to reach 165°F at the thickest part, but honestly, I pull them at 160°F and let carryover cooking do the rest—they stay juicier that way.
- Cutting board — For resting the chicken after cooking. Letting it rest for 5 minutes before serving helps the juices redistribute.
Budget-Friendly Options: If you don’t have an air fryer yet, you can still make this recipe in a convection oven at 400°F. Place the chicken on a wire rack set over a baking sheet and cook for about 30-35 minutes, flipping halfway. The skin won’t be quite as crispy, but it’s still delicious. Alternatively, if you’re in the market for an air fryer, you don’t need to spend a fortune—the Gourmia 6-quart models are often under $50 and work great.
Maintenance Tip: After cooking chicken, clean your air fryer basket thoroughly to prevent any residue from smoking during your next use. Most baskets are dishwasher-safe, but I find a quick hand wash with warm soapy water and a soft sponge keeps the non-stick coating in better shape longer.
Preparation Method
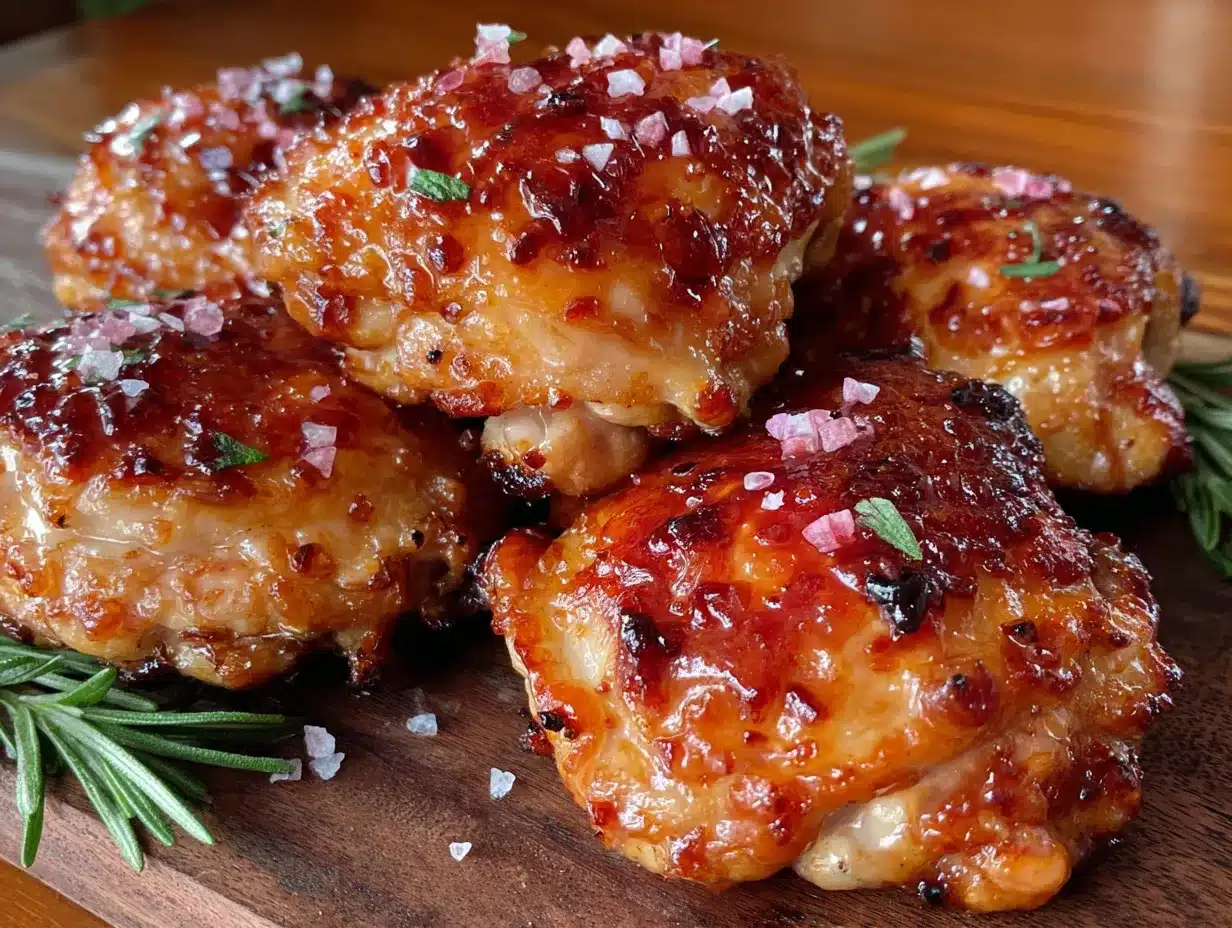
This method is straightforward, but each step matters. Don’t rush the drying process, and don’t overcrowd the basket—those two things are what separate good chicken from great chicken.
- Pat the chicken thighs completely dry. Remove the chicken from its packaging and use paper towels to pat every surface dry—especially the skin. This is the single most important step for achieving crispy skin. Any moisture on the surface will steam instead of crisp, leaving you with sad, rubbery skin. Take your time here. I usually go through 3-4 paper towels per batch.
- Season the chicken. In a medium mixing bowl, combine the smoked paprika, garlic powder, onion powder, dried thyme, salt, black pepper, and cayenne (if using). Drizzle the olive oil over the chicken thighs, then sprinkle the seasoning mixture evenly over all sides. Use your hands to rub the seasoning into the chicken, making sure to get it under the skin if possible. Don’t be shy—really work it in.
- Preheat your air fryer to 380°F. Most air fryers recommend a 3-5 minute preheat. While it’s heating, let the seasoned chicken sit at room temperature. This helps it cook more evenly.
- Arrange the chicken in the air fryer basket. Place the thighs skin-side down in a single layer. This is critical—if the pieces are touching or overlapping, they won’t crisp properly. Cook in batches if necessary. I can fit 4 medium thighs in my 5.8-quart basket without overcrowding.
- Cook for 12 minutes at 380°F. Set the timer and resist the urge to open the basket. The air fryer needs that hot air circulating to do its job.
- Flip and continue cooking. After 12 minutes, carefully flip each thigh using tongs. The skin should be starting to brown and crisp. Cook for another 10-12 minutes, depending on the size of your thighs.
- Check the internal temperature. Using your instant-read thermometer, check the thickest part of each thigh (avoiding the bone). You’re looking for 165°F, but I pull mine at 160°F because they’ll continue cooking as they rest. If they need more time, cook in 2-minute increments and check again.
- Rest before serving. Transfer the chicken to a cutting board and let it rest for 5 minutes. This step is non-negotiable—it lets the juices redistribute so every bite is moist and flavorful. If you cut into them immediately, all those beautiful juices will run out onto the board instead of staying in the meat.
Visual and Sensory Cues: At the 12-minute mark, the skin should be golden brown and starting to look crispy in spots. When you flip them, you should hear a slight crackling sound—that’s the sound of success. The finished chicken should have a deep golden-brown color all over, and when you press on the thickest part, it should feel firm but with a little give. If the skin is still pale or soft, give it a few more minutes.
Troubleshooting Tip: If your chicken skin isn’t getting crispy enough, try increasing the temperature to 400°F for the last 3-4 minutes of cooking. Some air fryers run cooler than others, so don’t be afraid to adjust. Also, make sure you’re not using too much oil—a light coating is all you need. Excess oil can actually steam the skin instead of crisping it.
Cooking Tips & Techniques
After making these crispy air fryer chicken thighs more times than I can count, I’ve collected a few lessons the hard way so you don’t have to.
The Drying Step Is Not Optional. I learned this the hard way during my first attempt. I was impatient, gave the chicken a half-hearted pat with one paper towel, and ended up with skin that was edible but definitely not crispy. Moisture is the enemy of crispiness. Be thorough. Let the chicken sit on a paper towel-lined plate for a few minutes if you have time—it helps draw out even more moisture from the skin.
Don’t Skip the Preheat. I know it’s tempting to just toss the chicken in and start cooking, but preheating makes a real difference. The initial blast of hot air is what starts the crisping process immediately. If you put chicken into a cold air fryer, the skin starts cooking before the air gets hot enough to crisp it, and you lose that window of opportunity.
Spacing Matters More Than You Think. I once tried to cram six thighs into my basket because I was short on time and didn’t want to cook in batches. The result was unevenly cooked chicken with patches of soft skin where the pieces had been touching. Give each thigh its own space. If you have to cook in batches, the first batch will stay warm in a 200°F oven while you finish the second one.
Let the Chicken Come to Room Temperature. This is one of those tips that sounds fussy but actually matters. Cold chicken straight from the fridge will lower the air fryer’s temperature significantly, extending cooking time and potentially leading to uneven results. Letting it sit out for 15-20 minutes while you preheat and prep makes a noticeable difference.
Use a Thermometer, Not a Timer. Chicken thighs are forgiving, but they’re not magic. The thickness can vary wildly even within the same package. A reliable instant-read thermometer takes the guesswork out completely. I’ve had batches that were done in 20 minutes and others that needed 26. Trust the temperature, not the clock.
Multitasking Strategy: While the chicken cooks, use that time to prep your sides. Roasted vegetables, a quick salad, or even some rice or quinoa come together easily in the 25 minutes the chicken is cooking. By the time the chicken rests, everything else is ready too. That’s the beauty of a 30-minute meal—everything can happen simultaneously.
Variations & Adaptations
One of the best things about this crispy air fryer chicken thighs recipe is how easily it adapts to different tastes, diets, and occasions. Here are some of my favorite variations.
Honey Garlic Glaze: During the last 3 minutes of cooking, brush the chicken with a mixture of 2 tablespoons honey, 1 tablespoon soy sauce, and 2 minced garlic cloves. The heat caramelizes the glaze into a sticky, sweet-savory coating that’s absolutely addictive. Just watch it closely—honey can burn quickly in the air fryer.
Lemon Herb Version: Swap the smoked paprika for 2 teaspoons of dried oregano and add the zest of one lemon to the seasoning mix. After cooking, squeeze fresh lemon juice over the chicken and sprinkle with chopped fresh parsley. This version is brighter and more Mediterranean, perfect for when you want something lighter.
Buffalo Style: After cooking, toss the chicken thighs in your favorite buffalo sauce (I use Frank’s RedHot mixed with a little melted butter). Serve with blue cheese dressing and celery sticks for a game-day dinner that feels indulgent but is actually pretty healthy.
Dietary Adaptations: This recipe is naturally gluten-free and low-carb. For a keto-friendly version, skip the honey glaze and use a dry rub with extra spices. If you’re watching your sodium, reduce the salt to ½ teaspoon and add more herbs and spices for flavor instead.
Different Cooking Methods: If you don’t have an air fryer, you can roast these thighs in a 425°F oven for 35-40 minutes. Place them on a wire rack set over a baking sheet so the air can circulate underneath. The skin won’t be quite as crispy, but it’s still really good. For a stovetop version, cook them skin-side down in a cold cast-iron skillet, then finish in a 400°F oven—that’s the classic method and it works beautifully.
Personal Variation I’ve Tried: Last month, I added a teaspoon of Chinese five-spice powder to the seasoning mix on a whim, and it was incredible. The star anise and cinnamon notes paired beautifully with the smoky paprika. It’s not traditional by any means, but it’s become my secret weeknight version when I want something a little different.
Serving & Storage Suggestions
These crispy air fryer chicken thighs are versatile enough to serve with almost anything, but here are my favorite pairings and storage tips.
Serving Temperature and Presentation: Serve the chicken hot, straight from the air fryer, with the skin at its crispiest. Arrange the thighs on a platter with fresh herbs like parsley or thyme sprigs for a simple, beautiful presentation. If you’re serving a crowd, keep them warm in a 200°F oven on a wire rack (not directly on a baking sheet, or the bottom will steam and soften).
Complementary Dishes: In the fall, I love serving these thighs with roasted butternut squash, Brussels sprouts, or a simple apple and fennel salad. The sweetness of roasted vegetables balances the savory, smoky chicken perfectly. For a heartier meal, serve with mashed potatoes or creamy polenta to soak up the juices. A side of crusty bread is never a bad idea either.
Beverage Pairings: A medium-bodied red wine like Pinot Noir or a dry rosé works beautifully. For beer drinkers, an amber ale or a brown ale complements the smoky flavors. And honestly, a cold glass of apple cider is a surprisingly perfect non-alcoholic pairing for fall dinners.
Storage Instructions: Leftover chicken thighs keep well in the refrigerator for up to 4 days. Store them in an airtight container, but don’t stack them—place them in a single layer so the skin doesn’t get crushed. If you need to stack them, separate layers with parchment paper.
Reheating Methods: The air fryer is actually the best way to reheat these. Preheat to 350°F and cook for 3-4 minutes until the skin crisps up again. The microwave will make the skin soggy, so avoid it if possible. If you’re reheating a large batch, you can also use a 375°F oven for 8-10 minutes. The skin won’t be quite as good as fresh, but it’s still pretty close.
Freezing Instructions: These freeze well for up to 3 months. Let them cool completely, then wrap each thigh individually in plastic wrap and place them in a freezer bag. To reheat, thaw in the refrigerator overnight, then reheat in the air fryer at 350°F for 5-6 minutes.
Flavor Development: Honestly, these chicken thighs are at their best fresh from the air fryer. But I’ve noticed that the flavors meld and deepen overnight, so leftovers the next day have a slightly more developed taste. The skin won’t be as crispy, but the meat is still incredibly flavorful. I’ve been known to make extra just for next-day lunch salads.
Nutritional Information & Benefits
These crispy air fryer chicken thighs are not only delicious but also fit well into a balanced diet. Here’s the estimated nutritional breakdown per serving (based on 4 servings, using bone-in skin-on thighs with the skin eaten).
| Nutrient | Amount Per Serving |
|---|---|
| Calories | 320-350 |
| Protein | 28-32g |
| Fat | 22-25g |
| Saturated Fat | 6-7g |
| Carbohydrates | 1-2g |
| Fiber | 0g |
| Sodium | 450-550mg |
Health Benefits: Chicken thighs are an excellent source of high-quality protein, which supports muscle health and keeps you feeling full and satisfied. They’re also rich in B vitamins, particularly niacin and B6, which help your body convert food into energy. The skin contains healthy fats that support hormone function and nutrient absorption. Compared to traditional fried chicken, this air fryer version uses a fraction of the oil, significantly reducing the calorie and fat content while still delivering that satisfying crispy texture.
Dietary Considerations: This recipe is naturally gluten-free, low-carb, and keto-friendly. It’s also Whole30-compliant if you use avocado oil instead of olive oil (check your spice blends for any additives). The main allergen to note is that this recipe contains no common allergens, making it suitable for most dietary needs.
Personal Wellness Perspective: I love that this recipe lets me enjoy the comfort of crispy chicken without the heaviness of deep frying. It’s one of those meals that feels indulgent but is actually pretty balanced. Pair it with a big pile of roasted vegetables or a fresh salad, and you’ve got a dinner that nourishes both body and soul. And honestly, knowing I can have this on the table in under 30 minutes makes it easier to resist the temptation of takeout on busy nights.
Conclusion
These crispy air fryer chicken thighs have become my fall dinner hero for good reason. They’re quick enough for a busy Tuesday, impressive enough for company, and so satisfying that you’ll find yourself craving them even when the weather isn’t cool and rainy. The combination of that shatteringly crisp skin and juicy, flavorful meat is the kind of comfort food that makes you slow down and actually enjoy your meal.
What I love most about this recipe is how forgiving it is. You can play with the seasonings, adjust the heat level, or swap in different herbs based on what you have or what you’re craving. It’s a technique more than a rigid formula—once you know how to get that perfect crispy skin in the air fryer, you can apply it to all kinds of variations. And honestly, that’s the kind of cooking I love most: simple, adaptable, and reliable.
If you make these crispy air fryer chicken thighs, I’d love to hear how they turn out. Did you try a different spice blend? Serve them with something unexpected? Share your experience in the comments below—your adaptations might inspire someone else’s dinner tonight. And if you’re looking for more cozy fall dinners, you might also enjoy this creamy pumpkin risotto or these honey garlic roasted carrots for the perfect side dish. Happy cooking, and here’s to many cozy nights with good food!
Frequently Asked Questions
Can I use boneless, skinless chicken thighs for this recipe?
You can, but the results won’t be the same. Boneless, skinless thighs cook faster (about 15-18 minutes total) and won’t develop that crispy skin we’re after. If you use them, reduce the cooking time and check for doneness earlier. The flavor will still be good, but the texture will be different.
Do I need to flip the chicken halfway through cooking?
Yes, flipping is important for even cooking and crisping. Starting skin-side down helps render the fat and crisp the skin, then flipping ensures the other side gets browned too. Don’t skip this step—it only takes a few seconds and makes a noticeable difference.
Can I cook frozen chicken thighs in the air fryer?
I don’t recommend it for this recipe. Frozen chicken will release too much moisture as it cooks, making it nearly impossible to get crispy skin. If you’re in a pinch, thaw the chicken completely in the refrigerator overnight, then pat it very dry before seasoning. The extra moisture from freezing means you’ll need to be extra thorough with the drying step.
Why is my chicken skin not getting crispy?
This usually happens for one of three reasons: the skin wasn’t dried thoroughly before cooking, the basket was overcrowded, or the temperature was too low. Make sure you’re patting the skin completely dry, leaving space between each thigh, and cooking at 380°F or higher. If you’ve done all that and it’s still not crispy, try increasing the temperature to 400°F for the last few minutes.
How do I keep the chicken warm while cooking in batches?
Place the finished chicken thighs on a wire rack set over a baking sheet in a 200°F oven. The wire rack prevents the bottom from steaming and getting soggy. They’ll stay warm and crispy for up to 30 minutes this way, giving you plenty of time to finish all the batches.
Pin This Recipe!

Crispy Air Fryer Chicken Thighs: Perfect Easy Fall Dinner

These crispy air fryer chicken thighs are quick, easy, and perfect for cozy fall dinners. With simple ingredients and a foolproof technique, you get shatteringly crisp skin and juicy meat in under 30 minutes.
- Prep Time: 10 minutes
- Cook Time: 22-24 minutes
- Total Time: 30 minutes
- Yield: 4 servings 1x
- Category: Main Course
- Cuisine: American
Ingredients
- 4–6 bone-in, skin-on chicken thighs (about 2 pounds total)
- 1 tablespoon olive oil or avocado oil
- 2 teaspoons smoked paprika
- 1 teaspoon garlic powder
- 1 teaspoon onion powder
- 1 teaspoon dried thyme
- 1 teaspoon fine sea salt
- ½ teaspoon freshly ground black pepper
- ¼ teaspoon cayenne pepper (optional)
Instructions
- Pat the chicken thighs completely dry with paper towels, removing all moisture from the skin.
- In a medium bowl, combine smoked paprika, garlic powder, onion powder, dried thyme, salt, black pepper, and cayenne (if using). Drizzle olive oil over the chicken, then sprinkle seasoning mixture evenly over all sides. Rub the seasoning into the chicken, including under the skin if possible.
- Preheat the air fryer to 380°F (about 3-5 minutes). Let the seasoned chicken sit at room temperature while preheating.
- Arrange the chicken thighs skin-side down in a single layer in the air fryer basket, ensuring they are not touching or overlapping. Cook in batches if necessary.
- Cook for 12 minutes at 380°F. Do not open the basket during this time.
- Carefully flip each thigh using tongs. Cook for another 10-12 minutes, until the skin is deep golden brown and crispy.
- Check the internal temperature with an instant-read thermometer inserted into the thickest part (avoiding the bone). Aim for 165°F, or pull at 160°F for juicier meat (carryover cooking will finish it).
- Transfer the chicken to a cutting board and let rest for 5 minutes before serving. This allows juices to redistribute.
Notes
Patting the skin dry is crucial for crispiness. Do not overcrowd the basket. Let chicken come to room temperature before cooking for even results. Use a thermometer for accuracy. For extra crispiness, increase temperature to 400°F for the last 3-4 minutes.
Nutrition
- Serving Size: 1 chicken thigh
- Calories: 335
- Sodium: 500
- Fat: 23.5
- Saturated Fat: 6.5
- Carbohydrates: 1.5
- Protein: 30
Keywords: air fryer chicken thighs, crispy chicken thighs, easy fall dinner, quick chicken recipe, gluten-free chicken, low-carb chicken


