There used to be a tiny bakery on the corner of Maple and 3rd called “The Sugar Beet” that made a cookie bar that was, honestly, legendary. They called it the “Kitchen Sink” bar, and it changed every day based on what broken candy pieces they had in the back. When they closed their doors two years ago—rent got too high, the owner told me with a sigh—I felt a genuine pang of loss. Not just because their coffee was perfect, but because those bars were my secret weapon for using up holiday candy.
After maybe a dozen tries—some were too dry, a few were so sweet they made my teeth ache—I finally cracked the code. The secret, I learned, is in the base. You can’t just throw candy into any cookie dough and hope for the best. You need a sturdy, buttery foundation that can hold its own against all that sugary chaos. Let me tell you, the first time I pulled a pan of these Easy Leftover Halloween Candy Cookie Bars out of the oven, I actually teared up a little. It tasted exactly like a Tuesday afternoon from The Sugar Beet.
Honestly, if you’ve got a bag of half-eaten fun-sized Snickers, a few rogue Twix bars, and maybe some crushed-up Kit Kats staring at you from the pantry, you know that feeling when you just can’t look at another plain chocolate bar? This recipe is your solution. It’s not about making something fancy—it’s about transformation. It’s about taking that chaotic pile of leftover candy and turning it into something that feels intentional and, dare I say, a little bit genius. I keep making this recipe because it solves a very real problem: too much candy, and a deep desire for something chewy, crunchy, and completely satisfying.
Why You’ll Love This Recipe
Look, I’ve tested this about seven times in the last month alone. My neighbors have become very willing taste-testers, and my kids now ask if we can “accidentally” buy too much Halloween candy just so I’ll make these bars. There’s a reason this recipe works, and it’s not just because it uses up leftovers. It’s because the technique is bulletproof.
- Quick & Easy: From start to finish, you’re looking at about 35 minutes. No chilling the dough, no rolling individual cookies—just press, bake, and cool. Perfect for when the sugar craving hits hard on a Tuesday night.
- Simple Ingredients: You probably have the base ingredients—butter, sugar, flour, eggs—in your kitchen right now. The star of the show is that sad bag of leftover candy hiding in your pantry.
- Perfect for Post-Halloween: This is the ultimate solution for the November 1st candy pile. It turns “what do I do with all this?” into “wow, I’m actually excited about leftovers.”
- Crowd-Pleaser: I brought these to a potluck last week, and three people asked for the recipe before the coffee was even ready. Kids and adults go absolutely bonkers for them.
- Unbelievably Delicious: The texture is what gets me every time. The edges get slightly crispy and golden, while the center stays soft and chewy. The candy pieces melt into little pockets of gooey, crunchy goodness throughout the bar.
What makes this recipe different from all the other “leftover candy” recipes out there is the butter-to-flour ratio. I spent a lot of time figuring out the perfect balance so the dough isn’t too sweet—because let’s be real, the candy brings plenty of sugar to the party. The dough itself is just sweet enough to be a cookie, but savory enough to let the different candy flavors shine through. It’s not just another version; it’s the version I’d serve to my mom, and she’s a tough critic.
This recipe is the kind that makes you close your eyes after the first bite. It’s comfort food reimagined—a little nostalgic, a little indulgent, but with that familiar, soul-soothing satisfaction that only a really good cookie bar can deliver. Perfect for impressing your kid’s classmates without spending hours in the kitchen, or for turning a simple Tuesday into something a little bit special.
What Ingredients You Will Need
This recipe uses simple, pantry-friendly ingredients to create a sturdy, flavorful base that can handle whatever candy you throw at it. The magic happens when the candy melts into the dough, creating little pockets of caramel, chocolate, and crunch.
For the Cookie Bar Base
- 1 cup (2 sticks) unsalted butter, softened — I use Land O’Lakes because it has a consistent fat content that gives the bars a reliable texture. Make sure it’s truly softened, not melted, or your bars will spread too thin.
- 1 cup packed light brown sugar — The molasses in brown sugar adds moisture and a subtle depth of flavor that pairs beautifully with chocolate and caramel candies. Dark brown sugar works too, but it will make the bars slightly darker and more molasses-forward.
- 1/2 cup granulated sugar — This gives the bars a little structure and helps them get those gorgeous golden edges.
- 2 large eggs, room temperature — Cold eggs can seize the butter and make the dough lumpy. If you forgot to take them out of the fridge, place them in a bowl of warm water for 5 minutes.
- 2 teaspoons vanilla extract — Pure vanilla extract makes a difference here. I’ve tried imitation, and the flavor just isn’t as warm and round.
- 2 1/4 cups all-purpose flour — Spoon and level your flour—don’t scoop directly from the bag, or you’ll end up with too much flour and dry bars.
- 1 teaspoon baking soda — This helps the bars rise just a little, giving them a soft, tender crumb.
- 1/2 teaspoon salt — Salt is non-negotiable. It balances the sweetness of the candy and makes all the flavors pop. I prefer fine sea salt for baking.
For the Candy Mix-In
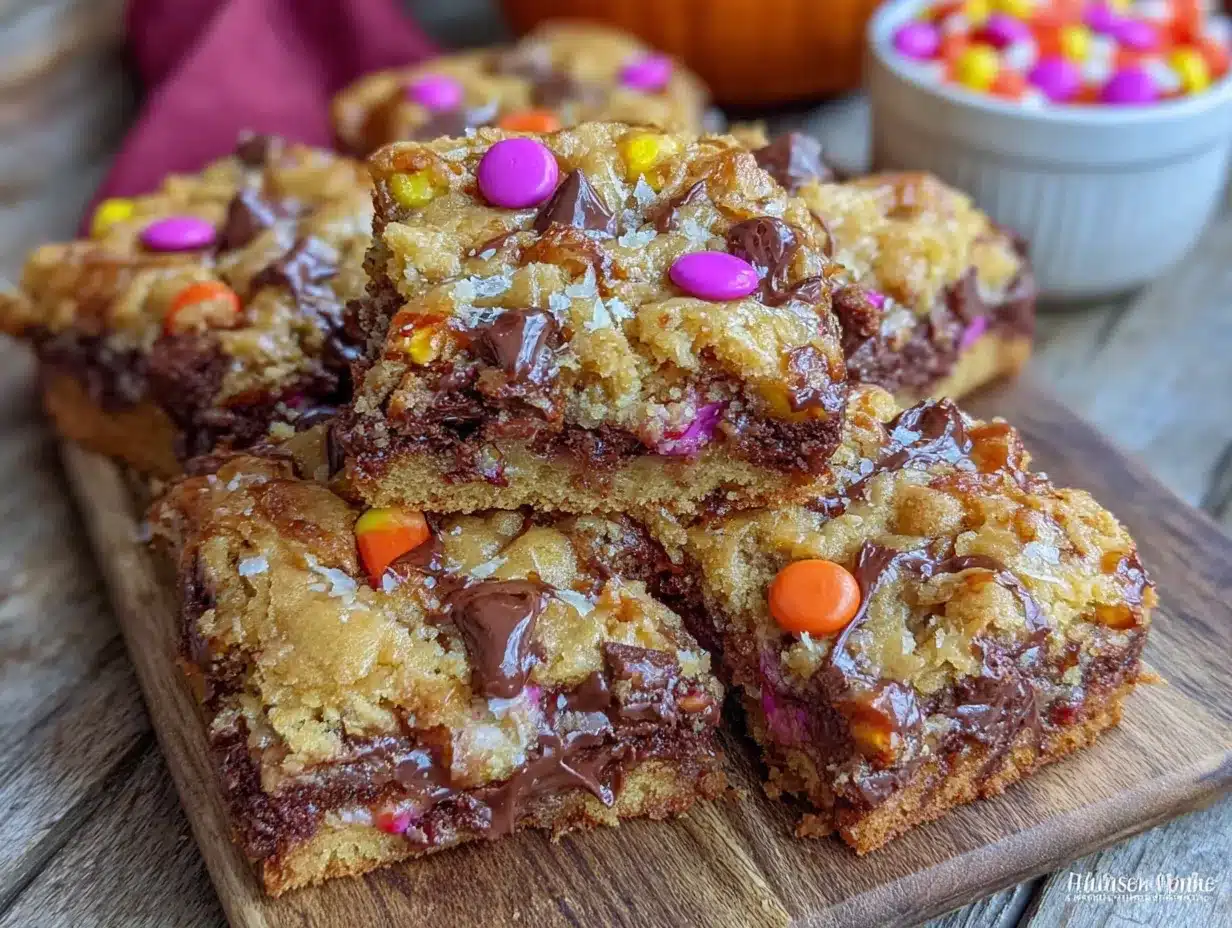
- 2 cups chopped leftover Halloween candy — This is where you get creative. I recommend a mix of textures: something chewy (caramel-filled like Milky Way or Snickers), something crunchy (Kit Kat or Nestle Crunch), and something pure chocolate (Hershey’s bars or Reese’s cups). If you have peanut butter cups, cut them into quarters. For Snickers, chop them into 1/2-inch pieces. Aim for roughly even-sized pieces so they distribute well.
- 1/2 cup semi-sweet chocolate chips (optional) — I add these if my candy selection is light on pure chocolate. It ensures every bite has a little chocolate goodness.
One thing I’ve learned the hard way: avoid using powdery or very soft candies like candy corn or those tiny chalky Halloween mints. They either dissolve into the dough and disappear or create weird, grainy spots. Stick with the classic chocolate-and-filling combos for the best texture.
Equipment Needed
You don’t need a fancy kitchen to make these bars. Here’s what I use every single time:
- 9×13-inch baking pan — This is the perfect size for thick, chewy bars. If you only have an 8×8 pan, the bars will be much thicker and need about 10 extra minutes of baking time. A 9×9 pan works too, but you’ll need to adjust the time.
- Parchment paper — I cannot stress this enough. Line your pan with parchment paper, leaving some overhang on the sides. It makes lifting the entire slab of bars out of the pan so much easier. I learned this after a particularly tragic bar that refused to leave the pan in one piece.
- Stand mixer or hand mixer — A stand mixer with a paddle attachment is my go-to, but a hand mixer works perfectly fine. You could even do this by hand with a wooden spoon if you have strong arms—I’ve done it before when my mixer was on the fritz.
- Large mixing bowl — For combining the dry ingredients.
- Medium mixing bowl — For whisking the flour mixture.
- Sharp knife and cutting board — For chopping the candy into uniform pieces. A serrated knife works surprisingly well for cutting through chocolate bars without shattering them.
- Cooling rack — Essential for letting the bars cool evenly so they set properly before cutting.
Pro tip: if you don’t have parchment paper, you can grease the pan thoroughly with butter or non-stick spray, but be careful when cutting the first piece out. I’ve used a cheap metal spatula in a pinch, and it worked, but the parchment method is just so much cleaner.
Preparation Method
Alright, let’s get to the good part. Here’s exactly how I make these bars, with all the little details I’ve picked up along the way.
- Preheat your oven to 350°F (175°C). Position the rack in the center of the oven. While it’s heating, line your 9×13-inch baking pan with parchment paper, leaving about 2 inches of overhang on the long sides. This creates handles for lifting the bars out later.
- Chop your candy. Take all your leftover Halloween candy and chop it into roughly 1/2-inch pieces. I like to keep some pieces a little bigger for texture, but try to keep them relatively uniform so they distribute evenly through the dough. Set the chopped candy aside. If you’re using chocolate chips, measure those out too.
- Cream the butter and sugars. In the bowl of your stand mixer fitted with the paddle attachment, beat the softened butter, brown sugar, and granulated sugar together on medium speed for about 3 minutes. You want it to look light and fluffy—almost like a thick paste. Scrape down the sides of the bowl halfway through. Don’t rush this step; proper creaming incorporates air that helps the bars rise slightly.
- Add the eggs and vanilla. Crack the eggs into a small bowl first (just in case you get a shell), then add them one at a time to the butter mixture, beating well after each addition. Add the vanilla extract and beat for another 30 seconds. The mixture might look a little curdled at this point—that’s totally normal, especially if your eggs were slightly cold.
- Whisk the dry ingredients. In a separate medium bowl, whisk together the flour, baking soda, and salt. Whisking aerates the flour and ensures the baking soda and salt are evenly distributed. I’ve skipped this step before and ended up with a pocket of baking soda in one bar—not pleasant.
- Combine wet and dry. With the mixer on low speed, gradually add the flour mixture to the butter mixture. Mix just until the flour disappears—about 30 seconds. Overmixing at this stage can develop the gluten too much, making the bars tough instead of tender. You want a soft, slightly sticky dough.
- Fold in the candy. Remove the bowl from the mixer and use a rubber spatula to fold in the chopped candy and chocolate chips (if using). Fold gently until the candy is evenly distributed. The dough will be thick and studded with candy pieces—this is exactly what you want.
- Press into the pan. Transfer the dough to your prepared baking pan. Using slightly damp fingers (this prevents sticking), press the dough evenly into the pan. Make sure it reaches all the corners and is relatively level. The dough will be thick—about 1/2 to 3/4 inch deep.
- Bake. Place the pan in the preheated oven and bake for 22-26 minutes. The bars are done when the edges are golden brown and the center looks set and slightly puffed. A toothpick inserted into the center should come out with a few moist crumbs, not wet batter. I start checking at 22 minutes because my oven runs a little hot.
- Cool completely. This is the hardest part, I know. Place the pan on a cooling rack and let the bars cool for at least 30 minutes in the pan. Then, using the parchment paper overhang, lift the entire slab of bars out of the pan and transfer to the cooling rack to cool completely—about another 30 minutes. If you cut them while they’re warm, they’ll crumble and fall apart. Trust me on this one. I’ve made that mistake more times than I care to admit.
- Cut and serve. Once completely cool, use a sharp chef’s knife to cut the slab into 24 bars (6 rows by 4 rows). Wipe the knife clean between cuts for neat edges. I like to cut them into slightly larger squares if I’m serving them as dessert, or smaller bite-sized pieces if they’re for a party.
Cooking Tips & Techniques
Over the course of testing this recipe, I’ve learned a few things the hard way so you don’t have to. Here are my best tips for perfect cookie bars every time.
The butter temperature matters more than you think. I once tried to rush the process and used butter that was still a little firm in the center. The dough didn’t cream properly, and the bars came out dense and flat. Let your butter sit on the counter for at least an hour before you start. It should be soft enough that your finger leaves an indent without any resistance.
Don’t skip the parchment paper. I know it seems like an extra step, but I’ve had bars that I literally had to chisel out of the pan because the caramel from the candy melted and glued them to the bottom. The parchment paper saves you from that heartbreak. Plus, it makes cleanup so much easier.
Chop your candy into uniform pieces. I made the mistake of throwing in whole fun-size Snickers bars once, thinking they’d melt and spread out. They didn’t. I ended up with giant pockets of caramel that made the bars impossible to cut neatly. Take the extra two minutes to chop everything into 1/2-inch pieces. Your future self will thank you.
Watch the baking time carefully. Every oven is different. My friend’s oven runs cool, so her bars need the full 26 minutes. Mine runs hot, so I start checking at 22 minutes. The first time I made these, I got distracted and left them in for 28 minutes. The edges were rock hard, and the candy on the bottom had burned. Set a timer and check early.
Let them cool completely. I know the smell is intoxicating, and you want to dig in immediately. But if you cut these bars while they’re even slightly warm, the candy will be molten, and the bars will fall apart. I’ve learned to make these in the evening so they can cool overnight. Then I cut them in the morning, and they’re absolutely perfect.
Variations & Adaptations
One of the best things about this recipe is how adaptable it is. Here are some variations I’ve tried and loved.
Peanut Butter Lover’s Version: Swap out 1/4 cup of the butter for 1/4 cup of creamy peanut butter. Cream it together with the butter and sugars. Then use mostly peanut butter cups and Reese’s Pieces as your candy mix-in. The peanut butter flavor in the dough complements the candy beautifully.
White Chocolate and Berry Twist: If you have leftover white chocolate Halloween treats (like those white chocolate ghosts), chop them up and use them instead of the mixed candy. Add 1/2 cup of dried cranberries or chopped dried cherries to the dough. The tartness of the berries cuts through the sweetness of the white chocolate.
Gluten-Free Adaptation: I tested this with a 1:1 gluten-free baking flour blend (I used Bob’s Red Mill), and it worked surprisingly well. The texture was slightly more crumbly, but the flavor was spot on. Just make sure your candy is gluten-free too—some candy bars contain wheat ingredients.
Salted Caramel Version: Before baking, press a few extra pieces of chopped caramel candy (like Werther’s or caramel-filled Milky Ways) into the top of the dough. Sprinkle the entire top with flaky sea salt right before baking. The salt creates a beautiful contrast with the sweet caramel and chocolate.
Mint Chocolate Chip: Use mostly chopped York Peppermint Patties and dark chocolate chunks. Add 1/2 teaspoon of peppermint extract to the dough along with the vanilla. The minty chocolate combination is incredibly refreshing and feels a little more grown-up.
Serving & Storage Suggestions
These cookie bars are incredibly versatile when it comes to serving. Here’s how I like to enjoy them.
Serving Temperature: These bars are absolutely delicious at room temperature. The texture is perfectly chewy, and the candy pieces have set into delightful little pockets of flavor. If you want to get fancy, warm a bar in the microwave for about 10 seconds and serve it with a scoop of vanilla ice cream. The contrast between warm, gooey bar and cold, creamy ice cream is pure magic.
Presentation Ideas: For Halloween parties, I cut the bars into small squares and arrange them on a platter with some candy corn or mini pumpkins for decoration. For a more casual setting, I just stack them on a plate and let people grab what they want. They’re not fussy, and that’s part of their charm.
Storage Instructions: Store leftover bars in an airtight container at room temperature for up to 5 days. Place a piece of parchment paper between layers to prevent them from sticking together. If your kitchen is warm, you can store them in the refrigerator, but let them come to room temperature before serving for the best texture.
Freezing Instructions: These bars freeze beautifully. Once they’re completely cool and cut, place them in a single layer on a baking sheet and freeze for about an hour. Then transfer the frozen bars to a freezer-safe bag or container. They’ll keep for up to 3 months. To thaw, just leave them at room temperature for about 30 minutes, or pop one in the microwave for 15 seconds for that just-baked warmth.
Flavor Development: Honestly, these bars taste even better the next day. The flavors meld together overnight, and the texture becomes even more tender. I’ve been known to make a batch specifically to eat over the next few days—if they last that long.
Nutritional Information & Benefits
Let’s be real: these are not health food. They’re a treat, and that’s okay. But here’s a rough estimate of what you’re looking at per bar (based on 24 bars).
| Nutrient | Amount Per Bar |
|---|---|
| Calories | 210 |
| Total Fat | 11g |
| Saturated Fat | 6g |
| Cholesterol | 35mg |
| Sodium | 150mg |
| Total Carbohydrates | 28g |
| Dietary Fiber | 1g |
| Sugars | 18g |
| Protein | 3g |
On the bright side, if you’re using dark chocolate candy, you’re getting a small dose of antioxidants. The peanuts in Snickers or Reese’s cups provide a little protein and healthy fats. And honestly, sometimes you just need a treat that makes you smile. Life is about balance, right? These bars are part of that balance—a little indulgence that brings joy without any guilt.
Frequently Asked Questions
Can I use any type of leftover Halloween candy?
Pretty much! I recommend sticking with chocolate-based candies with fillings like caramel, peanut butter, or nougat. Avoid powdery candies like candy corn or very soft candies that melt completely. Hard candies like Jolly Ranchers don’t work well either—they become rock-hard when baked.
Can I make these cookie bars ahead of time?
Absolutely. These bars actually taste better the next day. You can bake them up to 2 days in advance and store them in an airtight container at room temperature. You can also freeze the baked bars for up to 3 months.
Why did my bars turn out too dry?
This usually happens from overbaking or using too much flour. Make sure you spoon and level your flour rather than scooping directly from the bag. Also, check your bars at 22 minutes—every oven is different, and taking them out a minute early is better than a minute late.
Can I use white sugar instead of brown sugar?
You can, but the bars won’t be as moist or flavorful. Brown sugar adds moisture and a subtle caramel flavor that pairs beautifully with the candy. If you only have white sugar, add 2 tablespoons of molasses to mimic brown sugar.
How do I prevent the candy from sinking to the bottom?
This can happen if the dough is too thin or the candy pieces are too heavy. Make sure your dough is thick and scoopable before pressing it into the pan. Also, chopping the candy into smaller pieces helps them stay suspended in the dough.
Conclusion
These Easy Leftover Halloween Candy Cookie Bars are more than just a way to use up leftover candy—they’re a celebration of creativity and resourcefulness in the kitchen. They take something chaotic and turn it into something beautiful and delicious. I love this recipe because it reminds me that the best things in life are often born from necessity and a little bit of experimentation.
I hope you give these bars a try. Feel free to experiment with your own candy combinations and let me know what works for you. Did you use mostly peanut butter cups? Did you add a sprinkle of sea salt? I’d love to hear about your creations in the comments below. And if you have a favorite candy combination that I haven’t tried, please share it—I’m always looking for new inspiration.
Happy baking, and may your Halloween candy never go to waste again!
Pin This Recipe!
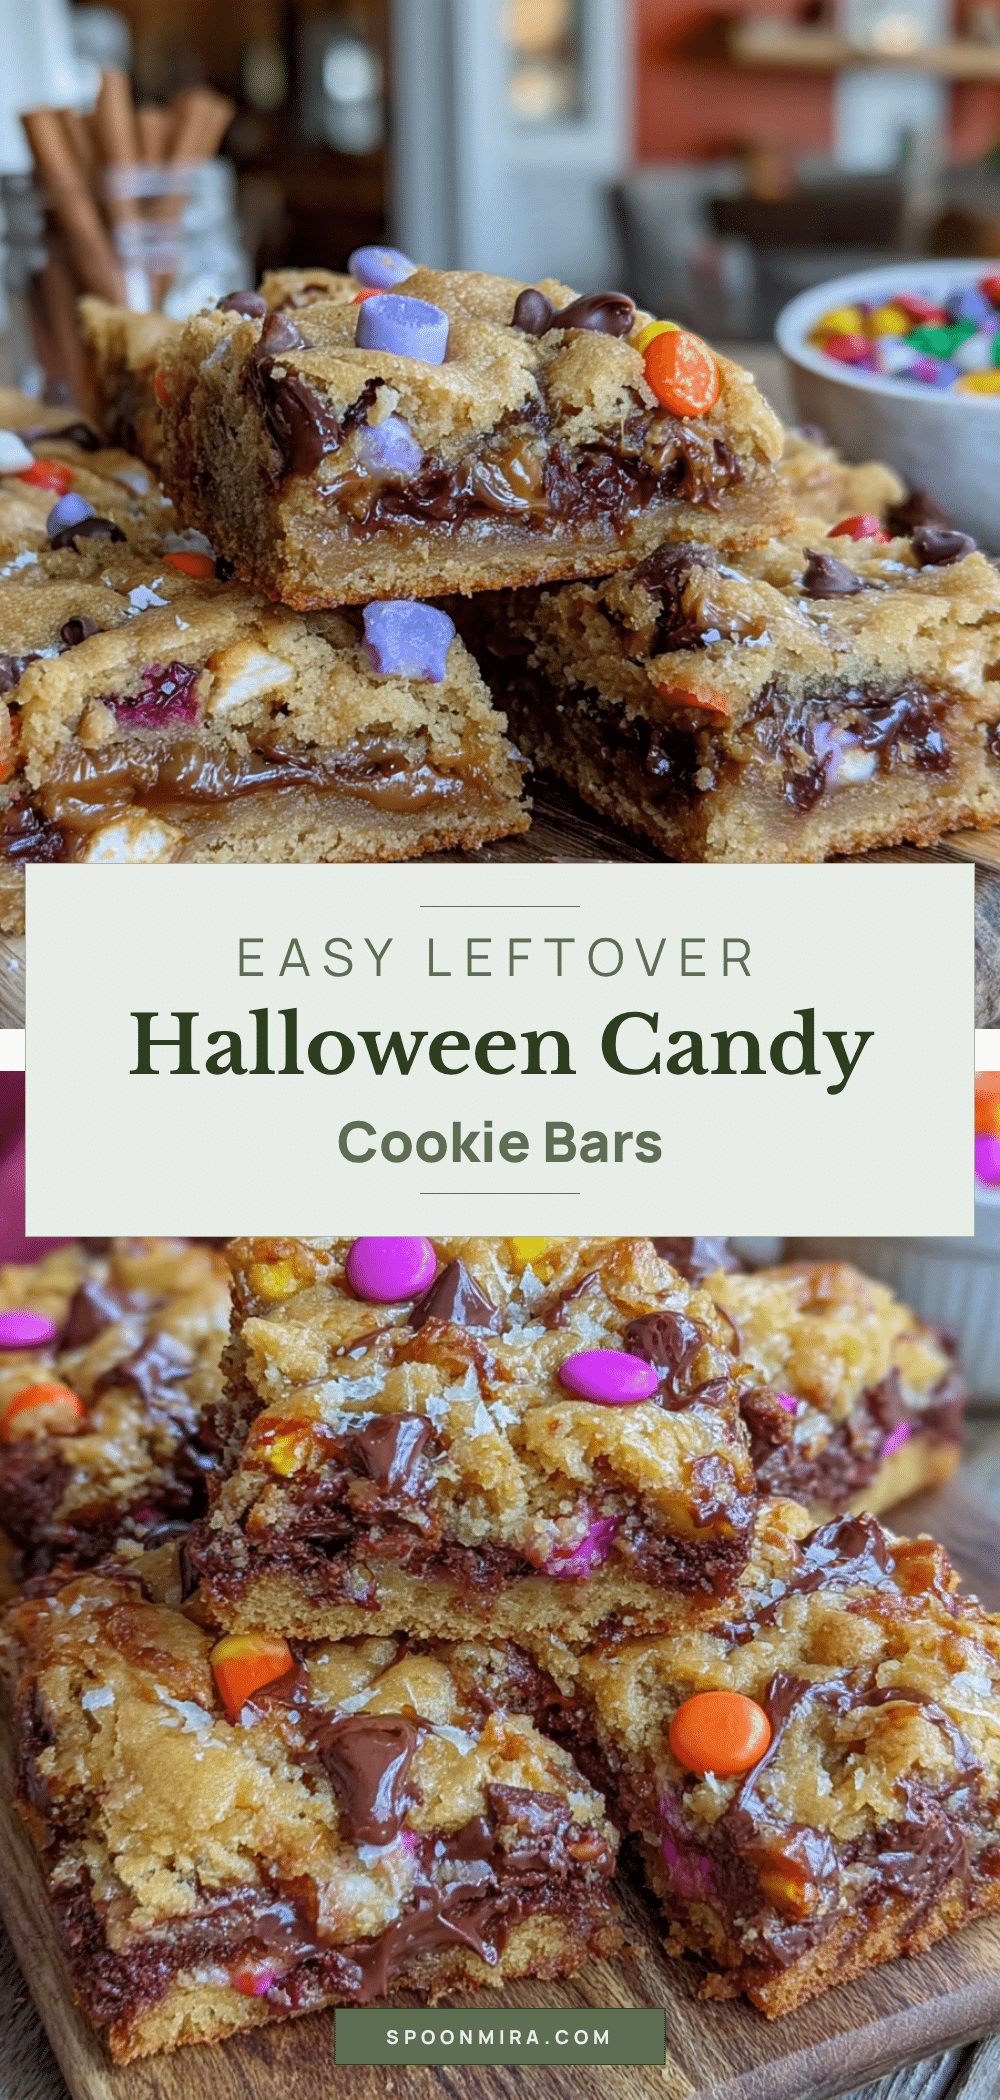
Easy Leftover Halloween Candy Cookie Bars

Transform your leftover Halloween candy into chewy, buttery cookie bars with crispy edges and gooey pockets of caramel, chocolate, and crunch. This quick and easy recipe is the perfect solution for post-Halloween candy piles.
- Prep Time: 15 minutes
- Cook Time: 25 minutes
- Total Time: 40 minutes
- Yield: 24 bars 1x
- Category: Dessert
- Cuisine: American
Ingredients
- 1 cup (2 sticks) unsalted butter, softened
- 1 cup packed light brown sugar
- 1/2 cup granulated sugar
- 2 large eggs, room temperature
- 2 teaspoons vanilla extract
- 2 1/4 cups all-purpose flour
- 1 teaspoon baking soda
- 1/2 teaspoon salt
- 2 cups chopped leftover Halloween candy (mix of chewy, crunchy, and pure chocolate)
- 1/2 cup semi-sweet chocolate chips (optional)
Instructions
- Preheat your oven to 350°F (175°C). Position the rack in the center of the oven. Line a 9×13-inch baking pan with parchment paper, leaving about 2 inches of overhang on the long sides.
- Chop your leftover Halloween candy into roughly 1/2-inch pieces. Set aside.
- In the bowl of a stand mixer fitted with the paddle attachment, beat the softened butter, brown sugar, and granulated sugar together on medium speed for about 3 minutes until light and fluffy. Scrape down the sides halfway through.
- Add the eggs one at a time, beating well after each addition. Add the vanilla extract and beat for another 30 seconds.
- In a separate medium bowl, whisk together the flour, baking soda, and salt.
- With the mixer on low speed, gradually add the flour mixture to the butter mixture. Mix just until the flour disappears, about 30 seconds. Do not overmix.
- Remove the bowl from the mixer and use a rubber spatula to fold in the chopped candy and chocolate chips (if using) until evenly distributed.
- Transfer the dough to the prepared baking pan. Using slightly damp fingers, press the dough evenly into the pan, making sure it reaches all corners and is relatively level.
- Bake for 22-26 minutes, until the edges are golden brown and the center looks set and slightly puffed. A toothpick inserted into the center should come out with a few moist crumbs.
- Place the pan on a cooling rack and let the bars cool for at least 30 minutes in the pan. Then, using the parchment paper overhang, lift the entire slab out of the pan and transfer to the cooling rack to cool completely, about another 30 minutes.
- Once completely cool, use a sharp chef’s knife to cut the slab into 24 bars (6 rows by 4 rows). Wipe the knife clean between cuts for neat edges.
Notes
Avoid using powdery or very soft candies like candy corn or chalky mints. For best results, use a mix of chewy (caramel-filled), crunchy (wafer or crisp), and pure chocolate candies. Let bars cool completely before cutting to prevent crumbling. Bars taste even better the next day.
Nutrition
- Serving Size: 1 bar
- Calories: 210
- Sugar: 18
- Sodium: 150
- Fat: 11
- Saturated Fat: 6
- Carbohydrates: 28
- Fiber: 1
- Protein: 3
Keywords: leftover Halloween candy, cookie bars, easy dessert, Halloween recipe, candy bars, chewy cookie bars


