It was 11:47 PM on a random Wednesday in October, and I had a sudden, almost desperate need to pipe something. Not just any something—I needed to make those perfect little turkey cookies you see all over Pinterest, the ones with the ruffled feathers and the glossy, jewel-toned royal icing. The problem? I didn’t have a single turkey cookie cutter. I had a star cutter, a heart cutter, and a slightly bent circle. But I had a bag of confectioners’ sugar, a carton of egg whites I’d meant to use for breakfast, and the wild, sleep-deprived idea that maybe, just maybe, I could fake it. Honestly, that late-night kitchen session felt like a secret. No one was watching, no one was judging. I could mess up a dozen times and it wouldn’t matter. And mess up I did—the first batch of icing was so thick it broke the piping bag. I mean, it just split right down the seam. There was sugar everywhere. But that’s the thing about late-night baking: the stakes are low, but the creativity is high. I figured out that if you let the base cookie be a simple shape (a circle for the body, a smaller circle for the head), you can build the feathers with icing alone. It’s a cheat code, honestly. And let me tell you, the first time I pulled that tray of cookies out and saw the little turkey faces staring back at me—made from nothing but patience and a steady hand—I knew I’d never go back to a cookie cutter. You know that feeling when a recipe just clicks? This is that recipe. It’s the one that makes you look like a pro, even if you’re just a person in pajamas at midnight.
Why You’ll Love This Recipe
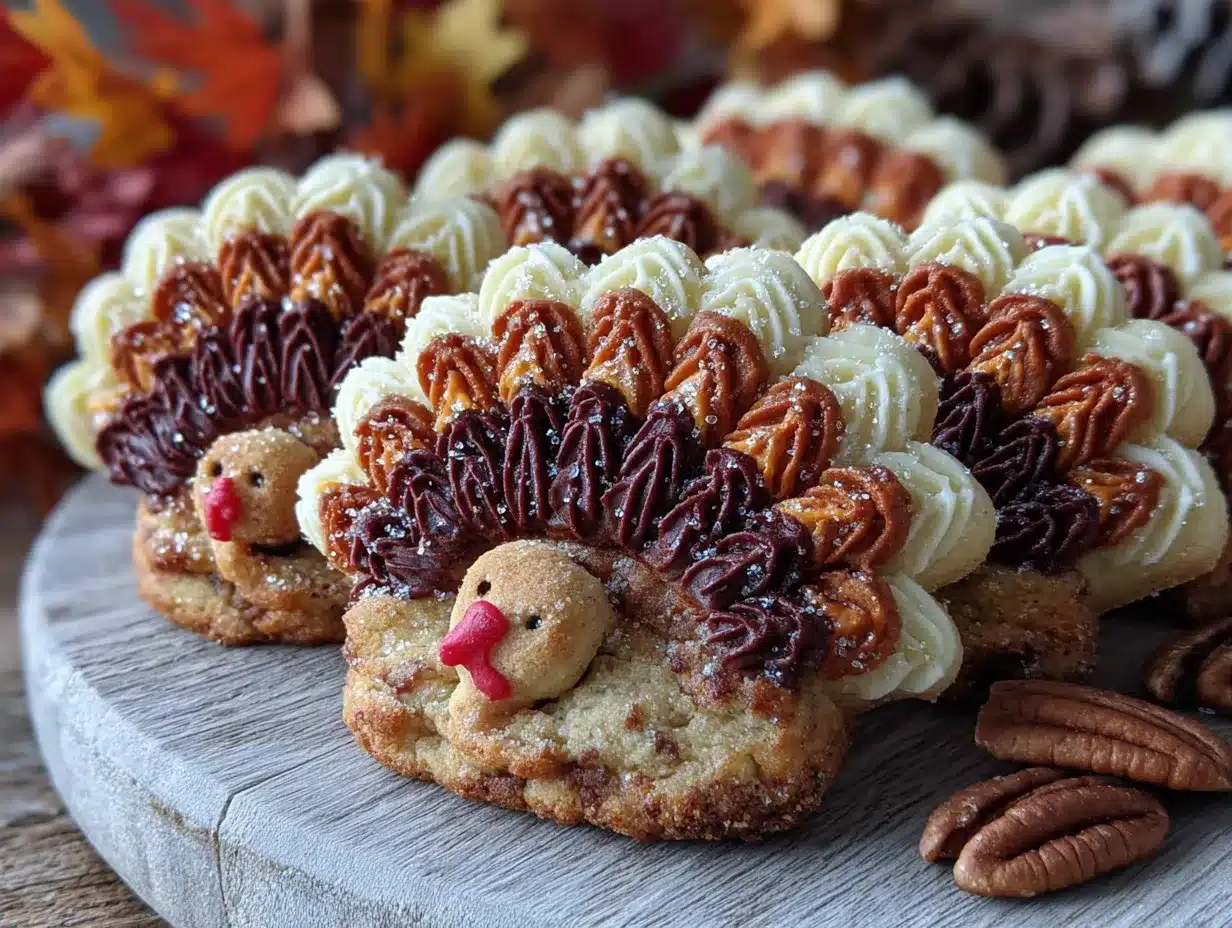
Let’s be real—you’re here because you want to make something that will stop a dinner party cold. These turkey cookies are that recipe. They are the centerpiece of the dessert table, the thing everyone takes a picture of before they eat. I’ve tested this method about six times now, tweaking the icing consistency and the baking time until it was absolutely foolproof. Here is why this version is the one you need.
- Show-Stopping Presentation: These cookies look incredibly intricate, but the technique is surprisingly simple. The ruffled feathers are just a matter of piping lines and letting them dry. Your guests will think you spent all day on them.
- Perfect for a Crowd: This recipe scales beautifully. You can easily double or triple the batch for a big Thanksgiving gathering or a Friendsgiving potluck. They travel well, too, which is a huge plus.
- Simple Ingredients: You likely have everything in your pantry already. Flour, butter, sugar, eggs, and some gel food coloring. No weird, expensive extracts or specialty flours.
- Prepping Ahead is a Breeze: The cookies themselves can be baked and frozen weeks in advance. The royal icing can be made and stored in the fridge. This is a host’s secret weapon—do the hard work early, and just assemble before the party.
- Unbelievably Delicious: Forget those bland, rock-hard sugar cookies from the store. This is a soft, buttery, slightly tangy sugar cookie that melts in your mouth. The royal icing adds a delicate crunch that is just pure satisfaction.
This isn’t just another sugar cookie recipe. It’s a system. It’s the kind of recipe that makes you feel like a culinary genius, even if you’ve never held a piping bag before. It’s comfort food reimagined—fancy enough for a holiday party, but simple enough that you won’t stress about it.
What Ingredients You Will Need
This recipe uses simple, wholesome ingredients to deliver a cookie that is both structurally sound for decorating and incredibly tender to eat. The magic is in the ratios and the technique.
For the Sugar Cookies
- Unsalted butter, softened: 1 cup (2 sticks / 226g). I prefer using Kerrygold for its rich flavor, but any good quality unsalted butter works. Let it sit out for at least an hour to get truly soft.
- Granulated sugar: 1 cup (200g). Just standard white sugar.
- Large egg: 1, at room temperature. (adds richness and structure)
- Vanilla extract: 1 teaspoon. Use pure vanilla extract, not imitation, for the best flavor.
- Almond extract: ½ teaspoon. This is my secret ingredient. It adds a warmth that makes the cookie taste more “bakery-like.”
- All-purpose flour: 2 ½ cups (312g). Spoon and level it—don’t scoop directly from the bag or you’ll get dense cookies.
- Baking powder: ½ teaspoon. This helps them puff just slightly, giving a nice soft bite.
- Salt: ½ teaspoon. Balances the sweetness.
For the Royal Icing
- Powdered sugar: 4 cups (480g), sifted. Sifting is non-negotiable here. Lumps will clog your piping tip.
- Meringue powder: 3 tablespoons. This is more stable than raw egg whites and safe for everyone. I recommend the Wilton brand.
- Warm water: 6-8 tablespoons (90-120ml). You’ll adjust this to get the right consistency.
- Gel food coloring: Orange, red, yellow, brown, and black. I use Americolor gels—they are super concentrated and don’t thin the icing like liquid colors do.
- Clear vanilla extract: ½ teaspoon. Optional, but it adds flavor without discoloring the white icing.
Equipment Needed
You don’t need a professional bakery setup, but having the right tools makes this process infinitely easier. Here is what you’ll need:
- Stand mixer or hand mixer: For creaming the butter and sugar, and for whipping the royal icing. A stand mixer is ideal, but a hand mixer and a bowl will work—just be prepared to hold it for a while.
- Rolling pin: I prefer a French rolling pin (the one without handles) for better control, but any rolling pin works. If you don’t have one, a wine bottle can be a hilarious, effective substitute.
- Parchment paper: For baking and for rolling out the dough without sticking.
- Baking sheets: At least two, so you can rotate them in and out of the oven.
- Piping bags: Disposable ones are easiest. Get a pack of 12-inch bags.
- Piping tips: You will need a #2 round tip for outlining and flooding the cookies, and a #1 or #1.5 tip for fine details like the turkey’s beak and eyes.
- Couplers: These let you change tips without changing bags. A huge time saver.
- Toothpicks: For popping air bubbles in the icing and for spreading it into corners.
- Cooling rack: Essential for letting the cookies cool completely before decorating.
Preparation Method
Alright, let’s get to the fun part. This method is broken down into clear stages. Don’t rush the chilling steps—they are crucial for cookies that hold their shape.
- Make the cookie dough (10 minutes): In the bowl of a stand mixer fitted with the paddle attachment, cream the softened butter and granulated sugar together on medium speed until light and fluffy, about 3 minutes. Scrape down the sides. Add the egg, vanilla extract, and almond extract, and beat until combined. It might look a little curdled—that’s fine.
- Add the dry ingredients (2 minutes): In a separate bowl, whisk together the flour, baking powder, and salt. With the mixer on low, gradually add the dry ingredients to the wet ingredients. Mix just until a soft dough forms. Do not overmix, or the cookies will be tough.
- Chill the dough (2 hours minimum): Divide the dough into two discs, wrap each tightly in plastic wrap, and refrigerate for at least 2 hours. I usually do this the night before. Chilling is not optional—it prevents the cookies from spreading into flat, shapeless blobs.
- Roll and cut (15 minutes): Preheat your oven to 350°F (175°C). On a lightly floured surface, roll out one disc of dough to about ¼-inch thickness. Use a 2-inch round cookie cutter for the turkey body and a 1-inch round cutter for the head. You’ll need one of each per turkey. Place them on a parchment-lined baking sheet, spacing them about 2 inches apart. For a more authentic look, slightly overlap the head and body on the sheet before baking—they will fuse together.
- Bake (8-10 minutes): Bake for 8-10 minutes, or until the edges are just barely golden. The centers should look set but not brown. Let them cool on the baking sheet for 5 minutes, then transfer to a wire rack to cool completely. It is critical that the cookies are 100% cool before you start icing, or the icing will slide right off.
- Prepare the royal icing (10 minutes): In the bowl of a stand mixer with the whisk attachment, combine the sifted powdered sugar and meringue powder. Add 6 tablespoons of warm water. Mix on low to combine, then turn the speed to medium-high and whip for 5-7 minutes. The icing should be thick, glossy, and hold stiff peaks. This is your “stiff” icing for outlining.
- Adjust the consistency for flooding (5 minutes): To make the “flood” icing that fills in the feathers, take about ¾ of the stiff icing and thin it with water, one teaspoon at a time. You want it to be like warm honey—it should flow off a spoon in a smooth ribbon and settle back into itself within 10 seconds. This is called the “10-second rule.”
- Color the icing (5 minutes): Divide the flood icing into separate bowls. Color one bowl orange (for the beak and feet), one bowl red (for the wattle), one bowl yellow (for the feathers), and one bowl brown (for the body). Leave a small amount of white for the eyes. Use gel colors sparingly—a little goes a long way.
- Pipe the feathers (20 minutes per cookie): This is where the magic happens. Using the #2 tip and the stiff yellow icing, pipe a series of overlapping arcs on the back of the body cookie to create the tail feathers. Start from the outside and work your way in. Then, using the brown flood icing, fill in the body and head. Use a toothpick to guide the icing into the edges. Let the base colors dry for at least 2 hours.
- Add the details (15 minutes per cookie): Once the base is dry, use the #1 tip to pipe a small orange triangle for the beak, a red teardrop for the wattle, and two tiny white dots for the eyes. Add black dots on top of the white for the pupils. Pipe small orange lines for the feet on the bottom of the body.
Cooking Tips & Techniques
I’ve ruined my fair share of sugar cookies, and I’ve learned from every single one. Here are the lessons I paid for in burnt butter and runny icing.
- The “10-Second Rule” is Your Bible: For flood icing, lift your spatula. If the icing falls back into the bowl and the surface smooths out in exactly 10 seconds, it’s perfect. If it takes longer, it’s too thick. If it’s faster, it’s too thin and will run off the cookie.
- Don’t Skip the Sifting: I know, it’s annoying. But sifting the powdered sugar is the single best way to prevent lumpy icing. Lumps will clog your #1 tip and ruin your fine details.
- Chill Between Layers: If you are doing multiple colors on the same cookie (like the feathers), let each color dry for at least 30 minutes before adding the next. Otherwise, the colors will bleed into each other and look muddy.
- Use a Damp Paper Towel: If your icing starts to crust over in the bowl while you’re working, cover the bowl with a damp paper towel. This keeps it from drying out and forming a skin.
- My Biggest Failure: The first time I made these, I tried to rush the drying time. I put the cookies in the fridge to speed things up, and the condensation ruined the glossy finish. Patience is not just a virtue here—it’s a requirement. Let them dry at room temperature for at least 6 hours, or overnight.
Variations & Adaptations
This recipe is a fantastic base, and you can absolutely make it your own. Here are a few ways I’ve adapted it for different crowds and dietary needs.
- Gluten-Free Option: Substitute the all-purpose flour with a 1:1 gluten-free baking flour blend. I’ve used Bob’s Red Mill with great success. Just make sure the blend contains xanthan gum. The dough will be a little more fragile, so handle it gently.
- Spiced Turkey Cookies: Add 1 teaspoon of cinnamon, ½ teaspoon of nutmeg, and ¼ teaspoon of cloves to the dry ingredients. This gives the cookies a warm, autumnal flavor that pairs beautifully with the sweet royal icing. It’s like a snickerdoodle-turkey hybrid.
- Chocolate Feathers: For a richer look, add a tablespoon of unsweetened cocoa powder to the flood icing for the feathers. It creates a beautiful, dark contrast against the orange beak and red wattle.
- Different Shapes: Don’t have round cutters? No problem. Use a star cutter for the feathers and a small heart for the body. Or just cut freehand shapes with a knife. The beauty of royal icing is that it hides a multitude of sins.
Serving & Storage Suggestions
These cookies are designed to be the star of the dessert table. Here is how to serve and store them for maximum impact.
- Serving Temperature: Serve them at room temperature. The royal icing should be hard and glossy, and the cookie should be soft. If they are too cold from the fridge, the texture suffers.
- Presentation Tips for Hosting: Arrange them on a large wooden board or a white cake stand in a circular pattern, with the turkey faces pointing outward. It creates a gorgeous, festive centerpiece. Pair them with a plate of classic pumpkin pie for a full fall dessert spread.
- What to Serve Alongside: These cookies are sweet, so they pair beautifully with a cup of hot apple cider or a spiced chai latte. For a party, set out a bowl of creamy homemade caramel sauce for dipping—it’s a crowd-pleaser.
- Storage: Store the decorated cookies in an airtight container at room temperature, layered between sheets of parchment paper. They will stay fresh for up to two weeks. Do not refrigerate them, as the moisture will soften the icing.
- Freezing: You can freeze the undecorated, baked cookies for up to three months. Just wrap them tightly in plastic wrap and then foil. When you are ready to decorate, thaw them at room temperature and proceed with the icing.
Nutritional Information & Benefits
Let’s be honest—these are a treat, not a health food. But knowing what’s in them helps you enjoy them mindfully.
| Nutrient | Per Cookie (approx.) |
|---|---|
| Calories | 180 |
| Fat | 7g |
| Carbohydrates | 28g |
| Protein | 2g |
| Sugar | 20g |
Pin This Recipe!
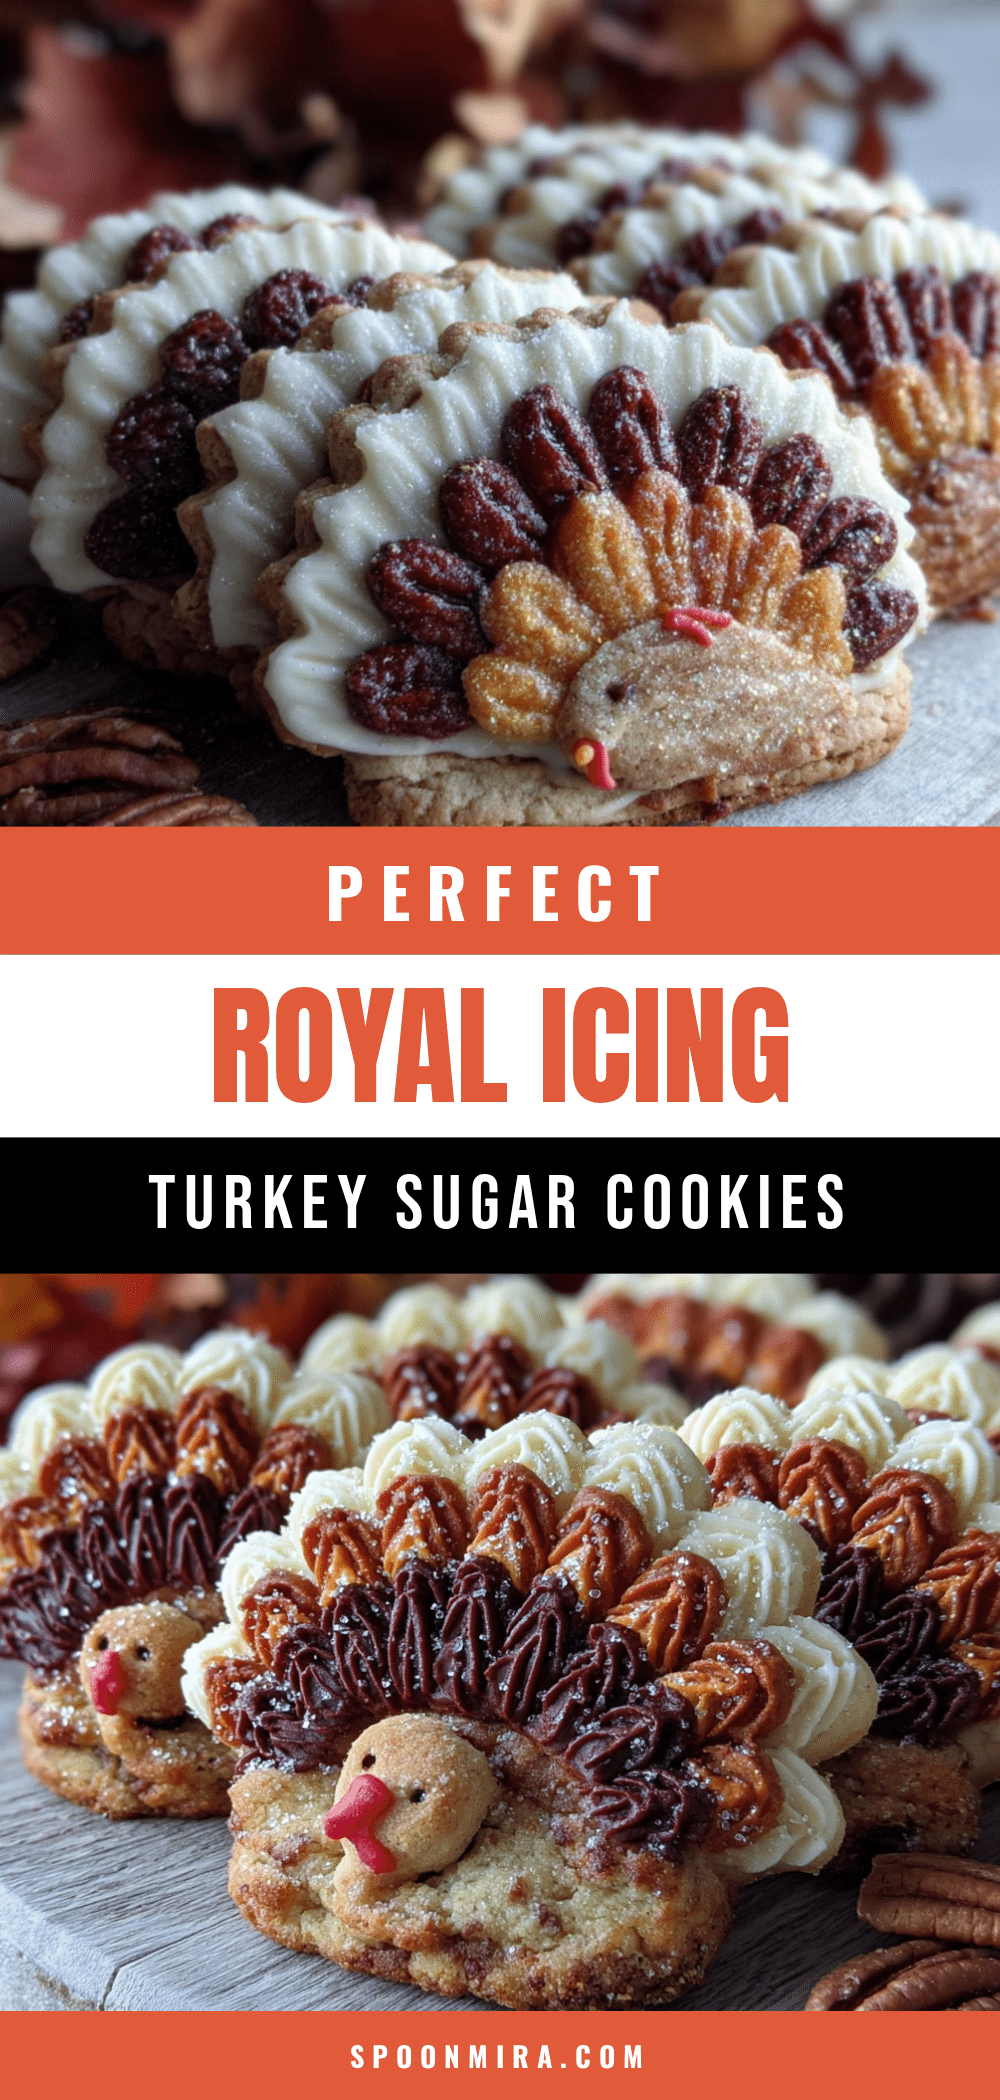
Perfect Royal Icing Turkey Cookies Recipe
These adorable turkey cookies feature a soft, buttery sugar cookie base and glossy royal icing feathers. They are surprisingly simple to make and create a show-stopping centerpiece for any Thanksgiving or fall gathering.
- Prep Time: 2 hours 30 minutes
- Cook Time: 10 minutes
- Total Time: 2 hours 40 minutes
- Yield: 24 servings 1x
- Category: Dessert
- Cuisine: American
Ingredients
- 1 cup (2 sticks / 226g) unsalted butter, softened
- 1 cup (200g) granulated sugar
- 1 large egg, at room temperature
- 1 teaspoon pure vanilla extract
- ½ teaspoon almond extract
- 2 ½ cups (312g) all-purpose flour, spooned and leveled
- ½ teaspoon baking powder
- ½ teaspoon salt
- 4 cups (480g) powdered sugar, sifted
- 3 tablespoons meringue powder
- 6–8 tablespoons (90-120ml) warm water
- Gel food coloring (orange, red, yellow, brown, black)
- ½ teaspoon clear vanilla extract (optional)
Instructions
- Make the cookie dough: In a stand mixer fitted with the paddle attachment, cream the softened butter and granulated sugar on medium speed until light and fluffy, about 3 minutes. Scrape down the sides. Add the egg, vanilla extract, and almond extract, and beat until combined.
- Add the dry ingredients: In a separate bowl, whisk together the flour, baking powder, and salt. With the mixer on low, gradually add the dry ingredients to the wet ingredients. Mix just until a soft dough forms. Do not overmix.
- Chill the dough: Divide the dough into two discs, wrap each tightly in plastic wrap, and refrigerate for at least 2 hours (or overnight).
- Roll and cut: Preheat oven to 350°F (175°C). On a lightly floured surface, roll out one disc of dough to about ¼-inch thickness. Use a 2-inch round cookie cutter for the turkey body and a 1-inch round cutter for the head. Place them on a parchment-lined baking sheet, spacing them about 2 inches apart. Slightly overlap the head and body on the sheet before baking.
- Bake: Bake for 8-10 minutes, or until the edges are just barely golden. Let cool on the baking sheet for 5 minutes, then transfer to a wire rack to cool completely.
- Prepare the royal icing: In the bowl of a stand mixer with the whisk attachment, combine the sifted powdered sugar and meringue powder. Add 6 tablespoons of warm water. Mix on low to combine, then turn the speed to medium-high and whip for 5-7 minutes until thick, glossy, and holding stiff peaks.
- Adjust the consistency for flooding: Take about ¾ of the stiff icing and thin it with water, one teaspoon at a time, until it flows like warm honey and settles back into itself within 10 seconds (the ’10-second rule’).
- Color the icing: Divide the flood icing into separate bowls. Color one bowl orange, one red, one yellow, and one brown. Leave a small amount of white for the eyes. Use gel colors sparingly.
- Pipe the feathers: Using a #2 tip and the stiff yellow icing, pipe a series of overlapping arcs on the back of the body cookie to create the tail feathers. Start from the outside and work your way in. Then, using the brown flood icing, fill in the body and head. Use a toothpick to guide the icing into the edges. Let the base colors dry for at least 2 hours.
- Add the details: Once the base is dry, use a #1 tip to pipe a small orange triangle for the beak, a red teardrop for the wattle, and two tiny white dots for the eyes. Add black dots on top of the white for the pupils. Pipe small orange lines for the feet on the bottom of the body.
Notes
Chill the dough for at least 2 hours to prevent spreading. Use the ’10-second rule’ for flood icing consistency. Let decorated cookies dry at room temperature for at least 6 hours or overnight. Do not refrigerate decorated cookies as moisture will soften the icing.
Nutrition
- Serving Size: 1 cookie
- Calories: 180
- Sugar: 20
- Sodium: 80
- Fat: 7
- Saturated Fat: 4
- Carbohydrates: 28
- Protein: 2
Keywords: turkey cookies, royal icing, Thanksgiving cookies, sugar cookies, decorated cookies, fall baking


