I was standing in line at the hardware store—of all places—when the woman in front of me started talking about her Thanksgiving appetizer. She was probably seventy, wearing a sweater with a cat embroidered on it, and she turned around to ask me if I’d ever made a cheese ball that looked like a turkey. I hadn’t. Honestly, I’d never even made a regular cheese ball. But something about the way she described it—how her grandkids would giggle every year when she brought it out, how the pretzel feathers looked just like real tail feathers—made me want to try it right then and there. She scribbled the basic idea on the back of a receipt, and I stood there holding it like it was gold.
That was three years ago, and I’ve made this turkey-shaped cheese ball every single November since. The first time, I’ll admit, it looked a little lopsided. The pretzel feathers kept sliding off, and the turkey’s head was more oval than round. But my family didn’t care. They ate the whole thing in about fifteen minutes, and my nephew asked if we could have “turkey cheese” for Thanksgiving forever. So here we are.
This recipe is the kind of thing that makes people smile before they even take a bite. It’s cute without being fussy, impressive without being complicated, and honestly? It tastes incredible. The cheese ball itself is creamy, savory, and perfectly seasoned—tangy from the cream cheese, sharp from the cheddar, with just a little kick from some hidden ingredients. And the pretzel feathers? They add that perfect salty crunch that makes you want to go back for one more dip, even when you’re full. Maybe you’ve been there—standing at a party table, eyeing the appetizers, wondering which one is worth the calories. This one is. Let me tell you, it’s worth every single one.
Why You’ll Love This Recipe
I’ve tested this recipe more times than I care to count, and every single batch has disappeared faster than I expected. Here’s why this turkey-shaped cheese ball has become a non-negotiable part of my fall entertaining lineup:
- Quick & Easy: This comes together in about 20 minutes of active prep time. No baking, no complicated steps, no stress. You just mix, shape, and decorate.
- Simple Ingredients: You probably already have most of these in your fridge and pantry. Cream cheese, cheddar, a few seasonings, and pretzels. That’s really it.
- Perfect for Thanksgiving: Whether you’re hosting the big meal or just bringing an appetizer to a Friendsgiving, this turkey-shaped cheese ball is the star of the snack table. Kids love it, adults love it, everyone loves it.
- Crowd-Pleaser: I’ve brought this to potlucks, office parties, and family gatherings. It gets photographed more than the actual turkey. People go nuts for it.
- Unbelievably Delicious: The texture is perfectly creamy and scoopable, and the flavor is balanced—sharp cheddar, rich cream cheese, a hint of garlic, and a little Worcestershire depth. It’s not just cute. It’s genuinely, mouthwateringly good.
What makes this recipe different from all the other cheese balls out there? It’s the combination of the creamy, savory cheese mixture with the salty crunch of pretzel feathers. Most turkey-shaped cheese balls use bell peppers or almonds for feathers, and those are fine, but they don’t give you that satisfying crunch. The pretzels change everything. Plus, I’ve perfected the seasoning blend over three years of testing—just the right amount of garlic powder, onion powder, and a secret pinch of smoked paprika that makes people say, “What’s in this? It’s amazing.”
This isn’t just a cheese ball. It’s the kind of appetizer that makes you close your eyes after the first bite, the kind that sparks conversations and creates memories. It’s comfort food in turkey form—simple, satisfying, and absolutely irresistible.
What Ingredients You Will Need
This recipe uses simple, everyday ingredients to deliver big flavor and that perfect creamy texture. Most of these are pantry and fridge staples, so you probably won’t need a special trip to the grocery store. Here’s everything you’ll need:
For the Cheese Ball Base
- 16 ounces cream cheese, softened — Full-fat cream cheese gives the best texture and flavor. I personally prefer Philadelphia brand for its consistent creaminess. Make sure it’s really softened to room temperature, or you’ll end up with lumps.
- 2 cups sharp cheddar cheese, shredded — Buy a block and shred it yourself. Pre-shredded cheese has anti-caking agents that affect the texture. Sharp cheddar gives the most flavor, but medium cheddar works too if that’s what you have.
- 1/4 cup grated Parmesan cheese — This adds a salty, nutty depth that balances the creaminess. The powdered kind in the green can works fine here, but freshly grated is even better.
- 2 tablespoons unsalted butter, softened — Adds richness and helps the cheese ball hold its shape. Don’t skip it.
- 1 teaspoon garlic powder — Not garlic salt. We’re controlling the salt ourselves.
- 1 teaspoon onion powder — Adds savory depth without being overpowering.
- 1/2 teaspoon smoked paprika — This is my secret ingredient. It adds a subtle smokiness that makes people wonder what’s different. Regular paprika works too, but smoked is better.
- 1 teaspoon Worcestershire sauce — Adds umami and complexity. Use a good brand like Lea & Perrins.
- 1/2 teaspoon salt — Start with this and adjust to taste. Remember, the pretzels and cheese are already salty.
- 1/4 teaspoon black pepper — Freshly ground is best.
- 1 tablespoon fresh parsley, finely chopped (optional) — Adds color and freshness. I like to mix some into the cheese ball and save some for garnish.
For the Turkey Decoration
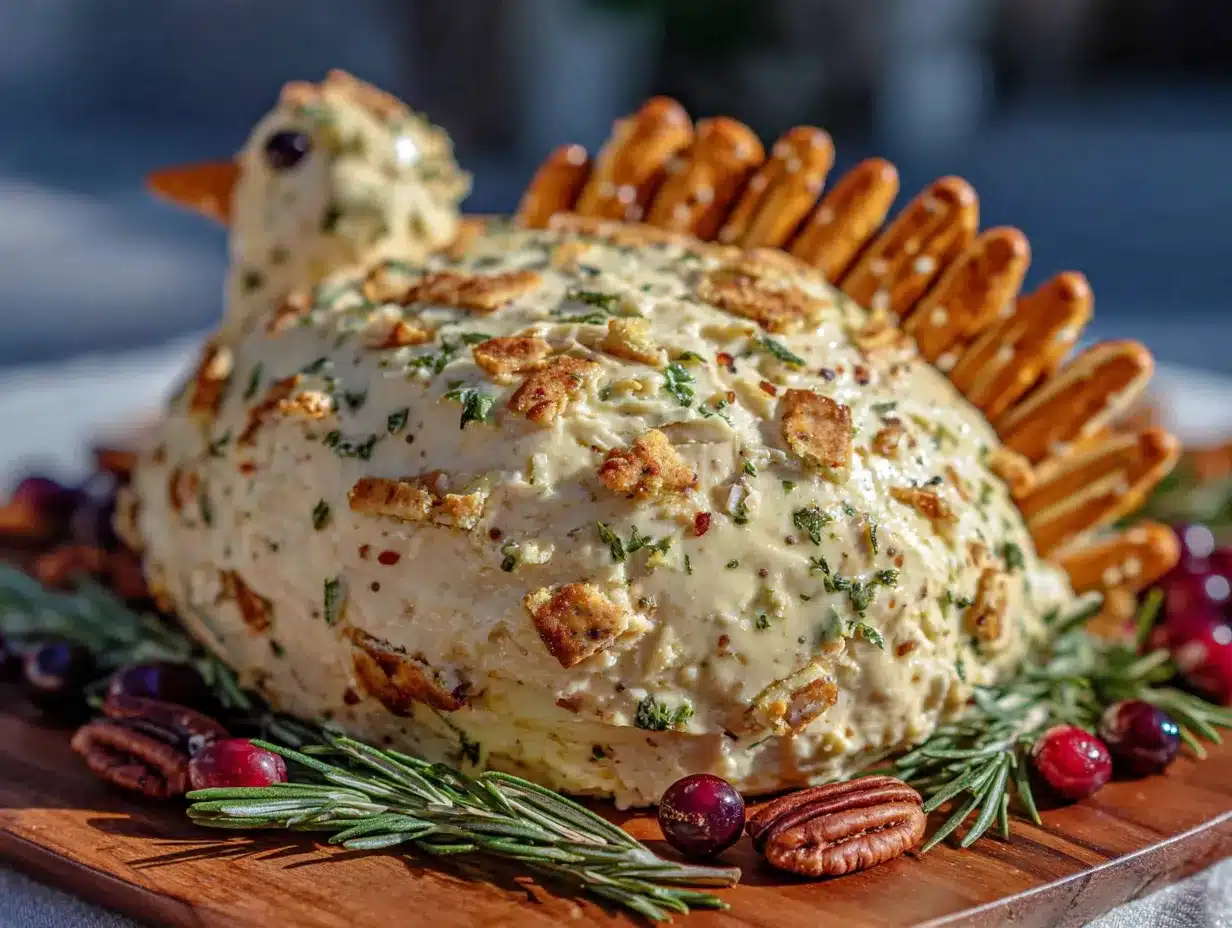
- 30-40 pretzel sticks — These become the tail feathers. Mini pretzel sticks work best because they’re easier to arrange. Regular pretzel sticks can be broken in half if needed.
- 1 candy corn or 1 small triangular piece of orange bell pepper — For the beak. Candy corn is classic and festive, but bell pepper works if you want to avoid sugar.
- 2 candy eyes or 2 black olives, sliced — Candy eyes from the baking aisle are easiest. If you don’t have them, slice a black olive into small rounds.
- 1 small piece of red bell pepper or 1 dried cranberry — For the wattle (that red dangly thing under the turkey’s beak).
- Fresh parsley or rosemary sprigs (optional) — For garnish around the base of the turkey.
For Serving
- Assorted crackers, pretzel chips, or vegetable sticks — Anything sturdy enough for scooping. I love buttery crackers, but pita chips and celery sticks work great too.
Substitution Guidance: If you need a dairy-free version, use dairy-free cream cheese and shredded vegan cheddar. The texture will be slightly different, but it still works. For a lower-fat option, use reduced-fat cream cheese, but don’t go nonfat—it won’t hold its shape. If you don’t have Worcestershire sauce, a splash of soy sauce or balsamic vinegar adds similar depth.
Equipment Needed
You don’t need any fancy equipment for this recipe, which is one of the reasons I love it. Here’s what you’ll need:
- Large mixing bowl — For combining the cheese mixture. Any medium-to-large bowl works.
- Hand mixer or stand mixer — A hand mixer makes the blending process much easier and gives you a smoother texture. You can do it by hand with a wooden spoon, but your arm will get tired.
- Rubber spatula — For scraping down the sides of the bowl and shaping the cheese ball.
- Plastic wrap — Essential for wrapping the cheese ball while it chills. It helps it hold its shape.
- Large plate or serving platter — For presenting the finished turkey. A white platter makes the colors pop.
- Small offset spatula or butter knife — For smoothing the surface of the cheese ball if needed.
- Parchment paper (optional) — If you want to shape the cheese ball on parchment and then transfer it to the serving platter, it makes cleanup easier.
If you don’t have a hand mixer, you can absolutely mix everything by hand. Just make sure your cream cheese is really soft—leave it on the counter for at least an hour. I’ve done it both ways, and while the mixer is faster, the hand-mixed version has a slightly more rustic texture that some people actually prefer. Budget-friendly tip: a basic hand mixer costs about $15 and is worth every penny for recipes like this.
Preparation Method
Let me walk you through this step by step. I’ve made this turkey-shaped cheese ball enough times to know exactly where things can go wrong, so I’ll share those little tricks along the way.
Step 1: Soften the Cream Cheese
Take your cream cheese out of the fridge at least 1 hour before you start. It needs to be at room temperature—soft to the touch but not melty. If you’re in a hurry, you can microwave it in 10-second bursts, but be careful. Overheated cream cheese turns into a greasy mess. I learned that the hard way. Cut the cream cheese into cubes before microwaving for even softening.
Step 2: Mix the Cheese Ball Base
In your large mixing bowl, combine the softened cream cheese, softened butter, shredded cheddar, Parmesan, garlic powder, onion powder, smoked paprika, Worcestershire sauce, salt, and pepper. If you’re using fresh parsley, add it now. Beat with a hand mixer on medium speed until everything is well combined and smooth. This takes about 2-3 minutes. Scrape down the sides of the bowl with your rubber spatula halfway through. The mixture should be thick, creamy, and uniform in color—a warm, pale orange from the cheddar and paprika.
Step 3: Taste and Adjust
Here’s the step nobody tells you about, but it’s crucial. Taste the mixture. Yes, it’s raw, but it’s all cheese and seasonings—totally safe. Dip a clean finger or a cracker in and see if it needs more salt, more garlic, or a little extra Worcestershire. I always end up adding another pinch of smoked paprika at this stage. Trust your taste buds.
Step 4: Shape the Turkey Body
Scoop the cheese mixture onto a large piece of plastic wrap. Use your hands to shape it into a rough oval or pear shape—wider at the bottom, narrower at the top. This will be the turkey’s body. The top part should be slightly rounded for the head. Don’t worry about perfection here. You’ll smooth it out later. Wrap the plastic wrap tightly around the shaped cheese ball and refrigerate for at least 2 hours, or up to overnight. This chilling step is non-negotiable. It firms up the cheese ball so it holds its shape when you add the pretzels.
Step 5: Prepare the Pretzel Feathers
While the cheese ball chills, sort through your pretzel sticks. You want the straightest ones for the feathers. If any are broken, save them for snacking. If you’re using regular-sized pretzel sticks, you can break them in half to make them shorter and easier to arrange. I like to have about 30-40 pretzel pieces ready to go.
Step 6: Assemble the Turkey
Once the cheese ball is firm, remove it from the refrigerator and unwrap it. Place it on your serving platter. Now, here’s the fun part. Starting at the back of the cheese ball (the wide end), insert pretzel sticks into the cheese at a slight angle, fanning them out like turkey tail feathers. Work in rows—start with the bottom row, then add a row above it, slightly staggered. The pretzels should be inserted about 1/2 inch deep into the cheese. Continue until the back half of the cheese ball is covered in pretzel feathers. The front half (the narrower end) will be the turkey’s head and chest.
Step 7: Add the Face
Press the candy corn or orange bell pepper piece into the front of the cheese ball for the beak, pointing outward. Place the candy eyes or olive slices just above the beak. Add the red bell pepper piece or dried cranberry below the beak for the wattle. Take a step back and look at your turkey. Adjust anything that looks crooked. This is your moment to make it perfect.
Step 8: Garnish and Serve
If you’re using fresh herbs, arrange parsley or rosemary sprigs around the base of the turkey to look like grass or a nest. This is purely decorative, but it makes the presentation look so much more polished. Surround the turkey with your choice of crackers, pretzel chips, or vegetable sticks. Serve immediately, or refrigerate until ready to serve. The cheese ball will hold its shape for several hours at room temperature, so it’s perfect for parties.
Cooking Tips & Techniques
After making this turkey-shaped cheese ball more times than I can count, I’ve collected a few tips that make the process smoother and the result more impressive. Let me share what I’ve learned.
Don’t skip the chilling step. I know it’s tempting to rush, but if you try to add the pretzels to a soft cheese ball, they’ll slide right out. The cheese needs to be firm enough to hold them in place. Two hours is the minimum. Overnight is even better. I once made the mistake of only chilling for 45 minutes, and let me tell you, it was a disaster. The pretzels fell over like dominoes.
Use room temperature ingredients. Cold cream cheese creates lumps that are nearly impossible to smooth out. Leave everything on the counter for at least an hour before you start. If you forget, cut the cream cheese into small cubes and microwave in 10-second bursts until soft but not warm.
Shred your own cheese. I know it’s more work, but pre-shredded cheese is coated with cellulose and starch to prevent clumping. Those additives also prevent the cheese from melting smoothly into the cream cheese. Your cheese ball will have a better texture if you shred a block of cheddar yourself. It takes about 5 minutes and makes a noticeable difference.
Wet your hands for shaping. If the cheese mixture is sticking to your hands while you shape it, lightly wet your hands with cold water. The moisture creates a barrier that prevents sticking. This trick works for shaping meatballs too.
Arrange pretzels in a fan pattern. Start from the bottom and work your way up, slightly overlapping each row. This creates a full, feathery look. If you leave too much space between pretzels, the turkey looks sparse. I usually use about 35 pretzel sticks for a full, impressive look.
Make it ahead of time. This is one of those recipes that actually tastes better after sitting in the fridge overnight. The flavors meld together, and the texture becomes even creamier. I often make the cheese ball base a day ahead, shape it, and refrigerate it. Then I add the pretzels and decorations right before serving. It makes party prep so much less stressful.
Variations & Adaptations
One of the best things about this recipe is how easily it adapts to different tastes and dietary needs. Here are some variations I’ve tried and loved.
Spicy Southwest Turkey
Add 1/4 cup finely chopped pickled jalapeños, 1 teaspoon cumin, and 1/2 cup pepper jack cheese (in place of half the cheddar). The heat from the jalapeños and pepper jack gives the cheese ball a nice kick. Use chili-lime flavored pretzels for the feathers for extra zing. This version is always a hit at my Friendsgiving gatherings.
Herb & Roasted Garlic Turkey
Replace the garlic powder with 2 tablespoons of roasted garlic paste (squeeze roasted garlic cloves out of their skins and mash them). Add 2 tablespoons each of fresh chopped chives, dill, and parsley. This version tastes like a fancy garden party appetizer. The roasted garlic is sweet and mellow, completely different from raw garlic.
Bacon Cheddar Ranch Turkey
Add 1/2 cup cooked, crumbled bacon, 1 tablespoon ranch seasoning mix (instead of the garlic and onion powder), and use extra-sharp cheddar. The smoky, salty bacon pairs perfectly with the creamy cheese. This version disappears fastest at parties, I’m not kidding.
Dairy-Free Adaptation
Use dairy-free cream cheese (I like Kite Hill or Miyoko’s), dairy-free shredded cheddar, and nutritional yeast instead of Parmesan. The texture will be slightly softer, so chill it for at least 4 hours before adding pretzels. It still tastes great—my dairy-free friends always appreciate having a festive option.
Gluten-Free Adaptation
Use gluten-free pretzel sticks for the feathers. Many brands make them now, and they work just as well. Check all your other ingredients to make sure they’re certified gluten-free. This is an easy swap that makes the recipe accessible to everyone.
Serving & Storage Suggestions
This turkey-shaped cheese ball is designed to be the centerpiece of your appetizer table, and it delivers on that promise every time. Here’s how to serve and store it for the best results.
Serving Temperature: Let the cheese ball sit at room temperature for about 15-20 minutes before serving. This softens it slightly, making it easier to spread on crackers. If it’s too cold, it will be hard to scoop. If it’s too warm, the pretzels might start to slide. That 15-minute sweet spot is perfect.
Presentation: Place the turkey on a large white platter or wooden board. Arrange crackers, pretzel chips, and vegetable sticks around it in a sunburst pattern. I like to use a mix of buttery crackers, whole wheat crackers, and celery sticks for variety in texture and flavor. Add small bowls of olives, pickles, or marinated vegetables on the side for extra options.
Complementary Dishes: This cheese ball pairs beautifully with a charcuterie board. Add some sliced salami, prosciutto, fresh grapes, apple slices, and nuts. For drinks, serve it with a crisp white wine like Sauvignon Blanc, a light beer, or sparkling water with lemon. It’s also perfect alongside a bowl of soup or a simple salad for a light meal.
Storage: If you have leftovers (which honestly, rarely happens), wrap the cheese ball tightly in plastic wrap and store it in the refrigerator for up to 5 days. The pretzels will soften over time, so if you’re storing leftovers, remove the pretzels first and store them separately. Then add fresh pretzels when you’re ready to serve again. The cheese ball itself freezes well for up to 2 months. Wrap it tightly in plastic wrap and then in foil. Thaw in the refrigerator overnight before serving.
Reheating: You don’t really reheat a cheese ball—it’s served cold or at room temperature. But if you want to soften it slightly after refrigeration, let it sit at room temperature for 30 minutes before serving. The flavors actually develop and deepen over time, so leftovers might taste even better the next day.
Nutritional Information & Benefits
I won’t pretend this is health food—it’s cheese, after all. But it does have some redeeming qualities, and knowing what’s in it helps you make informed choices. Here’s the breakdown for one serving (about 2 tablespoons of cheese mixture, without crackers or pretzels):
| Nutrient | Amount Per Serving |
|---|---|
| Calories | 120 |
| Total Fat | 10g |
| Saturated Fat | 6g |
| Cholesterol | 30mg |
| Sodium | 220mg |
| Total Carbohydrates | 2g |
| Protein | 5g |
| Calcium | 100mg |
Health Benefits: Cheese is a good source of calcium, which is essential for bone health. It also provides protein, which helps keep you full and satisfied. The cream cheese adds a small amount of vitamin A. The smoked paprika contains capsaicin, which has anti-inflammatory properties. And hey, this appetizer is portion-controlled—you can’t eat the whole thing in one sitting (well, you could, but you probably shouldn’t).
Dietary Considerations: This recipe is vegetarian and can be made gluten-free and dairy-free with the substitutions mentioned above. It’s not suitable for vegans in its current form, but a vegan version using cashew-based cream cheese and nutritional yeast is possible. The recipe contains dairy and gluten (from the pretzels), so be aware of those allergens if you’re serving a crowd.
My personal take? This is a special occasion recipe. It’s not something you eat every day, and that’s okay. When you do make it, enjoy it fully. Savor every bite. Food is about joy and connection, not just nutrients. This turkey-shaped cheese ball brings plenty of both.
Frequently Asked Questions
Can I make this cheese ball ahead of time?
Absolutely. In fact, I recommend it. You can prepare the cheese mixture, shape it into the turkey body, and refrigerate it for up to 2 days before serving. Just wrap it tightly in plastic wrap. Add the pretzel feathers and face decorations right before serving so the pretzels stay crunchy and the decorations stay fresh.
What if I don’t have pretzel sticks?
No problem. You can use almond slivers, bell pepper strips, or even carrot sticks for the feathers. Each gives a different look and texture. Almond slivers look elegant and add a nice nutty flavor. Bell pepper strips add color and crunch. Pretzels are my favorite for the salty crunch, but feel free to get creative.
How do I keep the pretzels from falling out?
The key is chilling the cheese ball thoroughly before adding the pretzels. The cheese needs to be firm enough to hold them in place. Insert the pretzels about 1/2 inch deep into the cheese, and arrange them in a fan pattern so they support each other. If a pretzel feels loose, you can insert it at a slightly different angle until it feels secure.
Can I use different types of cheese?
Absolutely. This recipe is very forgiving. Try using gouda, smoked cheddar, or even a spicy habanero cheddar for different flavor profiles. Just keep the total amount of shredded cheese the same (2 cups). Avoid using very soft cheeses like brie or goat cheese as the main base, as they won’t hold their shape as well.
How long can this sit out at a party?
You can safely leave this cheese ball at room temperature for up to 2 hours. After that, it should be refrigerated. If you’re serving it at a longer event, consider putting it out in batches or keeping it on a chilled platter. The good news is, it usually disappears well before the 2-hour mark anyway.
Conclusion
This turkey-shaped cheese ball with pretzel feathers is more than just an appetizer—it’s a conversation starter, a memory maker, and honestly, one of the most fun things you’ll ever put on a party table. It’s the recipe that came to me from a stranger in a hardware store, and I’ve been passing it along ever since. Every time I make it, someone asks for the recipe. Every time I serve it, people smile. That’s the kind of food I want to share with you.
I hope you’ll try this recipe and make it your own. Maybe you’ll add extra spice, swap in different cheeses, or use gluten-free pretzels for a friend. Maybe you’ll make it with your kids and let them arrange the feathers. However you make it, I promise it will be worth it. The creamy, savory cheese. The salty crunch of pretzels. The adorable little turkey face staring up at you from the platter. It’s comfort food at its most joyful.
So go ahead. Give it a try. And when you do, I’d love to hear about it. Leave a comment below, share a photo of your turkey, or tell me about your own unexpected recipe discoveries. Let’s keep the tradition going. Happy cooking, and happy Thanksgiving!
Pin This Recipe!
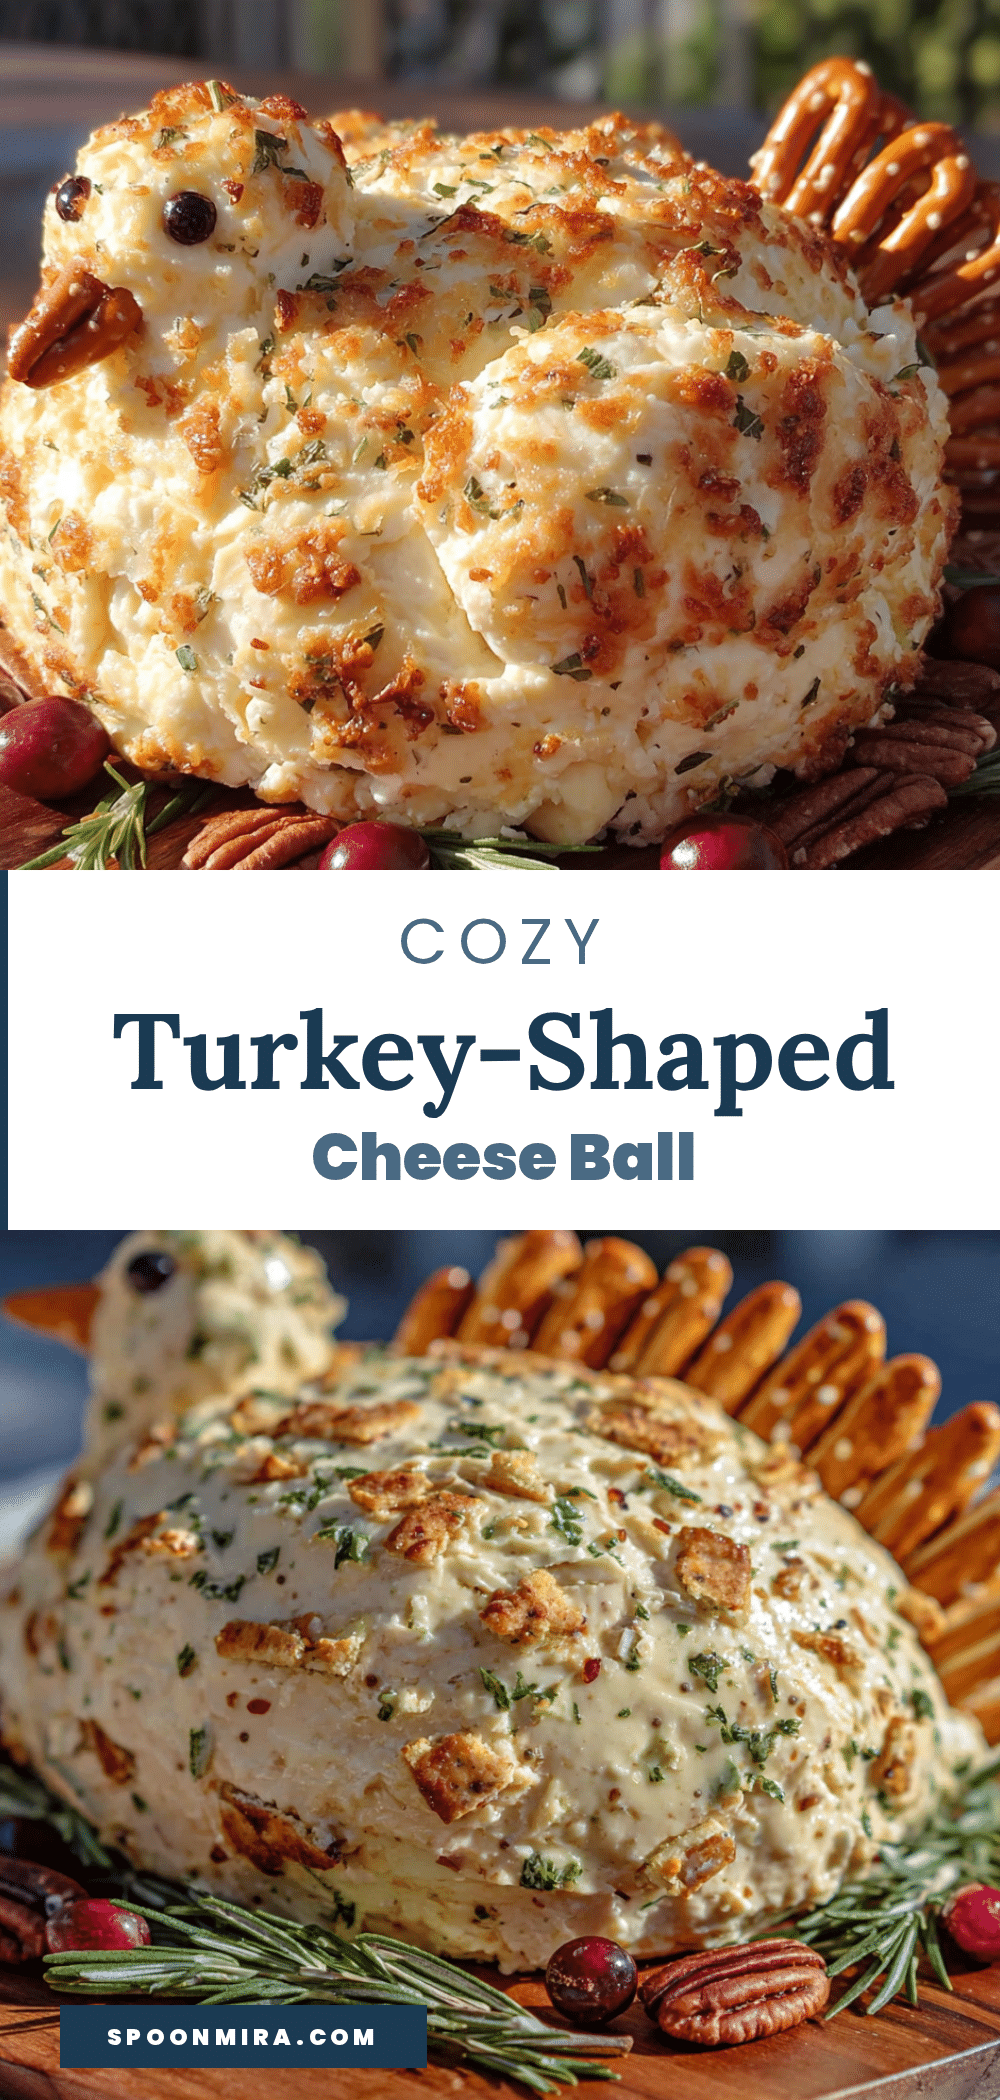
Best Easy Turkey-Shaped Cheese Ball with Pretzel Feathers
A fun and festive turkey-shaped cheese ball made with creamy cheddar and cream cheese, decorated with pretzel feathers for a salty crunch. Perfect as a Thanksgiving appetizer that will delight both kids and adults.
- Prep Time: 20 minutes
- Cook Time: 0 minutes
- Total Time: 2 hours 20 minutes (includes chilling)
- Yield: 16 servings 1x
- Category: Appetizer
- Cuisine: American
Ingredients
- 16 ounces cream cheese, softened
- 2 cups sharp cheddar cheese, shredded
- 1/4 cup grated Parmesan cheese
- 2 tablespoons unsalted butter, softened
- 1 teaspoon garlic powder
- 1 teaspoon onion powder
- 1/2 teaspoon smoked paprika
- 1 teaspoon Worcestershire sauce
- 1/2 teaspoon salt
- 1/4 teaspoon black pepper
- 1 tablespoon fresh parsley, finely chopped (optional)
- 30–40 pretzel sticks
- 1 candy corn or 1 small triangular piece of orange bell pepper
- 2 candy eyes or 2 black olives, sliced
- 1 small piece of red bell pepper or 1 dried cranberry
- Fresh parsley or rosemary sprigs (optional)
- Assorted crackers, pretzel chips, or vegetable sticks for serving
Instructions
- Soften the cream cheese: Take cream cheese out of fridge at least 1 hour before starting. If in a hurry, microwave in 10-second bursts until soft but not warm.
- Mix the cheese ball base: In a large mixing bowl, combine softened cream cheese, softened butter, shredded cheddar, Parmesan, garlic powder, onion powder, smoked paprika, Worcestershire sauce, salt, pepper, and optional parsley. Beat with a hand mixer on medium speed until smooth and well combined, about 2-3 minutes. Scrape down sides halfway through.
- Taste and adjust: Taste the mixture and adjust seasonings as needed. Add more smoked paprika or salt if desired.
- Shape the turkey body: Scoop mixture onto a large piece of plastic wrap. Shape into a rough oval or pear shape (wider at bottom, narrower at top). Wrap tightly and refrigerate for at least 2 hours or up to overnight.
- Prepare the pretzel feathers: Sort pretzel sticks, using the straightest ones. If using regular-sized sticks, break in half. Have about 30-40 pieces ready.
- Assemble the turkey: Remove chilled cheese ball from fridge and unwrap. Place on serving platter. Starting at the back (wide end), insert pretzel sticks at a slight angle, fanning them out like tail feathers. Work in rows from bottom to top, slightly staggered. Insert pretzels about 1/2 inch deep.
- Add the face: Press candy corn or orange bell pepper piece into front for beak. Place candy eyes or olive slices above beak. Add red bell pepper piece or dried cranberry below beak for wattle. Adjust as needed.
- Garnish and serve: Arrange fresh herbs around base if desired. Surround with crackers, pretzel chips, or vegetable sticks. Serve immediately or refrigerate until ready. Let sit at room temperature 15-20 minutes before serving for easier spreading.
Notes
Chilling is essential for the cheese ball to hold its shape when adding pretzels. Use room temperature ingredients for best texture. Shred your own cheese for smoother consistency. Wet hands with cold water to prevent sticking when shaping. Make ahead: prepare cheese ball base a day ahead, add pretzels and decorations just before serving. Leftovers can be stored in fridge for up to 5 days (remove pretzels first).
Nutrition
- Serving Size: 2 tablespoons of che
- Calories: 120
- Sugar: 1
- Sodium: 220
- Fat: 10
- Saturated Fat: 6
- Carbohydrates: 2
- Protein: 5
Keywords: turkey cheese ball, Thanksgiving appetizer, cheese ball, pretzel feathers, easy appetizer, holiday appetizer


