I was supposed to be making a classic, full-fat cheese ball for a New Year’s Eve party. The kind my grandmother used to make—the one that was basically a block of cream cheese, a stick of butter, and enough sodium to preserve a small fish. But here’s the thing: I grabbed the wrong block of cream cheese from the fridge. Instead of the full-fat brick, I grabbed the Neufchâtel. And I was already in a rush—the party started in two hours, I had spilled flour all over the counter, and my neighbor’s dog had just knocked over my entire spice rack. I was this close to just ordering a veggie platter.
But I was stubborn. I figured, “Let’s see what happens.” I mixed the Neufchâtel with some Greek yogurt I had lying around (because why not?), threw in the dried beef, and started shaping it. Honestly, I was bracing for a texture disaster. You know that feeling when you’re sure you’ve just ruined a recipe but you’re too far in to turn back? That was me, standing over a bowl of what looked like sad, lumpy dip. I rolled it in everything bagel seasoning because that’s all I had left, and I put it in the fridge to set, fully expecting to serve it with an apology.
Well, let me tell you—I took that cheese ball out of the fridge, set it on the table with some crackers, and watched it disappear in fifteen minutes. People were asking for the recipe. Someone actually said, “This is the best thing at the party.” I just smiled and nodded, not quite believing it myself. This lighter dried beef everything cheese ball was a total accident, but it’s the one I keep making. It’s got all that savory, salty, creamy goodness without the heavy feeling afterward. It’s the happy accident that taught me to stop panicking when things go wrong in the kitchen.
Why You’ll Love This Recipe
Let’s be real—most cheese balls are delicious but they’re also a nutritional nightmare. This one is different. After testing this recipe about six times (yes, six—I had to be sure), I can confidently say this is the cheese ball you’ll actually want to keep in your fridge. Not just for parties, but for a random Tuesday snack attack.
- Quick & Easy : Comes together in under 15 minutes of active prep time. No cooking, no complicated steps—just mix, shape, and chill. Perfect for when you remember you’re hosting people in an hour.
- Simple Ingredients : You probably have most of these in your kitchen right now. No fancy grocery trips needed, and the dried beef is a pantry staple you can keep on hand.
- Perfect for Parties : Great for game days, holiday gatherings, potlucks, or any occasion where you need a crowd-pleaser that doesn’t scream “I tried too hard.”
- Crowd-Pleaser : Always gets rave reviews from both kids and adults. I’ve seen people who swore they didn’t like cheese balls go back for thirds.
- Unbelievably Delicious : The texture is creamy and light, not heavy and greasy. The everything bagel seasoning adds this incredible crunch and savory pop that makes every bite interesting.
What makes this recipe different from the rest? It’s the secret swap of Greek yogurt for half the cream cheese. That one change cuts the fat significantly without sacrificing any of that rich, tangy flavor. Plus, the Neufchâtel gives you that same creamy texture with about a third less fat than regular cream cheese. This isn’t just another version of a cheese ball—it’s the one you’ll make when you want to feel good about what you’re eating.
This recipe isn’t just good—it’s the kind that makes you close your eyes after the first bite. It’s comfort food reimagined—healthier, faster, but with the same soul-soothing satisfaction. Perfect for impressing guests without stress, or turning a simple snack into something memorable.
What Ingredients You Will Need
This recipe uses simple, wholesome ingredients to deliver bold flavor and satisfying texture without the fuss. Most of these are pantry staples or easy to find at any grocery store.
For the Cheese Ball Base
- 8 oz Neufchâtel cheese, softened (this is the lighter cream cheese—it has about 30% less fat than regular cream cheese but the same creamy texture)
- 1/2 cup plain Greek yogurt (I recommend full-fat or 2% for best texture—nonfat can make the mixture too thin. Fage or Chobani work great)
- 2.5 oz dried beef, finely chopped (look for the jarred kind in the canned meat aisle—I prefer Armour brand for consistent quality)
- 1/4 cup finely chopped green onions (about 3-4 green onions, white and green parts both work)
- 1 tablespoon Worcestershire sauce (adds that savory depth—don’t skip it)
- 1 teaspoon garlic powder (not garlic salt—we’re controlling the sodium here)
- 1/2 teaspoon onion powder
- 1/4 teaspoon black pepper
For the Coating
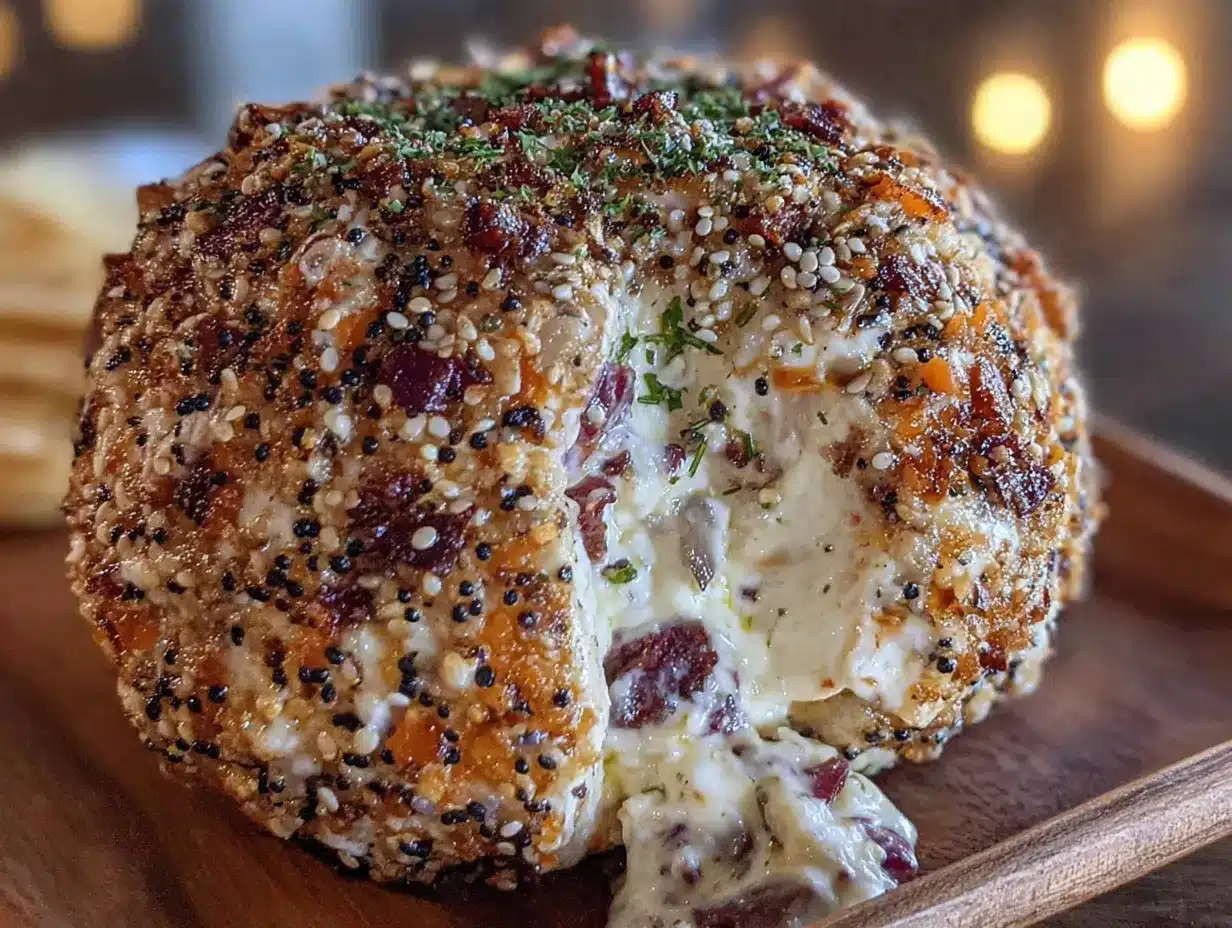
- 3 tablespoons everything bagel seasoning (store-bought is fine—I use Trader Joe’s or make my own with sesame seeds, poppy seeds, dried garlic, dried onion, and salt)
- 1 tablespoon finely chopped fresh parsley (optional, for color—but it really makes it look fancy)
Ingredient Selection Tips: When choosing your dried beef, look for the jarred slices rather than the pre-chopped kind. The slices are easier to chop yourself to your preferred consistency. If you can’t find dried beef, you can substitute with 3 ounces of finely chopped prosciutto or even crispy bacon—just be aware that will change the flavor profile and add more fat.
Substitution Guidance: For a dairy-free version, use dairy-free cream cheese and dairy-free plain yogurt. The texture will be slightly different, but it still works. For a vegetarian option (though it won’t taste the same), you can substitute the dried beef with 1/2 cup of finely chopped sun-dried tomatoes or 1/2 cup of toasted chopped walnuts for a different but delicious flavor.
Equipment Needed
You don’t need much for this recipe, which is part of the beauty of it. Here’s what you’ll need:
- Large mixing bowl (any size will do, but bigger is better for mixing without making a mess)
- Hand mixer or stand mixer (you can do this by hand with a wooden spoon, but a mixer makes it much smoother—I’ve done both, and the mixer wins every time)
- Rubber spatula (for scraping down the sides and getting every last bit of cheese ball goodness)
- Plastic wrap or parchment paper (for shaping and wrapping the cheese ball)
- Sharp knife and cutting board (for chopping the dried beef and green onions)
- Small shallow dish or plate (for rolling the cheese ball in the seasoning)
- Refrigerator space (you need at least 2 hours of chill time, preferably 4)
If you don’t have a hand mixer, don’t worry—I’ve made this with just a fork and some elbow grease. It takes a bit longer and the texture is slightly less smooth, but it still tastes amazing. Just make sure your Neufchâtel is really soft (leave it out for at least 30 minutes) to make mixing easier. Also, a tip from my own experience: use a flexible cutting mat for chopping the dried beef—it’s easier to scrape the chopped bits into the bowl without losing half of them on the counter.
Preparation Method
Follow these steps carefully, and you’ll have a gorgeous cheese ball that tastes like you spent hours on it. Trust the process, especially the chilling part—it makes a huge difference.
- Soften the Neufchâtel. Take your cream cheese out of the fridge at least 30 minutes before you start. If you’re in a hurry (I’ve been there), cut it into small cubes and microwave it on 50% power for 10-15 seconds. It should be soft but not melted. Pro tip: if it’s too cold, your mixture will be lumpy. If it’s too warm, it won’t hold its shape. Room temperature is the sweet spot.
- Mix the base. In a large mixing bowl, combine the softened Neufchâtel and Greek yogurt. Beat with a hand mixer on medium speed until smooth and creamy—about 2 minutes. Scrape down the sides of the bowl with your rubber spatula. The mixture should look like a thick, fluffy cloud. Sensory cue: it should smell tangy and fresh, not sour.
- Add the flavorings. Add the Worcestershire sauce, garlic powder, onion powder, and black pepper to the bowl. Beat on low speed until just combined—don’t overmix or you’ll incorporate too much air. Personal note: I once forgot the Worcestershire sauce and the cheese ball was flat and boring. Do not skip it.
- Fold in the dried beef and green onions. Using your rubber spatula, gently fold in the finely chopped dried beef and green onions. Make sure everything is evenly distributed. You want to see little flecks of beef and green onion throughout the mixture. Warning: the dried beef can be salty, so taste the mixture now. If it seems too salty, add a pinch more Greek yogurt to balance it out.
- Shape the cheese ball. Lay a large piece of plastic wrap on your counter. Scoop the cheese mixture onto the center of the plastic wrap. Using the plastic wrap to help you, shape the mixture into a ball. Twist the top of the plastic wrap to secure it. You can also use parchment paper if you prefer—I find it holds its shape better. Troubleshooting: if the mixture is too sticky to shape, refrigerate it for 15 minutes first. If it’s too dry, add a tablespoon of Greek yogurt.
- Chill the cheese ball. Place the wrapped cheese ball in the refrigerator for at least 2 hours, but 4 hours is better. Overnight is even better—the flavors really meld together. Time-saving tip: you can make this up to 3 days ahead. Just keep it wrapped tightly in the fridge.
- Prepare the coating. About 10 minutes before serving, combine the everything bagel seasoning and chopped parsley (if using) in a small shallow dish. Mix them together with a fork.
- Roll the cheese ball. Unwrap the chilled cheese ball. It should be firm but still slightly soft. Roll it gently in the seasoning mixture, pressing lightly so the seasoning sticks. Use your hands to pat the seasoning onto any bare spots. Sensory cue: the cheese ball should feel cool and firm, not squishy. If it’s too soft, pop it back in the fridge for 20 minutes.
- Final chill. Place the coated cheese ball back in the fridge for another 15-30 minutes to let the coating set. This step is optional but recommended—it helps the seasoning stick better when you’re serving it.
- Serve and enjoy. Place the cheese ball on a serving platter surrounded by crackers, vegetable sticks, or crusty bread. Let it sit at room temperature for about 10-15 minutes before serving for the best texture and flavor.
Cooking Tips & Techniques
After making this recipe more times than I care to admit, I’ve picked up a few tricks that make a real difference. Here’s what I wish someone had told me before my first attempt.
Don’t overmix the base. I know it’s tempting to keep beating until it’s super fluffy, but overmixing incorporates too much air. This can make the cheese ball crack when you try to shape it. Mix just until smooth and stop. Trust me on this one—I learned the hard way when my first cheese ball looked like a cracked desert landscape.
Chop the dried beef finely. If you leave the pieces too big, they’ll fall out when you slice the cheese ball and you’ll end up with sad little beef chunks on your plate. Aim for pieces about the size of a small pea. I like to stack a few slices of dried beef on top of each other and chop them all at once—it’s faster and more consistent.
Use the plastic wrap method for shaping. Don’t try to shape the cheese ball with your bare hands—it’s messy and the warmth from your hands will make it sticky. Instead, use the plastic wrap to pull the mixture into a ball shape. It’s like making a giant dumpling. This one trick changed my cheese ball game completely.
Chill time is non-negotiable. I know you’re excited to eat it, but if you skip the chill time, you’ll end up with a flat, spread-out mess instead of a beautiful ball. The chilling allows the fats to solidify and the flavors to meld. Think of it as the cheese ball’s beauty sleep.
Toast your own everything seasoning. If you have time, toast the everything bagel seasoning in a dry skillet over medium heat for about 2 minutes until fragrant. It brings out the nutty flavor of the sesame seeds and makes the whole thing taste more complex. Just let it cool completely before rolling the cheese ball in it.
One more thing—if your cheese ball cracks when you’re shaping it, don’t panic. Just press the cracks back together with your fingers and smooth it out. A little imperfection adds character. Honestly, some of my best cheese balls have been the ones that fought me the most.
Variations & Adaptations
This recipe is incredibly versatile. Here are some variations I’ve tried and loved:
Spicy Southwest Version
Substitute the dried beef with 1/2 cup of finely chopped chorizo (cooked and drained) or pepperoni. Add 1 tablespoon of chopped pickled jalapeños and a pinch of cayenne pepper. Use everything bagel seasoning mixed with a teaspoon of chili powder for the coating. This version is fantastic for game day—it has a nice kick without being overwhelming.
Herb & Walnut Version
For a vegetarian option, skip the dried beef entirely. Instead, add 1/2 cup of finely chopped toasted walnuts and 1/4 cup of chopped fresh dill. The coating becomes 1/4 cup of finely chopped walnuts mixed with 2 tablespoons of fresh parsley. This version is lighter and fresher—perfect for spring gatherings or brunch. I made this for a baby shower once and it was the first thing to disappear.
Smoked Salmon & Chive Version
Replace the dried beef with 4 ounces of smoked salmon, finely chopped. Swap the green onions for 2 tablespoons of fresh chives. Use everything bagel seasoning mixed with 1 tablespoon of capers (drained and chopped) for the coating. This is my personal favorite for holiday mornings or fancy brunches. It tastes like a bagel and lox in cheese ball form—absolutely divine.
Dietary Adaptations: For a gluten-free version, make sure your everything bagel seasoning is certified gluten-free (some brands add wheat-based fillers). For a lower-sodium version, use reduced-sodium dried beef and skip the extra salt in the seasoning. For a dairy-free version, use dairy-free cream cheese and yogurt—the texture will be slightly different but still delicious.
Serving & Storage Suggestions
This cheese ball is best served slightly chilled but not ice-cold. Take it out of the fridge about 15-20 minutes before serving. It should be firm enough to hold its shape but soft enough to spread easily on a cracker.
What to serve with it:
- Crackers: buttery crackers, whole wheat crackers, or even bagel chips
- Vegetables: carrot sticks, cucumber rounds, bell pepper strips, or celery
- Bread: toasted baguette slices, pita chips, or pretzel bites
- Fruit: apple slices or pear slices (the sweetness pairs beautifully with the savory cheese ball)
Storage Instructions: Wrap the cheese ball tightly in plastic wrap or store it in an airtight container. It will keep in the refrigerator for up to 5 days. The flavor actually gets better after a day or two as the ingredients meld together. I’ve found that day 2 is the sweet spot—the dried beef has softened slightly and the everything seasoning has infused into the cheese.
Freezer Instructions: You can freeze the uncoated cheese ball for up to 2 months. Wrap it tightly in plastic wrap, then in aluminum foil. When you’re ready to serve, thaw it in the refrigerator overnight, then roll it in the everything seasoning. I do not recommend freezing the coated cheese ball—the seasoning gets soggy and loses its crunch.
Reheating: This is a cold appetizer, so no reheating is needed! Just let it sit at room temperature for a few minutes before serving. If you’ve stored it in the fridge for a few days, let it sit out for 20-30 minutes to soften slightly.
One thing I love about this recipe is how the flavors develop over time. The first day, it’s fresh and tangy. By day three, the dried beef has softened and the everything seasoning has mellowed into something more complex. It’s like the cheese ball grows up as it sits in your fridge. Honestly, it’s hard to go wrong no matter when you serve it.
Nutritional Information & Benefits
Here’s the thing about this lighter cheese ball—it’s actually pretty reasonable for a party appetizer. Each serving (about 2 tablespoons) contains approximately:
- Calories: 85
- Fat: 6g (3g saturated)
- Carbohydrates: 3g
- Protein: 5g
- Sodium: 280mg
- Sugar: 1g
Compared to a traditional cheese ball, this version saves you about 40 calories and 5 grams of fat per serving. That might not sound like a lot, but over the course of a party where you might have 4-5 servings, it adds up. Plus, the Greek yogurt adds a boost of protein and probiotics that you just don’t get from regular cream cheese.
Health Benefits of Key Ingredients: Neufchâtel cheese is lower in fat and calories than regular cream cheese but still provides calcium and protein. Greek yogurt is packed with protein, probiotics for gut health, and calcium. Dried beef is a good source of iron and B vitamins (though it is high in sodium, so enjoy in moderation). Everything bagel seasoning provides sesame seeds, which are rich in healthy fats and minerals like copper and manganese.
Dietary Considerations: This recipe is low-carb and keto-friendly (about 3g net carbs per serving). It’s also gluten-free if you use certified gluten-free everything seasoning. It contains dairy and is not suitable for vegans. The sodium content is moderate—if you’re watching your salt intake, use reduced-sodium dried beef or cut back on the everything seasoning.
I’m not a nutritionist, but I do believe in eating well without feeling deprived. This cheese ball lets you have your party food and feel good about it too. It’s all about balance, right?
Conclusion
So there you have it—the cheese ball that started as a kitchen disaster and ended up being my most-requested recipe. This lighter dried beef everything cheese ball is proof that sometimes the best things come from our biggest mistakes. It’s creamy, savory, crunchy, and totally satisfying without weighing you down.
I really hope you give this recipe a try. Don’t be afraid to make it your own—swap in different seasonings, try different coatings, or experiment with the add-ins. That’s the beauty of a cheese ball; it’s incredibly forgiving and always delicious. And if you mess up? Well, that’s how I discovered this recipe in the first place. Some mistakes are worth making.
I’d love to hear how yours turns out! Drop a comment below and let me know what variations you tried, or tag me in your photos on social media. Did you add bacon? Did you make it spicy? Did your family fight over the last cracker? I want to know all about it. Happy cooking, my friends—and remember, the best recipes are the ones we stumble into.
Frequently Asked Questions
Can I make this cheese ball ahead of time?
Absolutely! This is actually one of the best recipes for making ahead. You can prepare the cheese ball up to 3 days in advance. Just keep it wrapped tightly in plastic wrap in the refrigerator. Wait to roll it in the everything seasoning until the day you’re serving it for the best crunch.
Can I use regular cream cheese instead of Neufchâtel?
Yes, you can. The texture will be slightly richer and the fat content will be higher. If you’re using regular cream cheese, you might want to reduce the Greek yogurt slightly (to about 1/3 cup) to keep the right consistency. The flavor will still be delicious, just a bit more indulgent.
What can I use instead of dried beef?
Great question! You can substitute the dried beef with finely chopped prosciutto, cooked and crumbled bacon, or even finely chopped salami. For a vegetarian version, try finely chopped sun-dried tomatoes or toasted walnuts. Each option will give you a different flavor profile, so feel free to experiment.
How do I keep the everything seasoning from falling off?
The key is to make sure your cheese ball is well-chilled before rolling it in the seasoning. A cold, firm cheese ball holds the coating better than a soft one. Also, gently press the seasoning into the cheese ball with your hands after rolling. If you’re still having trouble, you can mix a teaspoon of water with the seasoning to make a paste and spread it on the cheese ball—though this changes the texture slightly.
Can I freeze this cheese ball?
Yes, but only the uncoated version. Wrap the shaped cheese ball tightly in plastic wrap, then in aluminum foil, and freeze for up to 2 months. Thaw it in the refrigerator overnight, then roll it in the everything seasoning before serving. Do not freeze the coated cheese ball—the seasoning will become soggy and lose its crunch.
Pin This Recipe!
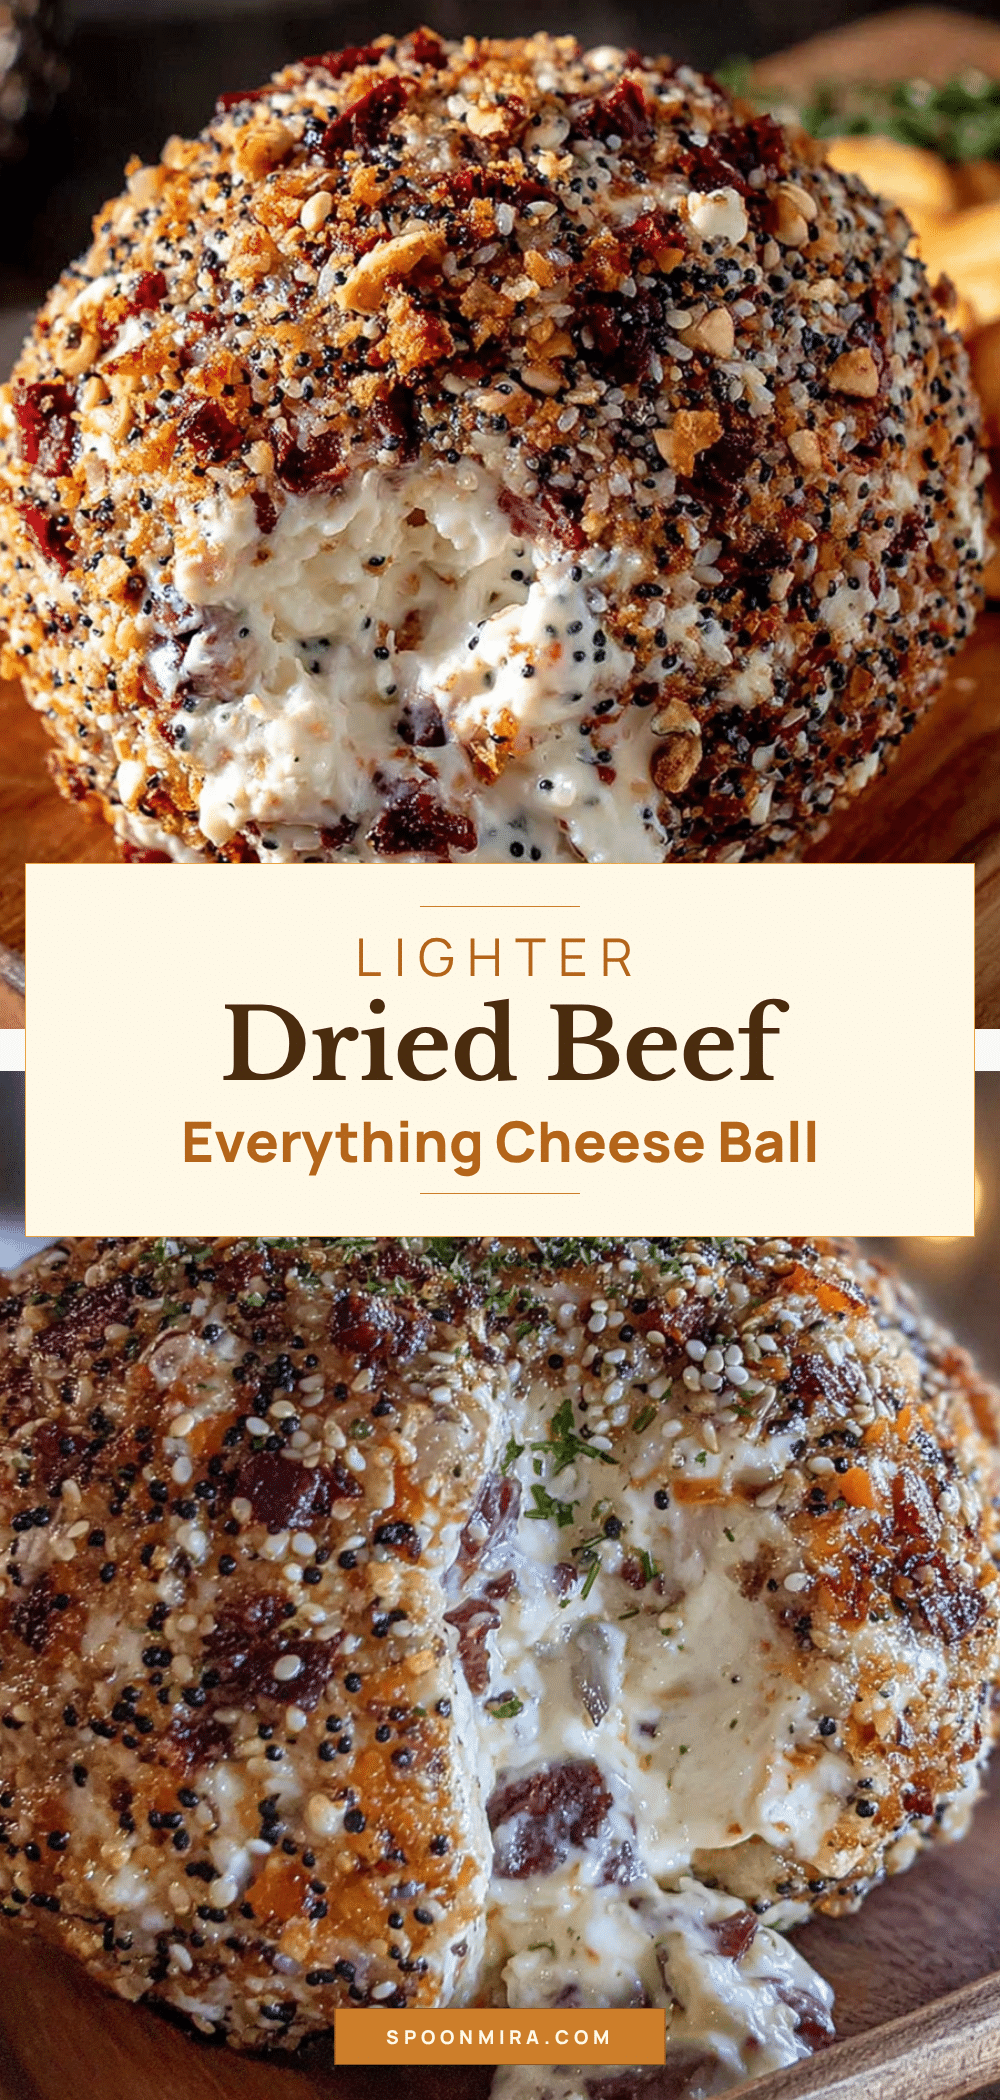
Easy Lighter Dried Beef Everything Cheese Ball
A lighter, healthier twist on the classic cheese ball, made with Neufchâtel and Greek yogurt, packed with savory dried beef and coated in everything bagel seasoning. Perfect for parties or a quick snack.
- Prep Time: 15 minutes
- Cook Time: 0 minutes
- Total Time: 2 hours 15 minutes (includes chilling)
- Yield: 12 servings 1x
- Category: Appetizer
- Cuisine: American
Ingredients
- 8 oz Neufchâtel cheese, softened
- 1/2 cup plain Greek yogurt (full-fat or 2%)
- 2.5 oz dried beef, finely chopped
- 1/4 cup finely chopped green onions (about 3–4 green onions)
- 1 tablespoon Worcestershire sauce
- 1 teaspoon garlic powder
- 1/2 teaspoon onion powder
- 1/4 teaspoon black pepper
- 3 tablespoons everything bagel seasoning
- 1 tablespoon finely chopped fresh parsley (optional)
Instructions
- Soften the Neufchâtel: Take cream cheese out of fridge at least 30 minutes before starting. If in a hurry, cut into small cubes and microwave on 50% power for 10-15 seconds until soft but not melted.
- Mix the base: In a large mixing bowl, combine softened Neufchâtel and Greek yogurt. Beat with a hand mixer on medium speed until smooth and creamy, about 2 minutes. Scrape down sides of bowl.
- Add the flavorings: Add Worcestershire sauce, garlic powder, onion powder, and black pepper. Beat on low speed until just combined.
- Fold in the dried beef and green onions: Using a rubber spatula, gently fold in finely chopped dried beef and green onions until evenly distributed.
- Shape the cheese ball: Lay a large piece of plastic wrap on counter. Scoop cheese mixture onto center. Use plastic wrap to shape into a ball. Twist top to secure.
- Chill the cheese ball: Place wrapped cheese ball in refrigerator for at least 2 hours, preferably 4 hours or overnight.
- Prepare the coating: About 10 minutes before serving, combine everything bagel seasoning and chopped parsley (if using) in a small shallow dish.
- Roll the cheese ball: Unwrap chilled cheese ball. Roll gently in seasoning mixture, pressing lightly so seasoning sticks. Pat seasoning onto any bare spots.
- Final chill: Place coated cheese ball back in fridge for 15-30 minutes to let coating set (optional but recommended).
- Serve: Place on serving platter surrounded by crackers, vegetable sticks, or crusty bread. Let sit at room temperature for 10-15 minutes before serving.
Notes
Chill time is crucial for texture and flavor melding. For best results, make ahead up to 3 days. Do not freeze coated cheese ball. If mixture is too sticky, refrigerate 15 minutes before shaping. If too dry, add a tablespoon of Greek yogurt.
Nutrition
- Serving Size: 2 tablespoons
- Calories: 85
- Sugar: 1
- Sodium: 280
- Fat: 6
- Saturated Fat: 3
- Carbohydrates: 3
- Protein: 5
Keywords: cheese ball, dried beef, everything bagel seasoning, lighter, Neufchâtel, Greek yogurt, party appetizer, easy


