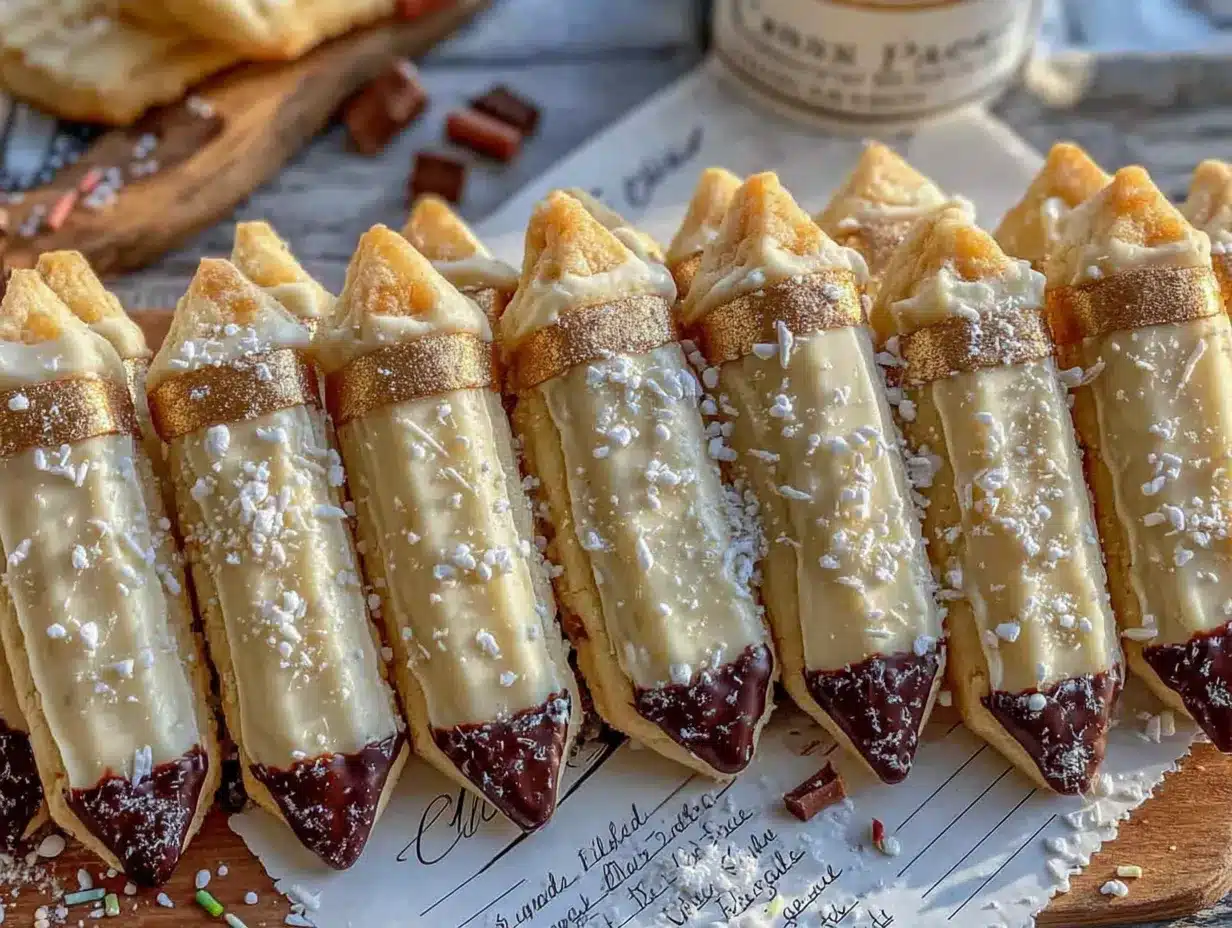
I need a cookie that looks like a No. 2 pencil and tastes like a cloud of butter and vanilla. That’s the thought I woke up with last week, two days before my oldest started second grade. Not a school supply list. Not a lunch menu. A cookie shaped like a pencil. The logic tracks—I have a four-year-old who calls every writing utensil a “color stick,” a roll of royal blue fondant I bought on a whim, and a deep, irrational fear of the school year starting without something homemade in the lunchbox. The sugar cookie dough is chilling in my fridge before I’ve even had coffee. I know exactly how this needs to look: a perfect little cylinder of dough, tipped with a “lead” point made from dark cocoa, striped with a thin band of yellow sanding sugar, and capped with a pink frosting eraser. It’s ridiculous. It’s necessary. It’s the kind of baking project that makes the first day of school feel like an occasion, not just a date on the calendar. And honestly? These adorable pencil sugar cookies turned out even better than I imagined—crisp on the edges, soft in the middle, and so cute that my kid actually paused his morning chaos to smile at his lunchbox.
Why You’ll Love These Pencil Sugar Cookies
These aren’t just another cut-out cookie. I tested this recipe four times to get the shape just right without the dough spreading into a blob. The first batch looked more like melted crayons than pencils. The second batch? Let’s not talk about it. By batch three, I figured out the trick—chilling the shaped logs before slicing, just like you would for slice-and-bake cookies. It’s a game-changer.
- School-Ready Cuteness: These cookies look like actual pencils, complete with a dark “lead” tip and pink eraser. Your kid will be the lunchroom hero.
- No Fancy Cutters Needed: You shape the dough into logs by hand. No special equipment required—just your hands and a little patience.
- Perfect for Busy Mornings: The dough comes together in 15 minutes. Chill it overnight, slice, and bake in the morning while everyone’s hunting for backpacks.
- Buttery, Not Too Sweet: The balance is spot-on. The cookie itself is classic sugar cookie—tender, buttery, with just enough sweetness to feel like a treat.
- Kid-Approved and Teacher-Approved: I sent a batch to my son’s teacher. She texted me a photo of the staff room with an empty plate and a note that said “gone in 60 seconds.”
What makes these different from every other pencil cookie out there? It’s the technique. Most recipes use a single color of dough and try to paint stripes on after baking. That never looks right. Instead, I layer thin sheets of colored dough—yellow for the body, dark cocoa for the tip, pink for the eraser—and roll them into a log. When you slice it, every cookie has a perfect pencil shape built right in. No painting, no piping, no stress. Just slice and bake.
This is the kind of recipe that turns a regular Tuesday into a memory. It’s the cookie you pack in a lunchbox on the first day, the one that says “I thought about you while you were gone.” And honestly? That’s worth a little extra effort.
What Ingredients You Will Need
This recipe uses simple, pantry-friendly ingredients to create something that looks complicated but isn’t. The magic is in how you layer the dough, not what’s in it.
For the Sugar Cookie Dough
- 2 ½ cups (312g) all-purpose flour – Spoon and level for accuracy. Too much flour makes the dough dry and crack when you roll it.
- 1 cup (226g) unsalted butter, softened – I use Kerrygold for the flavor, but any good-quality butter works. Let it sit out for an hour before starting.
- ¾ cup (150g) granulated sugar – Fine sugar dissolves more easily into the butter, giving you a smoother dough.
- 1 large egg, room temperature – Cold egg will seize the butter. Crack it into a bowl and let it sit for 10 minutes if you forgot to take it out.
- 1 ½ teaspoons vanilla extract – Pure vanilla, not imitation. It makes a noticeable difference in the flavor.
- ½ teaspoon salt – Balances the sweetness and enhances the butter flavor.
- ½ teaspoon baking powder – Gives the cookies a slight lift without spreading.
For the Pencil Details
- 2 tablespoons unsweetened cocoa powder – For the “lead” tip. I prefer Dutch-process for a darker, more realistic color.
- 1 tablespoon all-purpose flour – Mix with the cocoa to prevent it from making the dough too wet.
- Pink gel food coloring – For the eraser. Gel coloring gives you a vibrant pink without adding extra liquid. Americolor Soft Pink is my go-to.
- Yellow sanding sugar or yellow gel food coloring – For the pencil body. Sanding sugar adds sparkle and texture. If you prefer a solid color, use yellow gel coloring instead.
For Assembly
- Parchment paper – Essential for rolling and chilling the dough logs without sticking.
- Plastic wrap – To keep the logs tightly sealed while they chill.
Substitution Tips: If you’re gluten-free, swap the all-purpose flour for a 1:1 gluten-free baking blend. I’ve tested this with King Arthur Measure for Measure, and it works beautifully—just add an extra tablespoon of flour to account for the difference in absorption. For a dairy-free version, use vegan butter sticks (not tub margarine). Country Crock Plant Butter works well, but the dough will be slightly softer, so chill it for an extra 30 minutes before slicing.
Equipment Needed
You don’t need much for this recipe, which is part of why I love it. Here’s what you’ll want on hand:
- Stand mixer or hand mixer – A stand mixer makes creaming the butter and sugar effortless, but a hand mixer works just fine. I’ve made these with both.
- Rolling pin – For flattening the colored dough portions into thin sheets.
- Sharp knife or bench scraper – For trimming the dough layers and slicing the chilled logs.
- Baking sheets – Two standard half-sheet pans work perfectly. Line them with parchment paper.
- Parchment paper – Non-negotiable. It prevents sticking and makes cleanup a breeze.
- Plastic wrap – For wrapping the dough logs tightly before chilling.
- Ruler (optional but helpful) – If you want perfectly uniform cookies, a ruler helps you measure the dough layers. I eyeballed it on my third batch and they still looked great.
- Cooling rack – For letting the cookies cool completely before you add the eraser frosting.
If you don’t have a stand mixer, don’t worry. I made my first batch with a wooden spoon and a lot of elbow grease. The dough comes together quickly by hand—just make sure your butter is truly soft.
Preparation Method
Step 1: Make the Base Dough
In the bowl of your stand mixer fitted with the paddle attachment, cream the softened butter and granulated sugar together on medium speed for 3 minutes, until light and fluffy. Scrape down the sides of the bowl halfway through. Add the egg and vanilla extract, then mix on low until just combined—about 30 seconds. The mixture might look slightly curdled at this point. That’s normal. Don’t panic.
In a separate bowl, whisk together the flour, salt, and baking powder. With the mixer on low, add the dry ingredients in three additions, mixing until just combined after each. The dough will be soft but not sticky. If it feels too sticky to handle, add an extra tablespoon of flour.
Step 2: Divide and Color the Dough
Turn the dough out onto a lightly floured surface. Divide it into three portions: roughly ⅔ of the dough for the yellow pencil body, ⅙ for the pink eraser, and ⅙ for the dark tip. The remaining ⅙ will be used for the silver band (the metal part that holds the eraser).
For the yellow portion: Knead in yellow gel food coloring or roll the dough in yellow sanding sugar until evenly colored. I prefer sanding sugar because it gives the cookies a subtle sparkle, but gel coloring creates a more uniform look. Your call.
For the pink portion: Add a few drops of pink gel food coloring and knead until the color is even. Start with less than you think you need—you can always add more.
For the dark tip: Combine the cocoa powder and 1 tablespoon of flour, then knead this mixture into the reserved dough portion until fully incorporated. The dough will turn a deep, dark brown—almost black. That’s exactly what you want.
Leave the remaining portion plain. This will be the silver band.
Step 3: Shape the Dough Layers
Place a sheet of parchment paper on your work surface. Take the yellow dough and roll it into a rectangle about 6 inches wide, 8 inches long, and ¼ inch thick. Don’t stress about perfect measurements—just aim for an even thickness.
Take the dark cocoa dough and roll it into a thin log, about 6 inches long and ½ inch thick. This will be the “lead” tip of the pencil.
Take the pink dough and roll it into a rectangle about 3 inches wide, 6 inches long, and ¼ inch thick. This will be the eraser.
Take the plain dough and roll it into a thin strip about 1 inch wide and 6 inches long. This is the metal band.
Step 4: Assemble the Pencil Log
Place the yellow rectangle on the parchment paper with the long side facing you. Position the dark cocoa log along the left edge of the yellow rectangle, pressing it gently into the dough. Roll the yellow dough tightly around the cocoa log, like you’re rolling a cinnamon roll. The cocoa log should be completely encased in yellow dough, forming the tip of the pencil.
Now, place the plain dough strip (the silver band) along the right edge of the yellow roll, pressing it gently to adhere. Next, place the pink rectangle (the eraser) against the plain strip, rolling it up to form the eraser end. The final log should look like a long cylinder with a dark tip at one end, a yellow body in the middle, and a pink eraser at the other end, separated by a thin silver band.
Wrap the entire log tightly in plastic wrap and refrigerate for at least 2 hours, or overnight. Chilling is crucial—it prevents the cookies from spreading and losing their shape during baking.
Step 5: Slice and Bake
Preheat your oven to 350°F (175°C). Line two baking sheets with parchment paper.
Remove the dough log from the refrigerator. Using a sharp knife, slice the log into ¼-inch thick rounds. Each slice will reveal the pencil shape. Place the cookies on the prepared baking sheets, spacing them about 2 inches apart—they spread slightly, but not much.
Bake for 10-12 minutes, until the edges are just set and the bottoms are lightly golden. The cookies will look pale on top—that’s fine. Overbaking makes them dry. Let them cool on the baking sheet for 5 minutes, then transfer to a cooling rack to cool completely.
Step 6: Add the Eraser Detail (Optional)
If you want the eraser to look even more realistic, mix a small amount of pink frosting (½ cup powdered sugar, 1 tablespoon milk, and a drop of pink gel coloring) and pipe a tiny dot on the eraser end of each cookie. This step is purely cosmetic, but it makes the cookies look incredible. I skipped it on my first batch and they were still adorable, so don’t stress if you’re short on time.
Cooking Tips & Techniques
I learned most of these the hard way—through trial, error, and a few batches of cookies that looked like abstract art. Here’s what I wish I’d known from the start:
- Chill the dough thoroughly. This is non-negotiable. If the dough is even slightly warm when you slice it, the layers will smear together and you’ll lose the pencil shape. I chilled my first batch for only an hour and the cookies spread into blobs. Two hours minimum, overnight is better.
- Use a sharp knife. A dull blade will squish the dough and blur the layers. I use a chef’s knife, wiped clean between slices. If the dough starts to feel sticky as you slice, pop the log back in the fridge for 10 minutes.
- Don’t overwork the dough. When you’re kneading in the food coloring, handle the dough as little as possible. Overworking develops the gluten and makes the cookies tough. Stop as soon as the color is even.
- Test one cookie first. Before you slice the entire log, cut off one end and bake a test cookie. This lets you see if the shape holds and if the bake time is right for your oven. If the test cookie spreads too much, chill the log longer.
- Use a ruler for consistent thickness. I know it sounds extra, but measuring the dough layers ensures every cookie looks the same. My second batch had erasers of wildly different sizes because I eyeballed it. A ruler fixes that in 10 seconds.
- Bake on the middle rack. The bottom rack can cause the cookies to brown too quickly on the bottom, while the top rack might dry them out. Middle rack, every time.
Variations & Adaptations
This recipe is surprisingly flexible. Here are a few ways I’ve tweaked it for different occasions:
- Back-to-School Lunchbox Version: Swap the yellow sanding sugar for a mix of red and blue sanding sugar to make pencils that match your school colors. My son’s school colors are blue and gold, so I did a blue body with gold sanding sugar stripes. They looked amazing.
- Gluten-Free Adaptation: Use a 1:1 gluten-free baking flour blend. Add an extra tablespoon of flour to the dough to compensate for the lack of gluten structure. Chill the dough for at least 3 hours—gluten-free dough is softer and needs more time to firm up.
- Vegan Version: Substitute the butter with vegan butter sticks and the egg with a flax egg (1 tablespoon ground flaxseed mixed with 3 tablespoons water, let sit for 5 minutes). The cookies will be slightly less tender but still delicious. Chill the dough for an extra 30 minutes to account for the softer vegan butter.
- Flavor Twist: Add ½ teaspoon of almond extract along with the vanilla for a subtle nutty flavor that pairs beautifully with the butter. Or swap the vanilla for lemon zest and a tablespoon of lemon juice for a bright, citrusy pencil cookie.
- Mini Pencil Cookies: Roll the dough log into a thinner cylinder—about 1 inch in diameter instead of 2 inches—and slice into ⅛-inch thick rounds. Bake for 7-9 minutes. These are perfect for little hands and lunchbox treats.
Serving & Storage Suggestions
These cookies are best served at room temperature, straight from the cooling rack. The texture is perfect—crisp on the outside, soft and tender on the inside. If you’re packing them in a lunchbox, let them cool completely first, then place them in a single layer in an airtight container. I like to put a piece of parchment paper between layers to prevent any smudging of the colors.
For storage, keep the cookies in an airtight container at room temperature for up to 5 days. They’ll stay fresh and delicious. If you need to store them longer, freeze the baked cookies in a single layer on a baking sheet, then transfer to a freezer-safe bag. They’ll keep for up to 3 months. Thaw at room temperature for about 15 minutes before serving.
These cookies pair beautifully with a glass of cold milk or a warm cup of tea. For a school celebration, arrange them on a platter with a sign that says “You’re the write choice!”—corny, I know, but the kids love it. I also like to serve them alongside a batch of brown butter snickerdoodle crinkle cookies for a fun back-to-school dessert spread. The flavors complement each other perfectly—the buttery vanilla of the pencil cookies against the warm cinnamon of the snickerdoodles.
The flavors actually develop a bit over time. On day two, the butter and vanilla taste more pronounced, and the cookies are slightly softer. My family actually prefers them on day two. If you’re making these for a school event, bake them a day ahead for the best flavor.
Nutritional Information & Benefits
Let’s be real—these are sugar cookies. They’re a treat, not a health food. But here’s the breakdown per cookie (based on 24 cookies):
- Calories: 145
- Fat: 8g
- Carbohydrates: 17g
- Protein: 2g
- Sugar: 8g
- Fiber: 0.5g
The butter provides a small amount of vitamin A, and the vanilla adds a touch of antioxidants. Not exactly a superfood, but if you’re looking for a healthier option, you could swap half the butter for unsweetened applesauce—just know the texture will be more cake-like than cookie-like. I tried it once and the cookies were still delicious, just different.
For a slightly more balanced treat, serve these with a side of fresh fruit or a handful of nuts. My kids love them with apple slices and a glass of milk. It’s not a health food, but it’s a happy memory in cookie form, and that counts for something.
Conclusion
These pencil sugar cookies are more than just a cute baking project. They’re a way to celebrate the first day of school, to show your kids you’re thinking about them even when they’re not home, and to create a little bit of magic in an otherwise ordinary lunchbox. The recipe is forgiving enough for beginners, but the technique is impressive enough to wow your fellow parents at the school bake sale.
I love that these cookies are completely customizable—you can change the colors, the flavors, even the shape. Make them for the first day of school, teacher appreciation week, or just because your kid loves pencils. They’re a hit every single time.
So go ahead—make a batch. Slice them, bake them, and watch the smiles appear. And when you do, come back and tell me about it. Did your kids love them? Did the teachers request the recipe? Did you sneak one before lunchbox packing was done? (I won’t judge. I definitely did.) Drop a comment below or tag me in your photos. I can’t wait to see your pencil cookies in action!
Frequently Asked Questions
Can I use a sugar cookie mix instead of making dough from scratch?
Yes, you can use a store-bought sugar cookie mix, but the texture won’t be as tender and the dough might be harder to shape. If you go this route, add an extra tablespoon of flour to the mix to help the dough hold its shape better during rolling and slicing.
How do I keep the pencil shape from disappearing during baking?
The key is chilling the dough thoroughly. I recommend at least 2 hours in the refrigerator, but overnight is even better. Also, make sure your oven is fully preheated to 350°F—baking at a lower temperature can cause the cookies to spread more before they set.
Can I freeze the unbaked cookie dough logs?
Absolutely! Wrap the shaped dough logs tightly in plastic wrap, then place them in a freezer-safe bag. They’ll keep for up to 3 months. When you’re ready to bake, let the log thaw in the refrigerator overnight, then slice and bake as directed. You may need to add 1-2 minutes to the bake time if the dough is still cold.
My dough cracked when I tried to roll it. What went wrong?
This usually happens when the dough is too dry or too cold. If your dough is cracking, let it sit at room temperature for 5-10 minutes to soften slightly. You can also try adding a teaspoon of milk and kneading it in gently. If the dough is still cracking, it might be because you added too much flour. Next time, spoon and level your flour instead of scooping directly from the bag.
How do I make the pencil cookies look more realistic?
For extra realism, use a toothpick to draw a few thin lines along the yellow body of the cookie before baking—this mimics the wood grain of a pencil. You can also add a tiny silver or gray frosting dot on the metal band for a metallic effect. And don’t skip the pink frosting eraser detail—it makes a huge difference in the final look.
Pin This Recipe!
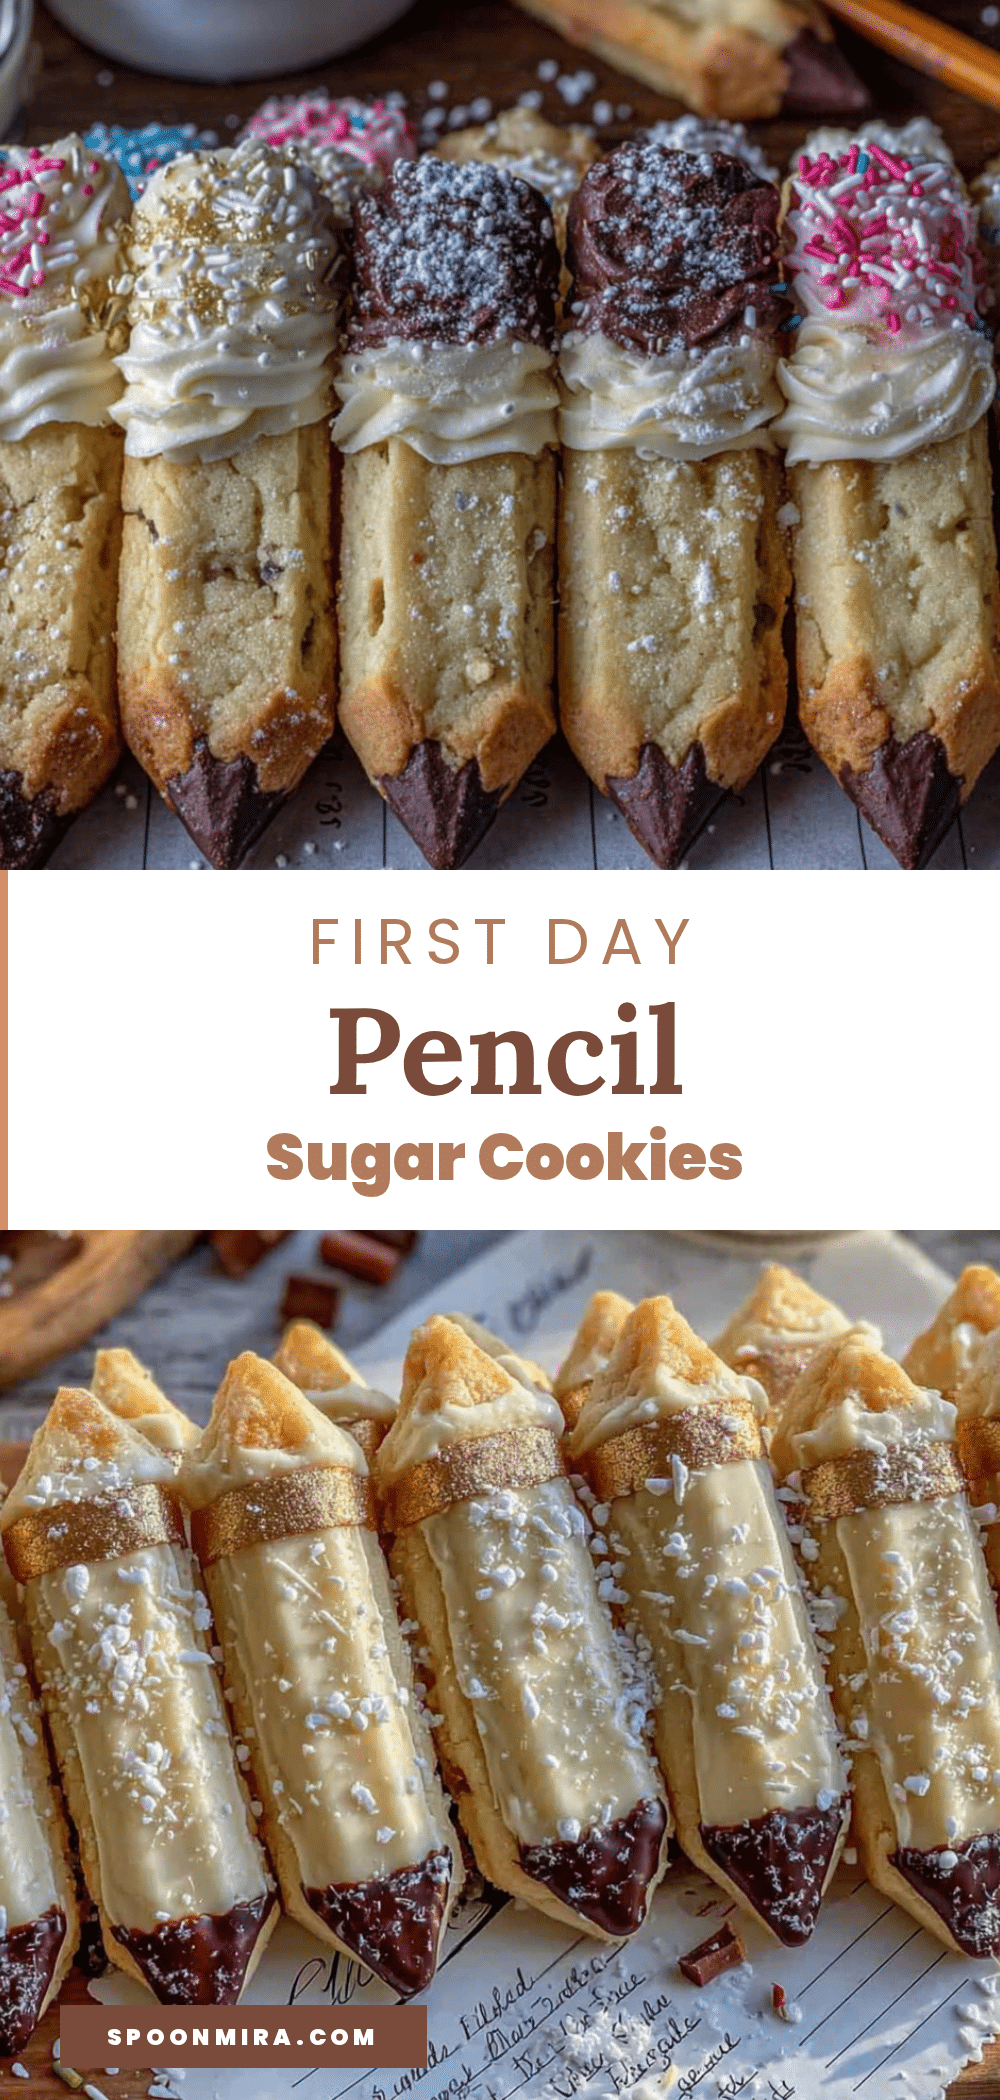
Best Easy Pencil Sugar Cookies for First Day of School

These adorable pencil-shaped sugar cookies are perfect for the first day of school. With a buttery vanilla flavor, a dark cocoa ‘lead’ tip, and a pink frosting eraser, they’re a fun and delicious treat that kids and teachers will love.
- Prep Time: 15 minutes
- Cook Time: 12 minutes
- Total Time: 2 hours 27 minutes (includes chilling time)
- Yield: 24 cookies 1x
- Category: Dessert
- Cuisine: American
Ingredients
- 2 ½ cups (312g) all-purpose flour
- 1 cup (226g) unsalted butter, softened
- ¾ cup (150g) granulated sugar
- 1 large egg, room temperature
- 1 ½ teaspoons vanilla extract
- ½ teaspoon salt
- ½ teaspoon baking powder
- 2 tablespoons unsweetened cocoa powder
- 1 tablespoon all-purpose flour
- Pink gel food coloring
- Yellow sanding sugar or yellow gel food coloring
- Parchment paper
- Plastic wrap
Instructions
- In a stand mixer fitted with the paddle attachment, cream the softened butter and granulated sugar together on medium speed for 3 minutes, until light and fluffy. Scrape down the sides of the bowl halfway through.
- Add the egg and vanilla extract, then mix on low until just combined—about 30 seconds.
- In a separate bowl, whisk together the flour, salt, and baking powder. With the mixer on low, add the dry ingredients in three additions, mixing until just combined after each.
- Turn the dough out onto a lightly floured surface. Divide it into three portions: roughly ⅔ of the dough for the yellow pencil body, ⅙ for the pink eraser, and ⅙ for the dark tip. The remaining ⅙ will be used for the silver band.
- For the yellow portion: Knead in yellow gel food coloring or roll the dough in yellow sanding sugar until evenly colored.
- For the pink portion: Add a few drops of pink gel food coloring and knead until the color is even.
- For the dark tip: Combine the cocoa powder and 1 tablespoon of flour, then knead this mixture into the reserved dough portion until fully incorporated.
- Leave the remaining portion plain. This will be the silver band.
- Place a sheet of parchment paper on your work surface. Roll the yellow dough into a rectangle about 6 inches wide, 8 inches long, and ¼ inch thick.
- Roll the dark cocoa dough into a thin log, about 6 inches long and ½ inch thick.
- Roll the pink dough into a rectangle about 3 inches wide, 6 inches long, and ¼ inch thick.
- Roll the plain dough into a thin strip about 1 inch wide and 6 inches long.
- Place the yellow rectangle on the parchment paper with the long side facing you. Position the dark cocoa log along the left edge of the yellow rectangle, pressing it gently into the dough. Roll the yellow dough tightly around the cocoa log.
- Place the plain dough strip (the silver band) along the right edge of the yellow roll, pressing it gently to adhere. Next, place the pink rectangle (the eraser) against the plain strip, rolling it up to form the eraser end.
- Wrap the entire log tightly in plastic wrap and refrigerate for at least 2 hours, or overnight.
- Preheat your oven to 350°F (175°C). Line two baking sheets with parchment paper.
- Remove the dough log from the refrigerator. Using a sharp knife, slice the log into ¼-inch thick rounds.
- Place the cookies on the prepared baking sheets, spacing them about 2 inches apart.
- Bake for 10-12 minutes, until the edges are just set and the bottoms are lightly golden. Let them cool on the baking sheet for 5 minutes, then transfer to a cooling rack to cool completely.
- Optional: Mix ½ cup powdered sugar, 1 tablespoon milk, and a drop of pink gel coloring to make pink frosting. Pipe a tiny dot on the eraser end of each cookie.
Notes
Chill the dough thoroughly for at least 2 hours to prevent spreading. Use a sharp knife for clean slices. For gluten-free, use a 1:1 gluten-free baking blend and add an extra tablespoon of flour. For dairy-free, use vegan butter sticks. The cookies can be stored in an airtight container at room temperature for up to 5 days or frozen for up to 3 months.
Nutrition
- Serving Size: 1 cookie
- Calories: 145
- Sugar: 8
- Sodium: 75
- Fat: 8
- Saturated Fat: 5
- Carbohydrates: 17
- Fiber: 0.5
- Protein: 2
Keywords: pencil cookies, sugar cookies, back to school cookies, first day of school cookies, lunchbox cookies, butter cookies, vanilla cookies, school treats, easy sugar cookies, slice and bake cookies


