I ruined maple pecan pie bars three times before I got them right. And honestly? I’m kind of glad I did. The first batch came out with a crust so tough you could have used it as a cutting board. The second one? The filling bubbled over like a science experiment gone wrong. By the third attempt, I was ready to throw in the towel and just stick with the regular pie. But something kept pulling me back—that memory of my grandmother’s kitchen, the way the air turned sweet and sticky every Thanksgiving morning. She never wrote down her recipe, just a few scribbled notes on a napkin that said “maple, pecans, patience.” It took me three tries to understand what she meant by patience. The shortbread crust needs to chill, the filling needs to set, and you absolutely cannot rush the caramelization on the maple syrup. These Classic Maple Pecan Pie Bars with Shortbread Crust are what came out of those failures. They’re buttery, crunchy, chewy, and exactly what a pecan pie wishes it could be in bar form. No soggy bottom crusts here. No runny filling. Just a perfect little square of fall that actually works.
Why You’ll Love This Recipe
Let me tell you why these bars have become my most-requested recipe for every gathering from October through December. It’s not just because they taste amazing—though they absolutely do. It’s because they solve every problem a traditional pecan pie has.
- No more soggy crust. The shortbread base is pre-baked, so it stays crisp and buttery even after the filling goes on. This is a game-changer, honestly.
- Way easier than pie. No rolling dough, no crimping edges, no worrying about a cracked crust. You press the shortbread into the pan and you’re done.
- Perfect for sharing. Bars are just easier to cut and serve at parties, potlucks, or holiday dinners. No fighting over who gets the bigger slice of pie.
- Maple-forward flavor. Most pecan pie recipes rely on corn syrup for sweetness. These bars use real maple syrup as the star, giving you that deep, woodsy sweetness that plain sugar just can’t match.
- Make-ahead friendly. These bars actually taste better the next day. The flavors settle and the texture firms up perfectly overnight. One less thing to stress about on the big day.
I’ve tested this recipe with my neighbor who claims she can’t bake (she can now), with my picky nephew who only eats “beige food,” and with my mom who has strong opinions about pecan pie. All of them gave it a thumbs up. That’s the kind of recipe you want in your back pocket for the holiday season.
What Ingredients You Will Need
This recipe uses simple, honest ingredients that work together to create something greater than the sum of their parts. Most of these are pantry staples, which makes these bars dangerously easy to whip up on a whim.
For the Shortbread Crust
- Unsalted butter, softened (1 cup / 2 sticks / 226g) – I use Kerrygold here. The higher butterfat content makes a noticeably better crust. Let it sit out for about 30 minutes before starting.
- Granulated sugar (1/2 cup / 100g) – Just regular white sugar. No need for anything fancy.
- All-purpose flour (2 cups / 250g) – Spoon and level it. Don’t scoop directly from the bag or you’ll pack in too much flour and get a dry crust.
- Salt (1/4 teaspoon) – Fine sea salt works best. It balances the sweetness without being noticeable.
- Vanilla extract (1 teaspoon) – Pure vanilla, not imitation. It makes a difference in the shortbread flavor.
For the Maple Pecan Filling
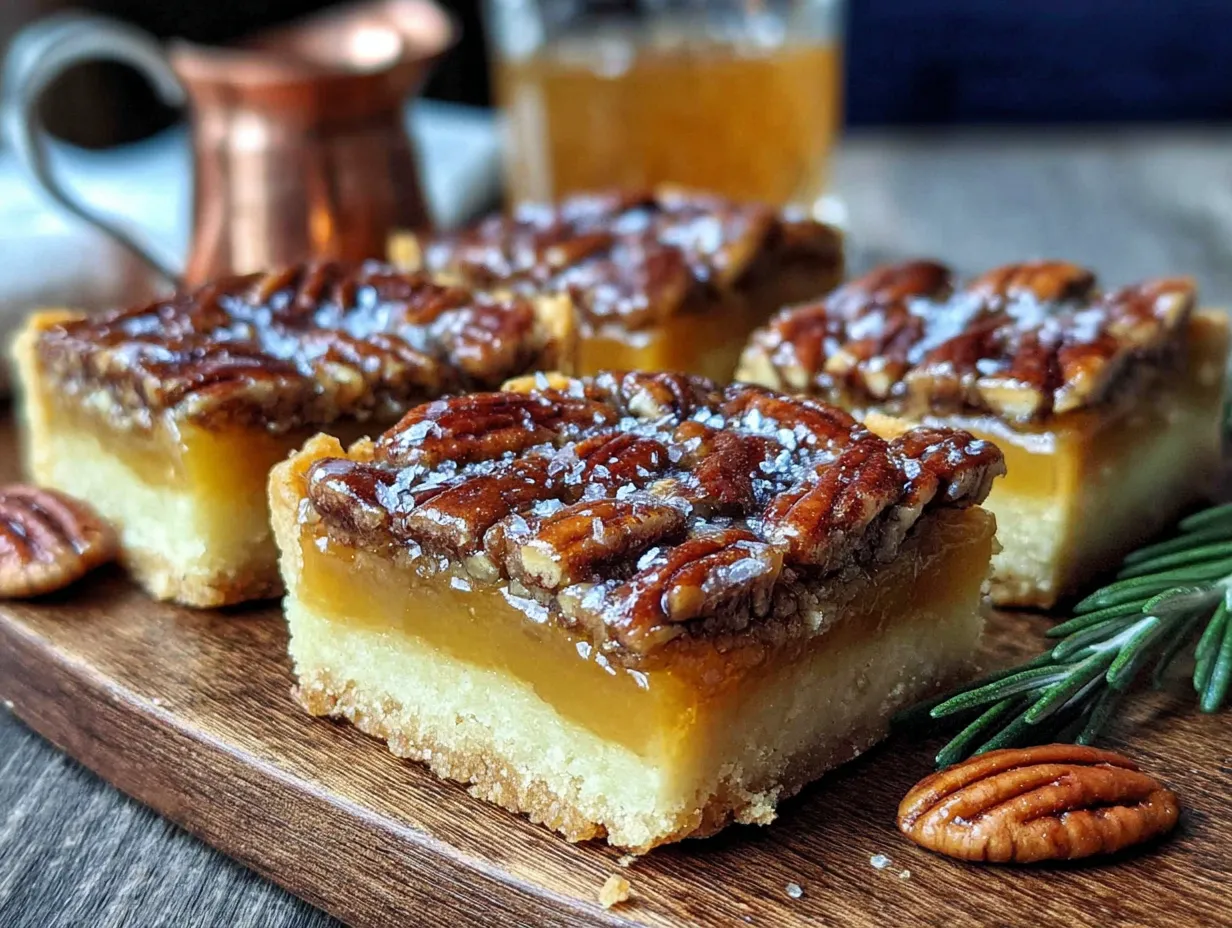
- Pure maple syrup (1 cup / 240ml) – Grade A dark amber is my go-to. It has a stronger maple flavor that stands up to baking. Do not use pancake syrup. Seriously. It’s not the same thing.
- Light brown sugar, packed (1/2 cup / 100g) – This adds molasses notes that complement the maple beautifully.
- Large eggs (3, at room temperature) – Cold eggs can seize the filling. Let them sit on the counter for 15 minutes or place them in a bowl of warm water for 5 minutes.
- Unsalted butter, melted (1/4 cup / 57g / half a stick) – Melt it gently in the microwave or on the stovetop. Let it cool slightly before adding to the eggs.
- Heavy cream (2 tablespoons / 30ml) – This gives the filling a silky texture. You can substitute half-and-half in a pinch, but the bars won’t be quite as rich.
- Vanilla extract (1 teaspoon) – Again, pure vanilla.
- Salt (1/2 teaspoon) – Don’t skip this. Salt is what makes the sweet flavors pop and keeps the bars from being cloying.
- Pecan halves (2 cups / 200g) – Toast them lightly before using. Spread them on a baking sheet at 350°F for 5-7 minutes until fragrant. It wakes up their oils and makes them crunchier.
If you’re looking for a gluten-free option, you can substitute a high-quality 1:1 gluten-free flour blend in the shortbread crust. I’ve had good luck with King Arthur’s Measure for Measure flour. The texture will be slightly more tender, but still delicious.
Equipment Needed
You don’t need a fancy kitchen to make these bars. Here’s what you’ll actually use:
- 9×13-inch baking pan – Metal works best for even browning. Glass pans can work but may need a few extra minutes of baking time.
- Parchment paper – Not negotiable. You need the overhang to lift the bars out cleanly. I’ve tried greasing the pan directly and regretted it every time.
- Electric mixer – A stand mixer or hand mixer works for the shortbread dough. You can do it by hand, but your arm will get a workout.
- Large mixing bowls – One for the crust, one for the filling.
- Whisk – For combining the filling ingredients smoothly.
- Spatula – A rubber spatula for scraping every last bit of filling into the pan.
- Sharp knife – For clean cuts. A chef’s knife works better than a butter knife here.
I used a cheap metal baking pan for years and it worked fine. You don’t need to invest in expensive equipment for this recipe. Just make sure whatever pan you use has straight sides for even cutting.
Preparation Method
Alright, let’s get into the actual making of these bars. I’ll walk you through every step so you don’t make the same mistakes I did.
- Preheat and prep the pan. Set your oven to 350°F (175°C). Cut a piece of parchment paper long enough to overhang on two opposite sides of your 9×13 pan. Press it in, then lightly grease the exposed sides with butter or cooking spray. The overhang is your handle for lifting the finished bars out.
- Make the shortbread crust. In a large bowl, beat the softened butter and granulated sugar together until light and fluffy. This takes about 2-3 minutes with an electric mixer. You want it pale yellow and airy. Add the vanilla and salt, then beat again. Gradually add the flour, mixing on low speed until just combined. The dough will look crumbly at first, but keep mixing and it will come together. If it seems too dry, add a teaspoon of cold water. If it’s too sticky, add a tablespoon more flour.
- Press the crust into the pan. Transfer the dough to your prepared pan. Press it evenly into the bottom using your fingers or the bottom of a flat measuring cup. Don’t press it up the sides—just an even layer on the bottom. Prick the dough all over with a fork (this prevents bubbling). Bake for 18-20 minutes until the edges are just starting to turn golden. The center will still look pale. Let it cool on a wire rack for 10 minutes while you make the filling.
- Toast the pecans. While the crust bakes, spread the pecan halves on a separate baking sheet. Toast them in the same 350°F oven for 5-7 minutes. Watch them closely—they go from fragrant to burnt very quickly. Let them cool slightly, then roughly chop them. I leave some halves intact for visual appeal on top.
- Make the maple filling. In a medium bowl, whisk the eggs until they’re uniform in color. Add the maple syrup, brown sugar, melted butter, heavy cream, vanilla, and salt. Whisk until everything is smooth and well combined. Don’t over-whisk—you don’t want to incorporate too much air. Just until it’s homogenous.
- Assemble the bars. Spread the toasted pecans evenly over the warm shortbread crust. Pour the maple filling over the pecans, making sure it covers everything evenly. The filling will seem thin and liquidy—that’s normal. It will set as it bakes.
- Bake. Place the pan back in the 350°F oven. Bake for 25-30 minutes. The edges should be set and slightly puffed, while the center will still have a slight jiggle when you shake the pan. A toothpick inserted near the center should come out with a little sticky filling attached, not wet batter. If the top is browning too quickly, tent the pan loosely with foil for the last 10 minutes.
- Cool completely. This is the hardest part. Let the bars cool in the pan on a wire rack for at least 2 hours. Then refrigerate for another 2 hours (or overnight) before cutting. I know you want to dig in immediately, but the filling needs this time to set properly. Cutting too early will give you a gooey mess.
- Cut and serve. Once fully chilled, use the parchment overhang to lift the entire block of bars out of the pan. Place it on a cutting board. Use a sharp chef’s knife to cut clean squares. Wipe the knife clean between cuts for the neatest edges. I usually cut 24 bars (4 rows by 6 rows), but you can go bigger or smaller depending on the occasion.
Cooking Tips & Techniques
Here are the things I learned the hard way so you don’t have to.
Don’t skip chilling the crust. I know it adds time, but putting the pressed dough in the fridge for 15-20 minutes before baking helps it hold its shape and prevents shrinking. If you’re in a rush, pop it in the freezer for 10 minutes instead.
Watch your oven temperature. My oven runs hot, so I check the bars at the 20-minute mark even though the recipe says 25-30. Every oven is different. Get to know yours. If the edges are setting too fast but the center is still liquid, lower the temperature by 25 degrees and extend the baking time.
Use room temperature ingredients. Cold eggs can cause the maple filling to seize up and become lumpy. Cold butter won’t cream properly with the sugar. Set everything out on the counter about 30 minutes before you start baking. Your future self will thank you.
Don’t overmix the shortbread. Once you add the flour, mix just until it comes together. Overworking the dough develops gluten, which makes the crust tough instead of tender and crumbly. You want it to melt in your mouth, not fight back.
Let it cool completely. I cannot stress this enough. The first time I made these, I cut into them after an hour and ended up with a sticky, runny mess. The filling needs time to set. Overnight in the fridge is ideal. If you’re serving them the same day, plan to make them first thing in the morning so they have time to chill before dessert.
Variations & Adaptations
These bars are pretty perfect as written, but here are some ways to make them your own.
Chocolate Maple Pecan Bars. Sprinkle 1/2 cup of dark chocolate chips over the warm crust before adding the pecans and filling. The chocolate melts slightly during baking, creating a fudgy layer throughout the bars. I tried this on a whim one rainy Sunday and it was dangerously good.
Bourbon Maple Pecan Bars. Add 2 tablespoons of good bourbon to the filling along with the vanilla. The alcohol bakes off, leaving behind warm, oaky notes that pair beautifully with the maple. This version is my go-to for adult gatherings. Just don’t tell the kids what’s in it.
Gluten-Free Version. Use a 1:1 gluten-free flour blend in the shortbread crust. I’ve tested this with Bob’s Red Mill and King Arthur brands, and both worked well. The crust will be slightly more delicate, so handle it gently when pressing into the pan.
Pecan-Free Version. Substitute the pecans with an equal amount of toasted walnuts or even pepitas (pumpkin seeds) for a nut-free option. Walnuts give a similar texture and flavor profile. Pepitas add a nice crunch and are great for school-safe treats.
Mini Bar Version. Press the crust into a mini muffin tin (greased well) and fill each cavity with a pecan half and a spoonful of filling. Bake for 12-15 minutes. These are perfect for holiday cookie trays or party platters. Just reduce the baking time since they’re smaller.
Serving & Storage Suggestions
These bars are versatile enough for almost any occasion. Here’s how to serve and store them.
Serving temperature. I prefer them chilled straight from the fridge because the filling firms up nicely and the shortbread stays crisp. But they’re also wonderful at room temperature if you let them sit out for about 15 minutes. The texture gets slightly more tender and gooey. Try both and see which you prefer.
Presentation ideas. Dust the tops with a light sprinkle of flaky sea salt right before serving—it makes the maple flavor sing. Arrange them on a rustic wooden board or a white platter for contrast. A dollop of lightly sweetened whipped cream or a scoop of vanilla ice cream on the side takes these from “great” to “unforgettable.”
What to serve with them. These bars pair beautifully with a hot cup of coffee or a chai latte. For a holiday spread, they sit nicely next to pumpkin pie cheesecake bars or a slice of classic banana bread with walnuts. If you’re hosting a fall brunch, try them alongside a cozy pumpkin chai latte for the ultimate autumn pairing.
Storage. Keep the bars in an airtight container in the refrigerator for up to 5 days. Layer them between sheets of parchment paper so they don’t stick together. They actually get better after a day or two as the flavors meld together.
Freezing. These freeze beautifully. Cut them into bars, place them on a baking sheet in the freezer for an hour (this prevents them from sticking together), then transfer to a freezer-safe bag or container. They’ll keep for up to 3 months. Thaw overnight in the fridge or at room temperature for about an hour before serving.
Reheating. If you want that warm-from-the-oven experience, pop individual bars in a 300°F oven for 5-7 minutes. The shortbread will crisp back up and the filling will get slightly gooey. Just don’t overheat or the filling can bubble out.
Nutritional Information & Benefits
Let’s be real—these are a treat, not a health food. But knowing what’s in them helps with mindful indulgence.
Estimated per bar (based on 24 servings):
- Calories: 220
- Fat: 14g
- Saturated Fat: 6g
- Carbohydrates: 23g
- Sugar: 16g
- Protein: 3g
- Sodium: 85mg
Health highlights. Pecans are actually a good source of healthy fats, fiber, and antioxidants. They contain magnesium and zinc, which support immune function and bone health. Maple syrup has more antioxidants than regular sugar and a lower glycemic index, though it’s still sugar and should be enjoyed in moderation.
Dietary considerations. These bars are vegetarian and can be made gluten-free with a simple flour swap. They contain dairy (butter, heavy cream) and eggs, so they’re not vegan-friendly. For a dairy-free version, substitute the butter with a plant-based butter stick (not margarine spread) and use coconut cream instead of heavy cream. The texture will be slightly different but still delicious.
Allergen note. These bars contain tree nuts (pecans), dairy, eggs, and gluten. If you’re serving a crowd with allergies, make sure to label them clearly or offer a nut-free alternative.
I personally believe that desserts like this are about joy, not nutrition. One bar with your afternoon coffee or after dinner is a beautiful thing. Just maybe don’t eat six in one sitting. (I’ve done it. No regrets, but also no judgment if you do.)
Conclusion
These Classic Maple Pecan Pie Bars with Shortbread Crust are everything I wanted my grandmother’s napkin recipe to be. They’re buttery, crunchy, chewy, and packed with that deep maple flavor that tastes like fall in a square. The shortbread crust solves the soggy bottom problem forever, and the bars are so much easier to make and serve than a traditional pie.
I love that I can make these a day ahead and not stress about last-minute baking on holiday mornings. I love that they travel well for potlucks and parties. And I really love that first bite—the way the shortbread crumbles, the pecans crunch, and the maple filling coats everything in sweet, sticky goodness.
Try them once and I think you’ll see why this recipe stuck with me through three failed attempts. Sometimes the best recipes are the ones that fight back a little. Give these a shot and let me know how they turn out. Drop a comment below or tag me in your photos—I’d love to see your version, especially if you try one of the variations. Happy baking, friends!
Frequently Asked Questions
Can I use dark corn syrup instead of maple syrup?
Technically yes, but you’ll lose that distinct maple flavor that makes these bars special. If you’re in a pinch, use a combination of half maple syrup and half dark corn syrup. The flavor won’t be as pronounced, but the texture will still work.
Why did my shortbread crust turn out tough?
You probably overmixed the dough after adding the flour. Shortbread should be mixed just until it comes together—no more. Overworking develops gluten, which makes the crust tough instead of tender. Next time, mix on low speed and stop as soon as the flour is incorporated.
Can I make these bars in a different size pan?
You can, but you’ll need to adjust the baking time. An 8×8 pan will give you thicker bars that need about 35-40 minutes of baking. A 9×9 pan will need about 30-35 minutes. Just watch for the same doneness cues—set edges, slightly jiggly center, and a toothpick that comes out with a little sticky filling.
How do I get clean cuts without the filling sticking to the knife?
Chill the bars completely (at least 4 hours or overnight). Use a sharp chef’s knife and wipe it clean with a damp paper towel between each cut. For the cleanest edges, run the knife under hot water before cutting and dry it off quickly. The heat helps the knife glide through the filling.
My filling bubbled over in the oven. What went wrong?
This usually happens when the pan is too full or the oven temperature is too high. Make sure your 9×13 pan is standard size (not smaller). If your oven runs hot, reduce the temperature by 25 degrees. You can also place a baking sheet on the rack below to catch any drips—it saves you from cleaning the bottom of the oven later.
Pin This Recipe!
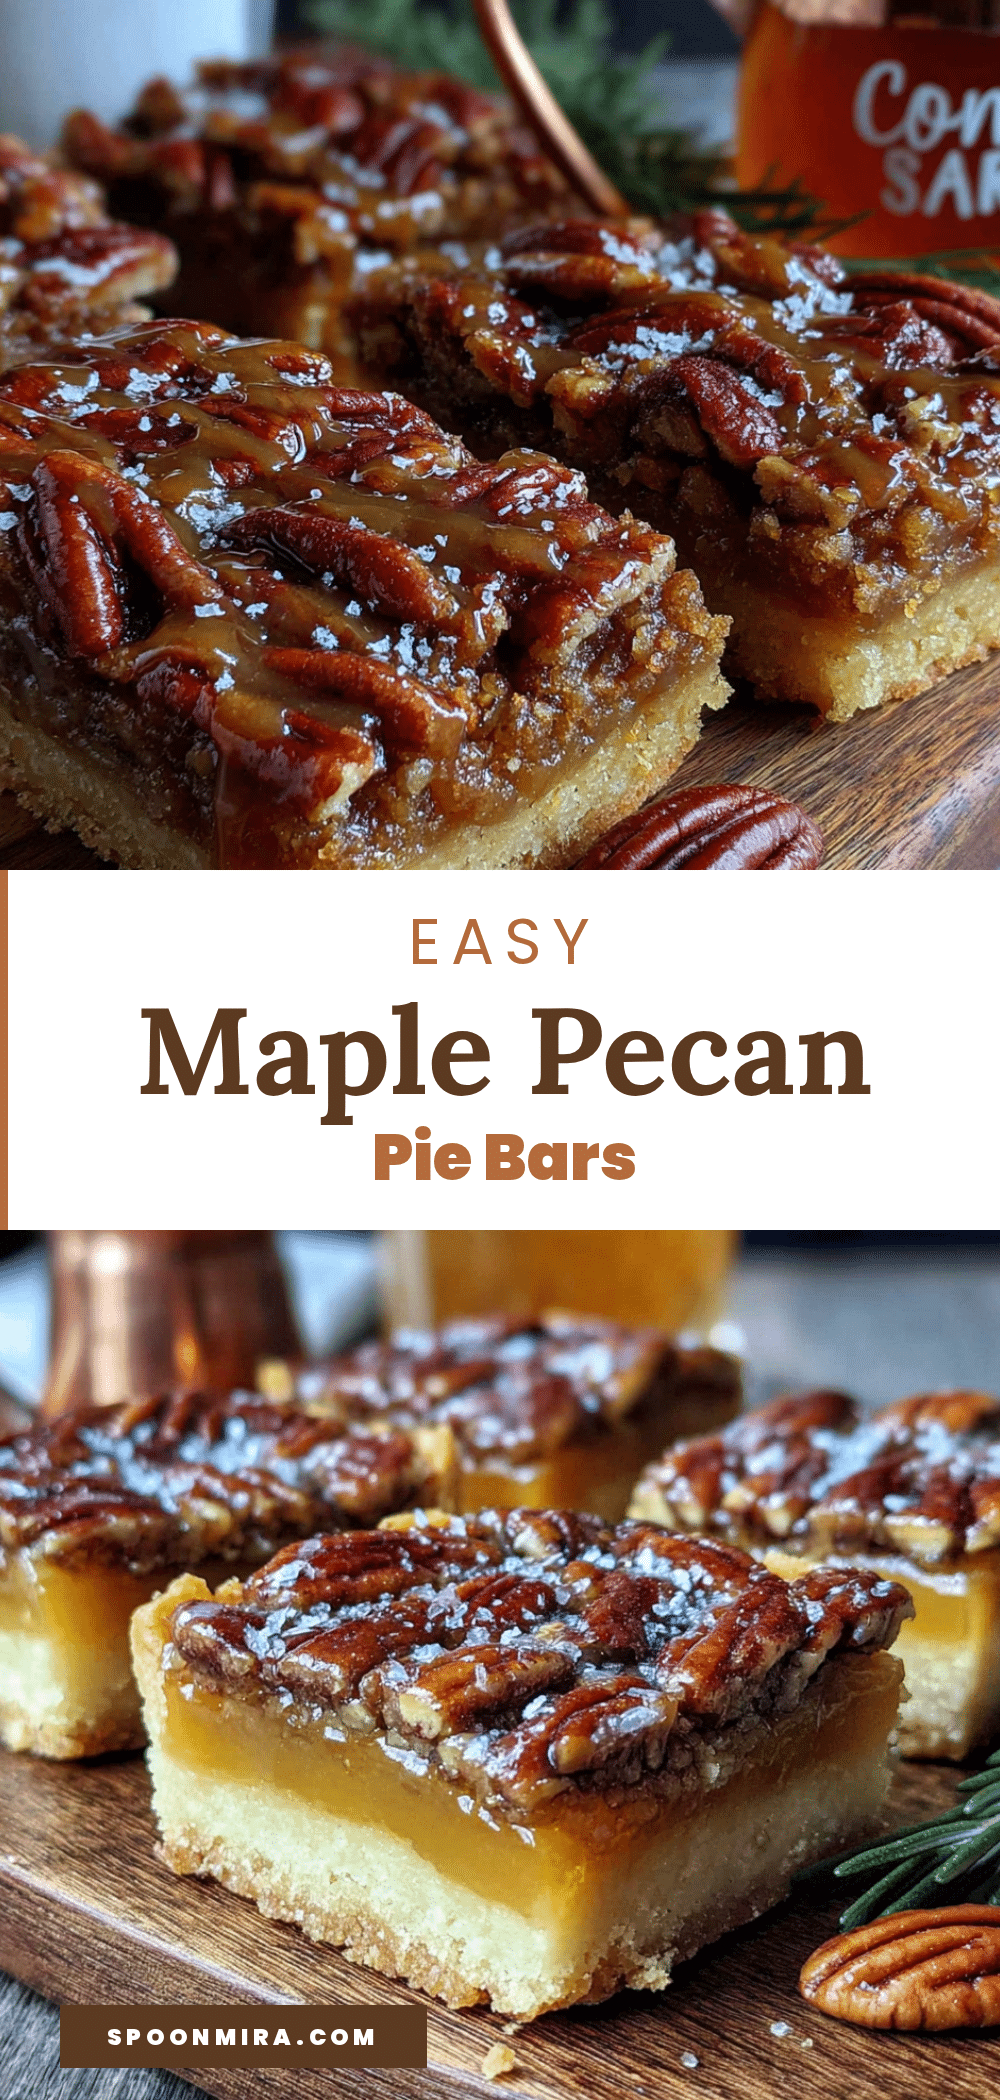
Classic Maple Pecan Pie Bars with Shortbread Crust
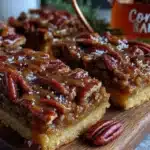
Buttery, crunchy, chewy maple pecan pie bars with a pre-baked shortbread crust that stays crisp. No soggy bottoms, no runny filling—just perfect squares of fall flavor that are easier to make and serve than traditional pecan pie.
- Prep Time: 30 minutes
- Cook Time: 45 minutes
- Total Time: 1 hour 15 minutes (plus 4 hours chilling)
- Yield: 24 bars 1x
- Category: Dessert
- Cuisine: American
Ingredients
- 1 cup (2 sticks / 226g) unsalted butter, softened
- 1/2 cup (100g) granulated sugar
- 2 cups (250g) all-purpose flour
- 1/4 teaspoon fine sea salt
- 1 teaspoon pure vanilla extract
- 1 cup (240ml) pure maple syrup (Grade A dark amber preferred)
- 1/2 cup (100g) light brown sugar, packed
- 3 large eggs, at room temperature
- 1/4 cup (57g / half a stick) unsalted butter, melted and cooled slightly
- 2 tablespoons (30ml) heavy cream
- 1 teaspoon pure vanilla extract
- 1/2 teaspoon salt
- 2 cups (200g) pecan halves, toasted and roughly chopped
Instructions
- Preheat oven to 350°F (175°C). Line a 9×13-inch baking pan with parchment paper, leaving overhang on two opposite sides. Lightly grease exposed sides with butter or cooking spray.
- In a large bowl, beat softened butter and granulated sugar together with an electric mixer until light and fluffy (2-3 minutes). Add vanilla and salt; beat again. Gradually add flour on low speed until just combined. If dough seems too dry, add 1 teaspoon cold water; if too sticky, add 1 tablespoon more flour.
- Transfer dough to prepared pan and press evenly into the bottom (not up the sides). Prick all over with a fork. Bake for 18-20 minutes until edges are just golden. Cool on a wire rack for 10 minutes.
- While crust bakes, spread pecan halves on a baking sheet and toast in the same 350°F oven for 5-7 minutes until fragrant. Cool slightly, then roughly chop (leave some halves intact for visual appeal).
- In a medium bowl, whisk eggs until uniform. Add maple syrup, brown sugar, melted butter, heavy cream, vanilla, and salt. Whisk until smooth and well combined (do not over-whisk).
- Spread toasted pecans evenly over warm shortbread crust. Pour maple filling over pecans, covering evenly.
- Bake for 25-30 minutes until edges are set and slightly puffed, center still has a slight jiggle. A toothpick inserted near center should come out with a little sticky filling (not wet batter). If top browns too quickly, tent loosely with foil for last 10 minutes.
- Cool completely in pan on a wire rack for at least 2 hours, then refrigerate for another 2 hours (or overnight) before cutting.
- Use parchment overhang to lift bars out of pan onto a cutting board. Cut into 24 squares (4 rows by 6 rows) with a sharp chef’s knife, wiping knife clean between cuts.
Notes
Don’t skip chilling the crust (15-20 minutes in fridge or 10 minutes in freezer) to prevent shrinking. Use room temperature ingredients for best results. Do not overmix shortbread dough. Let bars cool completely and chill before cutting for clean slices. Bars taste even better the next day. For gluten-free, use a 1:1 gluten-free flour blend. For dairy-free, substitute plant-based butter and coconut cream. Store in airtight container in refrigerator up to 5 days. Freeze up to 3 months.
Nutrition
- Serving Size: 1 bar
- Calories: 220
- Sugar: 16
- Sodium: 85
- Fat: 14
- Saturated Fat: 6
- Carbohydrates: 23
- Fiber: 1
- Protein: 3
Keywords: maple pecan pie bars, shortbread crust, pecan bars, fall dessert, Thanksgiving dessert, maple syrup, pecan pie bars, easy pecan bars