The plate was cleared faster than I expected. Two dozen little red velvet cheesecake bites vanished in less than an hour at a casual get-together. Someone nudged me, whispering, “Where’s the recipe for these? My friends are obsessed.” That moment felt oddly satisfying — because honestly, I wasn’t sure if a no-bake dessert could make such waves. But it did. The creamy texture paired with that classic red velvet flavor was apparently a knockout combo. I remember starting this recipe on a whim, looking for something festive but fuss-free to bring to a party. No oven, no stress, just a quick assembly that ended up stealing the show.
What surprises me most is how these bites hit that sweet spot — rich, smooth, with just the right hint of cocoa and that subtle tang from the cream cheese. They’ve become my quiet little secret for easy impressing. I don’t know if it’s the velvety crumbly base or the luscious cheesecake center, but people keep asking. And the best part? It’s a recipe that feels like a treat without the labor. After all, sometimes the simplest things leave the deepest impression.
It stuck with me because it’s the kind of dessert that doesn’t need a special occasion to shine. Whether it’s a sudden craving or an unexpected guest, these no-bake red velvet cheesecake bites have a way of making moments just a bit sweeter — and that’s why I keep making them.
Why You’ll Love This Recipe
Honestly, the charm of these creamy no-bake red velvet cheesecake bites is in how effortlessly they come together and how consistently they wow. I’ve tested countless cheesecake recipes, and this one is a standout — not just because it skips the oven, but because it nails that classic red velvet flavor with a smooth, dreamy finish. Here’s why it’s become a staple in my recipe box:
- Quick & Easy: Ready in under 30 minutes, perfect for those last-minute dessert emergencies or casual weekend treats.
- Simple Ingredients: No need to hunt down fancy items. Most are pantry staples, with the occasional nod to good-quality cream cheese and cocoa powder.
- Perfect for Any Occasion: Whether it’s a holiday party, a cozy family night, or even a fun addition to a potluck, these bites fit right in.
- Crowd-Pleaser: Kids, adults, picky eaters — they all seem to reach for seconds.
- Unbelievably Delicious: The balance of mildly tangy cream cheese and subtle cocoa keeps every bite interesting and comforting.
This recipe isn’t just another no-bake cheesecake. A subtle trick I use is folding in a splash of buttermilk, which adds a light tang that brightens the flavor and keeps the texture perfectly creamy but not dense. Plus, the crumbly red velvet base is made from crushed cake crumbs (yes, real cake!), which is an easy way to bring luscious red velvet flavor without fussing over baking layers.
It’s the kind of dessert you can make without a second thought and still impress your guests — the kind that gets texts later asking if you’ll bring it again. It’s comfort food that feels special, without being complicated or time-consuming.
What Ingredients You Will Need
This no-bake red velvet cheesecake bites recipe calls for simple, wholesome ingredients that work in harmony to deliver a creamy, rich texture and the iconic red velvet flavor without fuss. Most of these are pantry staples or easy to find in any grocery store.
- For the Red Velvet Crust:
- Red velvet cake crumbs (about 1 ½ cups) — you can use store-bought cake or bake a small cake ahead, then crumble it finely
- Unsalted butter, melted (4 tablespoons / 60g) — helps bind the crumbs into a firm base
- Granulated sugar (2 tablespoons / 25g) — optional, for a touch more sweetness
- For the Cheesecake Filling:
- Cream cheese, softened (8 oz / 225g) — I prefer Philadelphia brand for smoothness
- Powdered sugar (¾ cup / 90g) — to keep the texture silky
- Heavy cream (½ cup / 120ml) — whipped to soft peaks for that luscious fluffiness
- Unsweetened cocoa powder (1 tablespoon) — use a good quality Dutch-processed cocoa for a richer taste
- Vanilla extract (1 teaspoon)
- Buttermilk (2 tablespoons) — adds a subtle tang and creaminess
- Red food coloring (optional, 1 teaspoon) — for that classic vibrant red hue
- For Garnish (Optional):
- White chocolate shavings or curls
- Mini chocolate chips
- Fresh berries (like raspberries or strawberries) for a pop of freshness
Feel free to swap out the heavy cream with a coconut cream for a dairy-free twist, or use almond flour crumbs if you want a gluten-free base (though the texture will be different). For a seasonal touch, I sometimes add a pinch of cinnamon or nutmeg to the crust crumbs — it’s subtle but cozy.
Equipment Needed
Luckily, this recipe keeps equipment simple and accessible. Here’s what you’ll want to have on hand:
- Mixing bowls (medium and large) — for combining crust and filling ingredients
- Electric hand mixer or stand mixer — whipping the cream and mixing the cream cheese is much easier with one
- Measuring cups and spoons — precision matters for the best results
- Spatula — for folding whipped cream and scraping bowls clean
- Mini muffin tin or silicone molds — to shape the cheesecake bites neatly; silicone molds make removal easier
- Parchment paper or cupcake liners — optional, but handy for easy cleanup
If you don’t have a hand mixer, a sturdy whisk and a little muscle can do the job, but the texture might not be quite as light. For the crust, I often just use a zip-top bag and a rolling pin to crush the cake crumbs if I don’t have a food processor nearby. Budget-wise, you don’t need anything fancy — just reliable basics.
Preparation Method
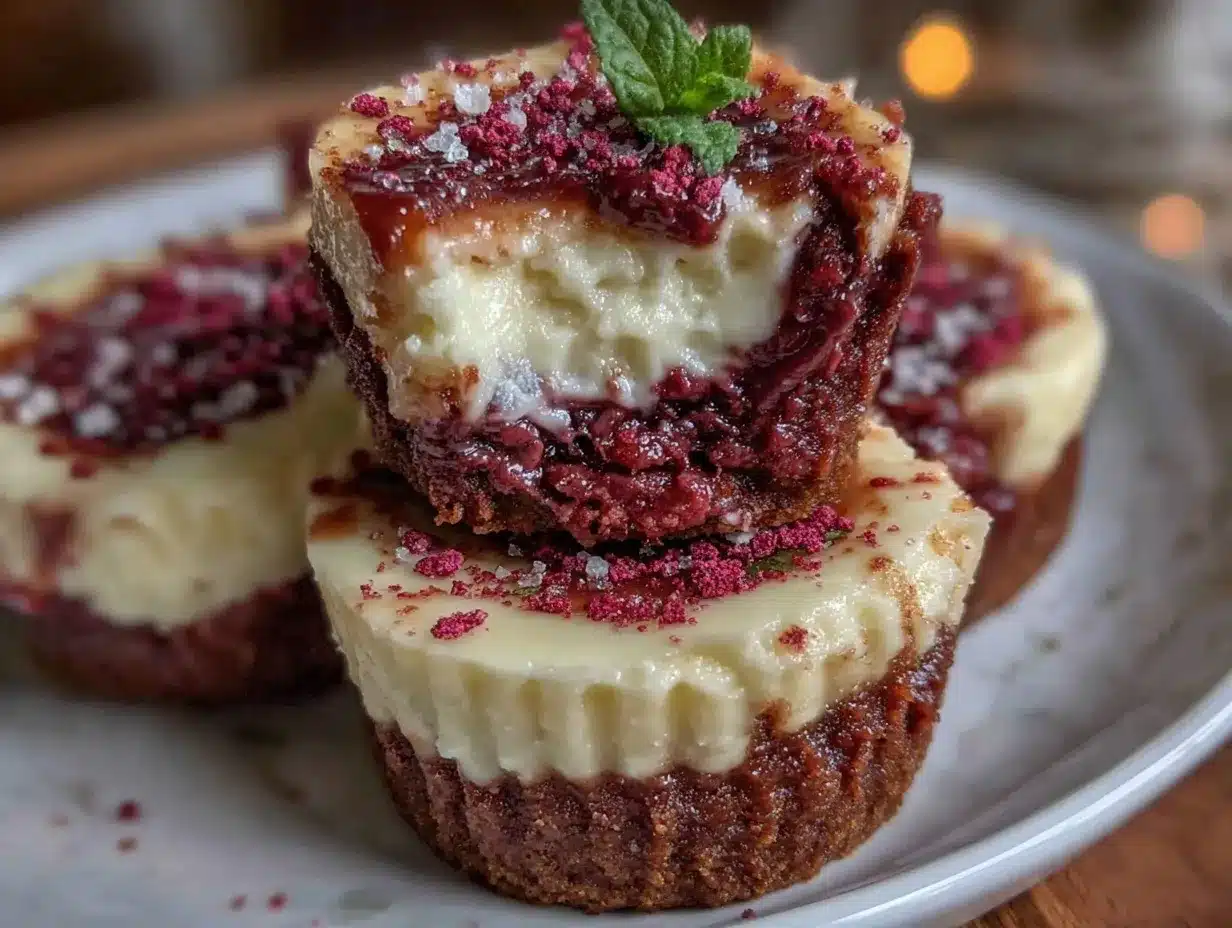
- Prepare the Red Velvet Crust: In a medium bowl, combine the red velvet cake crumbs (about 1 ½ cups), melted unsalted butter (4 tablespoons / 60g), and granulated sugar (2 tablespoons / 25g) if using. Stir until the crumbs are evenly coated and hold together when pressed. This should take about 5 minutes.
- Press the Crust Into Molds: Line a mini muffin tin with cupcake liners or lightly grease silicone molds. Spoon about 1 tablespoon of the crumb mixture into each cup. Press firmly with the back of a spoon or your fingers to form a compact base. Chill in the refrigerator for at least 15 minutes while preparing the filling.
- Make the Cheesecake Filling: In a large bowl, beat the softened cream cheese (8 oz / 225g) with powdered sugar (¾ cup / 90g) until smooth and creamy, about 2-3 minutes with an electric mixer. Add the cocoa powder (1 tablespoon), vanilla extract (1 teaspoon), buttermilk (2 tablespoons), and red food coloring (optional, 1 teaspoon). Mix until fully incorporated.
- Whip the Heavy Cream: In a separate bowl, whip the heavy cream (½ cup / 120ml) to soft peaks. This usually takes around 3-4 minutes on medium-high speed. Be careful not to overwhip — you want it fluffy but not stiff.
- Fold in the Whipped Cream: Gently fold the whipped cream into the cream cheese mixture using a spatula. Use slow, sweeping motions to keep the filling light and airy. This step is crucial for that creamy texture.
- Assemble the Cheesecake Bites: Remove the crusts from the fridge. Spoon or pipe the cheesecake filling over each crumb base, filling each mold generously. Smooth the tops with the back of a spoon or your finger. Chill for at least 3 hours, preferably overnight, until firm.
- Garnish and Serve: Once set, top each cheesecake bite with white chocolate shavings, mini chocolate chips, or fresh berries if desired. Carefully remove from molds or liners and arrange on a serving platter.
Keep in mind, chilling time is key here — rushing it usually means the bites won’t hold their shape well. The filling should be silky and firm enough to hold but still creamy when bitten into. If you notice any separation or runniness, a little extra chilling usually fixes it.
Cooking Tips & Techniques
Making no-bake cheesecake bites sounds straightforward, but I’ve learned a few lessons the hard way. First, the cream cheese absolutely must be softened — no skipping this step. Cold cream cheese leads to lumps and a grainy texture. Let it sit out at room temperature for about 30 minutes before mixing.
When whipping the heavy cream, stop once you reach soft peaks. Overwhipping can cause the cream to turn grainy or even butter-like, which throws off the smooth texture. I like to whip the cream in a chilled bowl for best results.
Folding is another step where patience counts. It’s tempting to mix everything fast, but folding the whipped cream gently into the cream cheese mixture keeps that light, airy feel. Use a spatula and a slow, sweeping motion — think of it like tucking the cream in rather than stirring it in.
Pressing the red velvet crumbs firmly enough into the molds is important so the base holds together when you bite. I usually press down with a flat-bottomed glass or the back of a spoon. If you find the crumbs too dry to stick, a little more melted butter will help.
Lastly, chill time can’t be rushed. I’ve tried serving them too soon, and the filling just oozes out. Three hours minimum, but overnight is best if you want perfect slices and a set structure. You can multitask here by prepping the crust and filling the day before a party.
Variations & Adaptations
This recipe is flexible — you can easily tweak it for different diets or flavor profiles without losing that creamy charm.
- Flavor Twists: Add a teaspoon of espresso powder to the filling to deepen the chocolate notes, or swirl in some cream cheese frosting for extra richness.
- Dietary Adjustments: Use coconut cream and dairy-free cream cheese to make these bites vegan-friendly. Swap the red velvet crumbs for gluten-free cake crumbs or crushed gluten-free cookies.
- Alternative Bases: Instead of red velvet crumbs, try crushed chocolate graham crackers or Oreo crumbs for a different texture and taste. I once made a batch with crushed ginger snaps — unexpected but delightful!
- Cooking Methods: While this is a no-bake recipe, you can bake the red velvet cake base if you prefer a firmer crust, then cool and crumble it for the bites.
One personal favorite variation is to add a handful of mini white chocolate chips right into the filling before folding in the whipped cream. It adds a subtle crunch that contrasts nicely with the creamy texture. Another time, I layered these bites with a thin spread of salted caramel for a sweet-salty surprise — that’s a crowd-pleaser for sure.
Serving & Storage Suggestions
Serve these cheesecake bites chilled — straight from the fridge is best to keep their shape and creamy texture intact. They make a perfect finger food for parties or a sweet treat alongside a cup of coffee or tea. I like to arrange them on a pretty platter with a few fresh berries for color and freshness.
If you have leftovers (rare, but it happens), store them in an airtight container in the refrigerator. They keep well for up to 4 days, and the flavors actually deepen after a day or two. For longer storage, you can freeze them on a tray, then transfer to a freezer-safe container for up to 2 months. Thaw in the fridge overnight before serving.
Reheating isn’t really recommended — these are best cold. However, if you want a creamier mouthfeel, let them sit at room temperature for 10-15 minutes before eating.
Pair these cheesecake bites with a refreshing salad like the fresh watermelon cucumber feta salad with tajin mint dressing for a balanced summer meal. Or contrast them with something savory like crispy lemon herb chicken thighs with roasted vegetables for a full dinner experience.
Nutritional Information & Benefits
Each bite is a small indulgence packed with flavor and some nutritional value from key ingredients. Here’s a rough breakdown per serving (about 1 bite):
| Calories | 120 kcal |
|---|---|
| Fat | 8g (mostly from cream cheese and butter) |
| Carbohydrates | 10g (mostly from cake crumbs and sugar) |
| Protein | 2g |
| Sugar | 7g |
Cream cheese provides calcium and some protein, while the cocoa adds antioxidants. The small amount of butter and sugar means these bites are better enjoyed in moderation, but they’re a satisfying treat that feels less heavy than traditional baked cheesecakes.
For those mindful of allergens, this recipe contains dairy and gluten (from the cake crumbs), but swapping ingredients can accommodate many dietary needs.
From my perspective, these bites are an easy way to satisfy a sweet craving without overdoing it, making them a smart choice for sharing with friends and family.
Conclusion
These creamy no-bake red velvet cheesecake bites have quietly become my go-to when I want to impress without the stress. They’re simple, quick, and deliver that classic red velvet cheesecake flavor in a perfectly bite-sized package. What I love most is how adaptable they are — whether you want to keep it classic or add your own twist, these bites play nicely with any variation.
Give them a try and see how easily they disappear at your next gathering. If you tweak the recipe or try a new garnish, I’d love to hear how it turns out! Sharing recipes and stories like this makes the kitchen feel like a community, don’t you think?
So go ahead, make these your own little secret weapon for effortless dessert success.
Frequently Asked Questions
Can I use store-bought red velvet cake crumbs for the crust?
Yes! Using pre-made red velvet cake crumbs saves time and works perfectly. Just make sure the crumbs are finely crushed for a firmer base.
Do I have to use food coloring in the cheesecake filling?
Nope, it’s optional. The cocoa powder gives a subtle reddish-brown hue, but if you want that vibrant red velvet look, a teaspoon of red food coloring does the trick.
How long should I chill the cheesecake bites before serving?
At least 3 hours is best, but overnight chilling gives the creamiest, firmest results.
Can I make these bites ahead of time for a party?
Absolutely! Prepare them a day or two in advance and keep them refrigerated until serving. They’ll stay fresh and delicious.
What’s the best way to remove the cheesecake bites from silicone molds?
Gently push from the bottom of each mold to pop them out. If they’re a bit stubborn, let them sit at room temperature for 5 minutes to soften slightly, then try again.
Pin This Recipe!
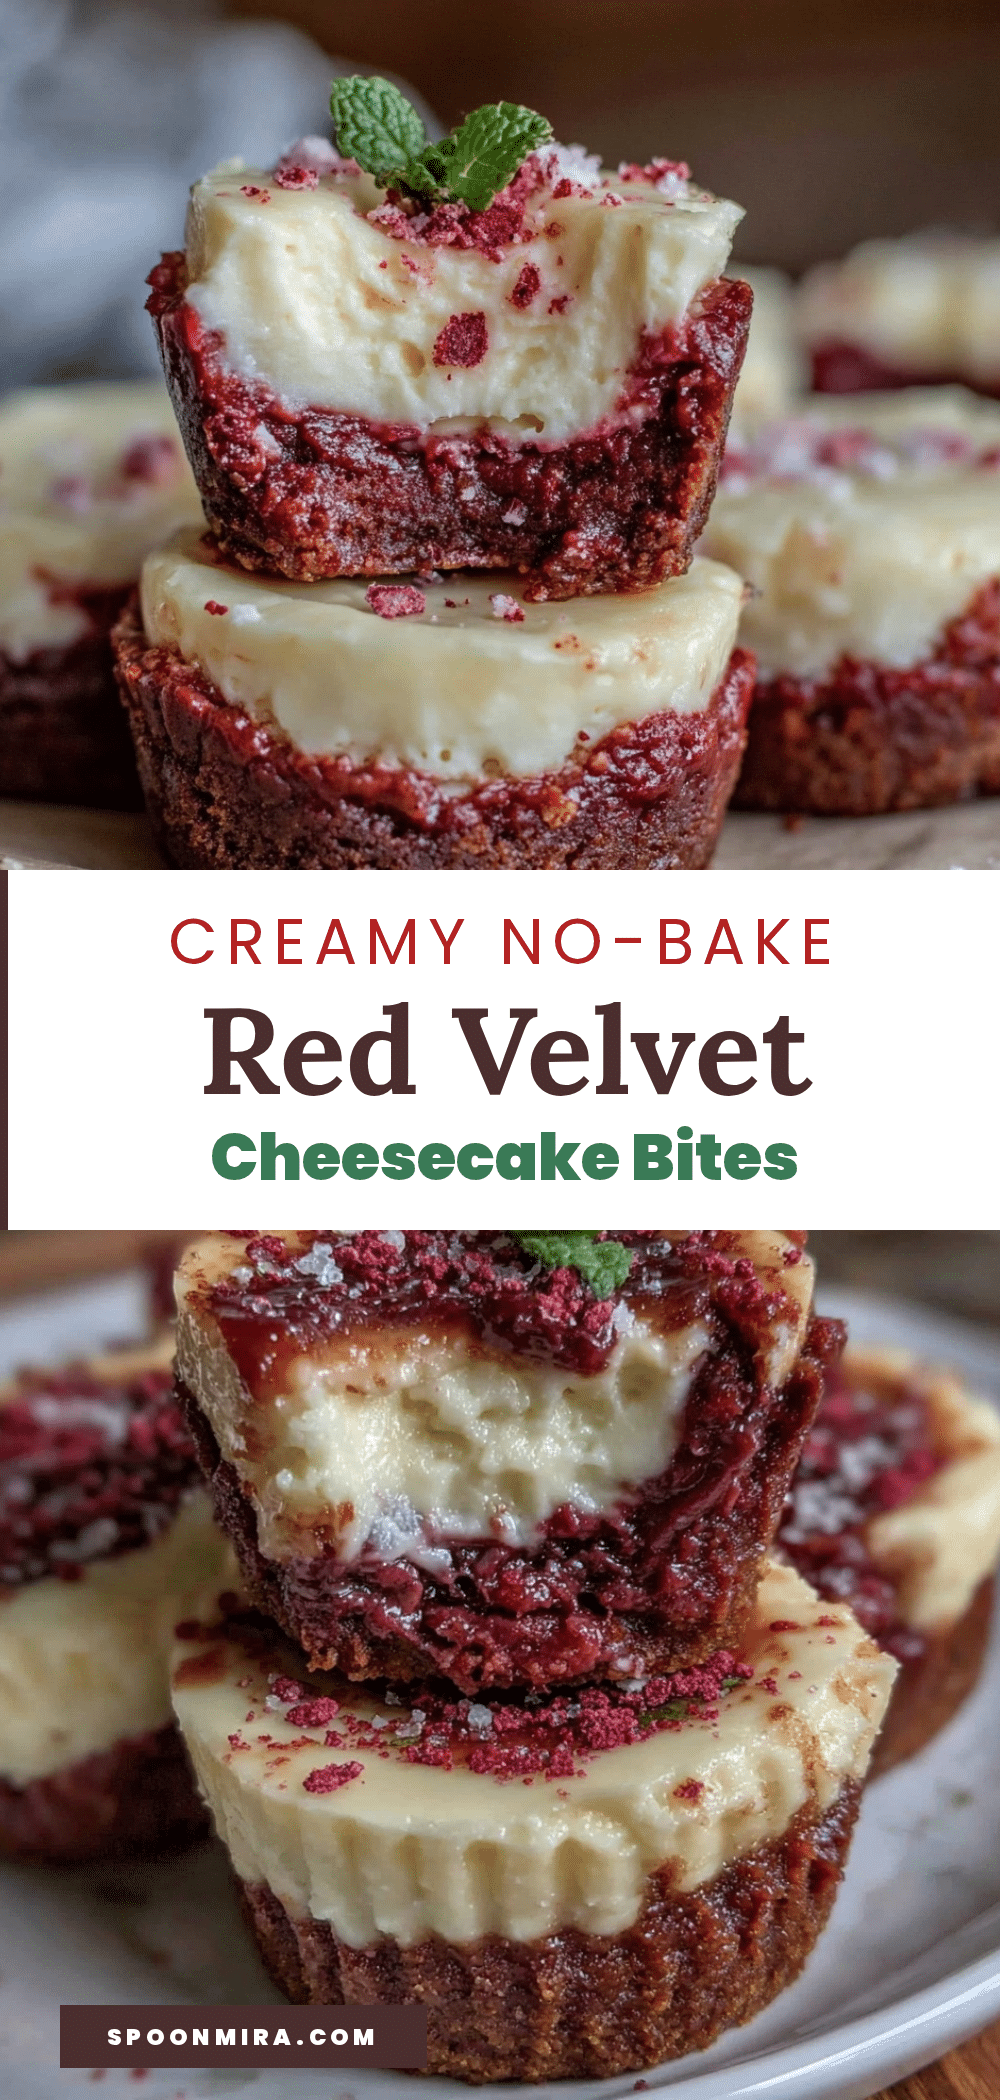
Creamy No-Bake Red Velvet Cheesecake Bites
These creamy no-bake red velvet cheesecake bites combine a rich, smooth cheesecake filling with a crumbly red velvet cake base, perfect for quick, fuss-free dessert that impresses at any occasion.
- Prep Time: 15 minutes
- Cook Time: 0 minutes
- Total Time: 3 hours 15 minutes
- Yield: 24 bites 1x
- Category: Dessert
- Cuisine: American
Ingredients
- 1 ½ cups red velvet cake crumbs (store-bought or homemade)
- 4 tablespoons (60g) unsalted butter, melted
- 2 tablespoons (25g) granulated sugar (optional)
- 8 oz (225g) cream cheese, softened
- ¾ cup (90g) powdered sugar
- ½ cup (120ml) heavy cream
- 1 tablespoon unsweetened cocoa powder
- 1 teaspoon vanilla extract
- 2 tablespoons buttermilk
- 1 teaspoon red food coloring (optional)
- White chocolate shavings or curls (optional, for garnish)
- Mini chocolate chips (optional, for garnish)
- Fresh berries like raspberries or strawberries (optional, for garnish)
Instructions
- Prepare the Red Velvet Crust: In a medium bowl, combine the red velvet cake crumbs, melted unsalted butter, and granulated sugar if using. Stir until crumbs are evenly coated and hold together when pressed, about 5 minutes.
- Press the Crust Into Molds: Line a mini muffin tin with cupcake liners or lightly grease silicone molds. Spoon about 1 tablespoon of the crumb mixture into each cup. Press firmly to form a compact base. Chill in the refrigerator for at least 15 minutes.
- Make the Cheesecake Filling: In a large bowl, beat the softened cream cheese with powdered sugar until smooth and creamy, about 2-3 minutes with an electric mixer. Add cocoa powder, vanilla extract, buttermilk, and red food coloring if using. Mix until fully incorporated.
- Whip the Heavy Cream: In a separate bowl, whip the heavy cream to soft peaks, about 3-4 minutes on medium-high speed. Avoid overwhipping.
- Fold in the Whipped Cream: Gently fold the whipped cream into the cream cheese mixture using a spatula with slow, sweeping motions to keep the filling light and airy.
- Assemble the Cheesecake Bites: Remove crusts from fridge. Spoon or pipe the cheesecake filling over each crumb base, filling each mold generously. Smooth the tops. Chill for at least 3 hours or overnight until firm.
- Garnish and Serve: Once set, top each cheesecake bite with white chocolate shavings, mini chocolate chips, or fresh berries if desired. Carefully remove from molds or liners and arrange on a serving platter.
Notes
Ensure cream cheese is softened to avoid lumps. Whip heavy cream to soft peaks only to maintain smooth texture. Fold whipped cream gently into filling to keep it airy. Press crust firmly to hold shape. Chill at least 3 hours or overnight for best results. Can substitute coconut cream and dairy-free cream cheese for vegan version. Use gluten-free crumbs for gluten-free adaptation.
Nutrition
- Serving Size: 1 bite
- Calories: 120
- Sugar: 7
- Fat: 8
- Carbohydrates: 10
- Protein: 2
Keywords: no-bake cheesecake, red velvet, cheesecake bites, easy dessert, party dessert, creamy cheesecake, no oven dessert


