The pockets were empty before the lunch bell even rang. Third time this month, the same story — a quick text from a fellow parent asking for the recipe. Honestly, I never expected these Easy Ham and Cheese Quesadilla Pockets to get such a buzz. It started as a last-minute fix for a hectic morning, just trying to get something warm and filling into a lunchbox without the usual sandwich snoozefest.
There’s something quietly satisfying about hearing kids rave about their lunch — not just “It’s good,” but really wanting more. I remember pulling these pockets out of the oven, the cheesy aroma filling the kitchen, and thinking, “Well, that’ll do.” But it wasn’t until I saw the empty containers and those repeated requests that it hit me: this simple recipe actually sticks. It’s the kind of food that turns an ordinary school lunch into a little moment of joy for both the kid and the parent trying to keep it all together.
What really surprised me was how easy it came together, no long prep or fancy ingredients, just good, honest food. The little pockets are crispy on the outside, gooey in the middle, and just the right size to pop into a lunchbox or grab on the go. They aren’t flashy, but they hold that perfect balance of comfort and convenience — which, let’s face it, is exactly what you need during the school year chaos.
Some days, I still catch myself quietly proud that something this simple can make that kind of difference. It’s not about impressing anyone with a complicated spread, but about knowing lunch will be eaten, appreciated, and maybe even remembered. That’s why these quesadilla pockets have stuck around — because they work, plain and simple.
Why You’ll Love This Recipe
I’ve tested these Easy Ham and Cheese Quesadilla Pockets more times than I can count, and here’s what makes them stand out in the crowded world of school lunch ideas:
- Quick & Easy: Ready in under 20 minutes, perfect for those mornings when you’re running on empty but want to send something homemade.
- Simple Ingredients: No obscure grocery runs — just basics like ham, cheese, tortillas, and a few pantry staples.
- Perfect for School Lunches: Portable, mess-free, and kid-approved, these pockets fit neatly in a lunchbox without fuss.
- Crowd-Pleaser: Both picky eaters and grown-ups tend to love these — a rare win in my kitchen!
- Unbelievably Delicious: The crispy, golden exterior and melty cheese inside hit that comfort food sweet spot without being heavy.
What sets this recipe apart is the little twist of folding the quesadilla into neat pockets instead of the traditional half-moon. It keeps everything contained, making it super lunchbox-friendly. Plus, I like to add a touch of seasoning to the cheese mix — a pinch of smoked paprika or a splash of mustard powder — it’s subtle but makes every bite feel special. Honestly, it’s the kind of recipe I’ve kept bookmarked because it’s just that reliable, that good.
What Ingredients You Will Need
This recipe uses simple, wholesome ingredients to deliver bold flavor and satisfying texture without any fuss. Most of these are pantry staples, and if you’re like me, you probably already have them on hand.
- Flour tortillas (8-inch size works best for easy folding)
- Sliced ham (about 6 ounces / 170 grams, deli-sliced or leftover ham works well)
- Shredded cheese (1 to 1 ½ cups / 100-150 grams, sharp cheddar or a Mexican blend recommended for meltiness)
- Butter (2 tablespoons / 30 grams, softened, helps get that golden crust)
- Optional seasoning: pinch of smoked paprika, garlic powder, or mustard powder for a little extra flavor kick
- Fresh spinach or mild greens (about 1 cup / 30 grams, optional but adds freshness and a pop of color)
- Green onions (1-2, thinly sliced, optional for subtle bite)
- Sour cream or Greek yogurt (for dipping, optional)
If you want to switch things up, you can swap ham with turkey or chicken slices. For a vegetarian option, try sautéed mushrooms or roasted veggies instead. For cheese, I recommend Cabot or Tillamook brands for a great melt and flavor.
Equipment Needed
- Non-stick skillet or frying pan: A medium-sized one around 10 inches (25 cm) works perfectly for cooking the quesadilla pockets evenly.
- Spatula: For flipping the pockets without breaking them.
- Mixing bowl: To toss the shredded cheese with seasonings if you decide to add them.
- Butter knife or pastry brush: To spread butter on the tortillas for that crisp finish.
- Plate lined with paper towels: To rest the cooked pockets briefly and drain excess butter.
If you don’t have a non-stick skillet, a cast iron pan is a great alternative but watch the heat carefully to avoid burning. I’ve tried both, and cast iron gives a nice crust, but non-stick is more forgiving for beginners. No fancy gadgets needed here — just the basics to get that golden, crispy finish.
Preparation Method

- Prepare the filling: In a mixing bowl, combine the shredded cheese with your choice of optional seasonings like smoked paprika or garlic powder. This adds a subtle depth to the flavor. Toss lightly to mix evenly.
- Lay out the tortillas: Place one flour tortilla flat on a clean surface. Spread about 1 tablespoon of softened butter evenly on one side — this will be the outside that hits the pan, creating that perfect golden crust.
- Add the filling: Flip the tortilla so the buttered side is down. On one half of the tortilla, layer about 3 ounces (85 grams) of sliced ham, a generous handful of the seasoned shredded cheese (about ½ cup / 50 grams), and, if using, a few fresh spinach leaves and some sliced green onions. Don’t overfill, or it gets tricky to seal.
- Fold the pockets: Carefully fold the tortilla over the filling, creating a half-moon shape. Press gently along the edges with your fingers or the back of a fork to seal the filling inside. This keeps the cheese from oozing out during cooking.
- Cook the pockets: Heat your skillet over medium heat. Place the folded quesadilla pockets in the pan. Cook for about 3-4 minutes on each side, or until the tortilla is golden brown and crispy, and the cheese inside has melted. You’ll smell that lovely buttery aroma when it’s just right.
- Rest and serve: Remove the pockets from the pan and place them on a plate lined with paper towels to absorb any excess butter. Let them rest for a minute — this helps the cheese set slightly, so it’s less likely to spill out when bitten.
Pro tip: If your tortillas feel a bit stiff, warm them briefly in the microwave for 10-15 seconds before assembling. It makes folding much easier and prevents cracking.
Cooking Tips & Techniques
There’s a fine line between a perfectly crispy quesadilla pocket and one that’s burnt or soggy. Here’s what I’ve learned through trial and error:
- Medium heat is your friend: Cooking on too high heat will brown the tortilla quickly but leave the cheese unmelted. Too low, and you’ll end up with a soggy, greasy pocket. Medium heat gives you that golden crust and gooey center.
- Butter, don’t oil: Butter adds flavor and helps crisp the tortilla beautifully. I’ve tried olive oil, but butter wins for that classic taste and texture.
- Don’t overload the filling: Too much ham or cheese makes folding tough and leads to leaks. Keep the filling balanced so the pockets hold up well in the pan and lunchbox.
- Seal edges well: Pressing the edges firmly ensures the filling stays inside and keeps the pockets neat. If you want, you can lightly moisten the edges with water before folding to help seal.
- Multitask efficiently: While the first pockets cook, prep the next batch so you can assemble and cook seamlessly. This keeps the morning rush less chaotic.
I once burnt half the batch by rushing the heat — lesson learned! Take your time, keep an eye on the pan, and you’ll get that perfect crisp every time.
Variations & Adaptations
This recipe is pretty flexible, so you can tweak it based on what you have or your kid’s tastes:
- Vegetarian version: Swap ham for sautéed mushrooms, roasted bell peppers, or black beans with corn for a protein-packed pocket.
- Different cheeses: Try mozzarella for a milder melt or pepper jack for a little heat. I’ve even mixed feta with cheddar for a tangy twist.
- Gluten-free option: Use gluten-free tortillas — many grocery stores carry them now, and they hold up well for pockets.
- Spicy kick: Add a spoonful of salsa or a sprinkle of chili flakes inside for kids who like a little heat.
- Bake instead of pan-fry: For a hands-off approach, brush pockets with butter and bake at 375°F (190°C) for 12-15 minutes, flipping halfway. It makes a crisp pocket with less mess.
One of my favorite twists was adding a tiny smear of fig jam inside before folding — that sweet-savory combo was a hit at a potluck and reminded me of the easy small-batch fig jam I keep making from this recipe.
Serving & Storage Suggestions
These quesadilla pockets are best served warm, but they hold up pretty well for lunchbox adventures. Pack them with a small container of sour cream or Greek yogurt for dipping — it adds a creamy contrast kids love.
They pair nicely with crunchy sides like carrot sticks or a fresh salad, such as the fresh watermelon cucumber feta salad for a light, refreshing balance.
If you want to prep ahead, these pockets freeze beautifully. Let them cool completely, then wrap individually in parchment paper and store in a freezer bag for up to 2 months. To reheat, pop them in a toaster oven or regular oven at 350°F (175°C) for about 10 minutes until crispy and warmed through. Microwaving works but can make the tortilla a bit soft.
Leftovers tend to get even tastier after a day as the flavors meld, but I’d suggest reheating just before eating for the best texture.
Nutritional Information & Benefits
| Nutrient | Per Serving (1 pocket) |
|---|---|
| Calories | 280 kcal |
| Protein | 15 g |
| Fat | 14 g |
| Carbohydrates | 22 g |
| Fiber | 1.5 g |
| Sodium | 600 mg |
The ham provides a solid protein boost, while the cheese offers calcium and fat for satiety. Using whole wheat tortillas could add fiber if you want to make the pockets more filling and nutritious. For those watching sodium, low-sodium ham or turkey slices can be a good swap.
From a wellness perspective, these pockets balance comfort and nutrition, making them a practical choice for busy school days without feeling like a compromise.
Conclusion
These Easy Ham and Cheese Quesadilla Pockets have quietly become a staple in my lunchbox rotation because they’re reliable, tasty, and kid-friendly. They’re not fancy, but sometimes that’s exactly what you need — a simple, satisfying meal that actually gets eaten and enjoyed. I love how adaptable they are, too, letting you tweak the fillings and methods to suit your mood or pantry.
Feel free to make this recipe your own, whether that means adding a hint of spice, tossing in some greens, or trying a different cheese. I’m always curious to hear how others put their spin on it — so if you try these pockets, drop a comment or share your favorite variation. It’s nice to know these little pockets of goodness keep making lunch a bit easier and tastier for families everywhere.
Frequently Asked Questions
Can I make these quesadilla pockets ahead of time?
Yes! You can assemble and cook them in advance, then store in the fridge for up to 2 days. Reheat in a toaster oven or skillet for best crispiness.
What’s the best cheese to use for melting?
Sharp cheddar, Monterey Jack, or a Mexican cheese blend work great. Mozzarella is also good for a milder flavor and gooey texture.
Can I freeze the quesadilla pockets?
Absolutely. Cool completely, wrap individually, and freeze up to 2 months. Reheat in an oven or toaster oven for best texture.
How do I keep the pockets from falling apart while cooking?
Don’t overfill and press the edges firmly to seal. You can also moisten the edges slightly with water before folding to help them stick better.
Are these pockets suitable for picky eaters?
Usually, yes! The familiar flavors of ham and cheese appeal to many kids. You can always customize fillings to suit your child’s preferences.
Pin This Recipe!
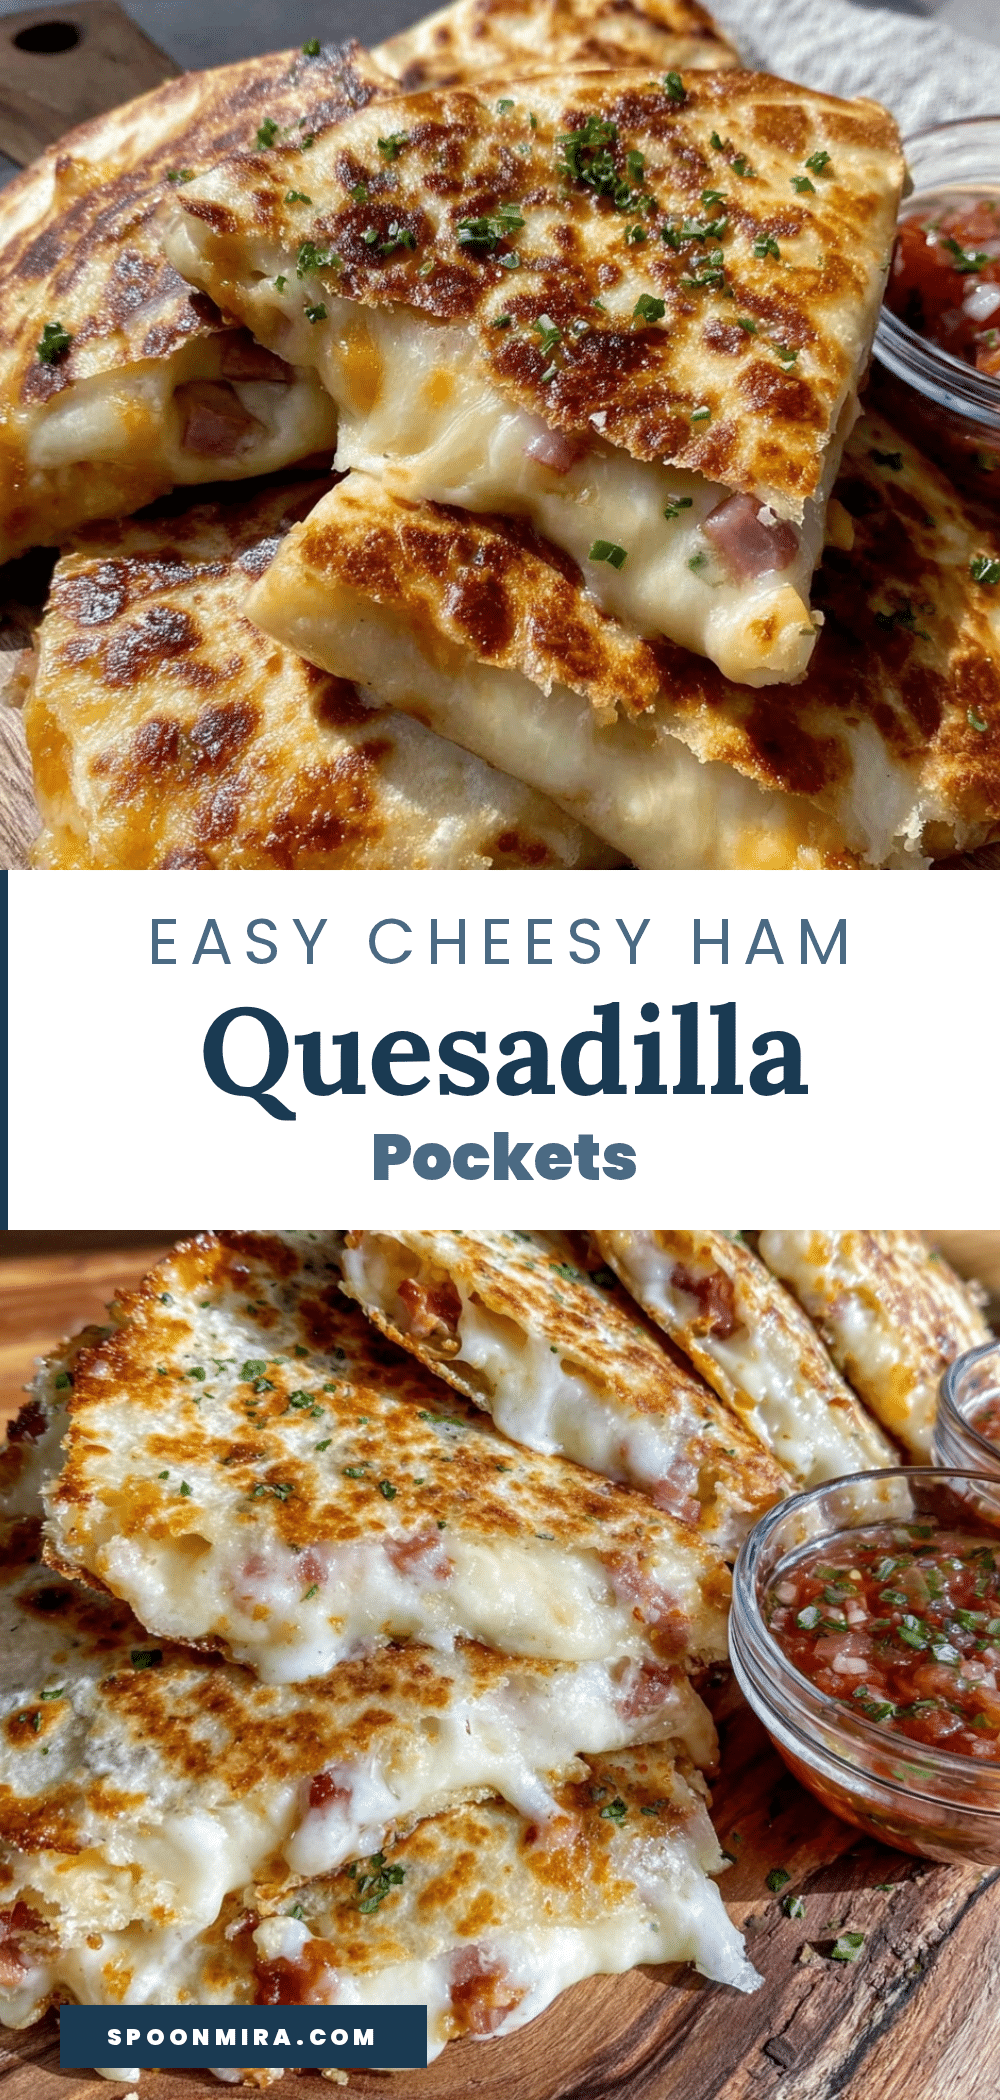
Easy Ham and Cheese Quesadilla Pockets Perfect for School Lunches

These crispy, gooey quesadilla pockets are a quick and easy school lunch option that kids love. Made with simple ingredients like ham, cheese, and tortillas, they are portable, mess-free, and perfect for busy mornings.
- Prep Time: 10 minutes
- Cook Time: 8 minutes
- Total Time: 18 minutes
- Yield: 4 servings 1x
- Category: Main Course
- Cuisine: American
Ingredients
- Flour tortillas (8-inch size)
- 6 ounces sliced ham (deli-sliced or leftover)
- 1 to 1 ½ cups shredded cheese (sharp cheddar or Mexican blend recommended)
- 2 tablespoons softened butter
- Optional seasoning: pinch of smoked paprika, garlic powder, or mustard powder
- 1 cup fresh spinach or mild greens (optional)
- 1–2 green onions, thinly sliced (optional)
- Sour cream or Greek yogurt for dipping (optional)
Instructions
- In a mixing bowl, combine shredded cheese with optional seasonings like smoked paprika or garlic powder. Toss lightly to mix evenly.
- Place one flour tortilla flat on a clean surface. Spread about 1 tablespoon of softened butter evenly on one side (this will be the outside that hits the pan).
- Flip the tortilla so the buttered side is down. On one half, layer about 3 ounces of sliced ham, about ½ cup of the seasoned shredded cheese, and if using, a few fresh spinach leaves and sliced green onions. Do not overfill.
- Carefully fold the tortilla over the filling to create a half-moon shape. Press gently along the edges with fingers or the back of a fork to seal.
- Heat a non-stick skillet over medium heat. Place the folded quesadilla pockets in the pan and cook for 3-4 minutes on each side until golden brown and cheese is melted.
- Remove pockets from the pan and place on a plate lined with paper towels to absorb excess butter. Let rest for a minute before serving.
Notes
Warm tortillas briefly in the microwave for 10-15 seconds before assembling to prevent cracking. Use medium heat to avoid burning while ensuring cheese melts. Press edges firmly to seal and prevent leaks. Butter is preferred over oil for flavor and crispiness. Can bake at 375°F for 12-15 minutes as an alternative cooking method.
Nutrition
- Serving Size: 1 quesadilla pocket
- Calories: 280
- Sodium: 600
- Fat: 14
- Carbohydrates: 22
- Fiber: 1.5
- Protein: 15
Keywords: ham and cheese, quesadilla pockets, school lunch, easy recipe, kid-friendly, quick lunch, portable snack


