“Wait, you mean I don’t even have to turn on the oven?” My sister-in-law looked at me like I’d just told her she could win the lottery by sneezing. It was July, her kitchen felt like a sauna, and she had a serious craving for something chocolatey, marshmallowy, and graham-cracker-crunchy. That was it. That single, sweaty, desperate question birthed this Easy No-Bake S’mores Icebox Cake.
Honestly, I’d been playing around with icebox cakes for a while. They’re kind of my secret weapon for summer gatherings when the last thing you want to do is heat up the house. But this one? This one felt different. It wasn’t just a chocolate pudding and whipped cream situation. It needed to taste like a real campfire s’more—the smoky, messy, perfect kind. The kind you eat with sticky fingers and a grin.
So I started testing. I wanted layers that held their shape, a filling that felt rich but not heavy, and that unmistakable crackle of a graham cracker. The first version was good. The second was better. The third? My sister-in-law texted me a photo of an empty dish and the words, “I have no self-control around this.” And honestly, that’s the highest praise I can think of. This cake is that good. It’s the kind of dessert that makes you feel like you’ve pulled off something magical, when really, you just stacked some stuff in a pan and let the fridge do all the work.
Why You’ll Love This Recipe
This isn’t just another no-bake dessert. It’s a game-changer for anyone who loves s’mores but hates the hassle of a campfire. Or, you know, just hates turning on the oven in the middle of a heatwave.
- Ready in 10 Minutes: Seriously. From start to fridge, you’re looking at about ten minutes of active work. The fridge does the rest. It’s the perfect last-minute dessert for unexpected guests or a sudden craving.
- Simple, Pantry-Friendly Ingredients: You probably already have most of these things in your kitchen. No weird extracts or hard-to-find specialty items. Just good, honest ingredients that come together beautifully.
- Perfect for Summer Parties & Potlucks: This cake is a showstopper without the stress. It travels well, feeds a crowd, and everyone—from kids to grandparents—goes crazy for it. It’s a guaranteed hit at any summer barbecue or family get-together.
- No-Bake Means No Sweat: Let’s be real. The best part is not heating up your kitchen. This is the ultimate hot-weather dessert. You get all the cozy, nostalgic flavor of s’mores without standing over a hot stove.
- Unbelievably Rich & Creamy: The texture is what gets everyone. The graham crackers soften into a cake-like layer, while the chocolate and marshmallow filling stays luscious and decadent. It’s like a s’more that grew up and learned some manners, but kept all the fun.
What makes this recipe different from all the others I’ve tried? It’s the layering technique. Most recipes just slop everything together. I tested the perfect ratio of chocolate to marshmallow to cream, and I found that letting the cake rest for a full 8 hours (or overnight) is non-negotiable. That’s when the magic happens—the crackers fully absorb the moisture and transform into a tender, almost torte-like texture. It’s not just a dessert; it’s an experience. It’s the kind of thing you make when you want to impress people without breaking a sweat, and it always, always delivers.
What Ingredients You Will Need
This recipe uses simple, wholesome ingredients to create that classic s’mores flavor without any fuss. Everything is easy to find and likely already in your pantry or fridge.
- Graham Crackers (1 box, about 14-16 whole sheets): These form the “cake” layers. You’ll need the full sheets, not the crumbs. I prefer the classic honey-flavored ones, but cinnamon grahams work in a pinch for a slightly spiced twist. Make sure they’re fresh and crisp for the best texture after chilling.
- Heavy Whipping Cream (2 cups / 480 ml): This is the base of our creamy filling. It whips up into soft peaks and gives the cake its light, airy texture. Don’t substitute with milk or half-and-half; you need the high fat content for stability. I always use a brand like Horizon Organic or Organic Valley for the best flavor and consistency.
- Powdered Sugar (1/2 cup / 60 g): This sweetens and stabilizes the whipped cream. It dissolves instantly, so you don’t get a gritty texture. Sift it if it’s lumpy.
- Vanilla Extract (1 teaspoon): A little goes a long way to enhance the sweetness and add depth. Pure vanilla extract is always best, but imitation will work in a pinch.
- Milk Chocolate Chips (1 1/2 cups / 270 g): These create the rich chocolate layer. I recommend a good-quality brand like Guittard or Ghirdelli for a smoother melt and superior flavor. Semi-sweet or dark chocolate chips work wonderfully if you prefer a less sweet profile.
- Marshmallow Fluff or Creme (1 jar, about 7 oz / 200 g): This is the secret to the gooey, marshmallowy center. It’s stable and mixes perfectly into the whipped cream. You can use store-bought or make your own, but the jarred stuff is perfectly fine and saves time.
- Mini Marshmallows (1 cup / 50 g): These are for the topping. They toast up beautifully under the broiler (if you choose) or stay soft and pillowy. They add a fun texture and visual appeal.
- Unsalted Butter (2 tablespoons / 28 g): A tiny bit is used to help the chocolate melt smoothly and adds a subtle richness. Salted butter works too, just skip adding any extra salt to the chocolate.
Equipment Needed
You don’t need any fancy gadgets for this one. Just a few basic kitchen tools you probably already own.
- 9×13-inch Baking Dish: This is the perfect size for a generous, layered cake. A glass or ceramic dish works best. If you don’t have one, you can use an 8×8-inch dish for a taller cake, just reduce the number of graham cracker layers.
- Electric Mixer (Hand or Stand): Whipping cream by hand is a workout. An electric mixer makes it a breeze. A stand mixer with the whisk attachment is my go-to, but a hand mixer works perfectly.
- Medium Microwave-Safe Bowl: For melting the chocolate. A glass bowl is ideal.
- Rubber Spatula: For folding the marshmallow fluff into the whipped cream and spreading the layers. A good, flexible spatula is your best friend here.
- Sharp Knife or Bench Scraper: For cutting the graham crackers to fit perfectly in the dish. A serrated knife works best to avoid crushing them.
- Plastic Wrap or Aluminum Foil: To cover the cake while it chills. This prevents it from absorbing any fridge odors.
Preparation Method
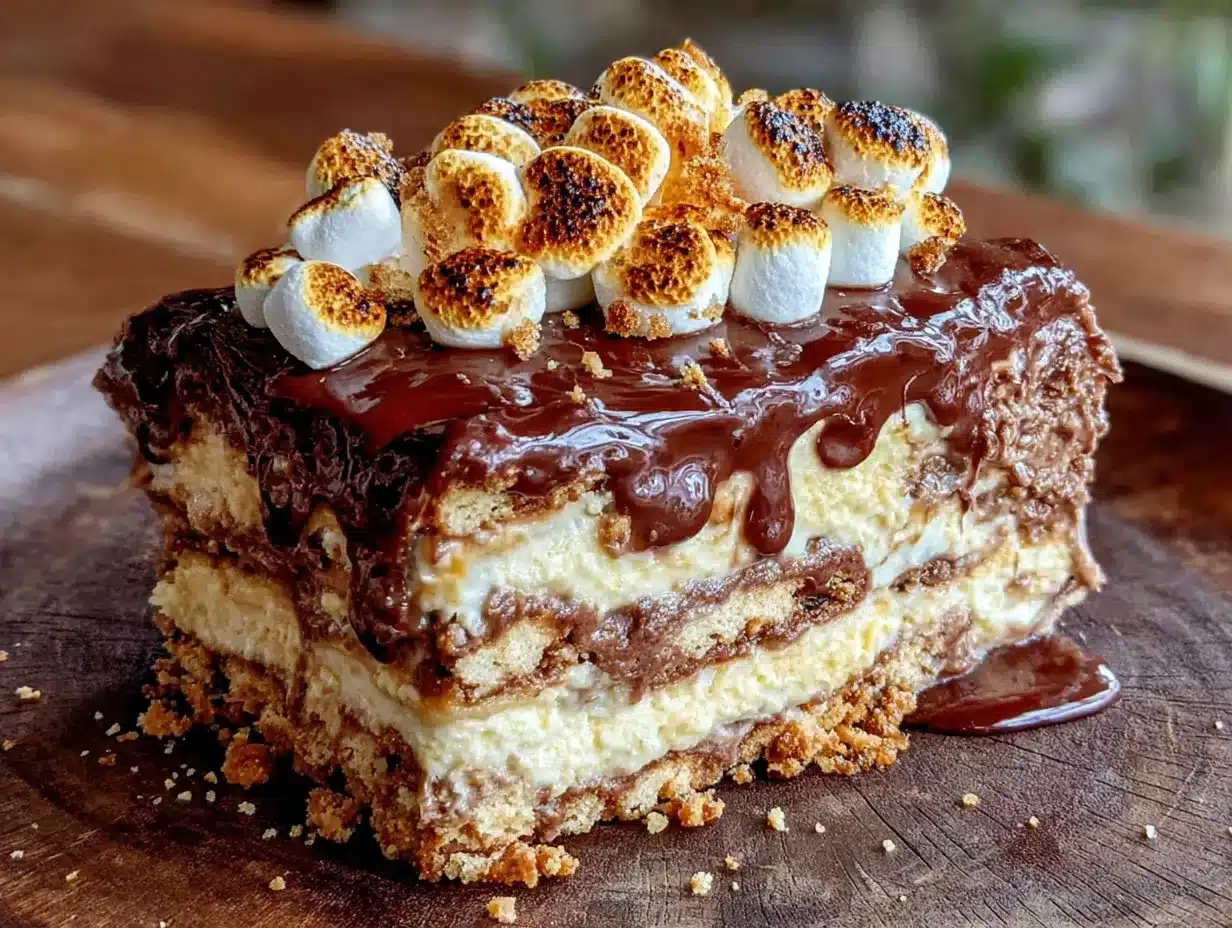
Follow these steps, and you’ll have a stunning, delicious cake with almost zero effort. Trust the process, especially the chilling time!
- Prepare the Graham Crackers: Take your full graham cracker sheets and carefully arrange them in the bottom of your 9×13-inch dish. You’ll likely need to break some in half or use a knife to cut them to fit snugly in a single layer. Don’t stress about perfection—just cover the bottom as best you can. Set aside.
- Whip the Cream: In a large mixing bowl, pour in the cold heavy whipping cream. Using your electric mixer, beat on medium-high speed until soft peaks form. This takes about 3-4 minutes. You’ll know it’s ready when the cream holds a soft, droopy peak when you lift the beaters.
- Sweeten the Cream: Add the powdered sugar and vanilla extract to the whipped cream. Continue beating on medium speed for another 30-60 seconds, until stiff peaks form. Be careful not to over-whip, or you’ll end up with butter!
- Fold in the Marshmallow Fluff: Take your rubber spatula and gently fold the marshmallow fluff into the whipped cream. Do this slowly and carefully, using a cutting motion through the center and then scraping the sides. You want a uniform, fluffy mixture without deflating all that air you just whipped in. It should look like a cloud.
- Melt the Chocolate: Place the chocolate chips and butter in your microwave-safe bowl. Microwave in 30-second intervals, stirring well after each, until completely smooth and glossy. This usually takes about 1-2 minutes total. Let it cool for a minute or two while you assemble the first layers.
- First Layer: Pour about one-third of the whipped cream mixture over the graham crackers and spread it into an even layer. Drizzle about one-third of the melted chocolate over the cream. Use a knife or spatula to swirl it in slightly—you don’t need to fully mix it; you want ribbons of chocolate.
- Repeat the Layers: Place another layer of graham crackers on top of the chocolate swirl. Gently press them down so they make contact with the cream. Repeat the process: add another third of the cream, then another third of the chocolate. Add a third layer of graham crackers, the remaining cream, and the remaining chocolate. You should have three layers of graham crackers and three layers of filling.
- Top with Mini Marshmallows: Sprinkle the mini marshmallows evenly over the top layer of chocolate. Press them down gently so they stick.
- Chill: Cover the dish tightly with plastic wrap or foil. Refrigerate for at least 8 hours, but overnight is best. This is the most important step! The graham crackers need time to soften and absorb the moisture from the cream. Don’t rush it.
- Serve: After chilling, the cake will be firm and sliceable. For an extra-special touch, you can broil the top for 1-2 minutes just before serving to toast the marshmallows. Keep a very close eye on it—they burn fast! Let it sit for 5 minutes after broiling, then slice and serve cold.
Cooking Tips & Techniques
I’ve made this cake more times than I can count, and I’ve learned a few things the hard way. Here are my best tips to make sure yours turns out perfect every time.
- Don’t Over-Whip the Cream: This is the most common mistake. You want stiff peaks, but if you keep going, it will turn grainy and then separate into butter and buttermilk. Stop as soon as the peaks stand up straight when you lift the beaters. If you’re unsure, it’s better to under-whip slightly than over-whip.
- Cool the Chocolate Slightly: If you pour hot melted chocolate directly onto the cold cream, it will seize up and create little hard chocolate chips. Let it cool for a minute or two after melting. It should still be liquid, but not piping hot. This ensures it swirls in beautifully.
- Press the Graham Crackers Gently: When you place each new layer of graham crackers, press down lightly with your fingertips. This helps them make contact with the cream below, which is crucial for them to soften evenly. If there are air pockets, you’ll get hard, crunchy bits of cracker.
- The Overnight Chill is Non-Negotiable: I know it’s tempting to dig in after a few hours, but trust me. At 4 hours, the crackers are still a bit crunchy. At 8 hours, they’re soft and cake-like. At 12 hours? Perfection. The flavors meld, the texture is uniform, and it’s absolutely divine. Plan ahead!
- Toasting the Marshmallows: If you want that campfire vibe, a quick broil is the way to go. But watch it like a hawk. Marshmallows go from perfectly toasted to burnt in about 15 seconds. I usually put the dish on the top rack and broil for 60-90 seconds, rotating once. You can also use a kitchen torch for more control.
Variations & Adaptations
This recipe is a fantastic base for customization. Feel free to make it your own!
- Peanut Butter S’mores Cake: Add 1/2 cup of creamy peanut butter to the melted chocolate and stir until smooth. You can also drizzle a little extra peanut butter between the layers. It’s a classic combo that works beautifully.
- Mint Chocolate S’mores Cake: Add 1/2 teaspoon of peppermint extract to the whipped cream along with the vanilla. Use dark chocolate instead of milk chocolate for a more sophisticated, minty-fresh flavor. It’s like a Thin Mint in cake form!
- Gluten-Free Version: Simply use gluten-free graham crackers. There are several good brands available now, like Kinnikinnick or S’moreables. The rest of the ingredients are naturally gluten-free.
- Berry S’mores Cake: Add a layer of fresh raspberries or sliced strawberries between the cream layers. The tartness of the berries cuts through the sweetness of the chocolate and marshmallow perfectly. It adds a beautiful color and fresh flavor.
- Spiced S’mores Cake: Add 1 teaspoon of cinnamon and 1/2 teaspoon of chili powder to the melted chocolate. This gives it a Mexican hot chocolate vibe that’s warm, complex, and utterly delicious. A pinch of cayenne pepper adds a nice kick.
Serving & Storage Suggestions
This cake is best served cold, straight from the fridge. The texture is firm, creamy, and incredibly satisfying.
- Serving Temperature: Serve it chilled. If you’ve toasted the marshmallows, let it sit for 5 minutes before slicing so the top sets slightly.
- Presentation: Slice into squares or rectangles. A sharp knife dipped in hot water and wiped clean between cuts gives the cleanest slices. Garnish with a few extra mini marshmallows, a drizzle of chocolate syrup, or a dusting of cocoa powder for a beautiful finish.
- Complementary Dishes: This cake is rich, so it pairs wonderfully with a light, tart beverage. A tall glass of cold milk is the classic choice. For a more adult pairing, try a cup of strong black coffee or a cozy pumpkin chai latte. The spices in the chai would complement the chocolate beautifully.
- Storage: Store any leftovers in the refrigerator, tightly covered, for up to 5 days. The cake will continue to soften and the flavors will meld even more over time. It’s actually even better on day two!
- Freezing: You can freeze this cake! Wrap the entire dish (or individual slices) tightly in plastic wrap, then a layer of aluminum foil. Freeze for up to 3 months. Thaw in the refrigerator overnight before serving. The texture remains surprisingly good.
Nutritional Information & Benefits
Let’s be honest—this is a dessert, and it’s meant to be enjoyed as a treat. But here’s a look at what’s in each serving (based on 16 servings).
- Estimated Nutritional Values (per serving): Calories: 385, Fat: 24g, Carbohydrates: 42g, Protein: 3g, Sugar: 30g. These are estimates and can vary based on brands and substitutions.
- Health Benefits of Key Ingredients: The heavy cream provides a good source of calcium and vitamin D. Dark chocolate (if you use it) is rich in antioxidants and can have heart-health benefits in moderation. Marshmallows… well, they make you happy!
- Dietary Considerations: This recipe is naturally vegetarian. It can be made gluten-free with a simple swap. For a dairy-free version, use a high-quality dairy-free whipped topping (like CocoWhip) and dairy-free chocolate chips. It won’t be quite as rich, but it’s still delicious.
- Potential Allergens: This recipe contains dairy (cream, butter) and gluten (graham crackers). Be sure to check your ingredient labels if you have allergies.
- Personal Wellness Perspective: I believe in balance. A slice of this cake after a long week is a form of self-care. It’s a celebration, a comfort, and a joy. Don’t stress about the numbers. Enjoy the moment, share it with people you love, and savor every single bite.
Conclusion
This Easy No-Bake S’mores Icebox Cake is more than just a recipe; it’s a solution. It solves the problem of wanting a show-stopping dessert without the work, the heat, or the stress. It’s the dessert that makes you look like a hero when you barely did anything. And honestly, that’s a pretty great feeling.
I love this recipe because it reminds me that simple can be spectacular. It takes a childhood classic and turns it into something elegant enough for a dinner party, yet cozy enough for a quiet night in. It’s forgiving, it’s flexible, and it’s always, always a crowd-pleaser. If you’re looking for a dessert that delivers on flavor and simplicity, this is it. I’d love to hear how yours turns out! Did you try the mint version? Did you toast the marshmallows until they were perfectly charred? Drop a comment below and share your s’mores creation. And if you’re looking for another easy, no-bake treat for your next gathering, you might also love this loaded nacho charcuterie board—it’s the perfect savory counterpart to this sweet dessert.
Frequently Asked Questions
Can I use Cool Whip instead of homemade whipped cream?
Yes, you can! If you’re short on time or just prefer the convenience, an 8-ounce tub of Cool Whip (thawed) works perfectly as a substitute for the homemade whipped cream. Just fold the marshmallow fluff directly into the Cool Whip. The texture will be slightly different—a bit more airy and less rich—but it’s still delicious and a great shortcut.
Why did my graham crackers stay crunchy?
This usually happens for two reasons: not enough chilling time, or the graham crackers weren’t pressed down enough to make contact with the cream. Make sure you chill the cake for at least 8 hours, ideally overnight. Also, when you add each new layer of graham crackers, gently press them into the cream below. This ensures they absorb the moisture evenly. If you still have crunchy spots, they might be from air pockets between the crackers and the cream.
Can I make this in a different size pan?
Absolutely! You can use a 9×9-inch or 8×8-inch square pan for a taller cake. You’ll just need to adjust the number of graham cracker layers. For a smaller pan, you’ll likely only get 2 full layers of graham crackers. You can also use a loaf pan for a smaller, more personal cake. Just keep an eye on the chilling time—a taller cake might need a bit longer to fully set.
How do I get clean slices?
For the cleanest slices, use a long, sharp knife. Run it under hot water, dry it off, then make one clean cut. Wipe the knife clean and reheat it under hot water between each cut. This prevents the cream from dragging and smearing. Chilling the cake for the full recommended time is also crucial—a well-chilled cake slices much more cleanly than one that’s still a bit soft.
Can I add other mix-ins to the filling?
Definitely! This is a very adaptable recipe. Try folding in 1/2 cup of crushed pretzels for a salty crunch, or 1/2 cup of toffee bits for a buttery, caramel flavor. You can also add a layer of sliced bananas or strawberries between the cream layers. For a fun twist, try adding a swirl of sweet and spicy fig jam between the layers—the fig and chocolate combination is incredible!
Pin This Recipe!
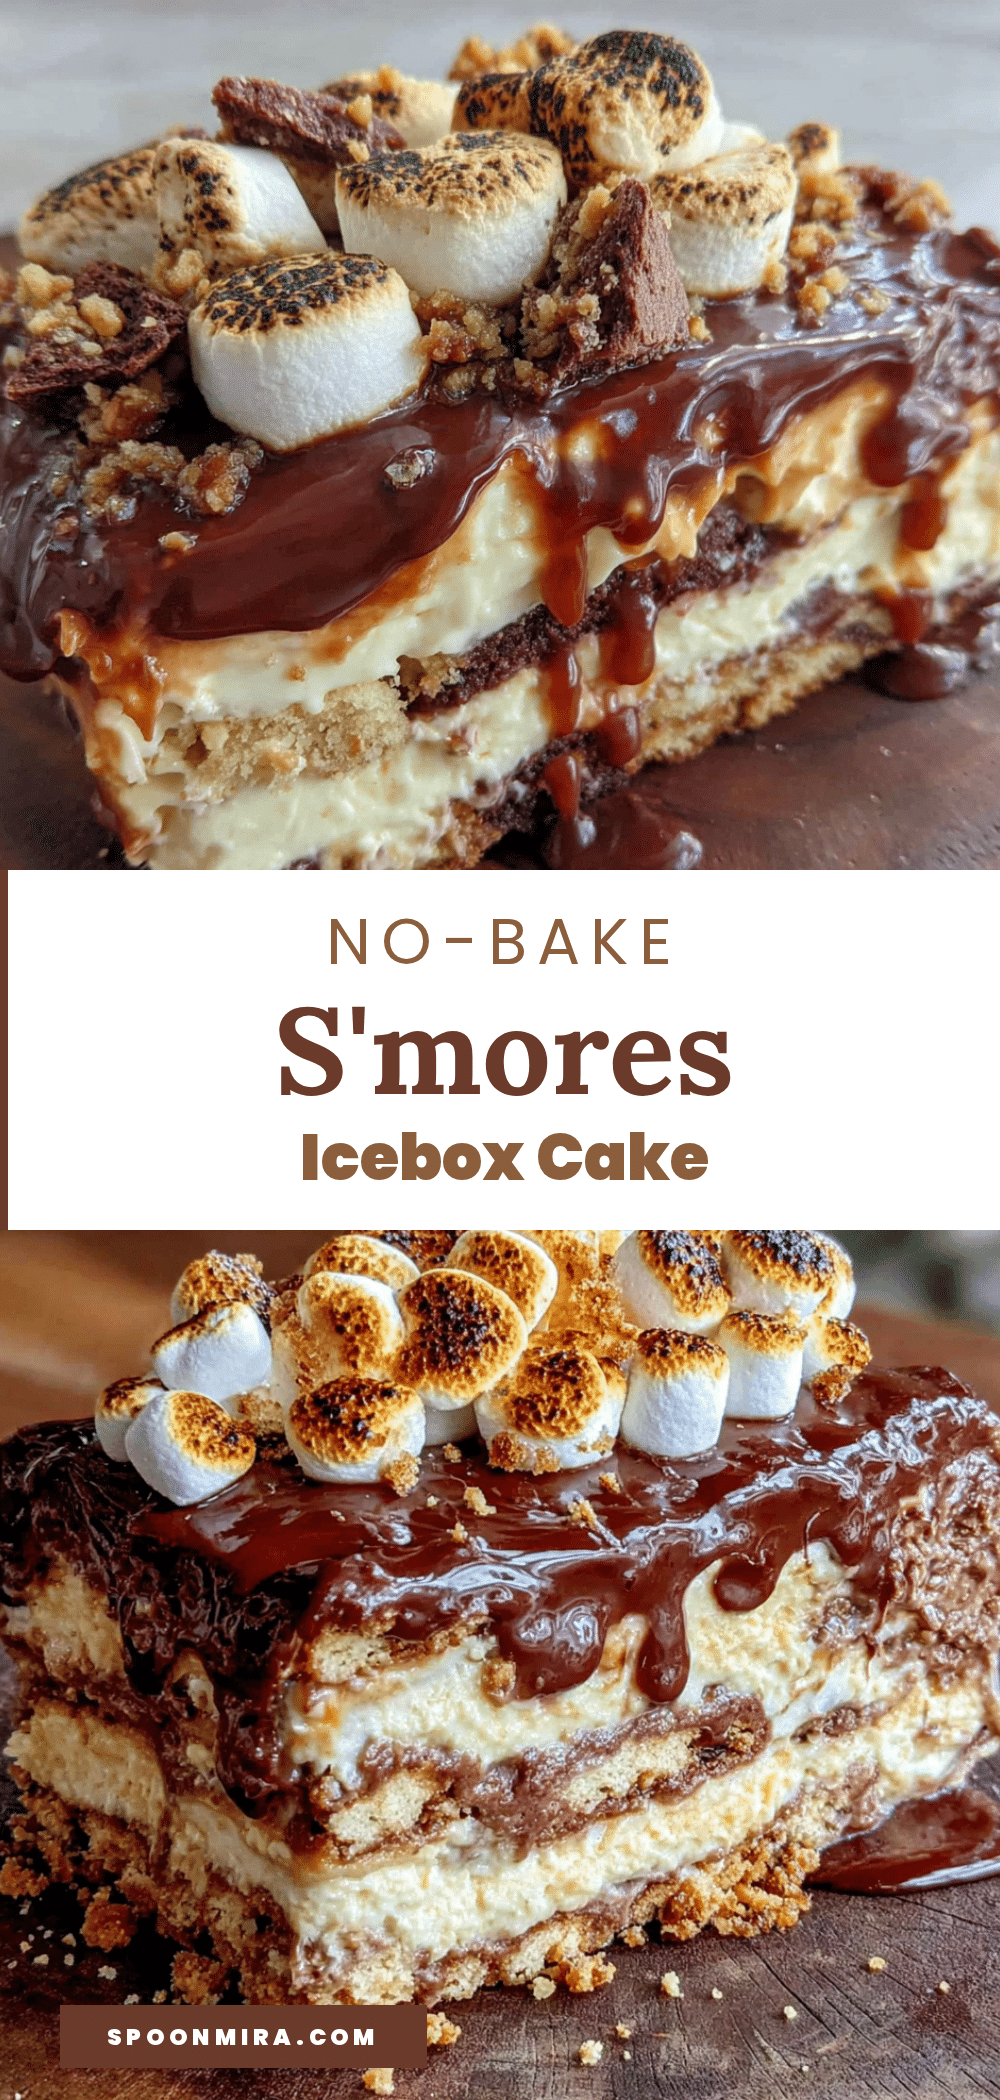
Easy No-Bake Smores Icebox Cake: Best 10-Minute Dessert
This Easy No-Bake S’mores Icebox Cake is a game-changer for anyone who loves s’mores but hates the hassle of a campfire or turning on the oven in a heatwave. Ready in 10 minutes of active work, it layers graham crackers with a rich chocolate and marshmallow cream filling for a decadent, crowd-pleasing dessert.
- Prep Time: 10 minutes
- Cook Time: 0 minutes
- Total Time: 8 hours 10 minutes (includes chilling)
- Yield: 16 servings 1x
- Category: Dessert
- Cuisine: American
Ingredients
- 1 box (about 14–16 whole sheets) graham crackers
- 2 cups (480 ml) heavy whipping cream
- 1/2 cup (60 g) powdered sugar
- 1 teaspoon vanilla extract
- 1 1/2 cups (270 g) milk chocolate chips
- 1 jar (about 7 oz / 200 g) marshmallow fluff or creme
- 1 cup (50 g) mini marshmallows
- 2 tablespoons (28 g) unsalted butter
Instructions
- Prepare the Graham Crackers: Arrange full graham cracker sheets in the bottom of a 9×13-inch dish, breaking or cutting to fit snugly in a single layer. Set aside.
- Whip the Cream: In a large mixing bowl, beat cold heavy whipping cream on medium-high speed until soft peaks form, about 3-4 minutes.
- Sweeten the Cream: Add powdered sugar and vanilla extract to the whipped cream. Continue beating on medium speed for 30-60 seconds until stiff peaks form.
- Fold in the Marshmallow Fluff: Gently fold the marshmallow fluff into the whipped cream using a rubber spatula until uniform and fluffy.
- Melt the Chocolate: Place chocolate chips and butter in a microwave-safe bowl. Microwave in 30-second intervals, stirring after each, until smooth and glossy. Let cool for 1-2 minutes.
- First Layer: Pour about one-third of the whipped cream mixture over the graham crackers and spread evenly. Drizzle about one-third of the melted chocolate over the cream and swirl slightly.
- Repeat the Layers: Place another layer of graham crackers on top, pressing gently. Repeat with another third of cream and chocolate. Add a third layer of graham crackers, remaining cream, and remaining chocolate.
- Top with Mini Marshmallows: Sprinkle mini marshmallows evenly over the top layer and press gently.
- Chill: Cover tightly with plastic wrap or foil. Refrigerate for at least 8 hours, preferably overnight.
- Serve: For toasted marshmallows, broil the top for 1-2 minutes just before serving, watching closely. Let sit 5 minutes, then slice and serve cold.
Notes
The overnight chill is non-negotiable for the graham crackers to soften into a cake-like texture. For a dairy-free version, use dairy-free whipped topping and dairy-free chocolate chips. Toasting the marshmallows under the broiler adds a campfire vibe but watch closely to avoid burning.
Nutrition
- Serving Size: 1 slice (1/16 of cak
- Calories: 385
- Sugar: 30
- Sodium: 180
- Fat: 24
- Saturated Fat: 14
- Carbohydrates: 42
- Fiber: 1
- Protein: 3
Keywords: no-bake dessert, smores, icebox cake, summer dessert, easy dessert, 10-minute dessert, graham cracker, chocolate, marshmallow


