Wednesday morning, 6:47 AM. I was staring into the fridge for the third time this week, trying to will a lunch idea into existence. The granola bar in my hand was sad, and honestly, I was tired of eating sad snacks between grading papers and chasing kids during recess. That’s when the idea hit me—why not treat my lunch box like I treat my lesson plans? Prepped, organized, and built to last through the chaos. By Friday, I’d made this Easy Teacher Meal Prep Protein Snack Box three separate times, tweaking the balance of crunchy, creamy, sweet, and savory until it felt just right. It’s not a fancy recipe. It’s a survival kit wrapped in a bento box, and I haven’t looked back since.
The first version was a mess—too many crackers, not enough protein, and the apple slices went brown by second period. But that’s the thing about obsession. You don’t stop until the container opens and everything inside still looks like you just packed it. This snack box became my Friday ritual, then my Monday ritual, and now it’s just my ritual. You know that feeling when you find something that actually works? This is that. A little bit of planning, a little bit of intention, and suddenly your day doesn’t feel so scattered.
So here’s what I landed on. A mix of hard-boiled eggs, cheese cubes, turkey roll-ups, fresh fruit, and a handful of nuts. Nothing groundbreaking, but the combination hits every craving you might have between breakfast and lunch. It’s the kind of snack box that makes you feel like you’ve got your act together, even when the rest of your classroom is falling apart. And honestly, isn’t that the goal?
Why You’ll Love This Recipe
Let’s be real—teachers don’t have time for complicated lunches. You need something you can grab and go, eat in five minutes between classes, and actually enjoy. This snack box delivers on all fronts. I’ve tested it during parent-teacher conferences, field trips, and those endless PD days where the coffee runs out way too early. It holds up every time.
- Quick & Easy: Takes about 15 minutes to prep on Sunday night, and you’ve got snacks for the whole week. No cooking required (except boiling eggs, which is basically foolproof).
- Simple Ingredients: You probably already have most of this stuff in your fridge. Turkey, cheese, eggs, fruit, nuts. No fancy grocery trips needed.
- Perfect for Busy Mornings: Grab a box, toss it in your bag, and you’re out the door. No assembly required when you’re running late (which is every day, let’s face it).
- Crowd-Pleaser: My students actually get jealous when they see me pull this out. It’s that visually appealing—like a lunchable but way better.
- Unbelievably Satisfying: The protein keeps you full through the 10 AM slump, and the fruit gives you that little sugar boost without the crash.
What makes this different from every other snack box out there? It’s the balance. I spent way too long figuring out the perfect ratio of savory to sweet, crunchy to soft. The turkey roll-ups add a savory punch, the cheese brings creaminess, and the apple slices give you that fresh crunch. It’s not just thrown together—it’s built with intention. And once you try it, you’ll understand why I couldn’t stop making it.
What Ingredients You Will Need
This recipe uses simple, wholesome ingredients that you can find at any grocery store. The beauty is in the combination—each component plays a role in making this snack box filling, tasty, and easy to prep. Here’s what you’ll need:
- Hard-boiled eggs, peeled and halved (2 per box) – The protein powerhouse. I boil a batch of 6-8 eggs on Sunday and keep them in the fridge. They add that satisfying, creamy texture that holds everything together.
- Turkey breast deli slices, rolled up (3-4 slices per box) – Look for low-sodium if you can. I prefer oven-roasted turkey for that classic flavor. Roll them up tight so they’re easy to grab and eat.
- Cheddar cheese cubes (1/4 cup per box) – Sharp cheddar adds a nice tang. You can also use colby jack or gouda if you’re feeling fancy. Cube them yourself for better texture—pre-shredded doesn’t work here.
- Apple slices, tossed in lemon juice (1/2 apple per box) – Honeycrisp or Granny Smith are my go-to. The lemon juice keeps them from browning, so they stay fresh all week. (Trust me on this—it’s a game-changer.)
- Grapes, red or green (1/2 cup per box) – They add a burst of sweetness and that pop of color that makes the box look pretty. I recommend red grapes—they’re sweeter and hold up better.
- Almonds or walnuts (1/4 cup per box) – A handful of nuts adds healthy fats and crunch. I use raw almonds because they’re less salty, but roasted works too.
- Baby carrots or cucumber slices (1/2 cup per box) – For that extra veggie crunch. Cucumbers are hydrating, but carrots hold up better if you’re prepping for the week.
- Hummus or ranch dip (2 tablespoons per box) – Optional, but highly recommended. It adds moisture and flavor. I like classic hummus for extra protein.
For substitutions, you can swap turkey for ham or roast beef. Use your favorite cheese—pepper jack adds a kick. If you’re allergic to nuts, try sunflower seeds or pumpkin seeds instead. The key is to keep the protein-to-crunch ratio balanced. I’ve also used leftover grilled chicken instead of turkey when I had it on hand, and it was fantastic. Just chop it into bite-sized pieces.
Equipment Needed
You don’t need much for this recipe, which is part of the appeal. Here’s what I use:
- Meal prep containers with compartments – I love the Bento-style boxes with dividers. They keep everything separate so nothing gets soggy. Look for BPA-free plastic or glass. Glass is heavier but lasts longer.
- Small saucepan for boiling eggs – Any pot will do. I use a 2-quart saucepan because it’s the perfect size for 6 eggs.
- Sharp knife and cutting board – For slicing apples, cubing cheese, and rolling turkey. A good knife makes prep faster and safer.
- Muffin tin or egg holder – Not required, but it keeps boiled eggs from rolling around in the fridge. I use a silicone egg holder I found at the dollar store.
- Ziplock bags or small containers – For storing nuts and grapes separately if you’re prepping in bulk. Keeps everything fresh longer.
If you don’t have compartment containers, just use regular Tupperware and separate ingredients with parchment paper or silicone muffin cups. It works just fine. I’ve also used bento boxes meant for kids—they’re actually perfect for adult portions too. Budget tip: hit up the dollar store for containers. They’re cheap and work great for meal prep.
Preparation Method
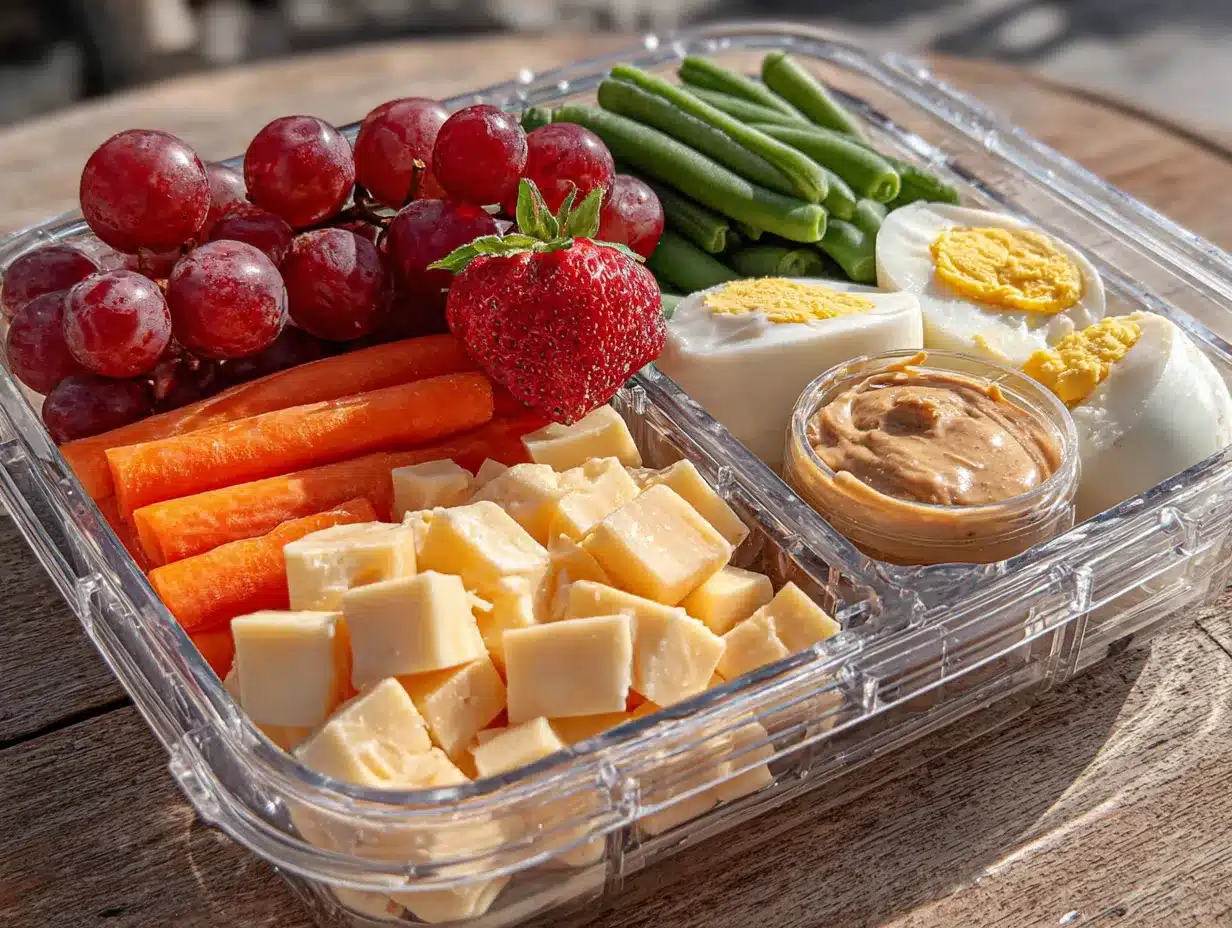
Let’s walk through this step by step. It’s simple, but each step matters for keeping everything fresh and tasty.
- Boil the eggs (10-12 minutes): Place eggs in a saucepan and cover with cold water. Bring to a rolling boil, then cover and remove from heat. Let sit for 10-12 minutes. Drain and transfer to an ice bath for 5 minutes. Peel and halve. This gives you perfect hard-boiled eggs every time—no green yolks.
- Prep the fruit (5 minutes): Wash and dry the grapes. Slice the apple into thin wedges and toss with a squeeze of lemon juice to prevent browning. I use about 1 teaspoon of lemon juice per apple. It sounds fussy, but it makes a huge difference by day three.
- Cube the cheese (3 minutes): Cut the cheddar into 1/2-inch cubes. Try to make them uniform so they’re easy to grab. I usually cube a whole block at once and store in a baggie.
- Roll the turkey (2 minutes): Take each slice of turkey and roll it tightly from one end to the other. Slice each roll in half if you want bite-sized pieces. This makes them easier to eat with one hand while you’re grading papers.
- Portion the nuts and veggies (2 minutes): Measure out almonds and baby carrots or cucumber slices. If using cucumber, slice into rounds and pat dry with a paper towel to remove excess moisture.
- Assemble the boxes (5 minutes): Divide the ingredients among your containers. Place eggs in one compartment, turkey rolls in another, cheese cubes in a third, and fruit and veggies in the remaining sections. If using hummus or ranch, add it to a small compartment or use a mini silicone cup to keep it separate.
- Store properly (1 minute): Seal the containers and refrigerate. They’ll stay fresh for up to 4 days. For best results, add the nuts and grapes just before eating to keep them crunchy.
A few notes from my trial and error: Don’t slice the apples too thin, or they’ll get mushy. And if you’re prepping for Monday through Friday, make the boxes on Sunday night. That way, you’re set for the whole week. I’ve also found that leaving the eggs whole (unpeeled) helps them stay fresh longer, but peeling them ahead saves time in the morning. Your call.
Cooking Tips & Techniques
I’ve made this snack box probably a dozen times now, and I’ve learned a few things the hard way. Here’s what I wish someone had told me:
- Don’t skip the lemon juice on the apples. I did once, thinking it wouldn’t matter. By Wednesday, my apple slices looked like they’d been through a war. A quick toss in lemon juice keeps them bright and crisp for days.
- Pat everything dry. Wet ingredients make the other stuff soggy. After washing grapes and cucumbers, dry them thoroughly with a clean towel. Same goes for the cheese—if it’s sweating, pat it dry before cubing.
- Use a muffin tin for egg organization. After boiling, I place the peeled eggs in a muffin tin and cover with plastic wrap. It keeps them from rolling around and getting bruised. Genius, right?
- Layer strategically. Put the wetter ingredients (like fruit) on one side and dry ingredients (like nuts) on the other. If your container doesn’t have dividers, use silicone muffin cups to create separation.
- Don’t overfill. It’s tempting to cram as much as possible into each box, but leaving a little space prevents squishing. You want each bite to feel intentional, not smashed.
One mistake I made early on? Adding the nuts directly to the container on Sunday. By Thursday, they were soft and sad. Now I keep them in a separate baggie and add them the morning of. It takes an extra 10 seconds and makes a world of difference. Also, if you’re using hummus, put it in a small container with a tight lid—otherwise it leaks into everything.
Variations & Adaptations
This snack box is endlessly customizable. Here are some of my favorite variations:
- Vegetarian version: Swap the turkey for extra cheese or add roasted chickpeas for protein. You can also use hard-boiled eggs as your main protein and add avocado slices for healthy fats.
- Low-carb / Keto-friendly: Skip the grapes and apples. Add more cheese, nuts, and cucumber slices. You can also include celery sticks with almond butter for crunch without the carbs.
- Kid-friendly twist: Use ham instead of turkey (kids love it), and add a small treat like a few dark chocolate chips or a mini cookie. My niece goes crazy for this version.
- Seasonal swap: In summer, use fresh berries instead of apples. In fall, add sliced pears or a handful of dried cranberries. It keeps things interesting all year round.
- Spicy kick: Add pickled jalapeños or a dash of hot sauce to the hummus. Or use pepper jack cheese for a subtle heat that builds as you eat.
I once tried a version with salami instead of turkey, and it was amazing—the saltiness paired perfectly with the sweet grapes. Just watch the sodium if that’s a concern. You can also swap the almonds for cashews or pecans depending on what you have in the pantry. The beauty of this recipe is that it’s a template, not a rulebook.
Serving & Storage Suggestions
These snack boxes are designed to be eaten cold, straight from the fridge. No reheating needed—just grab and go. I like to serve mine with a cold brew coffee or a big glass of water, especially on those long afternoons.
For storage, keep the boxes in the refrigerator for up to 4 days. If you’re prepping for the full work week, make them on Sunday and eat them Monday through Thursday. By Friday, the apples might start to soften, so I usually make a smaller batch for the end of the week.
If you want to freeze them, I don’t recommend it—the texture of the eggs and cheese changes when thawed. But you can freeze the nuts and grapes separately if you want to stock up. Just thaw overnight in the fridge.
One thing I’ve noticed: the flavors actually meld together a little after a day or two. The cheese takes on a slight hint of apple, and the turkey gets a tiny bit of sweetness from the grapes. It’s subtle, but it makes each box taste a little different as the week goes on. I actually prefer day 2 over day 1 for that reason.
Nutritional Information & Benefits
Here’s the rough nutritional breakdown for one snack box (based on the ingredients listed above):
| Nutrient | Amount |
|---|---|
| Calories | 380-420 |
| Protein | 28-32g |
| Carbohydrates | 25-30g |
| Fat | 18-22g |
| Fiber | 6-8g |
| Sugar | 15-18g (natural from fruit) |
The protein from the eggs, turkey, and cheese keeps you full and focused—perfect for those back-to-back classes. The almonds add healthy fats that support brain function (hello, lesson planning). And the fruit provides natural energy without the crash you get from processed snacks. This snack box is naturally gluten-free and can be made dairy-free by swapping the cheese for plant-based alternatives. Just be mindful of sodium if you’re watching your intake—the turkey and cheese can add up.
Conclusion
Look, I know meal prep can feel like a chore. But this Easy Teacher Meal Prep Protein Snack Box is different. It’s not about spending hours in the kitchen—it’s about spending 15 minutes once a week and saving yourself from vending machine regret. I’ve been there, and this is better.
I love this recipe because it’s honest. It doesn’t pretend to be gourmet or complicated. It’s just good food, packed with intention, designed to make your day a little easier. And honestly, isn’t that what we all need?
Try it this week. Customize it to your tastes. And if you come up with a killer variation, I want to hear about it. Drop a comment below or tag me in your snack box photos. Let’s make lunchtime something to look forward to, one compartment at a time.
Frequently Asked Questions
Can I prep these snack boxes for the whole week?
Yes! They stay fresh for up to 4 days in the fridge. Just keep the nuts separate until you’re ready to eat to maintain crunchiness.
What if I don’t have compartment containers?
No problem. Use regular containers and separate ingredients with silicone muffin cups or parchment paper. It works just as well.
Can I use pre-cooked chicken instead of turkey?
Absolutely. Leftover grilled or rotisserie chicken works great. Just chop it into bite-sized pieces and add it to the box.
How do I keep the apple slices from turning brown?
Toss them in a little lemon juice (about 1 teaspoon per apple). It’s a simple trick that keeps them looking fresh for days.
Is this snack box kid-friendly?
Yes! My niece loves it. Just swap the turkey for ham and add a small treat like dark chocolate chips to make it extra special.
Pin This Recipe!
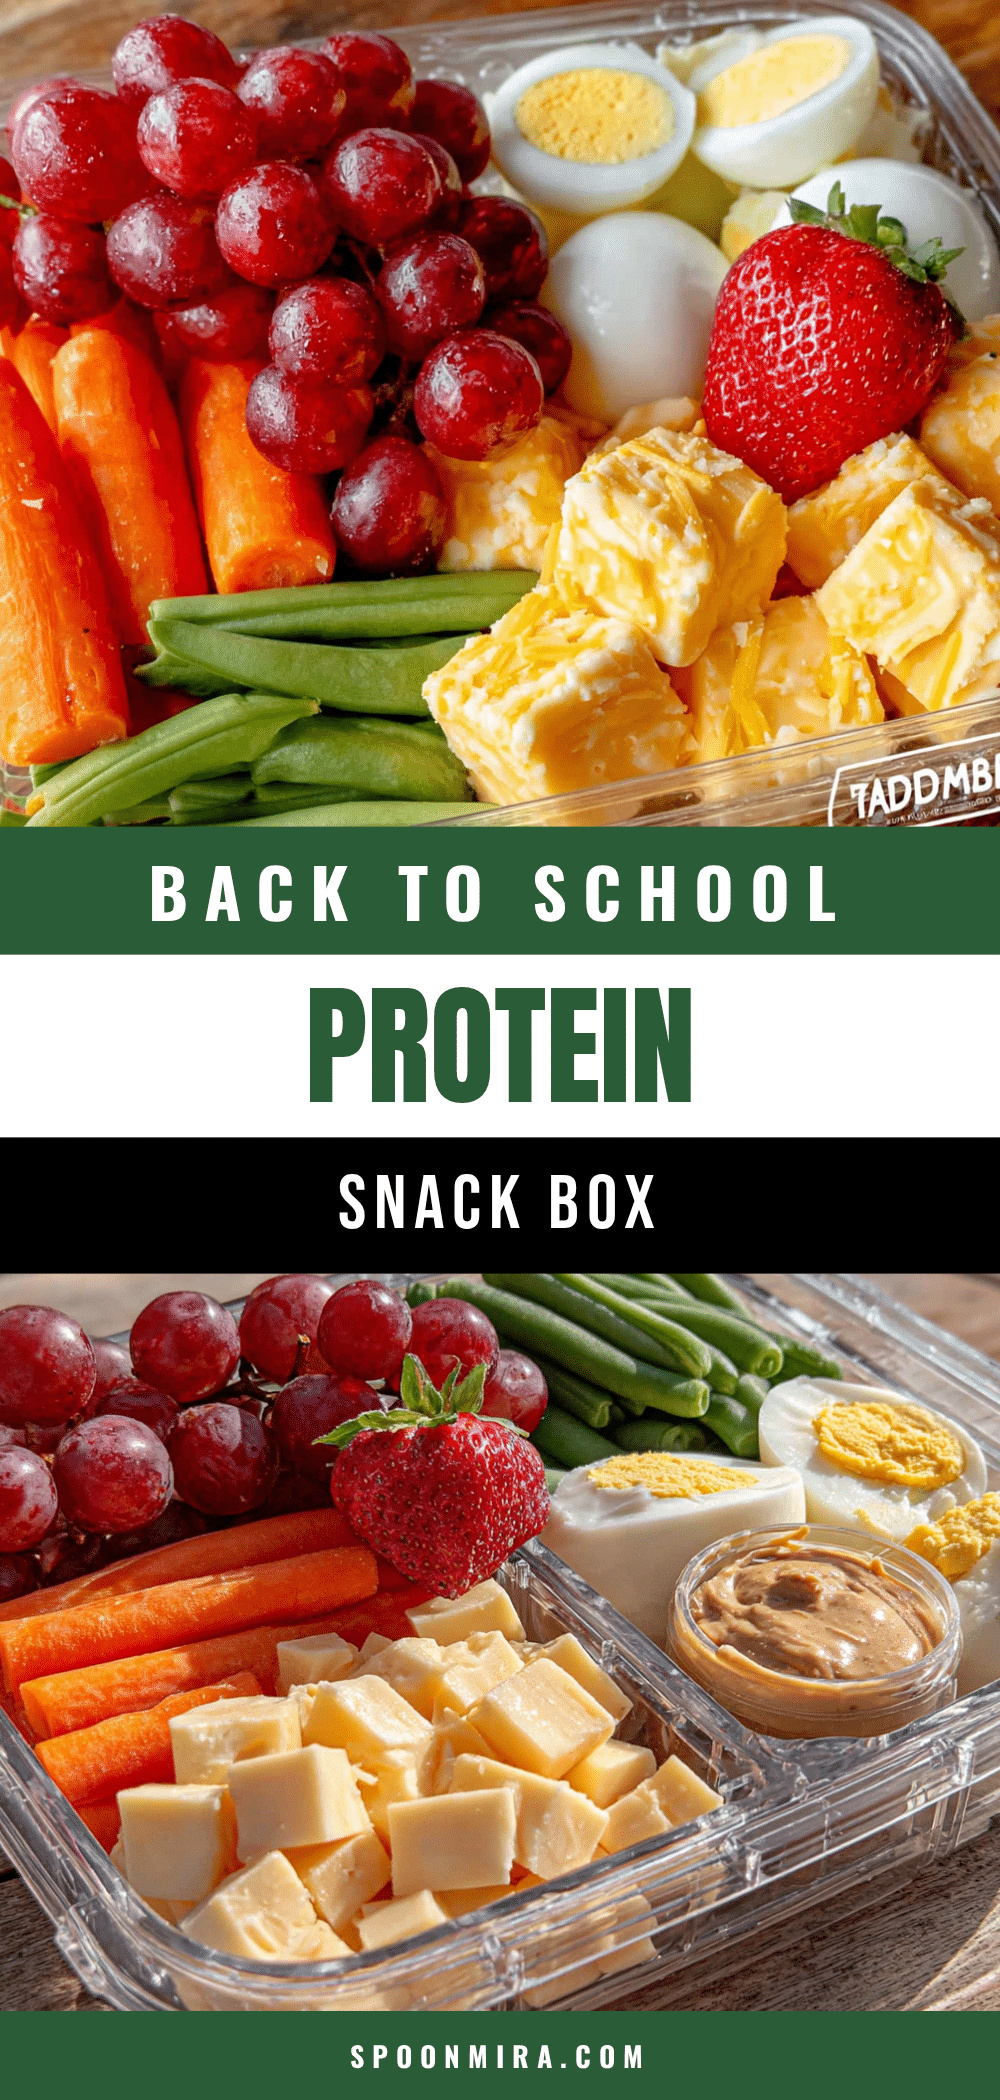
Easy Teacher Meal Prep Protein Snack Box
A balanced, prepped snack box with hard-boiled eggs, turkey roll-ups, cheese cubes, fresh fruit, and nuts. Perfect for busy mornings and on-the-go snacking.
- Prep Time: 15 minutes
- Cook Time: 12 minutes
- Total Time: 27 minutes
- Yield: 4 servings
- Category: Snack
- Cuisine: American
Ingredients
- Hard-boiled eggs, peeled and halved (2 per box)
- Turkey breast deli slices, rolled up (3-4 slices per box)
- Cheddar cheese cubes (1/4 cup per box)
- Apple slices, tossed in lemon juice (1/2 apple per box)
- Grapes, red or green (1/2 cup per box)
- Almonds or walnuts (1/4 cup per box)
- Baby carrots or cucumber slices (1/2 cup per box)
- Hummus or ranch dip (2 tablespoons per box, optional)
Instructions
- Boil the eggs: Place eggs in a saucepan and cover with cold water. Bring to a rolling boil, then cover and remove from heat. Let sit for 10-12 minutes. Drain and transfer to an ice bath for 5 minutes. Peel and halve.
- Prep the fruit: Wash and dry the grapes. Slice the apple into thin wedges and toss with a squeeze of lemon juice to prevent browning.
- Cube the cheese: Cut the cheddar into 1/2-inch cubes.
- Roll the turkey: Take each slice of turkey and roll it tightly from one end to the other. Slice each roll in half if desired.
- Portion the nuts and veggies: Measure out almonds and baby carrots or cucumber slices. If using cucumber, slice into rounds and pat dry.
- Assemble the boxes: Divide the ingredients among your containers. Place eggs in one compartment, turkey rolls in another, cheese cubes in a third, and fruit and veggies in the remaining sections. If using hummus or ranch, add it to a small compartment or use a mini silicone cup.
- Store properly: Seal the containers and refrigerate. They’ll stay fresh for up to 4 days. For best results, add the nuts and grapes just before eating.
Notes
Don’t skip the lemon juice on the apples to prevent browning. Pat all ingredients dry to avoid sogginess. Keep nuts separate until eating to maintain crunch. For best results, prep on Sunday for the week ahead.
Nutrition
- Serving Size: 1 snack box
- Calories: 400
- Sugar: 16
- Sodium: 600
- Fat: 20
- Saturated Fat: 8
- Carbohydrates: 28
- Fiber: 7
- Protein: 30
Keywords: meal prep, protein snack box, teacher lunch, healthy snack, easy lunch, bento box, high protein, gluten-free


