My friend Jenna had sworn off Halloween baking for years. “Too much effort for something that gets thrown away,” she’d say every October, watching me haul out sprinkles and gel colors. She was the type who bought candy from the drugstore and called it a party. Then last year, I was testing these witch finger pretzel rods “just for my blog” and caught her sneaking one from the back of the tray when she thought I wasn’t looking. “These are actually good,” she mumbled, almond nail crunching between her teeth. The woman who’d rather scrub baseboards than pipe spooky designs had been caught red-handed, and honestly, I’ve never felt more validated.
I mean, let me tell you—I get the hesitation. Halloween treats can be a total letdown. Too sweet, too messy, too much fondant that tastes like sweetened cardboard. But these Spooky Witch Finger Pretzel Rods with Almond Nails? They’re different. They’re salty and chocolatey with this little almond crunch that makes you forget you’re eating something that looks like it crawled out of a witch’s garden. The first time I made them, I accidentally used salted butter instead of unsalted, and you know what? It worked. The salt cut through the sweetness perfectly, and now I do it on purpose every time.
These rods have become my go-to Halloween contribution because they’re genuinely fun to make and even better to eat. Maybe you’ve been there—staring at a Pinterest board full of elaborate sugar cookies and feeling your soul leave your body. These are the antidote. They take about thirty minutes from start to finish, no rolling pins required, and they actually taste like something you’d want to eat. The almond nails give them this satisfying snap that makes the whole experience weirdly delightful. Honestly, I keep making them because they’re the one Halloween treat that disappears before the candy bowl does.
Why You’ll Love This Recipe
- Quick & Easy: You can have these done in under 30 minutes, start to finish. No chilling, no rolling, no complicated piping. Just dip, decorate, and let them set. Perfect for last-minute Halloween prep or when the kids are bouncing off the walls and you need a fast win.
- Simple Ingredients: Pretzel rods, chocolate, almonds, and a few drops of food coloring. That’s it. You probably have most of this in your pantry right now, which means no frantic trips to the craft store for specialty candy melts.
- Perfect for Halloween Parties: These are the kind of treat that makes people stop and take pictures before they even take a bite. They’re creepy without being gross, which is the sweet spot for Halloween snacks. Great for classroom parties, office potlucks, or just scaring your roommate.
- Crowd-Pleaser: Kids love the witch finger look, and adults love that they’re not cloyingly sweet. The salty pretzel balances the chocolate in a way that keeps people coming back. I’ve watched grown men eat four of these in a row without blinking.
- Unbelievably Delicious: Let’s be honest—most spooky treats taste like regret and food coloring. These actually taste good. The combination of crunchy pretzel, smooth chocolate, and nutty almond is genuinely satisfying. You’ll want to eat them even when it’s not Halloween.
What makes these different from every other spooky pretzel recipe out there is the method. Most versions use candy melts that taste waxy and weird. I use real semi-sweet chocolate with a tiny bit of coconut oil for that perfect snap and shine. The almond nails aren’t just decorative—they add texture and a subtle nutty flavor that makes the whole thing feel intentional. I tested this with white chocolate, dark chocolate, and even butterscotch chips, and semi-sweet won every time. It’s not just another Halloween treat—it’s the one you’ll actually look forward to making next year.
There’s something deeply satisfying about watching someone’s face shift from “ew, gross” to “wait, can I have another?” That’s the magic of these witch finger rods. They’re comfort food dressed up in a costume, and honestly, isn’t that what Halloween is all about?
What Ingredients You Will Need
This recipe uses simple, everyday ingredients to create something that looks complicated but isn’t. The key is using good-quality chocolate and fresh almonds—the rest is mostly assembly. Here’s what you’ll need:
- 24 pretzel rods (standard size, about 9 inches long. I use Snyder’s because they’re sturdy and don’t break easily during dipping)
- 12 ounces semi-sweet chocolate chips (I recommend Ghirardelli or Guittard for the smoothest melt. Avoid chocolate that contains wax or paraffin)
- 1 tablespoon coconut oil or vegetable shortening (this thins the chocolate slightly for easier dipping and gives it a nice shine. Coconut oil adds a subtle flavor that pairs well with chocolate)
- 24 whole almonds (skin-on almonds look more realistic for witch nails. If you only have blanched, they’ll work, but the brown skin adds to the spooky effect)
- Green gel food coloring (I use Wilton Leaf Green or Americolor Avocado. Liquid food coloring won’t work here—it’ll seize the chocolate. Gel is non-negotiable)
- Purple or red gel food coloring (optional, for adding a “bruised” look to the fingers. A tiny dot of purple mixed into the green gives a more realistic witchy tone)
- 1 teaspoon vanilla extract (optional, but it rounds out the chocolate flavor nicely. Skip if you’re using vanilla-scented candy melts instead)
For the “blood” detail (optional but recommended):
- 2 tablespoons white chocolate chips (melted, for the cuticle area around the almond nail)
- Red gel food coloring (to tint the white chocolate pink or red. I use Americolor Super Red for a realistic blood look)
- 1 teaspoon coconut oil (to thin the white chocolate for drizzling)
Ingredient tips from my kitchen: If you’re dairy-free, use dairy-free chocolate chips and skip the white chocolate detail. The coconut oil works perfectly for both. For a darker, more dramatic look, use dark chocolate with 60% cacao or higher—it gives the fingers a more aged, withered appearance. I once used milk chocolate and the fingers looked too cheerful, like they belonged on a cartoon witch instead of a scary one.
For the almonds, try to pick ones that are similar in size and shape. You want them to look like actual fingernails, not random nut fragments. I sort through the bag and pick the most almond-shaped almonds. Yes, that’s a thing I do, and no, I’m not ashamed.
If you can’t find pretzel rods, pretzel sticks will work, but they’re thinner and more fragile. You’ll get more pieces per batch, but they break easier during dipping. I’ve also used churro-style pretzels from the freezer section, but they’re softer and don’t hold up as well for the witch finger effect.
Equipment Needed
You don’t need much for this recipe, which is part of why I love it. Here’s what you’ll need:
- Baking sheet (lined with parchment paper or a silicone baking mat. The chocolate will stick to foil, so avoid that unless you want a mess)
- Microwave-safe bowl (glass or ceramic works best. Avoid plastic bowls—they can retain odors and affect the chocolate flavor)
- Spoon or offset spatula (for dipping and spreading. A regular dinner spoon works fine, but an offset spatula gives you more control)
- Small piping bag or zip-top bag (for the white chocolate details. A zip-top bag with the corner snipped off works perfectly and saves you from buying piping tips)
- Toothpicks (for creating knuckle lines and wrinkles. I use bamboo ones because they’re sturdier than plastic)
- Small bowl (for melting the white chocolate separately)
- Parchment paper (essential for easy cleanup and preventing sticking. I buy the pre-cut sheets to save time)
Budget-friendly alternatives: If you don’t have a piping bag, seriously, just use a sandwich bag. I’ve been doing it for years and it works great. No offset spatula? A butter knife works in a pinch. No microwave? Use a double boiler on the stove—just make sure the bowl doesn’t touch the water or your chocolate will seize. I learned that one the hard way, and it’s not a fun cleanup.
I prefer using a silicone baking mat because the chocolate releases perfectly every time, but parchment paper is a close second. If you’re using parchment, make sure it’s weighed down at the corners so it doesn’t curl up and touch your wet chocolate. Ask me how I know.
Preparation Method
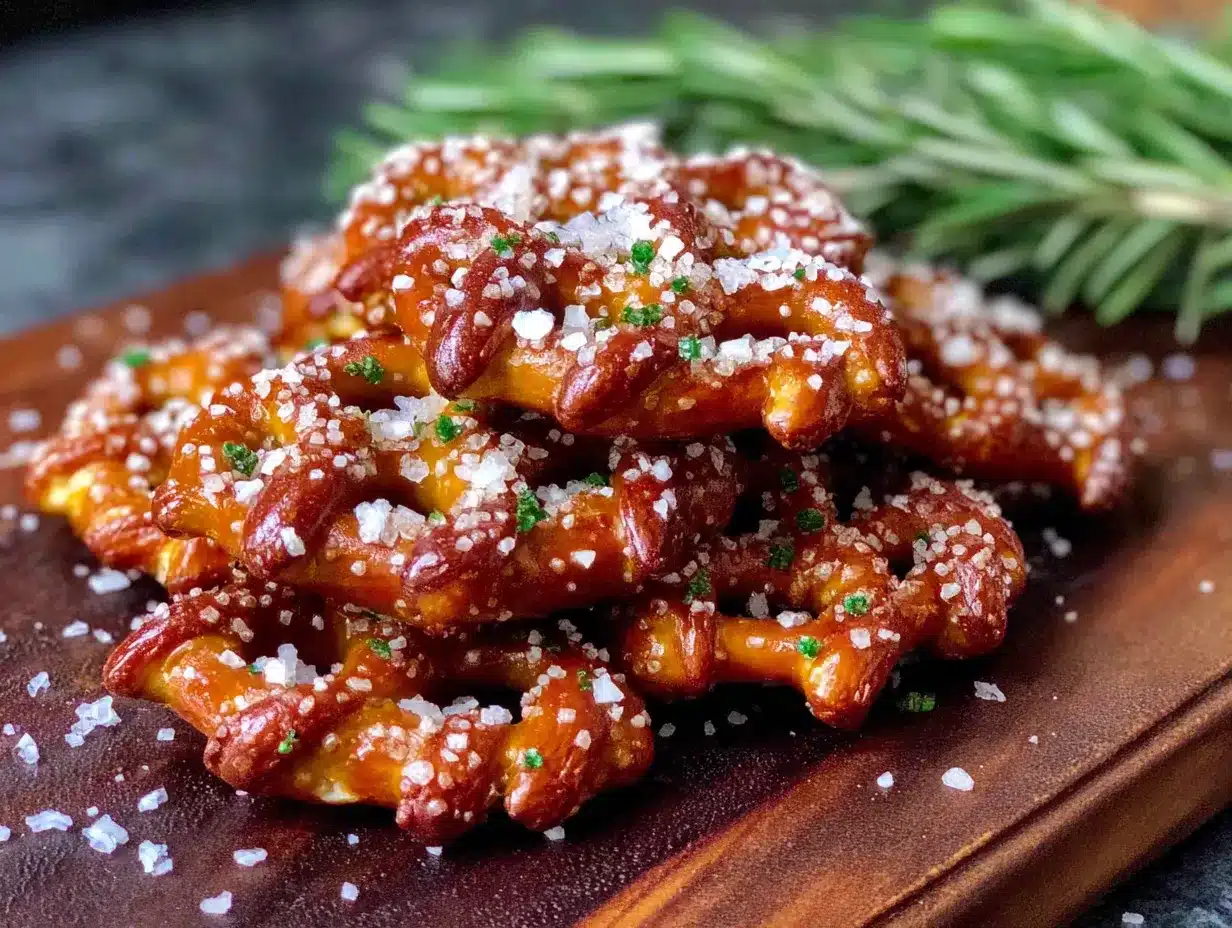
Alright, let’s make some witch fingers. Set aside about 30 minutes for this—the actual work takes 15, and the rest is waiting for chocolate to set. Here’s how it goes:
- Prepare your workspace. Line a baking sheet with parchment paper or a silicone mat. You want enough room to lay out all 24 pretzel rods without them touching. If you don’t have a big enough sheet, use two. Clear your counter of distractions—once you start dipping, you want to move quickly before the chocolate sets.
- Toast the almonds (optional but recommended). Spread the whole almonds on a separate baking sheet and toast them at 350°F for 5-7 minutes, just until they’re fragrant. Let them cool completely. This step isn’t mandatory, but it brings out the nutty flavor and makes the “nails” taste better. I skipped it once and the almonds tasted flat. Never again.
- Melt the chocolate. Combine the semi-sweet chocolate chips and 1 tablespoon coconut oil in a microwave-safe bowl. Microwave in 30-second intervals, stirring thoroughly between each. It usually takes about 90 seconds total. Stop when the chocolate is mostly melted—the residual heat will finish the job. Don’t overheat or your chocolate will seize and turn into a grainy mess. If that happens, you can sometimes save it by adding a teaspoon of coconut oil and stirring vigorously, but it’s better to just be careful.
- Add the color. Stir in the green gel food coloring one drop at a time. You want a sickly, witchy green—not bright neon. Start with two drops and add more until you’re satisfied. If you’re using purple for a bruised effect, add a tiny dab—like, the size of a pinhead—and mix thoroughly. The color should look like something that crawled out of a swamp, not like a St. Patrick’s Day decoration.
- Dip the pretzels. Hold one pretzel rod by the end and dip it into the melted green chocolate, leaving about an inch undipped at the top (this will be the “base” of the finger). Use a spoon to help coat it evenly if needed. Let the excess chocolate drip back into the bowl—you want a thin, even coating, not a thick glob. Place the dipped pretzel on the prepared baking sheet. Repeat with all 24 rods. Work quickly because the chocolate will start to set after about 10 minutes.
- Attach the almond nails. While the chocolate is still wet, press one whole almond onto the tip of each pretzel rod. The pointed end of the almond should face outward, like a fingernail. Press gently so it adheres but doesn’t squish the chocolate. If the chocolate has started to set, you can dab a little melted chocolate on the back of the almond before attaching it. I’ve done this and it works fine, just takes a little longer.
- Create the knuckle lines. Before the chocolate sets completely (about 5 minutes after dipping), use a toothpick to draw horizontal lines across the pretzel to simulate knuckles. I do two or three lines per finger, spaced about an inch apart. You can also add tiny vertical lines to look like wrinkles. Don’t overdo it—realistic witch fingers have subtle texture, not a roadmap. A light touch is better.
- Make the “blood” detail. Melt the white chocolate chips with 1 teaspoon coconut oil in a small bowl, using the same microwave method. Stir in red gel food coloring until you get a pinkish-red color—think watered-down blood, not straight from the vein. Transfer to a small piping bag or zip-top bag with the corner snipped off. Pipe a tiny line around the base of each almond nail, like cuticle blood. Don’t go overboard—a little goes a long way, and too much looks like a crime scene instead of a snack.
- Let them set. Place the baking sheet in the refrigerator for 10-15 minutes, or until the chocolate is completely firm. If you’re in a hurry, the freezer works in 5 minutes, but watch them carefully—chocolate can bloom (develop white streaks) if it gets too cold too fast. They’re ready when the chocolate looks matte and feels hard to the touch.
- Finishing touches. Once set, you can add extra details like green sprinkles for warts or a dusting of powdered sugar for a “dusty” effect. I sometimes pipe a tiny green dot on the almond nail for a fungus look, but that’s optional and maybe a little extra. Store them in an airtight container at room temperature or in the fridge.
Sensory cues to watch for: The chocolate should be glossy and smooth when you dip, not thick or clumpy. The almond should feel secure when pressed in—if it slides off, the chocolate is too set and you need to warm it slightly. The knuckle lines should look like gentle indentations, not deep gashes. When they’re done, they should look like something a witch would be proud to have attached to her hand.
Cooking Tips & Techniques
I’ve made these witch finger rods about a dozen times, and I’ve learned a few things the hard way. Here’s what I wish someone had told me:
Temperature is everything. If your chocolate is too hot when you dip, it’ll run off the pretzel and pool on the parchment. Too cold, and you’ll get thick, lumpy fingers that look more like swamp creatures than witch hands. The sweet spot is when the chocolate is warm to the touch but not hot—about 90°F if you’re using a thermometer. I test it by dabbing a little on my wrist, like you would with baby formula. Sounds weird, but it works.
Don’t overcrowd your dipping station. I made the mistake of trying to dip six pretzels at once and ended up with chocolate everywhere—on my hands, on the counter, somehow on the ceiling. Work with one pretzel at a time and give each one your full attention. The process is meditative if you let it be.
The almond nail placement matters. I once put the almonds on upside down (point facing inward) and the fingers looked like they had weird, stubby nails. Not the vibe. The pointed end should always face outward, mimicking a real fingernail. Also, make sure the almond is centered on the tip—off-center nails look like a bad manicure, not a spooky witch finger.
Common mistake: over-melting the chocolate. This is the number one way to ruin these. If your chocolate seizes (turns into a thick, grainy paste), you can’t fix it. You have to start over. Always melt in short bursts and stir between each. When you think it’s almost done, stop microwaving and stir until smooth. The residual heat will finish the job.
Multitasking strategy: While the first batch of dipped pretzels is setting in the fridge, clean your bowls and prep for the white chocolate detail. This keeps the momentum going and prevents that “ugh, I have to wash dishes” feeling. I also toast the almonds while the chocolate is melting—it saves time and keeps my kitchen smelling amazing.
For consistency: Use a kitchen scale to portion your chocolate if you’re making a double batch. 12 ounces per 24 pretzels is the sweet spot—too little and you’ll be scraping the bowl, too much and you’ll have waste. I’ve found that a 12-ounce bag of chocolate chips is exactly right for one batch, no measuring needed.
My biggest failure: The first time I made these, I used liquid food coloring and the chocolate seized into a green, chunky disaster. I tried to salvage it by adding more coconut oil, but it just got greasy. I ended up tossing the whole bowl and starting over with gel coloring. Learn from my mistakes—gel only, and add it drop by drop.
Variations & Adaptations
One of the best things about this recipe is how easy it is to adapt. Here are some variations I’ve tried and loved:
Vegan version: Use dairy-free dark chocolate chips and skip the white chocolate detail. The coconut oil keeps everything smooth and shiny. I’ve made these for a vegan Halloween party and they were a hit—nobody missed the dairy. Just double-check that your pretzels are vegan (most are, but some contain butter or milk powder).
White chocolate witch fingers: Swap the semi-sweet chocolate for white chocolate and use purple or black gel food coloring. The white chocolate gives a softer, more ethereal look—like a ghost witch instead of a swamp witch. Add a drop of lavender oil for a subtle floral note that’s surprisingly good. I did this for a friend’s witch-themed birthday party and they looked gorgeous on a black platter.
Spicy witch fingers: Add a pinch of cayenne pepper or a dash of cinnamon to the melted chocolate before dipping. The heat cuts through the sweetness and gives the fingers a little kick. I tried this on a whim and now I can’t go back—the spicy-chocolate-salty combination is addictive. Start with 1/8 teaspoon and adjust from there. You don’t want it to be overwhelming, just a warm finish.
Gluten-free option: Use gluten-free pretzel rods. They’re a little more fragile, so handle them gently during dipping. I’ve found that the gluten-free ones from Ener-G hold up well and don’t break as easily as some other brands. The rest of the ingredients are naturally gluten-free, so this is an easy swap.
Kid-friendly variation: Skip the “blood” detail and use green sprinkles or edible glitter instead. Kids love the sparkle, and it makes the fingers look magical rather than scary. You can also use candy eyes on the almond nails for a silly effect. My niece calls these “fairy fingers” and requests them for every holiday, not just Halloween.
Personal variation I love: I sometimes dip the undipped end of the pretzel in crushed Oreo crumbs for a “dirt” effect. It adds texture and makes the fingers look like they just crawled out of the ground. Just dip the base in melted chocolate and roll in the crumbs before the chocolate sets. It’s a little extra, but it’s worth it for the presentation.
Serving & Storage Suggestions
These witch finger pretzel rods are best served at room temperature. The chocolate has the perfect snap when it’s not too cold, and the almond nails stay crunchy. If you’ve stored them in the fridge, let them sit out for 10-15 minutes before serving.
Presentation ideas: Arrange the fingers in a “hand” formation on a black platter for maximum creep factor. I like to fan them out like a witch reaching out of the serving dish. You can also stand them upright in a tall glass or mason jar filled with black beans or coffee grounds—it looks like a bouquet of witch fingers, which is both disturbing and delightful.
Complementary dishes: These pair beautifully with a warm mug of spiced apple cider or a pumpkin spice latte. The salty-sweet combo is perfect alongside something warm and cozy. For a full Halloween spread, serve them with mummy hot dogs, ghost-shaped cheese crackers, and a bowl of pumpkin soup. They’re also great as a sweet finish after a chili dinner—the contrast works surprisingly well.
Storage instructions: Store in an airtight container at room temperature for up to 5 days. If your kitchen is warm (above 75°F), keep them in the refrigerator to prevent the chocolate from softening. Layer them between sheets of parchment paper to prevent sticking—I learned this after pulling out a clump of fused-together fingers that looked more like a mutant hand than individual witch fingers.
Freezer instructions: These freeze beautifully for up to 3 months. Place them in a single layer on a baking sheet and freeze until solid, then transfer to a freezer-safe bag or container. To thaw, let them sit at room temperature for about 20 minutes. The chocolate may develop a slight bloom (white streaks) after freezing, but they’ll still taste fine. I’ve made these two weeks before Halloween and they were perfect.
How flavors develop: These are actually better the next day. The chocolate sets fully, the almond flavor melds with the pretzel, and everything becomes more cohesive. If you can resist eating them immediately, let them sit overnight in the fridge. The texture improves and the flavors deepen. I’ve tested this side by side, and day-old fingers are noticeably better.
Nutritional Information & Benefits
Let’s be real—these are a treat, not a health food. But they’re not as bad as you might think. Here’s a rough breakdown per finger rod:
- Calories: Approximately 180-200 per rod
- Fat: 10-12 grams (mostly from chocolate and almonds)
- Carbohydrates: 22-25 grams
- Protein: 3-4 grams
- Fiber: 2-3 grams
- Sugar: 12-15 grams
Health benefits: Dark chocolate (if you use 60% or higher) is rich in antioxidants and can support heart health in moderation. Almonds are packed with vitamin E, healthy fats, and magnesium. Pretzel rods provide quick energy from carbohydrates. So while these aren’t a salad, they’re not empty calories either—you’re getting some nutritional value with your spooky snack.
Dietary considerations: This recipe can be made gluten-free, dairy-free, and vegan with simple substitutions. It contains tree nuts (almonds) and may contain traces of other allergens depending on your chocolate and pretzel brands. Always check labels if you’re serving people with allergies. The recipe is naturally egg-free and soy-free if you choose your chocolate carefully.
My personal take: I believe in enjoying treats without guilt. Halloween comes once a year, and these fingers are worth every calorie. The portion control is built in—one rod is satisfying without being over-the-top. I’d rather eat one of these than a handful of mediocre candy any day. Balance is key, and these fit perfectly into a balanced approach to holiday eating.
Conclusion
These Spooky Witch Finger Pretzel Rods with Almond Nails are the Halloween treat you didn’t know you needed. They’re fun to make, genuinely delicious, and just creepy enough to impress your guests without scaring the kids. The combination of salty pretzel, smooth chocolate, and crunchy almond is surprisingly addictive—I’ve watched people who swore they didn’t like chocolate-covered pretzels eat three in a row.
What I love most about this recipe is how customizable it is. You can make them as scary or as silly as you want, depending on your crowd. Add warts, skip the blood, use different colors—the possibilities are endless. And because they come together in under 30 minutes, you can make them the morning of your Halloween party without breaking a sweat. That’s a win in my book.
I’d love to see how yours turn out! Tag me in your photos, leave a comment with your favorite variation, or tell me about the time you accidentally made your witch fingers look like something out of a comedy sketch instead of a horror movie. We’ve all been there, and honestly, those are the best memories. So grab your pretzels, melt your chocolate, and let’s make some magic happen. Happy Halloween!
Frequently Asked Questions
Can I make these ahead of time?
Absolutely! These store beautifully for up to 5 days at room temperature or 3 months in the freezer. I actually prefer them the next day after the flavors have melded. Just make sure they’re fully set before storing, and layer them with parchment paper to prevent sticking.
Why did my chocolate seize?
Chocolate seizes when it comes into contact with even a tiny amount of water. This can happen if your bowl isn’t completely dry, if you use liquid food coloring, or if you overheat the chocolate. Always use gel food coloring, make sure your equipment is bone-dry, and melt in short bursts. If your chocolate does seize, you can sometimes save it by adding a tablespoon of coconut oil and stirring vigorously, but it’s not guaranteed.
Can I use candy melts instead of chocolate?
Yes, but I don’t recommend it. Candy melts are designed to be easy to work with, but they taste waxy and artificial. Real chocolate gives you a better flavor and texture. If you do use candy melts, look for a brand that uses real cocoa butter and avoid the ones that are mostly palm oil. You’ll still need to add a little coconut oil for the right consistency.
How do I get the almond nails to stick?
The key is pressing the almond into the chocolate while it’s still wet. If the chocolate has started to set, dip the back of the almond in a little melted chocolate before attaching it. Make sure the almond is centered on the tip of the pretzel and press gently but firmly. If it still won’t stick, your chocolate is too cool—warm it up slightly and try again.
Can I use different nuts for the nails?
Sure! Slivered almonds work for a more delicate nail look. Pecan halves give a wider, more rounded nail shape. Macadamia nuts are softer and less realistic but still tasty. I’ve even used sunflower seeds for a tiny, fairy-like nail effect. Just keep in mind that different nuts have different shapes and textures, so the final look will vary. Almonds are the most realistic, but feel free to experiment.
Pin This Recipe!

Spooky Witch Finger Pretzel Rods with Almond Nails

Salty pretzel rods dipped in green-tinted chocolate with almond nails create a delightfully creepy Halloween treat that’s quick to make and surprisingly delicious. These witch finger pretzels are the perfect balance of sweet, salty, and crunchy.
- Prep Time: 15 minutes
- Cook Time: 10 minutes
- Total Time: 30 minutes
- Yield: 24 servings 1x
- Category: Dessert
- Cuisine: American
Ingredients
- 24 pretzel rods (standard size, about 9 inches long)
- 12 ounces semi-sweet chocolate chips
- 1 tablespoon coconut oil or vegetable shortening
- 24 whole almonds (skin-on preferred)
- Green gel food coloring
- Purple or red gel food coloring (optional, for bruised look)
- 1 teaspoon vanilla extract (optional)
- 2 tablespoons white chocolate chips (for blood detail)
- Red gel food coloring (for blood detail)
- 1 teaspoon coconut oil (for blood detail)
Instructions
- Prepare your workspace: Line a baking sheet with parchment paper or a silicone mat. Clear your counter of distractions.
- Toast the almonds (optional but recommended): Spread whole almonds on a baking sheet and toast at 350°F for 5-7 minutes until fragrant. Let cool completely.
- Melt the chocolate: Combine semi-sweet chocolate chips and 1 tablespoon coconut oil in a microwave-safe bowl. Microwave in 30-second intervals, stirring thoroughly between each, until mostly melted (about 90 seconds total).
- Add the color: Stir in green gel food coloring one drop at a time until you achieve a sickly witchy green. Optionally add a tiny dab of purple for a bruised effect.
- Dip the pretzels: Hold one pretzel rod by the end and dip into melted green chocolate, leaving about an inch undipped at the top. Let excess drip off, then place on prepared baking sheet. Repeat with all 24 rods.
- Attach the almond nails: While chocolate is still wet, press one whole almond onto the tip of each pretzel rod with the pointed end facing outward. Press gently to adhere.
- Create knuckle lines: Before chocolate sets completely (about 5 minutes after dipping), use a toothpick to draw 2-3 horizontal lines across each pretzel to simulate knuckles. Add tiny vertical lines for wrinkles if desired.
- Make the blood detail: Melt white chocolate chips with 1 teaspoon coconut oil in a small bowl using the same microwave method. Stir in red gel food coloring until pinkish-red. Transfer to a small piping bag or zip-top bag with corner snipped off. Pipe a tiny line around the base of each almond nail.
- Let them set: Place baking sheet in refrigerator for 10-15 minutes until chocolate is completely firm. Alternatively, freeze for 5 minutes but watch carefully to prevent blooming.
- Finishing touches: Once set, optionally add green sprinkles for warts or a dusting of powdered sugar. Store in an airtight container at room temperature or in the fridge.
Notes
Use gel food coloring only—liquid will seize the chocolate. For best results, toast almonds to enhance flavor. Work quickly when dipping as chocolate sets in about 10 minutes. Store in an airtight container at room temperature for up to 5 days or freeze for up to 3 months.
Nutrition
- Serving Size: 1 pretzel rod
- Calories: 190
- Sugar: 13
- Sodium: 180
- Fat: 11
- Saturated Fat: 5
- Carbohydrates: 23
- Fiber: 2
- Protein: 3
Keywords: Halloween treats, witch finger pretzels, spooky snacks, chocolate covered pretzels, almond nails, easy Halloween recipe, party snacks