The way the quinoa catches the light after it’s been tossed with lime juice — that’s what I was chasing. Not the protein count, not the meal-prep efficiency, though both are nice bonuses. Just those tiny, translucent pearls of grain, glistening against the creamy green of diced avocado and the deep brown of a roasted chickpea. And that’s the whole point of this bowl. Everything else — the crunch, the tang, the little pop of salt — is just supporting the texture story.
I started making these bowls on a Sunday night a few years back, after a week of watching my youngest pick at sad, soggy cafeteria salads. You know the ones. They looked fine on the tray but wilted into a depressing heap by second period. I wanted something that would actually hold up in a lunch bag, something that wouldn’t need reheating and could be eaten cold or at room temperature without complaint. Honestly, I was tired of the sandwich rut too. So I grabbed a bag of quinoa, a couple of avocados that were finally ripe, and a can of chickpeas I’d been ignoring in the pantry.
The first version was a mess — too dry, not enough salt, the chickpeas went soft instead of crunchy. But I kept tweaking. I learned that you have to roast those chickpeas until they’re almost too dark, and you absolutely cannot skip the lime. That first truly good batch? My kid ate it three days in a row without being asked. That’s when I knew I’d stumbled onto something real, something that could actually make the school lunch rotation feel less like a chore and more like a tiny act of care. This wholesome high school lunch bowl with quinoa avocado and roasted chickpeas isn’t just a recipe. It’s a survival tool for the lunch-packing parent.
Why You’ll Love This Recipe
Let’s be honest — packing a lunch that your teenager will actually eat feels like a small miracle. This bowl delivers on flavor and practicality without any of the fuss. I’ve tested it on picky eaters, busy athletes, and even a few adults who stole bites from the fridge. It works.
- Quick & Easy: Comes together in about 30 minutes of active time, and most of that is just the oven doing the work. Perfect for Sunday meal prep or a quick morning assembly.
- Simple Ingredients: You probably have quinoa, olive oil, and chickpeas in your pantry right now. The fresh stuff — avocado, lime, cherry tomatoes — is a short grocery list, not a scavenger hunt.
- Perfect for School Lunches: It holds up beautifully in a container. No sogginess, no weird textures after a few hours. It’s designed to be eaten cold or at room temperature, which means no microwave lines.
- Crowd-Pleaser: I’ve packed this for field trips, study groups, and even a few road trips. It gets the same reaction every time — quiet, focused eating. That’s the highest compliment.
- Unbelievably Delicious: The contrast between creamy avocado, crunchy chickpeas, and fluffy quinoa is honestly addictive. The lime dressing ties it all together without being heavy.
What makes this bowl different from other grain bowls you’ve seen? It’s the double-roast on the chickpeas. Most recipes tell you to roast them until golden. I say take them further — until they’re deeply browned and almost crackly. That texture is the secret weapon. It doesn’t get lost in the bowl; it stands up and announces itself. And the dressing isn’t a complicated vinaigrette. It’s just lime juice, olive oil, a pinch of cumin, and salt. Simple enough that the ingredients can actually taste like themselves.
This isn’t just another healthy lunch idea. It’s the kind of bowl that makes you feel good about what you’re putting in your body — and your kid’s body — without feeling like a sacrifice. It’s comfort food, reimagined for the lunch bell.
What Ingredients You Will Need
This recipe relies on a short list of pantry-friendly ingredients that come together to create something genuinely satisfying. Each component plays a specific role, from the fluffy base to the crunchy topping and the bright, zesty dressing. Here’s what you’ll need and a few notes on how to choose them.
- Quinoa, 1 cup (uncooked): I prefer white or tri-color quinoa for this bowl. White quinoa is fluffier and milder, while tri-color adds a slightly nuttier flavor and more visual interest. Rinse it well before cooking to remove the bitter saponin coating. (I’ve forgotten this step before — trust me, it matters.)
- Water or Vegetable Broth, 2 cups: Water works perfectly fine, but using a low-sodium vegetable broth adds a subtle layer of flavor that makes the quinoa taste more intentional. I use chicken broth sometimes if I’m feeling extra.
- Canned Chickpeas, 1 (15-ounce) can, drained and rinsed: Look for chickpeas that are firm and not too mushy. I’ve had good luck with the Bush’s Best brand for texture. Pat them very dry with a clean kitchen towel before roasting — this is the key to getting them crunchy.
- Olive Oil, 3 tablespoons (divided): Use a good-quality extra virgin olive oil for the dressing, and a lighter olive oil or avocado oil for roasting the chickpeas. The flavor difference is subtle but noticeable.
- Ripe Avocados, 2 large: You want avocados that yield slightly to gentle pressure but aren’t mushy. If they’re too firm, they won’t have that creamy texture. If they’re overripe, they’ll turn brown in the lunch box. (I’ve learned this the hard way more than once.)
- Cherry Tomatoes, 1 cup, halved: Grape tomatoes work too. In the summer, I use whatever is freshest from the farmer’s market. They add a pop of sweetness and acidity that cuts through the richness.
- Fresh Lime Juice, 3 tablespoons: Bottled lime juice won’t give you the same brightness. Trust me on this one. Roll the limes on the counter before juicing to get the most out of them.
- Ground Cumin, 1/2 teaspoon: This is my secret weapon for the dressing. It adds a warm, earthy note that ties the lime and olive oil together. Toasting it in a dry pan for 30 seconds before adding it to the dressing makes it even more aromatic.
- Salt and Black Pepper, to taste: I use flaky sea salt for finishing and fine sea salt for the dressing. Don’t be shy with the salt on the chickpeas — it helps them get crispy.
- Optional Add-ins: Crumbled feta cheese, toasted pumpkin seeds, fresh cilantro, or a sprinkle of red pepper flakes for heat. I often add a handful of baby spinach or arugula to the bottom of the bowl for extra greens.
For the dressing, you can also whisk in a teaspoon of honey or maple syrup if you like a touch of sweetness. It balances the lime beautifully, especially if your tomatoes aren’t at peak sweetness.
Equipment Needed
You don’t need a fancy kitchen to make this bowl work. A few basic tools will get the job done, and I’ve included some alternatives for specialized equipment.
- Medium saucepan with lid: For cooking the quinoa. A heavy-bottomed pan works best to prevent scorching. If you don’t have a lid, foil works in a pinch.
- Baking sheet: A rimmed baking sheet is ideal for roasting the chickpeas. Line it with parchment paper for easier cleanup. I’ve used a half-sheet pan for years — it’s the most versatile size.
- Chef’s knife and cutting board: For dicing the avocado and halving the tomatoes. A sharp knife makes the avocado cut cleanly without smashing it.
- Mixing bowls: One large bowl for the dressing and one for tossing the quinoa with the dressing. I use stainless steel bowls because they don’t retain odors.
- Measuring cups and spoons: For precise measurements, especially with the quinoa and liquid. I’ve eyeballed it before and ended up with mushy quinoa. Not recommended.
- Whisk or fork: For emulsifying the dressing. A fork works fine if you whisk vigorously.
- Lunch containers: Glass or BPA-free plastic containers with tight-fitting lids. I prefer glass because it doesn’t stain or absorb smells. Mason jars work great for individual portions too.
If you don’t have a baking sheet, you can use a cast-iron skillet or even a toaster oven tray. Just keep an eye on the chickpeas — they cook faster in smaller spaces.
Preparation Method
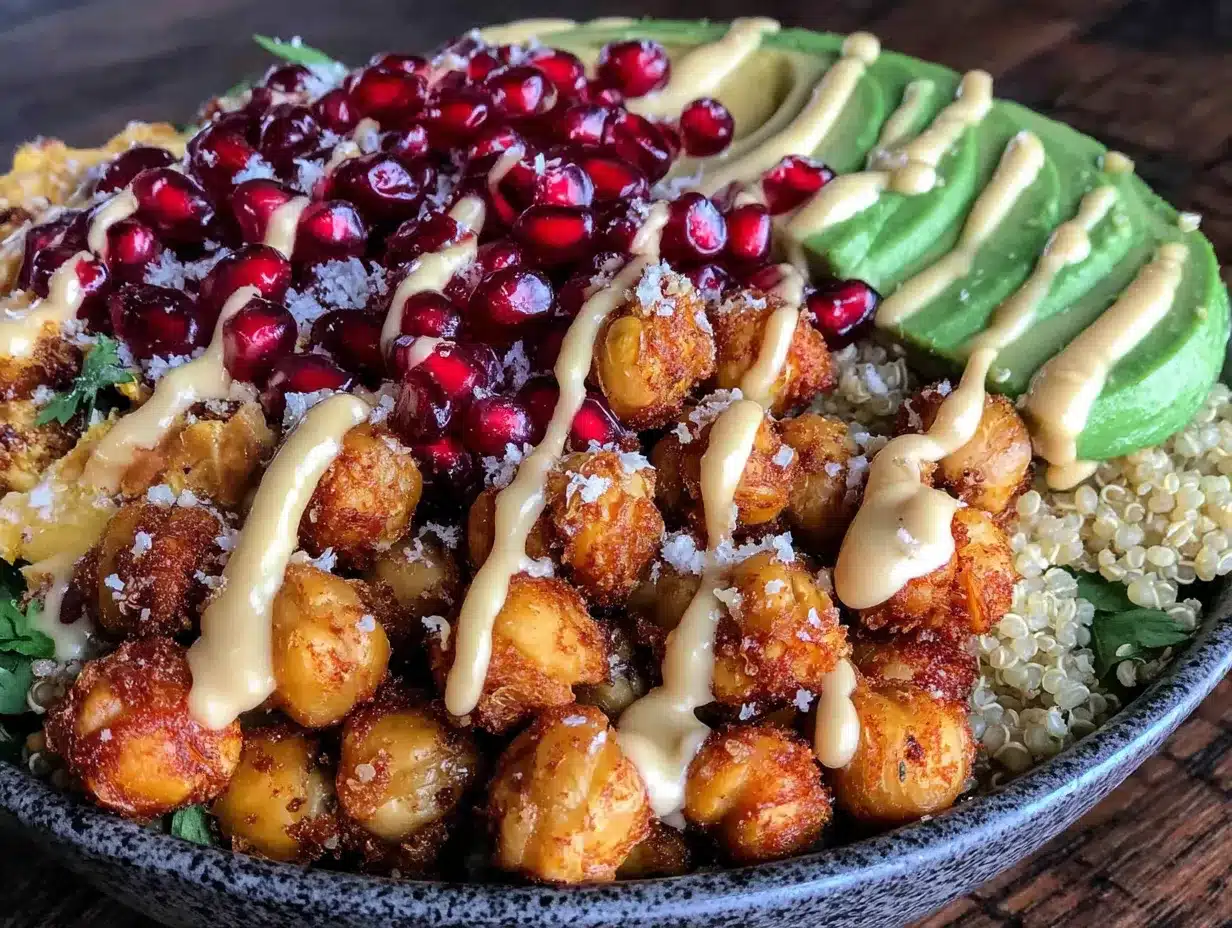
Let’s walk through this step by step. The process is straightforward, but a few small details make a big difference in the final result. Take your time with the chickpeas — they’re the star.
- Preheat your oven to 400°F (200°C). Line a rimmed baking sheet with parchment paper for easy cleanup.
- Cook the quinoa. Rinse 1 cup of quinoa in a fine-mesh strainer under cold water for about 30 seconds. This removes the natural bitterness. Transfer the rinsed quinoa to a medium saucepan and add 2 cups of water or broth. Bring to a boil over high heat, then reduce the heat to low, cover, and simmer for 15 minutes. Remove from heat and let it sit, covered, for 5 minutes. Fluff with a fork. You should have about 3 cups of cooked quinoa. (If it’s still a little wet, leave the lid off for a few minutes to let steam escape.)
- Roast the chickpeas. While the quinoa cooks, drain and rinse 1 can of chickpeas. Spread them on a clean kitchen towel or paper towels and pat them very dry. The drier they are, the crunchier they’ll get. Toss them with 1 tablespoon of olive oil and a generous pinch of salt. Spread them in a single layer on the prepared baking sheet. Roast for 25-30 minutes, shaking the pan halfway through, until they’re deeply golden and slightly crackly. Don’t pull them out when they’re just light brown — take them further. Let them cool on the pan; they’ll continue to crisp up.
- Make the dressing. In a small bowl or jar, whisk together 3 tablespoons of fresh lime juice, 2 tablespoons of olive oil, 1/2 teaspoon of ground cumin, and a pinch of salt and black pepper. Taste it. It should be bright and slightly tangy. If it feels too sharp, add a teaspoon of honey or maple syrup. Set aside.
- Prepare the vegetables. Halve 1 cup of cherry tomatoes. Dice 2 ripe avocados into cubes — about 1/2-inch pieces. If you’re packing this for later, toss the avocado with a little extra lime juice to prevent browning. (It won’t stay perfectly green, but it will look much better than if you skip this step.)
- Assemble the bowl. In a large bowl, combine the fluffed quinoa with about half of the dressing. Toss gently to coat. Divide the dressed quinoa among your lunch containers or serving bowls. Top with the roasted chickpeas, diced avocado, and halved cherry tomatoes. Drizzle the remaining dressing over the top. If you’re adding feta, pumpkin seeds, or cilantro, sprinkle them on now.
- Pack and store. If you’re making these for school lunches, let the bowls cool completely before sealing the lids. This prevents condensation from making the chickpeas soft. Store in the refrigerator for up to 4 days. The chickpeas will lose some crunch over time, but they’ll still be delicious.
Sensory cues to watch for: The quinoa should look fluffy and separate, not clumpy. The chickpeas should make a slight crackling sound when you bite into them. The avocado should be creamy enough to smear slightly when you stir the bowl. The dressing should coat everything without pooling at the bottom.
Cooking Tips & Techniques
I’ve made this bowl maybe thirty times, and I’ve learned a few things the hard way. Here are the tips that actually matter.
The chickpea trick: Most people under-roast their chickpeas. They pull them out when they’re golden and call it done. But the real magic happens in the last five minutes. Let them go until they’re a deep, almost amber brown. They’ll look slightly too dark, but that’s where the crunch lives. And don’t skip the pat-dry step. Wet chickpeas steam instead of roast, and you’ll end up with sad, chewy nubs.
Quinoa texture control: If your quinoa turns out mushy, you probably used too much water or didn’t let it rest long enough. The 15-minute simmer plus 5-minute rest is non-negotiable. And fluff it with a fork, not a spoon. A spoon mashes the grains together. A fork separates them into those beautiful, individual pearls.
Multitasking strategy: Start the quinoa and the chickpeas at the same time. While they’re both doing their thing, you can prep the vegetables and make the dressing. The whole active process takes about 15 minutes. The oven and stovetop do the rest.
My biggest failure: The first time I made this, I didn’t rinse the quinoa. The bitterness was so strong that my kid refused to eat it. I tried to mask it with extra lime and salt, but it was a lost cause. I’ve never skipped the rinse since. Learn from my mistake.
Consistency tip: If you’re meal-prepping for the week, store the dressing separately and add it just before serving. This keeps the quinoa from getting soggy and the avocado from turning brown too quickly. The bowls will last a full 4 days this way, no problem.
Variations & Adaptations
This bowl is endlessly adaptable. Here are a few ways I’ve tweaked it depending on the season, the occasion, or what’s in the fridge.
- Protein swap: Not a chickpea fan? Substitute roasted tofu cubes, shredded rotisserie chicken, or even canned tuna. For a vegetarian version, I’ve used hard-boiled eggs sliced on top. The texture changes, but the bowl still works beautifully.
- Grain swap: Quinoa is my go-to, but cooked farro, brown rice, or even couscous would work. Farro adds a chewier texture that’s really satisfying. If you’re going low-carb, try cauliflower rice — just make sure it’s well-drained so it doesn’t water down the dressing.
- Seasonal vegetables: In the summer, I add diced cucumber and fresh corn kernels. In the fall, roasted sweet potato cubes or pomegranate seeds. In the winter, shaved Brussels sprouts or roasted butternut squash. The formula stays the same: a grain, a protein, a creamy element, and a crunchy topping.
- Dressing variations: Swap the lime-cumin dressing for a lemon-herb version (lemon juice, olive oil, dried oregano, and garlic powder) or a creamy cilantro-lime dressing (Greek yogurt, lime juice, cilantro, and a pinch of salt). Both are excellent.
- Allergen-friendly: This recipe is naturally gluten-free and dairy-free if you skip the feta. For a nut-free version, omit the pumpkin seeds. For a lower-fat option, reduce the olive oil in the dressing to 1 tablespoon and use more lime juice.
I once made a version with roasted beets and goat cheese for a dinner party. It was completely different from the lunch bowl but just as good. That’s the beauty of this formula — it’s a starting point, not a rulebook.
Serving & Storage Suggestions
This bowl is designed to be eaten cold or at room temperature, which makes it ideal for packed lunches. But there are a few tricks to keep everything at its best.
Serving temperature: I prefer this bowl cold, straight from the fridge. The quinoa firms up slightly, and the chickpeas stay crunchy. If you’re serving it at home, you can let it sit out for 10 minutes to take the chill off. The avocado is best when it’s not ice-cold.
Presentation: For a lunch box, layer the ingredients in sections — quinoa on one side, chickpeas on another, avocado and tomatoes in the middle. It looks prettier and keeps the textures separate until the eater mixes it up. For a dinner bowl, pile everything in the center and drizzle the dressing over the top.
Storage: Store in airtight containers in the refrigerator for up to 4 days. I don’t recommend freezing this bowl — the avocado will turn mushy and the chickpeas will lose all their crunch. If you want to freeze the components separately, cook the quinoa and roast the chickpeas, then freeze them in separate bags. Assemble fresh with avocado and tomatoes when you’re ready to eat.
Reheating: This bowl is best enjoyed cold. If you absolutely must reheat it, remove the avocado and tomatoes first, then microwave the quinoa and chickpeas for 30-45 seconds. Add the fresh vegetables back after reheating. The chickpeas won’t be as crunchy, but they’ll still taste good.
Flavor development: The flavors actually meld together beautifully after a day in the fridge. The quinoa absorbs the dressing, and the cumin becomes more pronounced. Day 2 is often better than Day 1. By Day 4, the chickpeas have softened considerably, but the bowl is still delicious.
Nutritional Information & Benefits
This bowl is packed with nutrients that make it a smart choice for growing teenagers and busy adults alike. Here’s a rough estimate per serving (based on 4 servings, without optional add-ins).
| Nutrient | Amount per Serving |
|---|---|
| Calories | ~420 |
| Protein | 14g |
| Healthy Fats | 22g |
| Carbohydrates | 48g |
| Fiber | 12g |
| Sugar | 6g |
| Sodium | ~380mg |
Health highlights: Quinoa is a complete protein, meaning it contains all nine essential amino acids — rare for a plant food. Avocados are rich in heart-healthy monounsaturated fats and potassium, which supports muscle function and blood pressure. Chickpeas provide a solid dose of fiber and plant-based iron, which is especially important for active teens. The lime juice adds a boost of vitamin C, which helps with iron absorption.
Dietary considerations: This recipe is naturally gluten-free, dairy-free (if you skip the feta), and vegetarian. It’s also relatively low in added sugar, with only the natural sugars from the vegetables and optional honey. For a lower-carb version, reduce the quinoa to 1/2 cup and double the vegetables.
Personal perspective: I love that this bowl makes me feel good about what I’m packing. It’s not about deprivation or restriction. It’s about giving my kid — and myself — fuel that actually tastes like food, not a punishment. That’s a win in my book.
Conclusion
This wholesome high school lunch bowl with quinoa avocado and roasted chickpeas has become a staple in our house for good reason. It’s simple enough to throw together on a Sunday afternoon, flexible enough to adapt to whatever’s in the fridge, and satisfying enough to actually get eaten. No more sad, soggy lunches. Just a bowl that holds up, tastes great, and makes you feel like you’ve got your act together.
I hope you’ll give it a try — and then make it your own. Swap in your favorite vegetables, play with the dressing, or add a protein you love. The formula is forgiving. And if you come up with a version that blows your mind, I’d love to hear about it. Drop a comment below or tag me in your photos. Honestly, the best part of sharing recipes is seeing how other people make them their own.
Here’s to lunches that actually get eaten. You’ve got this.
Frequently Asked Questions
Can I make this bowl ahead of time for the whole week?
Absolutely. This bowl is perfect for meal prep. Assemble the components separately and store them in the fridge. Add the dressing just before serving to keep everything fresh. The bowls will last up to 4 days in the refrigerator.
My chickpeas never get crunchy. What am I doing wrong?
The most common mistake is not drying them thoroughly before roasting. Pat them very dry with a clean kitchen towel, and don’t overcrowd the baking sheet. Roast them at 400°F for at least 25 minutes, and let them cool completely on the pan — they’ll continue to crisp up as they cool.
Can I use a different grain instead of quinoa?
Yes! Cooked farro, brown rice, couscous, or even cauliflower rice all work beautifully. Just adjust the cooking time and liquid ratio based on the grain you choose. Farro adds a nice chewy texture that holds up well in lunch boxes.
How do I keep the avocado from turning brown in the lunch box?
Toss the diced avocado with a little extra lime juice before packing it. This helps slow down oxidation. You can also pack the avocado separately and add it just before eating, but the lime juice trick usually does the job for a few hours.
Is this recipe suitable for a gluten-free diet?
Yes, this recipe is naturally gluten-free as long as you use certified gluten-free quinoa and check your spice labels. The chickpeas, avocado, and vegetables are all gluten-free. Just avoid any optional add-ins that might contain gluten, like certain brands of crackers or croutons.
Pin This Recipe!
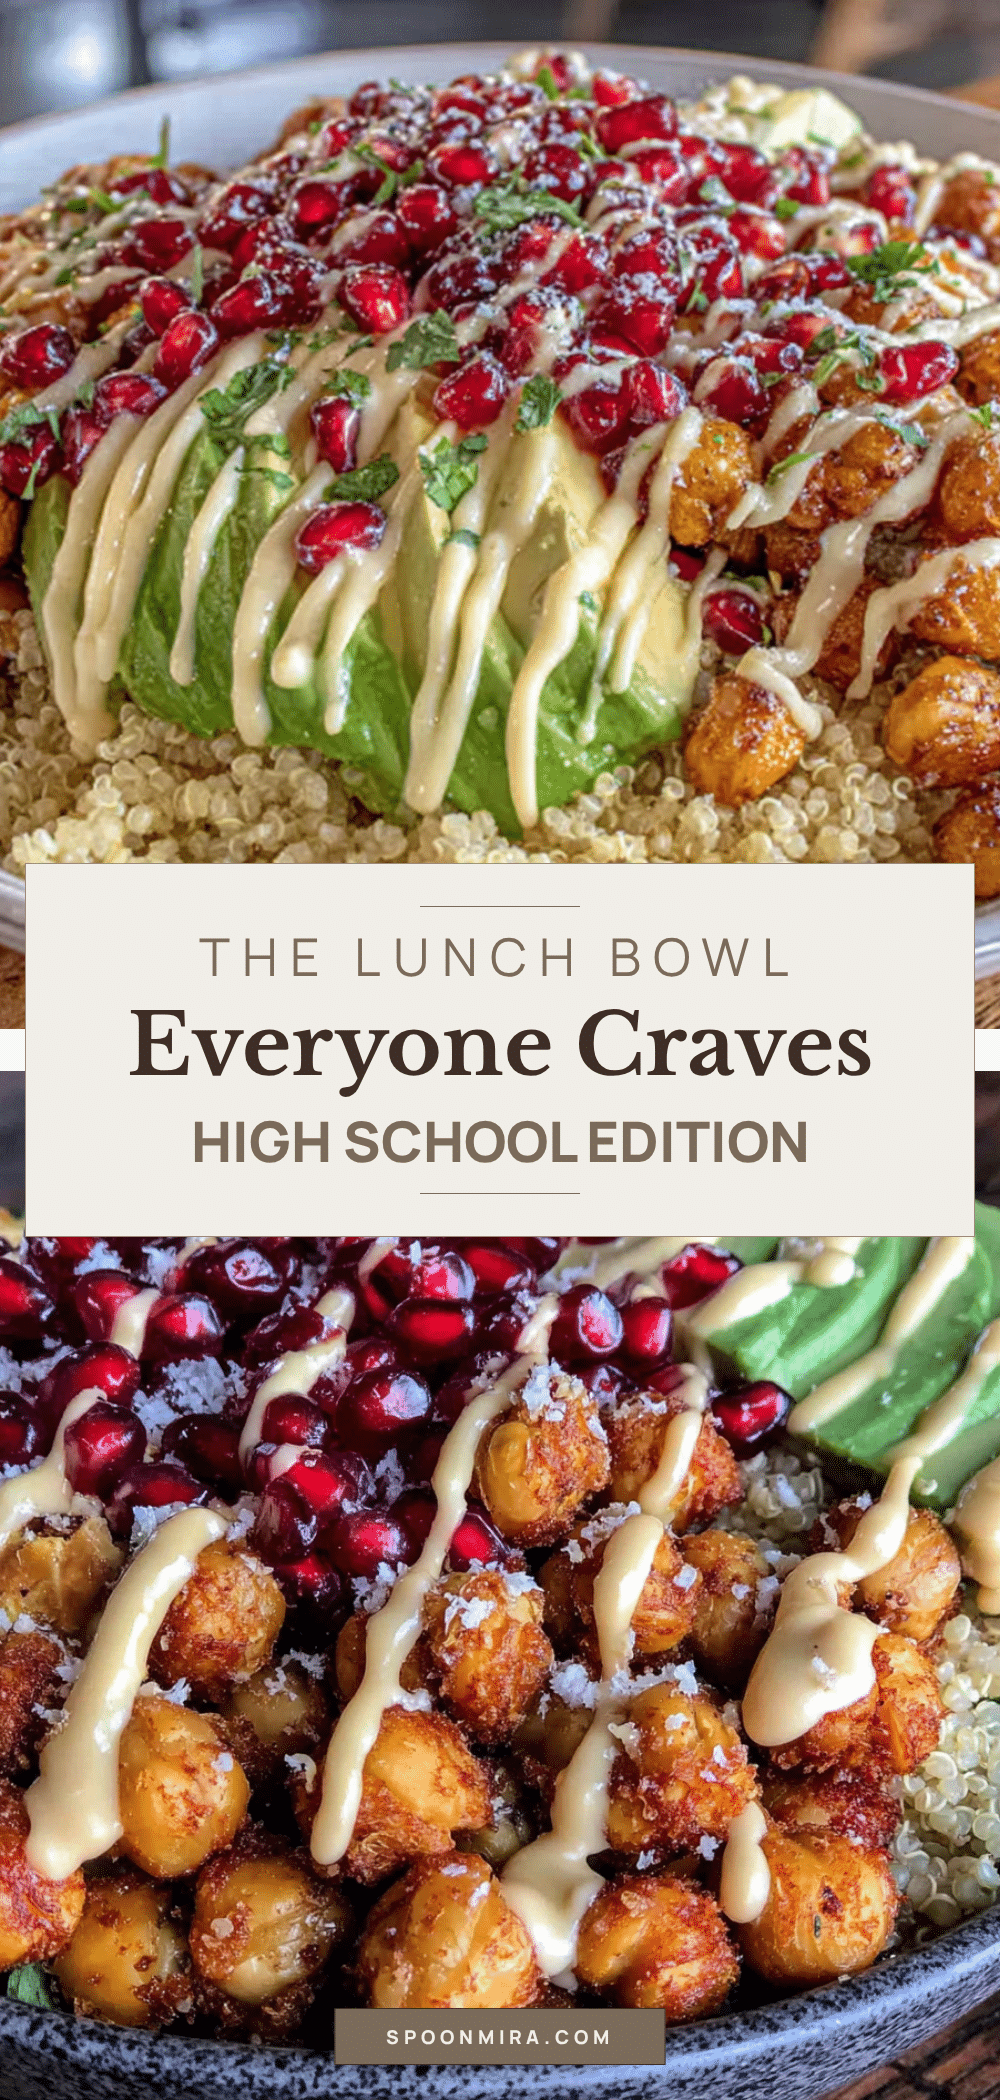
Wholesome High School Lunch Bowl with Quinoa Avocado & Chickpeas
A hearty and satisfying lunch bowl featuring fluffy quinoa, creamy avocado, and crunchy roasted chickpeas, all tossed in a bright lime-cumin dressing. Perfect for school lunches or meal prep, this bowl holds up beautifully and is packed with plant-based protein and healthy fats.
- Prep Time: 15 minutes
- Cook Time: 30 minutes
- Total Time: 45 minutes
- Yield: 4 servings 1x
- Category: Main Course
- Cuisine: American
Ingredients
- 1 cup quinoa, uncooked
- 2 cups water or vegetable broth
- 1 (15-ounce) can chickpeas, drained and rinsed
- 3 tablespoons olive oil, divided
- 2 large ripe avocados
- 1 cup cherry tomatoes, halved
- 3 tablespoons fresh lime juice
- 1/2 teaspoon ground cumin
- Salt and black pepper, to taste
- Optional: crumbled feta cheese, toasted pumpkin seeds, fresh cilantro, red pepper flakes, honey or maple syrup
Instructions
- Preheat oven to 400°F (200°C). Line a rimmed baking sheet with parchment paper.
- Rinse quinoa in a fine-mesh strainer under cold water for 30 seconds. Transfer to a medium saucepan with 2 cups water or broth. Bring to a boil, then reduce heat to low, cover, and simmer for 15 minutes. Remove from heat and let sit, covered, for 5 minutes. Fluff with a fork.
- While quinoa cooks, pat chickpeas very dry with a clean kitchen towel. Toss with 1 tablespoon olive oil and a generous pinch of salt. Spread in a single layer on the prepared baking sheet. Roast for 25-30 minutes, shaking halfway through, until deeply golden and slightly crackly. Let cool on the pan.
- In a small bowl or jar, whisk together lime juice, remaining 2 tablespoons olive oil, cumin, and a pinch of salt and pepper. Taste and adjust seasoning; add honey or maple syrup if desired.
- Halve cherry tomatoes. Dice avocados into 1/2-inch cubes. If packing for later, toss avocado with a little extra lime juice to prevent browning.
- In a large bowl, combine fluffed quinoa with about half the dressing. Toss gently. Divide among lunch containers or serving bowls. Top with roasted chickpeas, diced avocado, and halved cherry tomatoes. Drizzle remaining dressing over the top. Add optional toppings if desired.
- Let bowls cool completely before sealing lids. Store in the refrigerator for up to 4 days. For best texture, add dressing just before serving.
Notes
For maximum crunch, roast chickpeas until deeply browned. Rinse quinoa thoroughly to remove bitterness. Store dressing separately to keep quinoa from getting soggy. Avocado can be tossed with extra lime juice to prevent browning.
Nutrition
- Serving Size: 1 bowl
- Calories: 420
- Sugar: 6
- Sodium: 380
- Fat: 22
- Saturated Fat: 3
- Carbohydrates: 48
- Fiber: 12
- Protein: 14
Keywords: quinoa bowl, avocado, chickpeas, school lunch, meal prep, healthy lunch, vegetarian, gluten-free


