I was at the hardware store, of all places, buying a new drill bit. Not exactly where you’d expect to find a recipe for something as delicate and ethereal as a meringue cookie. But there I was, standing in the checkout line behind a man who had a smear of paint on his cheek and was holding a single, dusty bag of confectioners’ sugar. He turned to me, nodded at my drill bit, and said, “You know, the trick to getting those peaks stiff is to make sure your bowl is absolutely bone dry. Learned that making ghosts for the kids’ Halloween party.”
I didn’t get his name, but I got his recipe—or at least the spark of an idea. I mean, who knew the guy buying drywall compound was also a meringue master? It was one of those perfect, unexpected little moments. Honestly, it stuck with me more than any fancy cooking class I’ve ever taken. This recipe for Spooky Ghost Meringue Cookies is the direct result of that chance encounter. They are impossibly light, perfectly sweet, and require just three ingredients you probably already have. Maybe you’ve been there, scrambling for a last-minute Halloween treat that isn’t just another bag of candy. These are your answer. They’re so simple, so elegant, and so wonderfully spooky that I’ve been making them every October since. Let me tell you, they’re the only ghost I’m happy to have hanging around my kitchen.
Why You’ll Love This Recipe
Let’s be honest—most Halloween treats are a sugar bomb of artificial colors and preservatives. These Spooky Ghost Meringue Cookies are the opposite. They are pure, clean, and surprisingly sophisticated. Here’s why this recipe has become my go-to for the season:
- Quick & Easy: With just 10 minutes of active prep time, these come together faster than running to the store. The oven does the rest of the work while you get on with your day.
- Simple Ingredients: No fancy grocery trips needed. You likely have eggs, sugar, and vanilla extract in your kitchen right now. That’s it.
- Perfect for Halloween: They are the star of any spooky party, classroom treat, or movie night. They look like little ghosts floating on the tray.
- Crowd-Pleaser: Kids are mesmerized by the shape, and adults appreciate the light, crispy texture. They vanish in minutes.
- Unbelievably Delicious: The texture is a perfect paradox—crisp on the outside with a soft, marshmallowy center that melts on your tongue.
What makes this recipe different from the rest is the focus on technique. It’s not just about mixing; it’s about creating a stable foam that bakes into the perfect ghost shape. I’ve tested this with different sugar types and mixing times to give you the foolproof method. This isn’t just another meringue recipe—it’s my best version, born from that hardware store tip and years of tweaking. It’s the kind of cookie that makes you close your eyes after the first bite, a moment of pure, airy sweetness that feels like a little Halloween magic.
What Ingredients You Will Need
This recipe uses the simplest of ingredients to deliver a surprisingly complex and delightful cookie. The magic is in the proportions and the technique, not a long list of exotic items. You probably have everything you need to make these Spooky Ghost Meringue Cookies right now.
- 3 Large Egg Whites: These are the structural backbone of the meringue. It is absolutely critical that your bowl and whisk are completely free of any grease or yolk. A speck of fat will prevent the egg whites from whipping to stiff peaks. I recommend using room temperature eggs, as they whip up to a greater volume than cold ones. Separate them while they are cold, then let the whites sit on the counter for 15 minutes.
- ¾ Cup (150g) Granulated Sugar: This isn’t just for sweetness. The sugar dissolves into the egg whites, creating a stable foam that holds its shape. I prefer standard white granulated sugar. Avoid superfine or powdered sugar here, as the granules help create the right structure. For best results, add the sugar slowly, a tablespoon at a time, so it has time to dissolve completely.
- 1 Teaspoon Vanilla Extract: This adds a beautiful warmth and flavor that balances the sweetness. You can use clear vanilla extract if you want a pure white ghost, but I love the slightly warm, creamy color that real vanilla gives. For a more intense flavor, try using vanilla bean paste. (It adds those beautiful little speckles that look like ghost freckles!)
And that’s it. No cream of tartar, no cornstarch, no food coloring. Just three humble ingredients that, when treated with a little respect, transform into something truly spectacular. I always use large eggs from a local farm when I can—the fresher the egg, the stiffer the whites. If you are in a pinch, any large egg will work, but avoid using pasteurized egg whites from a carton, as they often contain stabilizers that can prevent the meringue from whipping up properly.
Equipment Needed
You don’t need a professional pastry kitchen to make these Spooky Ghost Meringue Cookies. A few basic tools will get the job done perfectly.
- Electric Mixer: A stand mixer with a whisk attachment is ideal, but a hand-held electric mixer works just as well. Whipping egg whites by hand is a workout—I’ve tried it, and it’s not fun. Save your arm strength for piping.
- Large Mixing Bowl: Make sure it is glass, metal, or ceramic. Plastic bowls can hold onto a microscopic film of grease, which will ruin your meringue. I keep a dedicated metal bowl just for this purpose.
- Baking Sheet & Parchment Paper: A good, heavy baking sheet prevents the bottoms from browning too quickly. Parchment paper is non-negotiable—the meringues will stick to a bare pan or wax paper.
- Piping Bag & Tip: A large piping bag fitted with a round tip (like a Wilton 1A or 12) is best for creating the ghost shape. If you don’t have a piping bag, a sturdy zip-top bag with the corner snipped off works in a pinch. Just be careful not to squeeze too hard!
I once tried to use a cheap, flimsy baking sheet, and the bottoms of my ghosts came out looking like toasted marshmallows. A good quality, light-colored pan makes all the difference. It’s a small investment for perfectly pale, spooky ghosts.
Preparation Method
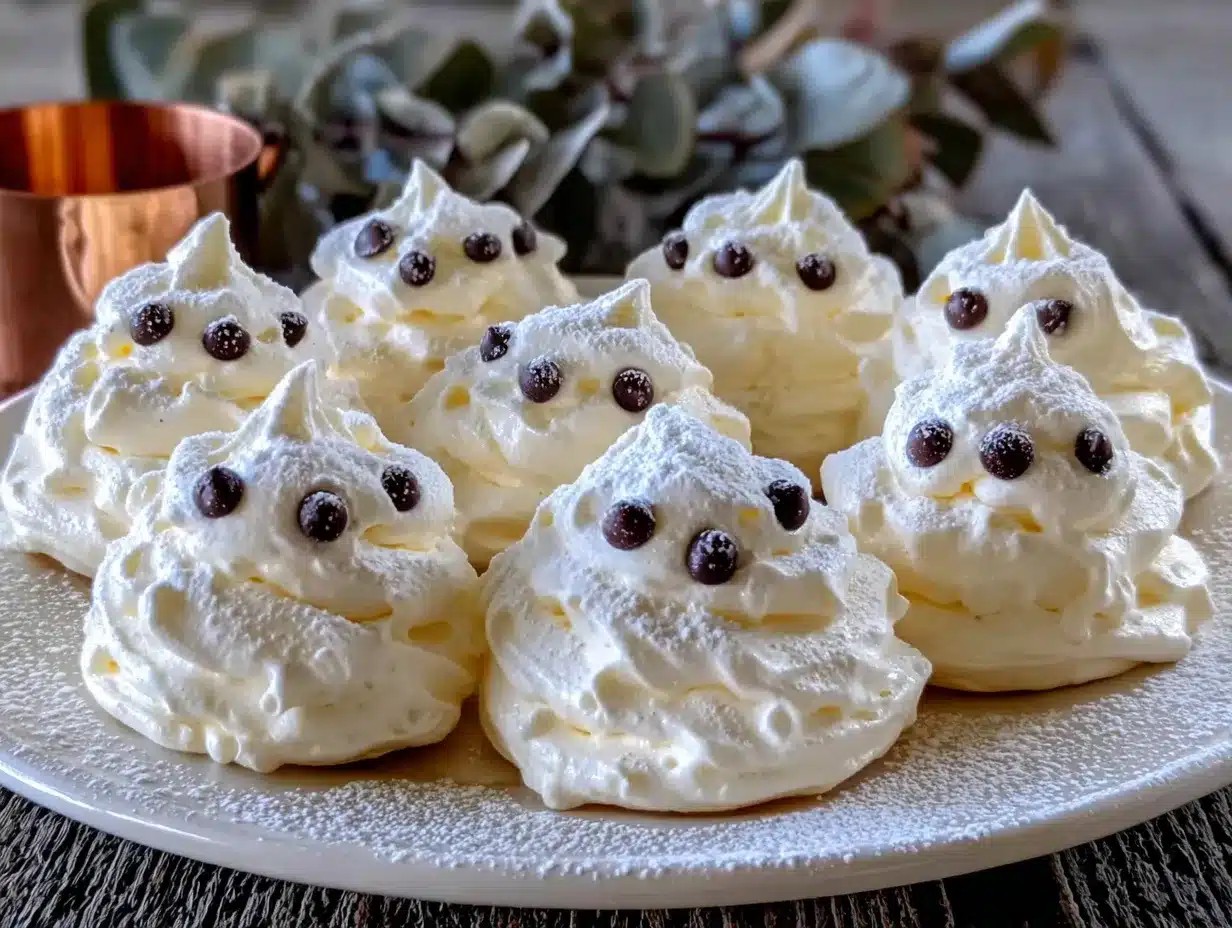
Follow these steps carefully, and you’ll have a tray of the cutest, lightest ghosts you’ve ever seen. This method is foolproof if you pay attention to a few key details.
- Preheat & Prep: Preheat your oven to 200°F (93°C). Line two large baking sheets with parchment paper. This low temperature is the secret to drying the meringues out without browning them.
- Whip the Egg Whites: Place the room-temperature egg whites in your impeccably clean, grease-free mixing bowl. Start beating on medium speed. After about 30 seconds, they will become frothy and bubbly. This is the foamy stage.
- Add the Sugar Slowly: With the mixer running on medium-high, begin adding the granulated sugar, one tablespoon at a time. This should take about 2-3 minutes. Don’t rush it! If you dump the sugar in all at once, the meringue can deflate. You are looking for the sugar to dissolve completely into the egg whites.
- Whip to Stiff Peaks: Once all the sugar is added, increase the speed to high. Whip for another 5-7 minutes. The mixture will become thick, glossy, and white. The test is to lift the whisk: the meringue should stand up in a stiff, unwavering peak. If the peak flops over, keep whipping. You should not feel any grittiness when you rub a tiny bit of the meringue between your fingers—that means the sugar is fully dissolved.
- Add the Vanilla: Add the vanilla extract and beat on high for just 15 seconds more until it’s fully incorporated.
- Pipe the Ghosts: Transfer the meringue to your piping bag fitted with the round tip. Hold the bag perpendicular to the baking sheet, about 1/2 inch above the surface. Pipe a tall, fat dollop, then pull the bag straight up and away quickly to create a little peak on top. This is the ghost’s head. Don’t worry if they aren’t perfect—the imperfections make them look more like friendly ghosts!
- Bake Low & Slow: Place the baking sheets in the preheated oven. Bake for 60-75 minutes. The meringues are done when they are completely dry and can be lifted easily off the parchment paper. They should not be brown at all, just a pale, creamy white. If they start to brown, your oven is too hot.
- Cool Completely: Turn the oven off and leave the door slightly ajar. Let the meringues cool completely in the oven for at least an hour. This prevents them from cracking from a sudden temperature change.
A note on timing: the baking time can vary slightly depending on the humidity and the size of your ghosts. On a rainy day, they might take a little longer. Just be patient—low and slow is the name of the game here.
Cooking Tips & Techniques
Making meringue can feel a bit like magic, but it’s really just science. Here are the lessons I’ve learned from my own kitchen failures.
- The Grease Enemy: This is rule number one. Any trace of fat—from egg yolk, oily hands, or a plastic bowl—will prevent your egg whites from whipping. I always wipe my bowl and whisk with a little lemon juice or white vinegar on a paper towel before I start. It’s a foolproof way to guarantee success.
- Stiff Peaks vs. Soft Peaks: You need stiff peaks for these ghosts. Soft peaks will slump and spread into puddles. The meringue should look like fluffy shaving cream and hold a dramatic point when the whisk is lifted.
- Don’t Over-Bake, Under-Dry: The goal is to dry the meringue out, not bake it. If your oven runs hot, the ghosts will turn an ugly tan color. I once forgot to turn my oven down from 350°F, and I ended up with little brown blobs. They were still tasty, but they looked nothing like ghosts.
- Humidity is the Enemy: Meringue is hygroscopic, meaning it absorbs moisture from the air. Don’t make these on a rainy or super humid day. They will become sticky and chewy instead of crisp and light. Save this recipe for a crisp, dry fall day.
- Multitasking: While the meringues are baking, you can clean up your kitchen or start prepping your Halloween decorations. The oven is doing all the work. Just remember to check on them around the 60-minute mark.
Variations & Adaptations
Once you master the basic Spooky Ghost Meringue Cookie, the possibilities are endless. Here are a few ways I’ve adapted this recipe over the years.
- Chocolate Ghosts: For a richer flavor, sift 1 tablespoon of unsweetened cocoa powder over the stiff meringue and gently fold it in before piping. You’ll get a subtle chocolate ghost that tastes like a light cloud of cocoa.
- Peppermint Specters: Replace the vanilla extract with ½ teaspoon of peppermint extract for a cool, wintery twist. These are fantastic for Christmas or a winter-themed party. Crush a candy cane and sprinkle the pieces on top before baking for a little crunch.
- Berry Boos: Before baking, gently press a single freeze-dried raspberry or strawberry into the center of each ghost. It looks like a little pink ghost heart, and the tart berry flavor cuts through the sweetness perfectly.
- Vegan Option: You can make these with aquafaba—the liquid from a can of chickpeas. Use 3 tablespoons of aquafaba to replace one egg white. Whip it just like egg whites; it works surprisingly well, though the texture is slightly less crisp.
- Spooky Faces: Once the meringues are cool and dry, you can pipe tiny faces on them using melted dark chocolate. A little dot for each eye and a tiny “o” for a mouth turns them from cute to properly spooky.
My personal favorite variation is the peppermint one. I made a batch last December for a holiday party, and people couldn’t stop talking about them. They are light enough to eat three without feeling guilty, and the peppermint smell is just divine.
Serving & Storage Suggestions
These Spooky Ghost Meringue Cookies are best served as a dramatic centerpiece or a light finish to a meal. Here’s how to handle them.
- Serving Temperature: Serve them at room temperature. They are perfectly crisp and airy straight from the cooling process. Don’t refrigerate them before serving, as the cold can introduce moisture.
- Presentation: Arrange them on a large, dark platter or cake stand. The white ghosts will pop beautifully against a black or dark purple background. For a Halloween party, I like to place them on a bed of black chia seeds or crushed chocolate cookies to look like dirt.
- Complementary Dishes: These are fantastic with a cup of hot apple cider or a rich, dark hot chocolate. For a dessert board, pair them with fresh berries, dark chocolate shards, and a few salted caramel candies. The sweet and salty combo is killer.
- Storage: This is the most important part. Meringues must be stored in an airtight container at room temperature. Do not put them in the refrigerator, as the humidity will turn them sticky. They will stay crisp for up to 5 days if stored properly. I keep mine in a metal tin with a tight-fitting lid.
- Freezer: You can freeze baked meringues for up to 3 months. Place them in a single layer in a freezer-safe container, separated by parchment paper. Thaw them at room temperature for about 15 minutes before serving. They won’t be quite as crisp as fresh, but they are still delicious.
One thing I love about these cookies is that the flavor actually improves after a day or two. The vanilla seems to deepen, and the texture becomes even more uniform. They are the perfect make-ahead treat for a busy holiday schedule.
Nutritional Information & Benefits
While these are a sweet treat, they are surprisingly light compared to a traditional cookie. Here’s a quick look at the numbers.
| Nutrient | Per Cookie (Approx. 1 ghost) |
|---|---|
| Calories | 25-30 |
| Fat | 0g |
| Carbohydrates | 6-7g |
| Sugar | 6g |
| Protein | 1g |
The main ingredient here is egg whites, which are pure protein and contain no fat. They are also a good source of selenium and riboflavin. The sugar content is the main calorie driver, but because these are so light and airy, you get a lot of cookie for a small amount of sugar. They are naturally gluten-free and dairy-free, making them a fantastic option for those with common dietary restrictions. They are also nut-free, so they are safe for school parties where allergies are a concern. From a wellness perspective, I love that they feel like a decadent indulgence but are actually one of the lightest desserts you can make. It’s a treat you can feel good about—especially when you see the joy on a kid’s face when they bite into a ghost.
Conclusion
So there you have it—a recipe born from a hardware store conversation that has become a beloved Halloween tradition in my kitchen. These Spooky Ghost Meringue Cookies are a testament to the fact that the best things in life are often the simplest. They are fun to make, magical to watch bake, and absolutely delightful to eat. I encourage you to make them your own. Play with the flavors, experiment with the shapes, and don’t be afraid if a few of your ghosts look a little lopsided. That’s part of their charm.
Honestly, every time I make these, I think of that man in the checkout line. I hope he’s still making ghosts for his kids. This recipe has brought so much joy to my family and friends, and I know it will do the same for you. If you give them a try, I would love to hear about it. Drop a comment below and tell me how your ghosts turned out, or share a photo on Pinterest. Happy haunting, and happy baking!
Frequently Asked Questions
Can I use a different extract instead of vanilla?
Absolutely! Peppermint, almond, or even lemon extract work wonderfully. Just be aware that almond extract is very potent, so start with just ½ teaspoon.
Why did my meringue turn out sticky and chewy?
This usually happens on a humid day. Meringue absorbs moisture from the air, which makes it sticky. Try making them on a dry day, and make sure they are completely dry before you store them in an airtight container.
Can I make these without a piping bag?
Yes! You can use a sturdy zip-top bag with a small corner snipped off. Or, you can simply drop the meringue by the spoonful onto the baking sheet for a more rustic, cloud-like ghost shape.
How do I know when the meringues are fully baked?
They are done when they lift easily off the parchment paper without sticking. The bottoms should be dry and the outside should feel firm and crisp. If they stick, give them another 10-15 minutes in the oven.
Can I add food coloring to make colorful ghosts?
Yes, but use gel food coloring, not liquid. Liquid food coloring can deflate the meringue. Add a tiny drop of gel color at the stiff peak stage and mix gently until just combined. A little goes a long way!
Pin This Recipe!
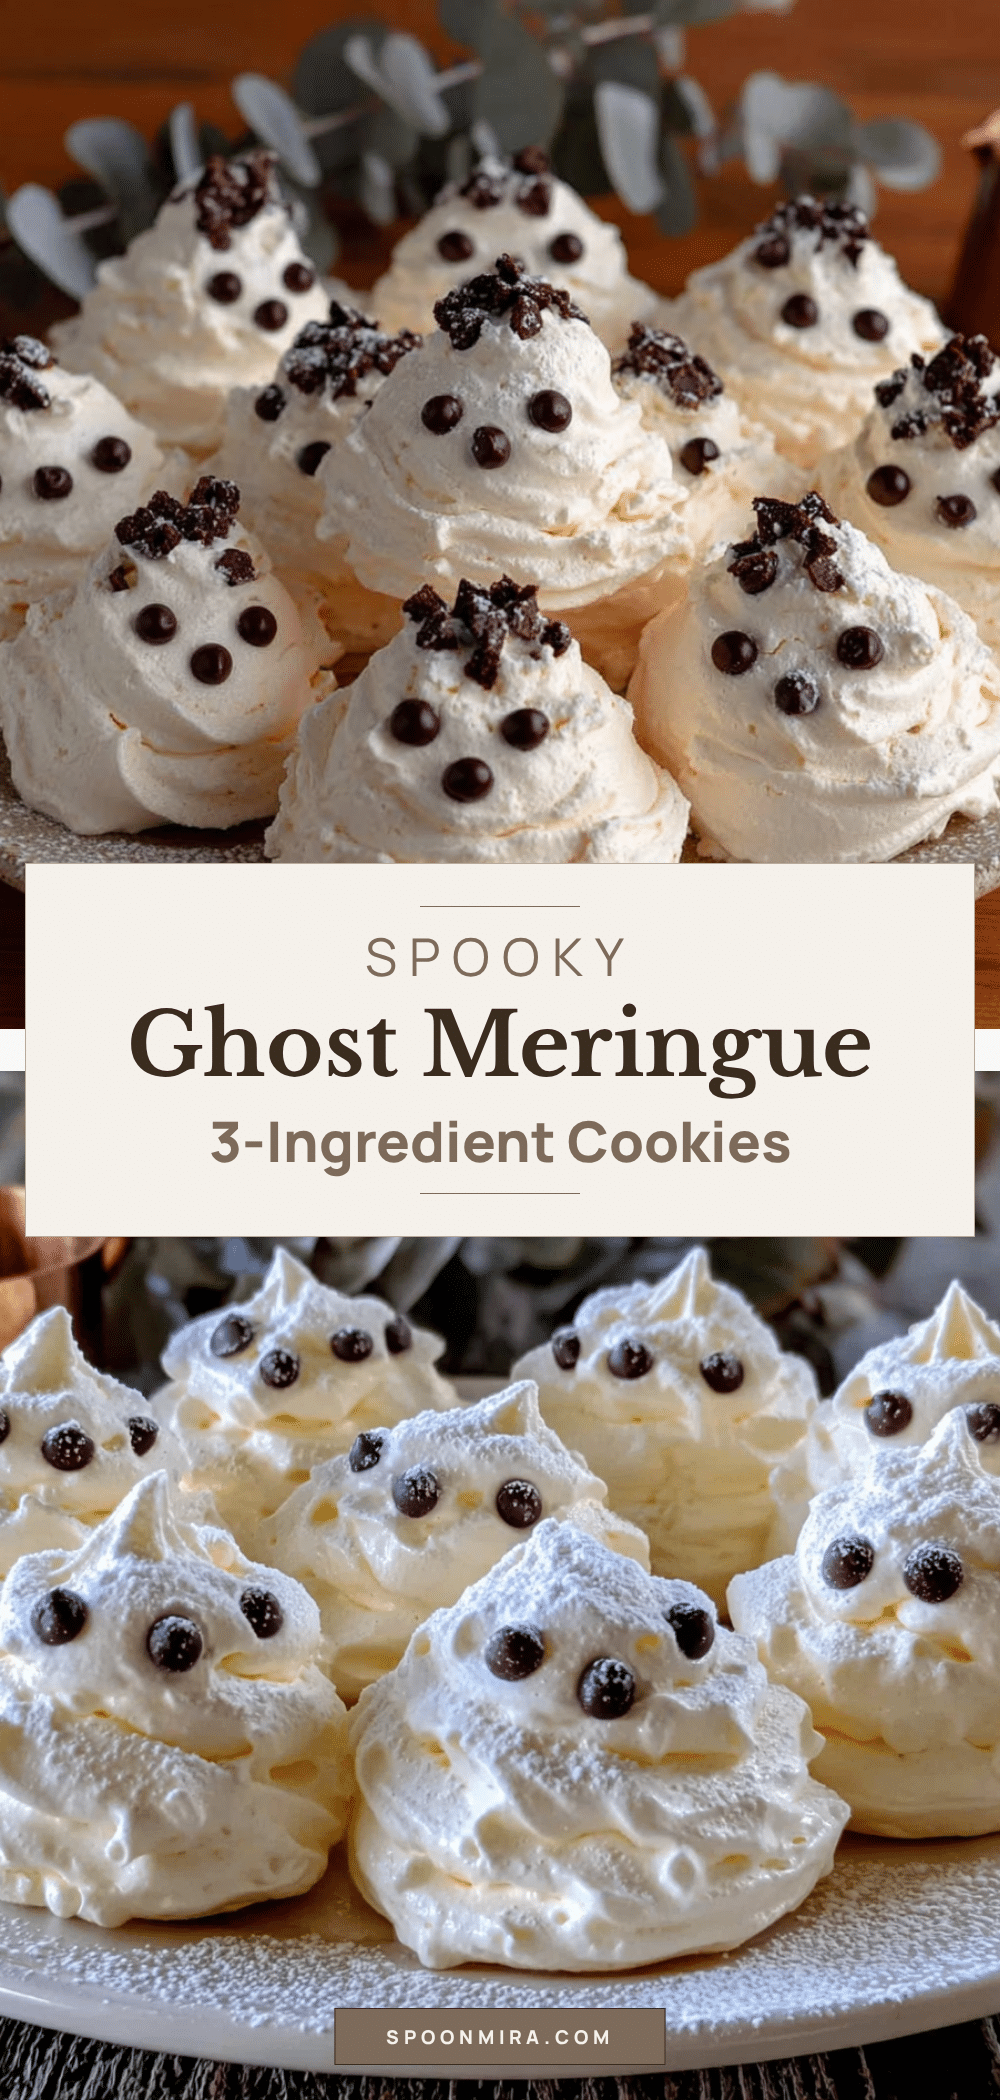
3-Ingredient Spooky Ghost Meringue Cookies
These impossibly light and perfectly sweet ghost-shaped meringue cookies require just three simple ingredients and are the perfect last-minute Halloween treat. They are crisp on the outside with a soft, marshmallowy center.
- Prep Time: 10 minutes
- Cook Time: 60-75 minutes
- Total Time: 1 hour 10 minutes to 1 hour 25 minutes
- Yield: 24 servings 1x
- Category: Dessert
- Cuisine: American
Ingredients
- 3 large egg whites, room temperature
- 3/4 cup (150g) granulated sugar
- 1 teaspoon vanilla extract
Instructions
- Preheat oven to 200°F (93°C). Line two large baking sheets with parchment paper.
- Place room-temperature egg whites in a clean, grease-free mixing bowl. Beat on medium speed until frothy and bubbly, about 30 seconds.
- With mixer running on medium-high, add granulated sugar one tablespoon at a time, taking 2-3 minutes. Ensure sugar dissolves completely.
- Increase speed to high and whip for 5-7 minutes until mixture is thick, glossy, and forms stiff peaks. The meringue should stand up in an unwavering peak and feel smooth when rubbed between fingers.
- Add vanilla extract and beat on high for 15 seconds until fully incorporated.
- Transfer meringue to a piping bag fitted with a round tip (e.g., Wilton 1A or 12). Pipe tall, fat dollops onto prepared baking sheets, pulling straight up to create a peak on top (ghost’s head).
- Bake for 60-75 minutes until meringues are completely dry and lift easily off parchment. They should remain pale and creamy white.
- Turn off oven, leave door slightly ajar, and let meringues cool completely in oven for at least 1 hour.
Notes
Ensure bowl and whisk are completely grease-free (wipe with lemon juice or vinegar). Use room temperature eggs for better volume. Avoid making on humid days. Store in airtight container at room temperature for up to 5 days. Do not refrigerate. For chocolate ghosts, sift 1 tbsp cocoa powder over stiff meringue and fold gently before piping.
Nutrition
- Serving Size: 1 cookie
- Calories: 2530
- Sugar: 6
- Sodium: 10
- Carbohydrates: 67
- Protein: 1
Keywords: Halloween cookies, meringue cookies, ghost cookies, 3-ingredient recipe, easy Halloween treat, egg white cookies, spooky dessert


